Multi-View Reference Manager (Blender Addon)
 Shift4cube



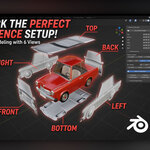
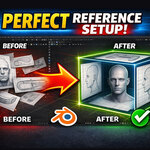
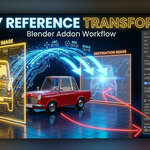
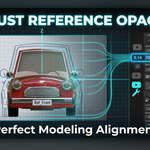
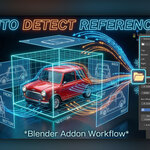
📖 Multi-View Reference Manager (MVRM)
Official Documentation
Version: 1.2.2
Author: shift4cube
Compatibility: Blender 4.0, 4.1, 4.2+ (Blender 5.0 API Ready)
1. Introduction
Welcome to the Multi-View Reference Manager! This addon was created to eliminate the tedious process of manually importing, aligning, and scaling reference images for 3D modeling. Whether you are modeling vehicles, characters, or hard-surface props, MVRM allows you to generate a mathematically perfect "Blueprint Box" in seconds.
2. Installation Guide
Download the
multi_view_ref_manager.zipfile. (Do not extract/unzip it).Open Blender.
Go to Edit > Preferences > Add-ons.
Click the Install... button (or click the down arrow in the top right and choose Install from Disk in Blender 4.2+).
Locate and select the downloaded
.zipfile, then click Install Add-on.Check the box next to 3D View: Multi-View Reference Manager to enable it.
Close the Preferences window.
In the 3D Viewport, press the N key on your keyboard to open the Sidebar.
Click on the new Reference tab on the right side of your screen.
3. Quick Start Workflow
Want to get set up in under 10 seconds? Follow these steps:
Ensure your reference images have the view name somewhere in their filename (e.g.,
car_front.png,top_view.jpg).Open the Reference tab in the sidebar.
Click Auto Detect Folder and select the folder on your computer containing your images. Click Accept.
Open the Global Controls panel.
Adjust the Global Scale so the blueprints match your desired real-world size.
Increase the Overall Offset slider under Box Offsets to push the images outward into a box shape.
Click Disable Select at the bottom of the panel so you don't accidentally click the images while modeling.
Add a mesh to the center of your scene and start modeling!
4. Detailed Feature Breakdown
A. Main Panel (Image Loading)
Auto Detect Folder: Select a directory, and the addon will automatically scan for standard image formats (.png, .jpg, .bmp, .tga, .webp, .tif, .exr). It looks for keywords like
front,back,top,bottom,left, andrightin the filenames and assigns them to the correct slots instantly.Manual Load (Open): Click the folder icon next to any view to manually browse for an image.
Visibility (Eye Icon): Quickly hide or show a specific image.
Selectability (Cursor Icon): Lock an image to prevent accidental clicks and transformations in the viewport.
Reset (Refresh Icon): Resets the specific image back to its exact default rotation, scale, and offset position.
Delete (Trash Icon): Removes the image from the viewport and deletes its data from the scene entirely.
B. Global Controls
This panel allows you to manipulate your entire blueprint rig simultaneously.
Global Location (X, Y, Z): Moves the absolute center of your blueprint setup. Click the arrows to move the entire rig in precise 0.05m increments.
Global Scale: Scales all loaded reference images up or down together.
Global Opacity: Adjusts the transparency of all loaded images. Drop this to ~0.5 to easily see your geometry through the references.
-
Box Offsets: Pushes the images outward from the center so they don't intersect with your 3D model.
Link (Enabled): Gives you a single "Overall" slider. Pushing this expands all images evenly, forming a perfect cube.
Link (Disabled): Unlinks the axes, giving you independent X (Left/Right), Y (Front/Back), and Z (Top/Bottom) sliders. Perfect for creating rectangular bounding boxes for long vehicles or tall characters.
Show in Perspective: By default, Blender only shows background images in flat orthographic views (Numpad 1, 3, 7). Check this box to keep your blueprints visible when rotating freely in 3D perspective space.
-
Global Action Buttons: * Show All / Hide All: Toggles viewport visibility for the entire rig.
Enable Select / Disable Select: Locks or unlocks the entire rig from being clicked in the viewport.
C. Active Image Editing
Note: This panel only appears when you select one of your loaded reference images in the viewport or outliner.
Manual Transforms: Fine-tune the Location, Rotation, and Scale of the specifically selected image without affecting the others.
-
Transfer Transforms: A powerful tool to perfectly align mismatched blueprints!
Select an image that you have scaled or aligned perfectly.
Click Get to copy its transform data to memory.
Select a different image that needs to match.
Choose what data you want to paste by checking the boxes for Scale, Rot (Rotation), or Loc (Location).
Click Apply to paste the data.
5. Scene Organization
To keep your workspace clean, MVRM automatically creates a dedicated collection in your Outliner called MVRM_References. Every image you load or auto-detect is neatly placed inside this collection, keeping your main modeling collections clutter-free.
6. Troubleshooting & Support
My opacity slider isn't working! Ensure your viewport is set to 'Material Preview' or 'Solid' mode. In Wireframe mode, Blender handles image transparency differently.
Auto Detect didn't find my images! Ensure your image formats are supported and that the filenames contain the actual view name (e.g.,
my_model_front_view.png).
Thank you for using the Multi-View Reference Manager! Happy modeling!
shift4cube
Have questions about this product?
Login to message
| Published | 7 months ago |
| Blender Version | 4.0 - 5.0 |
| Extension Type | N/A |
| Render Engine Used | Cycles, Eevee |
| License | Mit |