M.V.P Music Visualizer Pro
 Creative Collections
Music Visualizer Pro Documentation
Compatibility
Blender 4.3 or newer
Tested with Blender 5.2
Supports Cycles and Eevee
Windows, macOS and Linux
No external Python packages required
Music Visualizer Pro uses Blender’s built-in audio tools. Audio format support may vary by Blender installation, but common WAV, MP3, FLAC and OGG files should work.
Installation
Download
Music_Visualizer_Pro_v1_2.zip.Do not extract the ZIP.
Open Blender.
Go to Edit → Preferences → Add-ons.
Open the Add-ons menu and choose Install from Disk.
Select the downloaded ZIP.
Enable Music Visualizer Pro.
Return to the 3D Viewport and press N.
Open the Music Video tab.
When updating from an older version, save your project, disable the previous version, install the new ZIP and restart Blender before enabling it.
Quick Start
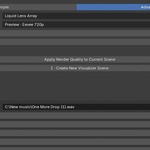
Simple Mode is enabled by default and organizes the process into four steps.
1. Choose a Look
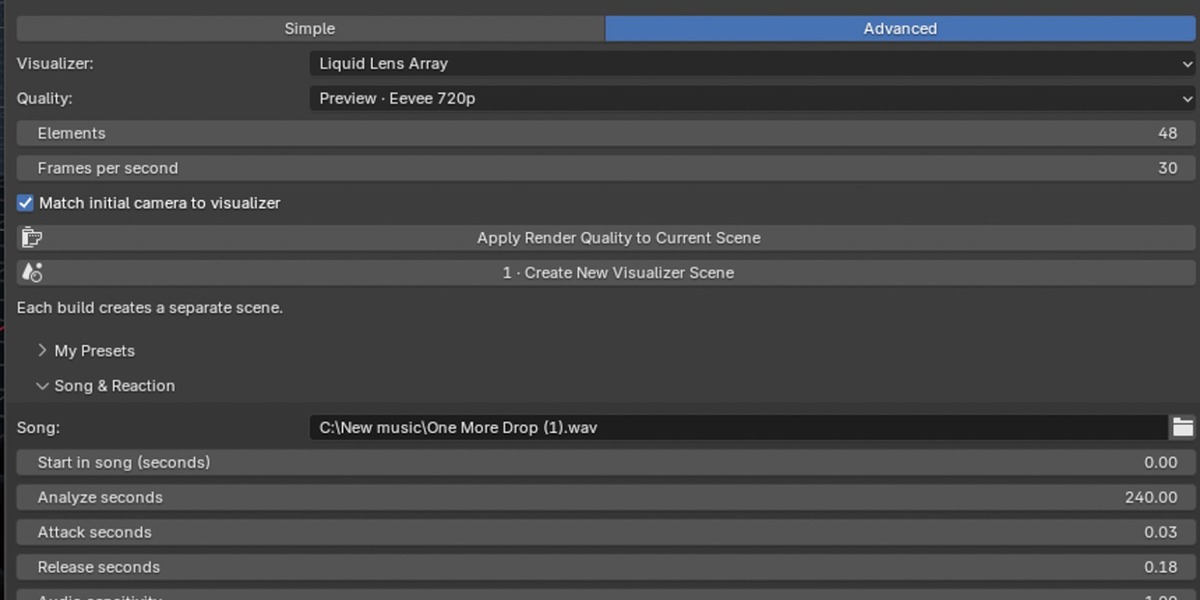
Select one of the production recipes or choose a visualizer and color palette manually.
The included production recipes are:
Neon Tunnel Fly-Through
Realistic Metal Spectrum
Liquid Dream
Performer Orbit
Orbital Swarm
Bass Dolly Corridor
Blood Eclipse
Fast Kaleidoscope
A recipe changes the current settings but does not immediately rebuild or delete your scene.
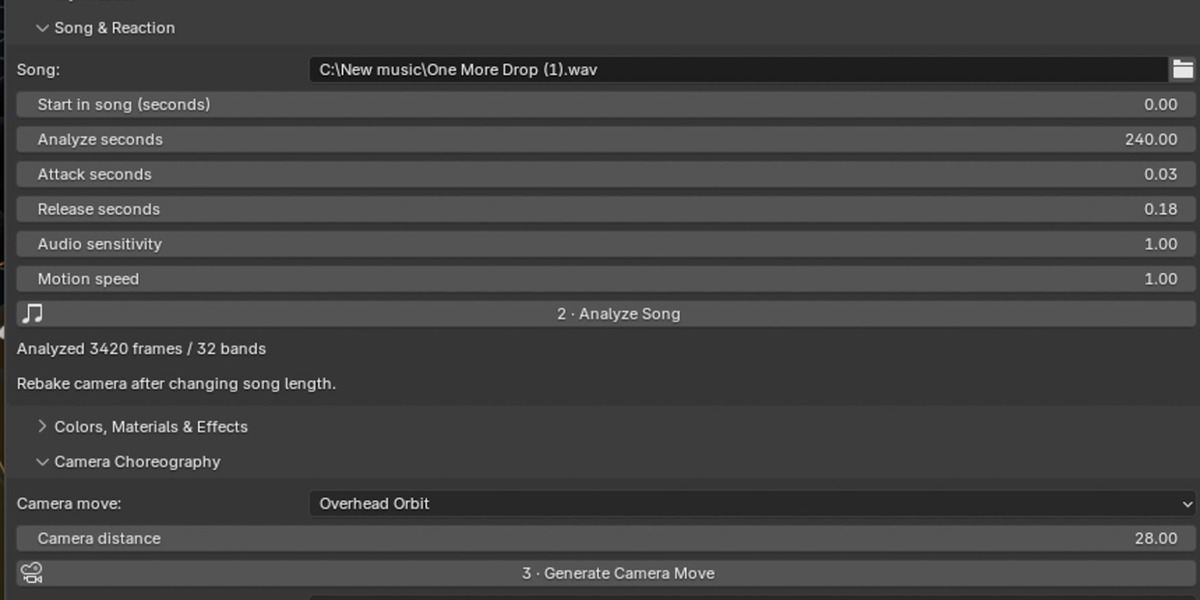
2. Load Your Song
Choose an audio file from your computer.
You can also adjust:
Starting point
Analysis duration
Audio sensitivity
Attack and release
Frequency response
Motion speed
For your first test, use a short section of the song. This makes it much faster to experiment with different visualizers and settings.
3. Create the Music Video
Press Quick Create.
This will:
Create a separate Blender scene
Build the selected visualizer
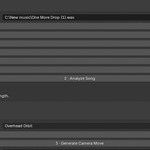
Analyze the chosen song
Set the animation length
Generate the selected camera movement
Each new build is created as a separate scene inside the same .blend file. Previous scenes can be accessed through Blender’s scene selector.
Gravity visualizers require one additional step: Bake Gravity Simulation.
4. Preview and Render
Press the Spacebar to preview the animation.
Use Numpad 0 to look through the active camera.
Before rendering:
Save the Blender project.
Choose an output location.
Select a render profile.
Configure MP4 output or a PNG frame sequence.
Go to Render → Render Animation.
Simple Mode and Advanced Mode
Simple Mode
Simple Mode is intended for quickly building a complete visualizer without opening every available setting.
It includes:
Production recipes
Song selection
Visualizer selection
Color selection
Quick Create
Camera selection
Render profiles
Project Check
Custom presets
Advanced Mode
Advanced Mode exposes the complete toolset, including:
All 68 visualizer styles
96 color palettes
Material controls
Audio-frequency controls
Reactive lighting
Atmospheric effects
Procedural generation
Gravity simulation
Camera choreography
Grease Pencil camera paths
Performer staging
Green-screen controls
Detailed render and output settings
Switching between Simple and Advanced Mode does not remove generated objects or reset the scene.
Audio Analysis
Music Visualizer Pro analyzes the song across 32 frequency bands. This allows different parts of the visualizer to react to bass, mids and higher frequencies instead of reacting only to overall volume.
Sensitivity
Controls the overall strength of the audio reaction.
Increase it when the movement is too subtle. Reduce it if objects are moving too far or the animation feels unstable.
Attack
Controls how quickly the visualizer responds when the music becomes louder.
Lower attack values create sharper hits. Higher values create softer transitions.
Release
Controls how quickly the visualizer settles after a hit.
Short release values work well for fast percussion. Longer values produce smoother, flowing motion.
Analysis Duration
Limits how much of the song is analyzed.
Short durations are useful while testing. Analyze the complete track once you are happy with the design.
Changes to the song, frame rate, trim range, attack or release require the song to be analyzed again.
Audio analysis is limited to 12 minutes per pass.
Visualizer Styles
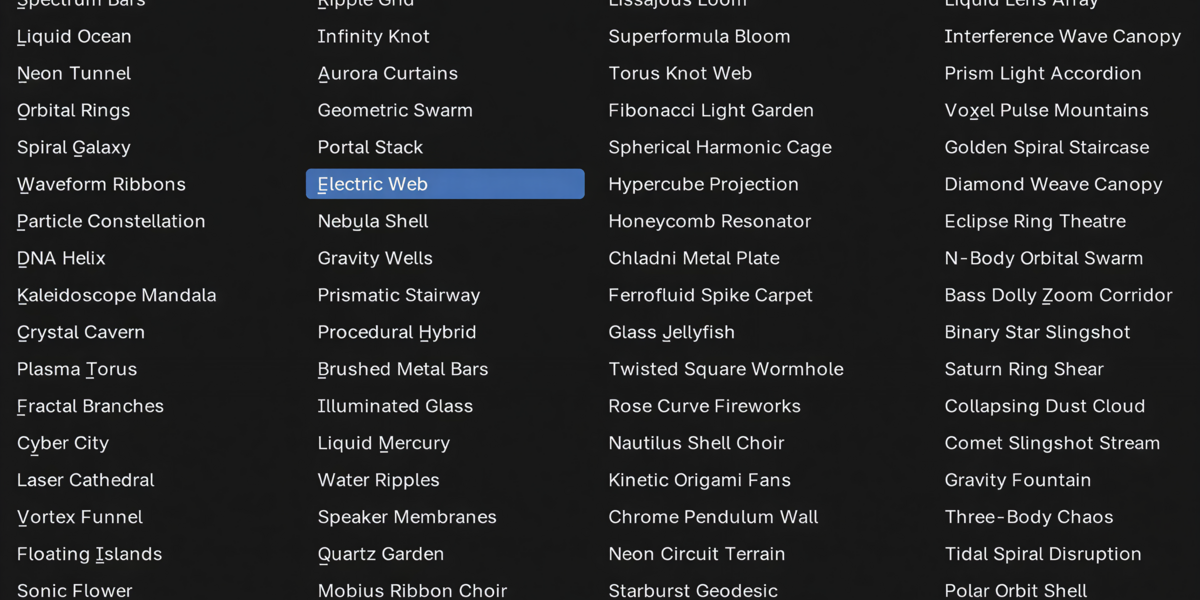
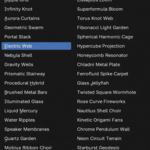
Music Visualizer Pro includes 68 visualizer styles covering clean equalizers, cinematic environments, realistic materials, abstract designs and physics-inspired motion.
Classic and Cinematic
Examples include:
Spectrum Bars
Neon Tunnel
Orbital Rings
Spiral Galaxy
Waveform Ribbons
Cyber City
Laser Cathedral
Aurora Curtains
Portal Stack
Ripple Grid
Realistic Styles
The realism-focused designs include:
Brushed Metal Bars
Illuminated Glass
Liquid Mercury
Water Ripples
Speaker Membranes
Quartz Garden
For glass, water and reflective materials, use Cycles and the Realistic render profile when creating the final result.
Procedural and Abstract Styles
Examples include:
Mobius Ribbon Choir
Lissajous Loom
Superformula Bloom
Torus Knot Web
Fibonacci Light Garden
Hypercube Projection
Ferrofluid Spike Carpet
Glass Jellyfish
Neon Circuit Terrain
Voxel Pulse Mountains
Eclipse Ring Theatre
Procedural Hybrid
Procedural Hybrid creates variations using a random seed, harmonic complexity, element count and other controls.
Use Generate Procedural Hybrid to create another variation. This changes the seed, palette and harmonic settings before building a new scene.
Gravity Visualizers
Nine visualizers use baked gravitational motion:
N-Body Orbital Swarm
Binary Star Slingshot
Saturn Ring Shear
Collapsing Dust Cloud
Comet Slingshot Stream
Gravity Fountain
Three-Body Chaos
Tidal Spiral Disruption
Polar Orbit Shell
Bass Dolly Zoom Corridor is included in the gravity-themed category, but it is a camera and perspective effect rather than a gravity simulation.
Baking Gravity
Select a gravity visualizer.
Choose the body count.
Create the visualizer scene.
Analyze the song.
Open Gravity & Bass Dolly Zoom.
Adjust the gravity settings.
Press Bake Gravity Simulation.
Generate or rebuild the camera.
Save the project before rendering.
Press Esc while baking to cancel.
Gravity Controls
Central Mass
Controls the strength of the main gravitational source.
Bass Mass Boost
Controls how strongly bass changes the gravitational pull.
Higher settings can produce tighter, faster and more chaotic movement. Very high settings may throw objects away from the center.
Softening
Reduces extreme forces when objects pass very close to each other. Increase this if the simulation becomes unstable.
Simulation Accuracy
Controls how precisely the motion is calculated. Higher settings may improve difficult simulations but take longer to bake.
Mutual Body Gravity
Allows the smaller bodies to attract one another instead of responding only to the main source.
Gravity animation is baked into normal Blender keyframes. After baking, the scene can be scrubbed and rendered without relying on a live Python simulation.
The system is intended for artistic motion. It does not include collisions, merging objects or scientifically calibrated real-world units.
Bass Dolly Zoom
Bass Dolly Zoom Corridor creates a coordinated camera and lens effect.
When the bass hits, the camera moves while its focal length changes in the opposite direction. The subject near the focal plane remains roughly the same size while the corridor perspective expands and contracts.
Use:
Dolly Rest Distance to set the camera’s starting distance
Bass Push / Zoom to control the strength of the effect
Audio attack and release to smooth the response
The intended focal plane is located at world Y=0.
Generating a different camera preset or rebuilding a drawn camera path removes the coordinated dolly-zoom setup.
Camera Presets
The add-on includes 20 camera movements:
Orbit
Reverse Orbit
Half Orbit
Spiral In
Spiral Out
Crane Rise
Crane Descent
Dolly In
Dolly Out
Side Slider
Figure Eight
Overhead Orbit
Low Sweep
Helix Climb
Tunnel Fly Through
Tunnel Corkscrew
Tunnel Reverse
Pendulum
Reveal Arc
Static Portrait
Generate the camera after analyzing the song so the movement matches the complete animation length.
Tunnel camera presets are intended for tunnel-style visualizers. Automatic framing chooses a suitable starting angle for flat, vertical and tunnel-based scenes.
Drawing a Custom Camera Path
Custom camera routes can be drawn using a Grease Pencil object.
Creating the Path
Build the visualizer.
Analyze the song.
Choose a useful top or side viewport angle.
Press Create Grease Pencil Drawing.
Draw one continuous stroke.
Select the Grease Pencil object.
Choose the desired stroke number.
Press Use Selected Drawing Stroke.
Use a Grease Pencil object rather than Blender viewport annotations.
Smoothing the Camera
Press Smooth Path & Rebuild Camera to reduce sharp turns and uneven travel.
The path is resampled and the camera moves at a more consistent speed. The endpoints remain in place.
You can press the smoothing button again for a softer result. Use Blender’s Undo command if the path becomes too smooth.
Editing Camera Angles
The camera’s position and angle are controlled separately.
To create custom angles:
Move to the desired frame.
Adjust Tilt, Pan, Roll and Lens.
Press Key Angle & Lens.
Repeat at other points in the timeline.
Smoothing or rebuilding the travel path preserves these angle and lens keyframes.
Camera Orientation
Look Along Path points the camera in the direction of travel.
Look at Target points the camera toward a selected target position.
Always preview the complete camera move before rendering. Camera paths do not include automatic collision avoidance.
Performer and Green-Screen Scenes
Music Visualizer Pro includes staging options designed for music videos featuring a performer.
Performer Layouts
Behind Performer
Places the main visualizer behind the performer.
Orbiting Hologram
Creates a smaller visualizer that moves around the performer position.
Handheld Hologram
Places a small visualizer near hand height.
Abstract Music Video
Creates a full visualizer scene without performer staging.
Importing Footage
Use Import Performer Plane to place a movie or transparent image sequence in the scene.
For green-screen footage:
Import the performer footage.
Select the screen color.
Adjust the threshold.
Adjust edge softness.
Import the plane again if you need to apply changed key settings.
The built-in key is intended for straightforward footage. Difficult hair detail, strong green spill and unevenly lit screens may require Blender’s compositor or external keying software.
The imported performer remains a flat plane. Static shots, dolly shots and small camera movements usually work best. Large camera orbits will reveal that the footage is two-dimensional.
Performer footage does not automatically supply the project’s music. Load the song separately in the Song & Reaction section.
Colors, Materials and Effects
The add-on includes 96 palettes, including neon, metallic, cinematic, horror, vaporwave, pastel, monochrome and high-contrast looks.
A custom two-color gradient is also available.
Optional effects include:
Reactive lighting
Emission
Bloom
Reflective stage
Rain
Stardust
Bass halos
Volumetric fog
Most visual, material and effect settings are applied while the scene is being created. Choose these options before building the visualizer.
Sensitivity and motion speed can be adjusted after creation.
Performance Advice
The following options have the largest effect on render time:
Volumetric fog
Glass and reflective materials
Rain with high object counts
Large numbers of visualizer elements
High Cycles sample counts
Gravity simulations with many bodies
Begin with Preview quality, 32–48 elements and fog disabled. Increase the quality after the composition and camera are working.
Render Profiles
Preview
Uses Eevee at 720p for quicker testing.
Final
Uses Cycles at 4K as a high-quality starting point.
Cycles 720p Fast
1280 × 720
Up to 64 samples
Adaptive sampling
Denoising
Reduced light-bounce settings
Intended for faster final renders and testing
Cycles 720p Realistic
1280 × 720
Up to 1024 samples
Adaptive sampling
Denoising
Higher reflection, transmission and indirect-light settings
Intended for glass, water, metal and detailed final renders
The quality button changes render settings on the current scene. It does not rebuild the visualizer or remove its animation.
Render time depends on the visualizer, effects, song length and computer hardware. You can make additional sample adjustments through Blender’s normal Render Properties.
The add-on does not automatically select a GPU. Configure your preferred Cycles device in Blender Preferences.
Video Output
MP4 with Song Audio
Choose an output folder and use Configure MP4 + Song Audio.
This prepares Blender’s output settings for a standard video render with the selected song.
Render through:
Render → Render Animation
PNG Frame Sequence
PNG frames are recommended for important or longer renders.
If Blender closes or the render is interrupted, previously completed frames remain available. The finished frames can be assembled with the song using Blender’s Video Sequencer or another video editor.
Make sure the output location has enough free storage before rendering.
Project Check
Project Check looks for common missing steps and provides a scene-complexity estimate.
It checks for:
A valid song file
A generated visualizer scene
Completed audio analysis
An active camera
A gravity cache when required
A selected output path
Complexity is displayed as Light, Medium or Heavy.
This is a general workload estimate rather than an exact render-time prediction.
Saving Custom Presets
The My Presets section stores your current creative settings inside the .blend file.
To save a preset:
Enter a preset name.
Press Save Preset.
Select it later from the preset list.
Press Load Preset.
Presets store settings such as the visualizer, palette, effects and camera choices.
They do not embed:
Audio files
Performer footage
Generated objects
Gravity caches
Rendered videos
Keep external media files together with the Blender project when moving it to another computer.
Troubleshooting
The Music Video tab is missing
Make sure the add-on is enabled in Blender Preferences. Return to the 3D Viewport, press N, and select the Music Video tab.
The song will not load
Confirm that the file still exists and is supported by your Blender installation.
If necessary, convert it to a standard WAV file. DRM-protected audio is not supported.
The visualizer is not moving
Make sure you pressed Analyze Song after creating the scene.
Also check:
The correct scene is active
Sensitivity is not too low
The selected part of the song is not silent
The timeline is inside the analyzed frame range
The gravity visualizer is not moving
Gravity scenes require both audio analysis and Bake Gravity Simulation.
If you change the song, frame rate, gravity settings, seed or animation length, bake the simulation again.
The camera movement is too short
Analyze the complete song before generating the camera. Camera movement uses the current scene frame range.
The drawn camera path is shaky
Use Smooth Path & Rebuild Camera. If the path still has sudden turns, edit its points in Blender’s Edit Mode or draw a cleaner stroke.
The camera passes through objects
Custom routes do not include collision avoidance. Adjust the path points or increase the distance from the visualizer.
The render is black
Run Project Check and confirm that:
A camera exists
The correct scene is active
Lights are enabled
The output frame is inside the animation range
Objects have not been disabled for rendering
The render is too slow
Try the following:
Use Cycles 720p Fast
Reduce the element or body count
Disable volumetric fog
Reduce rain
Avoid glass-heavy styles
Lower the Cycles samples
Render a short section first
Use Eevee for preview renders
The interface becomes busy during analysis
Audio analysis runs as a bounded process and may temporarily occupy Blender, especially with long tracks.
Analyze a shorter section while testing, then analyze the full song before the final render.
Important Project Notes
Generated objects, lights, materials and animation remain editable using Blender’s normal tools.
The add-on avoids permanent frame-change Python handlers. Generated animation is stored as standard Blender actions, drivers and keyframes.
Audio and performer footage remain external files. Use Blender’s File → External Data → Pack Resources where supported, or keep the media files beside the saved project.
Rain is a decorative looping effect. It does not create physical collisions or wet surfaces.
Liquid visualizers use procedural animated shapes rather than Blender fluid simulations.
The gravity system is an artistic numerical simulation. It is not intended for scientific calculations.
No music, footage, HDRIs, third-party textures or fonts are included.
Recommended First Project
For a quick first result:
Select Neon Tunnel Fly-Through.
Load a short section of your song.
Press Quick Create.
Preview through the camera.
Run Project Check.
Select Cycles 720p Fast.
Set an output folder.
Render a short test.
Adjust the colors and audio sensitivity.
Analyze the full song and render the finished version.
This workflow gives you a complete starting scene while leaving every generated object, material, light and camera available for further editing.
Have questions about this product?
Login to message
| Blender Extension Compatible | Yes |
| Published | 4 days ago |
| Blender Version | 5.0 - 5.2 |
| Extension Type | Add-on |
| Render Engine Used | Cycles |
| License | GPL |

Discover more products like this
User-Friendly 3D Tool New-user animeasy audio animation Visualizer fun music visualizer user friendly ui Music