Nekura Procedural Creature | No-Rig Needed
 Nika
Nika


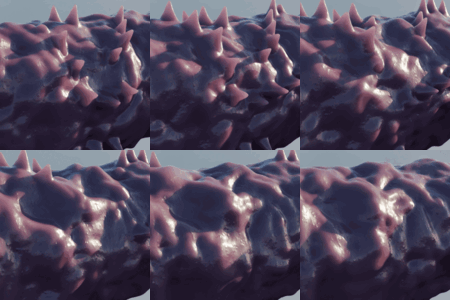

Tutorial
Full step-by-step tutorial.
NEKURA – DOCUMENTATION
Installation
Once purchased, you will receive a .blend file called Nekura_Asset.
Nekura is compatible with Blender’s Asset Browser.
- Place the Nekura .blend file anywhere on your system.
- In Blender, go to:
- Edit > Preferences > File Paths
- Under Asset Libraries, press the + button and select the folder containing the Nekura asset.
- Set the import method to Append.
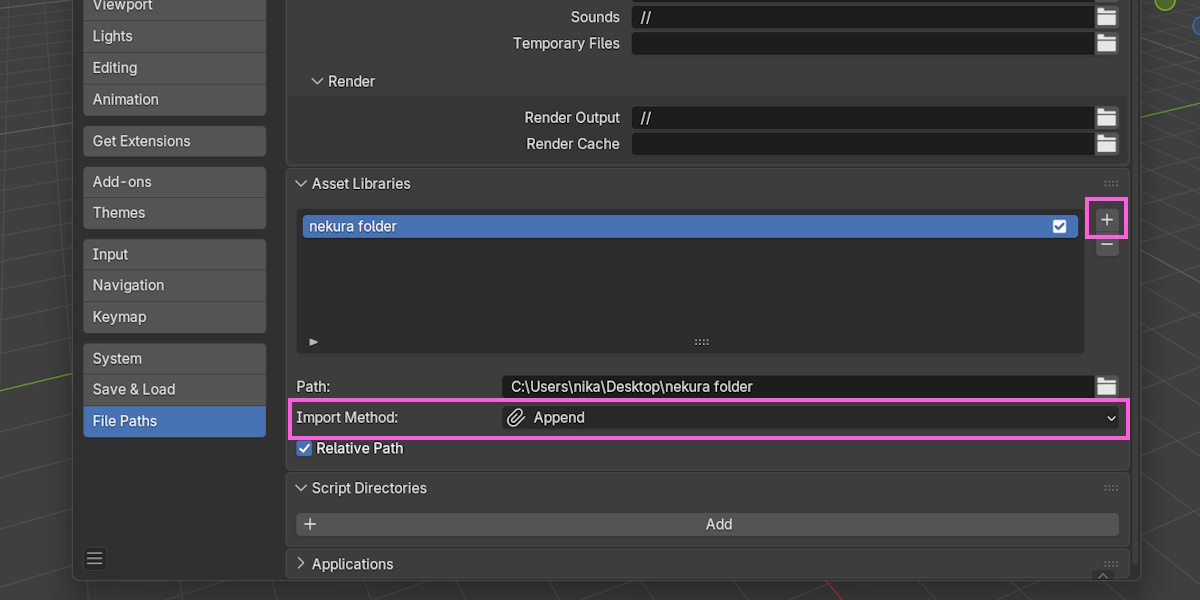
Once the library has been added, Nekura can be dragged directly into the scene from the Asset Browser.
Fundamentals
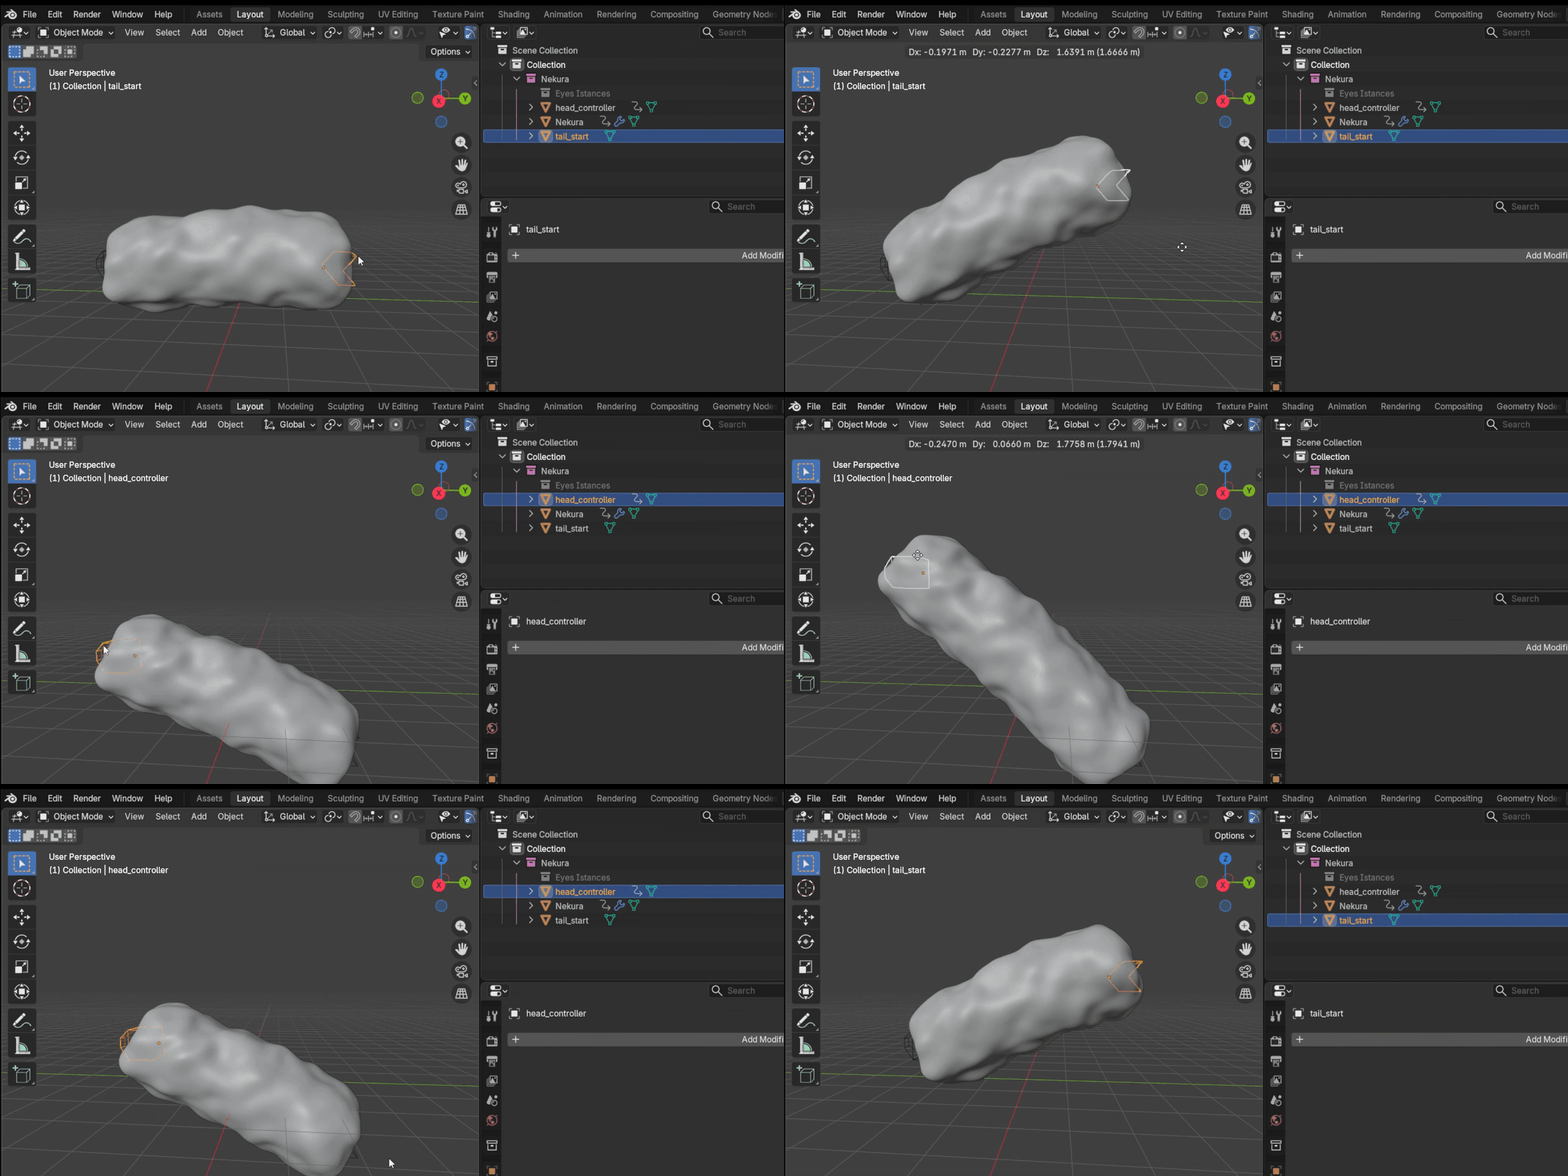
After importing Nekura into the scene, the first required step is resetting its transforms. Select the Nekura object and make sure its Location and Rotation values are set to 0, while all Scale axes are set to 1.
These values must remain unchanged for correct system behavior.
How the system works?
Nekura is entirely based on a Simulation Node system.
This means the creature is evaluated frame by frame and automatically stores simulation data in a cache during playback.
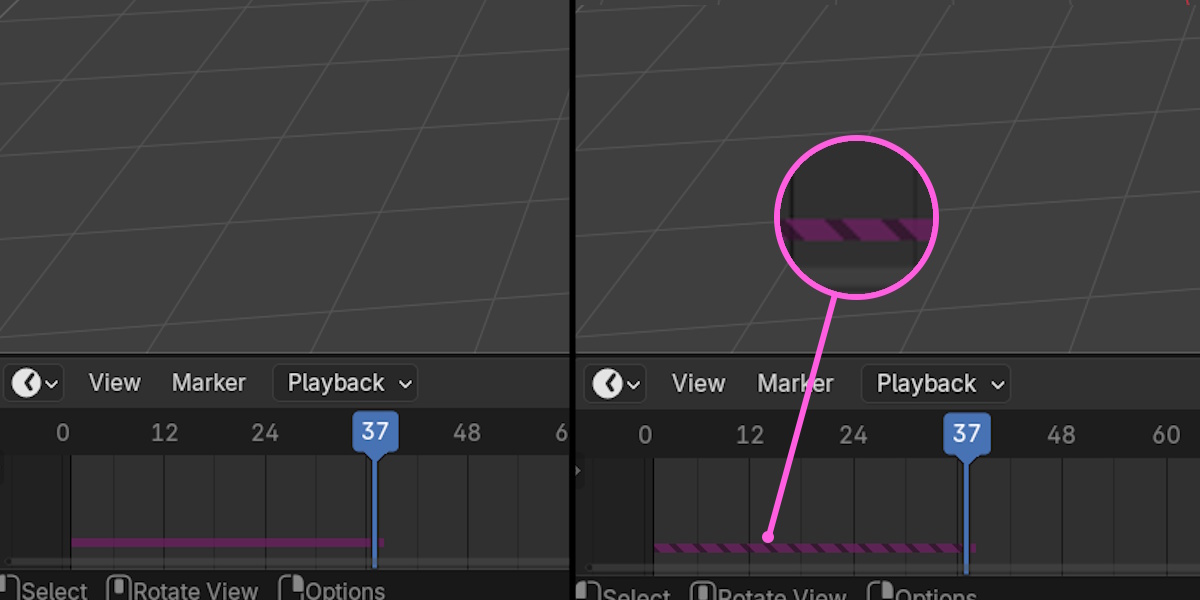
Cached frames appear as a purple overlay on the timeline. If parameters are modified inside an already cached range, the cache becomes outdated and Blender marks it with diagonal stripes. To refresh the simulation, return to the beginning of the timeline and replay it.
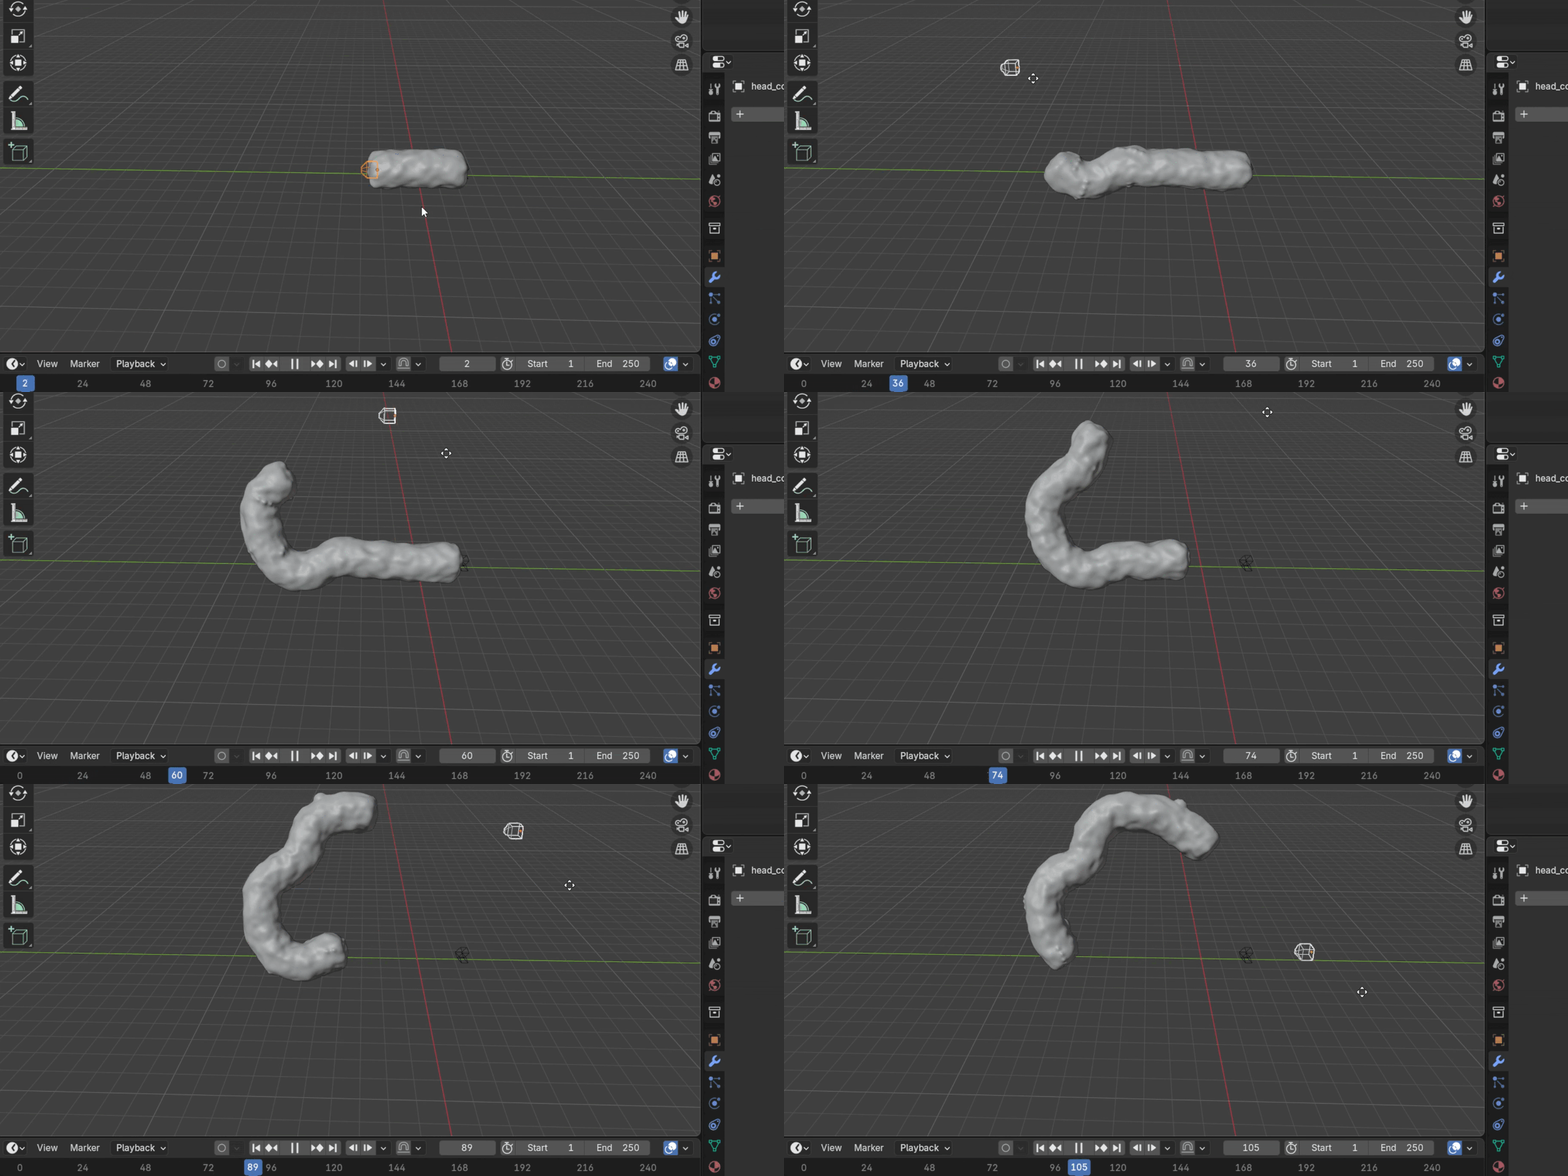
Animation mode
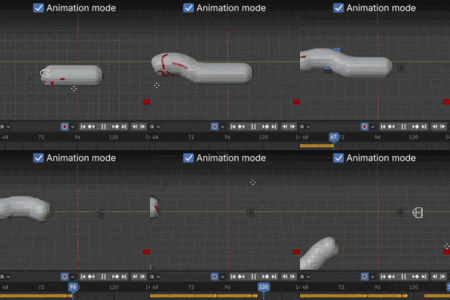
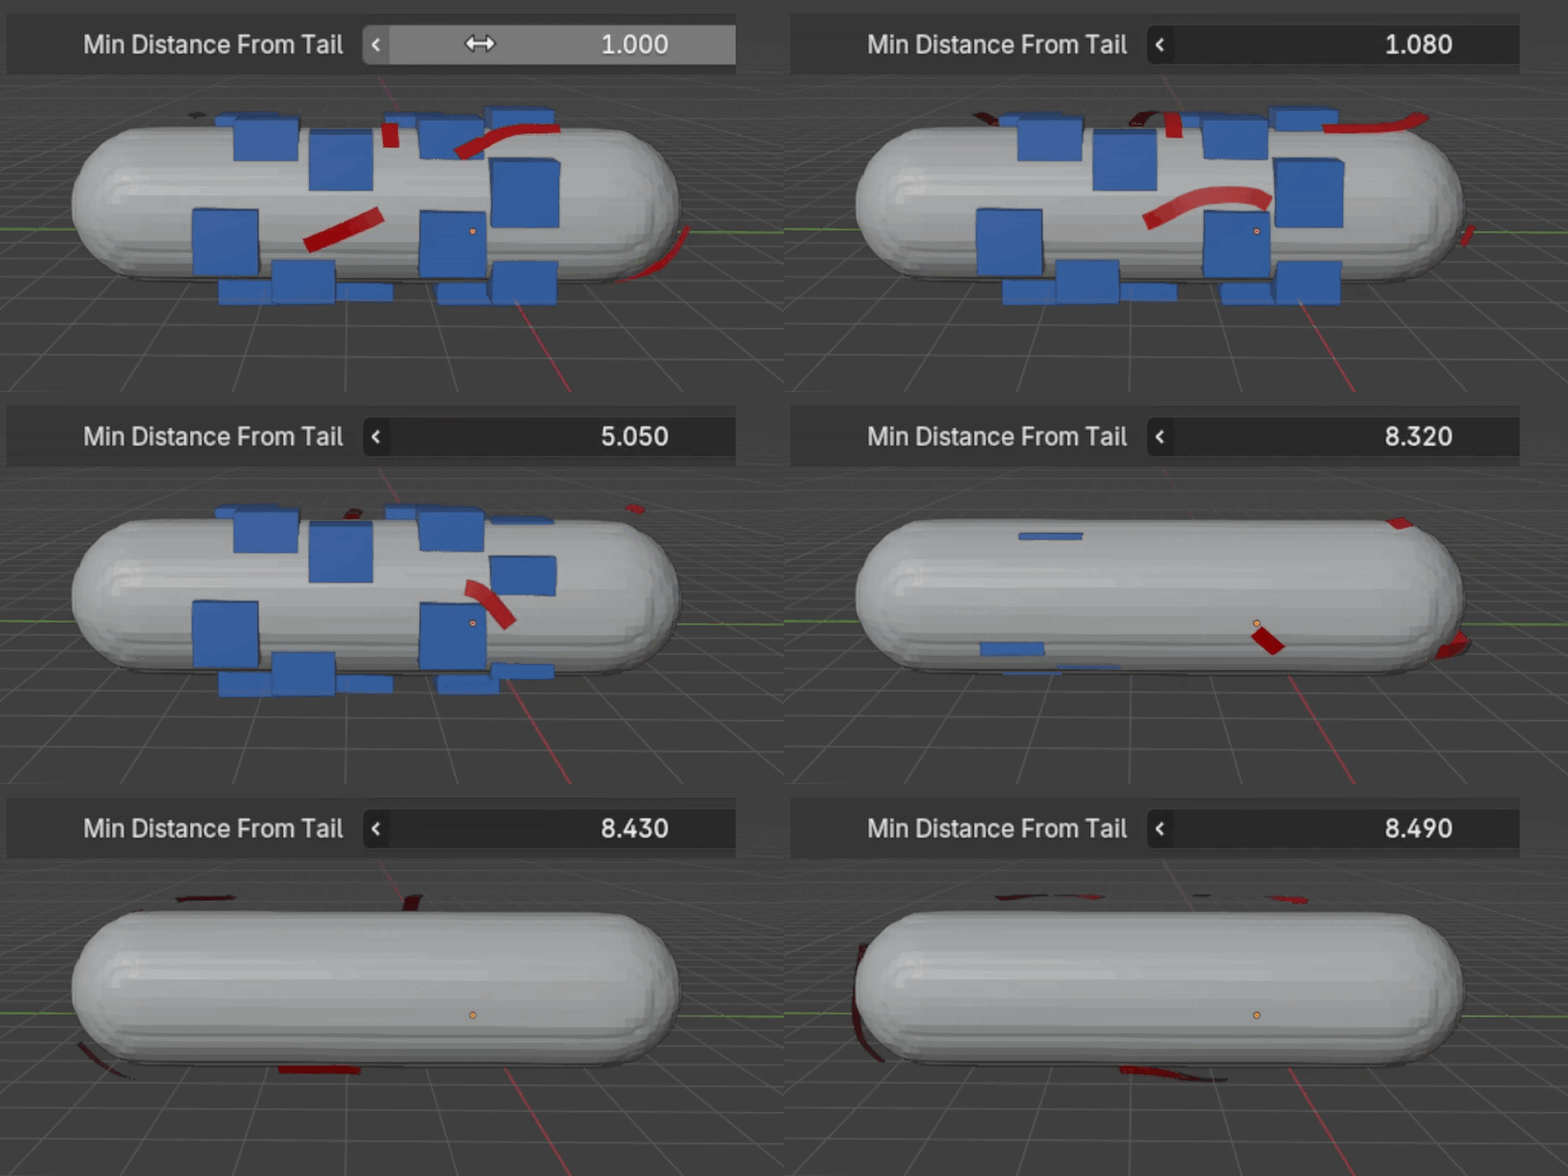
To improve real-time performance during animation, the Animation Mode checkbox can be enabled. In this mode, eyes are displayed as blue cubes and spikes are shown as red paths, allowing smoother viewport playback even on lower-performance hardware.
Baking
Once the animation is complete and all parameters are set as desired, the simulation must be baked to ensure correct and stable results. To do this, disable Animation Mode, go to the Physics Properties tab, and under Simulation Nodes press Bake.
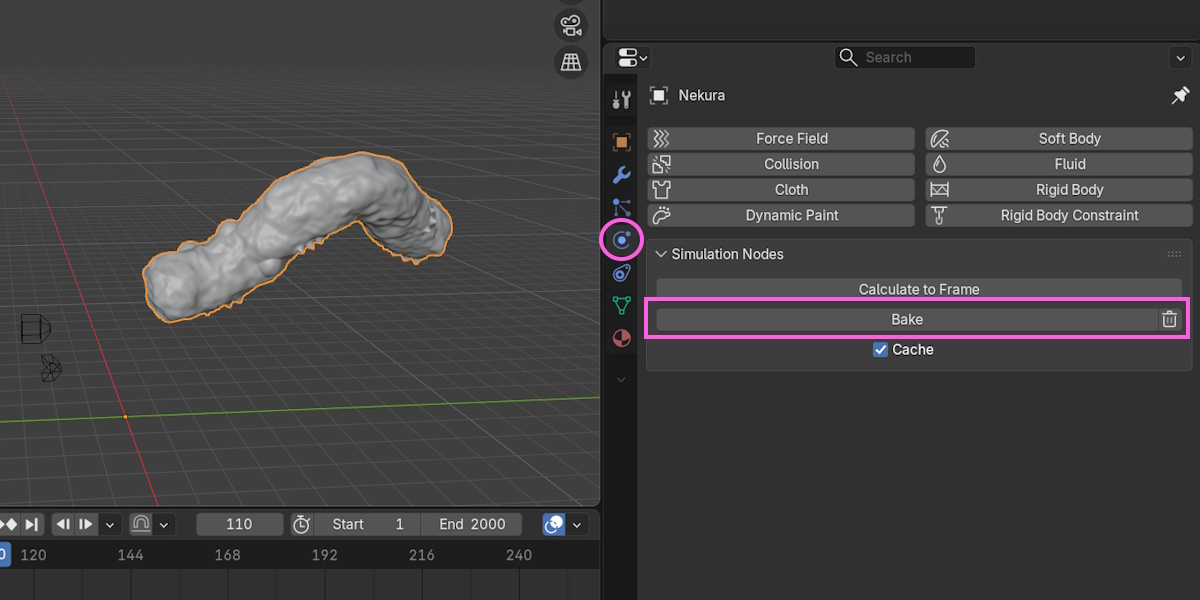
Movement
While Nekura attempts to reach the Head_Controller on every frame, it is constrained by a set of parameters found in the Movement panel. Each of these parameters can be animated using keyframes to achieve the desired effect.
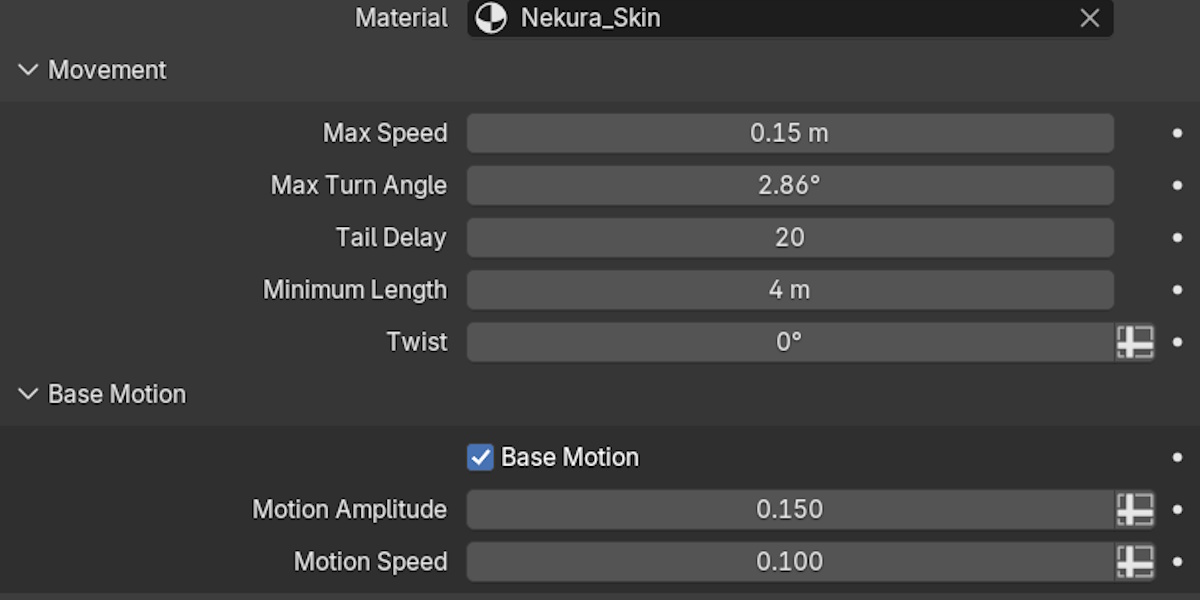
- Max Speed: Defines the maximum distance Nekura can travel per frame while following the Head_Controller. Higher values result in faster overall movement.
- Max Turn Angle: Limits how sharply Nekura can change direction between frames. Lower values produce smoother, more constrained turns; higher values allow tighter and more aggressive rotations.
- Tail Delay: Introduces a delay (in frames) between the movement of the head and the response of the tail. Higher values increase stretching and temporal offset along the body.
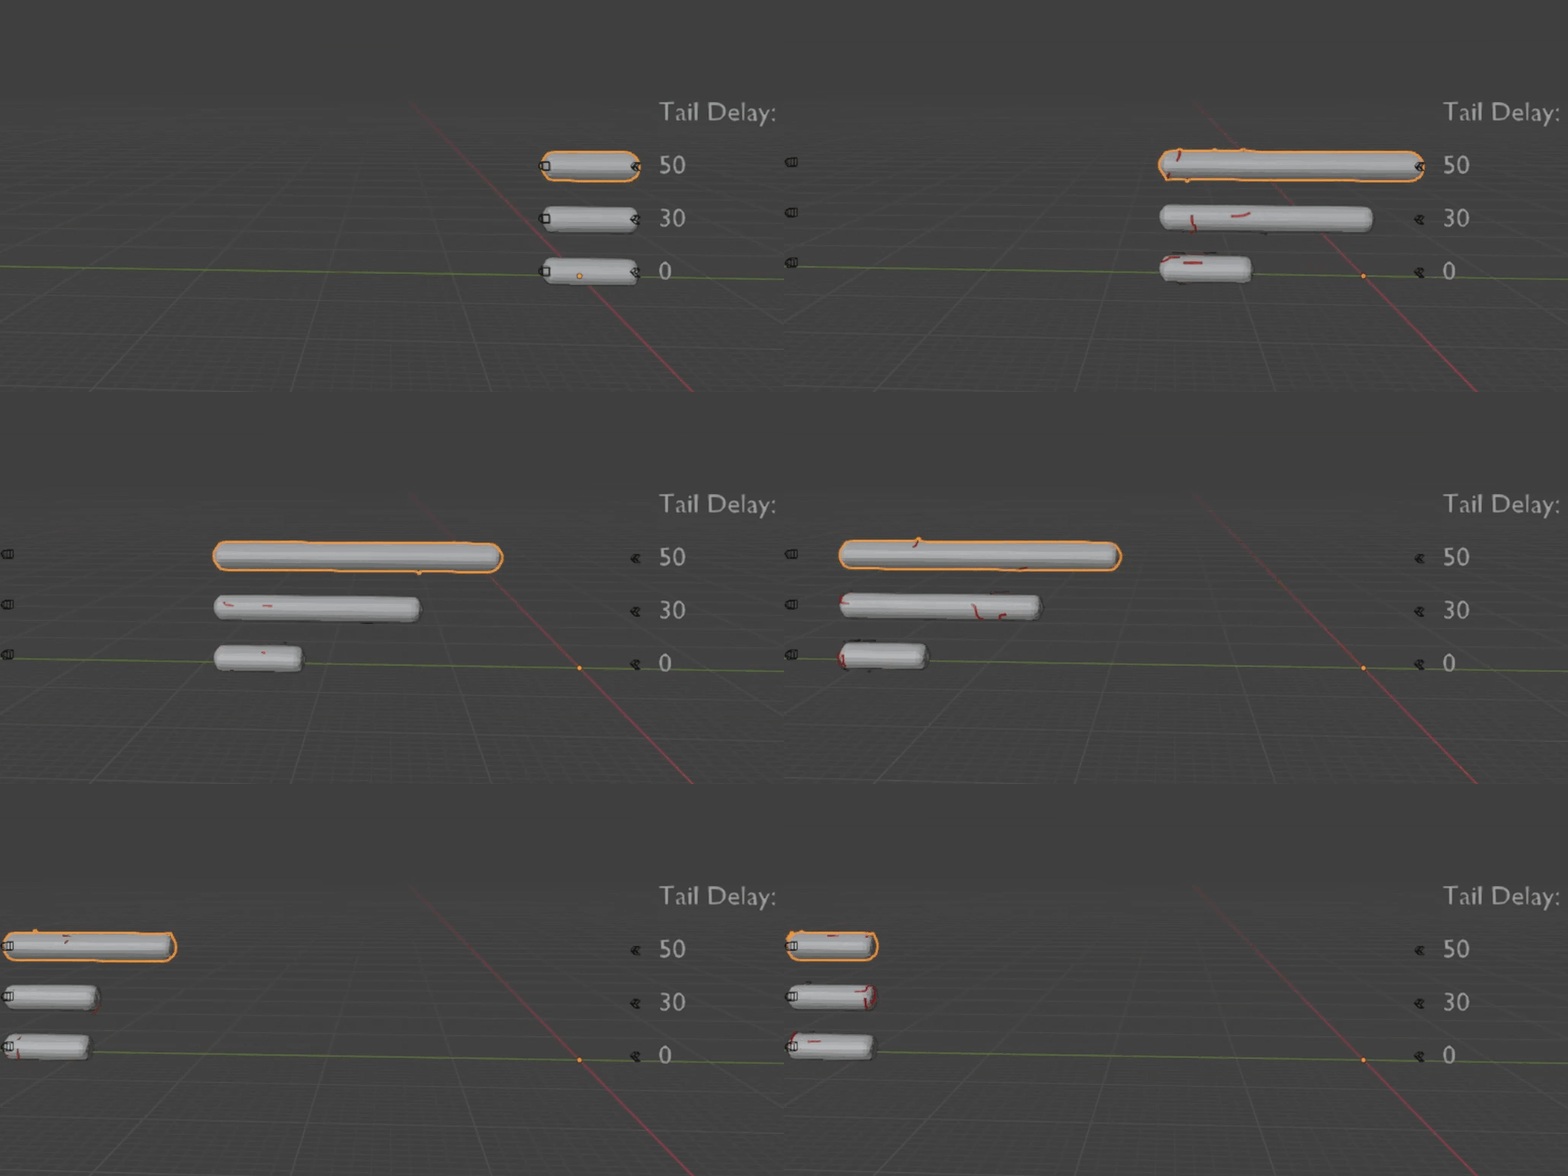
- Minimum Length: Sets the minimum allowed length of Nekura. Prevents excessive compression of the body during animation, especially when Tail Delay is active.
- Twist: Applies rotational deformation starting from the head and propagating along the body over time through the simulation.
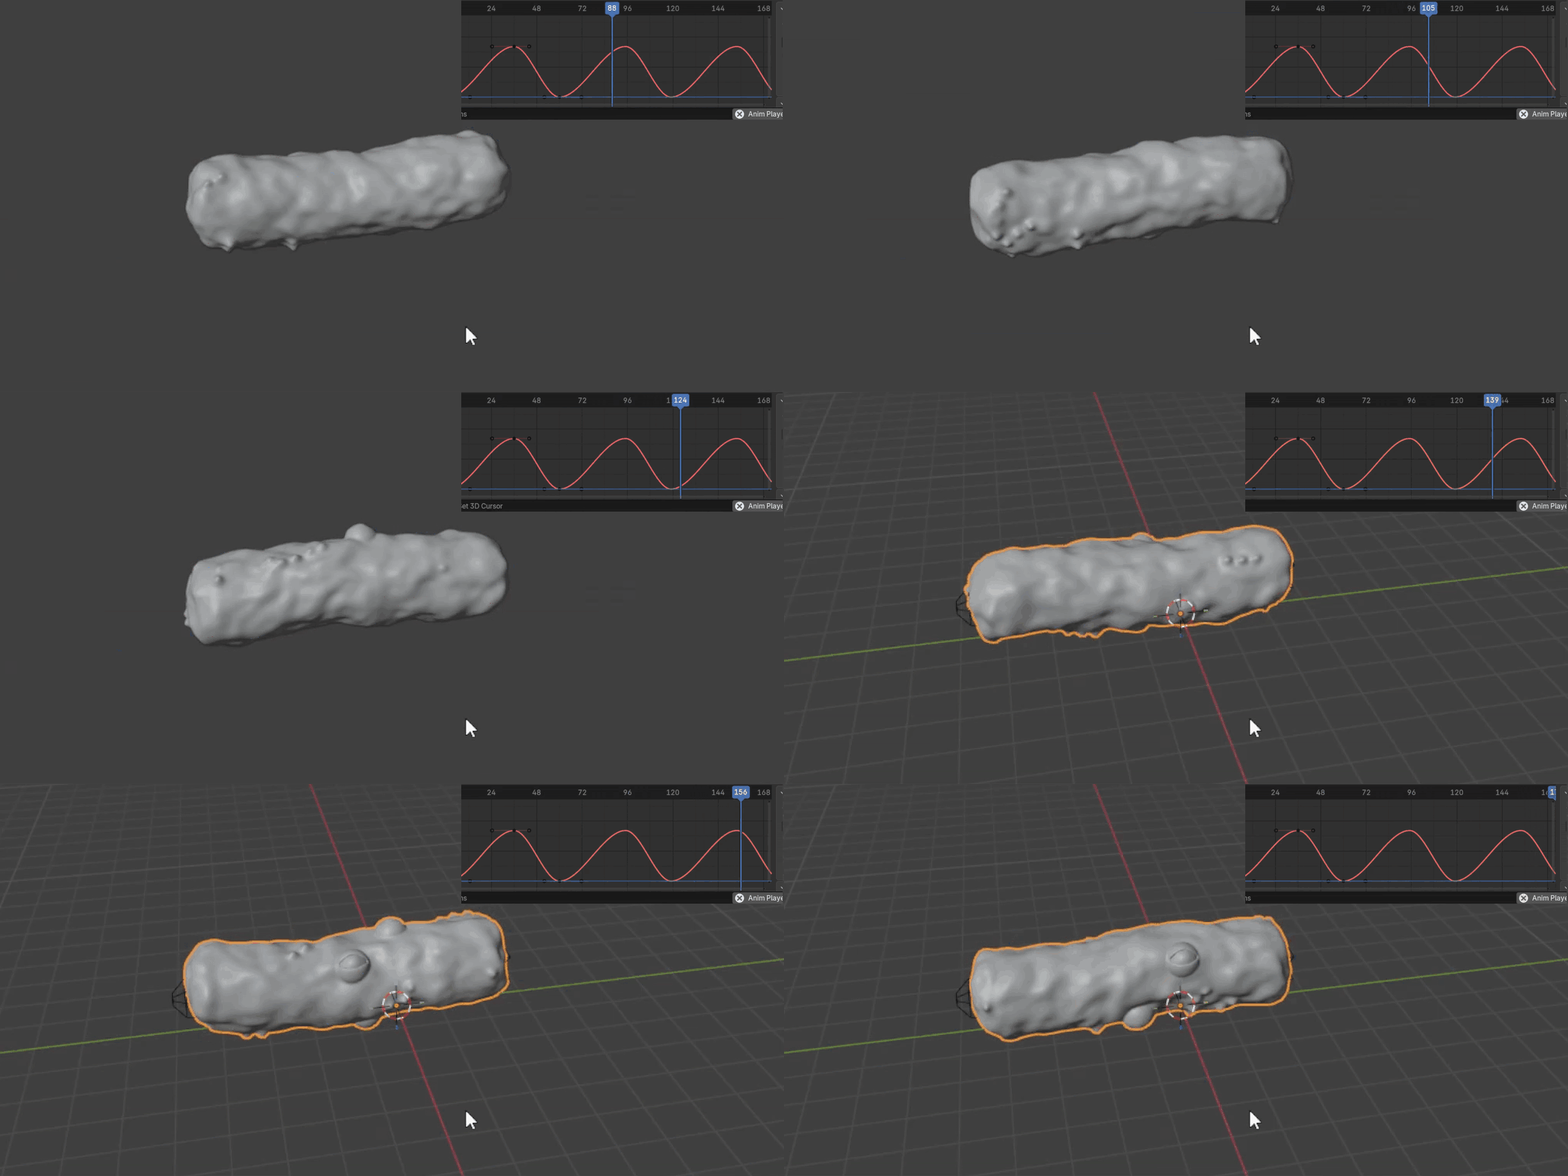
- Base Motion: Enables or disables a procedural idle motion applied to the entire body.
- Motion Amplitude: Controls the intensity of the Base Motion. Higher values produce stronger oscillation.
- Motion Speed: Controls the speed of the Base Motion oscillation. Higher values increase the frequency of the motion.
Body
The Body panel contains the main parameters controlling Nekura’s shape and surface appearance.
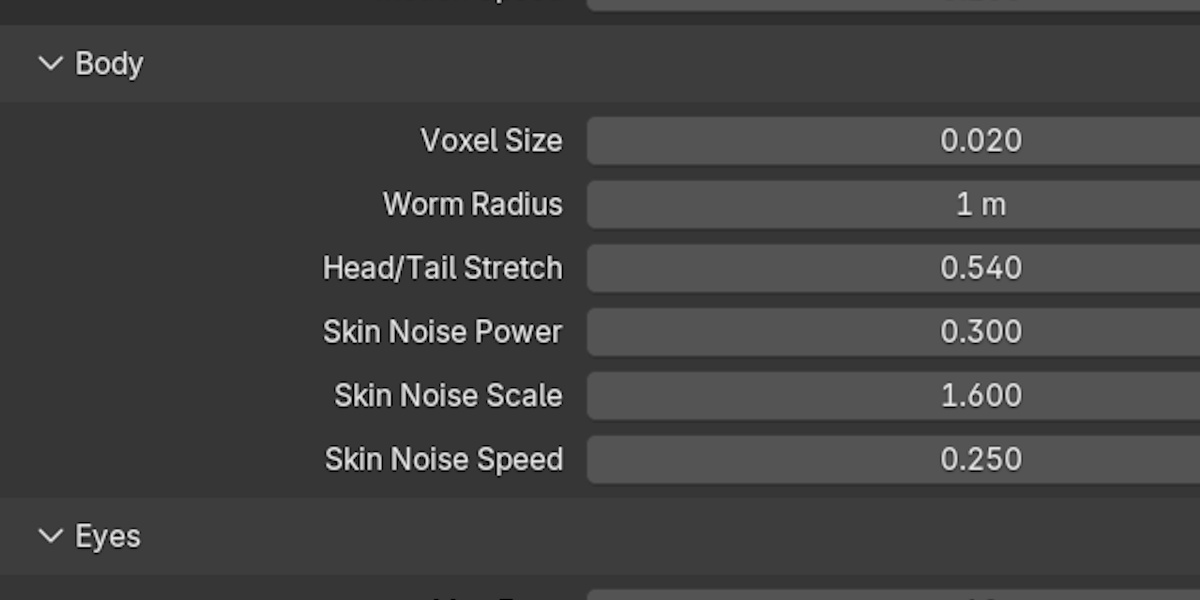
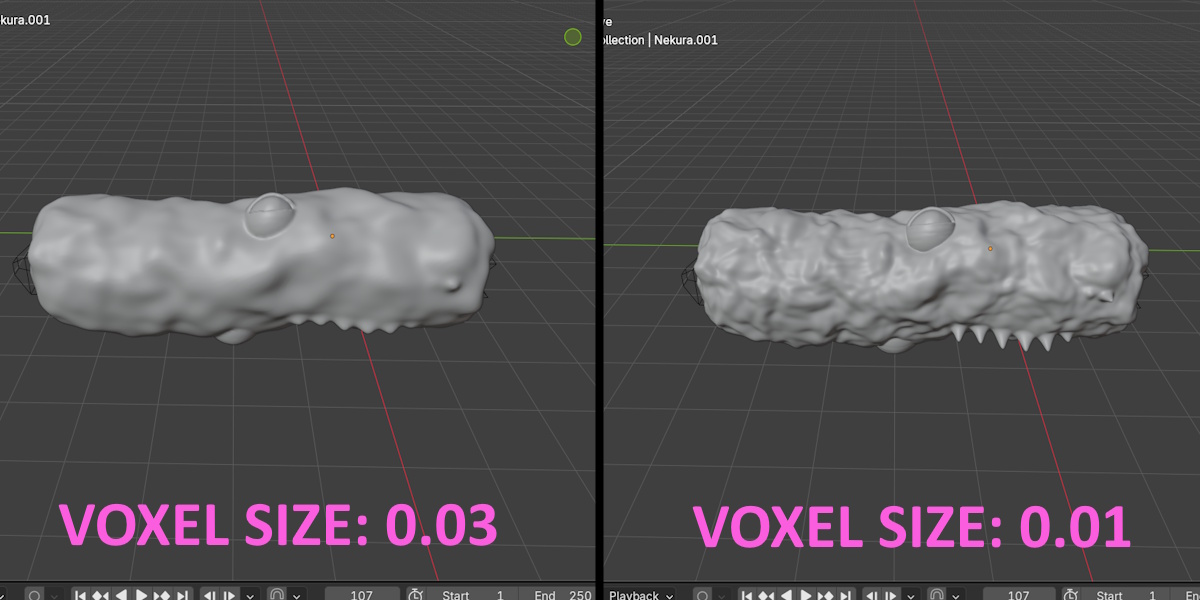
- Voxel Size: Controls the overall resolution of the system, including body detail, eyes, and spikes. Lower values produce higher detail at the cost of viewport and simulation performance.
- Worm Radius: Defines the overall thickness of Nekura’s body by changing the radius of the base cylindrical shape.
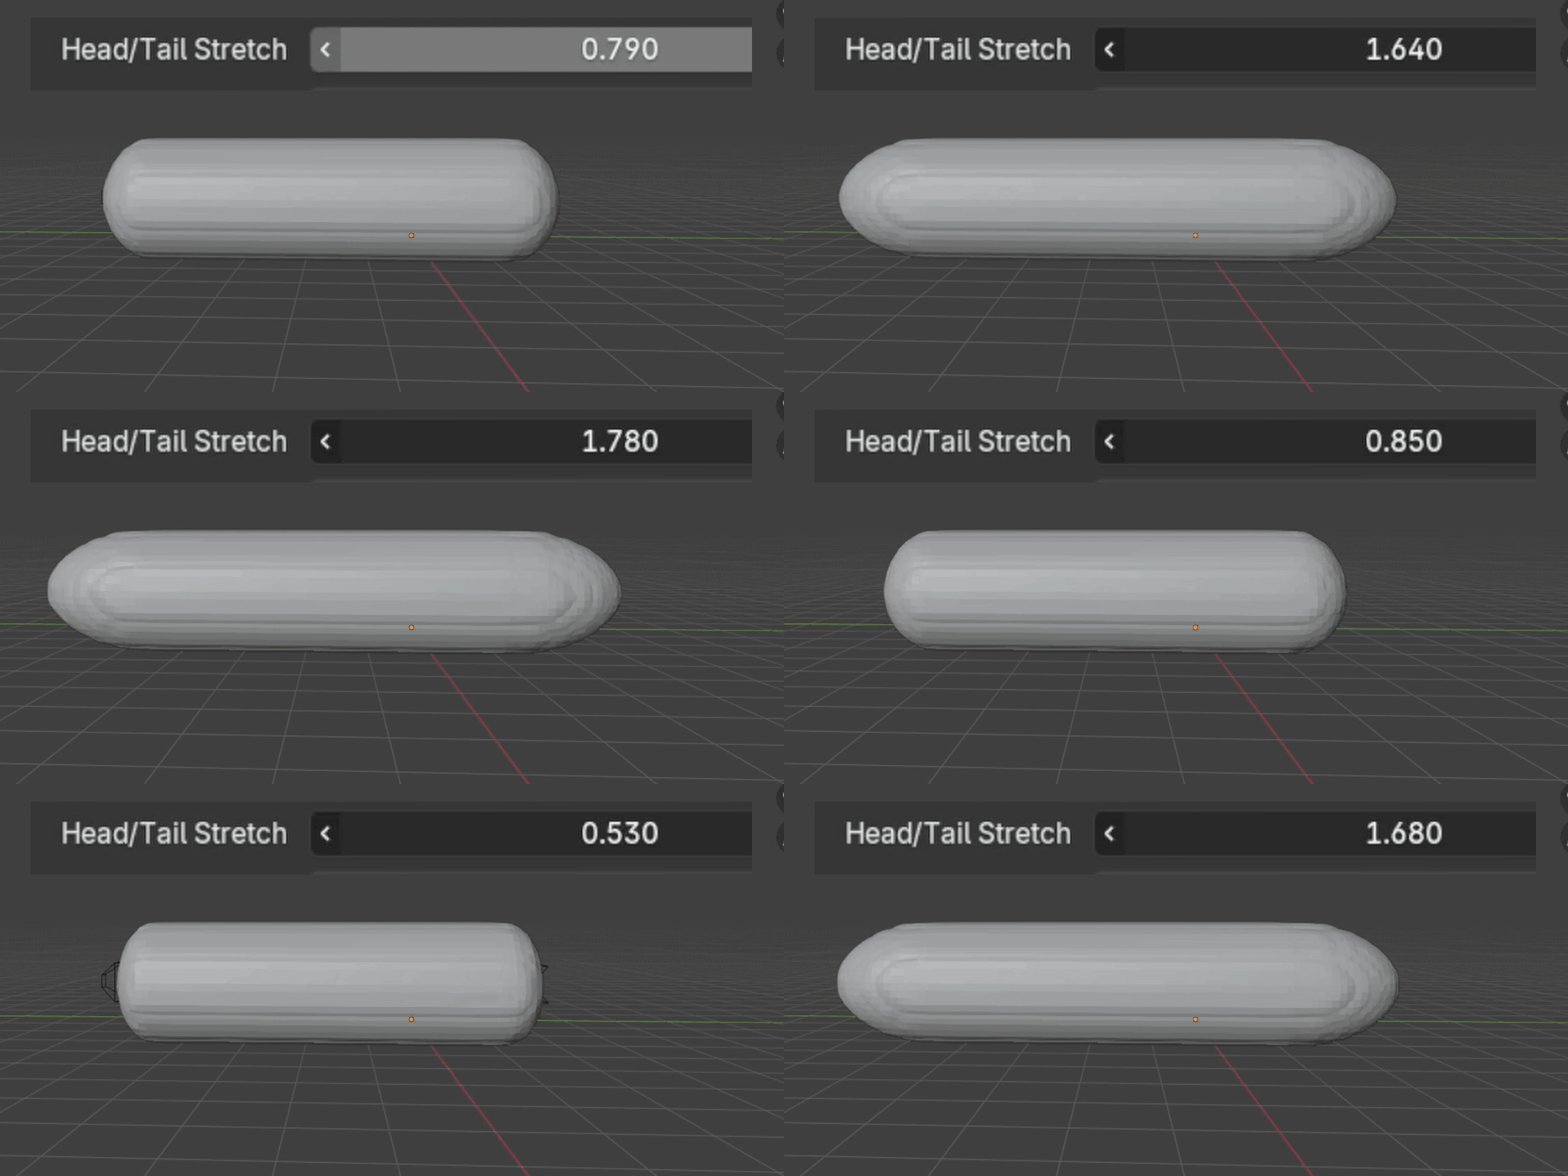
- Head/Tail Stretch: Controls the stretching applied to the hemispheres forming the head and tail. A value of 1 produces perfectly round extremities.
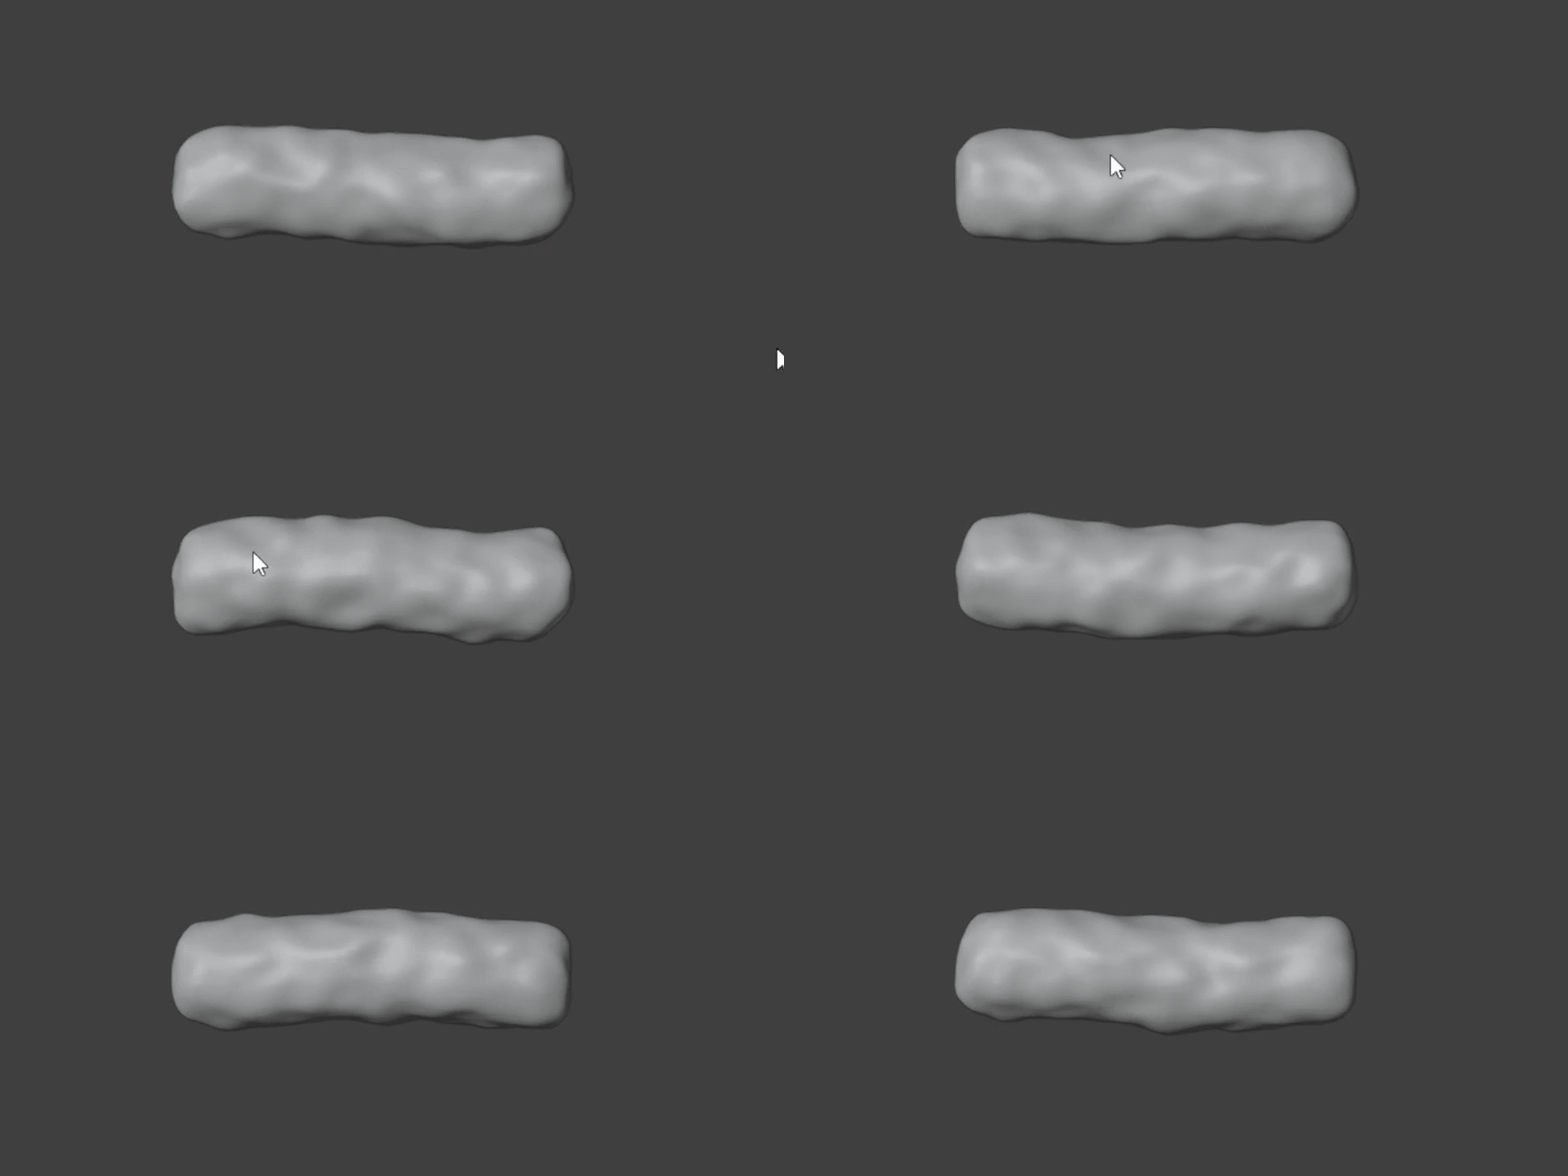
- Skin Noise Power: Controls the intensity of the procedural surface displacement.
- Skin Noise Scale: Controls the scale of the surface noise pattern. Lower values produce larger shapes, while higher values create finer surface detail.
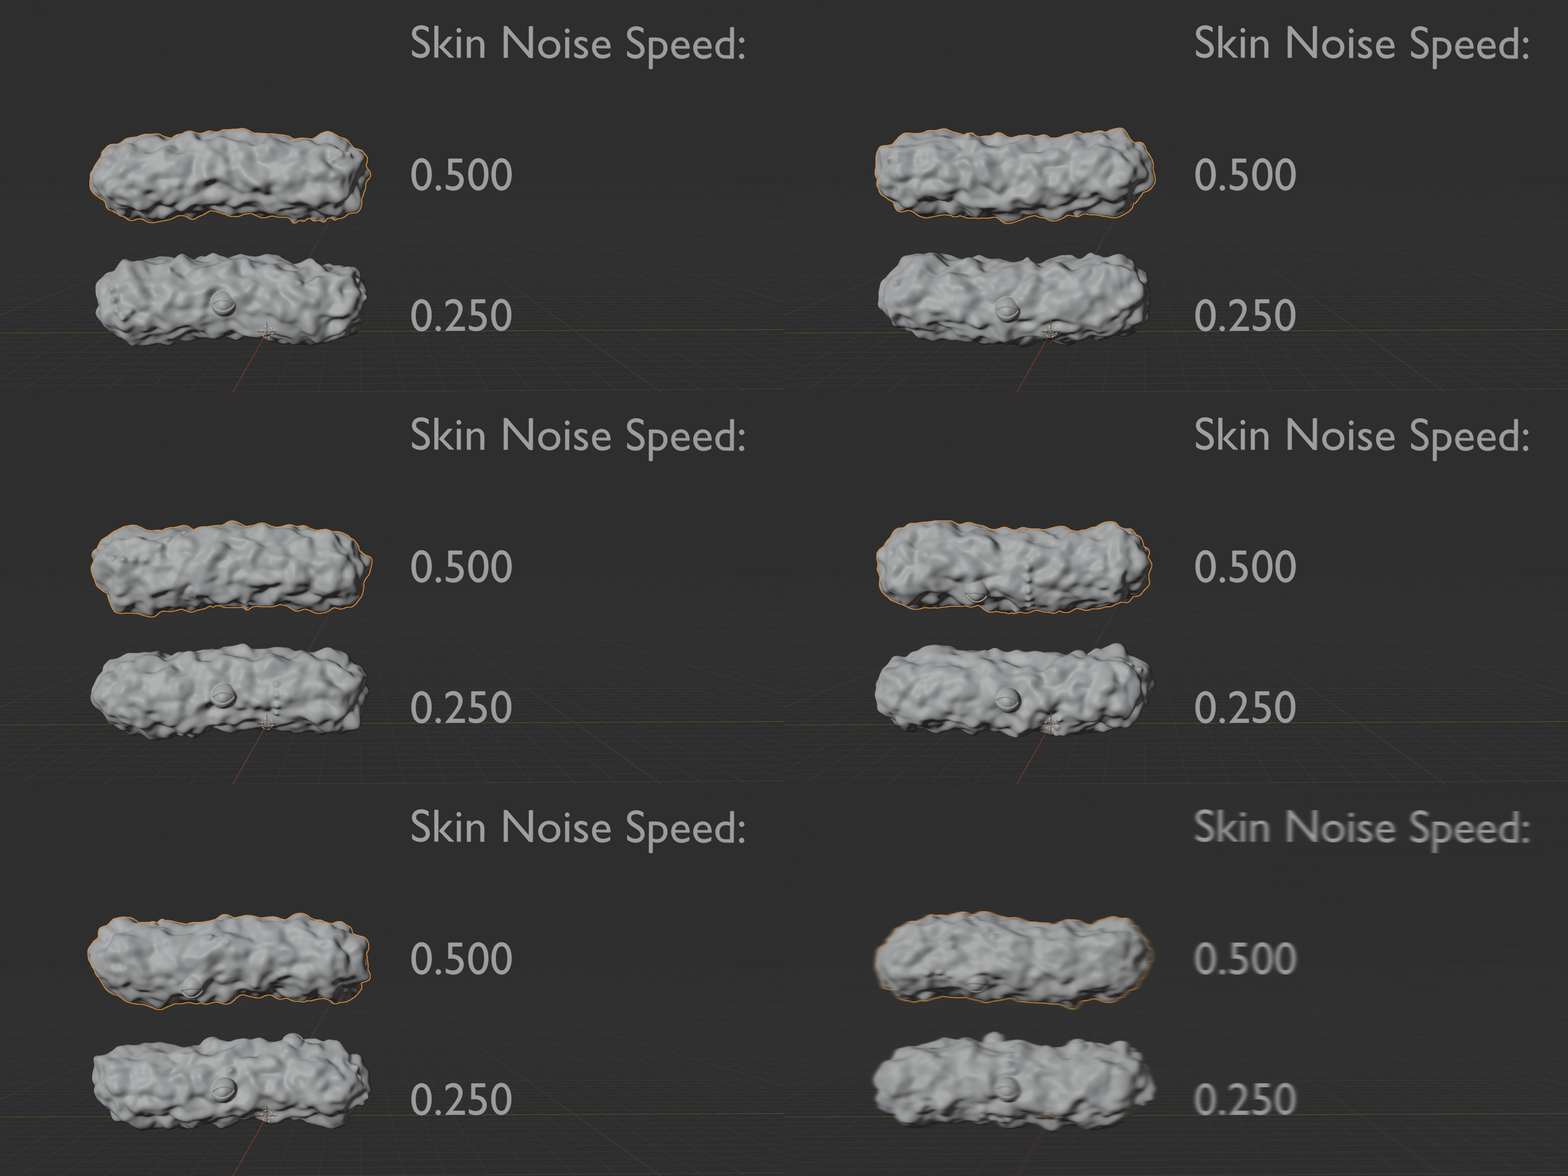
- Skin Noise Speed: Controls the animation speed of the procedural surface noise.
Eyes
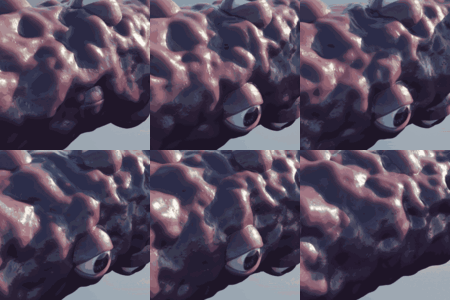
The Eyes panel controls the procedural eye spawning system and all related animation parameters.
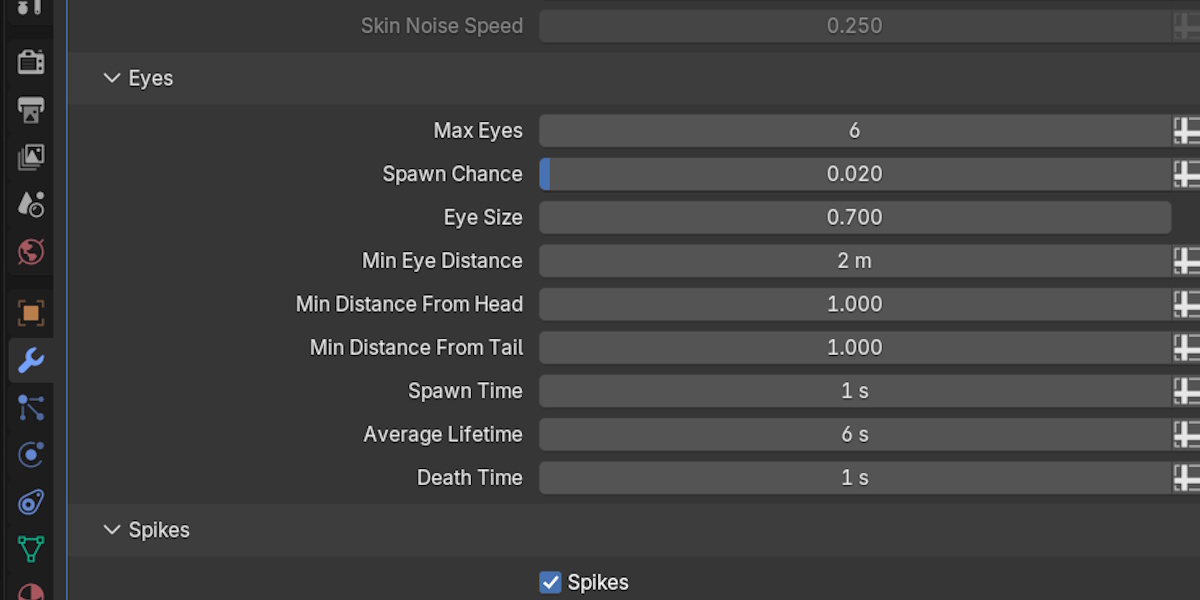
- Max Eyes: Defines the maximum number of eyes that can exist simultaneously on the surface.
- Spawn Chance: Controls the probability of spawning a new eye on each frame. Higher values increase spawn frequency
- Eye Size: Controls the overall scale of the eyes.
- Min Eye Distance: Defines the minimum allowed distance between individual eyes, preventing overlap and excessive density.
- Min Distance From Head: Prevents eyes from spawning too close to the head area. Eyes should not spawn on the head or on the tip of the tail in order for the system to function correctly.
- Min Distance From Tail: Prevents eyes from spawning too close to the tail area. This parameter also has the ability to trigger the disappearance phase early for any eye entering the defined distance range.
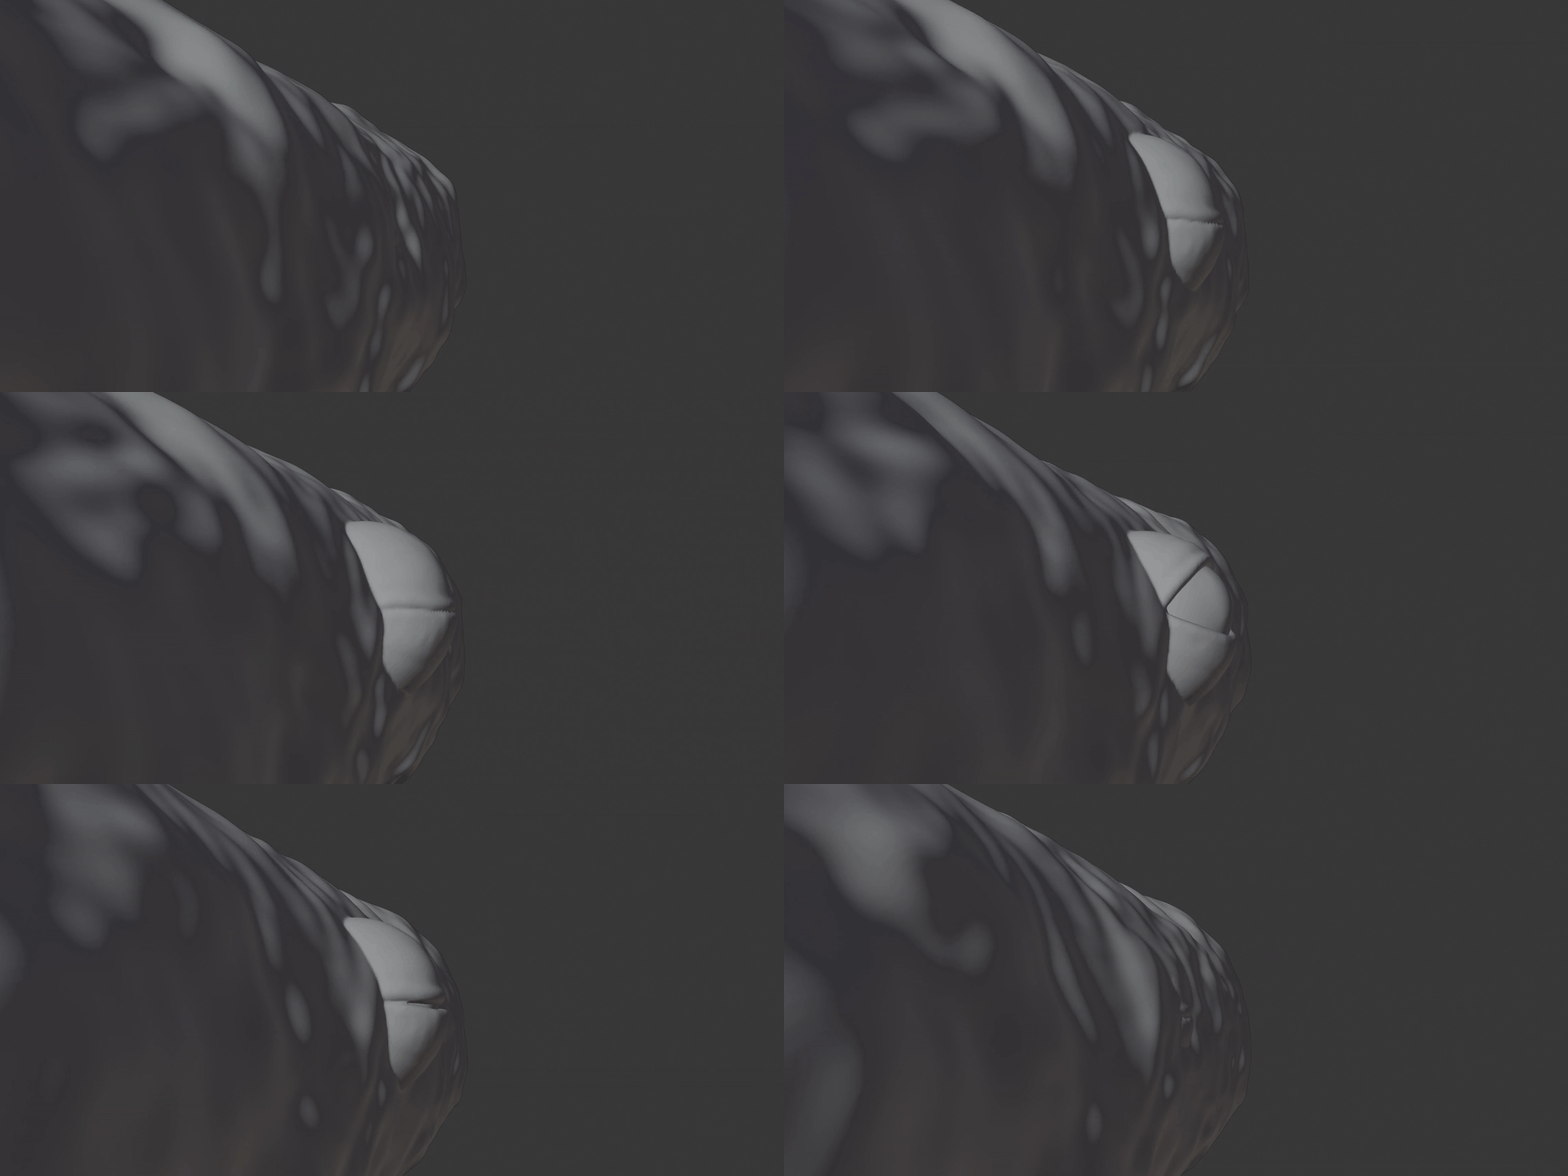
- Spawn Time: Defines the duration of the eye appearance animation, from emergence to fully open state.
- Average Life Time: Defines how long an eye remains fully visible before starting its closing phase.
- Death Time: Defines the duration of the disappearance animation before the eye is removed.
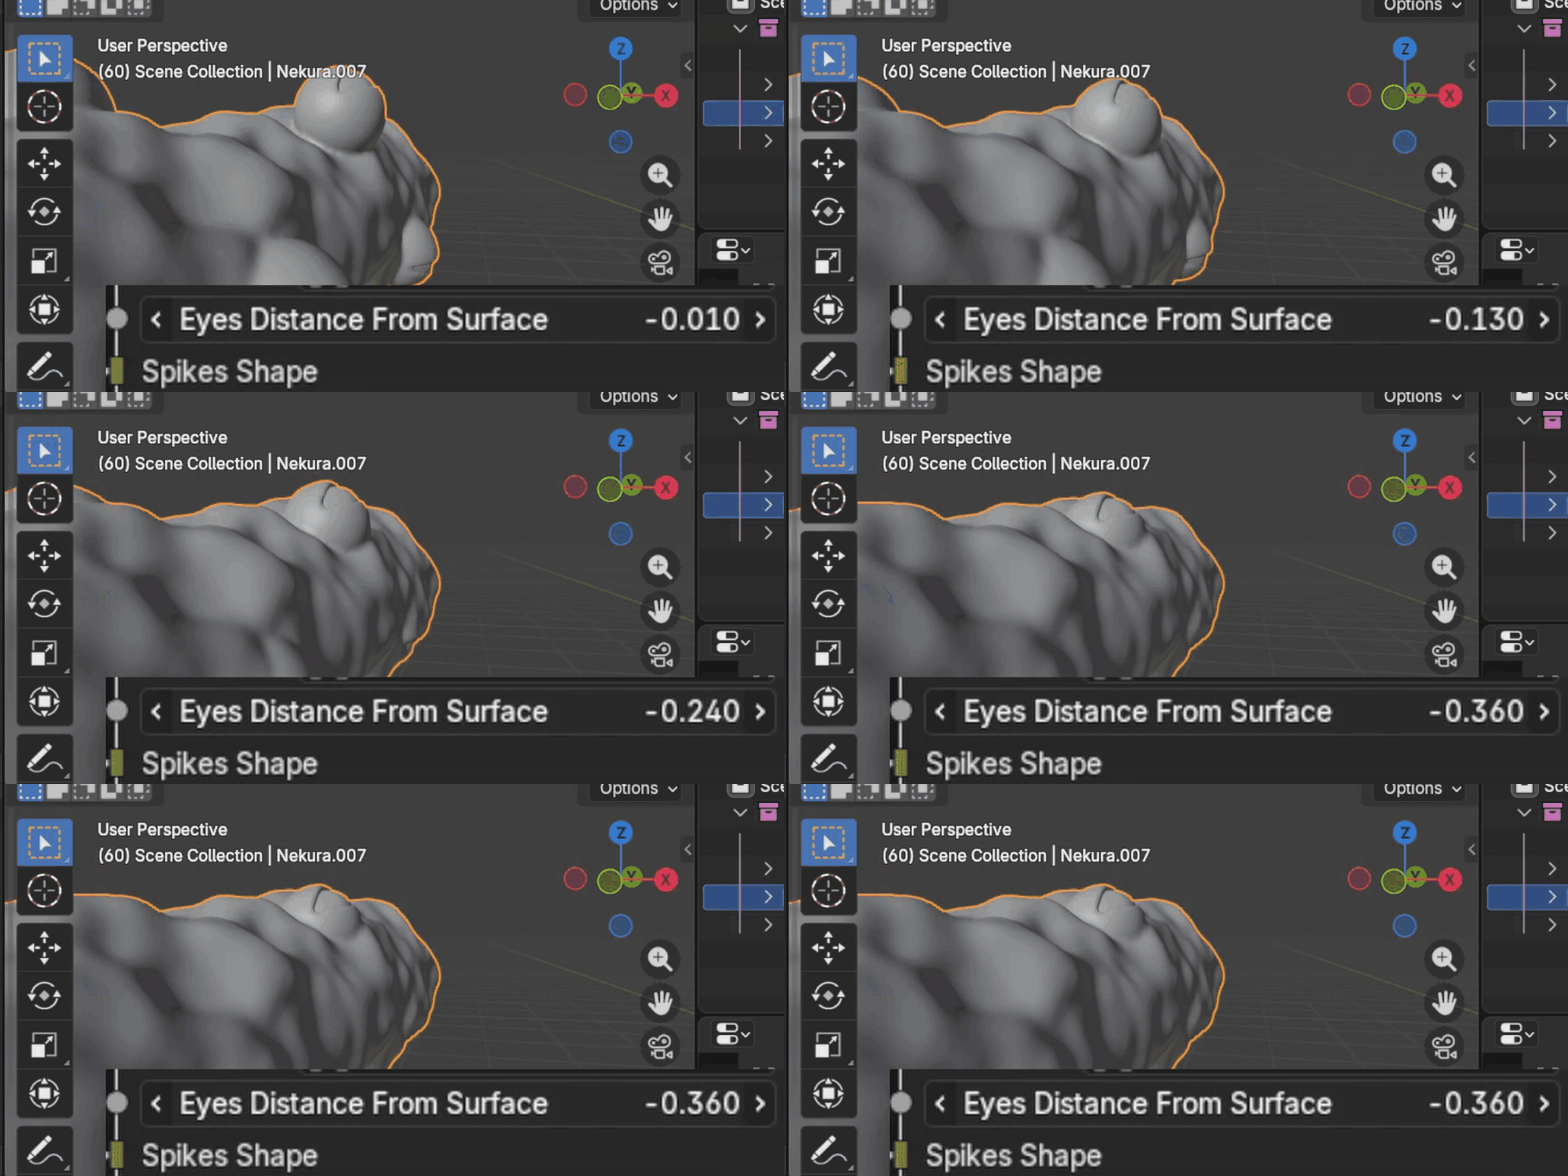
- Eyes Distance From Surface (Geometry Nodes > Extra Settings): Controls the final positional offset of the eyes relative to the worm surface. A value of 0 places the eye center directly on the surface, while negative values push the eyes deeper inside the body, producing a less protruding appearance.
Spikes
The Spikes panel controls the procedural spike-path system generated on Nekura’s surface.
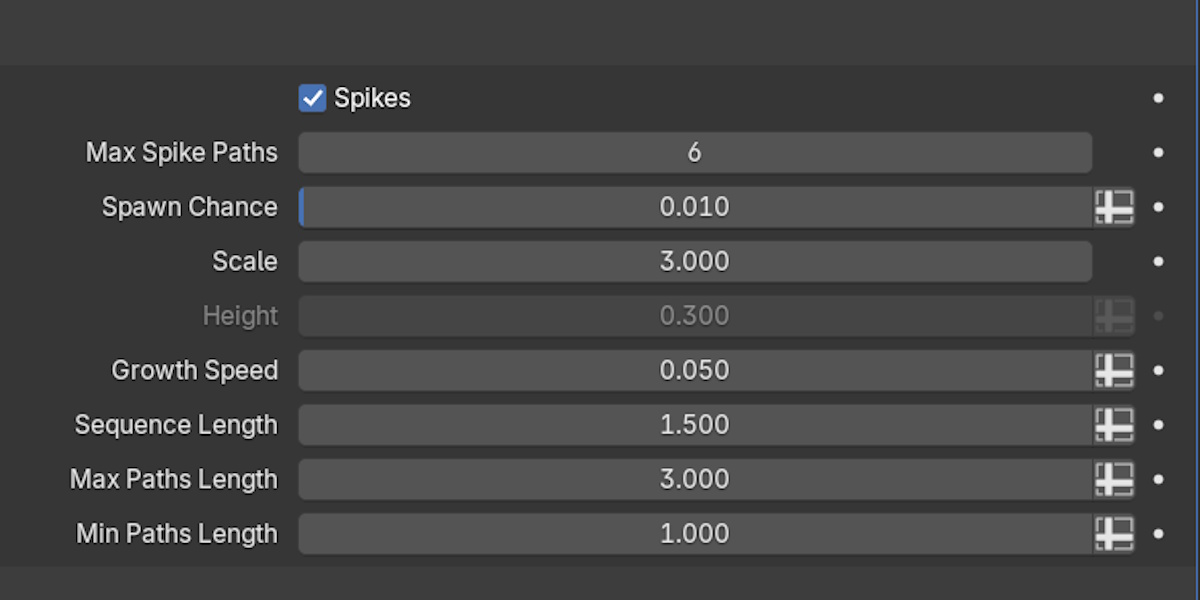
Spikes progressively appear along these paths over time before retracting again, creating a dynamic growth effect.
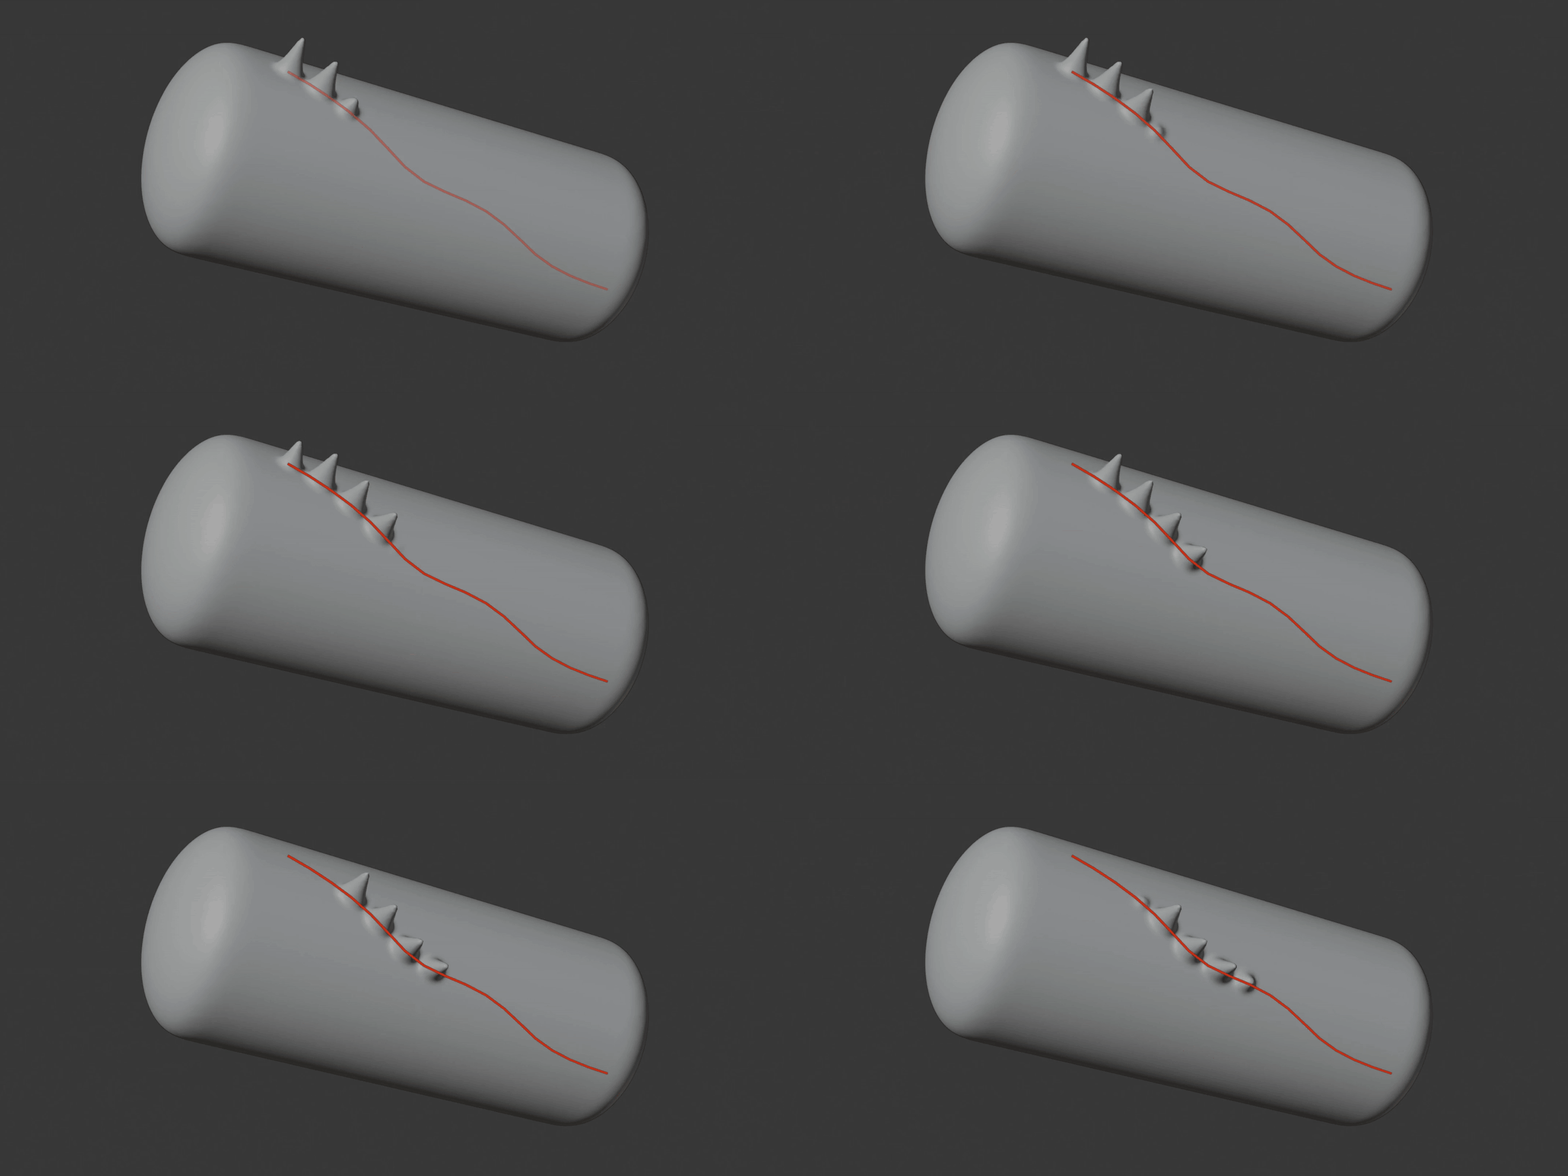
- Spikes: Enables or disables the entire spike system.
- Max Spike Paths: Defines the maximum number of spike paths that can exist simultaneously.
- Spawn Chance: Controls the probability of generating a new spike path on each frame.
- Scale: Controls the diameter of the spikes. Higher values produce thinner spikes.
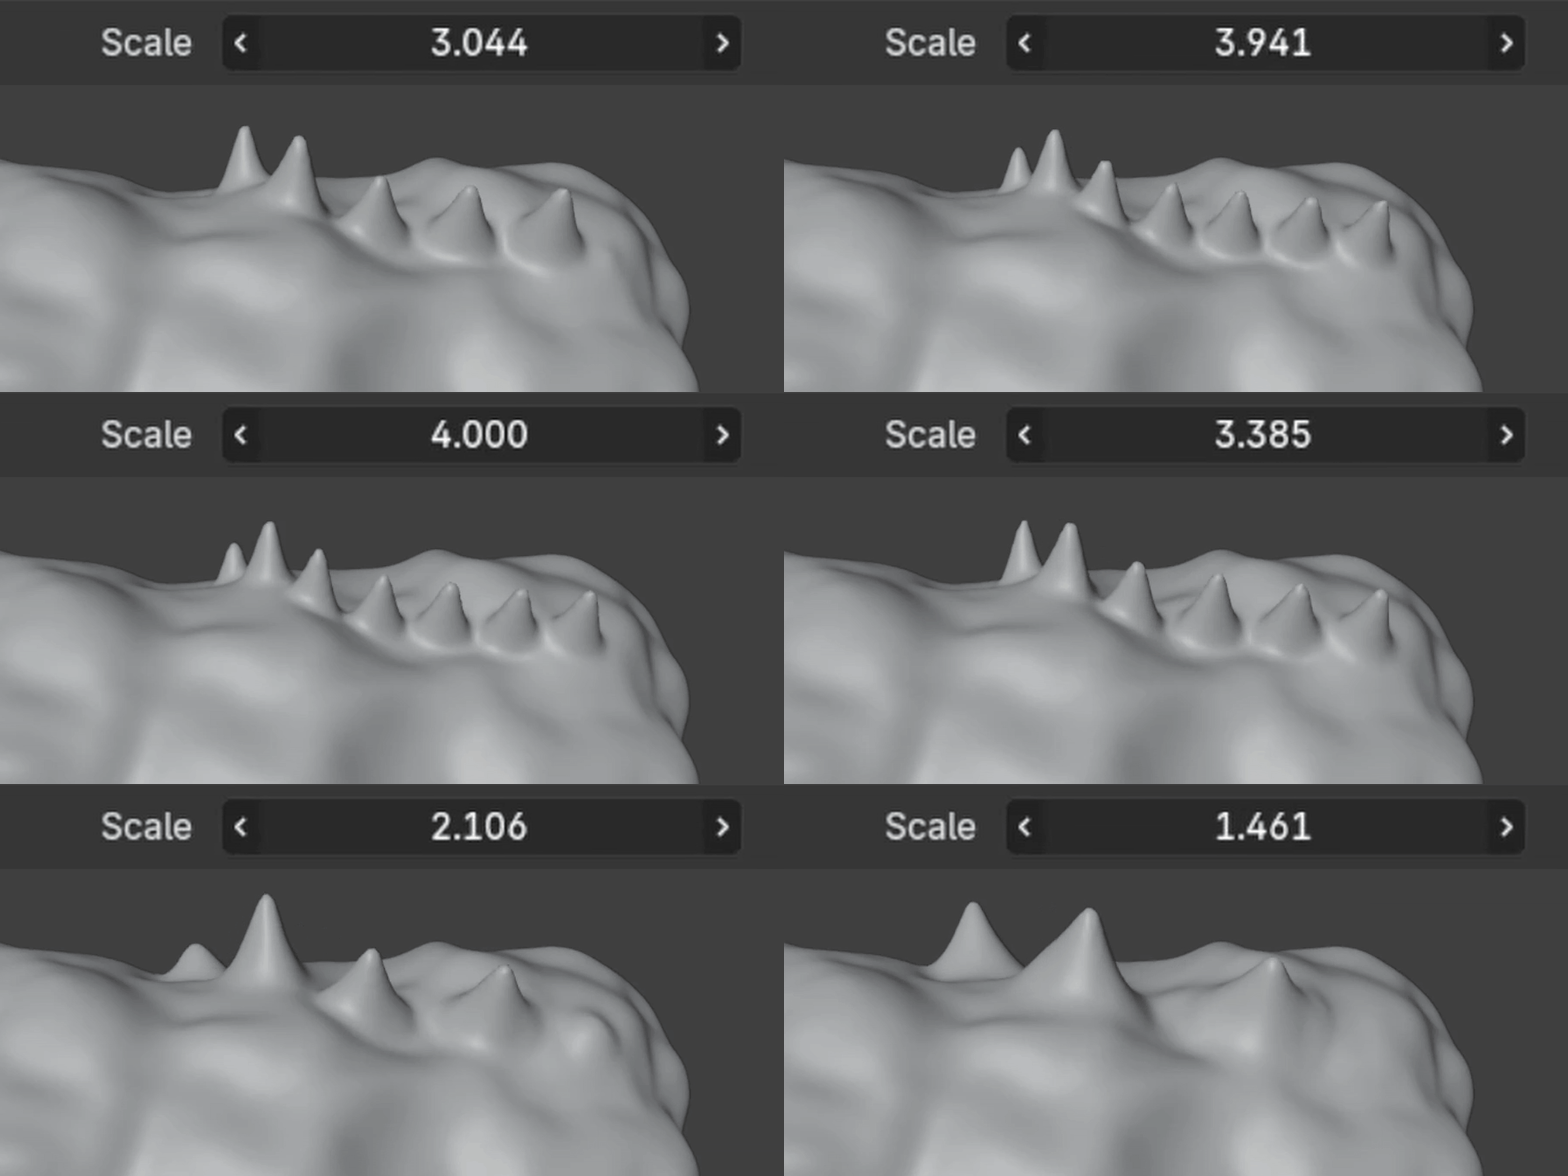
- Height: Controls the overall height of the spikes.
- Growth Speed: Controls how quickly spikes appear and retract along the generated path.
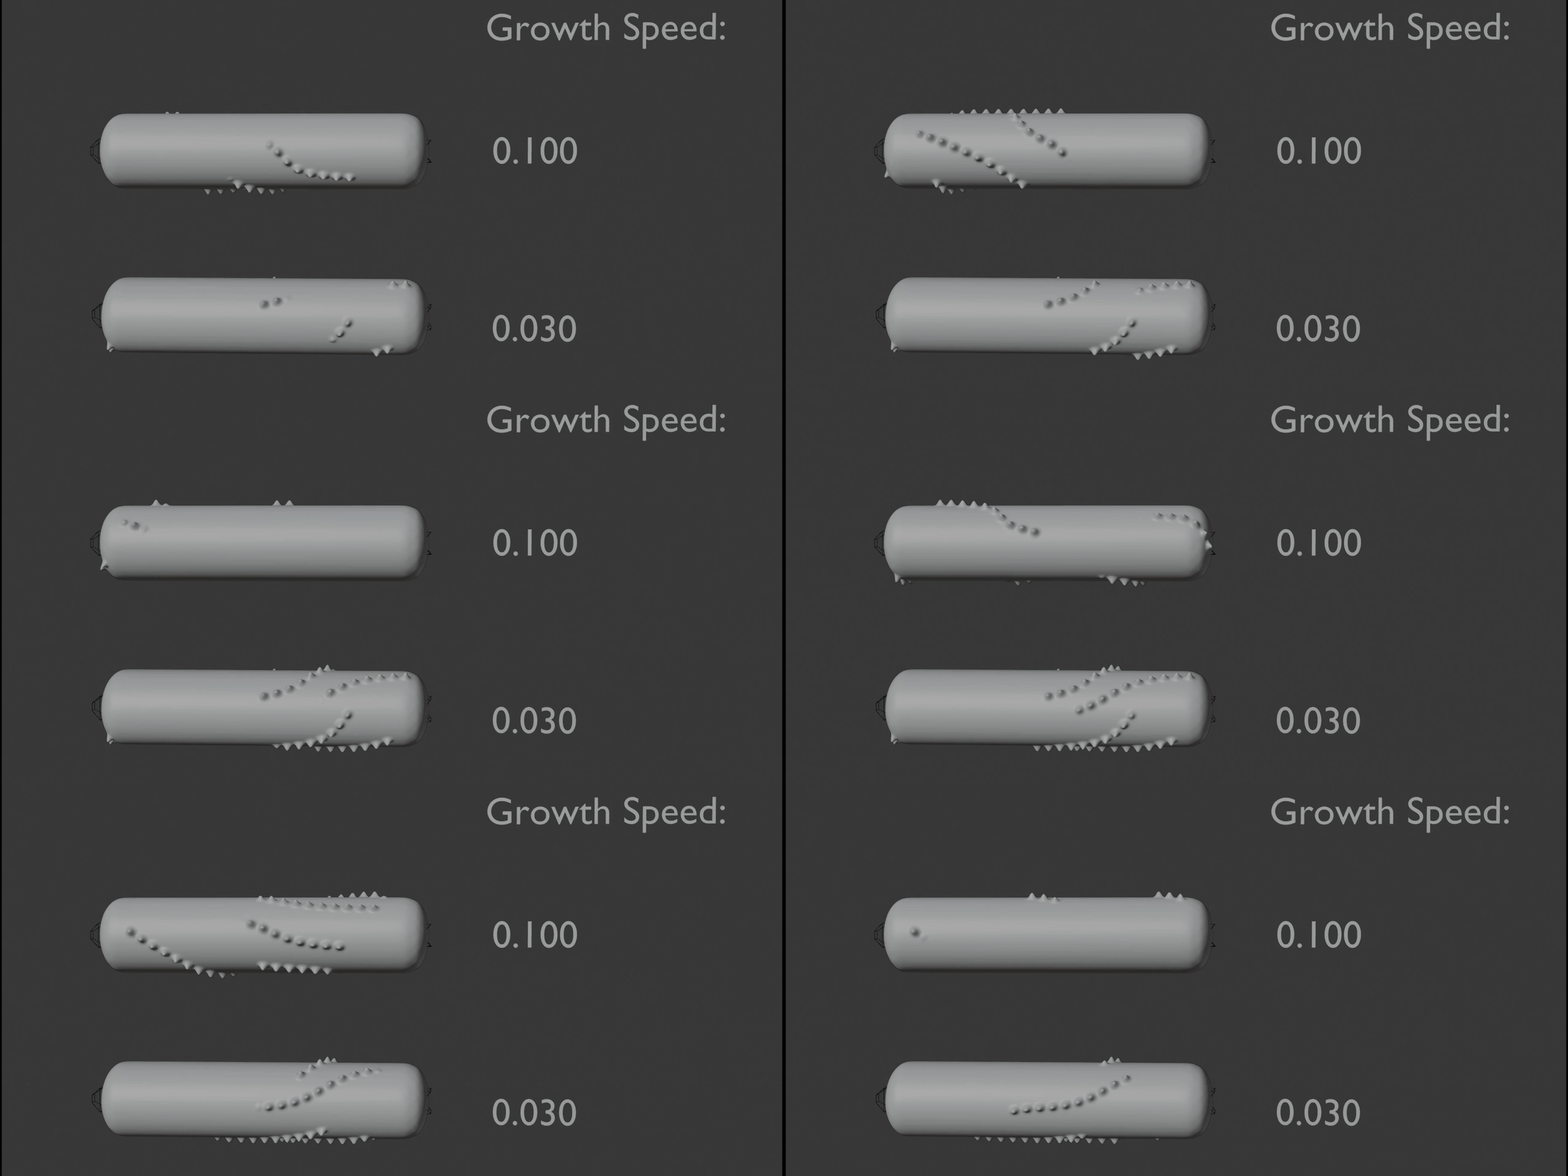
- Sequence Length: Defines the maximum visible progression length of spikes along the path before the retraction phase begins.
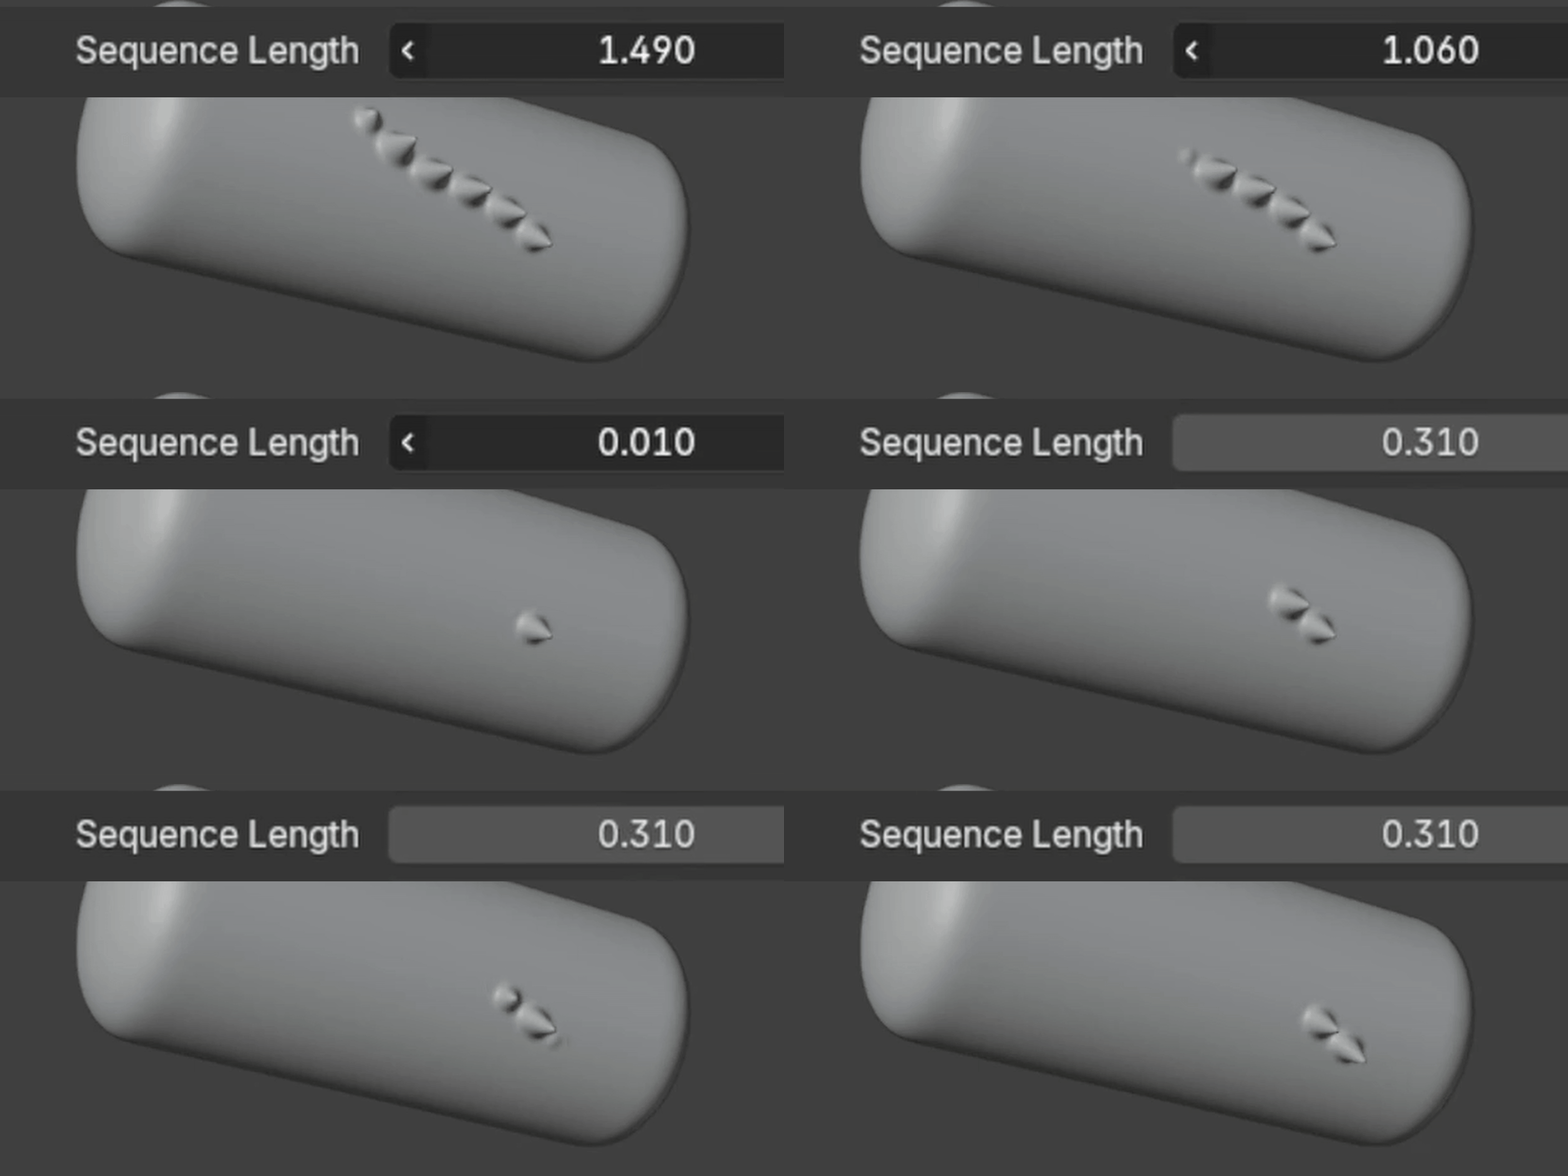
- Max Path Length: Defines the maximum allowed length for a generated spike path.
- Min Path Length: Defines the minimum allowed length for a generated spike path.
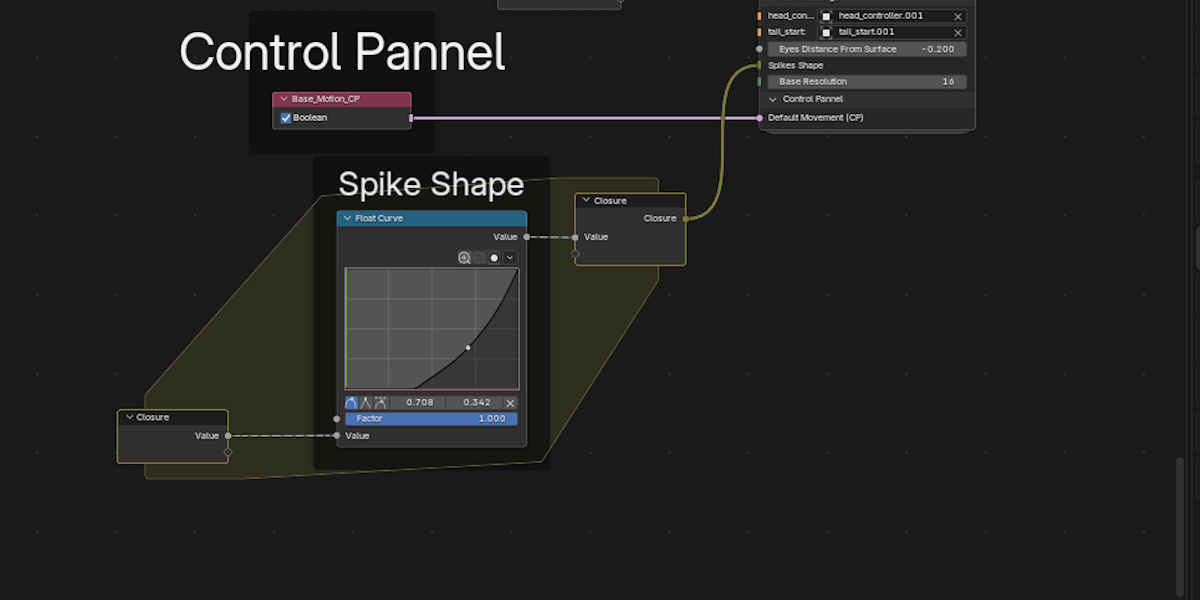
- Spikes Shape (Geometry Nodes > Extra Settings): Controls the overall shape profile of the spikes.
Workflows
Direct Controller Animation [Fast]
This is the fastest workflow and requires minimal setup.
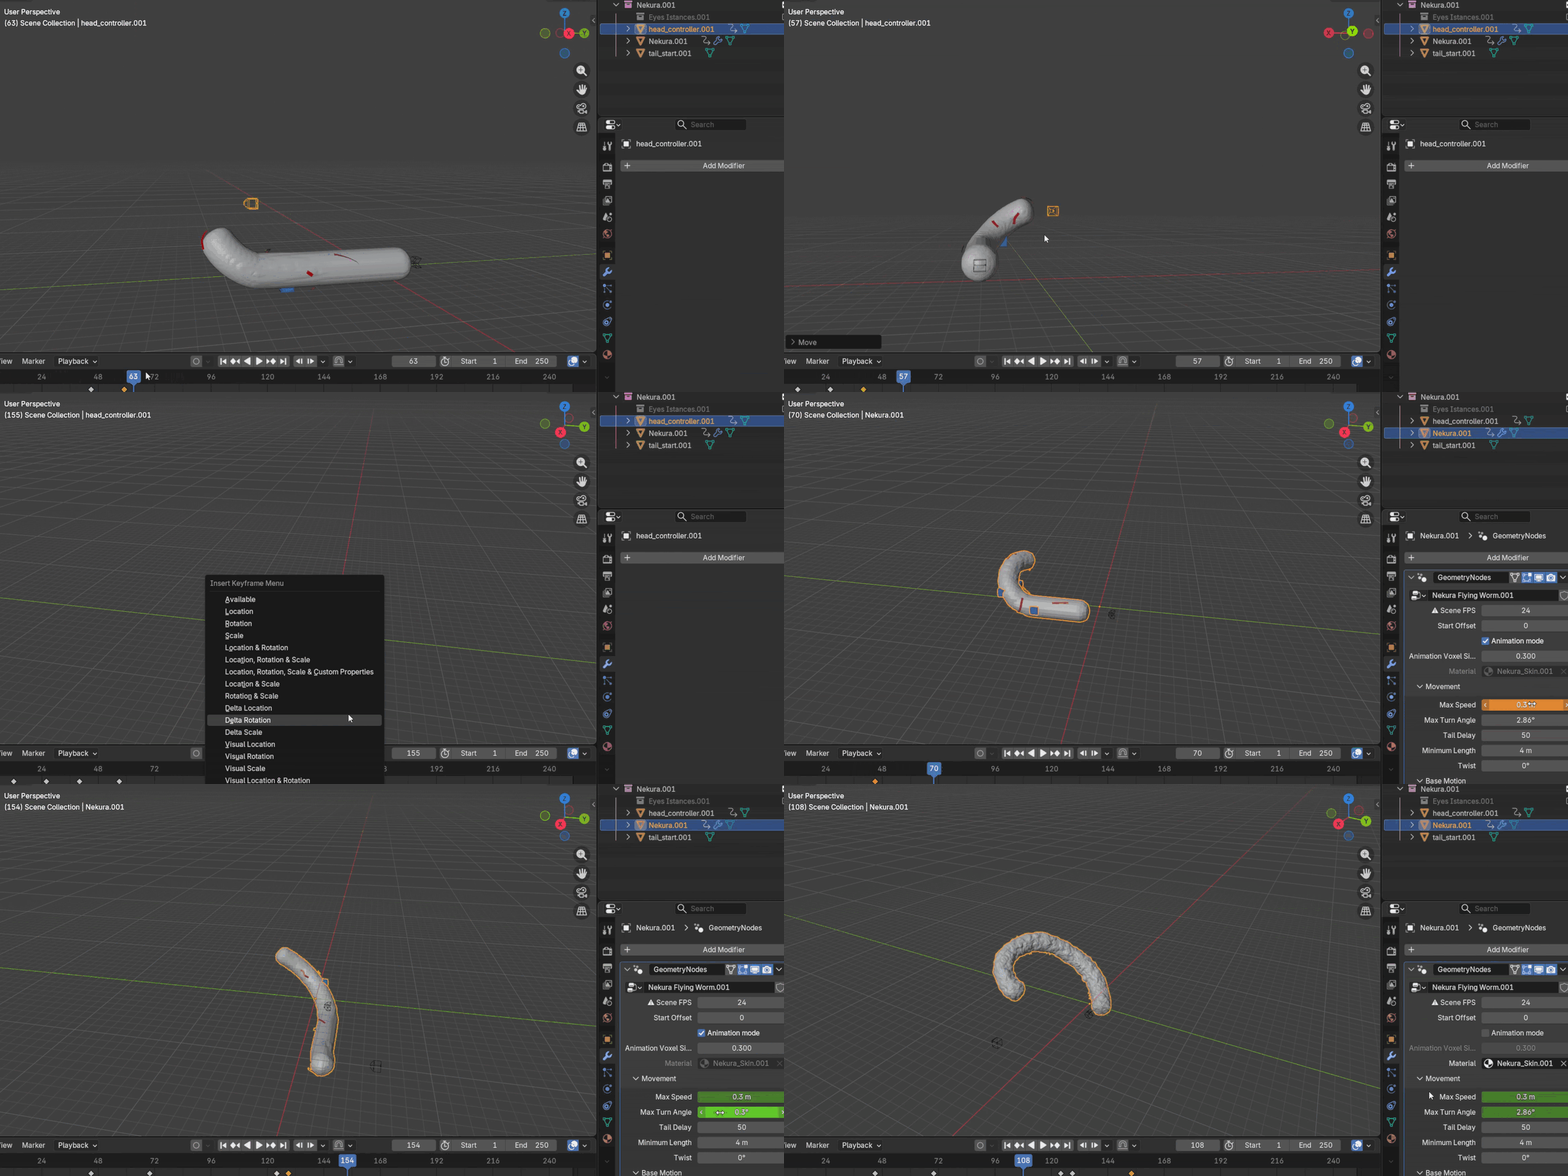
The movement is created by directly animating the position of the Head_Controller with keyframes. Since Nekura constantly attempts to reach the controller, complex motion can be achieved simply by combining controller animation with the Movement panel parameters.
Once you are satisfied with the animation, disable Animation Mode and bake the simulation.
Curve-Based Workflow [Precise]
This workflow requires more setup but provides significantly higher movement precision.
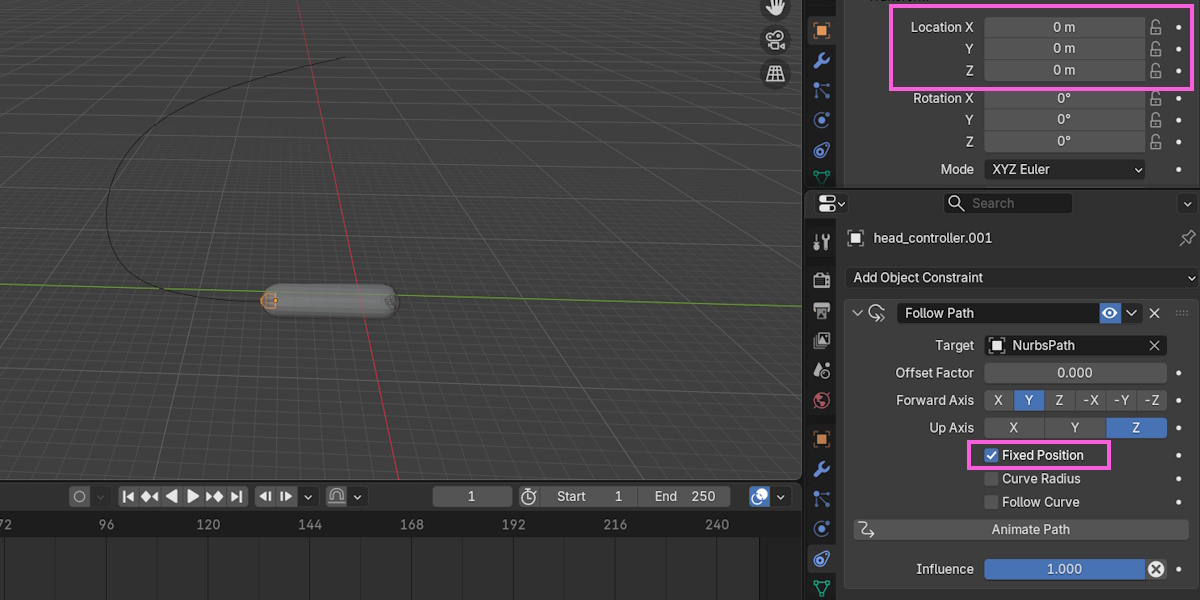
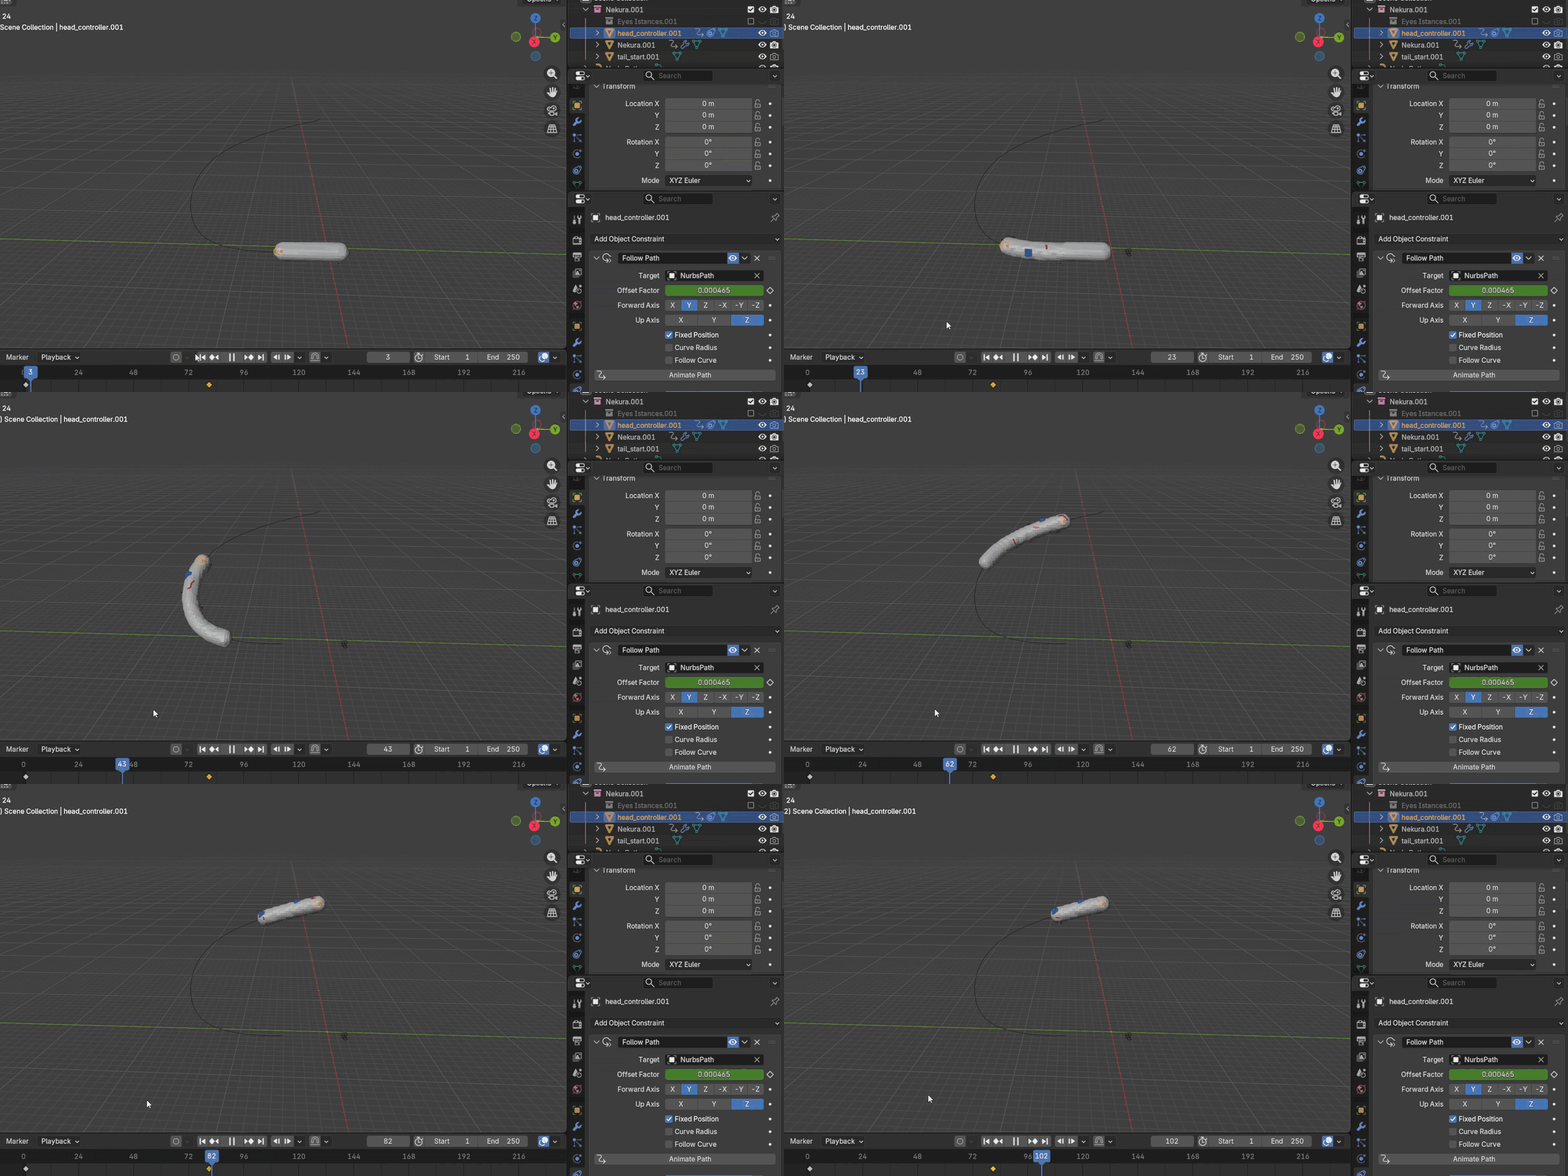
- Create a curve representing the desired movement path.
- Bind Head_Controller to the curve using a Path Constraint.
- Enable Fixed Position in the constraint settings.
- Reset the Head_Controller Location values to 0, 0, 0.
- Animate the constraint offset to move the controller along the curve.
The movement system itself remains unchanged: Nekura still attempts to reach the controller while respecting the Movement panel limitations.
- Max Speed
- Max Turn Angle
Higher values allow the head to remain closer to the controller position, resulting in movement that more accurately follows the animation along the curve.
Materials
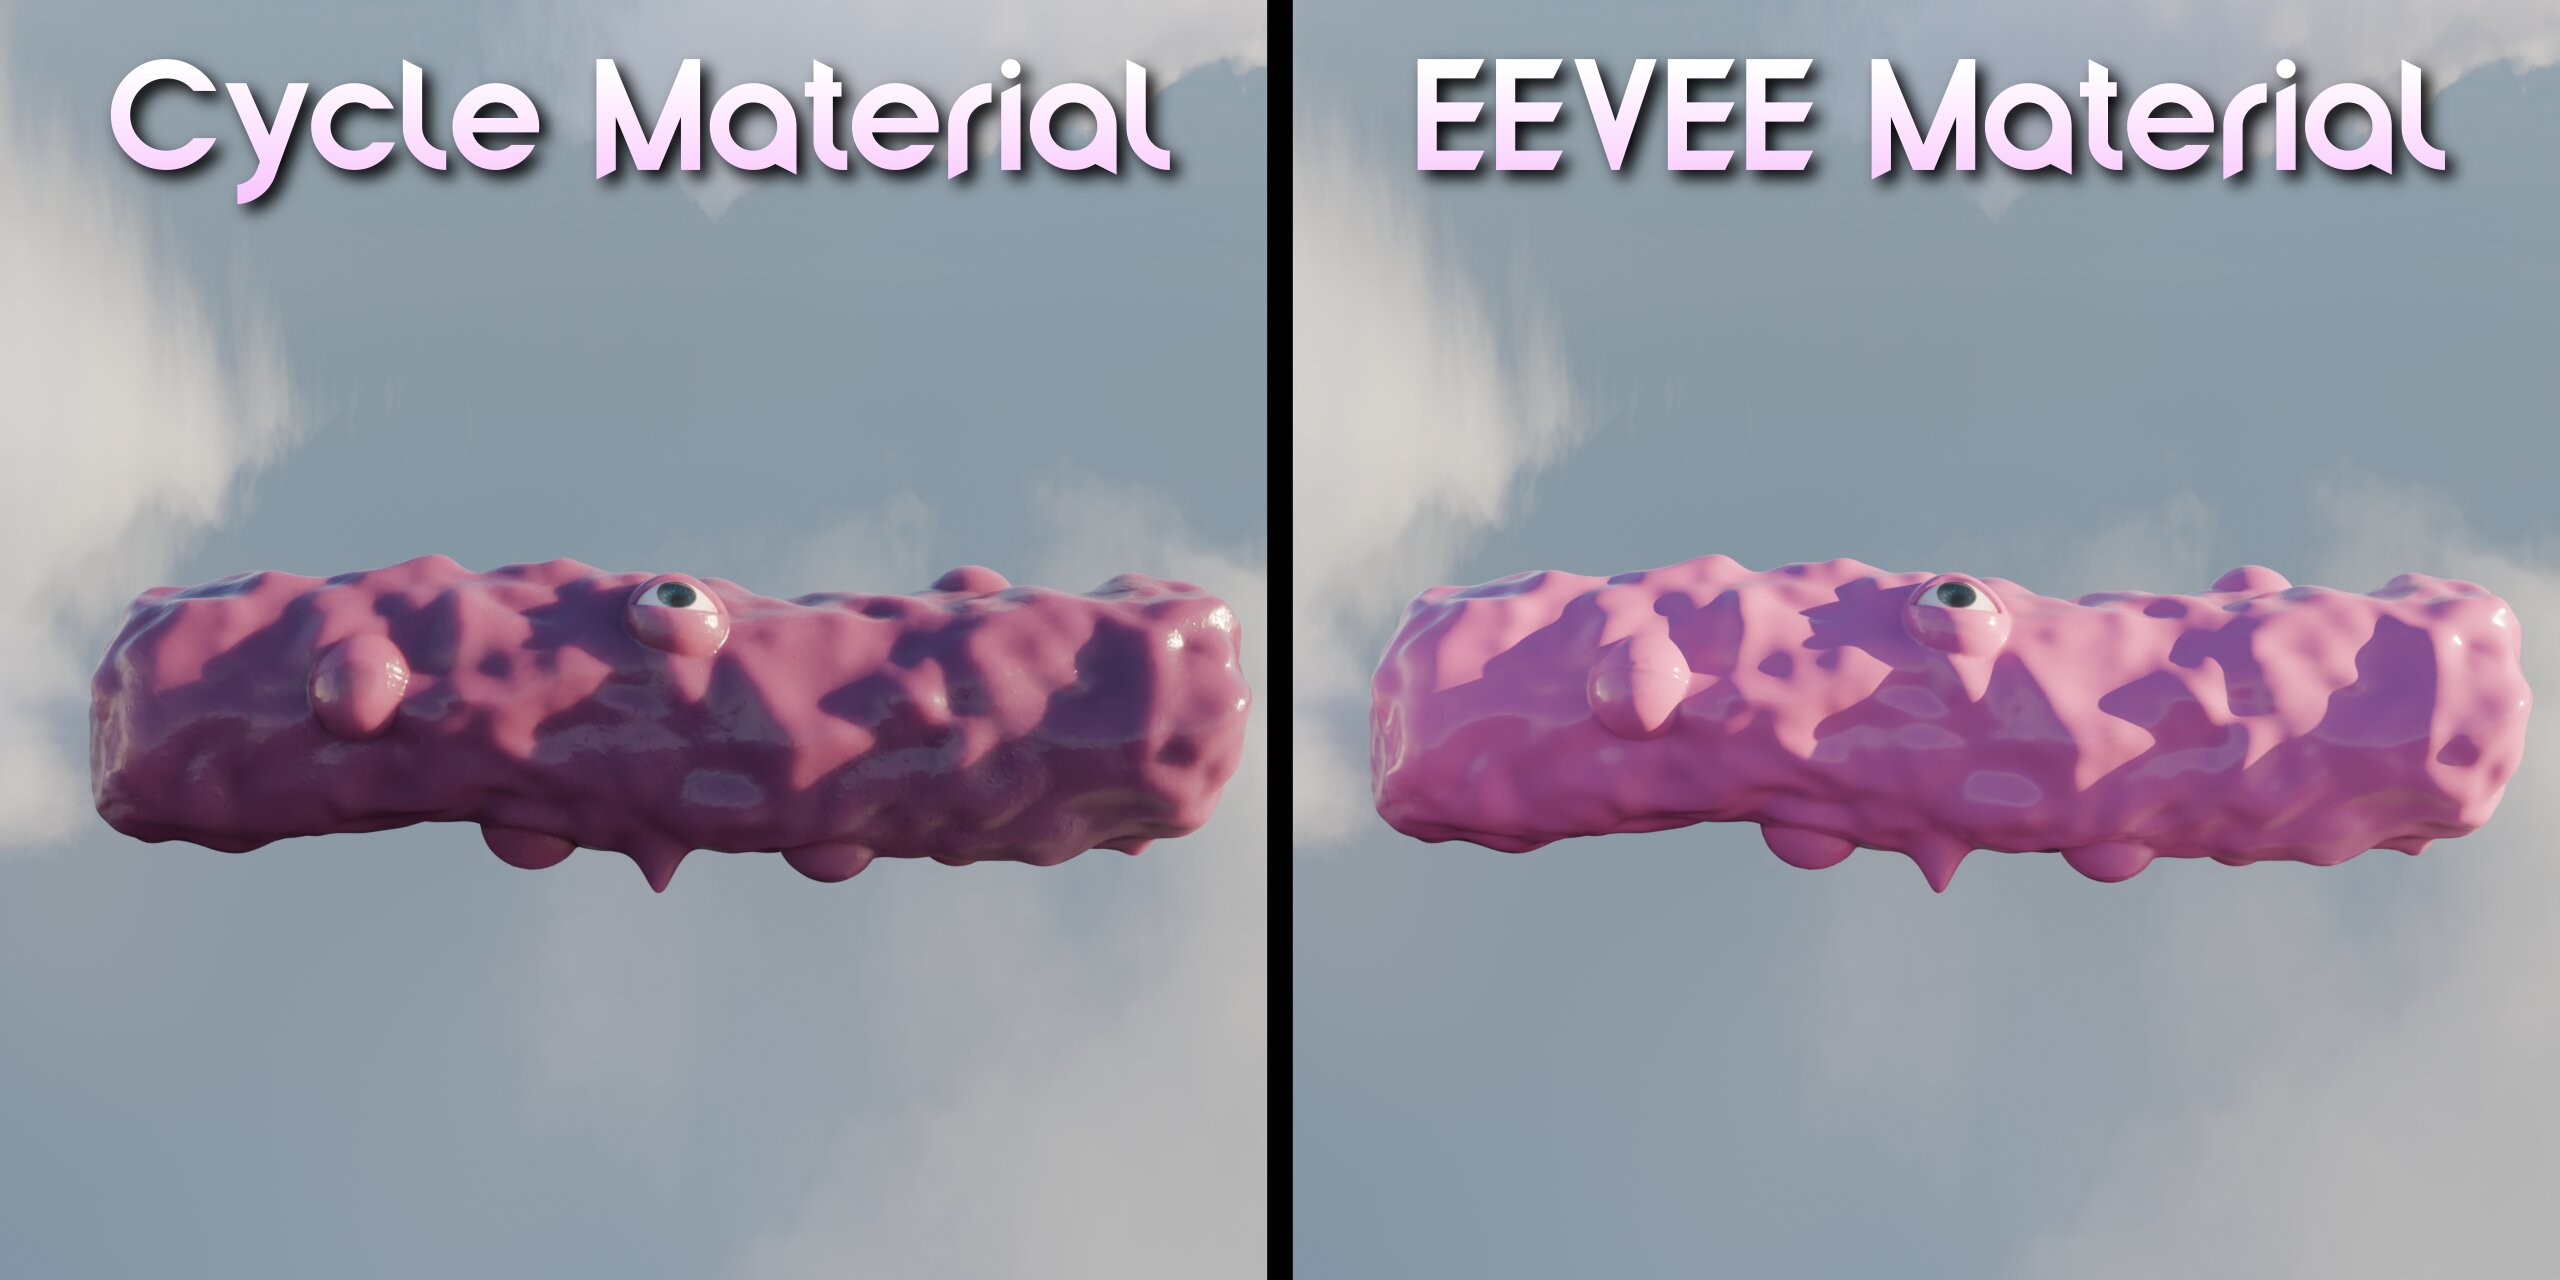
Nekura includes two ready-to-use materials.
- Nekura_Skin: The default material, designed primarily for Cycles rendering. This shader uses volume effects and may appear very dark unless Volume Bounces are enabled inside Render Properties > Light Paths.
- Nekura_Skin_Simple: A lighter alternative optimized mainly for Eevee and faster viewport performance. This version does not rely on volume rendering.
Have questions about this product?
Login to message
| Dev Fund Contributor | |
| Published | 5 months ago |
| Blender Version | 5.0 - 5.1 |
| Render Engine Used | Cycles, Eevee |
| License | Royalty Free |
Discover more products like this
3d-creature worm idleanimation organic-animation procedural-creature floating-worm Blender geometry nodes Real-Time Animation monster 3D-alien-model procedural horror creature