 SkdSam


Installation & Setup
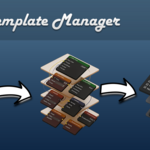
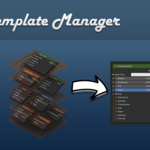
Node Template Master works as both a Blender Add-on and a Blender Extension. Follow these simple steps to get everything running.
1. Install the Add-on / Extension
- Open Edit > Preferences.
- Select the Add-ons tab (or the Extensions tab if installing as an extension).
- Click Install… and choose the
.zipfile you downloaded. - Enable Node Template Master in the list.
2. Required First-Time Setup
Before the main panels appear, you must choose where your template libraries will be stored. The add-on uses external .blend files to save your templates.
- Open the N-Panel in either the Shader Editor or Geometry Nodes Editor.
- Locate the new tab labelled NTM.
- At the top, you’ll see two settings:
- Material Template Directory
- Geometry Template Directory
- Click each one and choose or create a folder where templates will be saved.
Two separate folders are required so that the material and geometry nodes templates only show in right N-panel
3. Accessing the Template Panels
Once both directories are set:
- The Material Templates panel becomes available in the Shader Editor’s N-Panel.
- The Geometry Templates panel becomes available in the Geometry Nodes N-Panel.
- Your saved templates will begin appearing in the list as soon as you add them.
4. Saving & Using Templates
- Select any nodes in your material or geometry tree.
- Click Save Template.
- Give it a name. (The blender version will be added to the name to track what version the template was created with)
- Your template is written directly into the external
.blendlibrary. - To use a template, select it from the list and click Insert.
All templates are stored outside your project files, making them portable, clean, and perfect for team pipelines.
$7
Have questions about this product?
Login to message
| Blender Extension Compatible | Yes |
| Dev Fund Contributor | |
| Published | 10 months ago |
| Blender Version | 3.6 - 5.0 |
| Extension Type | Add-on |
| Render Engine Used | Cycles, Eevee |
| License | Mit |