Null Game Toolkit
 Null Station


📖 NULL GAME TOOLKIT - COMPLETE DOCUMENTATION
───────────────────────────────────────────────────────────────────────────────
INSTALLATION
───────────────────────────────────────────────────────────────────────────────
STEP 1: LOCATE YOUR BLENDER ADDONS FOLDER
Windows:
C:\Users\[YourUsername]\AppData\Roaming\Blender Foundation\Blender\[Version]\scripts\addons\
macOS:
/Users/[YourUsername]/Library/Application Support/Blender/[Version]/scripts/addons/
Linux:
/home/[YourUsername]/.config/blender/[Version]/scripts/addons/
STEP 2: INSTALL THE ADDON
Method A - Direct Install:
1. Copy the "NullGameToolkit" folder to your addons directory
2. Restart Blender
3. Go to Edit → Preferences → Add-ons
4. Search for "Null Game Toolkit"
5. Enable the checkbox
Method B - Zip Install:
1. In Blender, go to Edit → Preferences → Add-ons
2. Click "Install" button (top right)
3. Navigate to the NullGameToolkit folder (zipped)
4. Select and install
5. Enable the checkbox
STEP 3: VERIFY INSTALLATION
1. Open Blender
2. Press N in 3D Viewport to open sidebar
3. Look for "Null Game Toolkit" tab
4. If visible, installation successful!
───────────────────────────────────────────────────────────────────────────────
COLLISION GENERATION
───────────────────────────────────────────────────────────────────────────────
BASIC WORKFLOW:
1. Select one or more mesh objects
2. Open Null Game Toolkit panel (press N)
3. Choose collision type from dropdown
4. Adjust settings (optional)
5. Click "Create Collision"
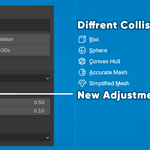
COLLISION TYPES EXPLAINED:
• BOX COLLISION
Best for: Buildings, crates, walls, furniture
Performance: Fastest
Accuracy: Low (bounding box)
Use when: Shape is roughly rectangular
• SPHERE COLLISION
Best for: Balls, planets, round objects
Performance: Very Fast
Accuracy: Low (bounding sphere)
Use when: Shape is roughly spherical
• CAPSULE COLLISION
Best for: Characters, trees, pillars
Performance: Fast
Accuracy: Medium
Use when: Shape is cylindrical or character-like
• CONVEX HULL COLLISION
Best for: Most game objects (RECOMMENDED)
Performance: Good
Accuracy: High
Use when: Need automatic, accurate collision
• MESH COLLISION
Best for: Complex static objects
Performance: Medium
Accuracy: Very High
Use when: Need detailed collision, can afford performance
• ACCURATE COLLISION
Best for: Critical gameplay objects
Performance: Slower
Accuracy: Maximum
Use when: Precision is essential
SETTINGS EXPLAINED:
• Collision Type: Choose from 6 collision methods
• Simplification: Reduce polygon count (0.0-1.0)
- 0.0 = No simplification
- 0.5 = Moderate simplification
- 1.0 = Maximum simplification
• Margin: Collision boundary offset (cm)
- Positive = Expand collision boundary
- Negative = Shrink collision boundary
- Default = 0.0 cm
• Origin Mode:
- BOUNDS: Center to bounding box
- GEOMETRY: Center to geometry
- CURSOR: Center to 3D cursor
• Detail Level:
- LOW: Fast, low polygon count
- MEDIUM: Balanced quality/performance
- HIGH: Detailed, higher polygon count
• Combine Collisions: Merge multiple collision meshes into one
• Apply Material: Add visual collision material (wireframe)
• Auto Organize: Automatically organize into collections
• Rename to LOD0: Rename source mesh to [Name]_LOD0
ISOLATION MODES:
• DEFAULT VIEW: Normal scene visibility
Use: General modeling and setup
• ISOLATE COLLISION: Show collision mesh only
Use: Focus on collision shape without distraction
• COMPARE MODE: Show both collision and source mesh
Use: Verify collision accuracy and coverage
───────────────────────────────────────────────────────────────────────────────
LOD GENERATION
───────────────────────────────────────────────────────────────────────────────
BASIC WORKFLOW:
1. Select source mesh
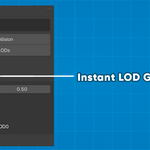
2. Navigate to "LOD Settings" panel
3. Set "Number of LOD Levels" (1-5)
4. Adjust reduction ratios per level
5. Click "Generate LODs" at the top
LOD LEVELS EXPLAINED:
LOD0: Original mesh (100% detail)
LOD1: 75% poly count - Close viewing distance
LOD2: 50% poly count - Medium viewing distance
LOD3: 25% poly count - Far viewing distance
LOD4: 10% poly count - Very far viewing distance
REDUCTION RATIO GUIDE:
• 0.9 = 90% original polygons (minimal reduction)
• 0.75 = 75% original polygons (subtle reduction)
• 0.5 = 50% original polygons (moderate reduction)
• 0.25 = 25% original polygons (aggressive reduction)
• 0.1 = 10% original polygons (extreme reduction)
BEST PRACTICES:
✓ Always test LODs in-engine at target distances
✓ Use more aggressive reduction for background objects
✓ Keep important silhouettes intact on LOD1-2
✓ Reserve extreme reduction (0.1-0.2) for LOD4+
✓ Consider baking normal maps to preserve detail
───────────────────────────────────────────────────────────────────────────────
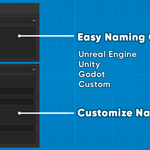
NAMING CONVENTIONS
───────────────────────────────────────────────────────────────────────────────
UNREAL ENGINE:
• Collision: UCX_[ObjectName]
Example: UCX_Barrel, UCX_Tree
• Source: SM_[ObjectName]
Example: SM_Barrel, SM_Tree
• LOD: [ObjectName]_LOD1, _LOD2, etc.
UNITY:
• Collision: [ObjectName]_Col
Example: Barrel_Col, Tree_Col
• LOD: [ObjectName]_LOD1, _LOD2, etc.
GODOT:
• Collision: [ObjectName]-col
Example: Barrel-col, Tree-col
• LOD: [ObjectName]_LOD1, _LOD2, etc.
CUSTOM:
• Define your own prefix and suffix
• Collision Prefix: Your choice (e.g., "COL_")
• Collision Suffix: Your choice (e.g., "_collision")
• LOD Suffix: Your choice (e.g., "_lod")
PREVIEW:
The Naming Convention panel shows live examples based on your settings:
"Example: Cube → [Result]"
───────────────────────────────────────────────────────────────────────────────
ORGANIZATION & COLLECTIONS
───────────────────────────────────────────────────────────────────────────────
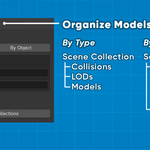
AUTO ORGANIZATION MODES:
BY TYPE:
├── Models
│ ├── Barrel
│ ├── Crate
│ └── Tree
├── Collisions
│ ├── UCX_Barrel
│ ├── UCX_Crate
│ └── UCX_Tree
└── LODs
├── Barrel_LOD1
├── Crate_LOD1
└── Tree_LOD1
BY OBJECT:
├── Barrel
│ ├── Barrel (source)
│ ├── UCX_Barrel (collision)
│ └── Barrel_LOD1 (LOD)
├── Crate
│ ├── Crate (source)
│ ├── UCX_Crate (collision)
│ └── Crate_LOD1 (LOD)
└── Tree
├── Tree (source)
├── UCX_Tree (collision)
└── Tree_LOD1 (LOD)
ORGANIZE COLLECTIONS BUTTON:
Context-Aware Behavior:
• If objects selected: "Organize Selected Collections"
- Only affects selected objects
• If nothing selected: "Organize Collections"
- Affects all objects in scene
───────────────────────────────────────────────────────────────────────────────
BULK EXPORT
───────────────────────────────────────────────────────────────────────────────
WORKFLOW:
1. Organize your collections (recommended)
2. Go to Utilities panel
3. Click "Bulk Export"
4. Choose export format (FBX, OBJ, or GLTF)
5. Select destination folder
6. Configure options
7. Click "Export"
EXPORT OPTIONS:
• Export Format: FBX / OBJ / GLTF
FBX: Best for Unreal Engine, Unity (most common)
OBJ: Simple, universal format
GLTF: Modern, web-friendly format
• Apply Transform: Apply scale/rotation/location before export
Enable: For game engines (RECOMMENDED)
Disable: If you need to preserve transforms
• Export from World Center: Temporarily moves objects to world origin
Enable: For consistent positioning in engine
Disable: Export at current positions
• Embed Textures: Include textures in exported files
Enable: For portability, sharing
Disable: For smaller file size, linked textures
HOW BULK EXPORT WORKS:
1. Scans all collections in scene
2. Exports each collection as separate file
3. Names files based on collection name
4. Automatically handles:
- Transform application
- Temporary repositioning
- Texture embedding
- File format conversion
5. Restores original scene state
BEST PRACTICES:
✓ Organize collections before exporting (use "Organize Collections")
✓ Use descriptive collection names (becomes filename)
✓ Enable "Apply Transform" for game engines
✓ Enable "Embed Textures" when sharing assets
✓ Test import in target engine before batch exporting many assets
───────────────────────────────────────────────────────────────────────────────
UTILITIES PANEL
───────────────────────────────────────────────────────────────────────────────
SELECTION TOOLS:
• Select All Models
- Selects all non-collision, non-LOD meshes
- Includes _LOD0 suffix objects
• Select All Collisions
- Selects all collision meshes (UCX_, _Col, -col)
• Select All LODs
- Selects all LOD meshes (_LOD1, _LOD2, etc.)
CLEANUP TOOLS (Context-Aware):
• Delete Collisions
- Selected objects only: "Delete Selected Collisions"
- Nothing selected: "Delete Collisions" (all in scene)
• Delete LODs
- Selected objects only: "Delete Selected LODs"
- Nothing selected: "Delete LODs" (all in scene)
• Delete Models
- Selected objects only: "Delete Selected Models"
- Nothing selected: "Delete Models" (all in scene)
───────────────────────────────────────────────────────────────────────────────
KEYBOARD SHORTCUTS
───────────────────────────────────────────────────────────────────────────────
N - Toggle sidebar (access Null Game Toolkit panel)
A - Select/Deselect all (exits isolation mode if active)
H - Hide selected
Alt+H - Unhide all
───────────────────────────────────────────────────────────────────────────────
TROUBLESHOOTING
───────────────────────────────────────────────────────────────────────────────
ISSUE: Addon doesn't appear in preferences
SOLUTION:
- Verify folder structure: .../addons/NullGameToolkit/__init__.py
- Restart Blender
- Check Blender version (4.0-5.0 required)
- Try "Install from ZIP" method
ISSUE: Sidebar tab not visible
SOLUTION:
- Press N to toggle sidebar
- Scroll down in sidebar tabs area
- Look for "Null Game Toolkit" at bottom
ISSUE: Collision not generating
SOLUTION:
- Ensure mesh object is selected (not empty/curve/camera)
- Check object has geometry (not zero faces)
- Try different collision type
- Check console for errors (Window → Toggle System Console)
ISSUE: Texture embedding not working
SOLUTION:
- Enable Edit → Preferences → File Paths → "Auto Pack Resources"
- For packed textures, manually unpack first (File → External Data → Unpack Resources)
- Ensure texture files exist on disk
- Check file paths are valid
ISSUE: LODs look broken
SOLUTION:
- Try higher reduction ratio (less aggressive)
- Check source mesh has no ngons or non-manifold geometry
- Use Mesh → Clean Up → Merge by Distance first
ISSUE: Export creates empty files
SOLUTION:
- Ensure collections contain meshes
- Check meshes have geometry
- Try exporting single collection first
- Verify export path is writable
ISSUE: Names not following convention
SOLUTION:
- Check Naming Convention dropdown (Unreal/Unity/Godot/Custom)
- For custom, ensure prefix/suffix fields are filled
- Re-create collision/LOD after changing convention
───────────────────────────────────────────────────────────────────────────────
ADVANCED TIPS
───────────────────────────────────────────────────────────────────────────────
TIP 1: BATCH PROCESSING
Select multiple objects before creating collisions. The addon will process all
selected meshes automatically.
TIP 2: MANUAL COLLISION EDITING
After creating collision, you can manually edit it in Edit Mode. Use "Apply
Material" to visualize wireframe during editing.
TIP 3: COMBINED COLLISIONS
Enable "Combine Collisions" when multiple objects should share one collision
mesh (e.g., building parts).
TIP 4: MARGIN FOR CHARACTERS
Use negative margin (-0.5 to -2.0 cm) on character collision to prevent wall
clipping.
TIP 5: LOD TESTING
Use Blender's "Display As" options to preview different LODs before exporting.
TIP 6: NAMING CONSISTENCY
Set your naming convention once at project start. All subsequent operations
will follow the same standard.
TIP 7: COLLECTION ORGANIZATION
Organize early and often. Well-structured collections make bulk export seamless.
TIP 8: BACKUP BEFORE CLEANUP
Before using Delete tools, save your file. Context-aware deletion is powerful
but permanent.
───────────────────────────────────────────────────────────────────────────────
WORKFLOW EXAMPLES
───────────────────────────────────────────────────────────────────────────────
EXAMPLE 1: SINGLE ASSET FOR UNREAL ENGINE
1. Import or create your mesh
2. Select mesh
3. Set Naming Convention → "Unreal Engine"
4. Enable "Rename Source to LOD0"
5. Choose "Convex Hull" collision
6. Click "Create Collision"
7. Set LOD Levels to 3
8. Click "Generate LODs"
9. Click "Organize Collections" → By Object
10. Click "Bulk Export" → FBX, Apply Transform ON
11. Import in Unreal Engine
Result: SM_ObjectName, UCX_ObjectName, LOD1-3, ready to import
EXAMPLE 2: ASSET PACK FOR UNITY (50+ OBJECTS)
1. Import all meshes
2. Select all (A key)
3. Set Naming Convention → "Unity"
4. Choose "Convex Hull" collision
5. Enable "Auto Organize" → By Type
6. Click "Create Collision"
7. Bulk Export → FBX, Embed Textures ON
8. Import folder into Unity
Result: 50 properly named assets with collisions, organized, exported
EXAMPLE 3: ENVIRONMENT PIECE WITH LODs
1. Create high-poly environment asset
2. Set Naming Convention → Your engine
3. Enable "Rename Source to LOD0"
4. Create collision (Mesh type for accuracy)
5. Generate 4 LOD levels (0.75, 0.5, 0.25, 0.1)
6. Organize By Object
7. Review each LOD in isolation
8. Bulk Export with Apply Transform
Result: Complete environment asset with collision and 5 LOD levels
───────────────────────────────────────────────────────────────────────────────
SYSTEM REQUIREMENTS
───────────────────────────────────────────────────────────────────────────────
MINIMUM:
• Blender 4.0 or higher
• Windows 7 / macOS 10.13 / Ubuntu 18.04 (or equivalent)
• 4GB RAM
• 100MB free disk space
RECOMMENDED:
• Blender 4.2 or higher
• Windows 10/11 / macOS 12+ / Ubuntu 22.04+
• 8GB RAM or more
• Dedicated GPU (NVIDIA/AMD)
• SSD for faster exports
───────────────────────────────────────────────────────────────────────────────
SUPPORT & UPDATES
───────────────────────────────────────────────────────────────────────────────
EMAIL SUPPORT: [email protected]
WEBSITE: https://www.nullstation.co
Response time: Within 24-48 hours
Updates: Delivered via email to registered users
Update policy: Lifetime free updates
───────────────────────────────────────────────────────────────────────────────
LICENSE
───────────────────────────────────────────────────────────────────────────────
Single-user license. Commercial use allowed.
See LICENSE.txt for complete terms.
Copyright (c) 2026 Null Station. All rights reserved.
Discover more products like this
unity3d blender addon FBX Export LOD Generator game development batch-export technical-art workflow tool collision mesh Game asset mesh optimization Unreal Engine