Old Stickers & Labels
 SirCharles.DESIGN





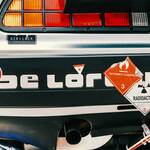



INSTALLATION & SETUP
Quick Start (3 Steps to Get Creating)
1. Download & Extract
- Download your OLD STICKERS & LABELS package from your SuperHive Market library
- Extract the ZIP file to a location you'll remember (we recommend: Documents/3D Assets/OLD_STICKERS/)
- Keep all resolution folders organized together
2. Choose Your Resolution
- 4K PNG - High-resolution renders, close-ups, hero assets
- 2K PNG - Standard production, real-time applications, VR/AR
Note: Individual stickers range from 2K to 4K resolution based on original detail and optimal quality.
3. Import into Your Software
- Navigate to your chosen resolution folder
- Import files directly into your project
- Reference the folder structure guide below for easy navigation
You're ready to add authentic weathering and aged details!
Important Note: Each sticker is already pre-weathered with authentic aging effects including fading, edge wear, surface cracking, and environmental degradation. Simply apply to your surfaces for instant realistic aging—no additional weathering layers required.
FILE STRUCTURE & ORGANIZATION
Root Directory Layout
OLD_STICKERS_LABELS/
├── OLD_STICKERS_1.png
├── OLD_STICKERS_2.png
├── OLD_STICKERS_3.png
├── ...
├── OLD_STICKERS_26.png
└── License_Agreement.pdf
Simple Organization: All 26 weathered stickers are provided in a single folder for easy access. Each sticker is numbered 1-26 and ranges from 2K to 4K resolution based on optimal detail.
Naming Convention
All assets follow a simple numbered naming pattern:
OLD_STICKERS_[Number].png
Examples:
- OLD_STICKERS_1.png
- OLD_STICKERS_12.png
- OLD_STICKERS_26.png
This naming system allows you to:
- ✓ Quickly access any sticker by number
- ✓ Easy to browse and preview
- ✓ Simple integration into any workflow
- ✓ Straightforward file management
THE WEATHERED STICKER COLLECTION
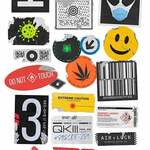
All 26 assets are provided with authentic alpha transparency, ranging from 2K to 4K resolution based on optimal detail. Each sticker captures authentic weathering, aging, and surface degradation with photorealistic quality. This varied collection includes multiple sticker types perfect for adding lived-in realism to any environment.
Collection Overview: 26 Authentic Aged Stickers
Warning & Safety Labels (9 stickers)
High-visibility safety and caution markings with authentic weathering:
- Hazmat and danger warnings
- Explosive and flammable diamonds
- Extreme caution labels
- Laser in use notices
- Radioactive warnings
- Do not touch advisories
- Industrial safety markings
Best For:
- Industrial environments and equipment
- Laboratory and facility props
- Hazardous material containers
- Safety-conscious scene dressing
- Post-apocalyptic and abandoned locations
- Sci-fi industrial settings
Usage Tips:
- Apply to equipment, containers, and machinery
- Use faded versions for abandoned environments
- Layer with dirt and grime for heavy use areas
- Position at eye-level for visibility logic
- Combine with substrate-specific weathering
Symbols & Icons (8 stickers)
Distinctive symbolic graphics and cultural icons with aged patina:
- Biohazard symbol
- Yin-yang design
- Alien graphics
- Cannabis leaf
- Smiley face
- Virus/bacteria symbol
- Spider emblem
- Electrical/power symbols
Best For:
- Counterculture and urban environments
- Faction identification and territory marking
- Character personality expression
- Subcultural storytelling
- Retro and vintage aesthetics
- Worldbuilding through symbolic language
Usage Tips:
- Use for character-owned items and personal effects
- Apply to laptops, cases, and personal gear
- Show faction allegiance through symbol clusters
- Mix aging levels for accumulated over time effect
- Create visual identity for locations or groups
Technical & Data Labels (6 stickers)
Functional identification and tracking elements:
- Barcodes
- QR codes
- Product labels with serial numbers
- Technical specification labels
- Data tracking stickers
- Geometric patterns (I-Ching hexagrams)
Best For:
- Product packaging and containers
- Inventory and logistics props
- Retail and warehouse environments
- Military and government equipment
- Sci-fi technical equipment
- Database and tracking systems
Usage Tips:
- Apply to boxes, crates, and shipping containers
- Use on equipment for authenticity
- Show inventory management systems
- Layer multiple labels for shipping history
- Fade based on handling frequency
Prohibition & Restriction Signs (3 stickers)
Regulatory and prohibition markings:
- No aliens allowed
- International prohibition symbols
- Restricted access warnings
- Foreign language warnings (Thai skull warning)
Best For:
- Restricted area designation
- Humorous or satirical elements
- International/multicultural environments
- Security and access control
- Sci-fi facility rules
- Border and checkpoint props
Usage Tips:
- Position at entry points and barriers
- Use for comedic or ironic effect
- Show jurisdiction through language variety
- Weather heavily for ignored warnings
- Combine with other security elements
Design Philosophy
This collection represents authentic sticker accumulation found in real-world environments—from industrial facilities to personal items, from official warnings to subcultural expression. Each sticker has been carefully weathered to show realistic aging: sun fading, edge peeling, surface cracking, adhesive yellowing, and environmental degradation.
Core Characteristics:
- Photorealistic Weathering: Authentic aging captured from real-world references
- Varied Applications: From official safety to personal expression
- Temporal Range: Light to heavy weathering for different timelines
- Cultural Diversity: International symbols and multilingual warnings
- Functional Variety: Technical, decorative, warning, and identification purposes
Sticker Age Indicators:
- Edge curling and lifting
- Color fading and discoloration
- Surface cracking and peeling
- Adhesive yellowing and residue
- Dirt and grime accumulation
- Partial removal and tearing
- Environmental staining
Usage Applications
Environmental Storytelling: Use sticker variety and placement to communicate:
- Location type (industrial, urban, personal, institutional)
- Time period and timeline
- Cultural context and demographics
- Use patterns and traffic
- Maintenance level and neglect
- Occupant personality and values
Layering Strategy: Real surfaces accumulate stickers over time. Create authentic complexity by:
- Mixing official warnings with personal stickers
- Varying aging levels (old faded + newer additions)
- Overlapping stickers partially
- Adding removal attempts and residue
- Including substrate-specific wear patterns
Scale and Placement:
- Warning labels: Typically 5-15cm, placed at decision points
- Personal stickers: Typically 3-8cm, clustered by preference
- Technical labels: Typically 3-10cm, systematic placement
- Symbol stickers: Typically 5-10cm, prominent display locations
ASSET COMBINATION STRATEGIES
Creating Authentic Aged Surfaces
The Layered Weathering Approach: Real-world aging combines multiple deterioration types simultaneously. Mix categories strategically for photorealistic results:
Example: Aged Industrial Equipment
- Primary Stickers: Warning labels (radioactive, explosive, laser)
- Secondary Details: Technical labels (barcodes, product IDs)
- Character Touch: Personal symbol stickers (added by workers)
- Surface Wear: Vary opacity for different ages and exposure
- Environmental: Match weathering to location (indoor vs. outdoor)
Example: Abandoned Building Interior
- Entry Points: Safety warnings and prohibition signs
- Personal Areas: Symbol stickers (cultural icons, counterculture)
- Functional Spaces: Technical labels and barcodes on equipment
- Story Elements: Mix of official and unofficial stickers
- Temporal Depth: Layer stickers at different aging levels
Example: Urban Street Props (Electrical Boxes, Utility Equipment)
- Official Markings: Warning labels and technical specifications
- Street Culture: Symbol stickers (cannabis, alien, smiley)
- Accumulation: Multiple stickers overlapping over time
- Weathering Variation: Some fresh, some heavily faded
- Removal Attempts: Partial tears and adhesive residue
Asset Hierarchy in Designs
Establish Visual Priority:
- Hero Stickers (40%) - Main warning labels, prominent symbols, focal identification
- Supporting Stickers (35%) - Technical labels, secondary warnings, additional symbols
- Background Details (25%) - Small barcodes, QR codes, partial/faded stickers, residue
This creates authentic surface complexity while maintaining visual clarity and environmental storytelling focus.
SOFTWARE-SPECIFIC WORKFLOWS
BLENDER (Standard Workflow)
Method 1: Direct Image Texture
- Select your object and enter Edit Mode
- Add a new material in the Shading workspace
- Add an Image Texture node
- Load your chosen OLD STICKERS asset
- Connect to a Mix Shader to blend with base material
- Adjust placement using UV coordinates or texture mapping nodes
Method 2: Using as Decal with Shrinkwrap
- Add a plane (Shift+A > Mesh > Plane)
- Scale to approximate sticker size
- Apply material with sticker texture
- Add Shrinkwrap modifier targeting your model
- Position plane over desired surface area
- Adjust Shrinkwrap offset for perfect surface placement
Pro Tip: For peeling stickers, use separate planes with slight offsets to create dimensional lift effects. Combine aged sticker, peeling edges, and residue layers for maximum realism.
BLENDER WITH KIT OPS
Setup:
- Install KIT OPS addon (https://gum.co/kitops)
- Create a KPACK folder in your KIT OPS library
- For each weathering asset you want quick access to:
- Create a simple plane with the asset material applied
- Export as FBX/OBJ to your KPACK folder
- Refresh KIT OPS library
Usage:
- Select your surface
- Open KIT OPS INSERT menu
- Browse to your OLD STICKERS KPACK
- Click asset to instantly place on surface
- Adjust using KIT OPS scaling and rotation tools
Installation Tutorial: https://youtu.be/05LkAZBZIn0
Custom PNG Tutorial (For importing your own PNG files): https://youtu.be/eM9MaKLVE2k?si=rBTJMC2OXfuOuXqD&t=230
Advantages:
- Instant placement with mouse click
- Real-time visual feedback
- Non-destructive workflow
- Easy repositioning and scaling
- Perfect for rapid weathering and aging
BLENDER WITH DECALMACHINE
Setup:
- Install DECALmachine addon
- Navigate to DECALmachine preferences
- Add OLD STICKERS folder as a decal library
- DECALmachine will automatically recognize PNG files
Usage:
- Select your model
- Activate DECALmachine (default: D key)
- Browse your OLD STICKERS library
- Click to project sticker onto surface
- Asset automatically wraps around geometry
Installation Tutorial: https://youtu.be/iKNtCkGOWvY
Advanced Features:
- Parallax mapping for depth
- Automatic UV handling
- Smart surface wrapping around curves
- Decal stacking for layered weathering
- Perfect for complex aged surfaces
UNITY
Import:
- Create Assets/Textures/OLD_STICKERS/ folder structure
- Drag asset folders into Unity project
- Unity automatically imports PNG files as textures
Usage Method 1: Standard Shader
- Create new material
- Assign sticker asset to Albedo texture slot
- Enable transparency (Rendering Mode: Transparent or Fade)
- Apply to plane or quad on surface
- Adjust for blending with base material
Usage Method 2: Decal Projector (URP/HDRP)
- Create new Decal Projector
- Assign OLD STICKERS asset to projector material
- Position projector on surface
- Adjust projection size and angle
- Layer multiple decals for complex weathering
Pro Tip: Use multiply blend modes for dirt and degradation layers. Use normal transparency for stickers. Combine multiple decal layers for authentic aging complexity.
UNREAL ENGINE
Import:
- Drag PNG files into Content Browser
- Unreal automatically creates Texture assets
- Organize in Content/Textures/OLD_STICKERS/ structure
Usage Method 1: Deferred Decals (Primary Method)
- Create new Material with Domain set to "Deferred Decal"
- Add Texture Sample node with your OLD STICKERS asset
- Connect RGB to Base Color
- Connect Alpha to Opacity
- Place Decal Actor on surface
- Assign material and adjust projection
- Layer multiple decals for complete weathering
Usage Method 2: Material Blending
- Create material with weathering textures
- Use Lerp nodes to blend stickers with base material
- Control opacity with parameters
- Add roughness variation for adhesive effects
- Perfect for close-up hero props
Pro Tip: Create material instances with different aging levels. Use decal blend modes (Multiply for dirt, Translucent for stickers) for realistic integration.
SUBSTANCE PAINTER
Import:
- Create custom smart material or drag onto surface
- Add Fill layer with OLD STICKERS asset as mask
Usage:
- Create new Fill layer
- Add OLD STICKERS asset to the layer's mask
- Adjust blend mode (Normal for stickers, Multiply for dirt)
- Add roughness variation for adhesive shine
- Use projection tools for complex surfaces
Advanced Workflow:
- Create layered material with multiple aging stages
- Add dirt and grime generators around sticker edges
- Use curvature masks to concentrate wear at edges
- Layer stickers, peeling, degradation, and weathering
- Create preset materials for different aging levels
Pro Tip: Use generators to drive dirt accumulation around sticker edges. Combine with AO and curvature maps for authentic wear patterns. Build material presets for consistent aging across asset library.
PROCREATE
Digital Painting Integration:
- Import PNG files into Procreate as layers
- Use as texture overlays for digital paintings
- Apply to 3D models in Procreate's 3D painting mode
- Combine with brushes for enhanced weathering
Best For:
- Concept art with aged surface details
- Digital illustration with realistic props
- Texture painting for 3D models
- Mixed media artwork
- Style exploration and mockups
Pro Tip: Create custom brushes from weathering textures for procedural aging effects in digital paintings.
ADOBE PHOTOSHOP/GRAPHIC DESIGN
Direct Usage:
- Open/Place PNG files directly
- Alpha transparency automatically recognized
- Use as layers in compositions
- Resize, rotate, and blend as needed
Best For:
- Concept art and pre-visualization
- Product mockups with aged aesthetics
- Poster and graphic design
- Photo manipulation and enhancement
- Marketing materials
- Vintage design projects
Advanced Techniques:
- Use blend modes (Multiply for dirt, Overlay for subtle wear)
- Apply filters for additional aging variation
- Create custom color adjustments for environmental theming
- Build smart object libraries for non-destructive editing
- Combine multiple weathering layers for depth
BEST PRACTICES & PRO TIPS
Resolution Management
Resolution Range: 2K-4K
Each sticker is provided at its optimal resolution based on detail complexity and intended use. The collection includes stickers ranging from 2K (2048x2048) to 4K (4096x4096), ensuring maximum quality for each asset.
When to Use Higher Resolution (3K-4K) Stickers:
- Hero props and close-up renders
- High-resolution architectural visualization
- Cinema and broadcast production
- Product visualization details
- VR applications with close inspection
- Large format outputs
When to Use Standard Resolution (2K-3K) Stickers:
- Standard game development
- Real-time applications
- General 3D visualization
- Film and TV at standard distances
- Balance of quality and performance
- Most production scenarios
Pro Tip: All stickers are already optimized at their ideal resolution—simply import and use. For background elements or distant placement, you can scale down in your software for additional performance optimization.
Aging Authenticity Strategy
Temporal Consistency: Consider how long a surface has been exposed:
- Recent (weeks to months): Minimal fading, clean edges, little peeling
- Moderate (1-3 years): Noticeable fading, edge curling beginning, some dirt
- Heavy (5+ years): Significant fading, major peeling, heavy dirt accumulation
- Extreme (10+ years): Barely legible, mostly adhesive residue, extreme degradation
Environmental Context: Match weathering to location and climate:
- Indoor/Protected: Slow, minimal weathering, mostly dust and dirt
- Outdoor/Exposed: Fast degradation, sun fading, water damage, heavy weathering
- Industrial: Chemical staining, oil contamination, particulate buildup
- Coastal: Salt damage, accelerated corrosion, moisture effects
- Urban: Pollution staining, graffiti over-spray, vandalism attempts
Substrate Material Considerations
Metal Surfaces:
- Rust bloom around sticker edges
- Oxidation beneath adhesive
- Contrast between covered and exposed areas
- Accelerated degradation at edges from moisture
Concrete/Masonry:
- Adhesive absorption into porous surface
- Difficult removal leaves heavy residue
- Surface discoloration beneath stickers
- Edge lifting from expansion/contraction
Wood:
- Sun bleaching differential (covered vs. exposed)
- Moisture penetration causing adhesive failure
- Wood grain visible through thin sticker areas
- Raised edges from wood expansion
Plastic/Painted Surfaces:
- Clean removal more common but residue remains
- UV damage to both sticker and substrate
- Edge peeling from flexibility mismatch
- Ghosting from adhesive chemical reaction
Common Pitfalls to Avoid
✗ Uniform aging: All stickers look identically aged ✓ Solution: Vary aging levels based on exposure, protection, and time
✗ Ignoring substrate: Sticker looks pasted on, no surface interaction ✓ Solution: Add surface degradation, discoloration, and material-specific wear
✗ Wrong scale: Stickers too large or small for context ✓ Solution: Reference real-world sticker sizes (typically 2-15cm)
✗ Perfect edges: All edges crisp and uniform ✓ Solution: Add peeling, curling, and torn areas for realism
✗ No environmental logic: Heavy weathering in protected areas ✓ Solution: Consider exposure, moisture, sun, and traffic patterns
✗ Flat placement: No dimensional quality ✓ Solution: Use offset planes for peeling areas, subtle normal maps for texture
PROJECT-SPECIFIC WORKFLOWS
GAME DEVELOPMENT
Environmental Storytelling:
- Use aged stickers to indicate history and function
- Apply to props based on world timeline
- Create variation through different aging stages
- Implement sticker placement logic (warning labels near hazards, brands on products)
- Build material libraries for consistent aging
Optimization Checklist:
- ✓ Use texture atlases for similar sticker types
- ✓ Implement LOD for distant weathering details
- ✓ Compress textures appropriately for platform
- ✓ Profile performance and optimize draw calls
- ✓ Use lower resolution for background elements
ARCHITECTURAL VISUALIZATION
Realistic Environment Building:
- Apply aged stickers to utility boxes, equipment, and fixtures
- Show building history through warning label accumulation
- Indicate neglect or maintenance through weathering levels
- Add authenticity to industrial and utility spaces
- Create temporal contrast (new vs. existing elements)
Presentation Strategy:
- Subtle aging for client presentations of existing conditions
- Heavy aging for renovation "before" scenarios
- Strategic placement for realism without overwhelming
- Climate-appropriate weathering for location accuracy
FILM & ANIMATION
Set Dressing and Prop Detail:
- Age hero props to match timeline and story
- Create continuity in weathering across shots
- Use weathering to indicate prop history
- Match aging intensity to narrative needs
- Integrate with practical set elements
VFX Enhancement:
- Add weathering to CGI props for photorealism
- Match live-action surface aging
- Create temporal consistency across mixed media
- Age digital set extensions appropriately
PRODUCT & INDUSTRIAL DESIGN
Realistic Wear Simulation:
- Show product use history through strategic weathering
- Demonstrate durability and material aging
- Create before/after comparisons
- Illustrate maintenance requirements
- Visualize long-term appearance
Vintage and Retro Aesthetics:
- Create authentic aged product appearances
- Design period-appropriate surface wear
- Build vintage brand presentations
- Develop weathered packaging concepts
CONCEPT ART & DESIGN
Rapid World Building:
- Quickly establish environmental age and history
- Create mood through weathering intensity
- Develop faction/location identities via sticker styles
- Build visual timelines through aging variation
- Generate style guides for production teams
TROUBLESHOOTING
Problem: Stickers look too perfect or digital
Causes:
- No variation in aging
- Missing peeling and degradation layers
- Uniform opacity across sticker
Solutions:
- Layer multiple weathering categories
- Vary opacity across different sticker areas
- Add peeling at edges and corners
- Include surface degradation context
- Adjust colors for fading and discoloration
Problem: PNG transparency not working
Causes:
- Material not set for transparency
- Alpha channel disabled
- Import settings incorrect
Solutions:
- Unity: Enable transparency in material settings
- Unreal: Set blend mode to Translucent or Masked
- Blender: Enable alpha in Blend Mode settings
- Verify PNG file has alpha channel intact
Problem: Weathering looks inconsistent with environment
Causes:
- Wrong weathering intensity for location
- Incorrect environmental effects for climate
- Mismatched substrate interactions
Solutions:
- Match weathering to environmental exposure
- Consider climate-specific degradation patterns
- Respect substrate material behavior
- Reference real-world examples for location
- Adjust aging intensity for story timeline
Problem: Stickers appear flat on curved surfaces
Causes:
- Not using projection systems
- Simple plane placement without wrapping
- No surface conforming
Solutions:
- Use DECALmachine or decal projectors
- Apply proper UV mapping
- Use shrinkwrap modifiers
- Project textures rather than flat application
- Consider geometry subdivision for better conforming
Problem: Performance issues with many weathering decals
Causes:
- Too many unique materials
- High resolution everywhere
- No LOD implementation
Solutions:
- Combine weathering into texture atlases
- Use lower resolution for distant elements
- Implement LOD systems
- Optimize with draw call batching
- Profile and identify bottlenecks
TECHNICAL SPECIFICATIONS
File Format Details
PNG Format:
- Bit Depth: 8-bit per channel
- Color Space: sRGB
- Channels: RGBA (Red, Green, Blue, Alpha)
- Compression: Lossless PNG compression
- Resolution range: 2K to 4K (optimized per sticker)
Alpha Channel:
- Pure transparency workflow
- No pre-multiplied alpha
- Clean edge anti-aliasing
- Perfect for overlay and decal usage
Resolution Specifications
| Resolution Range | Dimensions | File Size (avg) | Notes |
|---|---|---|---|
| 2K-4K PNG | 2048x2048 to 4096x4096 | 3-12 MB | Each sticker optimized for maximum detail |
Individual Sticker Resolutions:
- Each sticker is provided at its optimal resolution (2K, 3K, or 4K)
- Resolution selected based on detail level and intended use
- All stickers maintain photorealistic quality
- Suitable for close-up renders and standard production use
Total Collection Size:
- Complete package: ~500MB
- Average per sticker: 5-8MB
System Requirements
Minimum:
- 4GB RAM
- 1GB free storage
- Graphics card with 1GB VRAM
- Any software supporting PNG textures
Recommended:
- 16GB+ RAM
- 2GB+ free storage
- Modern graphics card with 4GB+ VRAM
- SSD for faster asset loading
ADDITIONAL RESOURCES
Video Tutorials
KIT OPS Integration:
KPACK Installation: https://youtu.be/05LkAZBZIn0
Custom PNG Tutorial: https://youtu.be/eM9MaKLVE2k?si=rBTJMC2OXfuOuXqD&t=230
DECALmachine Integration:
Installation & Usage: https://youtu.be/iKNtCkGOWvY
Recommended Reading:
- Surface Weathering and Aging Techniques
- Environmental Storytelling Through Props
- PBR Texturing Best Practices
- Game Environment Art Fundamentals
- Architectural Visualization Detail Standards
SUPPORT & CONTACT
Need Help?
Technical Support:
[email protected]
- File/download issues
- Software compatibility questions
- Technical troubleshooting
- Integration assistance
License Questions:
[email protected]
- Usage rights clarification
- License upgrades
- Commercial use questions
General Inquiries:
[email protected]
- Feature requests
- Custom asset requests
- Feedback and suggestions
- Partnership opportunities
Response Time: Typically within 24-48 hours
QUICK REFERENCE CHECKLIST
First-Time Setup
- ☐ Download and extract ZIP file
- ☐ Review the weathered sticker collection (26 total in one folder)
- ☐ Browse individual stickers (numbered 1-26)
- ☐ Import into your primary software
- ☐ Test a few assets to verify workflow
- ☐ Save your license documentation for reference
Starting a New Weathering Project
- ☐ Determine appropriate aging level for narrative/timeline
- ☐ Identify environmental context (climate, exposure, location)
- ☐ Choose substrate-appropriate weathering patterns
- ☐ Plan sticker placement logic and frequency
- ☐ Select resolution based on viewing distance
Weathering Application Workflow
- ☐ Apply base surface materials
- ☐ Place hero aged stickers at logical locations
- ☐ Add peeling and adhesive effects for realism
- ☐ Layer surface degradation for context
- ☐ Apply environmental weathering appropriate to setting
- ☐ Vary aging levels across multiple stickers
- ☐ Add dirt accumulation at edges and recesses
- ☐ Test from multiple angles and lighting conditions
- ☐ Optimize performance for target platform
Quality Check
- ☐ Sticker scale appropriate for context
- ☐ Aging consistent with environmental exposure
- ☐ Substrate interaction realistic
- ☐ Layering creates dimensional depth
- ☐ Weathering tells coherent story
- ☐ Performance optimized
LEARNING PATH SUGGESTIONS
Beginner: Start with Simple Aged Stickers
- Apply to flat surfaces
- Practice basic aging placement
- Learn opacity and blending
- Understand scale and positioning
Intermediate: Explore Multi-Layer Weathering
- Combine stickers with peeling effects
- Add surface degradation context
- Practice environmental weathering
- Develop substrate-specific techniques
Advanced: Create Complete Aged Environments
- Build complex multi-sticker systems
- Master temporal storytelling through weathering
- Develop location-specific aging styles
- Create procedural weathering systems
- Optimize for production pipelines
FINAL TIPS FOR SUCCESS
The Authentic Weathering Approach
These assets represent real-world aging and degradation processes. Every weathered sticker, peeling edge, and surface stain tells a story about time, exposure, and neglect. When applying these weathering elements, you're not just adding texture—you're creating history, atmosphere, and believability.
Key Principles:
- Time is visible: Every surface shows its age through accumulated weathering
- Environment matters: Climate, exposure, and protection determine aging patterns
- Materials behave differently: Each substrate ages uniquely
- Story through detail: Weathering reveals use, neglect, and history
- Variation is authentic: Mix aging levels and types
Remember:
- Real weathering is never uniform
- Environmental exposure creates distinctive patterns
- Substrate material affects aging behavior
- Temporal consistency maintains believability
- Less perfection = more authenticity
Most Importantly: Study real weathered surfaces! Look at old buildings, abandoned equipment, urban infrastructure, and aged products. Observe how stickers fade, peel, and degrade. Notice how surfaces change beneath and around adhesives. These assets are tools to recreate that authentic aged quality—layer them, vary them, weather them, and make them tell the stories your projects demand.
Document Version: 1.0
Last Updated: October 2025
Product: OLD STICKERS & LABELS
© 2025 SirCharles.DESIGN. All rights reserved.
-
$15
$15 Total (Base Price) ✅ Personal projects and portfolio work ✅ Educational and skill development ✅ Non-commercial creative exploration ✅ Authentic aged adhesive elements ✅ All resolution options (4K, 2K, 1K) ✅ Cross-platform compatibility
-
$22
$22 Total ($7 additional) ✅ Everything in Personal License plus: ✅ Client projects and commercial design work ✅ Professional weathering applications ✅ Unlimited commercial usage rights ✅ Professional liability protection
-
$30
$30 Total ($15 additional) ✅ Everything in Commercial License plus: ✅ Team and multi-user applications ✅ Large-scale professional projects ✅ Studio distribution with full liability protection ✅ Unlimited enterprise deployment
Have questions about this product?
Login to message
| Dev Fund Contributor | |
| Published | 12 months ago |
| Blender Version | 2.6x - 4.5 |
| Render Engine Used | Arnold, Blender-Internal, Blender-Game-Engine, Cycles, Eevee, Freestyle, Luxrender, Mental-Ray, Octane, Vray, Yafaray |
| Misc Data | Low-High-Resolution |
| License | Royalty Free |
Discover more products like this
aged decals weathered blender kit ops caution sticker sircharles stickers-pack sircharles.design Stickers decalmachine