 SqueezyPixels
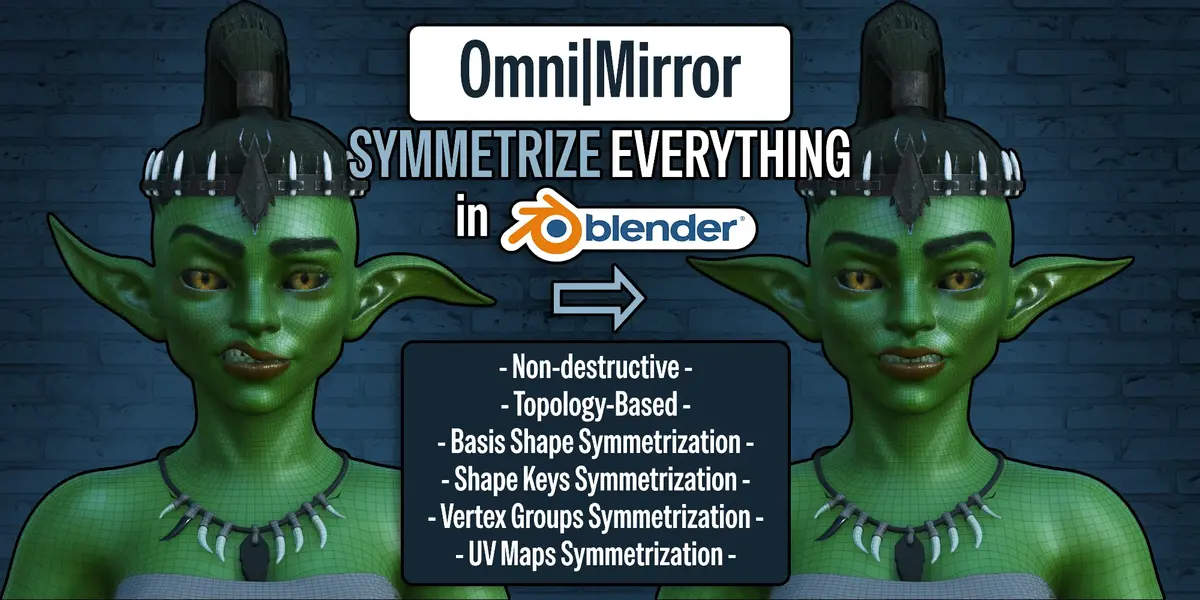



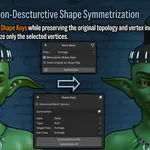
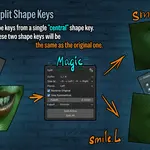
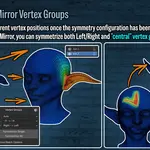
Calculate symmetry first. Use it throughout your workflow.
OmniMirror is a symmetry toolkit for Blender built around a simple idea: calculate the symmetry correspondence first, then use it whenever you need it.
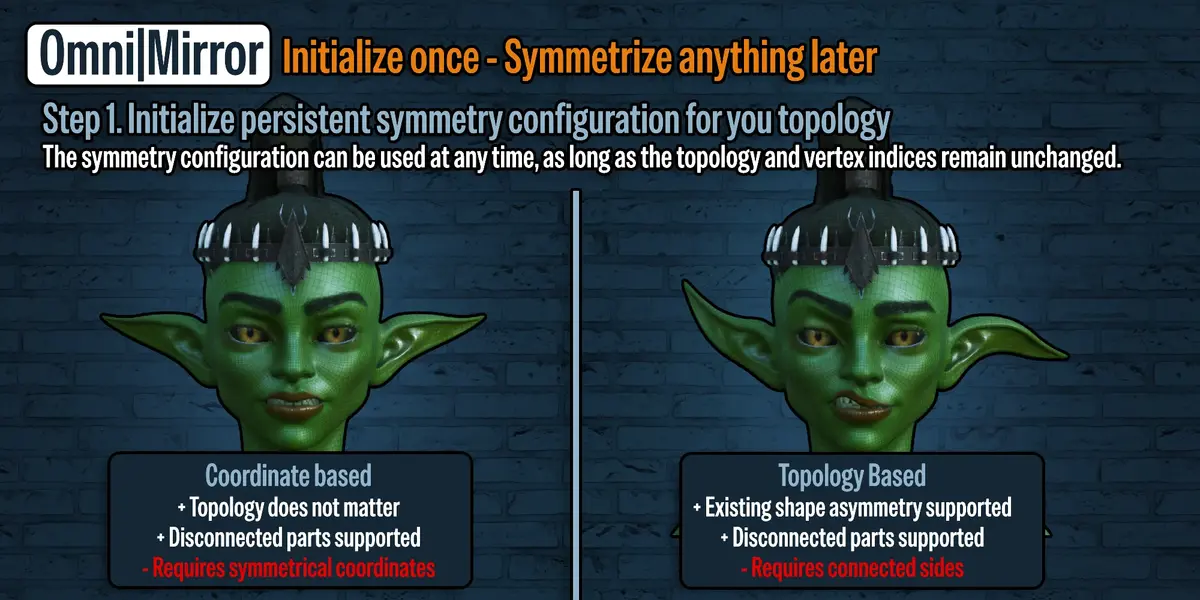
First, OmniMirror identifies matching vertices on opposite sides of your mesh and saves their correspondence in a persistent symmetry configuration. Several detection methods are available to help you create that configuration for your model.
Once saved, this correspondence can be reused even after the geometry becomes asymmetrical. OmniMirror remembers which vertices belong together, so you can keep working without reconstructing their correspondence from the current vertex positions every time.
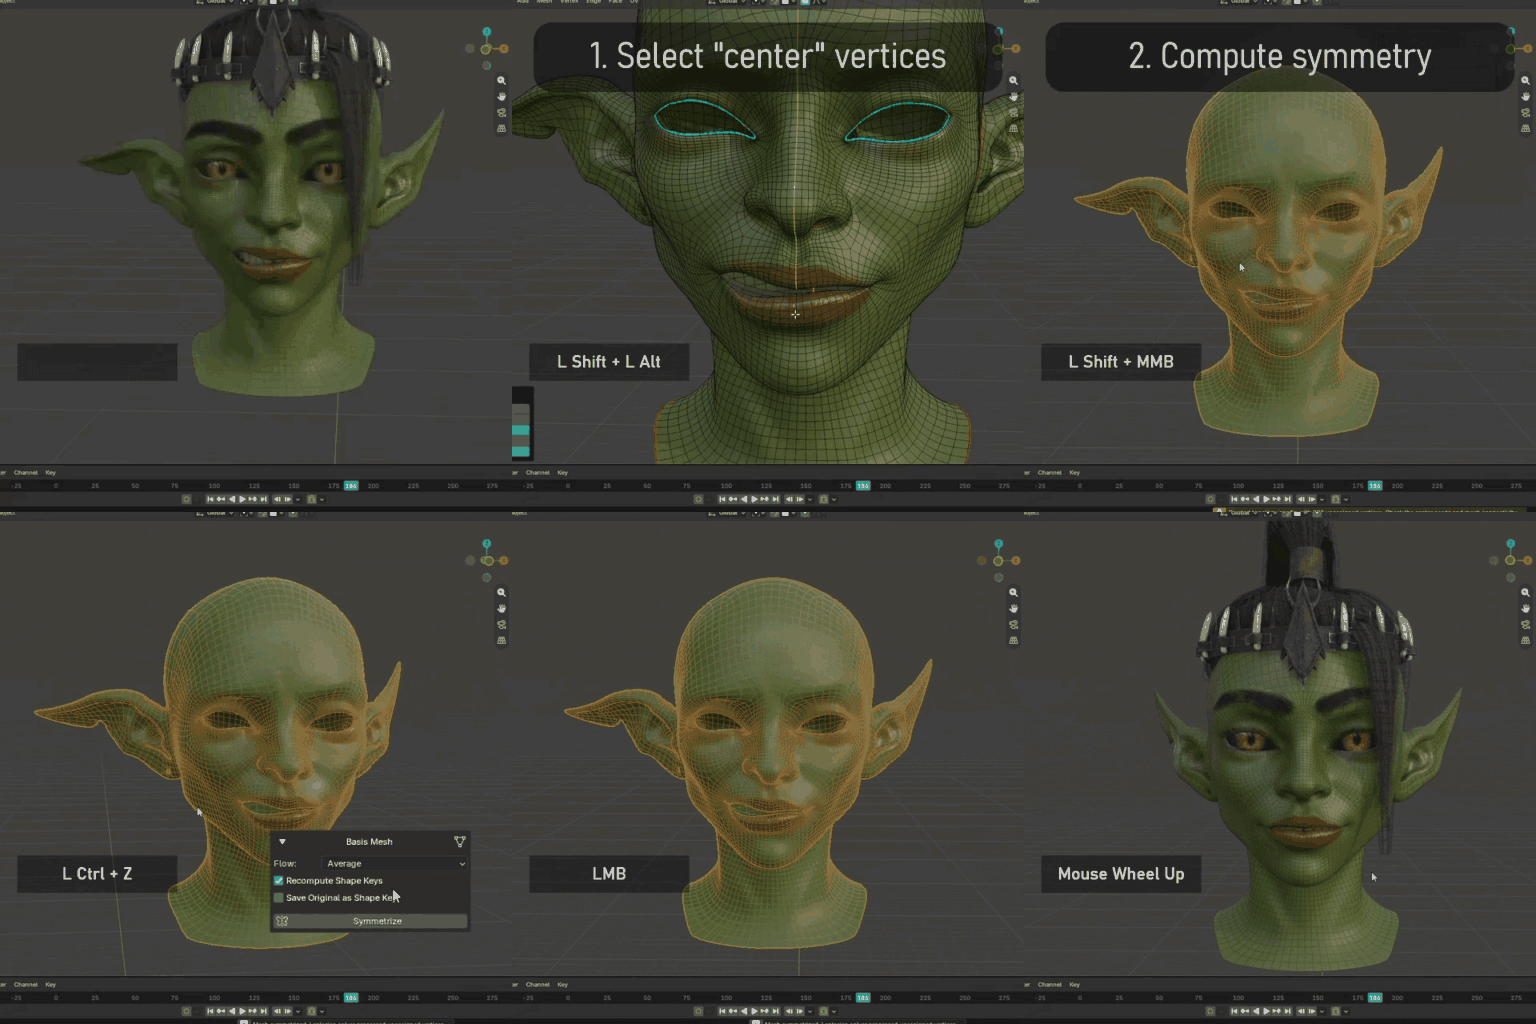
- Open OmniMirror > Create Config > Coordinate Based and choose the Mirror Axis.
- Click Create Config from Coordinates.
The Symmetry Threshold controls how closely mirrored positions must match. The Center Threshold determines which vertices belong to the center plane. Use Select Center and Select Unassigned to inspect the result and adjust the thresholds if needed.
How to Install
- Download the OmniMirror ZIP and keep it zipped.
- In Blender, open Edit > Preferences > Get Extensions.
- Open the menu in the top-right corner and choose Install from Disk.
- Select the ZIP and confirm. If OmniMirror is disabled after installation, enable it under Preferences > Add-ons.
Press N in the 3D Viewport or UV Editor and open the OmniMirror tab.
Topology Based
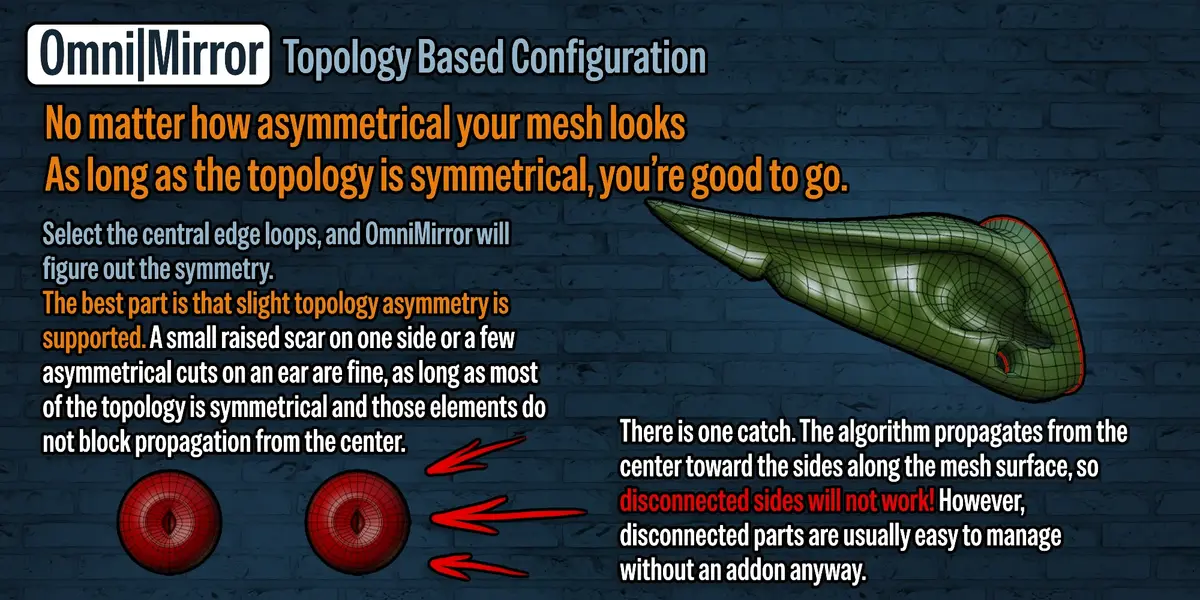
The vertex positions do not have to be symmetrical if the mesh still has matching topology across its two sides. Topology Based follows mesh connectivity from the center loops to find corresponding vertices.
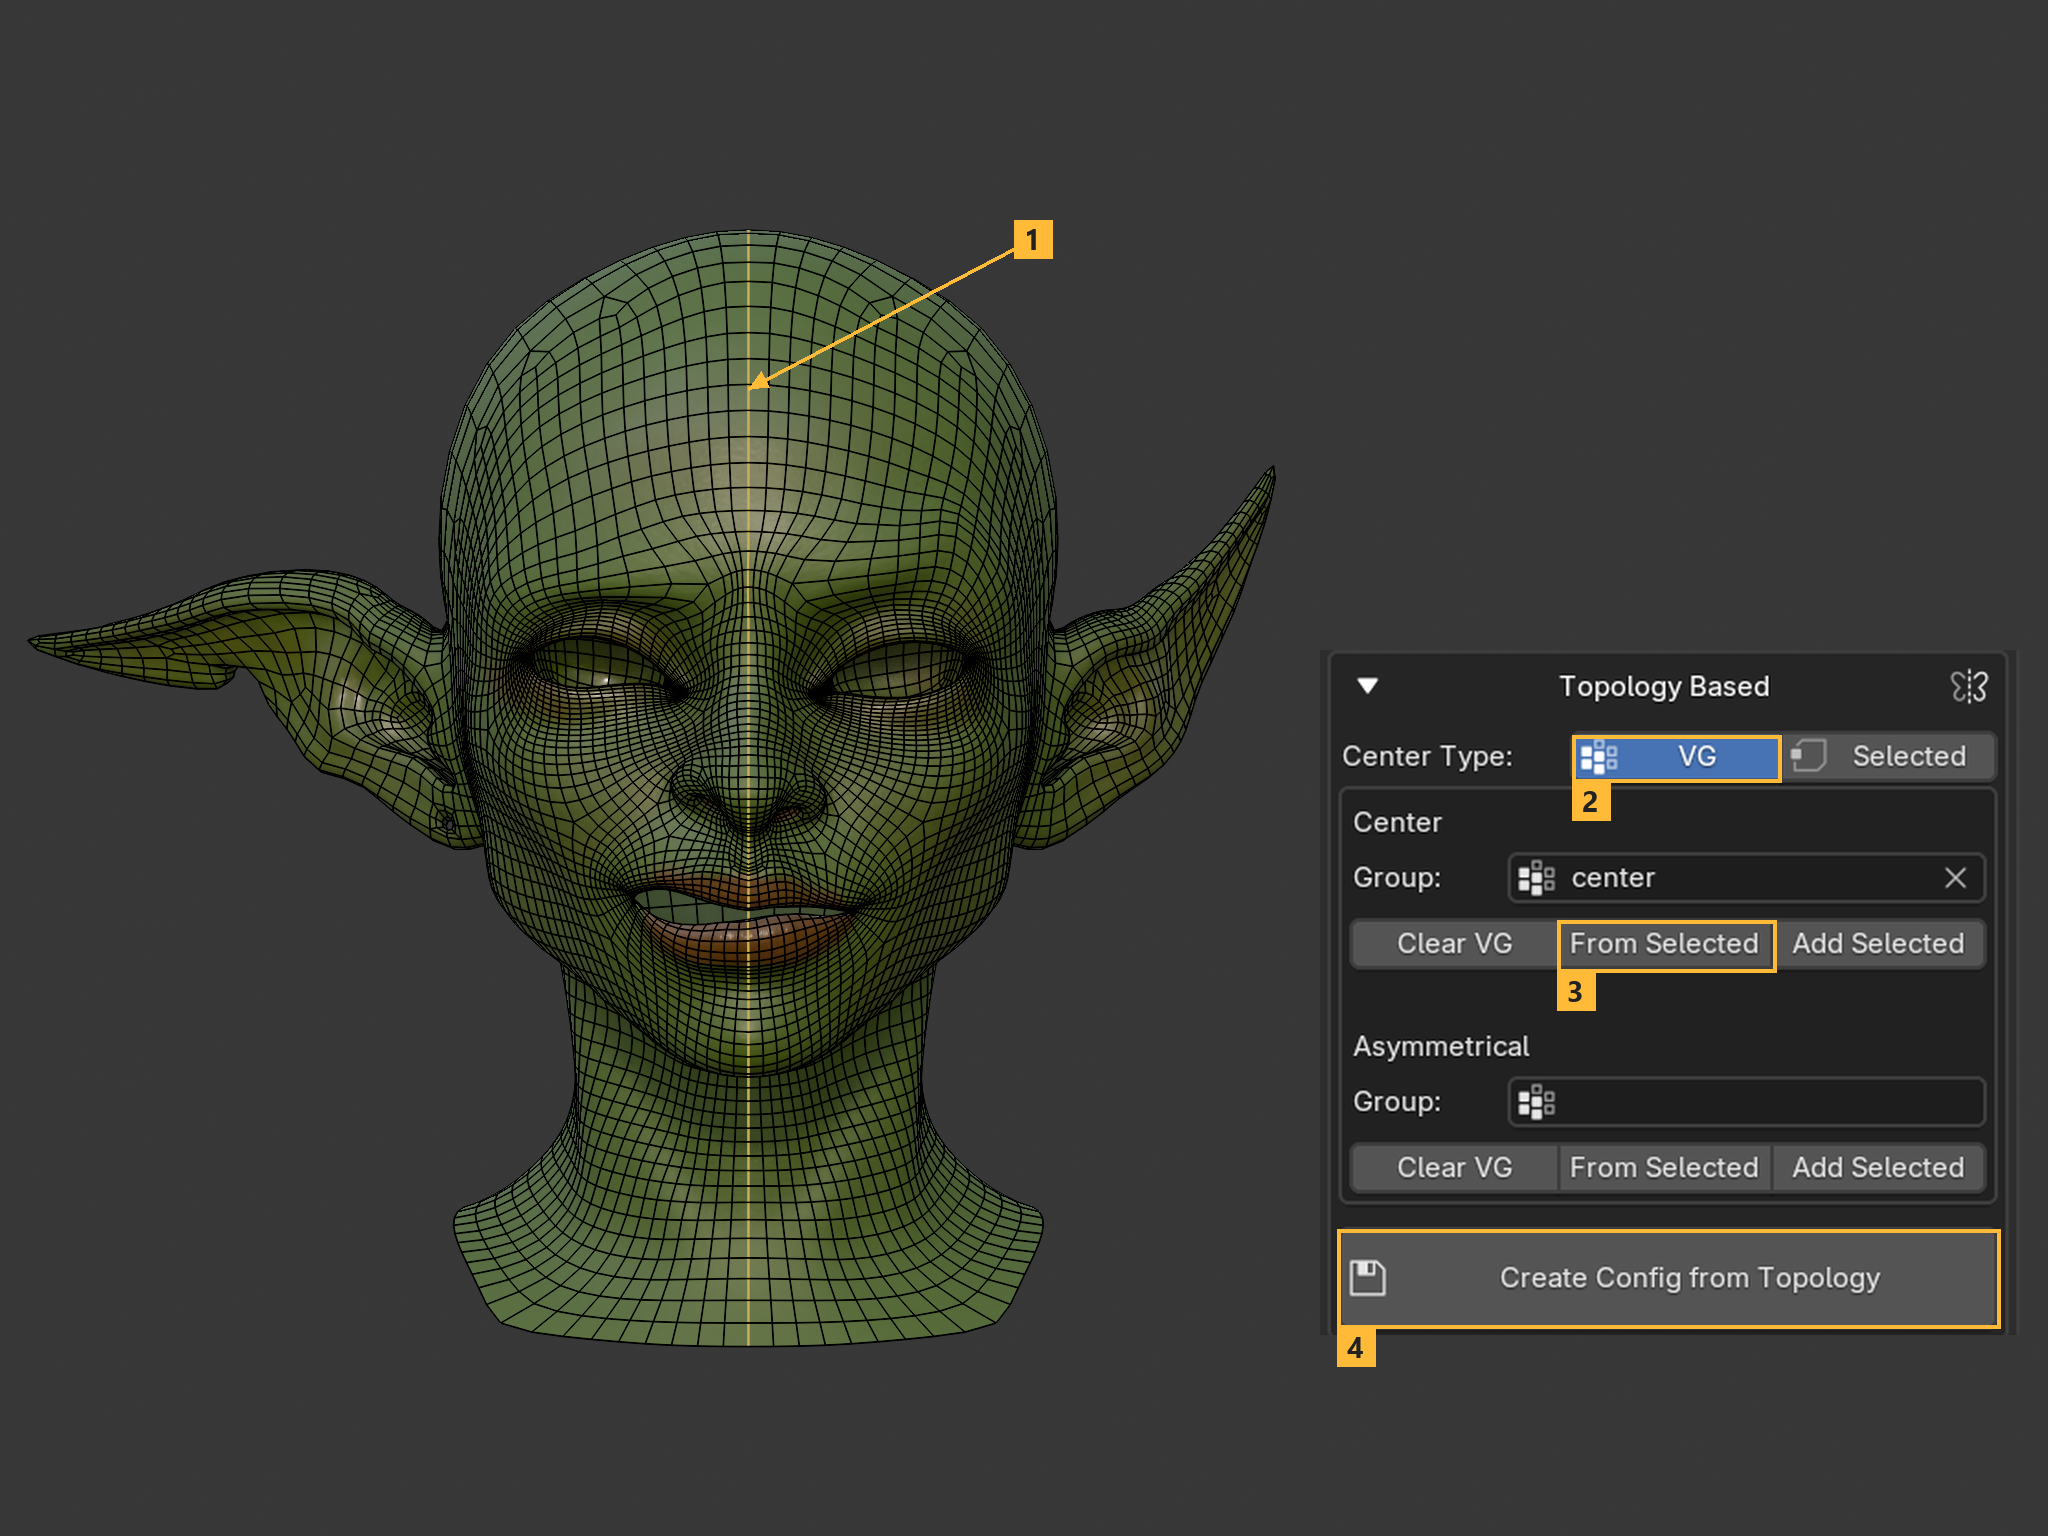
- In Edit Mode, select the edge loops that define the center of the mesh.
- Open Create Config > Topology Based and set Center Type to VG.
- Under Center, click From Selected to create the center vertex group from those loops. You do not need to create the group beforehand.
- Click Create Config from Topology.
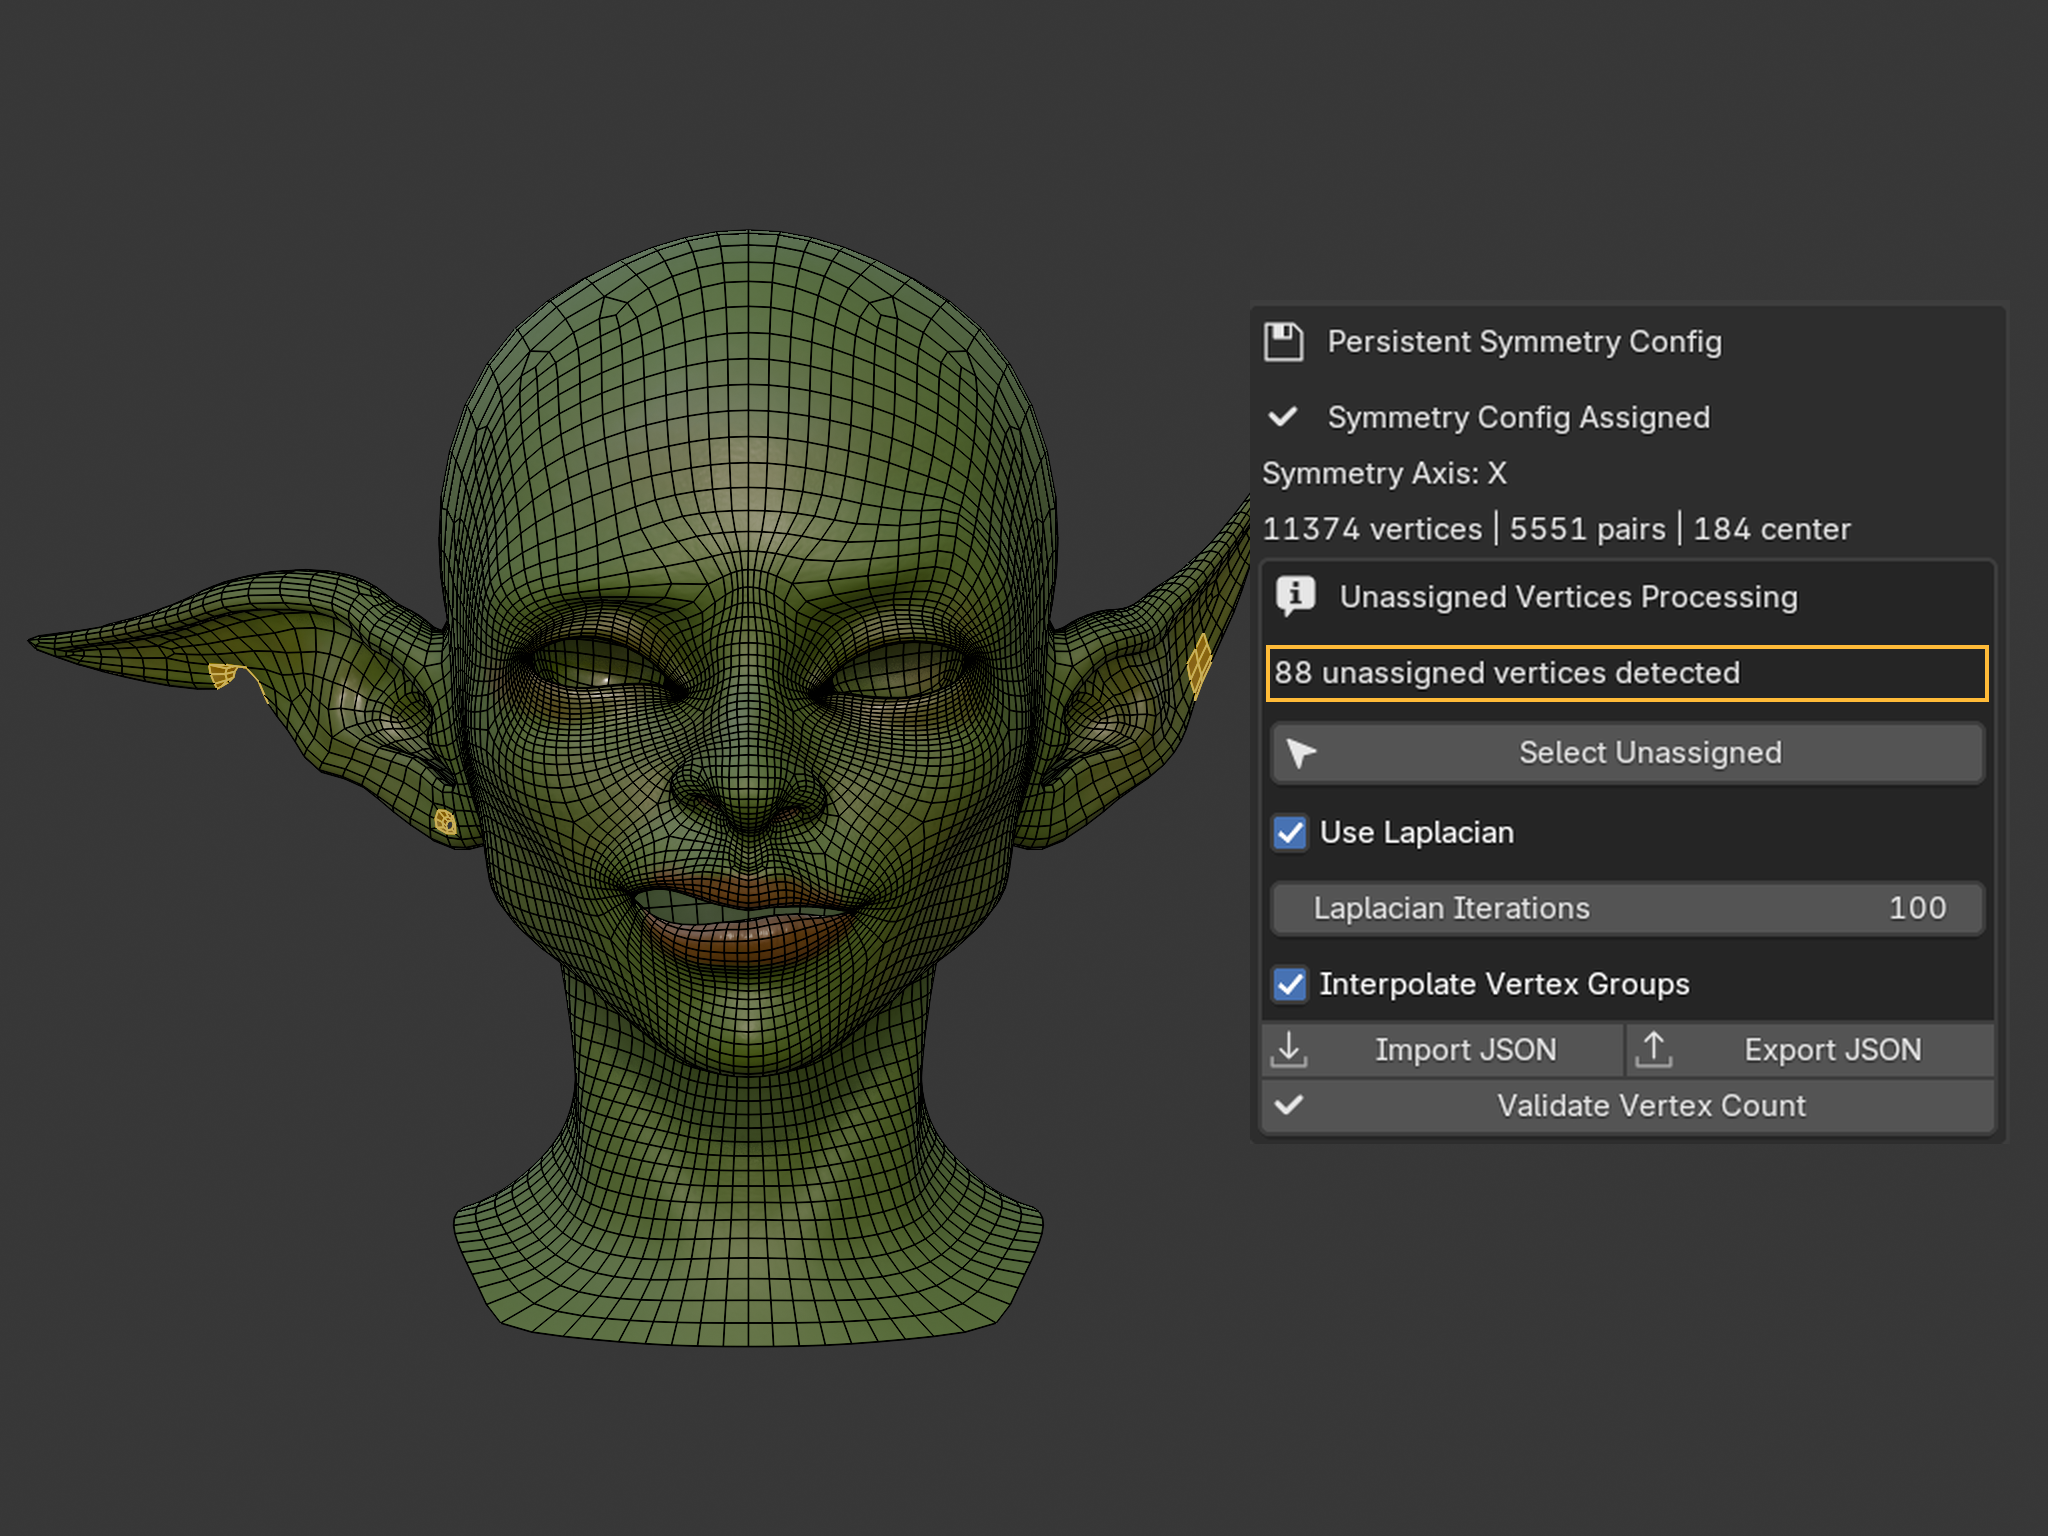
If the mesh contains some asymmetrical topology, OmniMirror may create the configuration with a warning about unassigned vertices. For small, local regions, you can continue: those vertices can follow the surrounding configured vertices through interpolation during later symmetry operations.
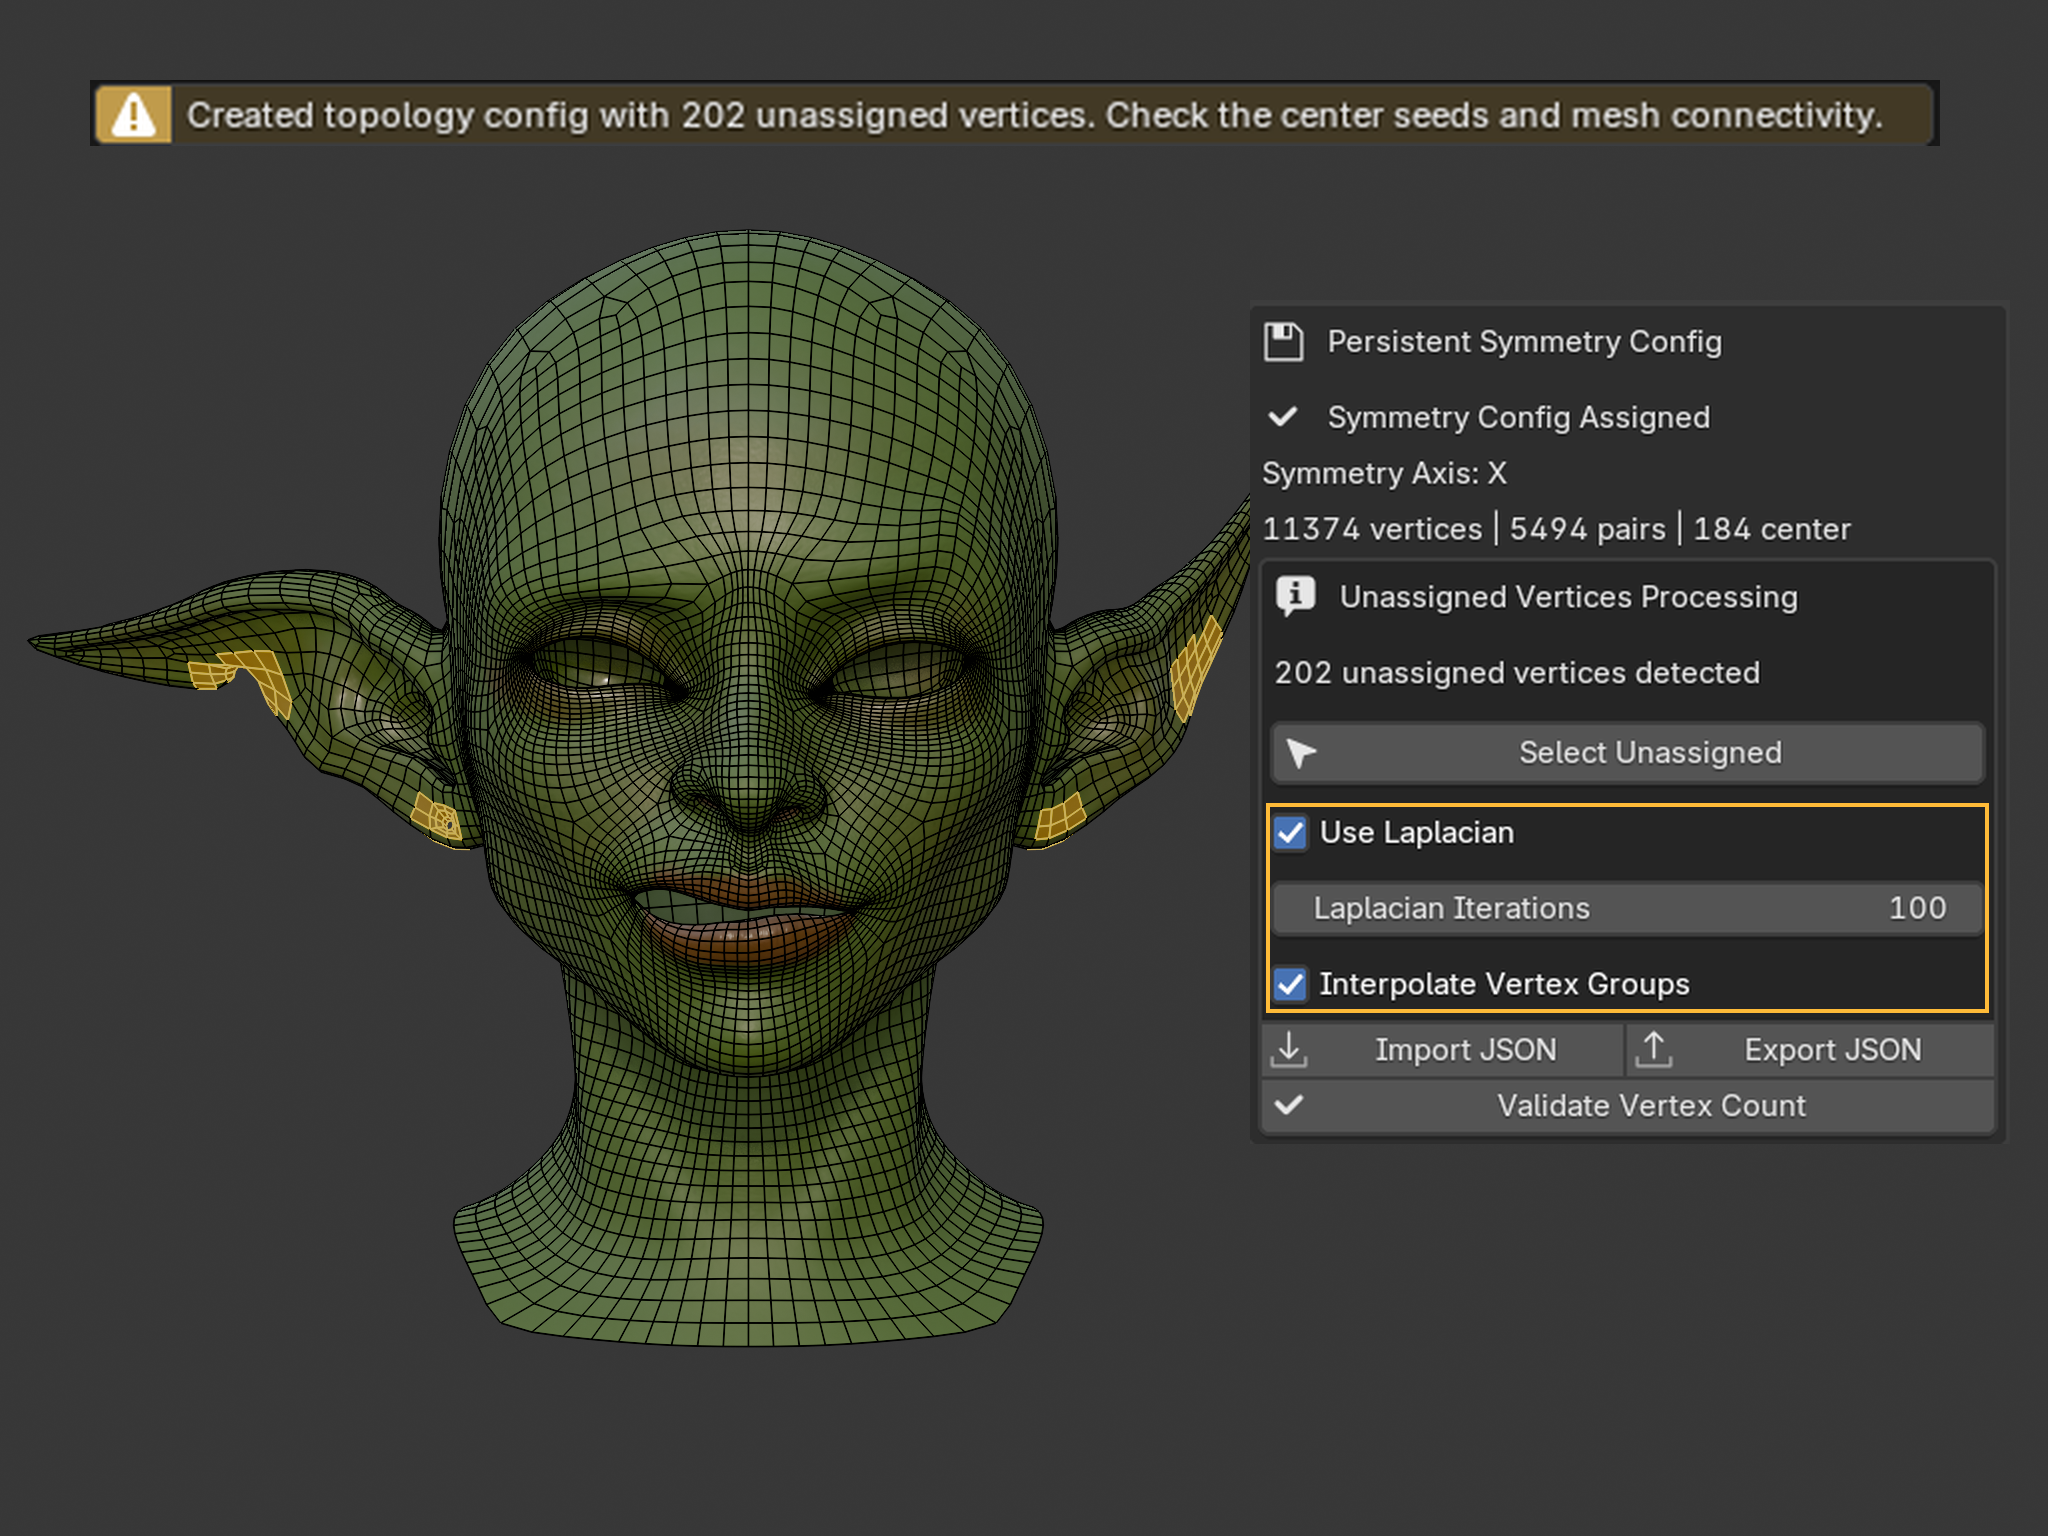
Use Laplacian lets unassigned geometry, shape keys and UVs follow the surrounding configured vertices when symmetry is applied. Laplacian Iterations controls the solver iteration limit. Interpolate Vertex Groups fills unassigned vertex weights from nearby configured vertices along the mesh topology.
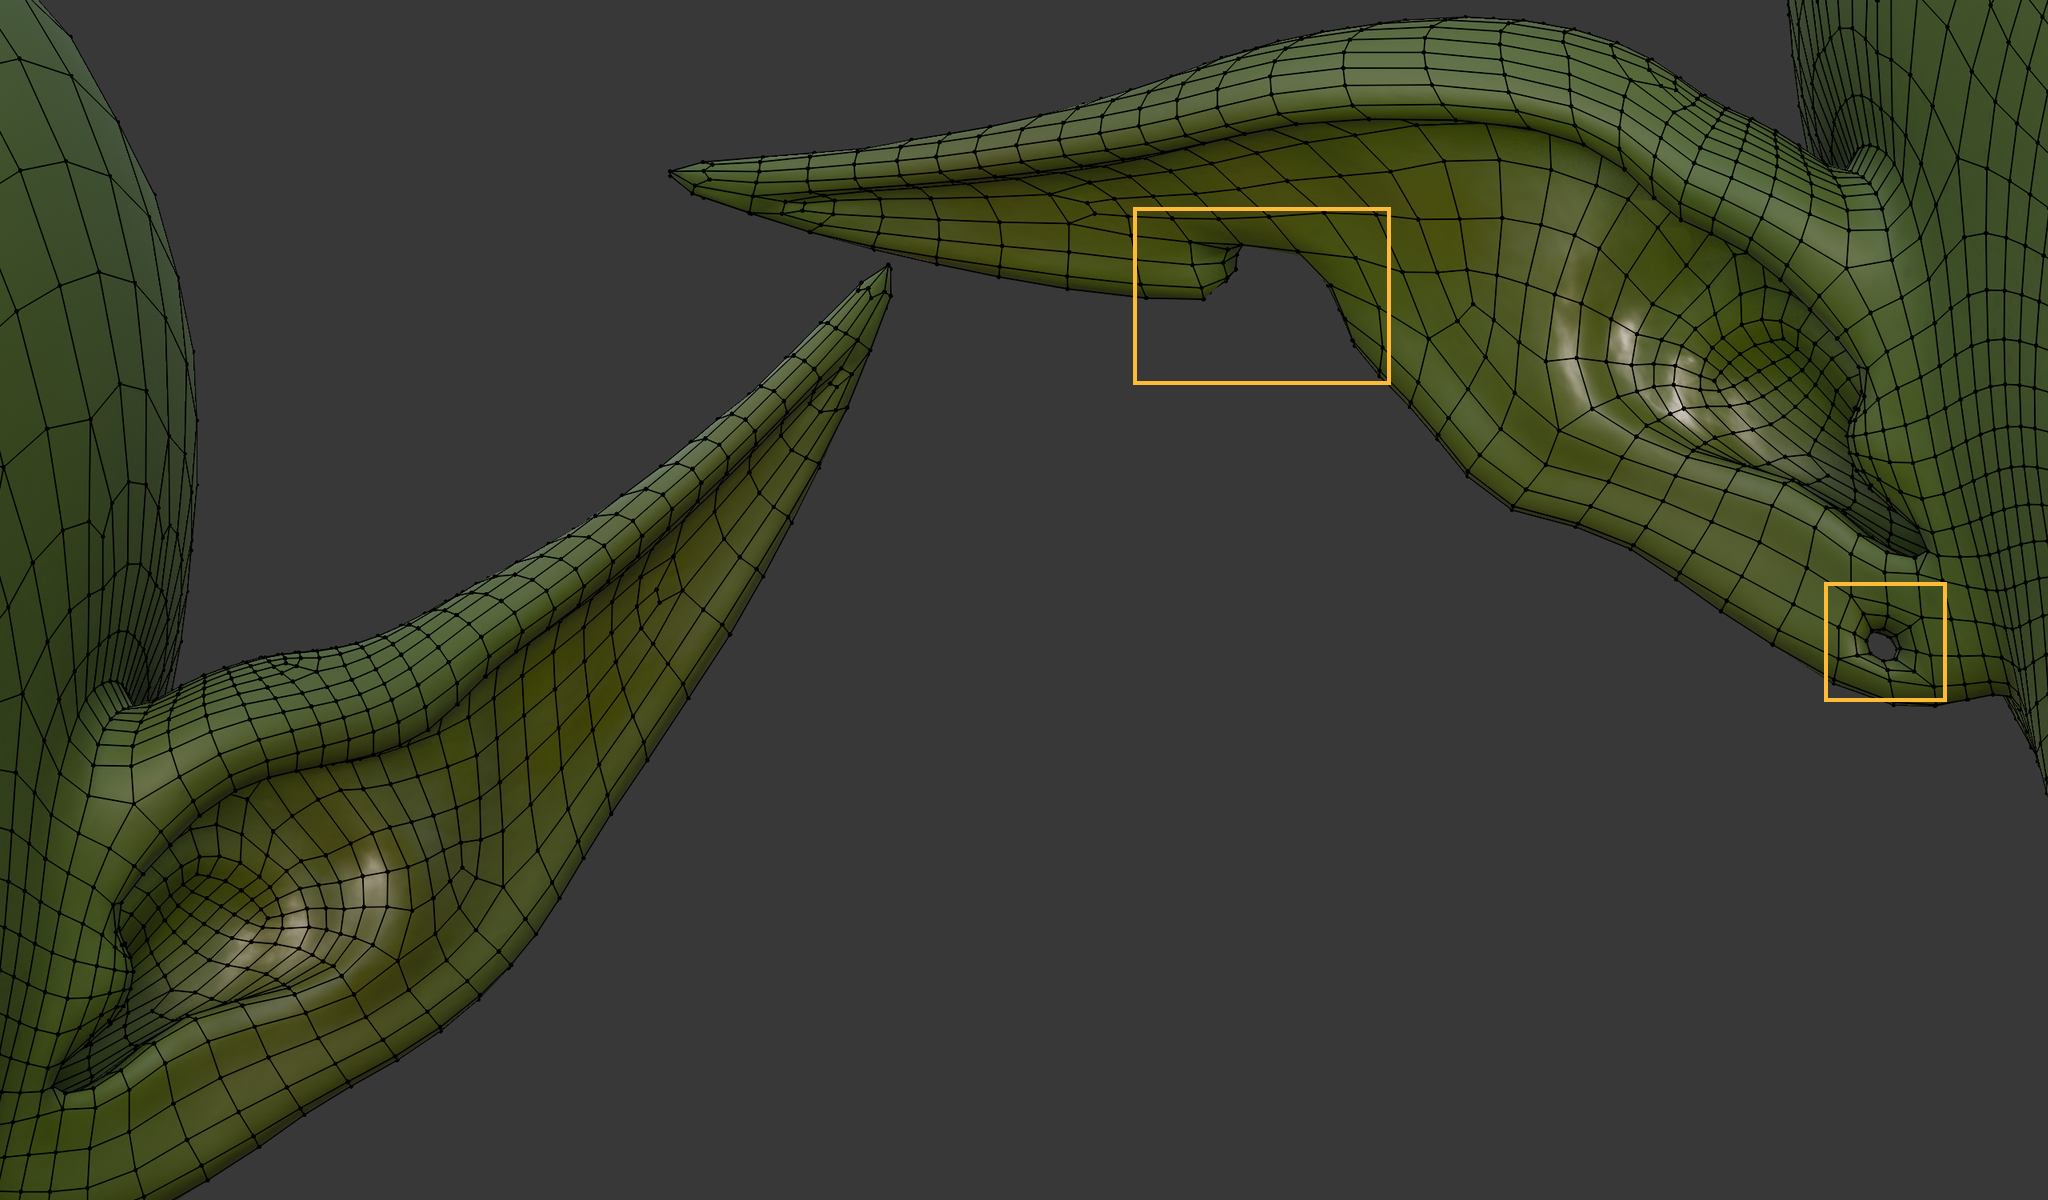
You can also improve the matching by explicitly identifying asymmetric elements. This gives the algorithm more certainty about which vertices should not be paired, helping it resolve more of the surrounding topology.
Here, one ear has a hole near its base and a cut in its edge. The rectangles mark those differences; the opposite ear has neither feature.
Build the asymmetrical group from your selections:
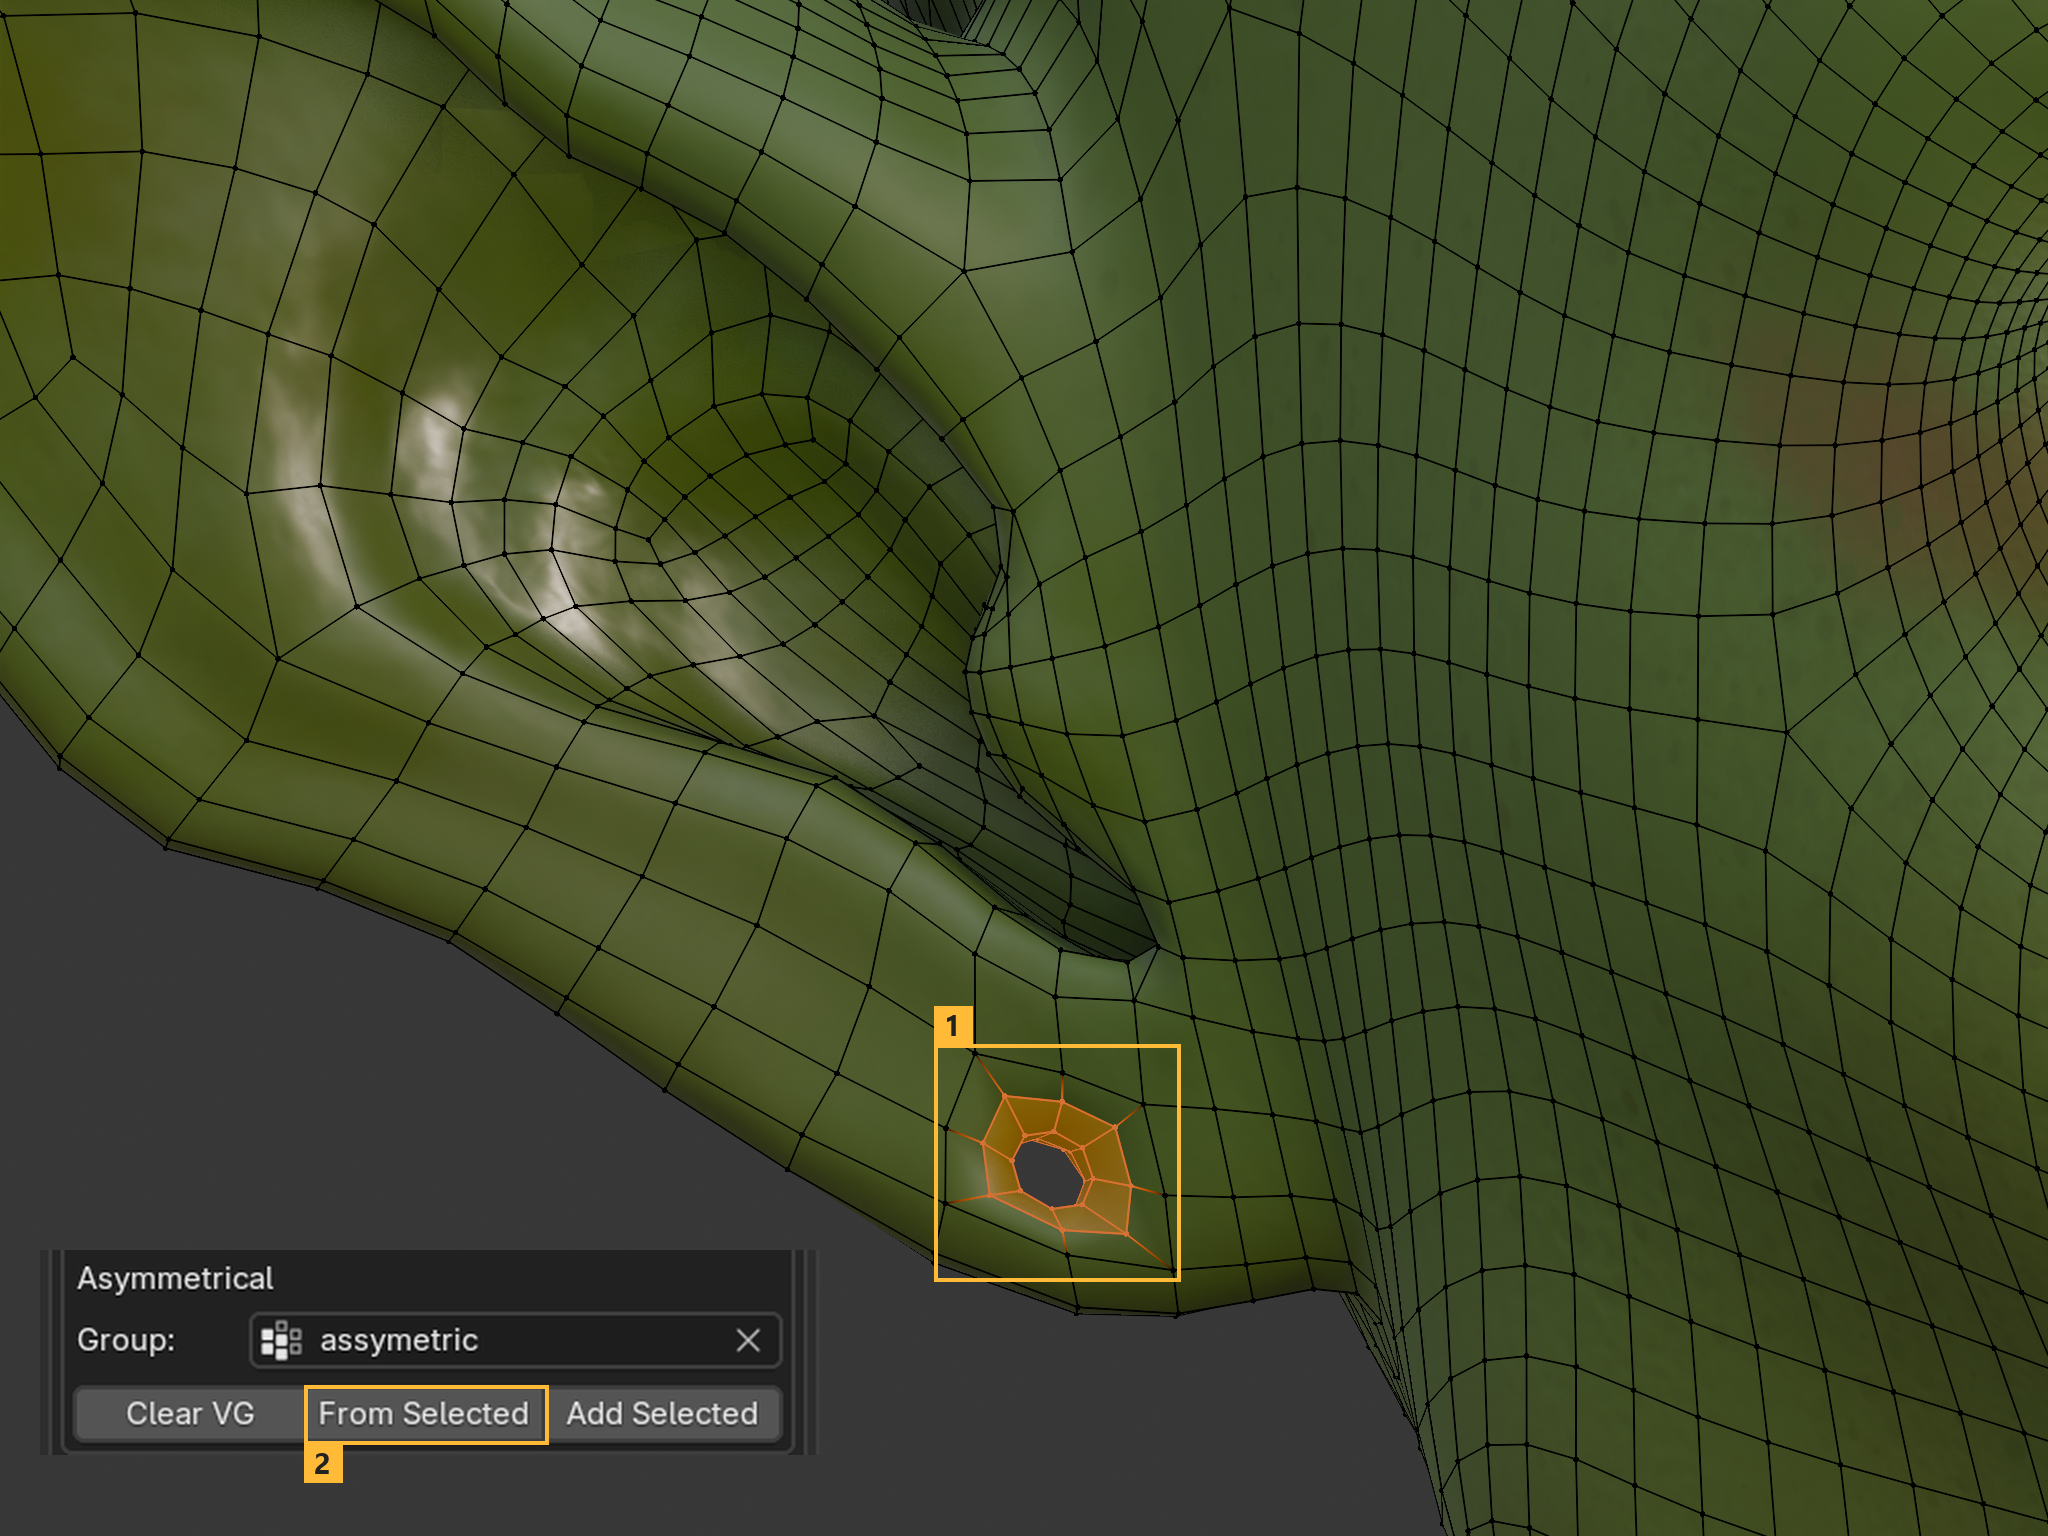
- Select the vertices around the hole that has no counterpart on the other side.
- Under Asymmetrical, click From Selected to create a group from that selection. In this example, the group is named assymetric.
You can include other separate regions in the same group without losing the first selection.
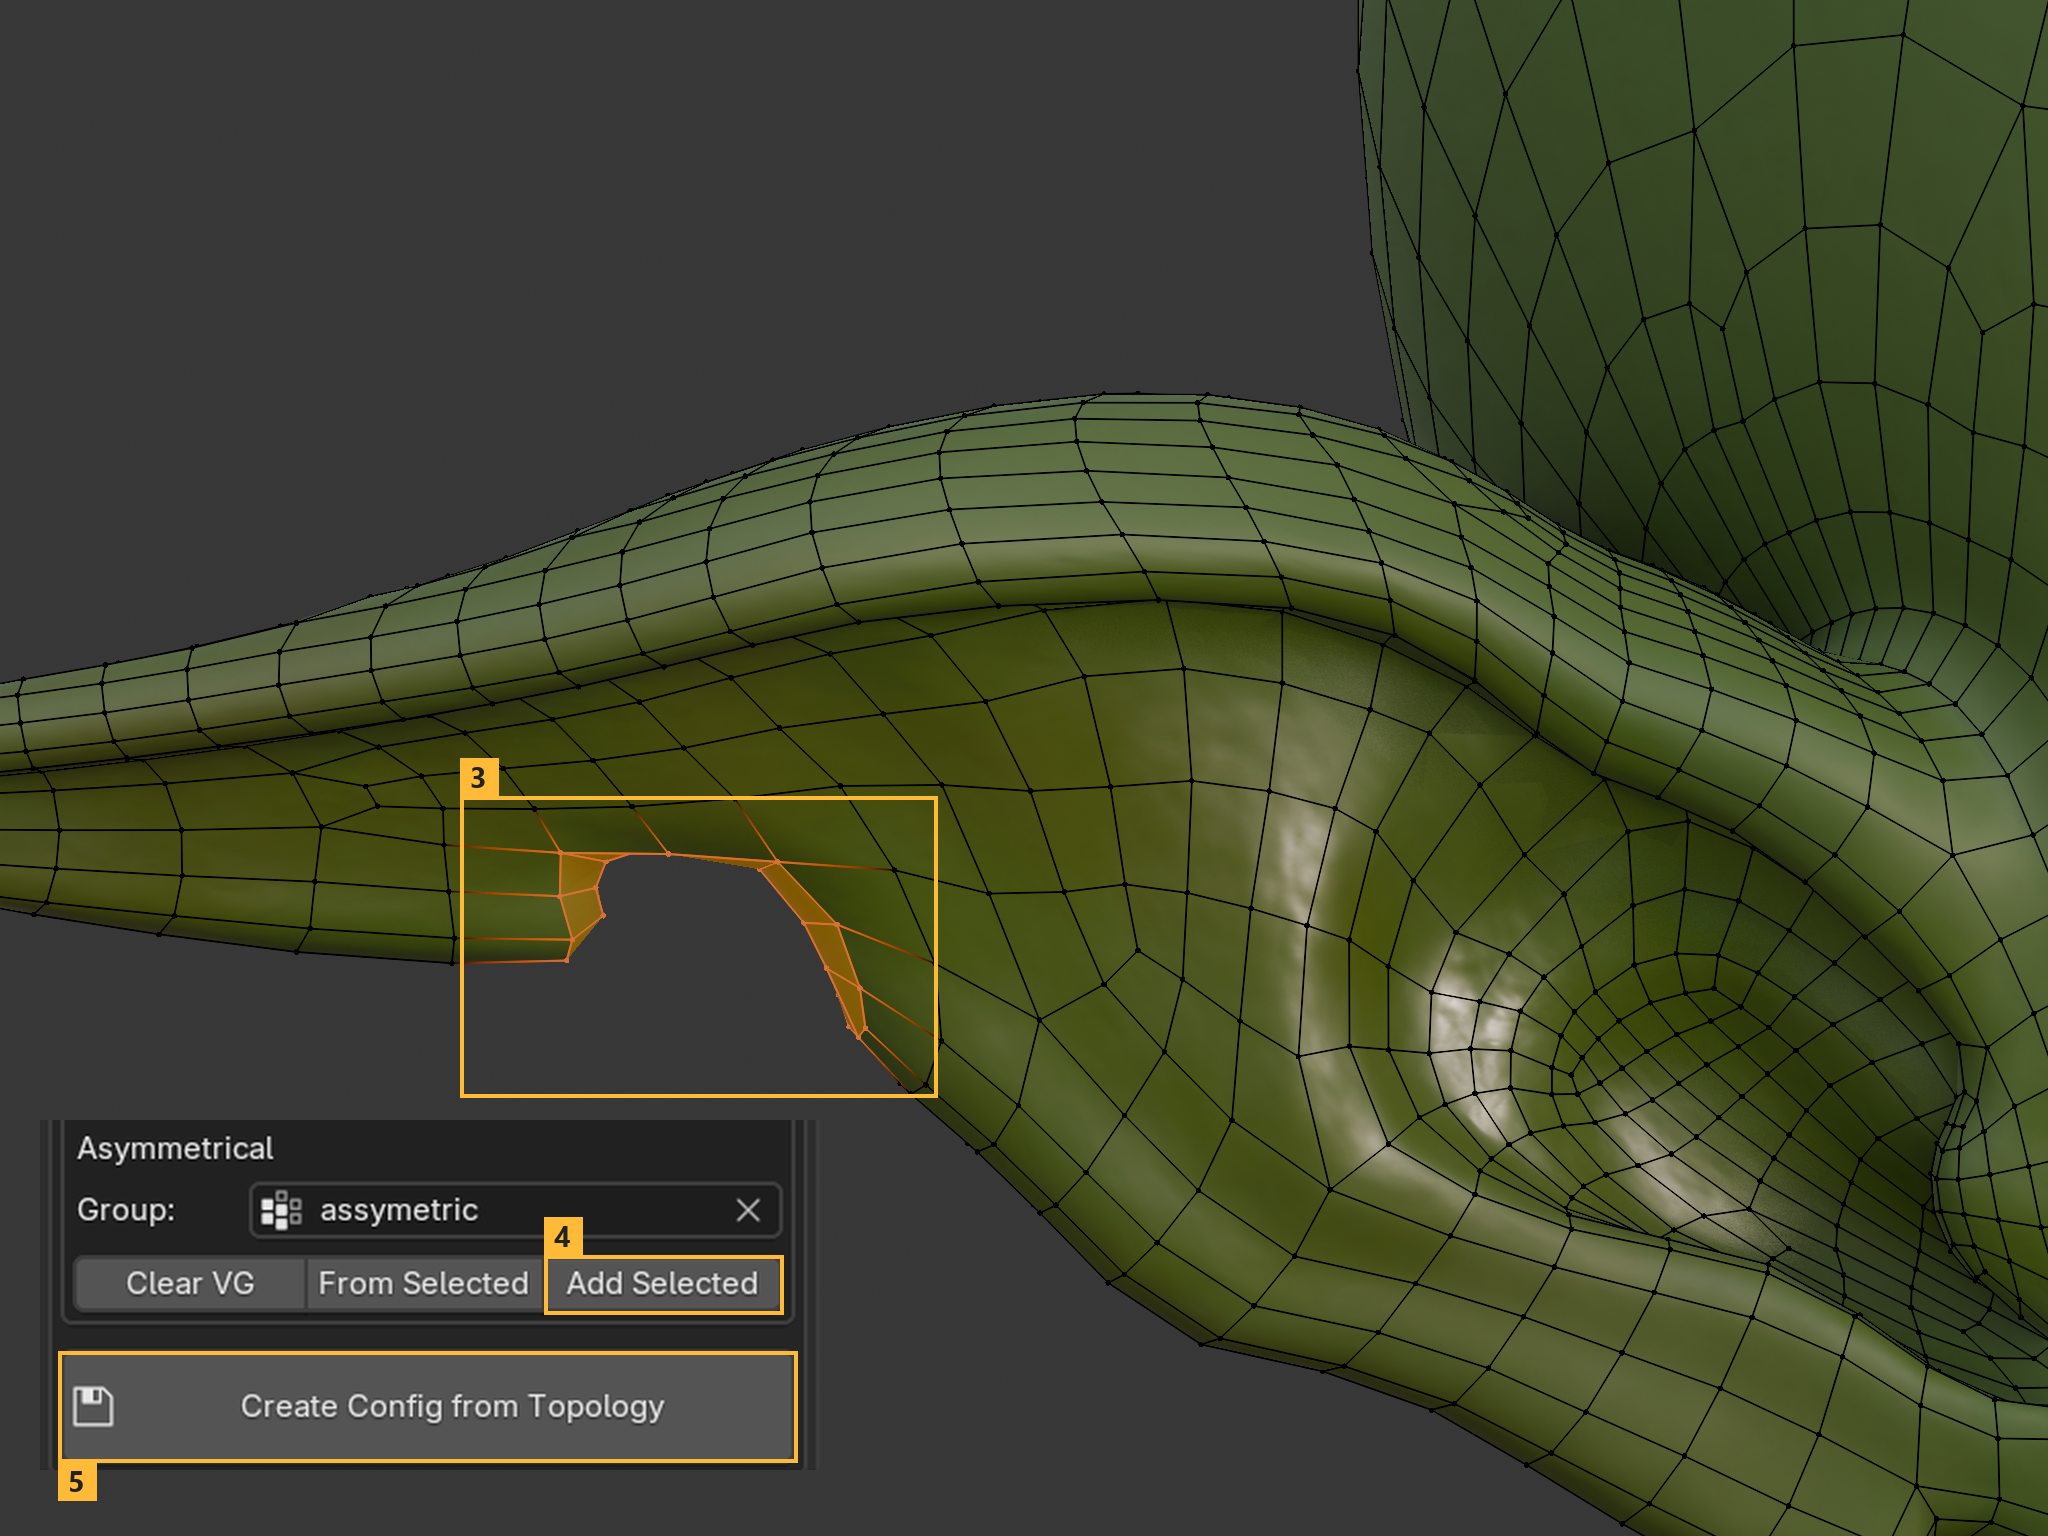
- Select the vertices around the other asymmetric feature, such as this cut in the ear.
- Click Add Selected under Asymmetrical. The vertices around the hole remain in the group, and the new selection is added to them.
- Click Create Config from Topology.
In this example, using only the center group leaves 202 unassigned vertices. Defining the 59 vertices around the hole and cut reduces that to 88. The explicitly excluded vertices remain unpaired, while the additional guidance lets OmniMirror resolve more of the surrounding topology.
You can also choose Selected to build a topology configuration directly from selected center edges, without creating a center vertex group.
Keep the topology unchanged. A saved configuration remains valid while the mesh topology and vertex order stay unchanged. You can move vertices and make the shape asymmetrical without rebuilding it. After adding, removing, merging or reordering vertices, create a new configuration.
If you already have a configuration for a mesh with the same vertex order, use Copy to Selected or transfer it between files with Export JSON and Import JSON.
Mesh symmetrization
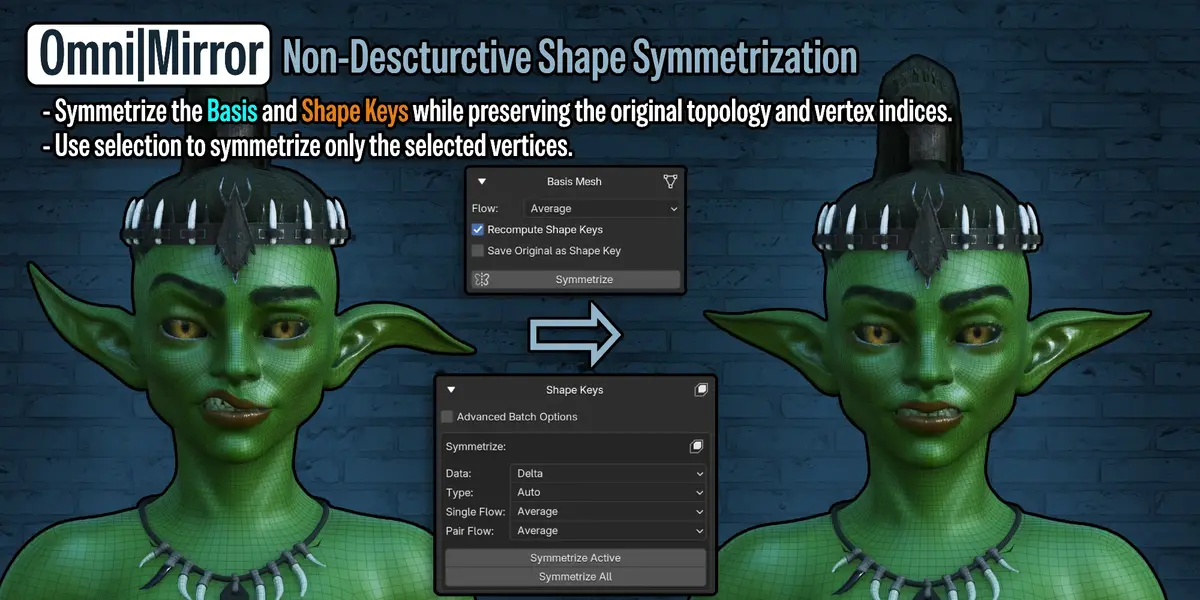
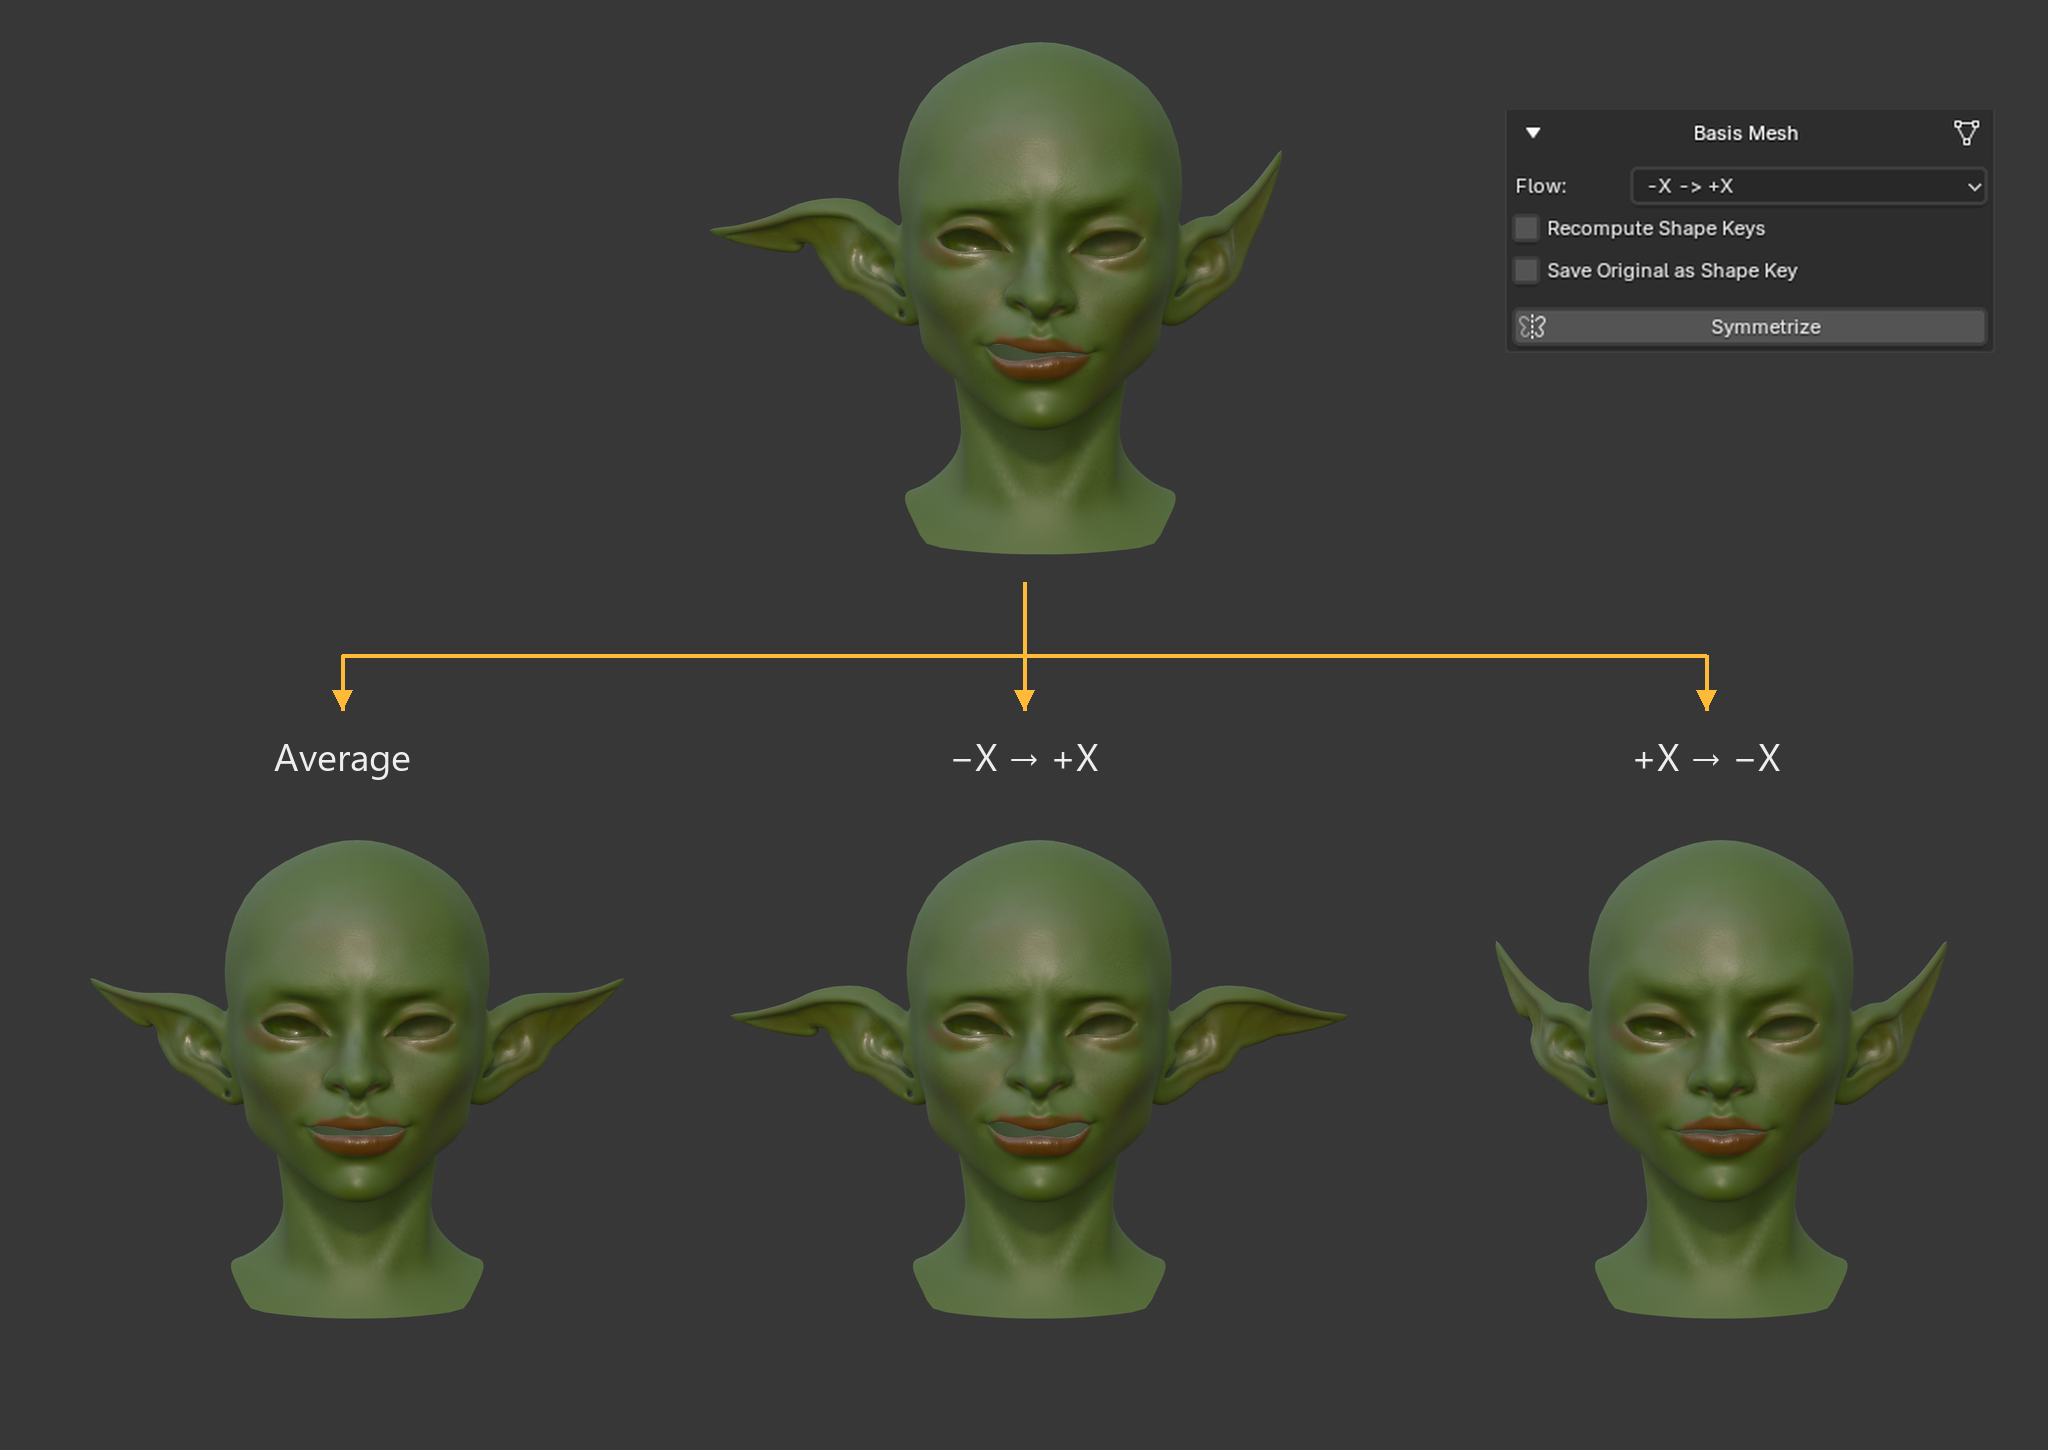
With a configuration saved, you can symmetrize the mesh even after its shape becomes asymmetrical. Open Basis Mesh, choose a direction and click Symmetrize.
There are three modes. For a configuration built along the X axis:
- Average moves both sides toward a symmetrical average of their current positions.
- -X → +X keeps the negative side and copies its shape to the positive side.
- +X → -X keeps the positive side and copies its shape to the negative side.
Recompute Shape Keys preserves the existing shape key offsets when you change the Basis, so those deformations carry over to the updated mesh.
Symmetrize a selection
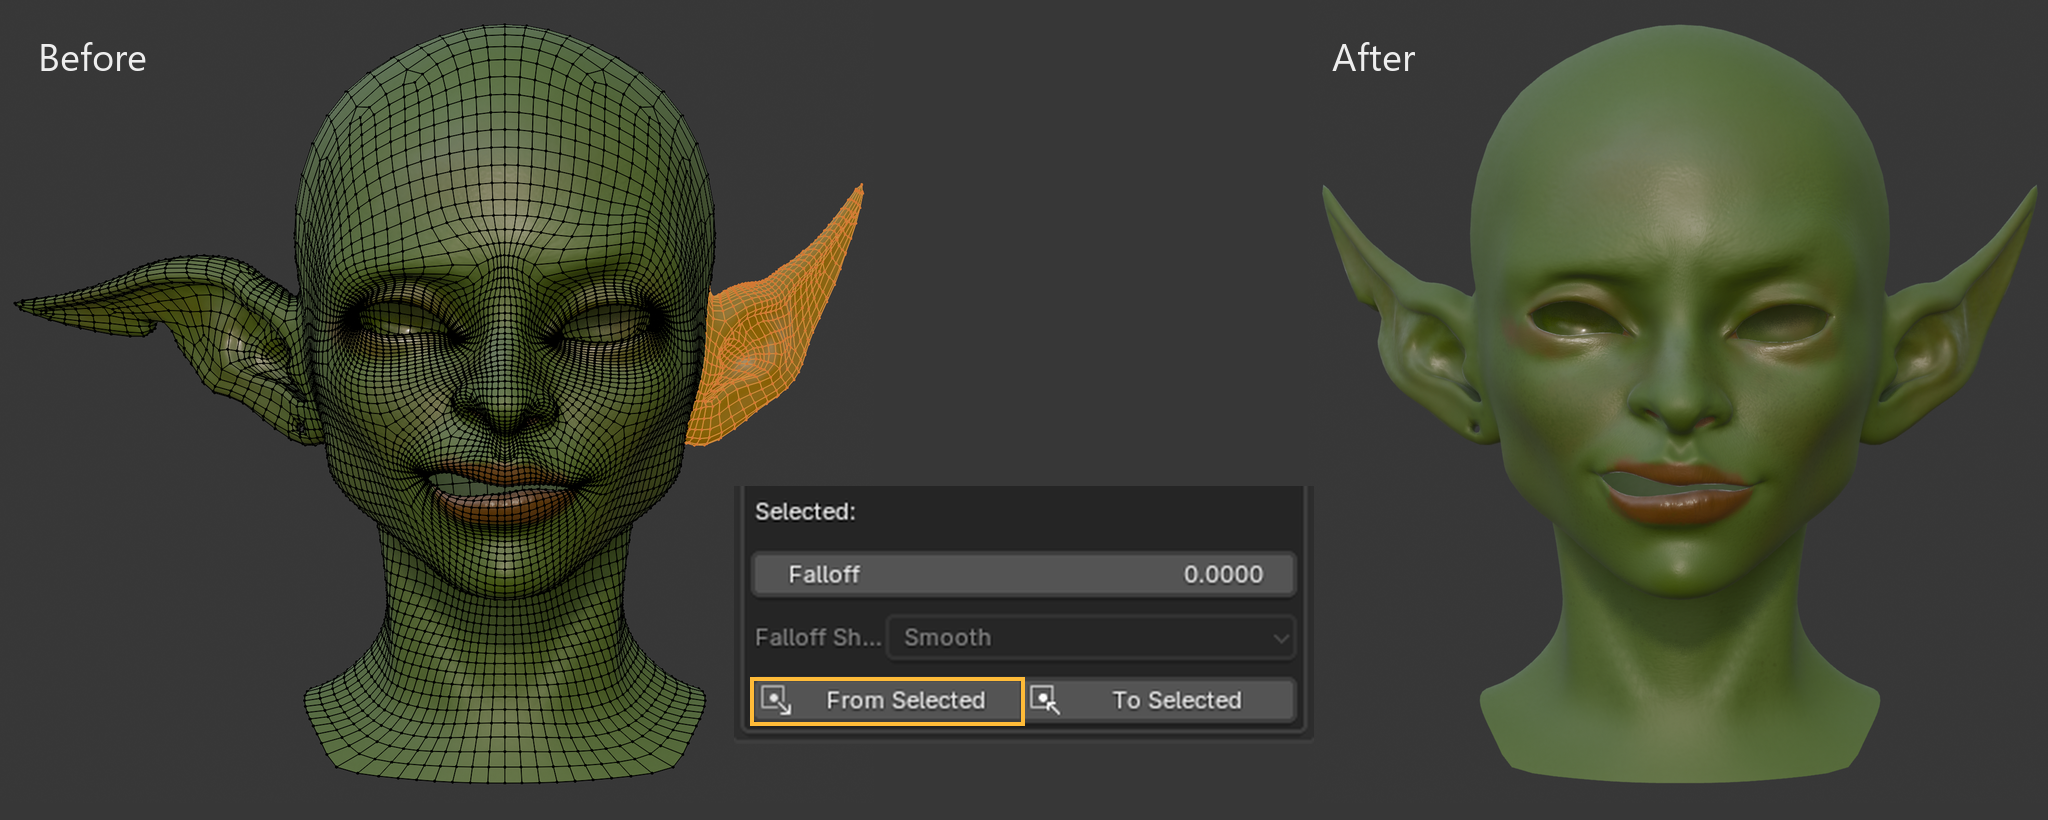
You can also work on part of the mesh. In Edit Mode, select the vertices you want to use and open the Selected controls under Basis Mesh.
- From Selected copies the selected vertices to their counterparts.
- To Selected updates the selected vertices from their counterparts.
Here, select one ear and click From Selected to copy its shape to the opposite ear. The selected ear keeps its shape, and the face stays unchanged.
Smooth deformation around asymmetric topology
The hole and cut in this ear have no matching topology on the opposite side. With Use Laplacian enabled, these unassigned vertices follow the surrounding symmetrized mesh through Laplacian deformation, preserving the local detail while it moves with the ear.
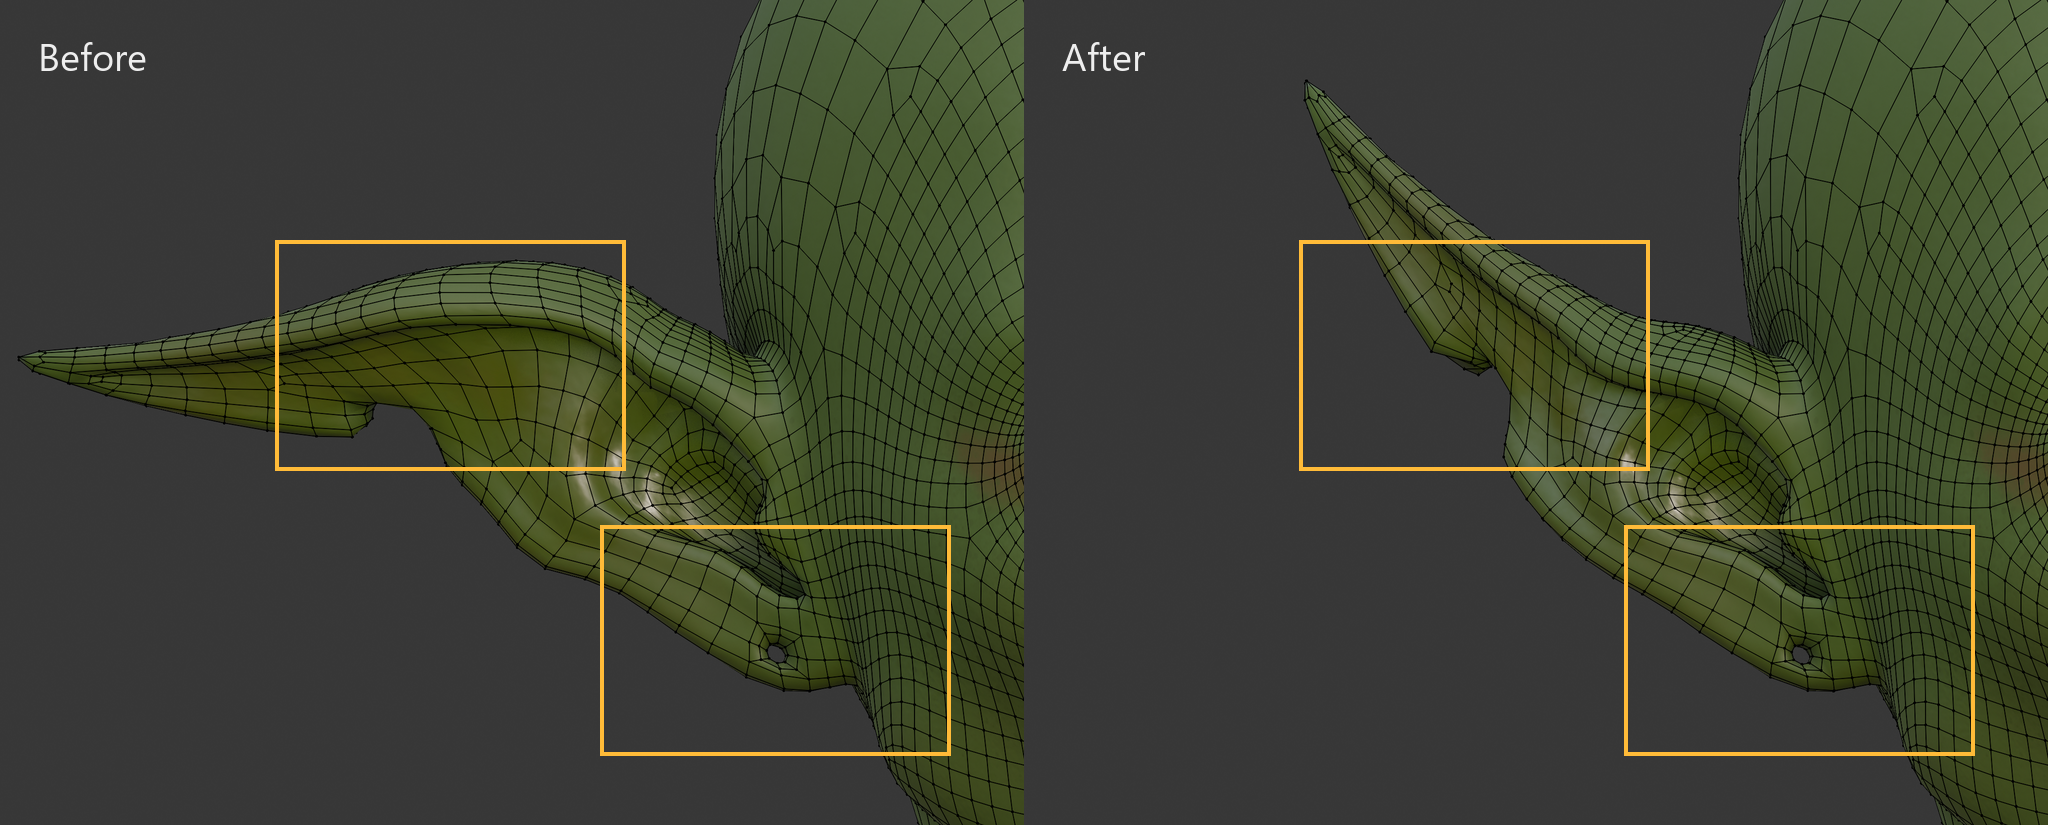
The hole and cut retain their topology as the ear changes shape.
Symmetrize edge properties
In Edges, enable the properties you want to copy, choose a Flow and click All.
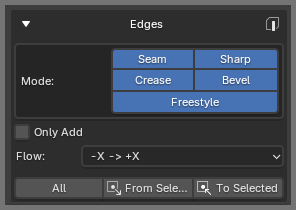
In Edit Mode, use From Selected to copy properties from the selected edges to their counterparts, or To Selected to copy in the opposite direction.
Shape keys
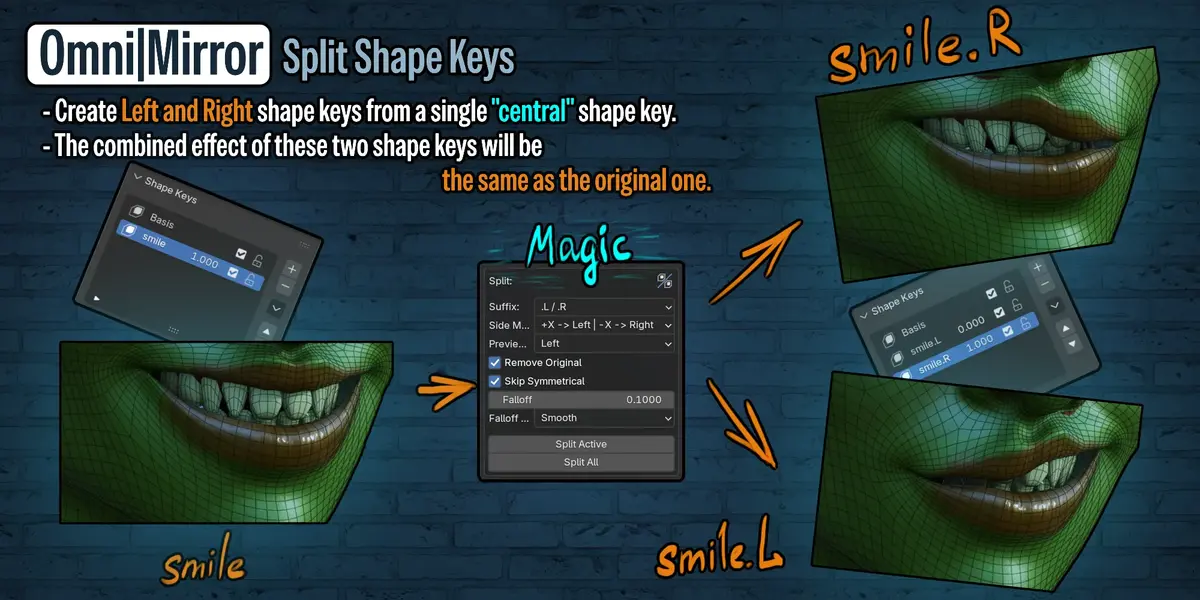
Use the saved symmetry configuration to mirror a shape key to its partner, symmetrize one key, or split a bilateral expression into two sides.
Mirror a paired shape key
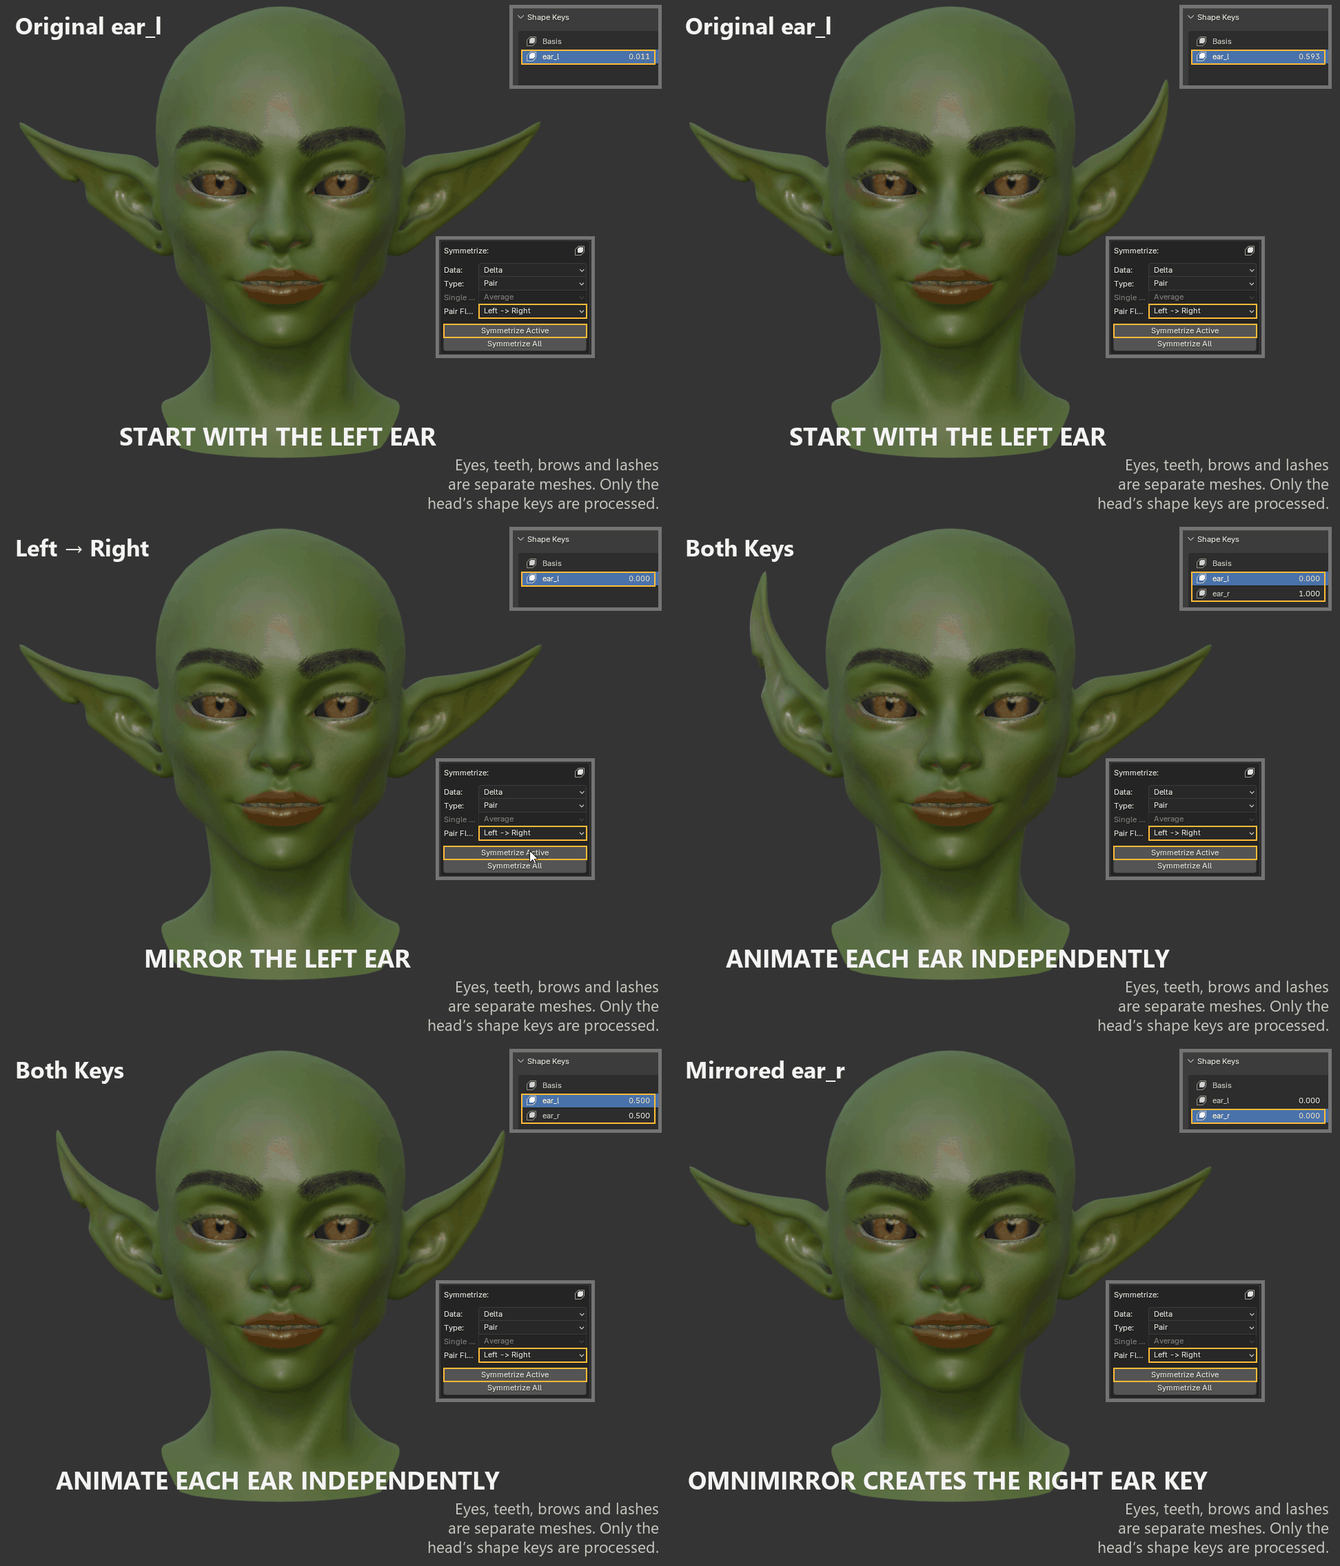
With ear_l active, open OmniMirror > Shape Keys. Set Type to Pair and Pair Flow to Left → Right, then click Symmetrize Active. OmniMirror creates ear_r from the original ear motion. The two keys can then be animated independently.
Symmetrize a shape key in place
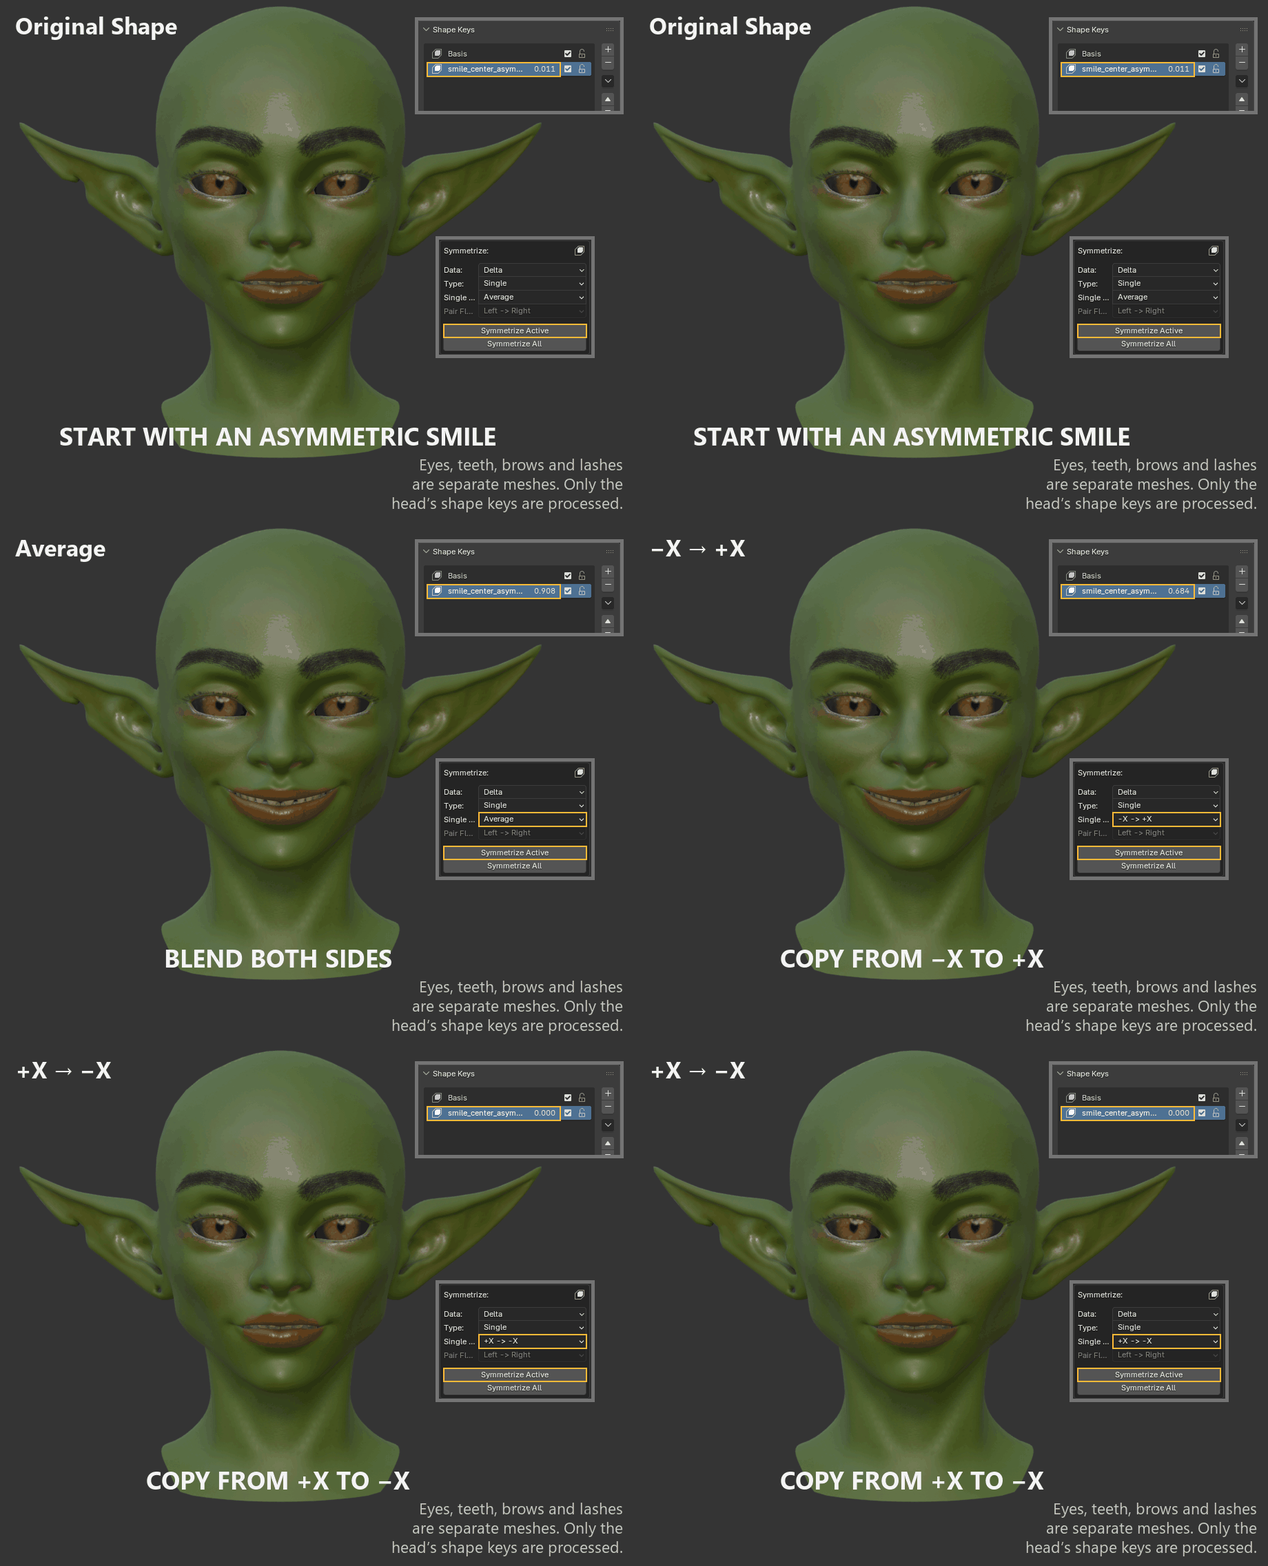
For smile_center_asymmetric, set Type to Single. Average blends the two sides, while −X → +X and +X → −X copy one side to the other. Each result below starts from the same asymmetric smile.
Split a shape key into left and right
Select smile_center and click Split Active. With Remove Original turned off, the original smile stays alongside smile_center.L and smile_center.R. Animate either half independently, or raise both to 1 together to recreate the original smile.
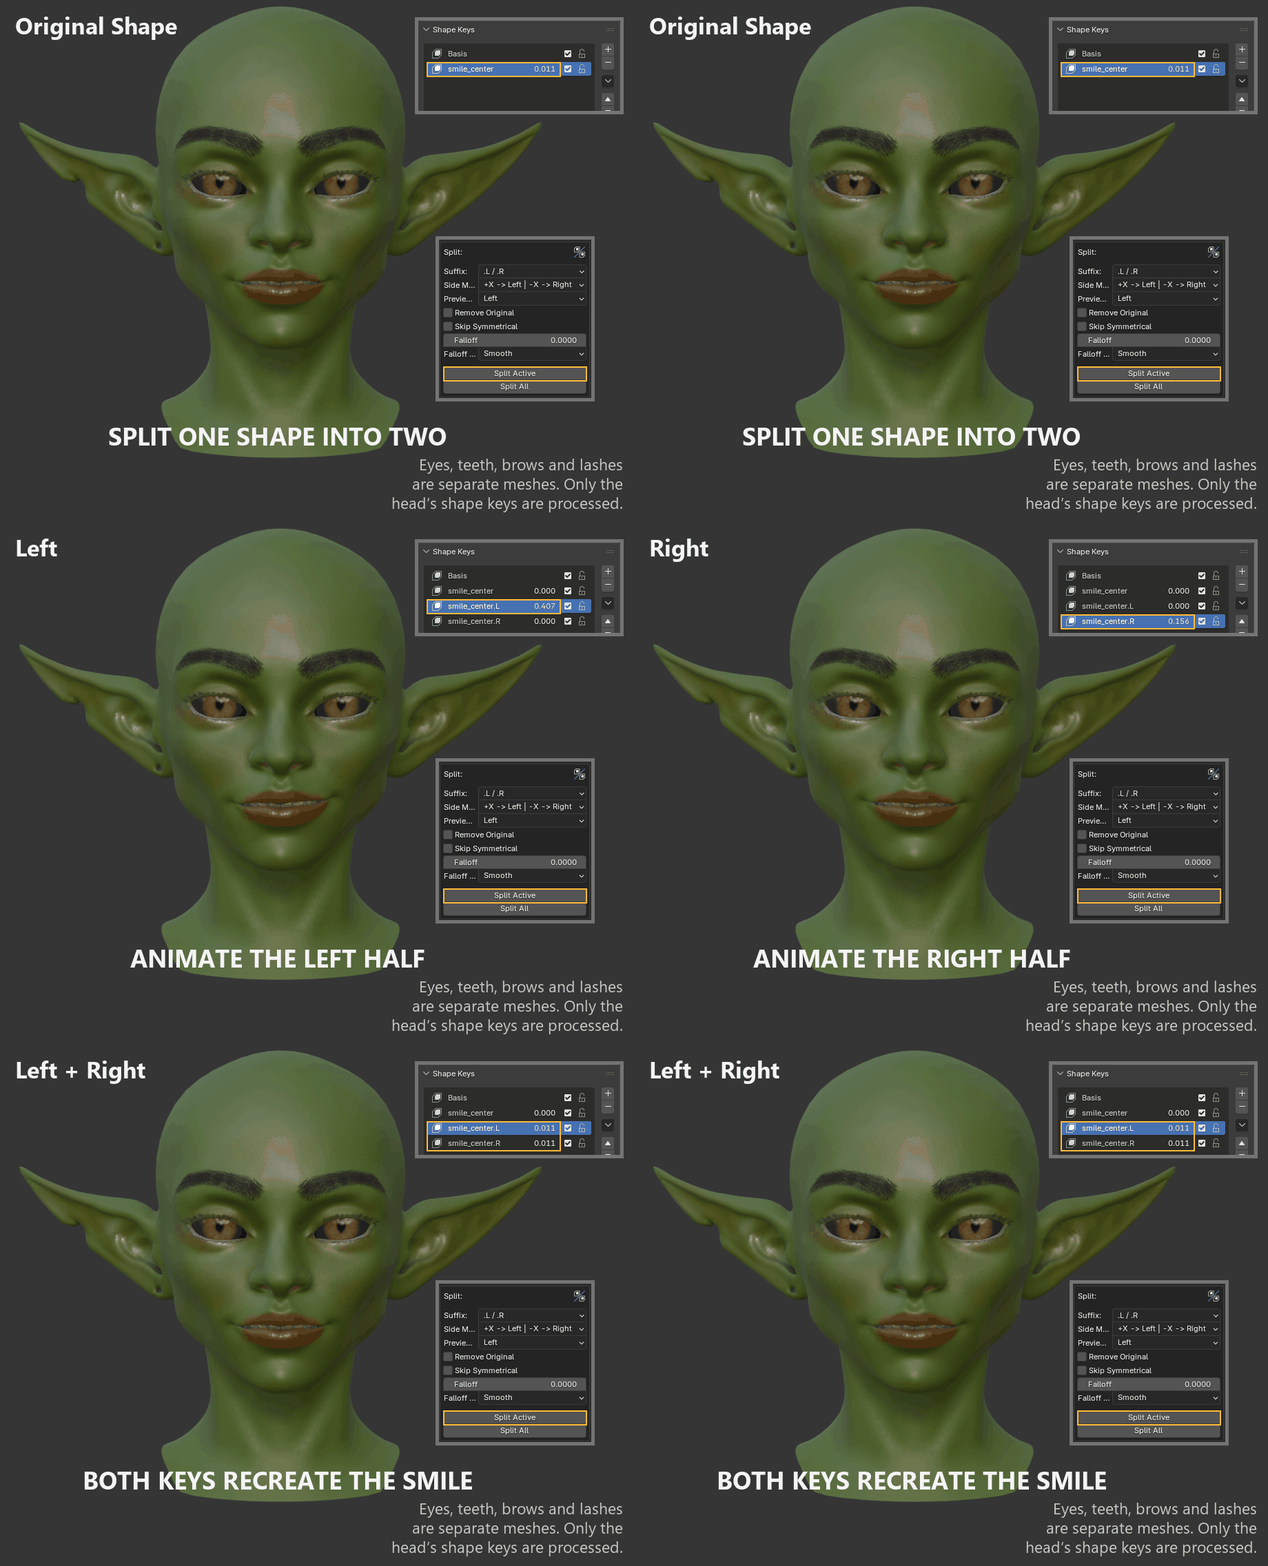
Vertex group weights
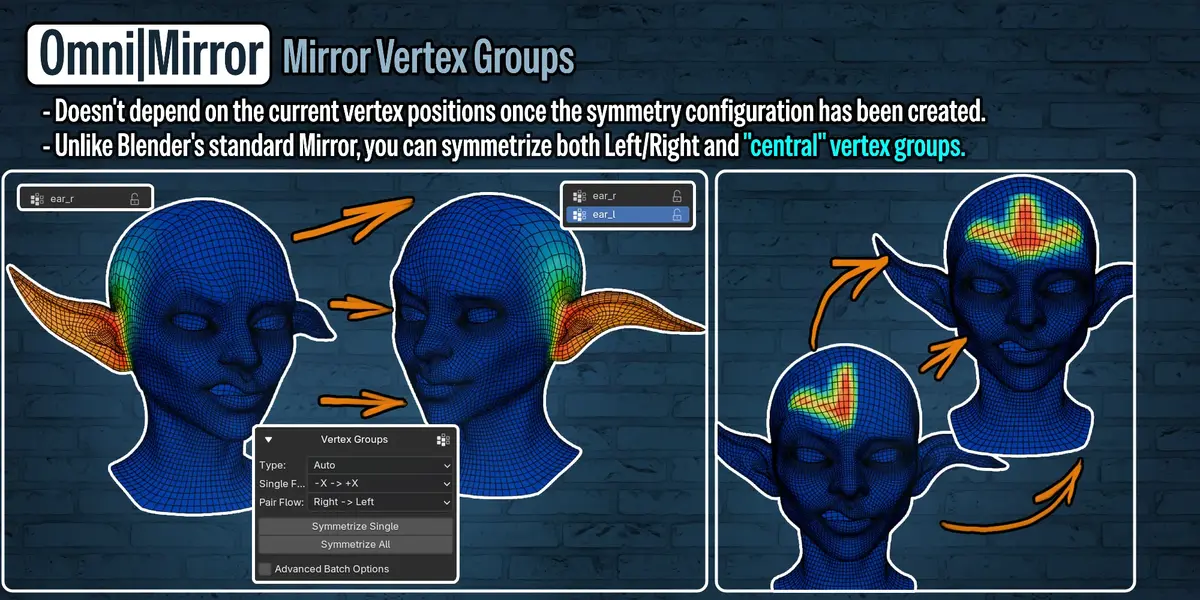
Use the saved symmetry configuration to mirror painted weights. You can transfer weights between two groups, such as ear_l and ear_r, or symmetrize both sides within one group, such as forehead.
Mirroring ear weights with Blender
In Weight Paint, start with ear_l on one ear. For the standard paired workflow, duplicate the group and run Mirror Vertex Group on the copy. In a separate copy, try Mirror Vertex Group (Topology). Both results below show the duplicate after the operation.
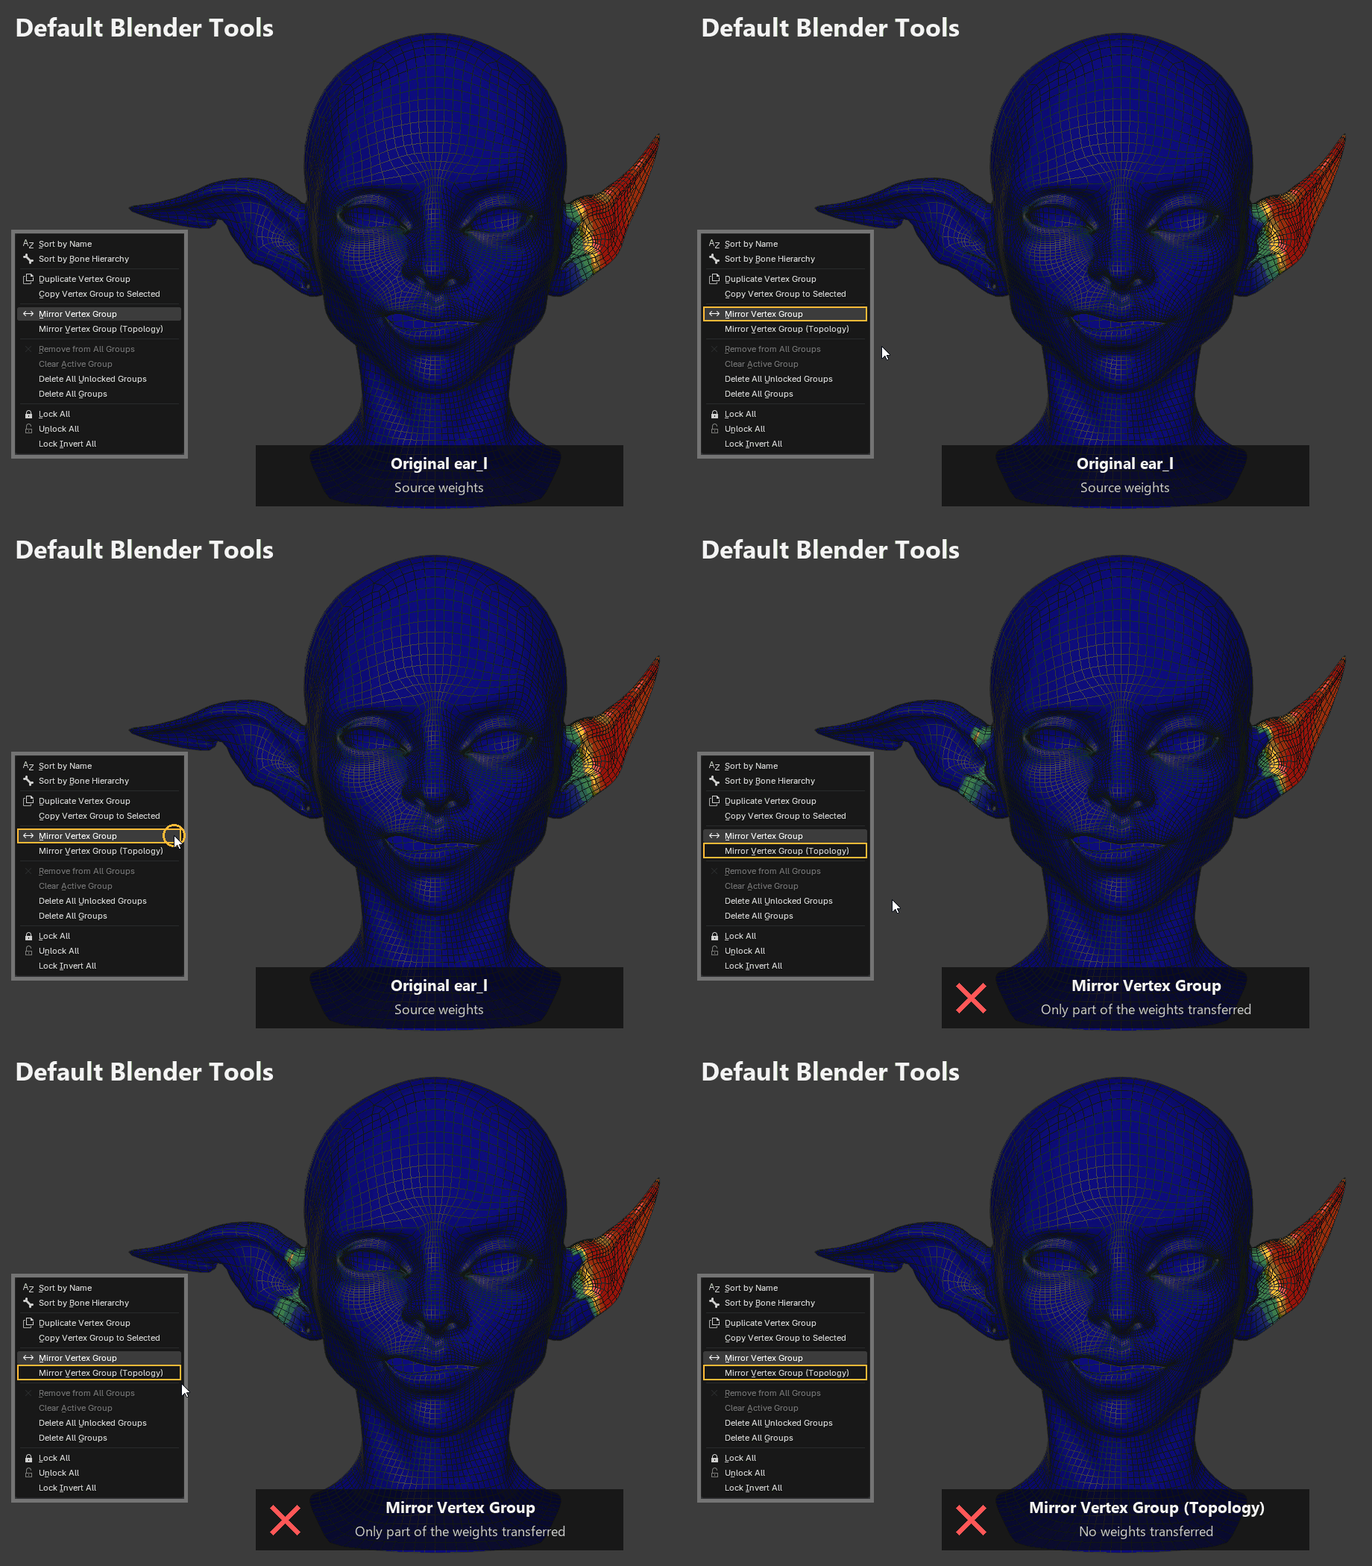
On this mesh, Mirror Vertex Group transfers only part of the painted area and leaves weights on the original side of the duplicate. Mirror Vertex Group (Topology) leaves the ear weights on the original side.
Transfer weights between paired groups
With ear_l active, open OmniMirror > Vertex Groups. Set Type to Pair and Pair Flow to Left → Right, then click Symmetrize Single.
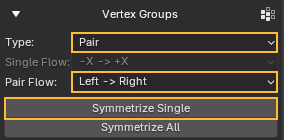
OmniMirror creates ear_r when it is missing and copies the weights using the stored vertex pairs. Select ear_r to inspect the transfer on the opposite ear.
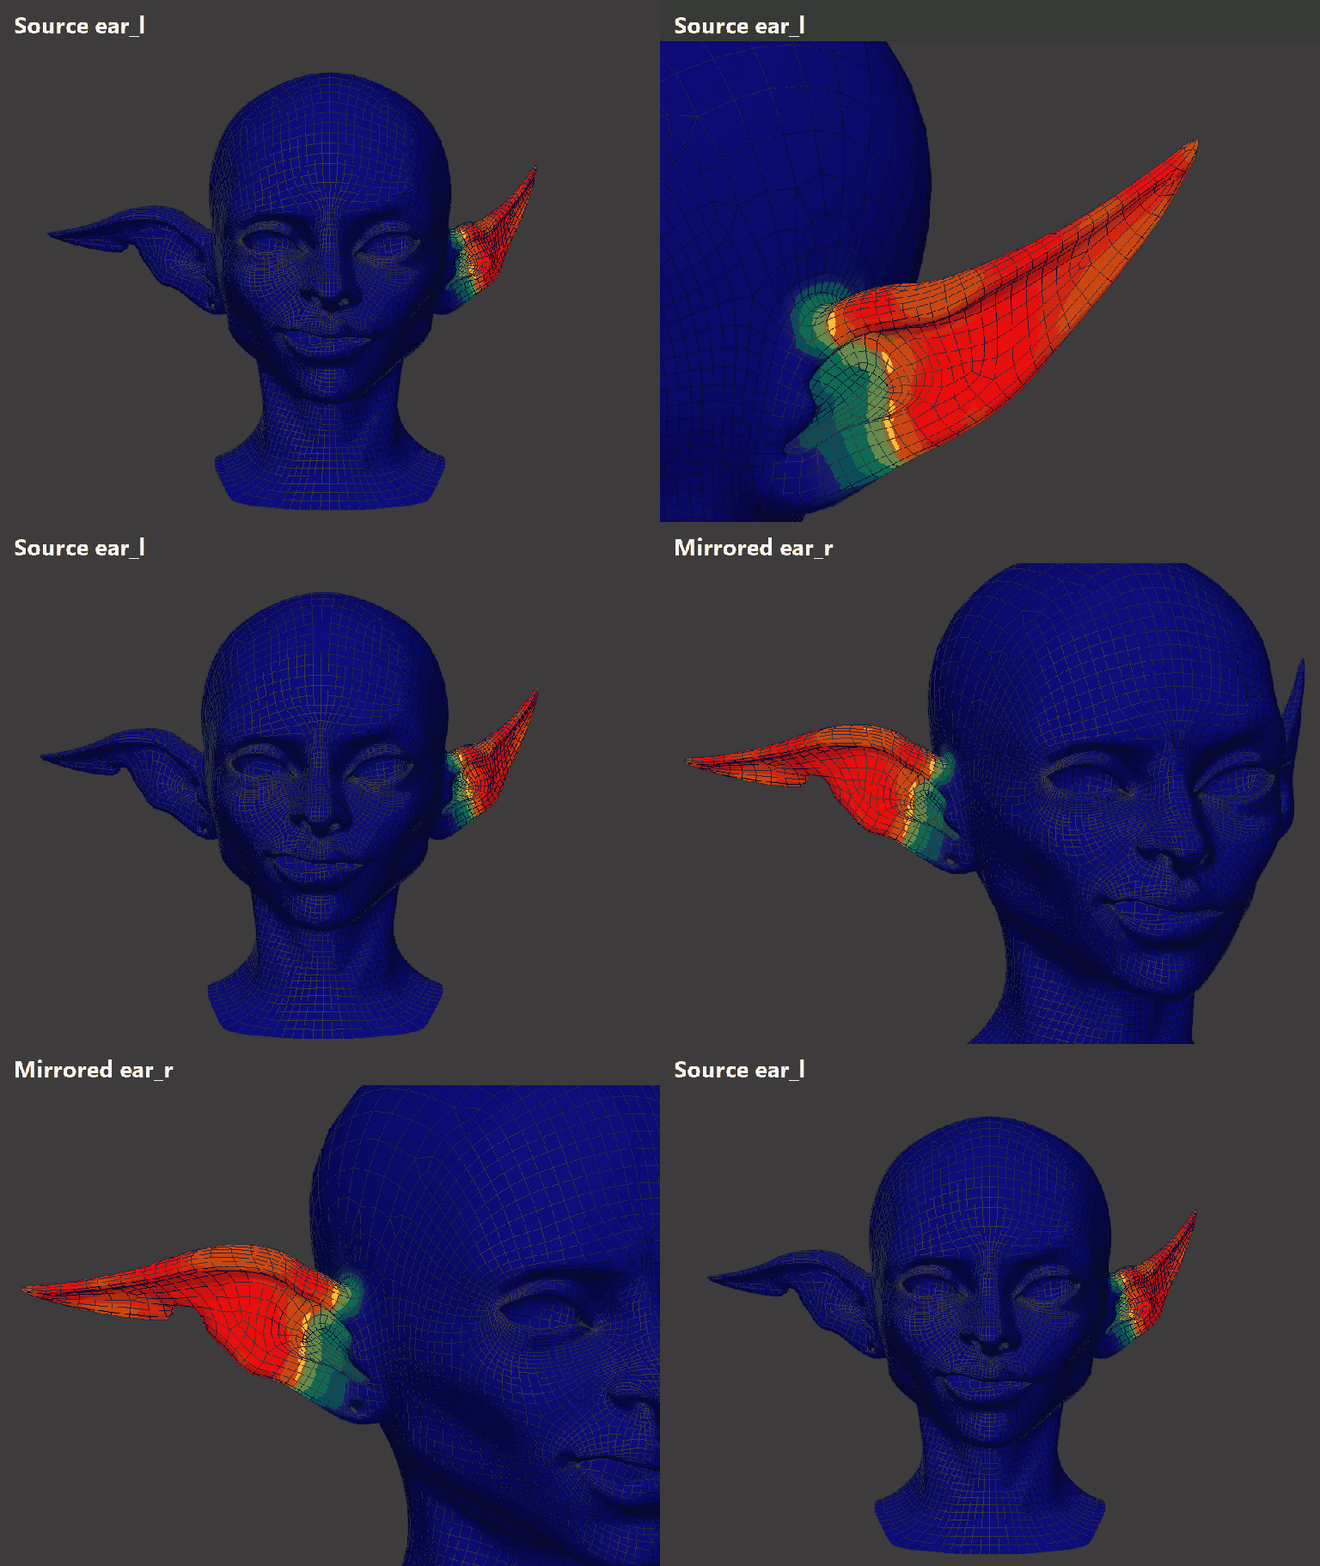
Weight interpolation is enabled by default, so the transferred weights blend smoothly around the ear’s cut and hole.
Symmetrize weights within one group
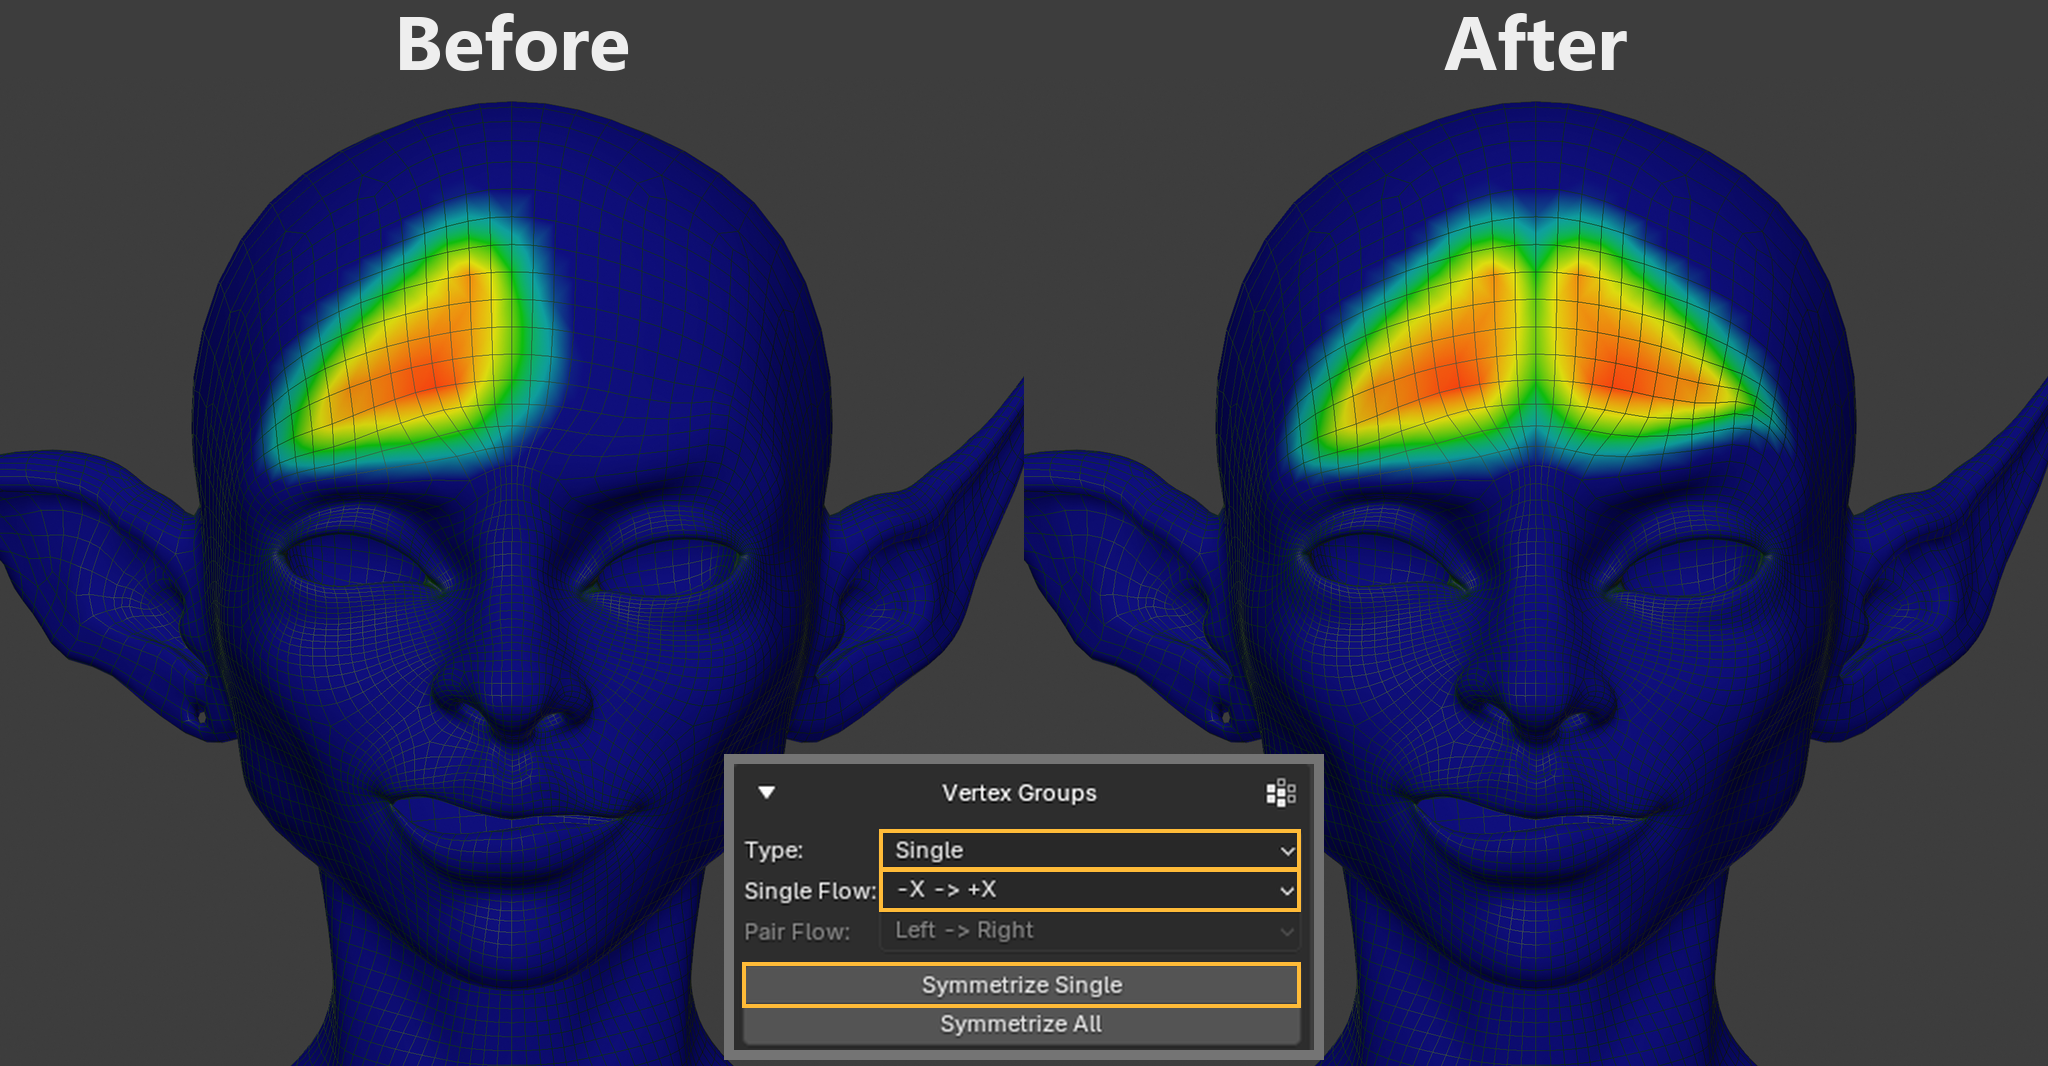
For forehead, set Type to Single and Single Flow to −X → +X, then click Symmetrize Single. This copies the painted side across the X axis within the same vertex group.
Batch processing
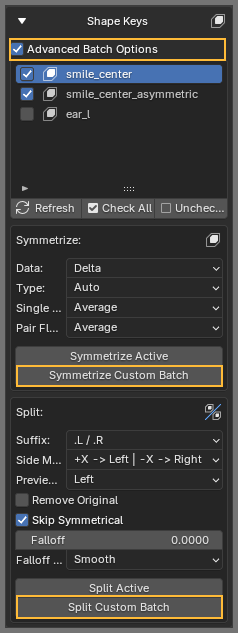
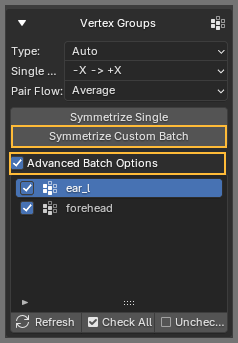
Use Symmetrize All for shape keys or vertex groups, or Split All for shape keys. To choose a subset, turn on Advanced Batch Options, click Refresh to load the list, and check the items you want to process.
Shape keys
Use Symmetrize Custom Batch to mirror the checked keys or Split Custom Batch to create left and right versions of them. In Auto mode, symmetrization recognizes side names like ear_l and treats the other keys as single shapes.
Vertex groups
Check the vertex groups to process and click Symmetrize Custom Batch. With Auto, a single batch can mirror a paired group such as ear_l and symmetrize an unpaired group such as forehead.
Symmetrize UV maps
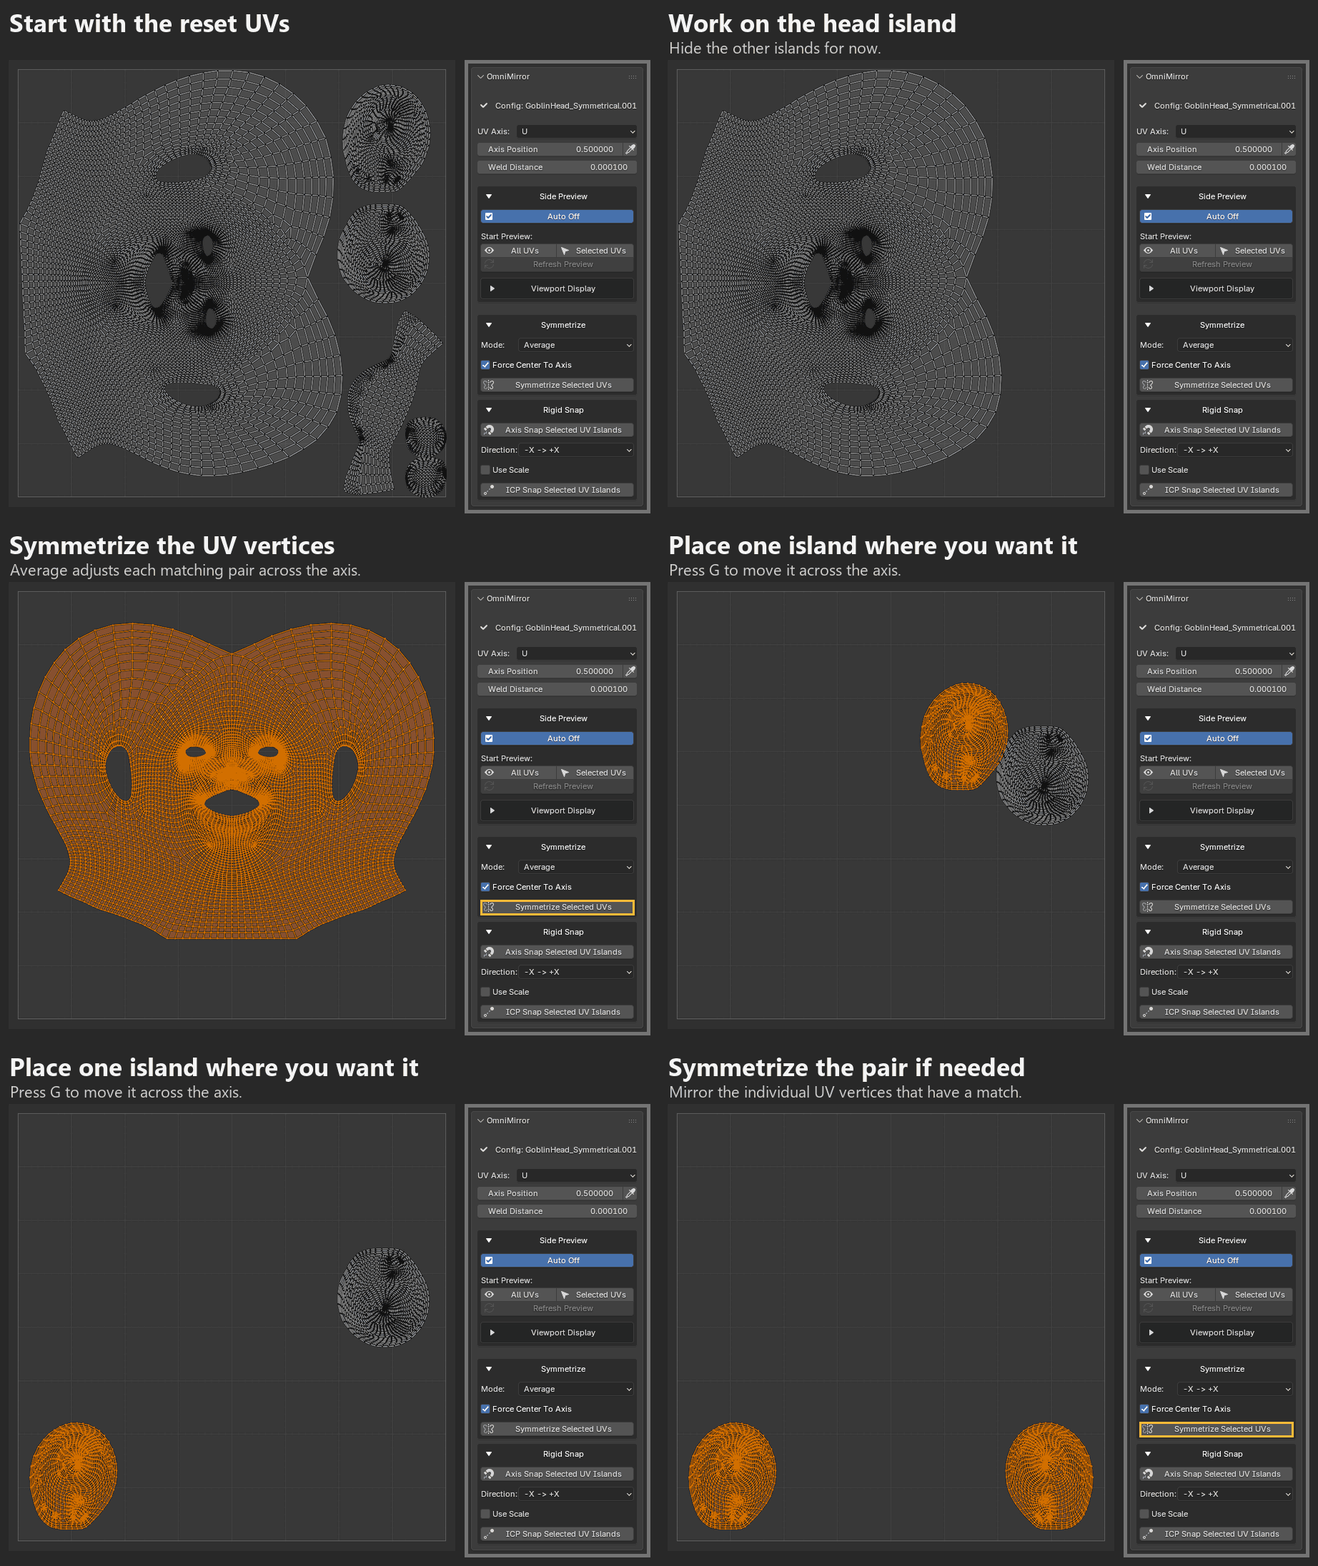
Check the sides with Side Preview so you know which UVs belong to each side and where the center vertices are.
Axis Snap uses the center vertices to align the entire head island as one piece. Then use Symmetrize Selected UVs in Average mode to adjust the matching UV vertices individually.
Place one ear island where you want it and select both. ICP Snap moves its counterpart into the mirrored position. With Use Scale off, it keeps the island’s shape and size. If needed, use Symmetrize Selected UVs to mirror the matching UV vertices.
Support
If you have a question, start with the FAQ. If you still need help or would like to share feedback, email me at [email protected].
