Onemat — Reduce Draw Calls, Simplify Assets, Improve Performance
 Brighter's Studio


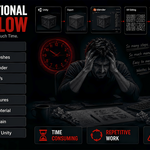
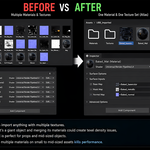
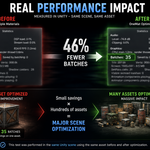
OneMat
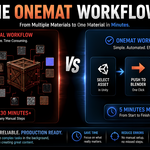
Reduce Draw Calls by Combining Multiple Materials Into One
Documentation & User Guide
Package Contents
OneMat_Unity.cs
OneMat_Blender.zip
README.pdf
Quick Start
1. Install the Unity Bridge
Open your Unity project.
Create an Editor folder if you do not already have one.
Drag OneMat_Unity.cs into the Editor folder.
Wait for Unity to finish compiling.
A new menu will appear under:
Tools → OneMat
2. Install the Blender Addon
Open Blender.
Go to Edit → Preferences → Add-ons.
Click Install.
Select OneMat_Blender.zip.
Enable the addon.
The addon panel can be found under:
3D View → Sidebar → OneMat
3. Send Your Objects From Unity
Return to Unity.
Select the GameObjects you want to combine.
Open Tools → OneMat.
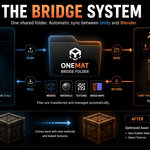
Choose a folder to use as the Bridge Folder.
Click Push To Blender.
OneMat exports the selected meshes, materials, and textures to the Bridge Folder.
4. Load the Assets in Blender
Open Blender.
Open the OneMat panel.
Set the same Bridge Folder used in Unity.
Click Load Unity Assets.
Your selected Unity objects will now appear in Blender.
Note: Imported Unity objects are intentionally transform-locked to preserve synchronization with Unity.
5. Choose a Workflow Mode
Fast Mode
Use Fast Mode if you want the quickest possible workflow. OneMat automatically handles:
UV names
Texture names
Material names
Manual Mode
Use Manual Mode if you want custom naming for:
UV Maps
Textures
Materials
6. Generate and Pack UVs
Fast Mode
Click Pack UV.
Manual Mode
Click Generate UVs.
A UV Editor window will open. Using Blender's UV tools or your preferred UV packing addon:
Select all UV islands.
Pack the islands.
Close the UV window.
7. Bake the Atlas
Before You Bake
Make sure:
Your objects are selected.
A bake UV has been generated and packed.
At least one bake type is selected.
Supported Bake Types
Base Color
Normal
Metallic
Roughness
Emission
Only selected bake types will be included in the final material.
Resolution Guide
| Resolution | Recommended Use |
|---|---|
| 1024 | Small props |
| 2048 | Recommended for most assets |
| 4096 | Large hero assets |
| 8192 | Use only when necessary |
Execution
Choose a texture resolution.
Select the maps you want to bake.
Click Bake + Auto-Assign.
OneMat will automatically:
Bake the selected maps
Create atlas textures
Create a new material
Connect the baked textures
Assign the new material to all selected objects
After the bake finishes, your mesh is fully optimized and uses a single material.
8. Send the Result Back to Unity
In Blender, click:
Push To Unity
Your Blender work is now complete.
9. Import the Optimized Asset in Unity
Return to Unity.
Open Tools → OneMat.
Click Pull From Blender.
OneMat automatically imports:
The optimized mesh
The baked textures
The new material
The optimized version will appear in the same location as the original object.
Additional Notes
Hover your mouse over any button to view a quick tooltip.
The tool is designed to be self-explanatory and beginner-friendly.
Support
Developed By
Brighters Studio
-
$14.99
-
$29.99
Have questions about this product?
Login to message
| Published | 3 months ago |
| Blender Version | 4.0 - 5.0 |
| Extension Type | N/A |
| Render Engine Used | Cycles, Eevee |
| License | GPL |
Discover more products like this
autobake Material Merge optimization game ready unity-bridge bake materials onemat simplebake texture atlas uv packing Cycles Bake texture-baker unity