 BlenddON


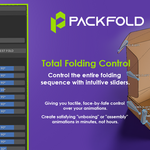
PACKFOLD
User Guide
From 2D packaging dieline to foldable, animated 3D packaging in Blender
Version 1.0 | Prepared from the published PackFold product description
1. Welcome to PackFold
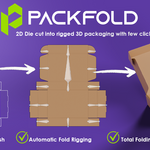
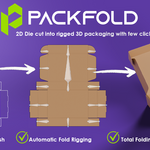
PackFold is a Blender add-on for turning 2D packaging dielines into controllable 3D packaging. It is intended for packaging designers, 3D artists, CGI artists, and visualization workflows involving folding cartons, display boxes, shippers, and other paperboard packaging.
The goal is to reduce repetitive manual work such as rebuilding panels, setting up a folding armature, weighting geometry, posing panels, and positioning artwork. PackFold brings dieline conversion, folding, panel curvature, and presentation options into one workflow.
What you can do
· Convert a 2D DXF dieline into a 3D mesh.
· Generate a folding armature from a selected face.
· Control individual panel folds with sliders and keyframe them.
· Add non-destructive curvature to selected panels.
· Add thickness and bevels for more convincing edge highlights.
· Fit artwork to the generated dieline and apply a corrugated-cardboard texture where appropriate.
2. Before you begin
The product listing currently identifies Blender 5.0–5.2 as supported. Check the latest listing or the download package for updated compatibility information before installing or opening a project.
Prepare your dieline
· Export or obtain the packaging dieline as a DXF file.
· Check that cut lines, fold/crease lines, slits, and lock details are clearly represented.
· Remove duplicate or unnecessary geometry where possible.
· Keep a copy of the original 2D file so you can return to it if the source needs correction.
· Confirm the intended physical dimensions and units before building the 3D package.
Tip: DXF files can differ in how they represent layers, line types, scale, and units. If the result looks incorrect, inspect the source file and import settings before adjusting the 3D model.
3. Typical workflow
1. Import — Bring the 2D DXF dieline into Blender using the PackFold workflow.
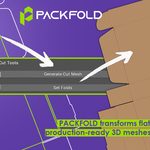
2. Generate — Use the Cutting Dieline tools to create the 3D mesh. Review the mesh and any cut-through, slit, or lock details.
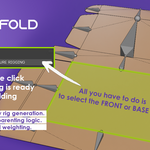
3. Build the folding rig — Select a suitable face/panel and run the Folding System. PackFold uses the connected panel structure to generate the folding armature.
4. Fold and pose — Use Fold Mode sliders to open, close, and position individual panels. Apply the full-fold or rest-fold presets when useful.
5. Curve panels — Select a panel and adjust its curvature value and direction if the package needs a curved or stylized surface.
6. Finish the model — Adjust thickness and bevel settings. Fit artwork and apply the corrugated texture when suitable.
7. Animate — Keyframe the folding controls to create assembly, opening, closing, or reveal animations.
8. Render — Set up materials, lighting, camera, and render settings in Blender for the final visualization.
4. Module reference
4.1 Cutting Dieline
Purpose: convert the 2D dieline into clean 3D geometry ready for folding.
· DXF-to-mesh conversion.
· Adjustable mesh subdivision.
· Fold placement controls.
· Support for slit/lock cuts and one-line cut-through details.
· Adjustable slit thickness.
Recommended practice: inspect the generated mesh before rigging. Pay special attention to panel boundaries, narrow tabs, slots, and small details.
4.2 Folding System
Purpose: automatically create a folding armature from the panel structure. The published workflow describes selecting one face to generate the rig, with panel relationships and hierarchy handled by the add-on.
· Choose a clear, representative panel face before generating the rig.
· Review the resulting hierarchy and panel relationships.
· If the rig does not behave as expected, check for disconnected panels, overlapping geometry, or incorrect fold lines.
· Use the reset/regeneration option if you need to rebuild the folding setup.
4.3 Fold Mode
Purpose: control the folding state of individual panels after a rig has been created.
· Adjust per-panel fold sliders to open, close, or position the package.
· Use the full Folding and Rest Fold presets as starting points.
· Keyframe controls to create animated assembly and reveal sequences.
· Return the package to a flat state when needed.
Animation tip: set the timeline to the desired frame, adjust the relevant fold controls, insert keyframes using the method supported by the current add-on UI, then repeat at later frames. Preview the motion and refine timing in Blender.
4.4 Panel Curver
Purpose: apply non-destructive curvature to a selected panel without permanently rebuilding the base geometry.
· Select the panel to curve.
· Adjust the curve amount, using positive or negative values as needed.
· Choose horizontal or vertical curvature direction.
· Edit or remove the curvature later if the design changes.
Use this for curved top locks, rounded carton forms, display structures, or stylized product shots.
4.5 Extra Options
Thickness
Adds visible board thickness to help the package read as paperboard or cardboard. Choose a value appropriate to the scale and intended stock.
Bevel
Adds adjustable edge bevels and segments for highlights. Keep bevels subtle when the goal is to represent a real printed carton.
Auto Artwork Fitting
Fits artwork to the generated dieline to reduce manual UV and placement work. Review alignment, orientation, seams, and panel mapping before final rendering.
Corrugated Cardboard Texture
Applies a corrugated-cardboard texture designed to fit shipper/corrugated geometry. Check texture scale and direction at the final camera distance.
5. Tips for better results
· Start with a clean, correctly scaled DXF.
· Verify cut and fold information before generating the mesh.
· Use simple test geometry first if you are learning the workflow.
· Generate the folding rig only after checking that panels connect as intended.
· Test fold controls before adding final artwork and detailed materials.
· Use restrained thickness and bevel settings so the model remains believable at its real-world scale.
· Check artwork placement on every panel, especially glue flaps, narrow side panels, and areas near cuts.
· Save a new project version before major rig regeneration or geometry changes.
6. Troubleshooting
DXF imports at the wrong size — Check the source file's units and scale, then confirm the import workflow's unit assumptions. Avoid compensating with arbitrary scaling until you know the intended dimensions.
Mesh is incomplete or messy — Inspect the DXF for duplicate lines, open contours, overlapping segments, or unclear cut/fold definitions. Simplify or correct the source and regenerate.
A panel does not fold correctly — Check panel connectivity, the selected face, and the location of fold lines. If needed, reset and regenerate the folding rig after correcting the mesh.
Slits or locks look wrong — Review the source geometry and the relevant slit/lock or cut-through settings. Very narrow features may need source cleanup or adjusted thickness.
Artwork is misaligned — Verify dieline scale and panel mapping. Inspect UV orientation and artwork alignment across folds, seams, and flaps.
Curvature looks unexpected — Try a smaller curve value and test horizontal versus vertical direction. Confirm the selected panel is the intended one.
Corrugated texture looks stretched — Check object scale and texture scale, and review the direction of the corrugation relative to the package panels.
Animation pops or folds oddly — Review keyframes, panel relationships, and fold values across the timeline. Test one panel at a time to isolate the problem.
7. Suggested production workflow
· Keep the original DXF and any source artwork in the project folder.
· Save a working version after mesh generation and another after rig generation.
· Use descriptive names for the dieline, mesh, armature, artwork, and materials.
· Test the complete fold animation using a simple material before final shading.
· For print-related work, verify the dieline and dimensions against the approved production file; PackFold is a visualization/modeling aid, not a substitute for production preflight.
· Before delivery, check the model at both flat and assembled states, including artwork, edges, and any slots or tabs.
8. Quick reference
|
Module |
Main purpose |
|
Cutting Dieline |
Convert DXF dielines into 3D mesh |
|
Folding System |
Generate the folding armature |
|
Fold Mode |
Control and animate panel folding |
|
Panel Curver |
Add editable, non-destructive panel curvature |
|
Thickness / Bevel |
Improve board thickness and edge highlights |
|
Auto Artwork Fitting |
Fit artwork to the package |
|
Corrugated Texture |
Add corrugated-cardboard surface detail |
9. Support and product information
Product page: PackFold on Superhive
The product page currently lists Blender 5.0–5.2. Refer to the current product listing and the included package notes for the latest supported versions and exact UI labels.
This guide was prepared from the publicly visible PackFold product description. Because the actual add-on interface and release package were not provided, button names, installation steps, and version-specific details should be checked against the installed build before publishing this as final official documentation.
Have questions about this product?
Login to message

Discover more products like this
paperboard-packaging procedural modeling parametric modeling packaging mockup Packaging Design print-production folding-carton packaging-design-tool cut-and-fold box-design structural-packaging carton-design Box Modeling packaging-visualization packaging dieline packaging-automation packaging-engineering 3D packaging packaging-prototype box-template Corrugated Box box-generator blender addon dxf import