Pbr Texture Loader
 MarkoPetrush


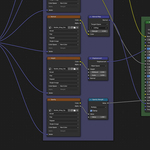
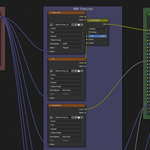
PBR Texture Loader - Documentation
Thank you for purchasing the PBR Texture Loader! This guide will walk you through everything you need to know to get the most out of this time-saving add-on.
1. Installation
Installing the add-on is a standard Blender process:
- Go to
Edit>Preferences>Add-ons. - Click the Install... button at the top.
- Navigate to where you saved the PBR_Texture_Loader.zip file and select it.
- Enable the add-on by ticking the checkbox next to its name.
The add-on panel will now appear in the 3D Viewport. Press the N key to open the sidebar and look for the "PBR Loader" tab.
2. Quick Start Guide
Want to create a material in seconds? Here’s the fastest way:
- Select Your Object: In the 3D Viewport, select the object you want to apply the material to.
-
Select Texture Folder: In the add-on panel, click the
Select Texture Folderbutton and navigate to the folder that contains your PBR texture maps. -
Click Create/Update: Click the
Create/Update Materialbutton.
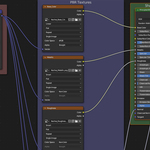
That's it! The add-on will automatically create a new material, build the entire node tree, and connect all the recognized texture maps.
3. User Interface (UI) Explained
Here is a breakdown of each setting in the add-on panel:
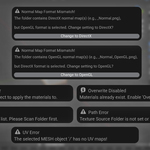
- Select Texture Folder: This button opens Blender's file browser, allowing you to choose the folder containing your textures.
-
Overwrite Existing Materials:
- Checked: If your selected object already has a material, the add-on will replace it.
- Unchecked: The add-on will create a new material and add it to a new material slot on the object.
-
Normal Map Format (OpenGL / DirectX):
- OpenGL (Default): Use this for rendering directly in Blender (Eevee & Cycles).
- DirectX: Use this if your Normal Map was baked for game engines like Unreal Engine.
-
Use Height Map:
- Checked: Enables the displacement setup for true geometry displacement (Cycles) or bump (Eevee).
- Bump Strength: Controls the intensity of the Bump node.
- Displacement Strength: Controls the scale of the Displacement node.
- Create/Update Material: The main button that runs the script.
- Log Messages: Provides real-time feedback on which textures were found.
4. Texture Naming Convention (Very Important!)
- The texture type identifier (e.g.,
_BaseColor) must be at the very end of the filename. - All textures for a single material must share the exact same name before the suffix.
Example of How Grouping Works:
| ✔ CORRECT (Creates ONE material) Nachos_Base_Color.png Nachos_Roughness.png Nachos_Normal.png | ✘ INCORRECT (Creates TWO materials) Nachos_Base_Color.png Potato_Chip_Roughness.png |
Full List of Available Suffixes:
| Map Type | Supported Suffixes |
|---|---|
| Base_Color |
_BaseColor_Base_Color_Albedo_Diffuse_Color
|
| Metallic |
_Metallic_Metalness_Metal
|
| Roughness | _Roughness |
| Glossiness |
_Glossiness_Gloss_Glossy
|
| Specular | _Specular |
| Reflection |
_Reflection_Reflect
|
| Normal |
_Normal_Nrm
|
| Normal_OpenGL | _Normal_OpenGL |
| Height |
_Height_Displacement_Disp_Bump
|
| AO |
_AO_AmbientOcclusion
|
| Opacity |
_Opacity_Transparency_Alpha
|
| Emissive |
_Emissive_Emission_Emit
|
| IOR |
_IOR_IndexOfRefraction
|
| Transmission | _Transmission |
| Subsurface_Color |
_SubsurfaceColor_Subsurface_Color_SSSColor_SSS
|
| Clearcoat | _Clearcoat |
| Clearcoat_Roughness |
_ClearcoatRoughness_Clearcoat_Roughness
|
| Sheen | _Sheen |
| Sheen_Tint |
_SheenTint_Sheen_Tint
|
| Anisotropy | _Anisotropy |
| Anisotropy_Rotation |
_AnisotropyRotation_AnisotropicRotation
|
| Thickness | _Thickness |
5. Troubleshooting & FAQ
-
Q: I clicked the button, but nothing happened.
A: Make sure you have an object selected in the 3D Viewport. The add-on needs an active object to apply the material to. Also, check for any pop-up error messages. -
Q: Some of my textures are not loading.
A: Double-check your filenames against the "Supported Texture Naming" section above. This is the most common issue. -
Q: My model looks strange or has incorrect shadows.
A: This is likely a Normal Map issue. Try switching the `Normal Map Format` between OpenGL and DirectX. -
Q: I don't see any displacement on my model.
A: True displacement only works in the Cycles render engine and requires your object to have enough vertices. Try adding a `Subdivision Surface` modifier.
6. Contact & Support
If you encounter a bug or need any help, please contact us through the platform where you purchased the add-on. We are committed to providing dedicated customer support.
Thank you again for your support!
Have questions about this product?
Login to message
| Published | over 1 year ago |
| Blender Version | 4.1 - 4.5 |
| Extension Type | N/A |
| Render Engine Used | Cycles, Eevee |
| License | GPL |