 CGMatter
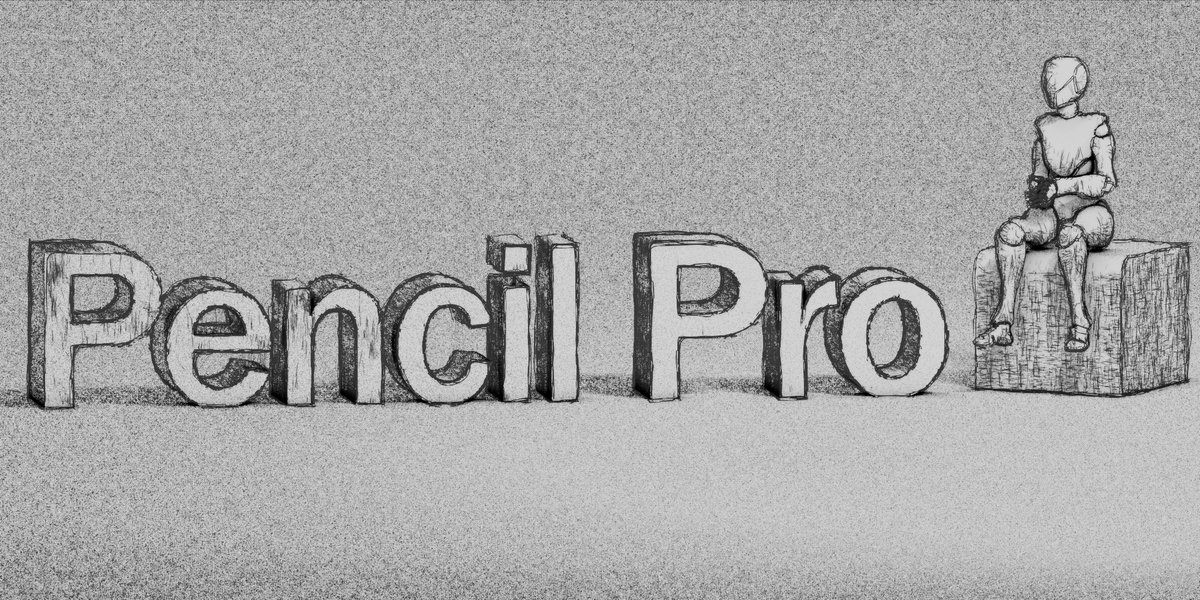


Pencil Pro is the most sophisticated drawing emulator - period.
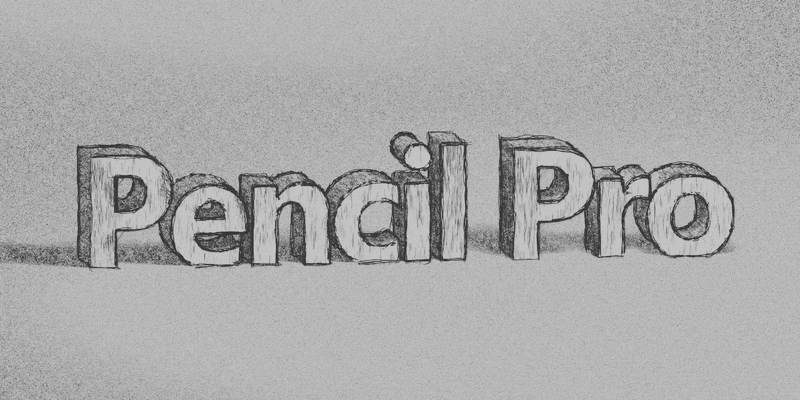
Unlike other converters (which essentially use a simple material trick), Pencil Pro is far more detailed and realistic. It achieves this by simulating how someone would actually draw!

Where should the pencil strokes be? In which direction? How hard should the pencil be pressed? How will cross-hatching work? What about shading? Where is detailed needed/omitted?
Pencil Pro handles all of these decisions. And oh ya... it can do this uniquely for every single frame completely on the fly!
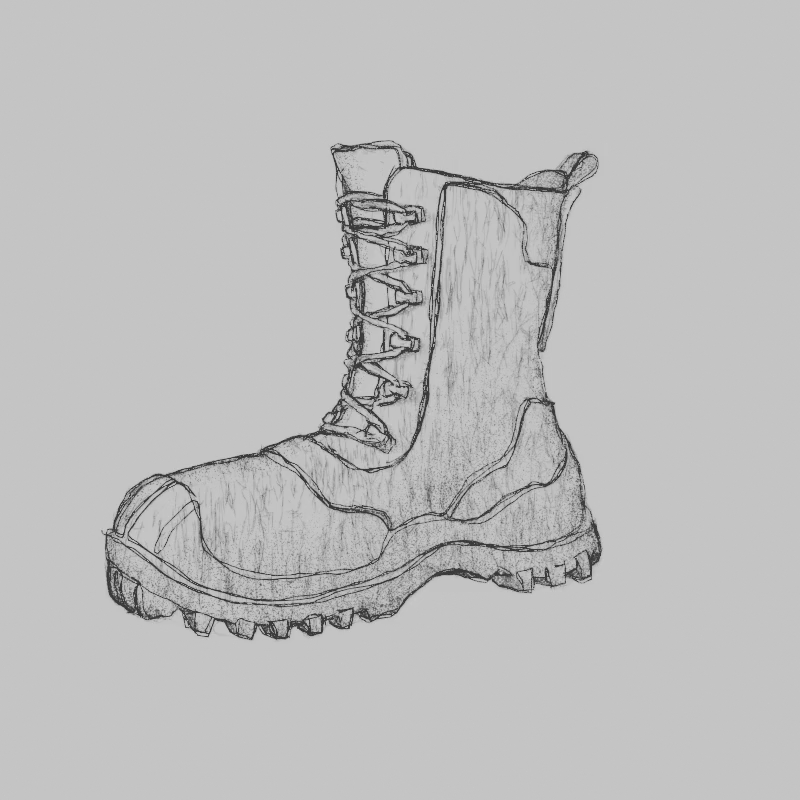
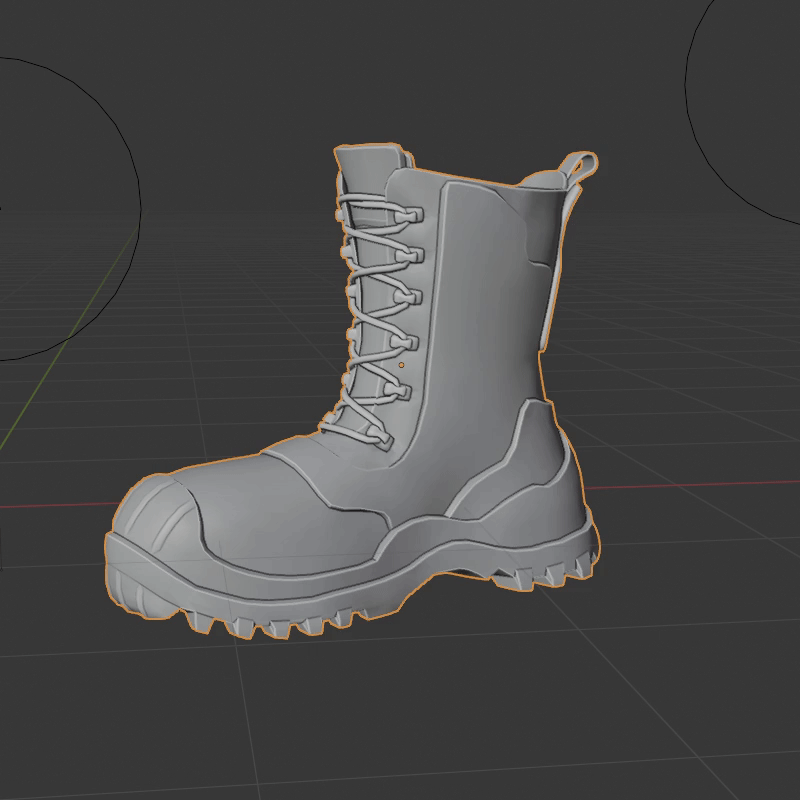
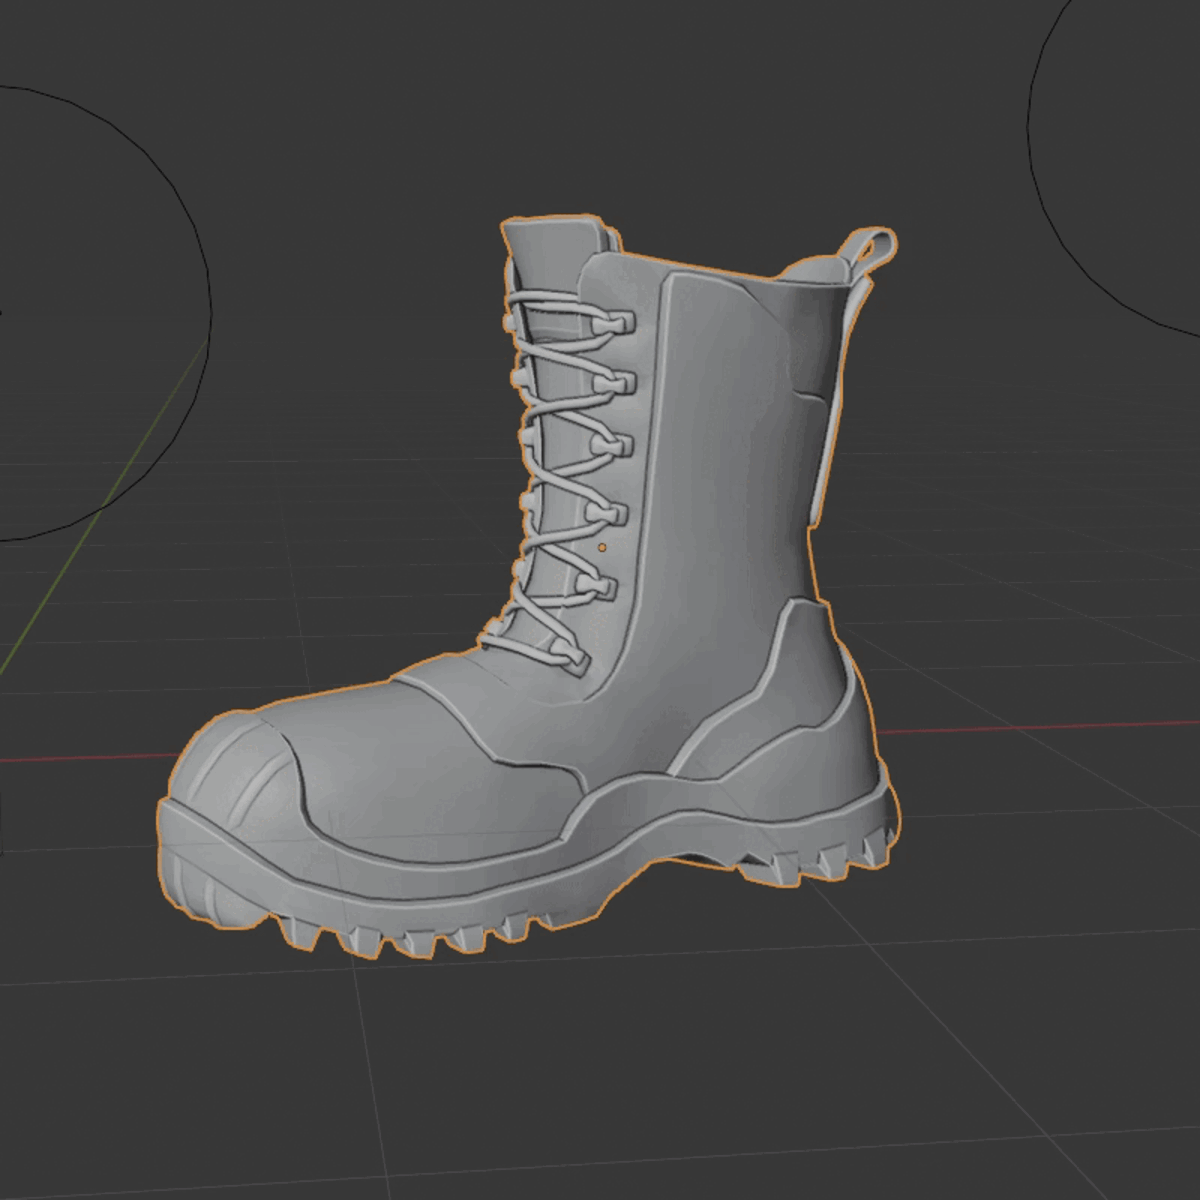
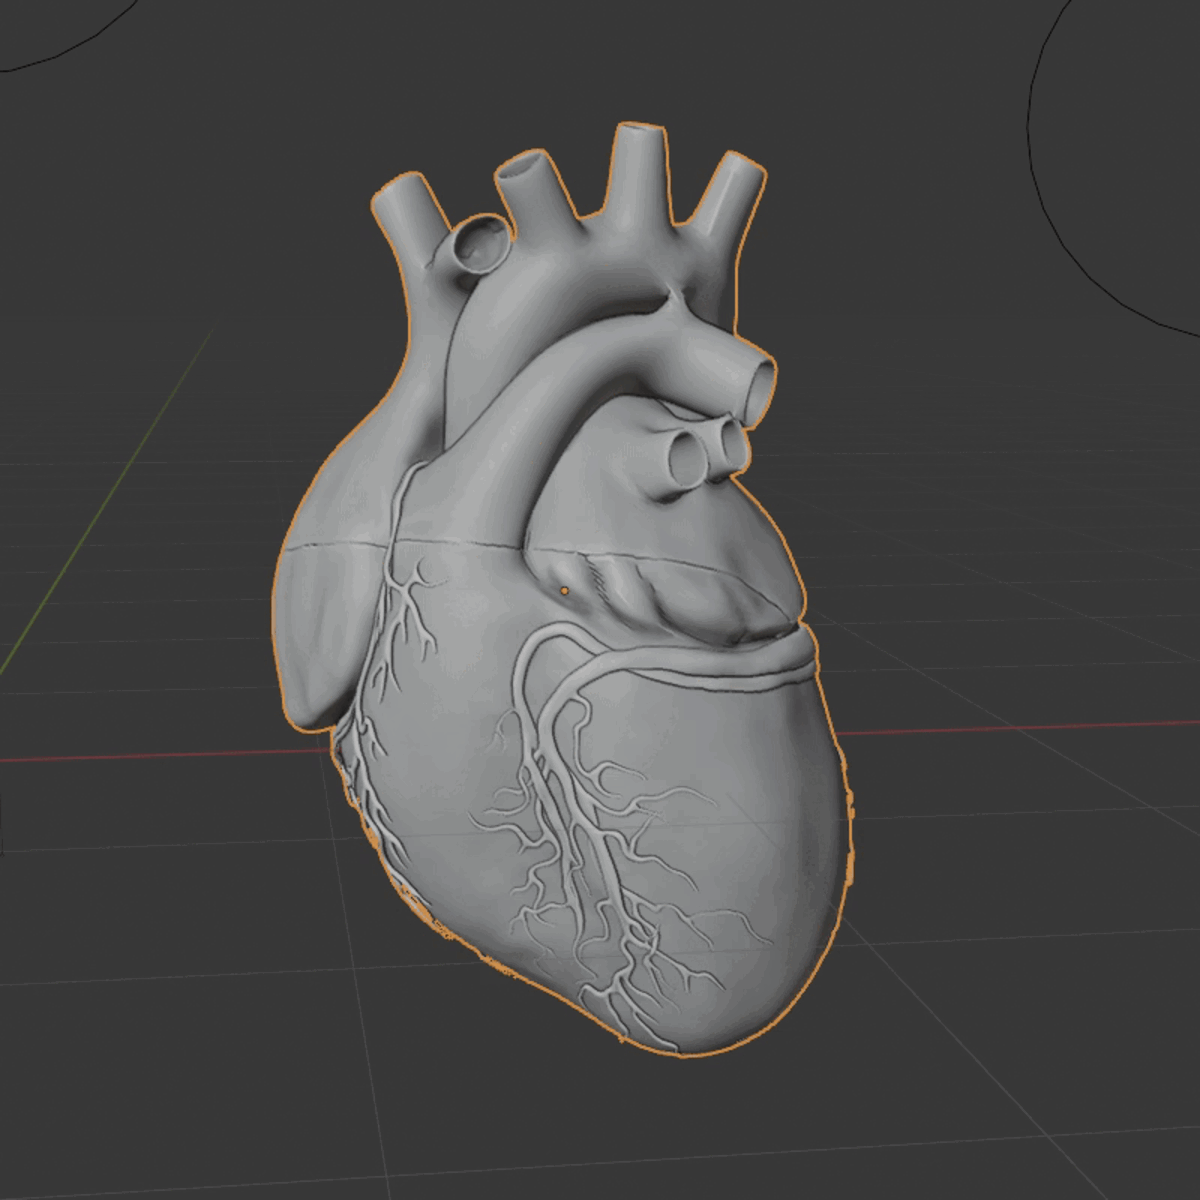
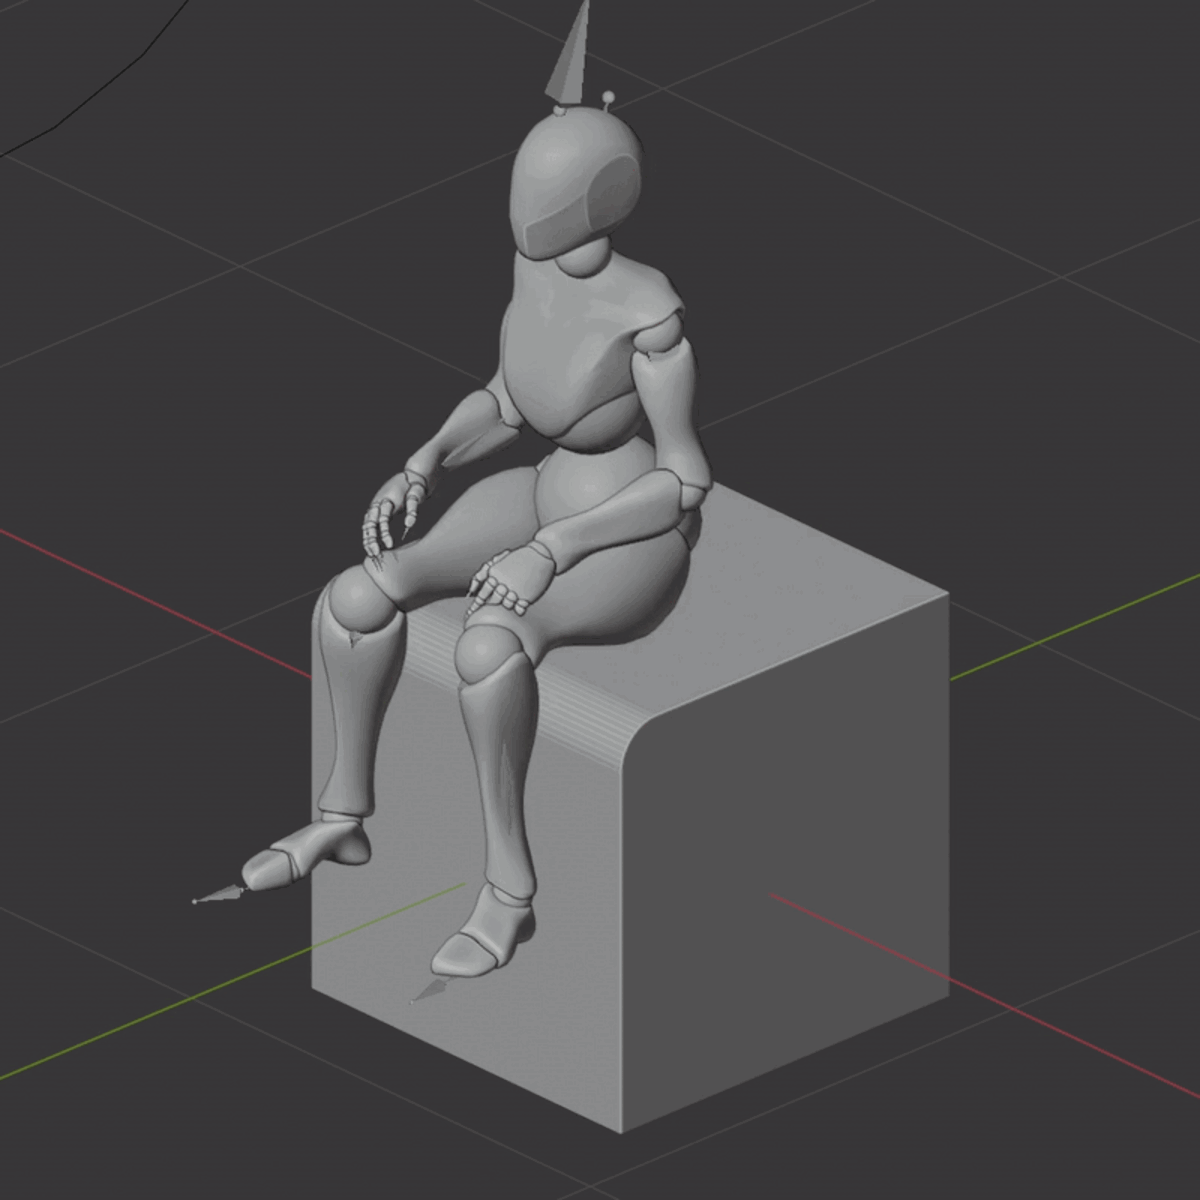
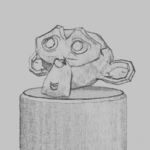
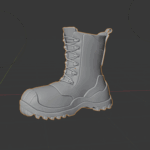
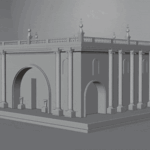
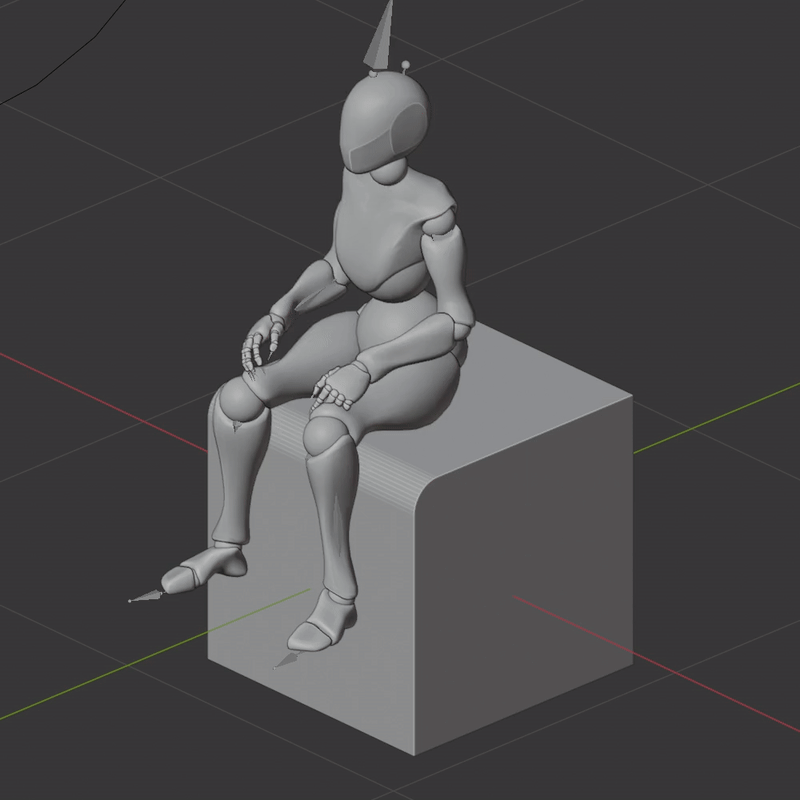
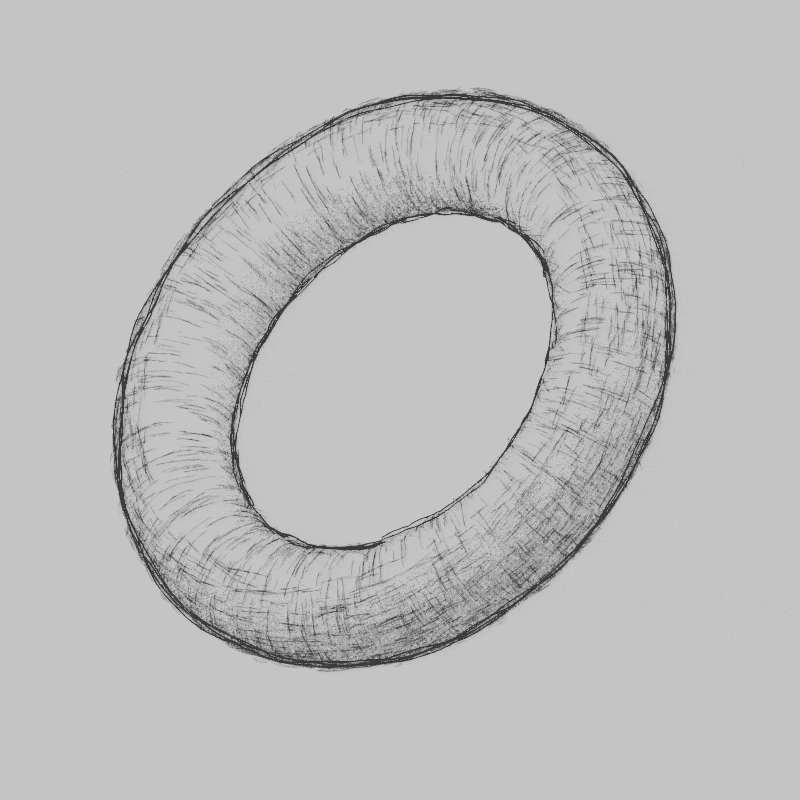
Works with larger objects as well :)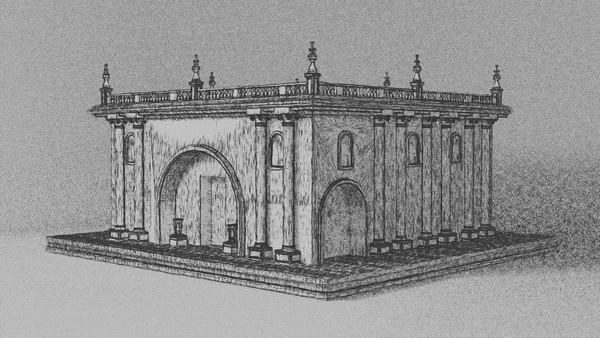
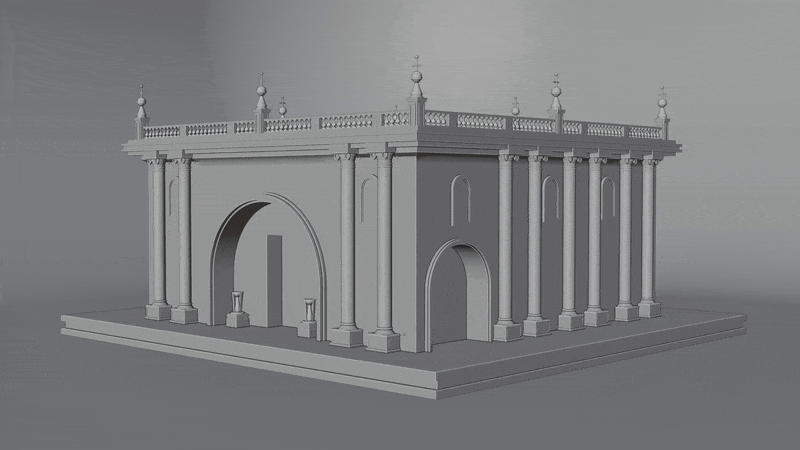
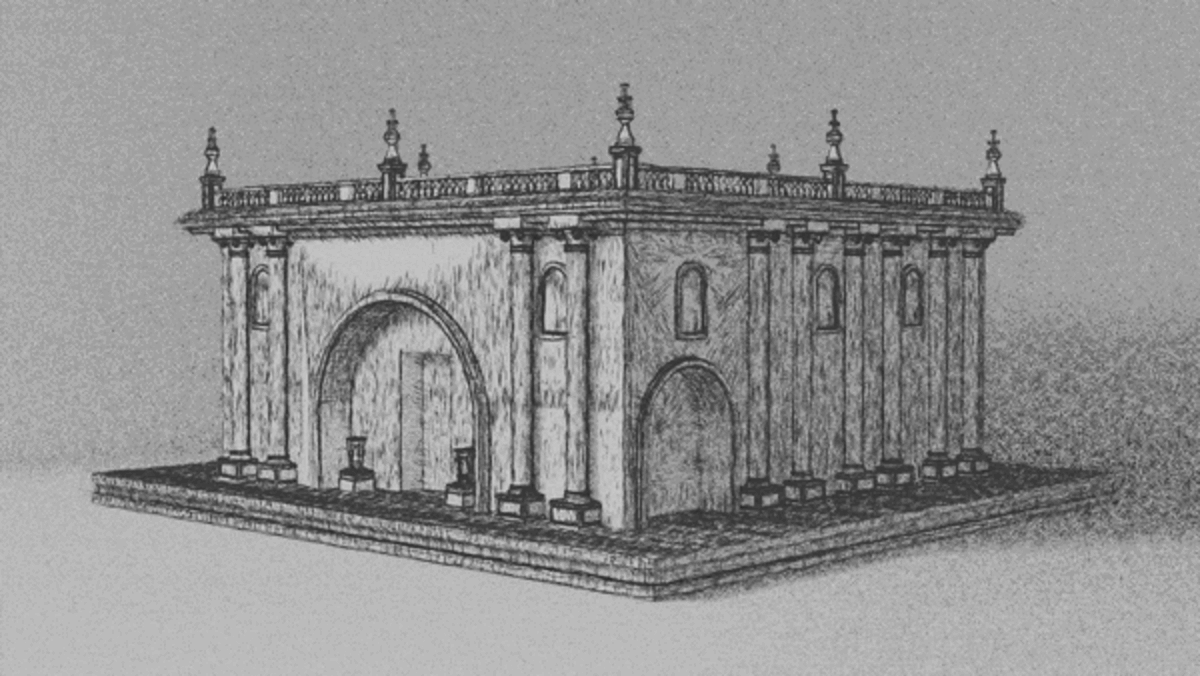
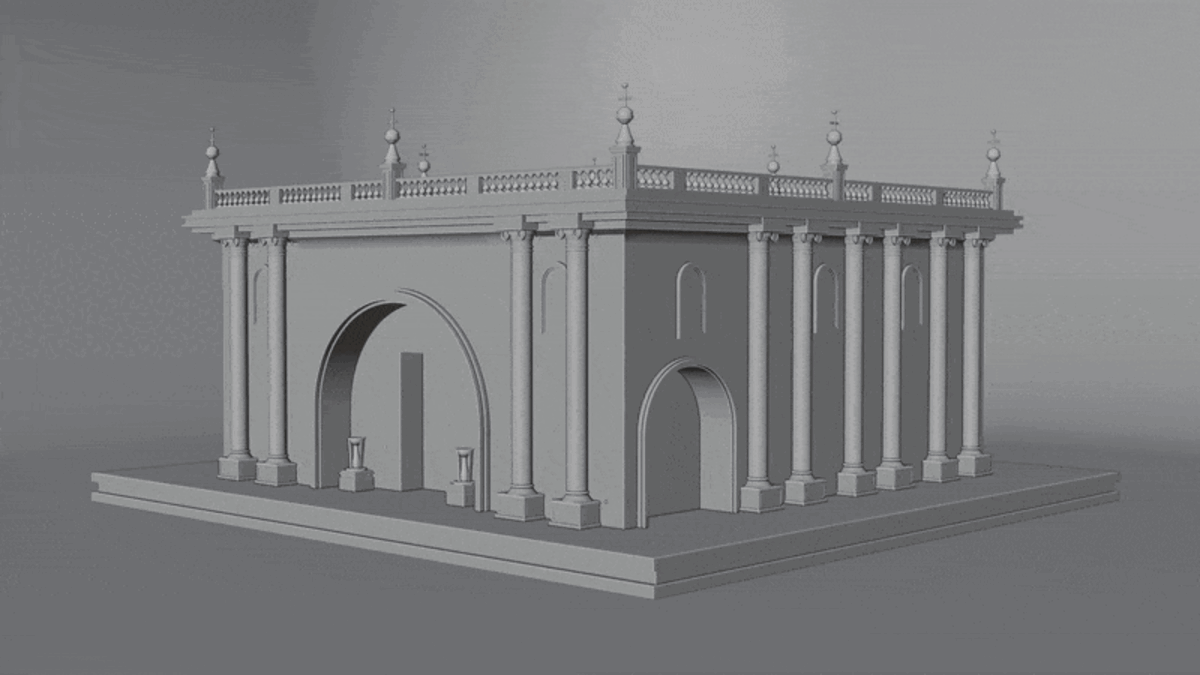
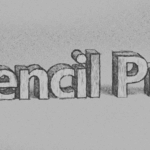
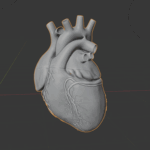
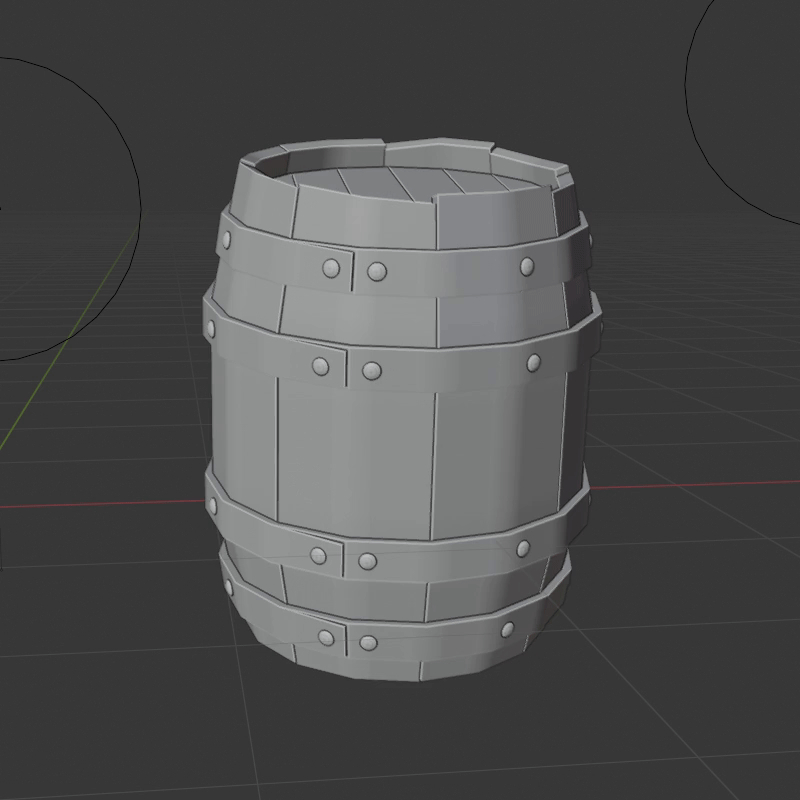
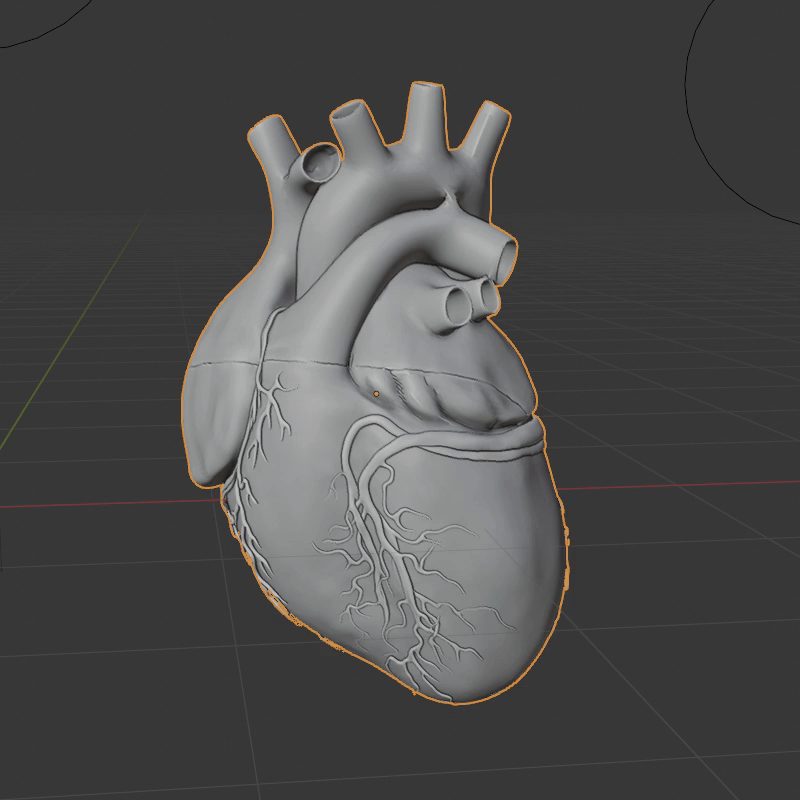
This one is just to gloat...
What's The Secret
The secret that set's Pencil Pro apart from the typical smudgy charcoal product is threefold:
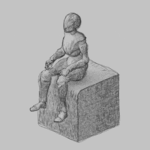
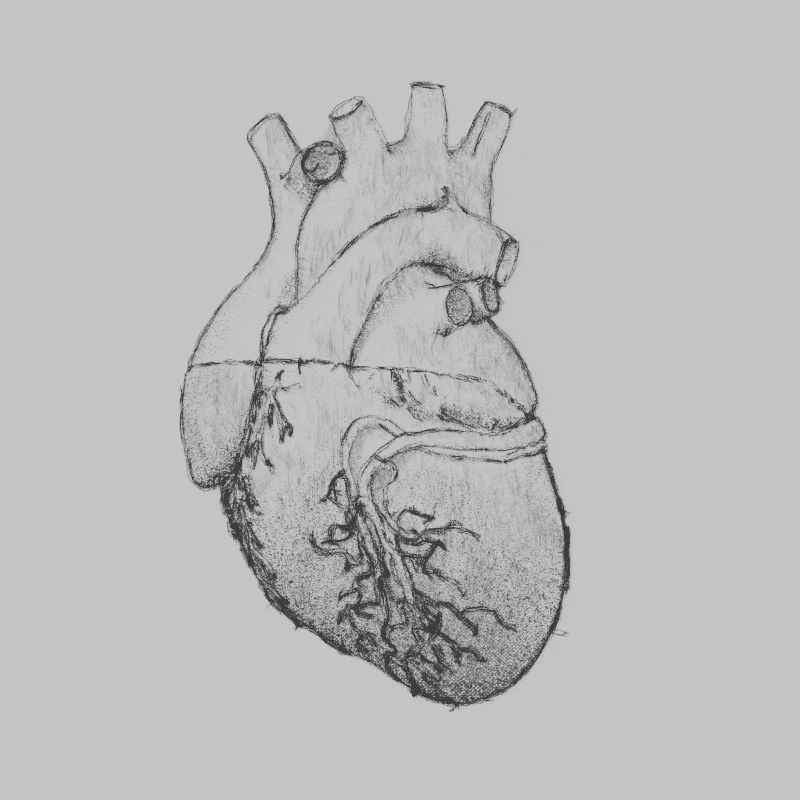
1) Believable drawings come from the combination of shading and general pencil strokes. Pencil Pro accounts for both these passes:
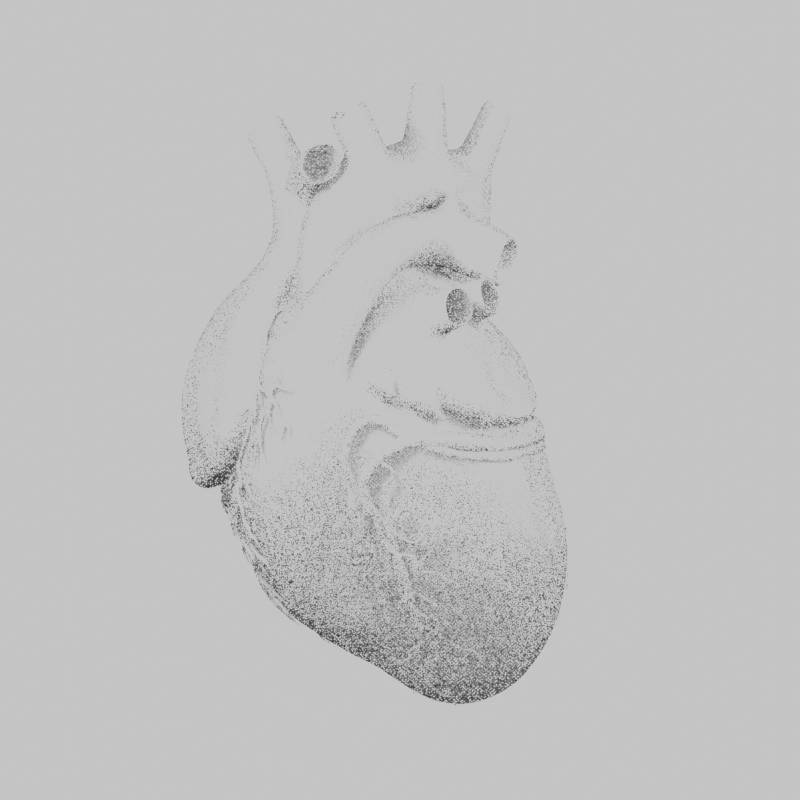 +
+  =
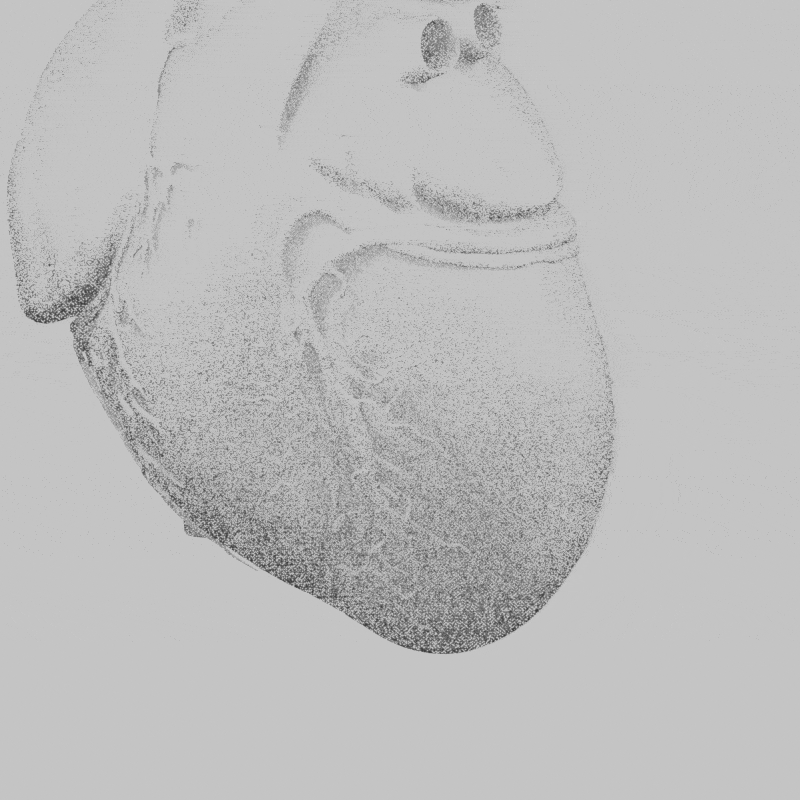
= 
2) A real drawing is drawn in screen-space! It's that iconic '2D look' that isn't just grunge on a 3D mesh. Pencil Pro uses screen coordinates. A bonus of this approach is you never run out of shading detail - zoom away!
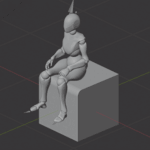
3) Pencil strokes should generally follow the curvature of the object. Pencil Pro looks at the actual edge flow to approximate this (here is an exaggerated example):
Here are all 3 principles at once:

There are many benefits to this approach so I put together a rapid-fire FAQ.
Does it work on any mesh?
Yes.
What if the mesh is animated?
Yep.
Multiple objects at once?
Yes.
Is it fully procedural?
Yessir.
Can I tweak the settings for a new look?
Yes.
No UVs needed?
Correct.
With any lighting?
Yes.
Should I buy Pencil Pro?
Ya.

How To Use
At a simple level Pencil Pro is as easy as choosing a target collection and hitting a single button. However for artistic control and a more full understanding please watch this video:
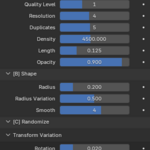
Settings
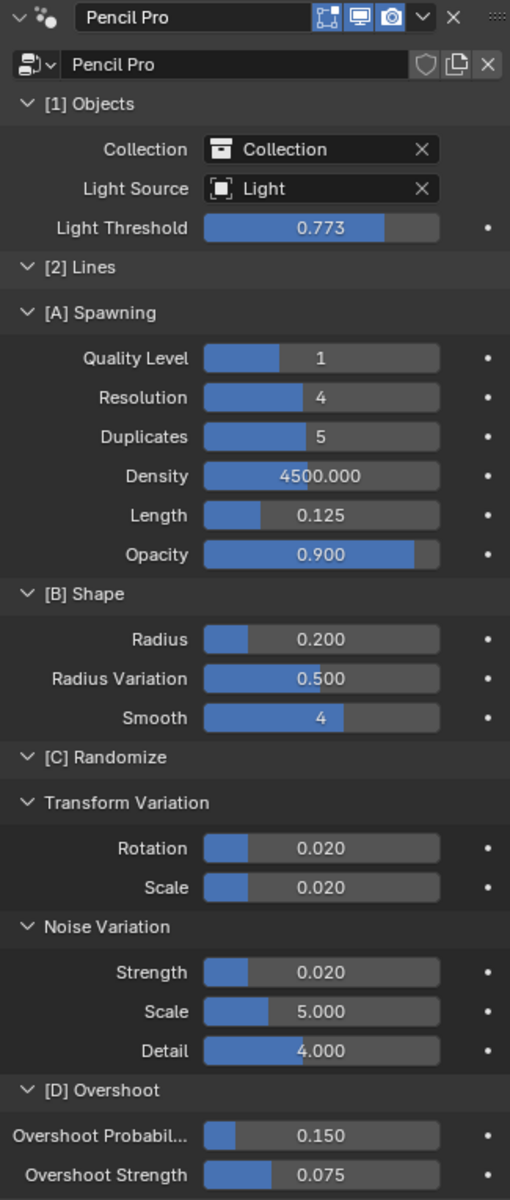
Line Settings:

Collection (Collection): Objects to apply Pencil Pro to (must coincide with collection in lineart modifier).
Light Source (Object): Objects to apply Pencil Pro to (must coincide with collection in lineart modifier).
Light Threshold (Float): Threshold to delete lines facing light source.
Quality Level (Integer): Number of subdivisions to apply to source collection (for calculating edge flow).
Resolution (Integer): Resolution of pencil lines.
Duplicates (Integer): Amount of redraws of lineart.
Density (Float): How many pencil lines are spawned.
Length (Float): Length of pencil lines (reduce to fix floating lines).
Opacity (Float): Opacity of pencil lines.
Radius (Float): Thickness of pencil lines.
Radius Variation (Float): Changes thickness of distributed pencil lines.
Smooth (Integer): Fillets pencil lines to smooth out strokes.
Rotation Variation (Float): Randomizes 3D rotation of strokes.
Scale Variation (Float): Randomizes 3D scale of strokes.
Noise Strength (Float): Strength of distortion.
Noise Scale (Float): Frequency of distortion.
Noise Detail (Float): Detail of distortion.
Overshoot Probability (Float): Probability of extruding stroke endpoints.
Overshoot Strength (Float): Strength of endpoint extrusion.
Shader Settings:
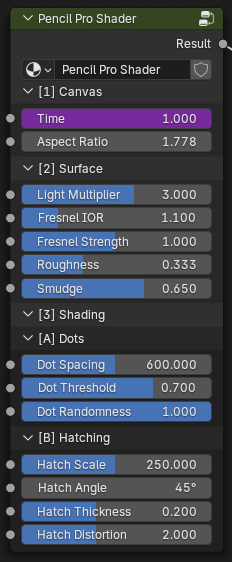
Time (Frame): Used for randomization over time (by default set to #frame driver).
Aspect Ratio (Float): The aspect ratio of your camera/render (this is 1.778 for 1920x1080 for example).
Light Multiplier (Float): How much influence lights have on the shading.
Fresnel IOR (Float): Index of refraction for fresnel effect.
Fresnel Strength (Float): Strength of fresnel effect (used to highlight boundaries).
Roughness (Float): How much light diffuses across the surface.
Smudge (Float): A cosmetic effect to break up hatching/dots.
Dot Spacing (Float): Scale of dots in screen space.
Dot Threshold (Float): Radius of dots.
Dot Randomness (Float): Randomizes dot positions (use 0 for a perfect array).
Hatch Scale (Float): Scale of cross hatching in screen space.
Hatch Angle (Angle): Rotation of cross hatching in screen space.
Hatch Thickness (Float): Thickness of hatching lines.
Hatch Distortion (Float): Strength of screen space noise.
Installation
Install Pencil Pro just like any other addon (for Blender 4.3 or above). Drag the .zip right into Blender and hit ok. Menu can be found in the N-Panel of the 3D Viewport.