Phyllotactic Dome
 Martin Preston


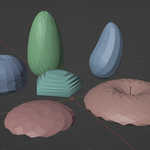
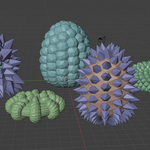
The basic shape is basically a bullet with the surface divided up into quads. Below are the controls that can be used to manipulate it:-
Parastichy :- another bit of technical language, but basically how many spirals there are left and right. Aloes and Cacti tend to be based on 2/3 and 3/5. Pine Cones tend to fall into 3/5 and 5/8. If you want to make a Sunflower you will need 21/34.
Faces :- This governs how the faces are created from the points. By default the majority of the shape is joined as quad diamonds, with triangles used near the top and bottom when necessary to make the geometry cleaner. Alternatively you can split it entirely into triangles, with the quads being split in two vertically or horizontally.
Vertex Count :- Simply the number of vertices
Diameter :- Overall Width
Height :- Overall Height
Flat Section Top / Bottom :- By manipulating these figures you can flatten the side of the shape between two points. Flat Section Top indicates the percentage of the height at which the flattened section ends. Flat Section Bottom is the percentage of the height where it starts. Outside these points the shape will be domed.
** The setting of these two factors can produce Python Traceback errors. If this occurs, set them both to 0.5, make any other shape adjustment and then come back to altering these two slowly. **
Base Width ;- The width that the base is brought in to. 1 represent the Diameter ie the resultant shape is a dome, 0 brings the shape back to its centre forming an egg.
Top Dimple Width / Depth :- Many composite flowers have a depressed centre and these controls allow you to create that depression.
From here on there are more specialist controls I developed specifically for my Pine Cones.
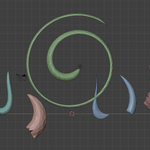
Lean :- Curves the top of the shape over by a number of degrees. Low numbers give a nice curve, but higher values can produce some interesting shapes. I've allowed leans of up to twice a circle, allowing a spiral to be produced which could be used as the basis for an animal horn.
Base Shear Angle / Height / Lateral / Factor :- All of these help to twist the base of the shape and are easier to understand when shown than explained. Angle is how much the base point is rotated away from the horizontal. Height and Lateral are the centre of rotation for the base. Factor is a multiplier for the effect. If you turn on 'See Rotation Point', the shape is moved such that the origin is the rotations centre.
Jitter Factor :- Adds randomness to the position of each point.
Tighten Base :- Affects how the points in the base section are compressed. Figures above 1 compress them. Figures below 1 distribute more of the points towards the centre and draw them inwards.
Compress Spine Top / Bottom :- Within the shape is a central spine of points which can be ignored or can be used. I use them to create cones by creating scales from the inner spine to the corresponding outer face. The indices of the points of the spine start after the indices of the main shell and are correspondent. ie each outer point has a corresponding point on the inner spine at the same mathematical relation. So in a 50 point shape, outer point 10 might correspond to spine point 60 and outer point 11 to spine point 61 and so on. If the compress spine options are set to 1 then the spine is the full inner height. Lowering the figure compresses the top of bottom of the spine towards the centre point.
Have questions about this product?
Login to message
| Blender Extension Compatible | Yes |
| Published | 11 months ago |
| Blender Version | 4.2 - 4.5 |
| Extension Type | Add-on |
| Render Engine Used | Cycles, Eevee |
| License | GPL |
