Pigment Color Atlas Generator
 3DGameObjects


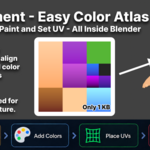
Pigment — Color Atlas for Blender
Build a color atlas palette and place your UVs on it, all from one sidebar in the Image or UV Editor. Flat colors, gradients, and automatic UV snapping — the whole low-poly texturing workflow inside Blender.
Works with Blender 4.5 LTS and 5.2 LTS.
What it does
Low-poly models are usually colored from one small texture: flat blocks of color and strips of gradient, with every face's UVs collapsed onto the swatch it should wear.
Pigment builds that atlas from data instead of by hand. You define the layout, pick your colors, and the PNG is baked from it. The hex you pick is the exact hex that lands in the texture — and when you change a color or resplit a region, it just rebuilds. No repainting cells, no dragging UV islands onto tiny slots by eye.
Install
- Open
Edit ▸ Preferences ▸ Add-ons ▸ Install from Diskand pick the Pigment zip. - Open an Image Editor or UV Editor, press
N, and choose the Pigment tab.
Quick start
Five steps from nothing to a shaded model:
-
Create the page —
Palette ▸ +. Give it a name, size, and background color. Use 512 for a prop, 1024 for a full scene. -
Cut it into cells —
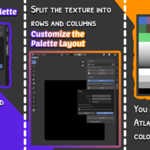
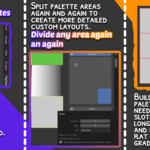
Layout ▸ Divide(e.g. 4 × 4). The grid in the sidebar mirrors the texture. Select a cell and Divide again to go deeper. -
Color them — click a cell and set its color in the Pigment panel, or paste a hex code. Select several cells and one edit colors them all. To make a cell a gradient, set its type to
Gradientand edit the ramp. - Point the material at the page — add an Image Texture node to your material, set it to the palette image, and set Interpolation: Closest (see Material setup below).
-
Place the UVs — in Edit Mode, select faces, click the target slot, then
UV ▸ Move to selected slot. Or pressShift + Alt + Pfor the pie menu.
The panels
Palette — the palette page you're working on, its size and slot count, plus Rebuild.
Layout — the cell map and everything that changes its shape: Divide, Merge, Split, Delete. Cells you divided further carry a divide icon; cells left with no slot are free painting space.
Pigment — the selected slot: its type (flat or gradient), color, an editable hex field, the gradient ramp, your recent colors, and the swatch list.
UV — placing UVs, in three groups: move an island that already exists, rework one in place (Fit, Flip), or build one from the geometry (Project from view, Project Radial, Project with Path).
Export — write the PNG, hand it to an external editor, and read the hand-painted areas back.
Material setup
Ordinary Blender, with one setting that matters:
- Add an Image Texture node to the object's material.
- Set its image to the palette page.
- Plug Color into the shader.
Placing UVs
All UV tools run in Edit Mode and aim at the slot you selected. There are three groups:
Relocate an existing island
-
Move to selected slot — refits the island into the slot, keeping its shape. Best for something you already unwrapped, or for moving a projection to a different color. Keep proportions (
F9) fits without stretching; turn it off to fill the slot exactly. - Move to 2D cursor — drops the selected faces on the exact point the 2D cursor sits, so you can reach one band inside a merged gradient strip. Center on slot lands on the middle of the slot under the cursor instead.
Rework in place
- Fit Z / Fit Y / Fit X — spreads the UVs along the slot by how far each vertex sits along an object axis. This is the classic trunk shader: Fit Z on a gradient slot takes dark roots up to light tips.
- Flip — mirrors the island.
Build from geometry
- Project from view — projects UVs from your current viewing angle onto the slot.
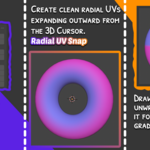
- Project Radial — projects from a distance, for radial effects.
- Project with Path — draw a custom gradient path with shape detection (see below).
Project with Path
Draw a stroke and the gradient follows it. A few things to know:
It's drawn in front of the model, not on it. The stroke lands on the plane you're looking through, at the depth of the mesh, so it can go anywhere — a circle around a helmet, a line begun off the model and pulled across it. The gradient doesn't depend on depth, so the near and far side of an arm take the same value and a band comes out even instead of wrapping.
The trade-off: a limb pointing straight at the camera has no length on screen to draw along — orbit and draw it from the side.
Hold still and the path snaps to a shape. Keep the button down and the mouse still for about ¾ of a second: a stroke reaching for a straight line snaps straight, one that went round snaps to a clean arc, and anything else is left as drawn. After a snap:
- Line — follows the cursor.
- Arc — move ← → to resize, ↑ ↓ to turn.
- Circle — closes itself to exactly one turn.
Hold Cmd/Ctrl mid-stroke to slide the whole path — a circle drawn slightly off-center can be recentered without redrawing it.
A drawn path is smoothed before use, so an unsteady hand doesn't push the gradient's bands out of place. Bends survive: a path that follows a branch still follows it.
Export round trip
Take the texture out to a paint program and back without losing the palette:
- Export PNG — writes an 8-bit PNG. The hex you picked is the hex in the file.
- Open in … — hands it to the editor you configured (Photoshop, Krita, etc.).
- Paint in a free area (space no slot covers), then save over the same file.
- Import edited PNG — reads it back and takes only the pixels outside every slot. Your slots are reprinted from Blender, so a stray stroke over a palette cell can never make a slot disagree with its color.
Rebuild (in the Palette panel) reprints every slot from its data — the escape hatch whenever pixels and layout have drifted.
Good to know
Free painting coexists with the palette. The bake only writes inside slot rects, so anything you paint in an area no slot covers survives every rebuild. That's how a lxogo can share the texture with the palette.
Hand painting isn't auto-saved. A palette page is a generated image, and Blender doesn't keep the pixels of a generated image between sessions or through undo. Pigment repaints every slot for you automatically, but hand-painted areas have no data to rebuild from — use Image ▸ Pack, or save the image to disk, if your texture holds hand-painted work.
UVs stay clear of slot edges. Every placement insets UVs by half a texel, so gradients keep their darkest and lightest bands and no neighboring slot bleeds in as a seam.
Requirements
- Blender 4.5 LTS or 5.2 LTS
- An external image editor (Photoshop, Krita, etc.) only if you want to use the paint round-trip — otherwise not needed
Questions and bug reports: [email protected]
Have questions about this product?
Login to message
| Blender Extension Compatible | Yes |
| Published | about 2 months ago |
| Blender Version | 4.5 - 5.2 |
| Extension Type | Add-on |
| Render Engine Used | Blender-Internal, Cycles, Eevee |
| License | GPL |
Discover more products like this
lowpoly uv mapping blender Palette color-atlas 3d-stylized 3D Art 3D game asset uvtools