Poly Organic - The Ultimate Procedural Material Tool
 Poly Playground

PolyOrganic Documentation
PolyOrganic builds procedural materials you shape with a dial. Everything it makes is a normal Blender material, so it renders anywhere a Principled material does.
Install
- In Blender 4.2 or newer, open Edit > Preferences > Get Extensions, then use the menu at the top right and choose Install from Disk.
- Pick the PolyOrganic zip. It enables itself.
- An orange dial button appears in the bottom-left corner of every 3D view, and a PolyOrganic tab appears in the sidebar (N).
Getting started
- Select a mesh and click the orange button (or press Shift+Alt+D).
- Pick a family in the Material ring, then a material. The dial jumps straight to its Styles.
- Pick a style, then turn knobs. Drag the centre knob or scroll over any knob. Every change blends in live.
- Press Close or Esc when you're done. Everything is also in the sidebar.
Tip: with the Material ring open, just start typing to search (glass, oak, rust, cone). Backspace deletes, Esc clears.
The dial
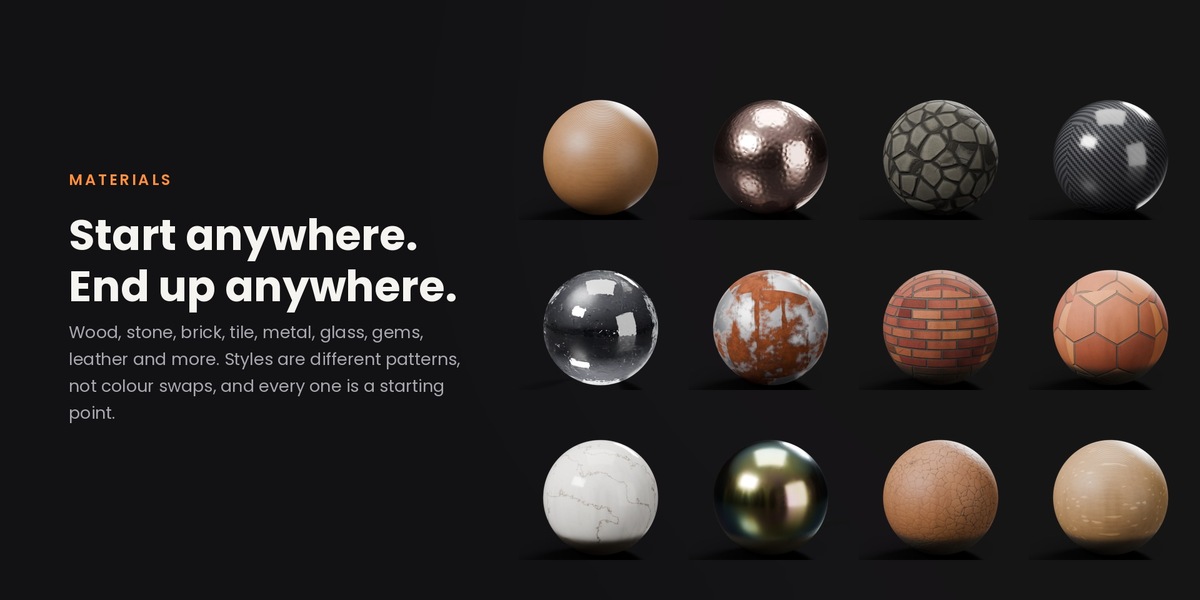
- Material: nine families (Wood; Stone & Masonry; Metal; Plastic & Rubber; Fabric & Leather; Nature & Water; Glass & Gems; Building; Paint, Paper & Skin).
- Style: the looks for that material, plus Size. Styles are different patterns, not colour swaps.
- Layout: boards, herringbone, chevron, parquet, cladding, brick bonds, tile shapes, stone laying patterns, metal and plastic finishes. Advanced shows the less common ones.
- Colour: a colour wheel for each colour slot (Master drags the others along).
- Detail: the controls for the current material, such as ring spacing, knots and figure for wood, or rock form, chipping and ledges for stone.
- Form: size, structure, variation between copies, and cavity shading (darker gaps and joints).
- Surface: roughness (0 = mirror, 100 = matte), metal, clear coat, sheen, glow and iridescence.
- Depth: Add Real Depth, Displacement, Bump, Clean Edges, fit mode, quality and Optimise.
- Wear and Scratches: styles and strength. Click a lit style again to switch it off.
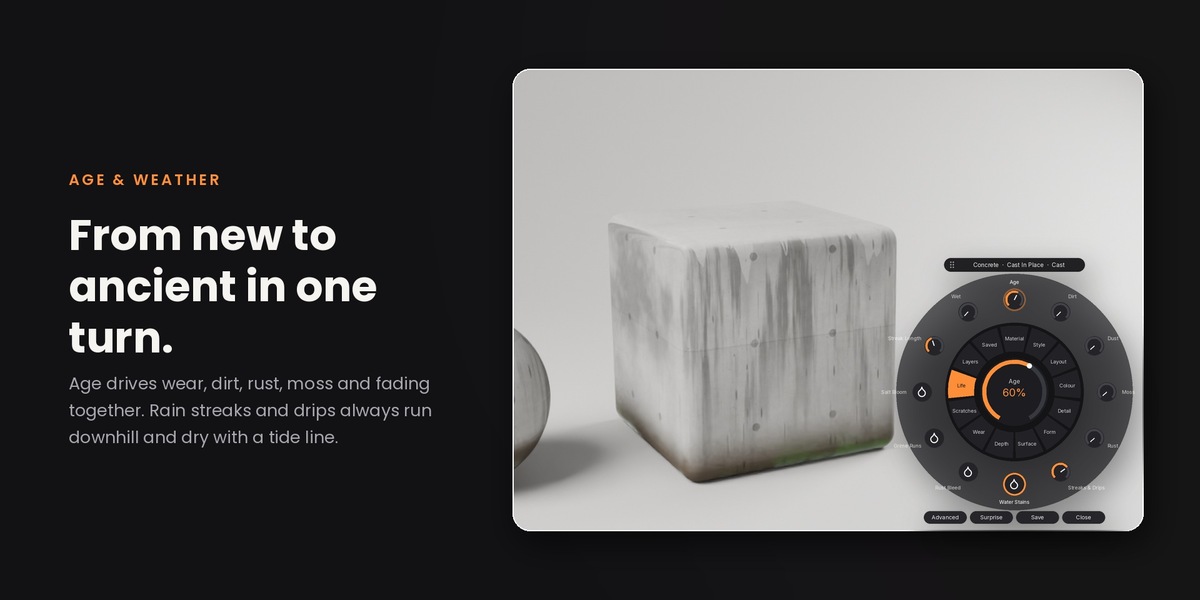
- Life: Age, dirt, dust, grime, moss, rust, streaks and drips, and wet.
- Layers: add and manage layers. Saved: your library and Bake.
Dial button and corner: turn the orange button off or move it (and where the dial opens) in the sidebar or in Preferences > Add-ons > PolyOrganic.
Layers
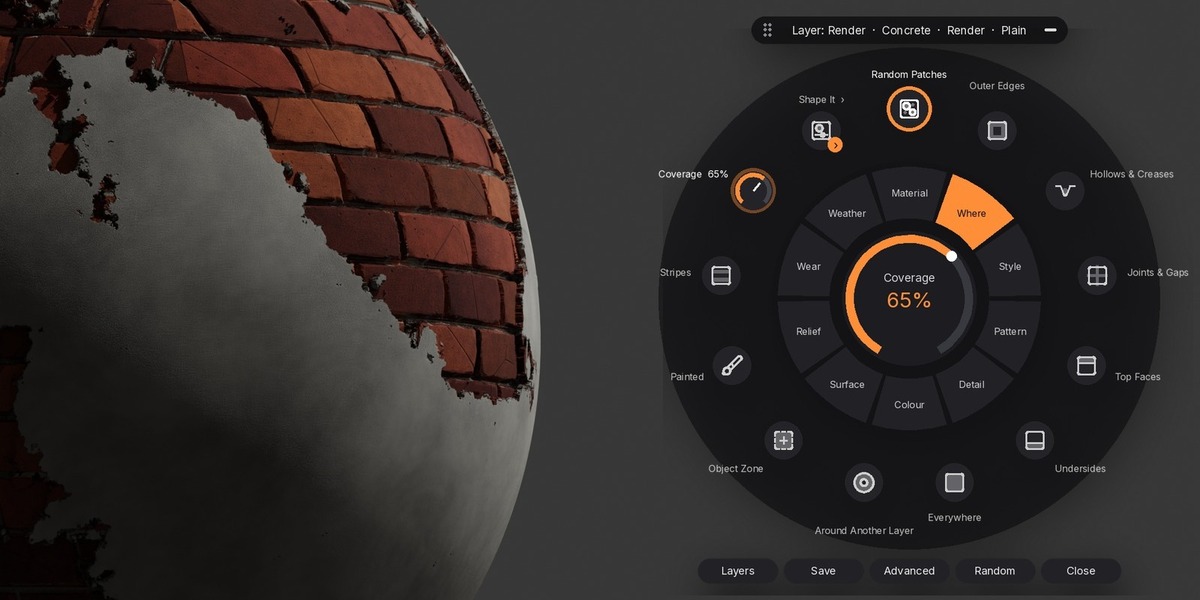
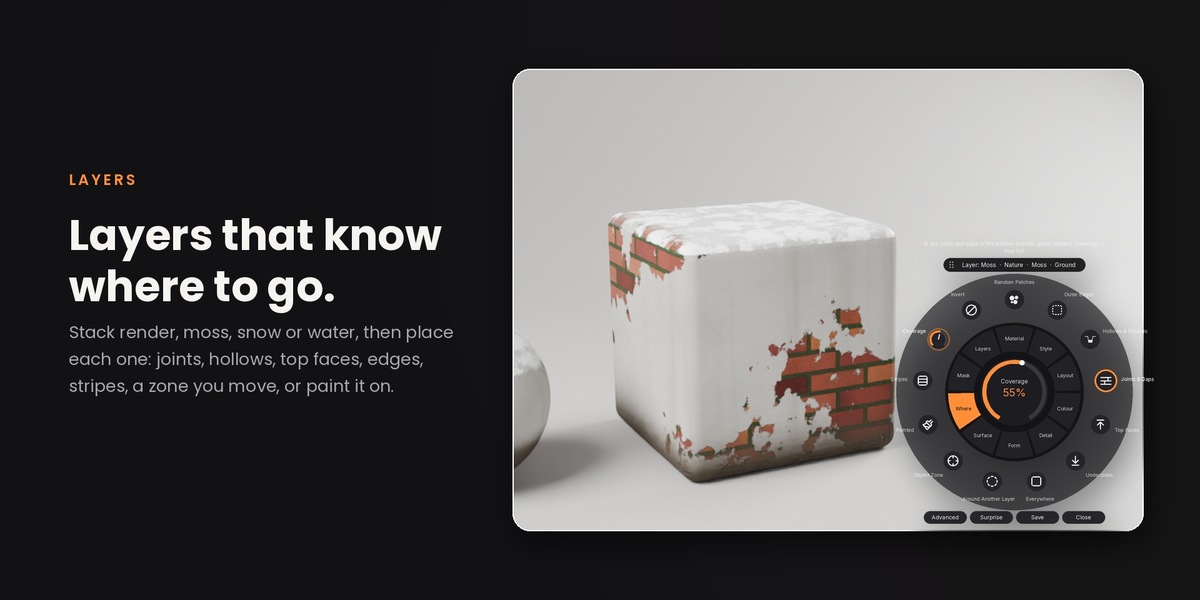
Layers sit on top of the base material: render, moss, grass, mud, water, snow, sand, leaves and reflective bands, or any material you like. Open Layers > Add Layer, then use Where to place it:
- Random Patches, Outer Edges, Hollows & Creases, Joints & Gaps, Top Faces, Undersides, Everywhere, Stripes, Around Another Layer, Object Zone (an empty you move and scale), and Painted.
- Mask controls: Coverage, Mask Size, Edge Softness, Edge Breakup, Thickness, Invert and Shuffle.
- Painted: switches to Vertex Paint. Paint white where the layer goes, black to remove it, then Tab back to Object Mode. Painting follows the mesh's vertices, so subdivide low-poly models for smooth edges.
Age, weathering, streaks and drips
- Age (top of the Life ring) takes everything from brand new to ancient in one move: wear, scratches, dirt, grime, dust and streaks, plus rust on metal and roofing, moss on masonry, wood and ground, and sun fading on wood, plastics, paint and fabric. It adds to your own settings; it never overwrites them.
- Streaks & Drips: Water Stains, Rust Bleed, Grime Runs or Salt Bloom. They always run downhill in world space, start below tops and ledges, and dry with a darker tide line. Streak Length sets how far they run.
Real depth and mapping
- Add Real Depth (Depth ring) adds subdivision so the surface really moves. Displacement is in real metres whatever the object's scale.
- The pattern stays pinned to the surface while it displaces. If you edit the mesh, it updates itself when you leave Edit Mode.
- Clean Edges eases displacement off on rounded and bevelled edges so they never tear. Turn it off for full displacement to the very edge.
- Fit: Real Size (true scale), Stick (moves with the object), World (continuous across neighbours) or UV Map (follows your own unwrap, best for curved or complex models).
- Grain Follows Shape (Detail ring, solid wood): the grain runs along each part of chairs, frames and branches. Press Update Grain Direction after editing the mesh.
Real grass
- On a Ground material (or a Ground layer), press Grow Grass in the sidebar Detail panel.
- Controls: Density, Height, Height Variation, Clumping, Clump Size, Blade Width, Bend, Wind Strength, Wind Speed and Viewport Density. Wind moves over time when you play or render an animation.
- Grass stays off the Ground's mud patches and off other layers placed with Random Patches (up to three). Press Refresh Grass after changing layers.
- Scaling a grass object is fine: once you let go, the scale is applied so the blades stand upright at real size.
Glass, water and gems
- Caustic shadows are on by default: glass throws a bright core into its shadow and water throws a caustic network on what's beneath.
- Real Caustics (Surface ring or sidebar) turns on true Cycles caustics. It needs Cycles and at least one lamp (Sun, Point, Spot or Area); HDRI light alone won't make them.
- Gems have Facet Size, Facets, Refraction (IOR), Fire (colour dispersion in Cycles), Clarity, Cloudiness, Inclusions, Growth Lines, Frosting and Colour Play.
Paste onto other objects
- With the dial open, hold Ctrl and click another object. Each gets its own copy, sized for that object.
- Hold Shift as well to share the same material instead, so edits change both.
- Shift+Alt+V (or Paste onto Others in the sidebar) starts paste mode: click as many objects as you like, right-click or Esc to finish.
Baking
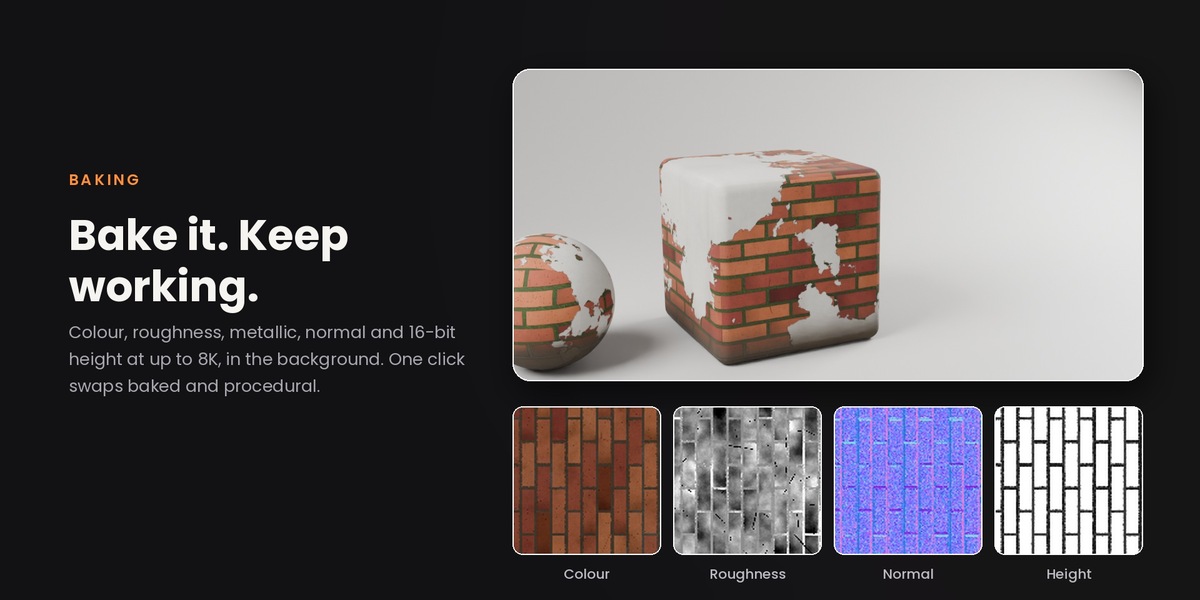
- Select one or more objects and press Bake (sidebar, or the Saved ring).
- Choose 1K, 2K, 4K or 8K and a quality. Leave Bake in the background on to keep working while it bakes.
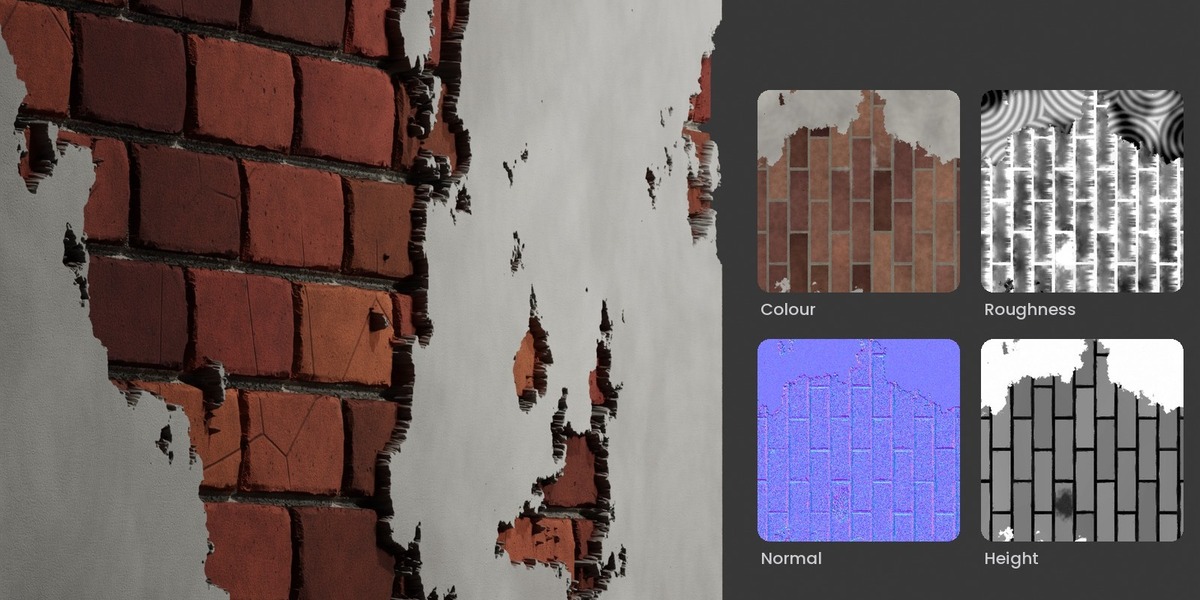
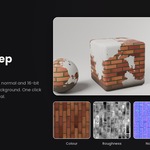
- You get colour, roughness, metallic, normal (16-bit) and height (16-bit, plus or minus 5 cm around mid-grey) maps, and an image material wired up with them.
- Maps are saved in a textures folder next to your .blend (save the file first to keep them there).
- Objects without UVs are unwrapped automatically. The procedural material is always kept; the Swap button flips between baked and procedural.
Not baked: glass see-through, glow, iridescence and real grass (grass is geometry).
Saving and your library
- Save stores the material and its layers in your PolyOrganic library and the Asset Browser. Update Saved or Save as New; it never overwrites without asking.
- Materials name themselves after their style and layers until you rename them yourself.
Performance
- Use Draft quality while dialling, Final for renders.
- Optimise removes effects that are switched off or at zero.
- For heavy scenes, bake materials you've finished and swap back whenever you need to edit.
 Included
Includes 12 months of
- Support from Poly Playground
- Product updates
Extend this product’s Support Period +12 months: 25% of product price
Have questions before purchasing?
Login to message
| Blender Extension Compatible | Yes |
| Sales | 40+ |
| Dev Fund Contributor | |
| Published | 5 days ago |
| Blender Version | 4.2 - 5.2 |
| Extension Type | Add-on |
| Render Engine Used | Cycles, Eevee |
| License | GPL |
Discover more products like this
Material 16k materials materials blender procedural materials unlimited materials