Production Photogrammetry With Poly Haven
 Poly Haven


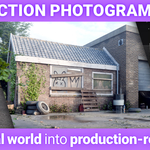
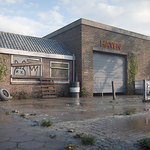
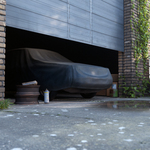
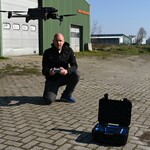
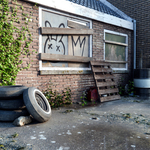
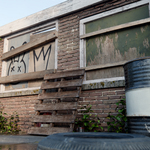
Production Photogrammetry
Everything you need to download, extract and watch the course, plus what's inside the project files. If you get stuck, the FAQ at the bottom of this page covers the most common questions.
Three steps to start watching
You do not need to download everything. The course itself is 16 GB; the rest is optional source material.
Don't change the folder Windows offers you when extracting. Each zip is built to create its own correctly-named folder automatically. If you already extracted one into the wrong place, just delete the folder it made and extract it again, accepting the default.
This is all six chapters extracted. You'll only see folders for the chapters you actually downloaded - that's fine, the rest simply show as unavailable until you add them.
The folder names must stay exactly as extracted. If you rename or move them, _START_HERE.html won't find the videos.
The course, and the project files
Your Superhive download is the course itself - 7 files, 16.4 GB, and a _START_HERE.html offline web page to help you watch the videos in order, tracking your progress.
The project files are much larger, so rather than duplicate them here they're downloaded straight from Poly Haven whenever you want them. Links are at the bottom of _START_HERE.html.
The video lessons, with English subtitles beside every file, plus _START_HERE.html. This is the course.
chapter_03_pt2.zip · 1.90 GB
Everything below is downloaded from Poly Haven, not Superhive. Open _START_HERE.html and scroll to the bottom - every file listed here has a direct download link there. It's free and always available, so there's no rush to grab it all up front. All of it is CC0.
Factory_scene_Final_Packed.zip - the finished Blender scene from the course, with every texture and model packed inside the .blend file. Needs Blender 5.0 or newer.
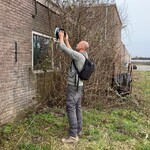
Completely optional, and one download per scan. These are the untouched RAW photos straight from the camera, so you can process the same scans yourself alongside Rob.
_START_HERE.html
A self-contained page that runs entirely from your own drive. No internet connection, no account, nothing to install. Open it in any modern browser.
Your progress is saved in that browser, on that computer only. It is never uploaded anywhere, the web page is simply a cross-platform interface to the video files on your drive so you don't have to fiddle with video players and remembering which video you were on.
You don't have to use it. Every lesson is an ordinary .mp4 with matching .srt subtitle files beside it. VLC, mpv and most other players load those automatically when you open the video.
Software and hardware
Check this before you buy: RealityScan is Windows-only
The scan reconstruction in Chapters 3 and 5 uses RealityScan (formerly RealityCapture), which does not run on macOS. A Linux build exists, but it's intended for command-line use rather than following along with the course.
Either GPU brand works. Since version 2.2 RealityScan accelerates on AMD as well as NVIDIA, and can even split the work across both in the same machine. On NVIDIA you need CUDA Compute Capability 3.5 or higher; on AMD you need an RDNA 3 or RDNA 4 card - Radeon RX 7000 or 9000 Series, Radeon Pro W7000, Radeon AI Pro 9000, or a Ryzen AI Max Pro chip. AMD acceleration is Windows-only for now.
Everything else in the course - the Blender work, the material creation, the scene building - is fully cross-platform. You can still watch and learn the whole pipeline on any machine; you just won't be able to run the reconstruction step yourself.
If you're on a Mac, there are alternatives that do run there - see the RealityScan entry below. The photos go in and a textured mesh comes out either way; only the buttons differ.
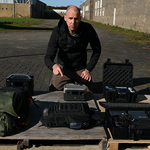
Photogrammetry is demanding. For RealityScan, Epic lists a minimum of 8 GB RAM and 1 GB VRAM, and recommends at least 4 CPU cores and 16 GB RAM, with a recent NVIDIA (CUDA Compute Capability 6.1 or above) or AMD RDNA 3/4 card. In practice, more RAM makes a large difference on big scans. You will also want plenty of free disk space - the RAW photos for a single scan here run to 7-14 GB before processing.
Common questions
They are inside the final scene file, not separate downloads. Everything made during the course - the tileable materials, the scanned models and all their texture maps - is packed into Factory_scene_Final_Packed.blend, which you'll find under Project files at the bottom of _START_HERE.html. There is no separate library of finished texture sets or model files.
To pull them out as normal files, open the scene in Blender 5.0+ and use File > External Data > Unpack Resources. That writes every packed texture out to a folder next to the .blend. Models can be exported from there as usual.
The course is 16.4 GB - seven files from Superhive. The project files (79 GB of RAW photos and the final scene) aren't part of that; they're downloaded free from Poly Haven, only if you want them, using the links at the bottom of _START_HERE.html. You can come back for them at any time.
Blender 5.0 or newer to open the final scene file. Earlier versions cannot read it. The techniques taught in the course work in older versions too, but the supplied .blend will not open in them.
Partly. You can watch all of it, and every Blender section works on macOS. But RealityScan - used to reconstruct the scans - is Windows-only, so you won't be able to run the reconstruction steps yourself on a Mac. Try Agisoft Metashape instead of RealityScan.
_START_HERE.html greys out anything it can't find on disk. Usually that means the zip hasn't been extracted yet, was extracted somewhere else, or the folder was renamed. Check that the chapter folder sits in the same folder as _START_HERE.html, still using its original name, then refresh the page with F5.
Chapter 3 is too large for a single download, so it comes as two files: chapter_03.zip and chapter_03_pt2.zip. Extract both and the whole chapter becomes available. The same applies to the photoscans, which come in 2-3 parts each.
Not from Superhive - open _START_HERE.html and scroll to the Project files section at the bottom. Every scan and the final scene has a direct download link there. They're hosted by us, free and always available, so you don't need to download them up front. Those links do need an internet connection, unlike the rest of the page.
No. The scans made during this course aren't part of the free Poly Haven library - they exist only here, in the final scene file, along with the RAW photos if you want to process them yourself.
CC0 - public domain. Use the scene, the models, the textures and the RAW photos for anything you like, commercial or otherwise, no attribution required. The video lessons themselves are not CC0; please don't redistribute those.
Yes, English subtitles on every lesson. They're built into _START_HERE.html, and also supplied as .srt files beside each video for your own player.
No. The principles apply to any camera that shoots RAW and lets you control aperture, shutter and ISO. Chapter 2 covers what actually matters in your gear and settings. You can probably even use your phone.
No photogrammetry experience is needed - it starts from what a photoscan actually is. You should be reasonably comfortable in Blender already, since the course teaches the scanning pipeline rather than Blender basics.
Everything stays available from your SuperHive orders page. Download individual parts again at any time - you never need to re-download the whole course.
Still stuck?
Ask us on Discord - the Poly Haven team and plenty of other artists are there, and it's the fastest way to get an answer about anything in the course.
Join the Poly Haven Discord
Have questions about this product?
Login to message
| Sales | 30+ |
| Published | 2 months ago |
| Blender Version | 5.0 - 5.2 |
| Render Engine Used | Cycles, Eevee |
| License | Royalty Free |
Discover more products like this
game ready environment art course photoscanning 3d-scanning photogrammetry realityscan