 CG_Flow


Pro Pyro Documentation
Welcome! This guide walks you through installing the add-on, creating your first simulation, and understanding every feature of the Pro Pyro solver.
1. System Requirements
| Blender | 4.3 or newer |
| Operating System | Windows 10 / 11 macOS 12+ (Apple Silicon) Linux |
| GPU | The entire fluid solver runs on the GPU. A dedicated GPU is strongly recommended - integrated graphics are significantly slower and not officially supported. Supported graphics APIs (used automatically):
Not supported:
The Compute Device picker in the add-on panel (Quality & Devices section) lists only compatible adapters and hides unsupported ones automatically. Leave the selection at -1 (auto) to let the solver pick the best available device, or choose a specific index to use a particular GPU. To keep a specific index across all projects, click Set as Default in the panel after selecting the index; it will be applied automatically whenever you open a new scene. Set the index back to -1 and click Set as Default again to restore auto-selection. Minimum 6 GB VRAM for small simulations. 8 GB+ recommended for typical work. If the simulation reports an out-of-memory error, reduce Max Cells in the panel. |
| RAM | 8 GB minimum. 16 GB+ recommended. The in-memory frame cache (configurable in the Cache & Export section) can hold several GB of simulation data to allow instant playback. |
| Disk | VDB preview mode writes temporary files to disk on each frame. Baking a simulation to a VDB sequence requires free disk space proportional to the simulation size and frame range. A fast SSD is recommended. |
2. Installation (Two-Part Setup)
Pro Pyro ships as a Blender extension plus a separate simulation solver executable. Both parts are required.
Step 1: Install the Add-on
- Download the main add-on file, pro_pyro_v1.X.X.zip, from your library.
- In Blender (4.3 or newer), go to Edit > Preferences > Get Extensions.
- Click Install from Disk... and select the downloaded zip.
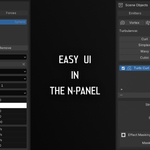
- The Pro Pyro panel will appear in the 3D Viewport Sidebar (press N). If the solver is not yet installed it shows a status panel.
Step 2: Download and Place the Simulation Solver
- Open your store library and download the solver archive for Pro Pyro.
- Choose the correct file for your platform:
-
Windows:
windows/pyro_solver.exe -
macOS:
macos/pyro_solver - Linux:
linux/pyro_solver
-
Windows:
- Place the executable into the path shown in the Pro Pyro sidebar panel. Typical locations:
- Windows:
...\pro_pyro\libs\windows\pyro_solver.exe - macOS:
.../pro_pyro/libs/macos/pyro_solver - Linux:
.../pro_pyro/libs/linux/pyro_solver
- Windows:
- Restart Blender.
After restart the status panel disappears and the full Pro Pyro UI is available.
Security Prompts (No Code Signatures)
Because the solver is not code-signed, your OS may warn on first launch. Here is how to proceed safely on each platform.
Windows (SmartScreen)
- Click More info ➜ Run anyway when SmartScreen appears.
- Optional: Right-click the executable ➜ Properties ➜ check Unblock ➜ OK.
macOS (Gatekeeper)
- Open System Settings ➜ Privacy & Security and click Open Anyway next to the solver entry.
- Alternatively, run in Terminal:
xattr -dr com.apple.quarantine "~/Library/Application Support/Blender/x.y/extensions/user_default/pro_pyro/libs/macos/pyro_solver"chmod +x "~/Library/Application Support/Blender/x.y/extensions/user_default/pro_pyro/libs/macos/pyro_solver"
Linux
- Make the file executable:
chmod +x "~/.config/blender/x.y/extensions/user_default/pro_pyro/libs/linux/pyro_solver" - If your mount point has the
noexecflag, move the add-on to a user-writable executable location under your home directory.
Replace x.y with your current Blender version number.
3. Quick Start: Your First Simulation
This walkthrough creates a basic rising smoke and fire effect in under two minutes.
- Open the Panel: In the 3D Viewport Sidebar (press N), open the Pro Pyro tab.
- Create the Setup: Click Create Pyro Setup. This creates the simulation volume object in your scene.
- Add an Emitter: In the Emitters sub-tab, click Add Emitter. Use the eyedropper for
Objectto select any mesh in your scene (e.g. a UV Sphere). - Enable Fire: Set
Smoke Rateto 10.0 andTemperature Rateto 4.0. - Start the Solver (if needed): Click Start Solver in the Simulation Control box.
- Press Play: Hit Spacebar. Smoke and fire should rise from the emitter object immediately.
- Tweak: In the Physics & Look section, increase
Buoyancyto make the fire rise faster, or raiseVorticity Confinementto add swirling detail.
4. Presets
The Presets panel sits at the very top of the Pro Pyro sidebar tab. It loads a complete simulation setup - emitters, forces, and all physics parameters - pre-tuned for a specific visual effect. It is the fastest way to get a working simulation running.
Built-in Presets
Seven ready-to-use presets are included:
- Campfire - classic fire with rising smoke and a gentle side wind.
- Dry Ice - heavy negative-buoyancy fog that rolls along the floor.
- Flamethrower - high-velocity combustion jet with a fuel tongue.
- Ink in Water - zero-gravity RGB color advection with curl turbulence.
- Magic Portal - vortex-driven cyan smoke spiral.
- Cigarette Smoke - thin rising thread that breaks into chaotic curls.
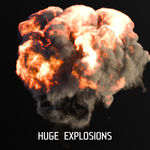
- Explosion - burst-emission fireball expanding into a mushroom pillar.
Load Preset & Start
Select a preset from the dropdown and click Load Preset & Start. Pro Pyro creates all required objects in your scene, applies the full parameter set, and starts the solver automatically. Press Spacebar to see the result immediately.
5. Simulation Control & Domain
Solver Buttons
-
Start / Stop Solver: Starts or stops the background simulation process. The solver must be running to simulate. -
Reset: Clears the current simulation state and restarts from the beginning. -
Step Frame: Advances the simulation by exactly one frame without pressing Play - useful for inspecting the result frame by frame. -
Live Update: When enabled, any parameter change you make is applied to the running simulation immediately. Disable this when batch-editing settings. -
Catch-Up on Jump: When enabled and you scrub the timeline more than one frame forward, the solver automatically simulates all skipped frames in the background before updating the viewport. Press Escape to cancel the catch-up and jump to the current frame immediately.
Solver Restart Warning
Certain critical settings require a solver restart to take effect. When you change one of these parameters, the panel displays a warning box listing the changed settings. Click Start Solver to apply them. This prevents unexpected simulation state changes and ensures stable results.
Voxel Size
Controls the resolution of the simulation grid in Blender units. Smaller values give finer detail but require more memory and GPU time. A value of 0.05 is a good starting point. Halving the voxel size increases memory usage roughly eightfold. The hard minimum is 0.001; below 0.01 the simulation may become unstable, so a warning appears.
Time Scale
Scales the rate at which the simulation advances. Values below 1.0 produce slow-motion effects; values above 1.0 speed up the fluid.
Sparse Volume Budget - Max Cells
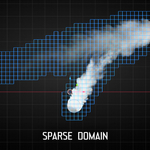
Pro Pyro uses an adaptive sparse domain, meaning it only allocates simulation cells where fluid actually exists. This keeps performance high even in large scenes. Max Cells sets a hard cap on how many cells can be active at once, which directly limits memory usage. The panel shows you the live cell count and total millions of voxels in use. If the counter turns red, your simulation is hitting the cap and fluid may be clipped - increase the budget or raise the voxel size.
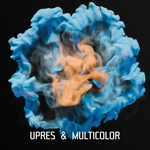
GPU Upscaling (Upres)
Upscaling magnifies the simulation output on the GPU before writing it to the cache or disk. The base simulation runs at your chosen voxel size; the upscaler then produces a higher-resolution result at virtually no extra simulation cost.
-
Upscale: Choose 2×, 3×, or 4×. A 4× upscale yields up to 64× more output voxels compared to the base grid. Simulate at a coarser voxel size for speed, then apply upscaling to recover fine detail at export time. -
Sharpen: Edge-preservation strength during upscaling. 0 = pure trilinear interpolation; higher values (up to 2.0) prevent blurring and retain sharp smoke and fire boundaries. This sharpen is only shown when Upscale is active.
Sharpen (without Upscale): When Upscale is set to Off, a separate Sharpen parameter appears that sharpens the density edges at the native simulation resolution. This post-process sharpens the output without changing the simulation itself. Set to 0 to disable, or increase to 2.0 for maximum edge clarity.
6. Emitters
Emitters are the sources of smoke, fuel, flame, and temperature in the simulation. Add as many as your scene needs.
Object & Shape
-
Object: The Blender object that defines where emission happens. -
Shape: How the object's volume is interpreted:-
Box- uses the object's axis-aligned bounding box. Fast. -
Sphere- uses a bounding sphere. Fast and smooth. -
Mesh- voxelizes the actual mesh geometry. Most accurate for complex shapes. -
Particles- emits from the positions of a linked Blender particle system. -
Curve- samples emission points along a linked Blender curve and emits a seamless tube of smoke or fire along the full path. UseSample Pointsto control how finely the curve is traced andRadiusto set the thickness of the emitted tube. Ideal for trails, lightning, vines, and any effect needing continuous emission along a path. UseStart %andEnd %to limit emission to a specific portion of the curve.
-
-
Fill Mode:Volumefills the interior;Surfaceemits only from the outer shell.
Emission Weight Map
When Fill Mode is set to Surface for a Mesh emitter, you can use a vertex group to mask which areas emit smoke. Higher weights in the vertex group increase the emission rate; zero-weight vertices emit nothing. This lets you paint emission density directly on the mesh in Edit Mode.
Motion Type
Tells the solver how the emitter object moves, so it can correctly transfer velocity to the fluid:
-
Static- the object never moves. The geometry is voxelized once and reused every frame. Fastest. -
Rigid- the object moves or rotates but does not deform. The mesh is cached once; only the transform is updated. The velocity imparted to the fluid matches the object's translation, rotation, and scale around its pivot. -
Deforming- the object changes shape every frame (cloth, shape keys, animated character). Full re-voxelization occurs each frame. Slowest, but most accurate.
Emission Rates
-
Smoke Rate: How much density (visible smoke) is injected per frame. -
Fuel Rate: How much combustible fuel is added. Fuel ignites when temperature exceeds the Ignition Temperature set in the Combustion section. -
Flame Rate: Directly injects flame without requiring the full combustion pipeline. -
Temperature Rate: Heat added per frame. Higher values make the smoke rise faster through buoyancy. -
Color: The RGB color emitted into the color field, which you can read in the volume shader. -
Velocity Scale: Multiplies the velocity the emitter imparts to newly emitted fluid when it moves. Set to 0 to emit smoke that instantly separates from the emitter.
Initial Velocity
A world-space velocity vector added to all emitted fluid on the first frame of contact, independent of the emitter's own movement.
Velocity Noise
Adds procedural noise variation to the initial emission velocity, creating organic turbulence in the launch direction of freshly emitted smoke. This produces more natural-looking initial expansion instead of uniform directional flow. Choose from Curl, FBM, Simplex, Perlin, or Voronoi noise types and adjust Scale, Detail, Speed, Strength, and Seed.
Pressure
Adds outward pressure injected at this emitter each frame. This creates a divergence source that pushes surrounding smoke outward - useful for explosive or pressure-driven effects. Set to 0 for no extra pressure (default).
Emission Mode
-
Continuous: Emits every frame throughout the simulation. -
Burst: Emits only between a definedStart Frameand for a setDurationin frames. -
Interval: Pulses on and off. Define thePulse(active frames),Pause(inactive frames), andOffsetto stagger multiple emitters.
Emission Noise
Modulates the emission strength with a procedural noise field, creating organic, non-uniform emission patterns. Choose from Curl, FBM, Simplex, Perlin, or Voronoi noise types and adjust Scale, Detail octaves, Speed, and Strength.
-
Seed: A random seed for the noise pattern. Change this to get a completely different noise shape without changing any other parameters.
Emission Modes
Each emission channel (Smoke, Fuel, Temperature) has its own mode that controls how the emitted value is applied to voxels:
-
Add: Adds the emitted value on top of the existing value in each voxel. Use this for continuous accumulation over time. -
Set: Directly replaces the existing value in the emitted voxels. Use this for precise control over the fluid state.
Emission Substeps
Controls how many times per frame the emitter position is sampled, available for Particle emitters. Increase this for fast-moving particles to avoid gaps in the smoke trail. Higher values give denser, more continuous emission.
Particle System Emitter
When Shape is set to Particles, link any particle system on the selected object. Each particle becomes an emission point. Enable Use Particle Radius to read the size of each particle, or set a fixed Override Radius. The Velocity Multiplier scales the inherited particle velocity. You can also choose the Pro Particles source to read a raw point-cloud mesh from the separate Pro Particles add-on, filter by group or set the emission color with the particle color.
7. Colliders
Colliders are solid obstacles that the fluid cannot pass through. The smoke wraps around and is displaced by collider geometry.
-
Object: The mesh to use as a collision boundary. -
Motion Type: Same Static / Rigid / Deforming modes as emitters. A Rigid collider moving through smoke will push the fluid aside with physically correct surface velocity. -
Friction: Controls how much of the fluid's velocity is absorbed at the collision boundary. 0.0 = perfectly slippery; 1.0 = full velocity damping at contact. -
Velocity Scale: Multiplies the surface velocity the collider imparts to adjacent fluid voxels. Increase to make a fast-moving object push the smoke harder. -
Color Transfer: When enabled, the collider transfers its color to smoke that touches its surface. This lets you create color-tinted smoke that takes on the color of the surface it contacts. -
Color: The RGB color applied to smoke on contact. -
Strength: How strongly the color blends into the smoke per substep. 1.0 = instant; lower values give gradual tinting over multiple frames. -
Distance: How many voxels away from the surface the color transfer reaches (1 to 5 voxels).
8. Forces
Forces shape how the fluid moves after emission. Add any number of forces from the Forces sub-tab. Each force type has its own settings and can be individually masked.
Force Types
-
Vortex: Rotational swirling force around a point defined by an Empty object. AdjustAxisto change the rotation plane,Radiusfor influence distance, andFallofffor how sharply the force decreases with distance.-
No Fly Away: Prevents smoke from flying outward at high vortex strengths. Adds a centripetal inward force equal to the tangential force, keeping smoke in a tighter circular orbit. Ideal for tornado-style effects. -
Attract to Axis: Additional inward force pulling smoke toward the vortex axis. Use this to counteract outward drift in the upper and lower parts of the vortex that No Fly Away alone cannot fix. Tune independently of vortex strength.
-
-
Wind: A constant directional push. Set theDirectionvector to any world-space direction. Strength is encoded in the vector's magnitude. -
Attract: Pulls fluid toward a point defined by an Empty. Useful for creating suction effects and concentrating smoke around a specific location. -
Follow Curve: Guides fluid along a Blender Bezier or NURBS curve. Animate the curve to steer the smoke.-
Strength: How strongly the fluid is pulled toward and along the curve. -
Attract: 0.0 = fluid flows purely tangent to the curve; 1.0 = fluid is pulled strongly toward the curve centre line. -
Invert: Reverses the flow direction so fluid moves against the curve instead of along it. -
Sample Points: Resolution of the internal curve representation (up to 2048). Increase for very long or complex curves.
-
Turbulence Types
All turbulence forces share Scale, Speed, and Seed parameters. Scale controls frequency (larger values = finer details; smaller values = broader features). FBM also exposes Octaves, Lacunarity, and Persistence for fractal detail control.
-
Curl: Divergence-free turbulence - creates smooth, swirling flows without any artificial sink or source artifacts. Ideal for organic smoke movement. -
FBM: Fractal Brownian Motion - adds layered octaves of noise for rich, detailed turbulence. -
Simplex: Smooth and fast noise with no axis-alignment artifacts. -
Classic: Traditional Perlin turbulence for a familiar, timeless look. -
Wavy: Sinusoidal modulation layered over noise - produces wave-like periodic patterns. -
Voronoise: Voronoi-cell-based noise with sharp, cellular features. -
Cubic: Smooth cubic-interpolated noise - softer transitions than classic Perlin.
Effect Masking
Every force has an Effect Masking sub-section that limits where the force is applied. Choose a mask type and set its Min/Max range and Contrast:
-
Density- applies force only where smoke concentration is within the chosen range. -
Temperature- limits the force to hot or cold regions. -
Flame/Fuel- activate the force only near active combustion. -
Velocity Magnitude- targets fast-moving or slow-moving fluid. -
Velocity Direction- applies the force only to fluid moving in a specific direction, defined by a reference vector. -
Gradient X / Y / Z- fades the force along a world-space axis. Mask Min and Mask Max are in Blender meters (e.g. Z = 2.0 to 5.0 creates a height-based fade from 2 m to 5 m above the world origin). -
Sphere Field- uses the distance from an Empty object (whose scale sets the radius) as the mask. -
Procedural Noise- generates a spatial noise mask. Choose Curl, FBM, Simplex, Perlin, or Voronoi and adjust Scale, Detail, and Speed.
9. Physics & Look
Environment
-
Ambient Temp: The baseline temperature of air in the scene. Smoke hotter than this rises. -
Buoyancy: How strongly temperature differences drive upward motion. The main control for how fast fire and hot smoke rise. -
Smoke Weight: Scales how strongly smoke density reacts to gravity. Force = Gravity * Density * Smoke Weight. At 0.0, smoke rises normally regardless of density. Higher values create heavy, sinking effects - perfect for dry-ice fog, poison gas, or waterfall mist that pools on the floor. -
Gravity Z: Scales the gravitational contribution to the simulation. Negative values pull fluid downward.
Vorticity & Turbulence
-
Vorticity Confinement: Restores small-scale rotational motion that is lost to numerical dissipation over time. This is the primary tool for keeping fire and smoke looking detailed and alive. Values around 0.1-0.3 add fine swirling tendrils; higher values produce more aggressive corkscrewing. -
Baroclinic Torque: Generates vortices at the boundary where hot and cold air meet. This physically shreds flame edges in a way that looks extremely realistic without requiring any added noise on top. Values of 0.5-2.0 are typical for fire. -
Turbulence Strength / Scale / Speed: A global Perlin noise turbulence field applied across the entire domain. Strength is the force magnitude. Scale sets the frequency of the noise (higher values give finer, smaller features; lower values give coarser, larger swirls). Speed animates the pattern over time. Add Octaves for fractal detail (Lacunarity and Gain control the fractal character).
Dissipation (Decay)
Each fluid channel fades out at its own rate. All values represent the fraction lost per frame.
-
Smoke: How fast density fades. -
Color: How fast the injected color channel fades. -
Temperature: How fast heat dissipates. Higher values make fire cool quickly and stop rising. -
Velocity: Damping applied to the velocity field each frame. -
Fuel: How fast unburned fuel evaporates. -
Flame: How quickly the flame channel fades after combustion stops. -
Viscosity: Diffuses the velocity field, simulating a thicker fluid. 0.0 is standard air. Higher values progressively move toward thick, slow mediums like glycerin or ectoplasm.
10. Combustion
Combustion is active when an emitter injects Fuel that reaches the Ignition Temperature. The fire simulation then drives its own heat and smoke production.
-
Burn Rate: How quickly fuel is consumed per frame. Higher values produce shorter, hotter bursts. -
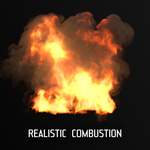
Oxygen Depletion: How strongly smoke density suppresses combustion in a voxel. This is the secret to realistic fireballs: the interior chokes on its own smoke, so only the outer surface burns. Increase this value to create mushroom-cloud-style explosions with dark, smoke-filled centers. -
Burn Variation: Noise intensity applied to the burn rate, creating organic, non-uniform burning patterns instead of a perfectly even flame. -
Ignition Temperature: The minimum temperature a voxel must reach before its fuel ignites. Use a high ignition temperature to pre-fill a region with invisible fuel that only lights when a hot emitter spark reaches it. -
Heat Release: How much temperature is released per unit of burned fuel. Combined with Buoyancy, this controls how explosively the fire rises. -
Expansion: Volumetric expansion of gas released during combustion - creates outward pressure blasts. -
Flame Intensity: Scales the flame channel value produced during combustion, directly affecting how bright fire appears in shaders that read the flame grid. -
Smoke Release: How much smoke density is generated by the burning process itself (separate from emitter smoke rate). -
Smoke Lift: Adds an upward offset to newly produced combustion smoke, making it rise away from the flame base. -
Extinction Smoke: Smoke produced when an active flame is extinguished - simulates the lingering wisp of smoke left behind after a fire goes out. -
Smoke Release Color: RGB color tint applied to smoke produced by burning fuel. White = neutral; any other color tints the combustion smoke. -
Extinction Smoke Color: RGB color tint applied to smoke produced when flames extinguish. Use dark grey or black for realistic soot effects.
11. Quality & Solver
Adaptive Substeps
The solver automatically adjusts the number of internal steps per frame to maintain stability. Min Substeps sets the floor - useful for ensuring smooth slow-motion animation. Max Substeps caps the maximum steps, preventing individual frames from taking too long at high velocities.
Pressure Solver - Pressure Iterations
The pressure solver enforces the incompressibility of the fluid. More iterations produce a tighter, more divergence-free result and better contain smoke within colliders. The default of 80 is a good balance for most scenes. Increase to 150-300 for dense simulations that need clean, tight boundaries; decrease to 40-60 for fast preview iterations where some minor leakage is acceptable.
12. Initial State
Initial State lets you start the simulation from a saved VDB file instead of an empty domain. This is useful for pre-filled scenes, looping simulations, or continuing a baked simulation with different settings.
-
Use Initial State: When enabled, the simulation loads the specified VDB file on each reset instead of starting empty. -
VDB File: Path to the VDB file to use as the initial state. The voxel size must match the current simulation voxel size - if they differ, a warning appears. - Set Current Frame as Initial State: Exports the current frame as a VDB file and sets it as the initial state path.
- Delete Initial State: Clears the initial state settings and path.
Note: The initial state VDB must have the same voxel size as the simulation. If you change the voxel size after setting an initial state, reload it from the current frame to update the resolution.
13. Cache & Export
Output Channels
Select which data channels are read back from the GPU and made available for preview and baking:
-
Density (Smoke): the main visible smoke channel. -
Color: per-voxel RGB color for tinted or multi-source simulations. -
Temperature: useful for glow shaders driven by heat. -
Velocity: for motion blur in the volume shader. -
Fuel: unburned fuel for custom combustion shaders. -
Flame: the active flame field, typically used to drive emission color and strength in the volume shader.
Disabling unused channels reduces data transfer time and VDB file size.
RAM Cache
Simulated frames are stored in memory and play back instantly - scrub the playhead or press Play to replay any cached frame without re-simulating. Max RAM (MB) caps the cache size. When the limit is reached, older frames are evicted to make room. The current usage and frame count are shown in the panel.
Viewport Preview
-
Points: Displays the simulation as a fast point cloud mesh. Best for interactive playback during setup. -
Volume: Writes a temporary VDB file and displays it as a true Blender volume. This is the most accurate viewport representation and uses the Display Channel selector to choose which grid to show.
Points Mode Settings:
-
Threshold: Minimum density value shown in the point cloud. Lower values show more points but slow the viewport. -
Max Points: Maximum number of preview points displayed (10,000 to 1,000,000; default 100,000). Points are randomly sampled from the volume. More points give better coverage but reduce viewport performance. Tune this to balance fidelity and speed.
Bake to Disk
Set a Start Frame and End Frame, choose a Cache Folder and File Name, then click Bake. The simulation runs frame by frame and saves a numbered VDB file for each frame. The resulting sequence can be loaded directly by Blender's volume object for final rendering in Cycles or EEVEE. Click Clear Cache to delete all baked files.
Cache Versioning
Versioning stores VDB files inside a numbered sub-folder (e.g. v1, v2). This lets you keep multiple independent caches in the same base directory - useful for iterating on effects without overwriting previous bakes.
-
Versioning: When enabled, baked files are stored in a version sub-folder instead of the base cache folder. -
Version: The version number for the active cache sub-folder (v1 to v1000). Change this to start a new independent cache.
Load from Cache (Solver Bypass)
When Use Cache is enabled, the solver is bypassed and every frame is loaded directly from the baked VDB files on disk. The playhead scrubs through the sequence instantly without re-simulating. This is useful for previewing or rendering a baked simulation with different viewport settings. Works with Live Update disabled and the solver stopped.
14. Add-on Changelog
- v1.1.0 (2026-05-27): Performance, new features, and bug fixes
- New: Collider Color Transfer - colliders now transfer color to adjacent fluid voxels.
- New: SDF Collisions - smooth, accurate collision boundaries for all collider shapes.
- New: Vortex Modes - new toggle to prevent fluid from flying away (conservative mode) and a dedicated attract parameter for suction effects.
- New: Curve Emitter Range - control which portion of a curve emits, from any start to any end percentage.
- New: Initial Velocity Noise - procedural noise variation applied to emitted velocity for more organic initial motion.
- New: Emitter Pressure - inject outward-pressured smoke that expands on its own, useful for bursts and explosions.
- New: Initial State - pre-fill the simulation domain with smoke, fuel, or flame before playback begins.
- New: Emission Modes Set/Add - "set" replaces existing fluid; "add" accumulates on top, giving more control over layering.
- Smoke & Extinction Color - dedicated color fields for smoke produced by combustion and for smoke appearing when flame is extinguished.
- Sharpen for Non-Upres - new separate Sharpen parameter that applies even when upscaling is disabled.
- Max Preview Particles - configurable cap on particles shown in viewport preview (10k to 1m, default 100k) to balance performance and fidelity.
- VDB Cache Versioning - optional cache versioning for safe multi-session baking; each version loads independently with solver disabled.
- Press ESC to Cancel - press Escape to abort frame processing and catch up to the playhead.
- Solver Restart Warning - UI now warns when a critical setting change requires a solver restart.
- Bug fix: Gravity affecting only fluid - gravity now correctly affects density and temperature, not empty space.
- Improved default values for fire - updated presets and defaults for better-looking fire out of the box.
- Optimized preset loading and engine performance.
- Better Linux (GLIBC 2.34+ Ubuntu 22.04+) compatibility.
- 20% less VRAM required - optimized memory layout.
- v1.0.4 (2026-04-22): Bug fix
- fixed crash when rendering animation - frame update handler now correctly skips updates during render operations
- v1.0.3 (2026-03-21): Bug fix
- export issue of empty grids in vdb files
- attract force did not support negative values
- v1.0.2 (2026-03-19): Bug fix
- otimize tool tips in ui
- v1.0.1 (2026-03-10): Bug fix
- fix: wrong description for noise/turbulence parameters
- fix: dissipation was not strong enough
- v1.0.0 (2026-03-09): Initial release
- GPU-powered sparse fluid solver with adaptive domain.
- Full combustion pipeline: fuel, flame, oxygen depletion, heat release, and expansion.
- Baroclinic torque and vorticity confinement for realistic flame detail.
- Smoke Weight for heavy, sinking smoke and dry-ice effects.
- Viscosity for thick, slow-medium simulations.
- Emitters: Box, Sphere, Mesh, Particles, and Curve shapes with Static, Rigid, and Deforming motion modes.
- Continuous, Burst, and Interval emission modes with per-emitter procedural emission noise.
- Colliders with friction and velocity transfer in all three motion modes.
- Force system: Vortex, Wind, Attract, Follow Curve (up to 2048 sample points), and seven Turbulence types (Curl, FBM, Simplex, Classic, Wavy, Voronoise, Cubic).
- Per-force field masking: density, temperature, flame, fuel, velocity magnitude, velocity direction, gradient, sphere, and noise.
- Global Turbulence with full FBM fractal controls.
- Preset system with 7 built-in presets: Campfire, Dry Ice, Flamethrower, Ink in Water, Magic Portal, Cigarette Smoke, Explosion.
- Post-simulation GPU Upscaling (Upres): 2×, 3×, and 4× modes (up to 64× more output voxels) with Sharpen parameter.
- RAM cache with configurable memory limit and instant frame playback.
- VDB bake to disk with per-channel output selection.
- Point-cloud and live VDB viewport preview modes.
- Adaptive substep solver with configurable pressure iterations.
15. Licensing & Terms of Use
By purchasing this product, you agree to the following terms.
License Overview
- The Python UI scripts are licensed under the GPLv3+.
- The simulation solver is a precompiled, proprietary executable shipped with the add-on. Redistribution is prohibited.
Key Terms of Use
- Usage: You may use the proprietary solver for personal, educational, and commercial rendered works.
- Restrictions: You may not redistribute or resell the proprietary solver executable. Reverse engineering is prohibited except as permitted by law. Redistribution of the GPL Python scripts must comply with the GPL.
- Disclaimer: The software is provided "AS IS", without warranty of any kind. You assume all risk as to quality and performance.
-
$99
Commercial use - For 1 user - All updates included
Have questions about this product?
Login to message
Discover more products like this
explosion pyro simulation sparse smoke GPU pyro vdb export realtime gpu pyro Blender VFX fire sparse solver