Pro-Quest
 Art In Motion


Pro Quest User Manual
1. Introduction
Welcome to Pro Quest! This manual will guide you through all the features of the addon. Pro Quest is designed to give you valuable insights into your work habits by tracking your project time, monitoring deadlines, and providing detailed statistics, all from within Blender.
2. Installation and Setup
To begin using Pro Quest, you must first install it.
-
Download: Get the
pro_quest.pyfile. -
Install in Blender:
- Open Blender.
- Go to the main menu and select
Edit > Preferences. - In the Preferences window, click on the
Add-onssection. - Click the
Install...button at the top right. - Find the
pro_quest.pyfile on your computer and select it.
-
Enable the Addon:
- After installation, you will see "Object: Pro Quest" in the list.
- Click the checkbox to the left of its name to enable it.
The Pro Quest panel is now available in your Scene Properties.
3. The Main Panel
You can find the main Pro Quest interface in the Properties Editor, under the Scene Properties tab.
3.1. Timer Display and Status
The most prominent feature of the panel is the large time display, which shows the total active time spent on the project in an HHh MMm SSs format.
Next to the time is a status icon:
- ⚫ REC: The timer is active and tracking your work.
- ▶ PLAY: The timer is running but has been paused by you manually. Click Resume to continue.
- ❚❚ PAUSE: The timer is running but has automatically paused due to inactivity. It will resume when you move your mouse or use your keyboard in Blender.
- ◯ Off: The timer is stopped.
3.2. Primary Controls
- Start: Begins a new time-tracking session for the current file.
- Pause / Resume: Temporarily pauses or resumes the timer. This is useful for when you need to take a quick break. Pausing does not stop the session.
- Stop: Completely stops the current tracking session. To track more time, you will need to click Start again.
- Reset: (Use with caution!) This will permanently reset all tracked data for the current file back to zero. This includes total time, render stats, and editor breakdowns. This action cannot be undone.
-
Export: This opens a file browser, allowing you to save a
.csvfile containing a simple time log for the current project. This is useful for client billing or personal records. - Stats: Opens the Global Project Dashboard, giving you a summary of all projects you've worked on.
4. Sub-Panels
The main panel contains several sub-panels that provide more detailed information.
4.1. Deadline
This panel allows you to set a deadline for your project.
- Use the Day, Month, and Year dropdowns to set the date.
- Below the date selectors, a status message will tell you how many days are remaining, if the deadline is today, or if the project is overdue.
4.2. Render Stats
This panel gives you insights into your rendering activity.
- Time Spent: Shows the total cumulative time the Cycles or Eevee renderer has been active for this project.
- Frames Rendered: Shows the total number of frames (or single images) that have been successfully rendered.
This data is logged automatically whenever you render.
4.3. Editor Time Breakdown
This panel shows you exactly where you're spending your time within Blender. It lists the time spent in each editor (e.g., 3D Viewport, Shader Editor, Compositing, UV Editor), sorted from most to least time spent.
5. Global Features & Preferences
5.1. Global Project Dashboard
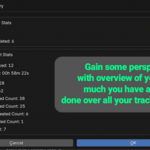
Accessed via the Stats button, this dashboard provides a high-level overview of all your projects where Pro Quest has been used and the file has been saved at least once.
For each project, it lists:
- Project Name (the
.blendfilename) - Total Time Tracked
- Date and Time of the Last Save
A "Grand Total" at the top shows the combined time for all listed projects.
5.2. Automatic Idle Detection
Pro Quest respects your time. If you don't move your mouse or use your keyboard within Blender for a certain period, the timer will automatically pause. It resumes as soon as you become active again.
5.3. Add-on Preferences
You can configure the idle detection time in the Add-on Preferences.
- Go to
Edit > Preferences > Add-ons. - Find "Pro Quest" in the list and expand it by clicking the small arrow.
- Adjust the Idle Threshold (seconds) to your liking. The default is 60 seconds.
6. How Data is Stored
-
Project-Specific Data: All information for a single project (total time, deadlines, etc.) is stored directly within its
.blendfile. -
Global Data: To power the Global Project Dashboard, a summary of each project is also saved to a
global_projects_log.jsonfile in your Blender user configuration directory. This happens automatically every time you save a.blendfile with the timer active.
