Procedural Glass (Marine Chronometer Series)
 Ocelot VFX
in Glass
Ocelot VFX
in Glass


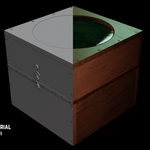
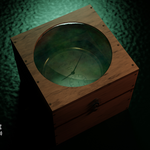
PROCEDURAL MATERIAL SETUP GUIDE
SYSTEM REQUIREMENT WARNING: These material/s have not been tested in versions lower than Blender 5.1; Doing so may cause issues with loading and rendering the file.
IMPORTANT NOTE: The materials in this guide are generic examples and not indicative of the purchased material.
OPTION 1: HOW TO INSTALL INTO YOUR BLENDER ASSET LIBRARY (Recommended)
This option makes the material/s permanently available via your asset browser in every new project you open. If you haven't used this system before, these steps will assist:
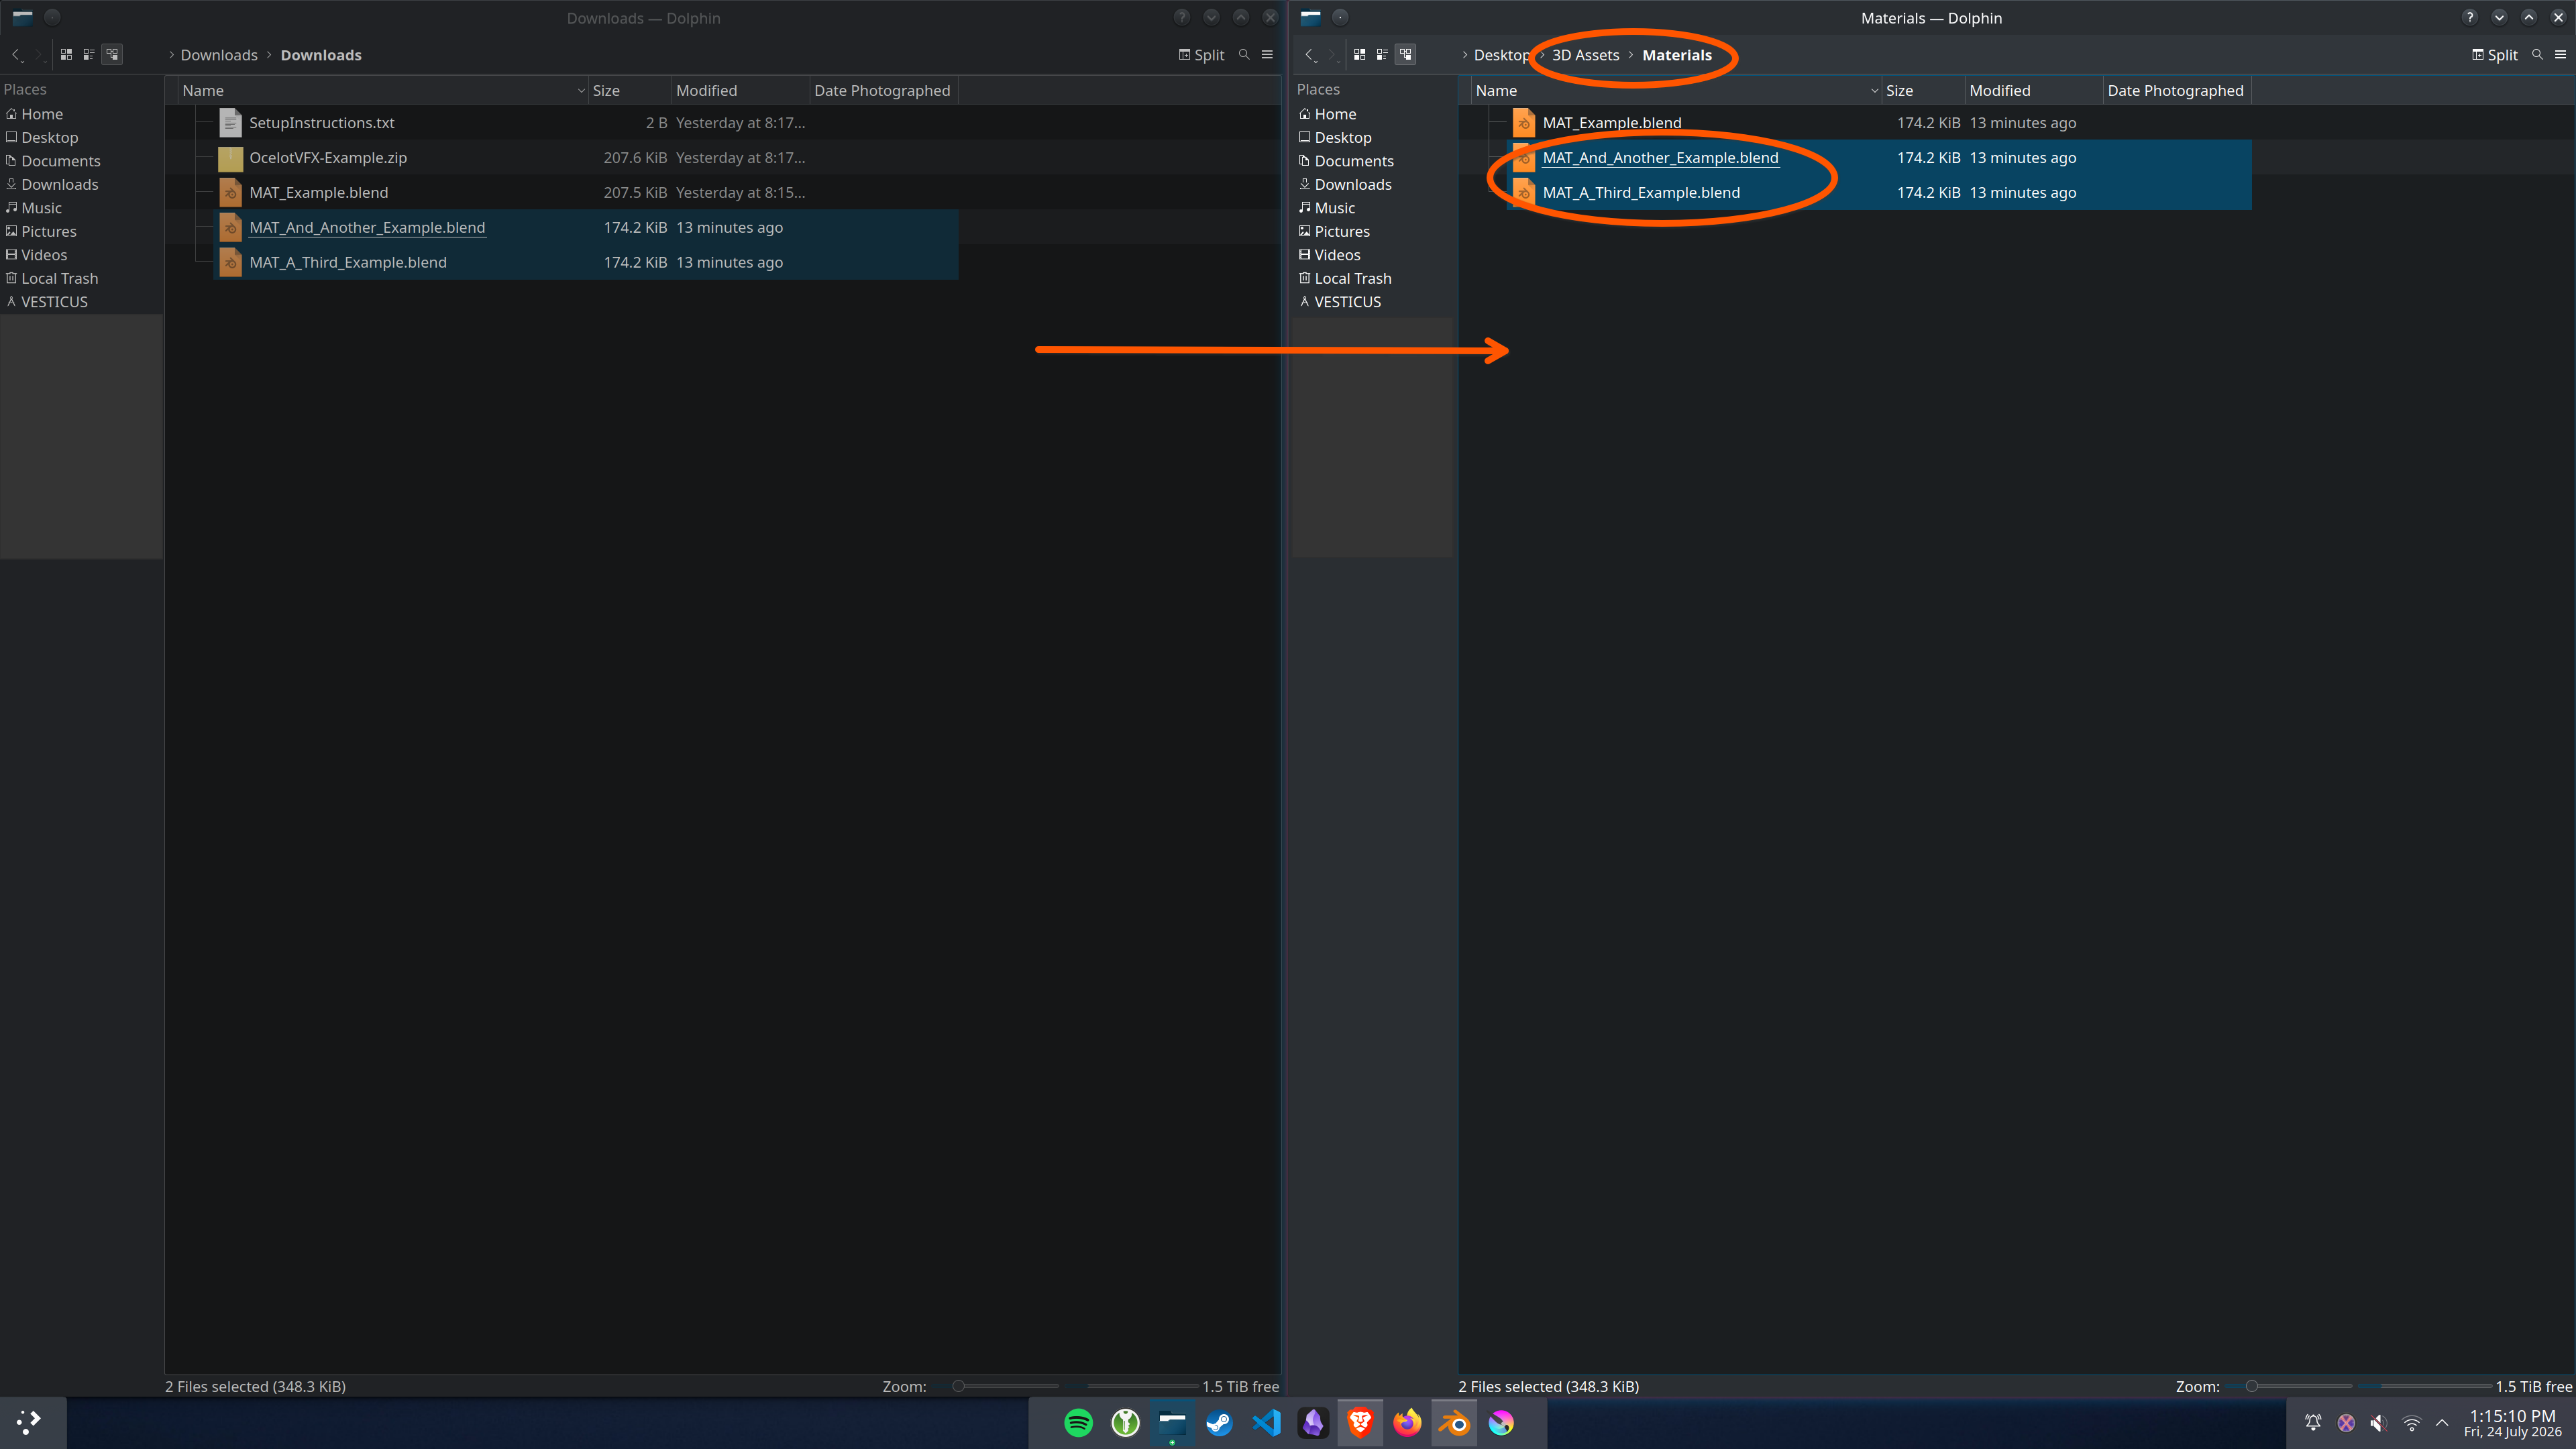
Step 1: Move the ".blend" file included in this download to a permanent 3D assets folder on your computer (e.g. C://3D_Assets/Materials).
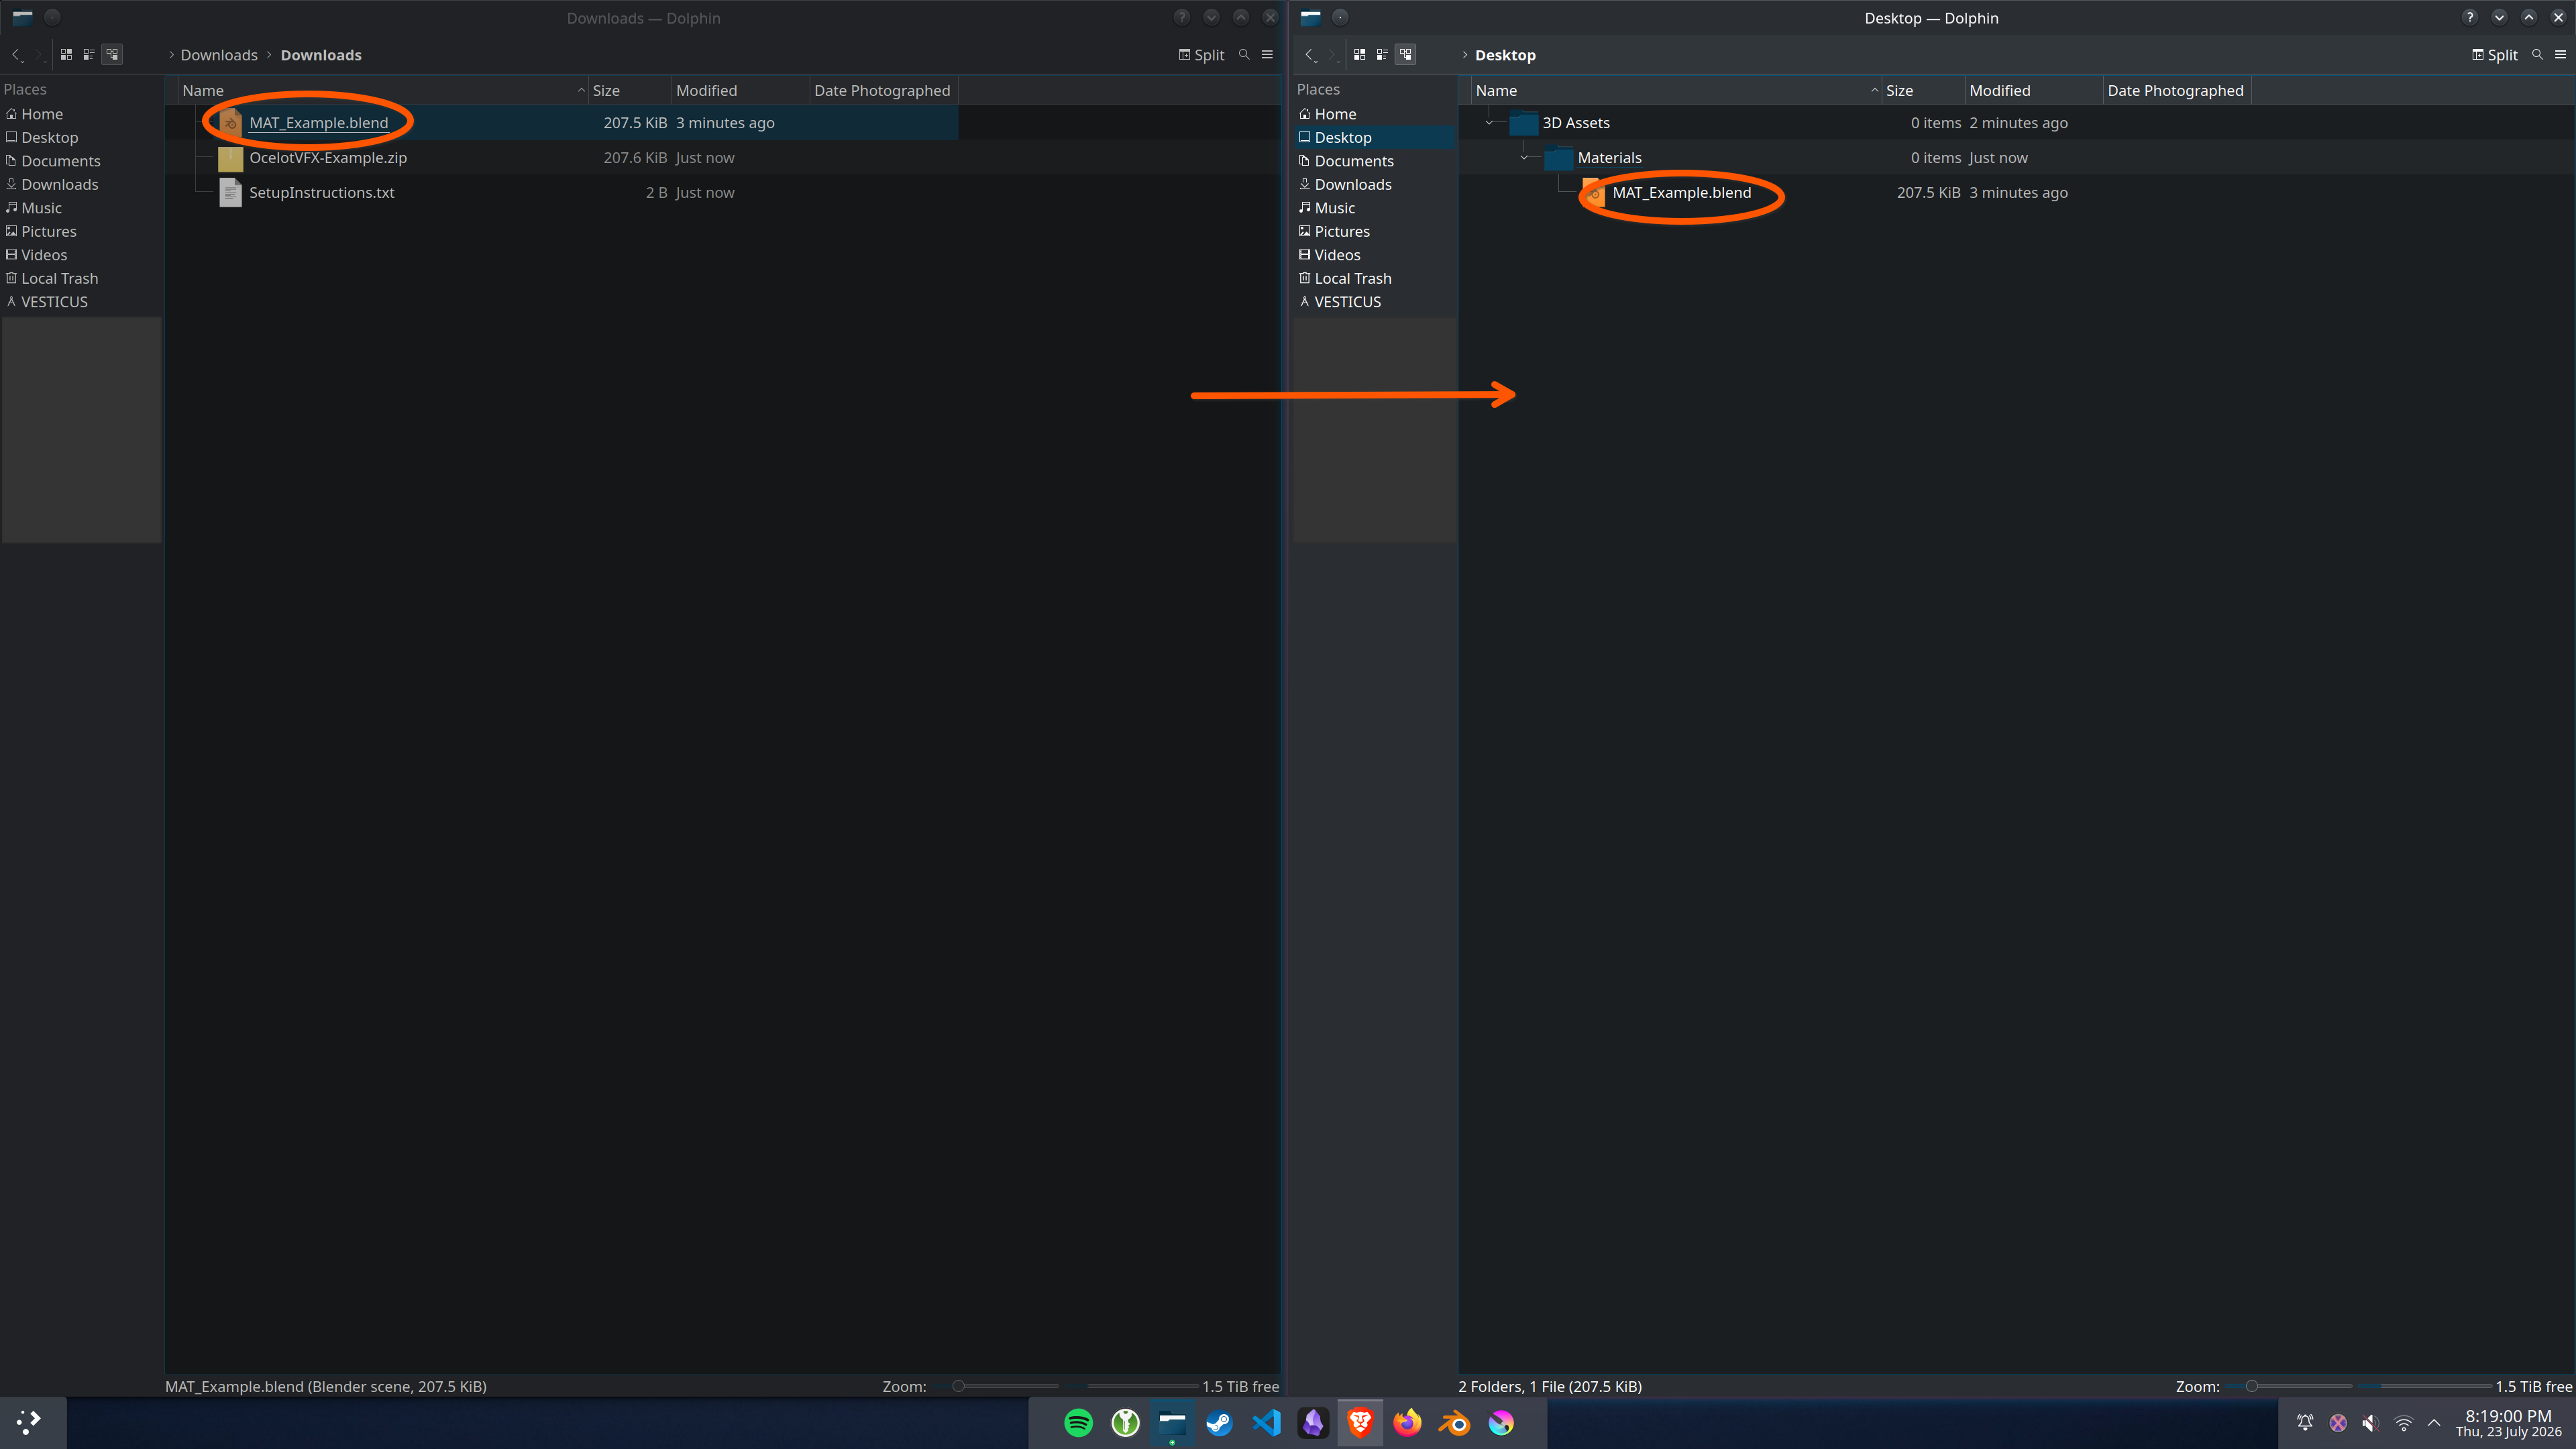
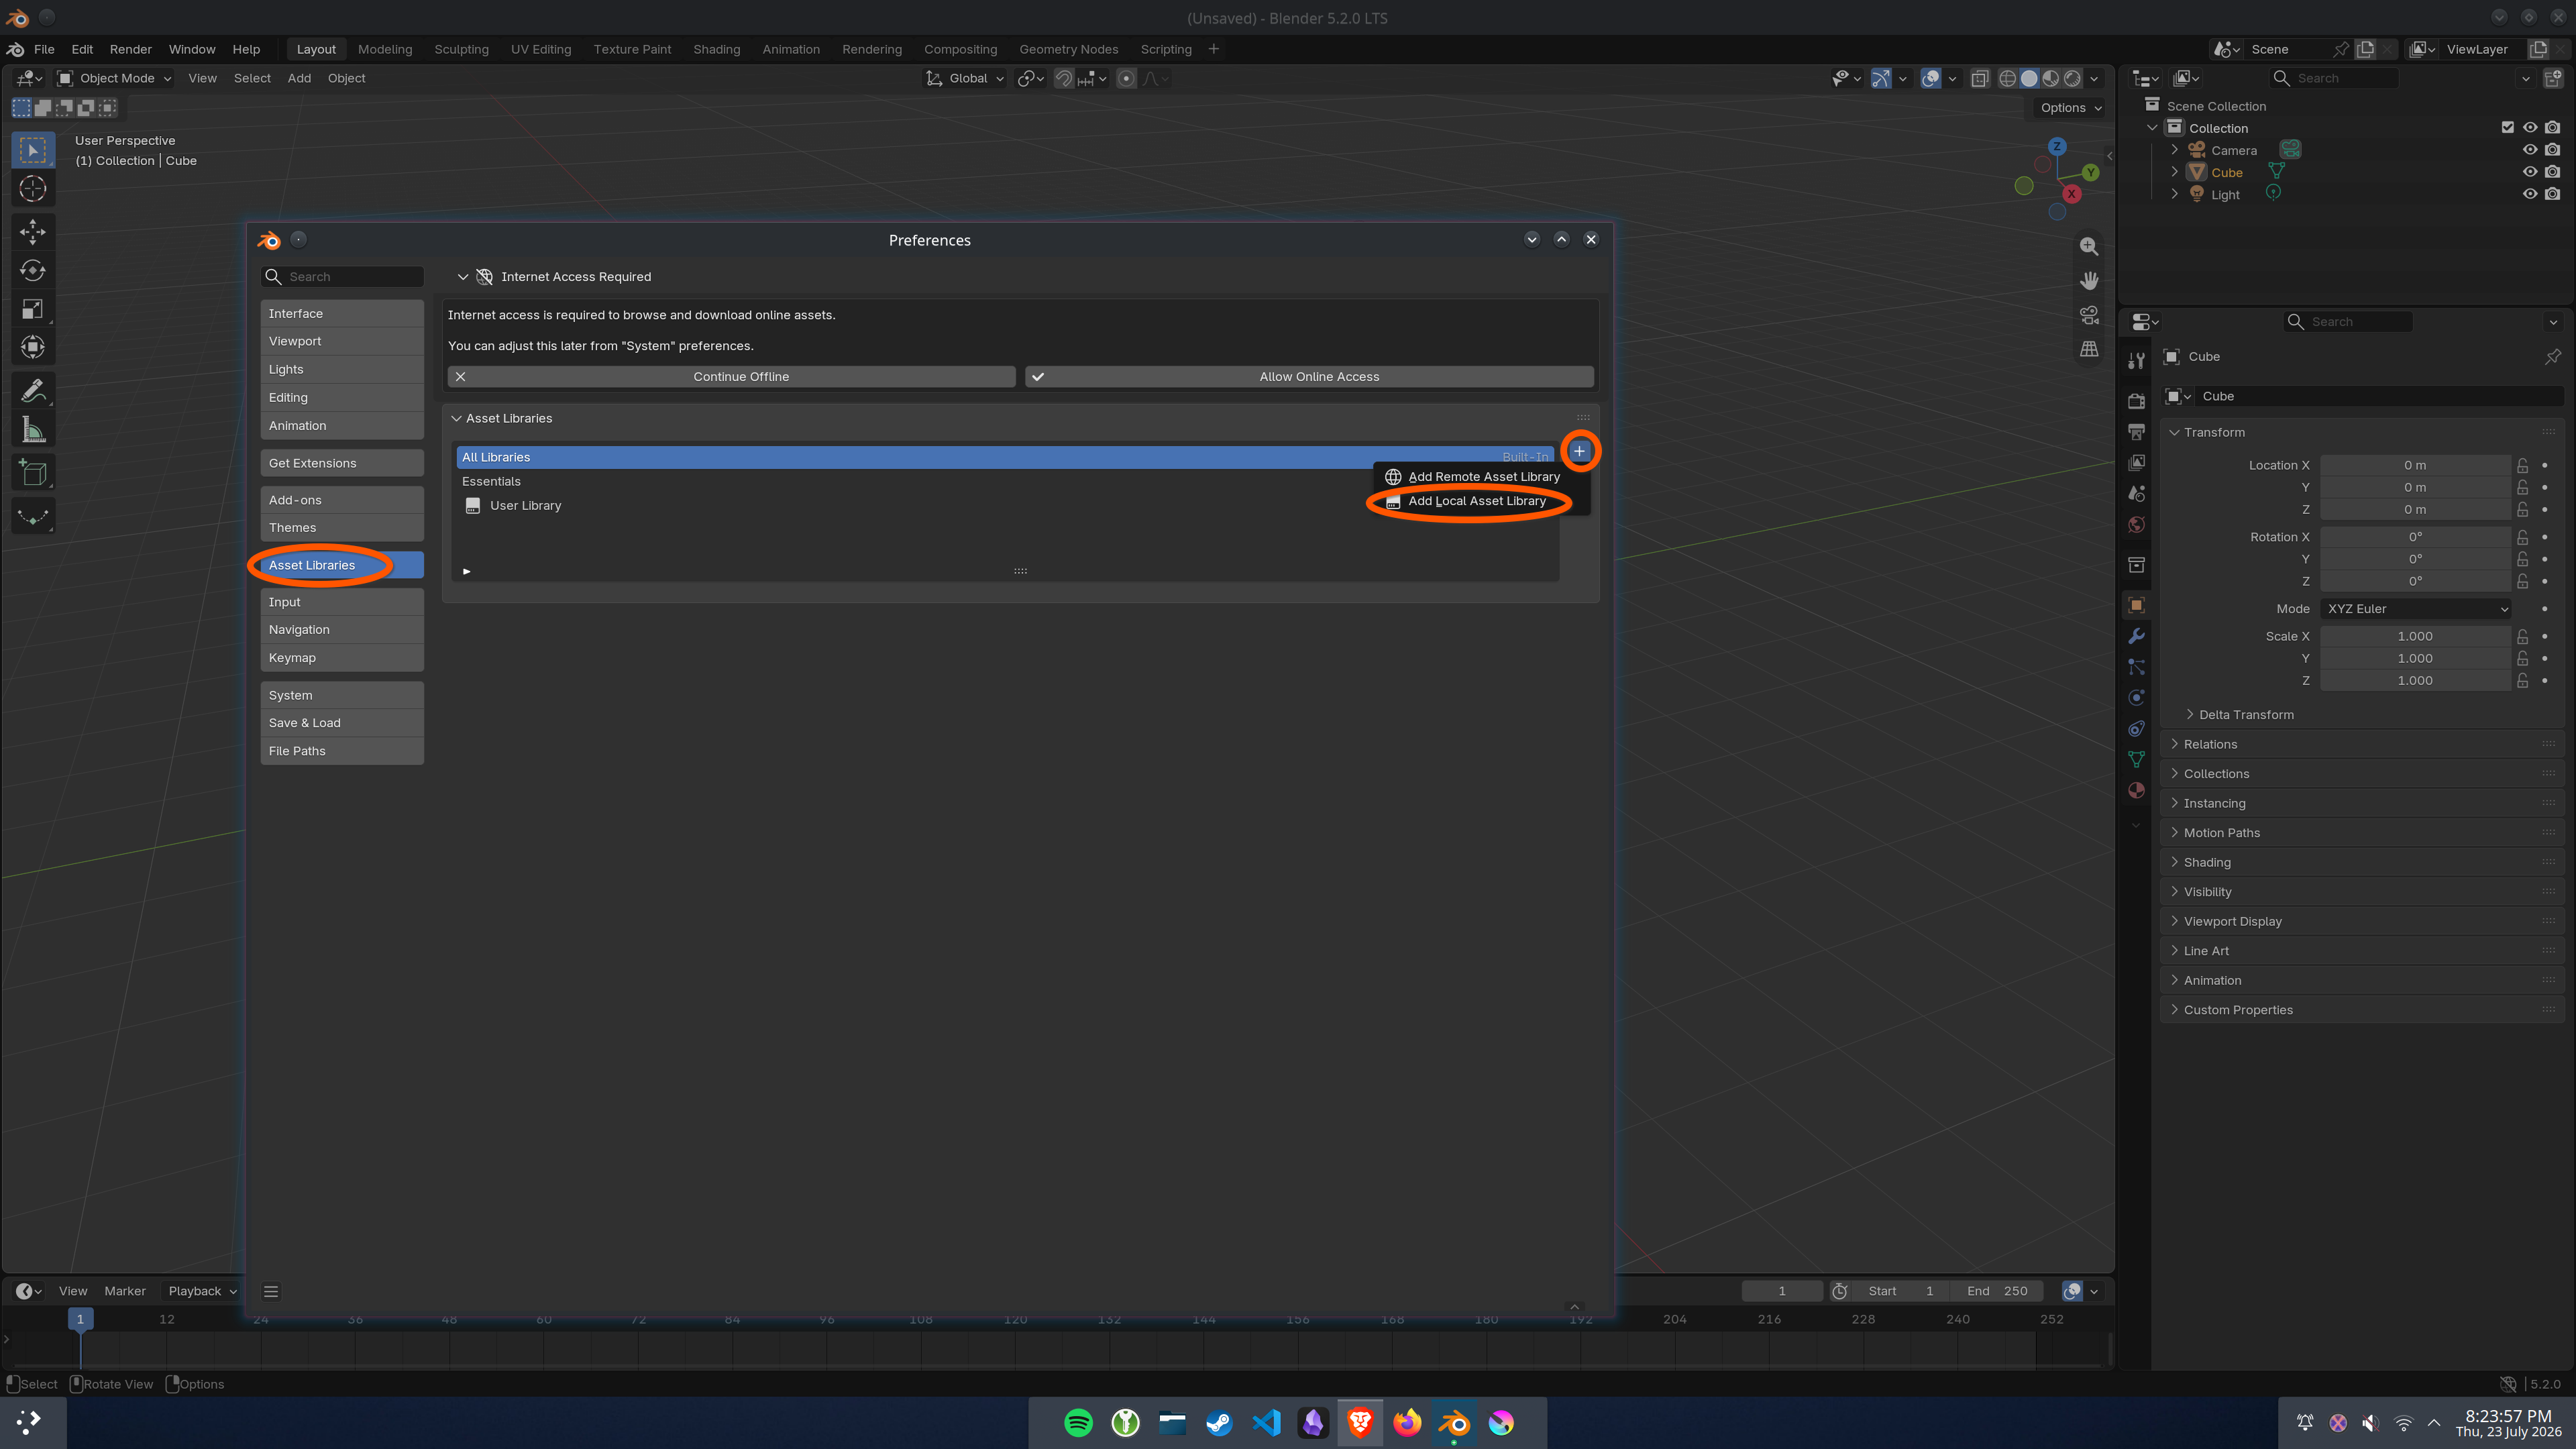
Step 2: Open Blender and navigate to Edit > Preferences > Asset Libraries.
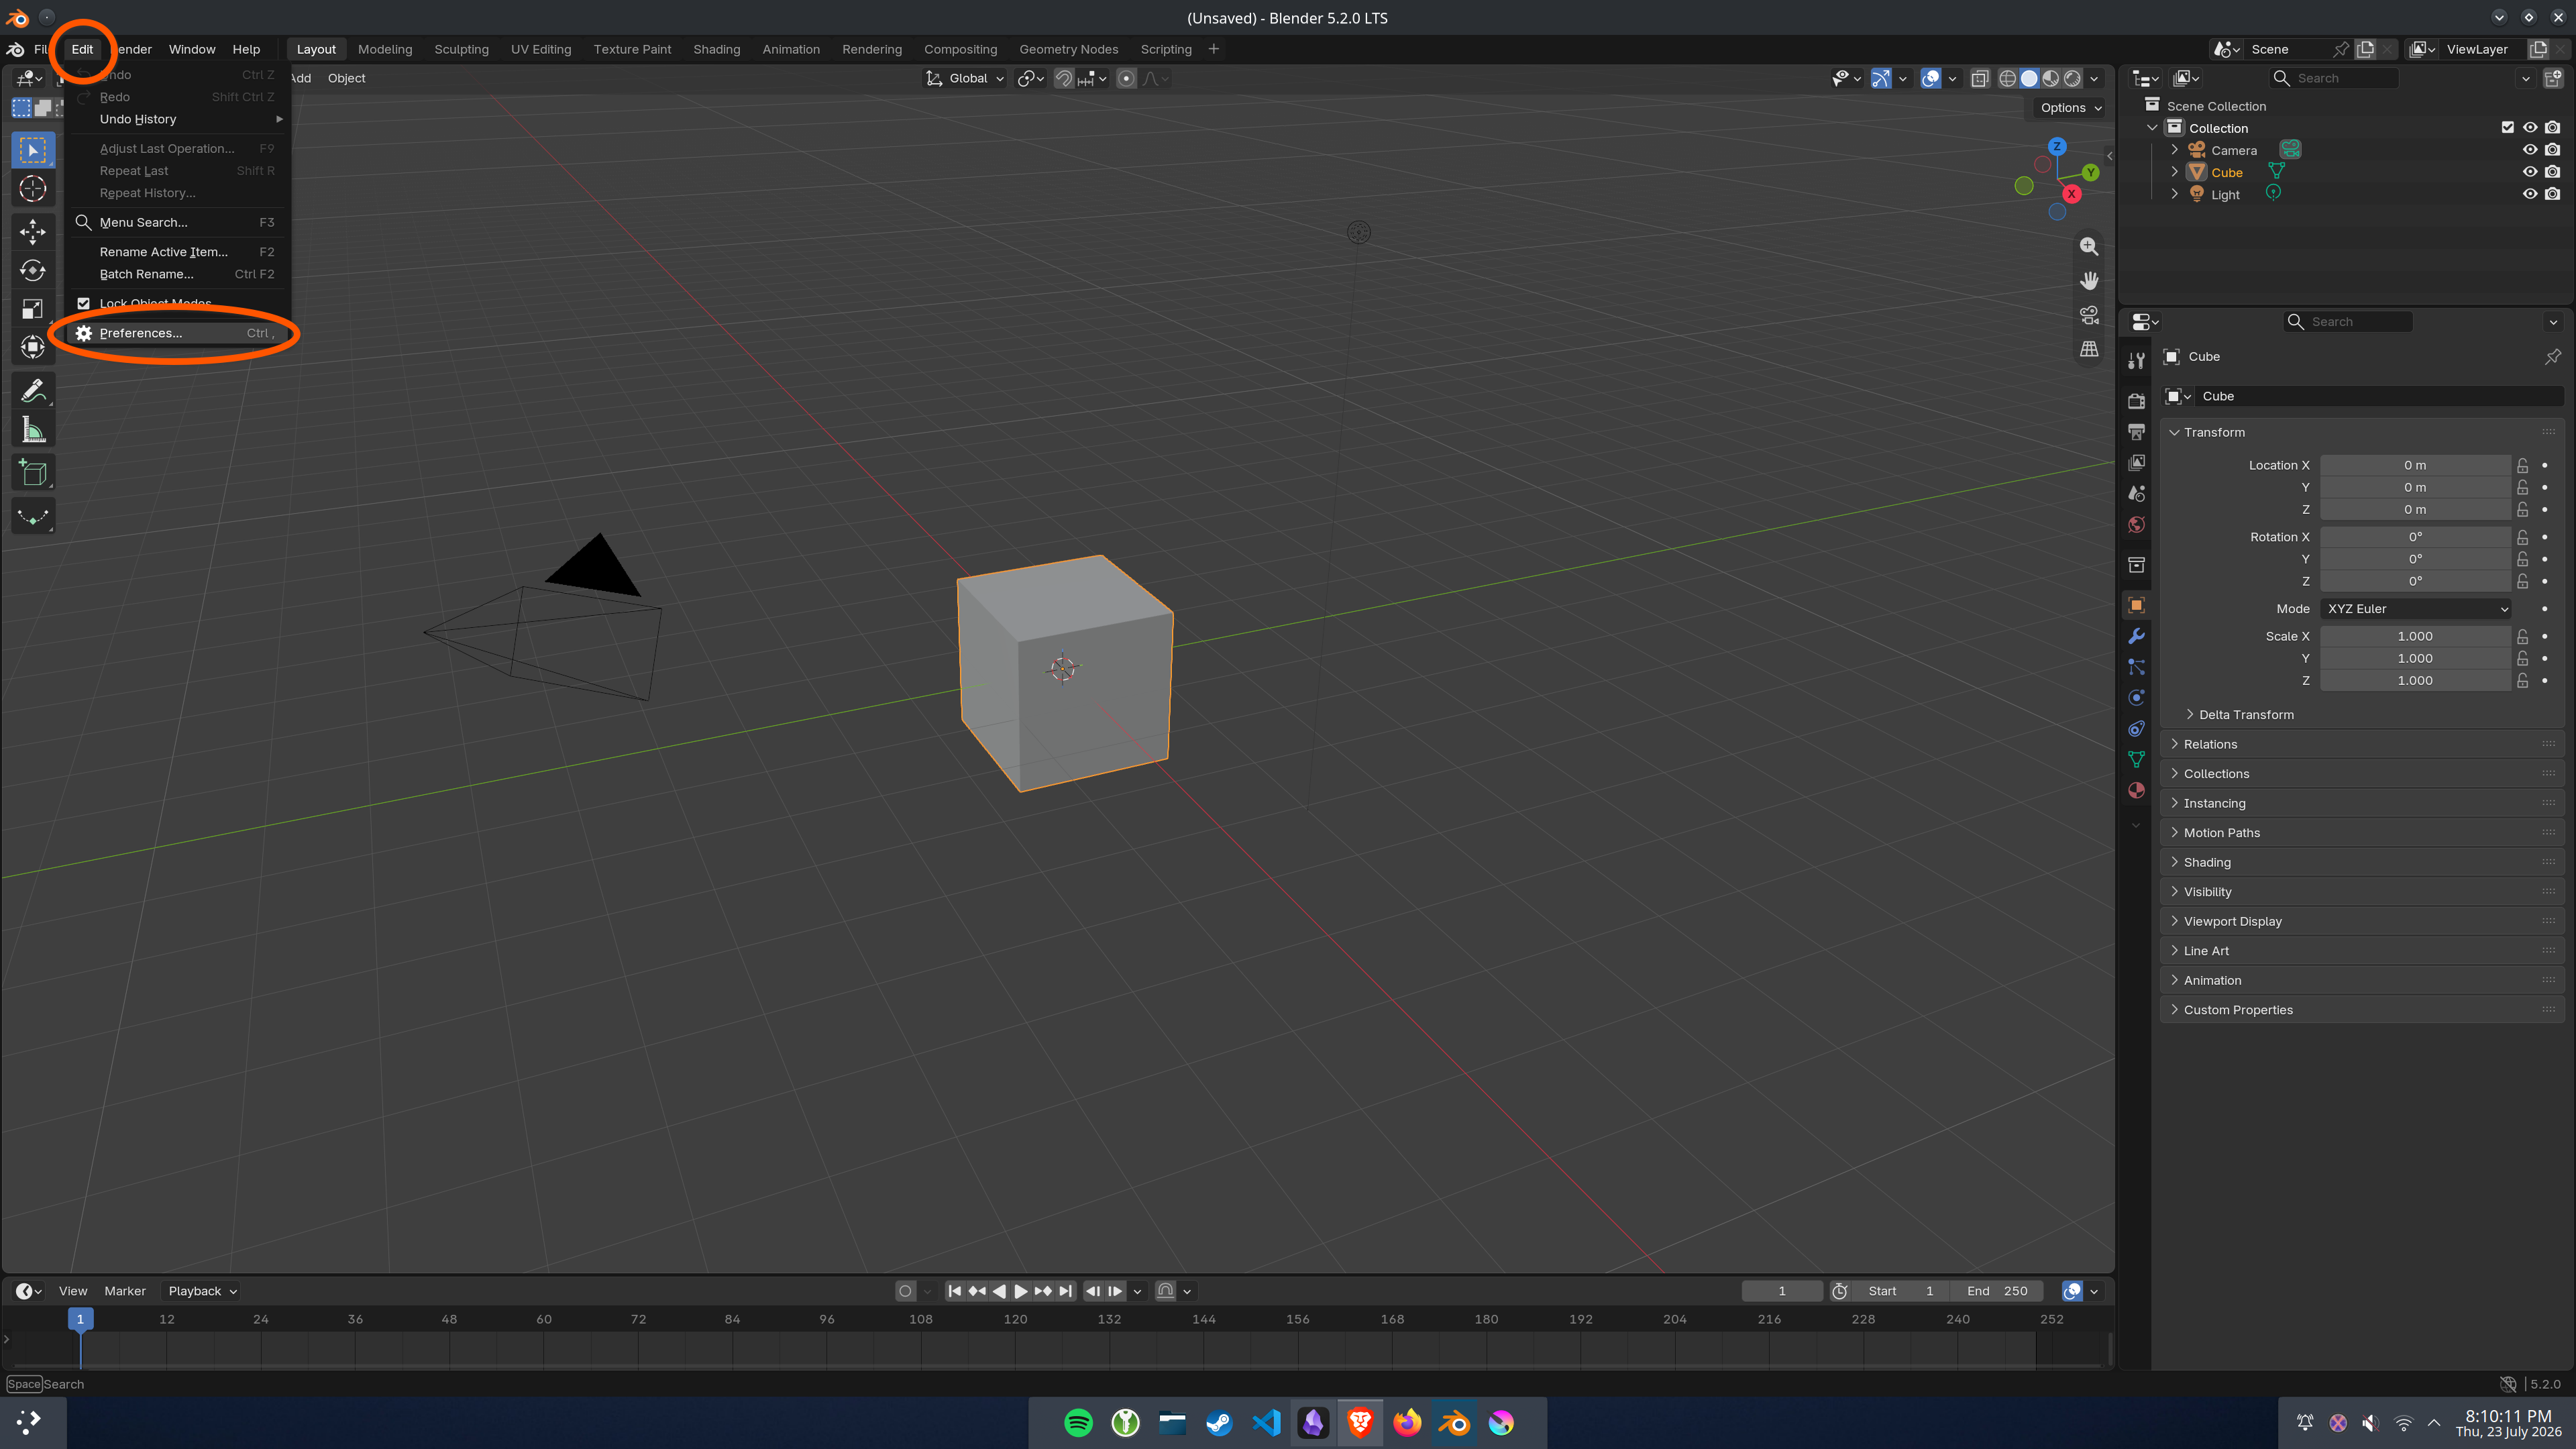
Step 3: Click the "+" button followed by "Add Local Asset Library".
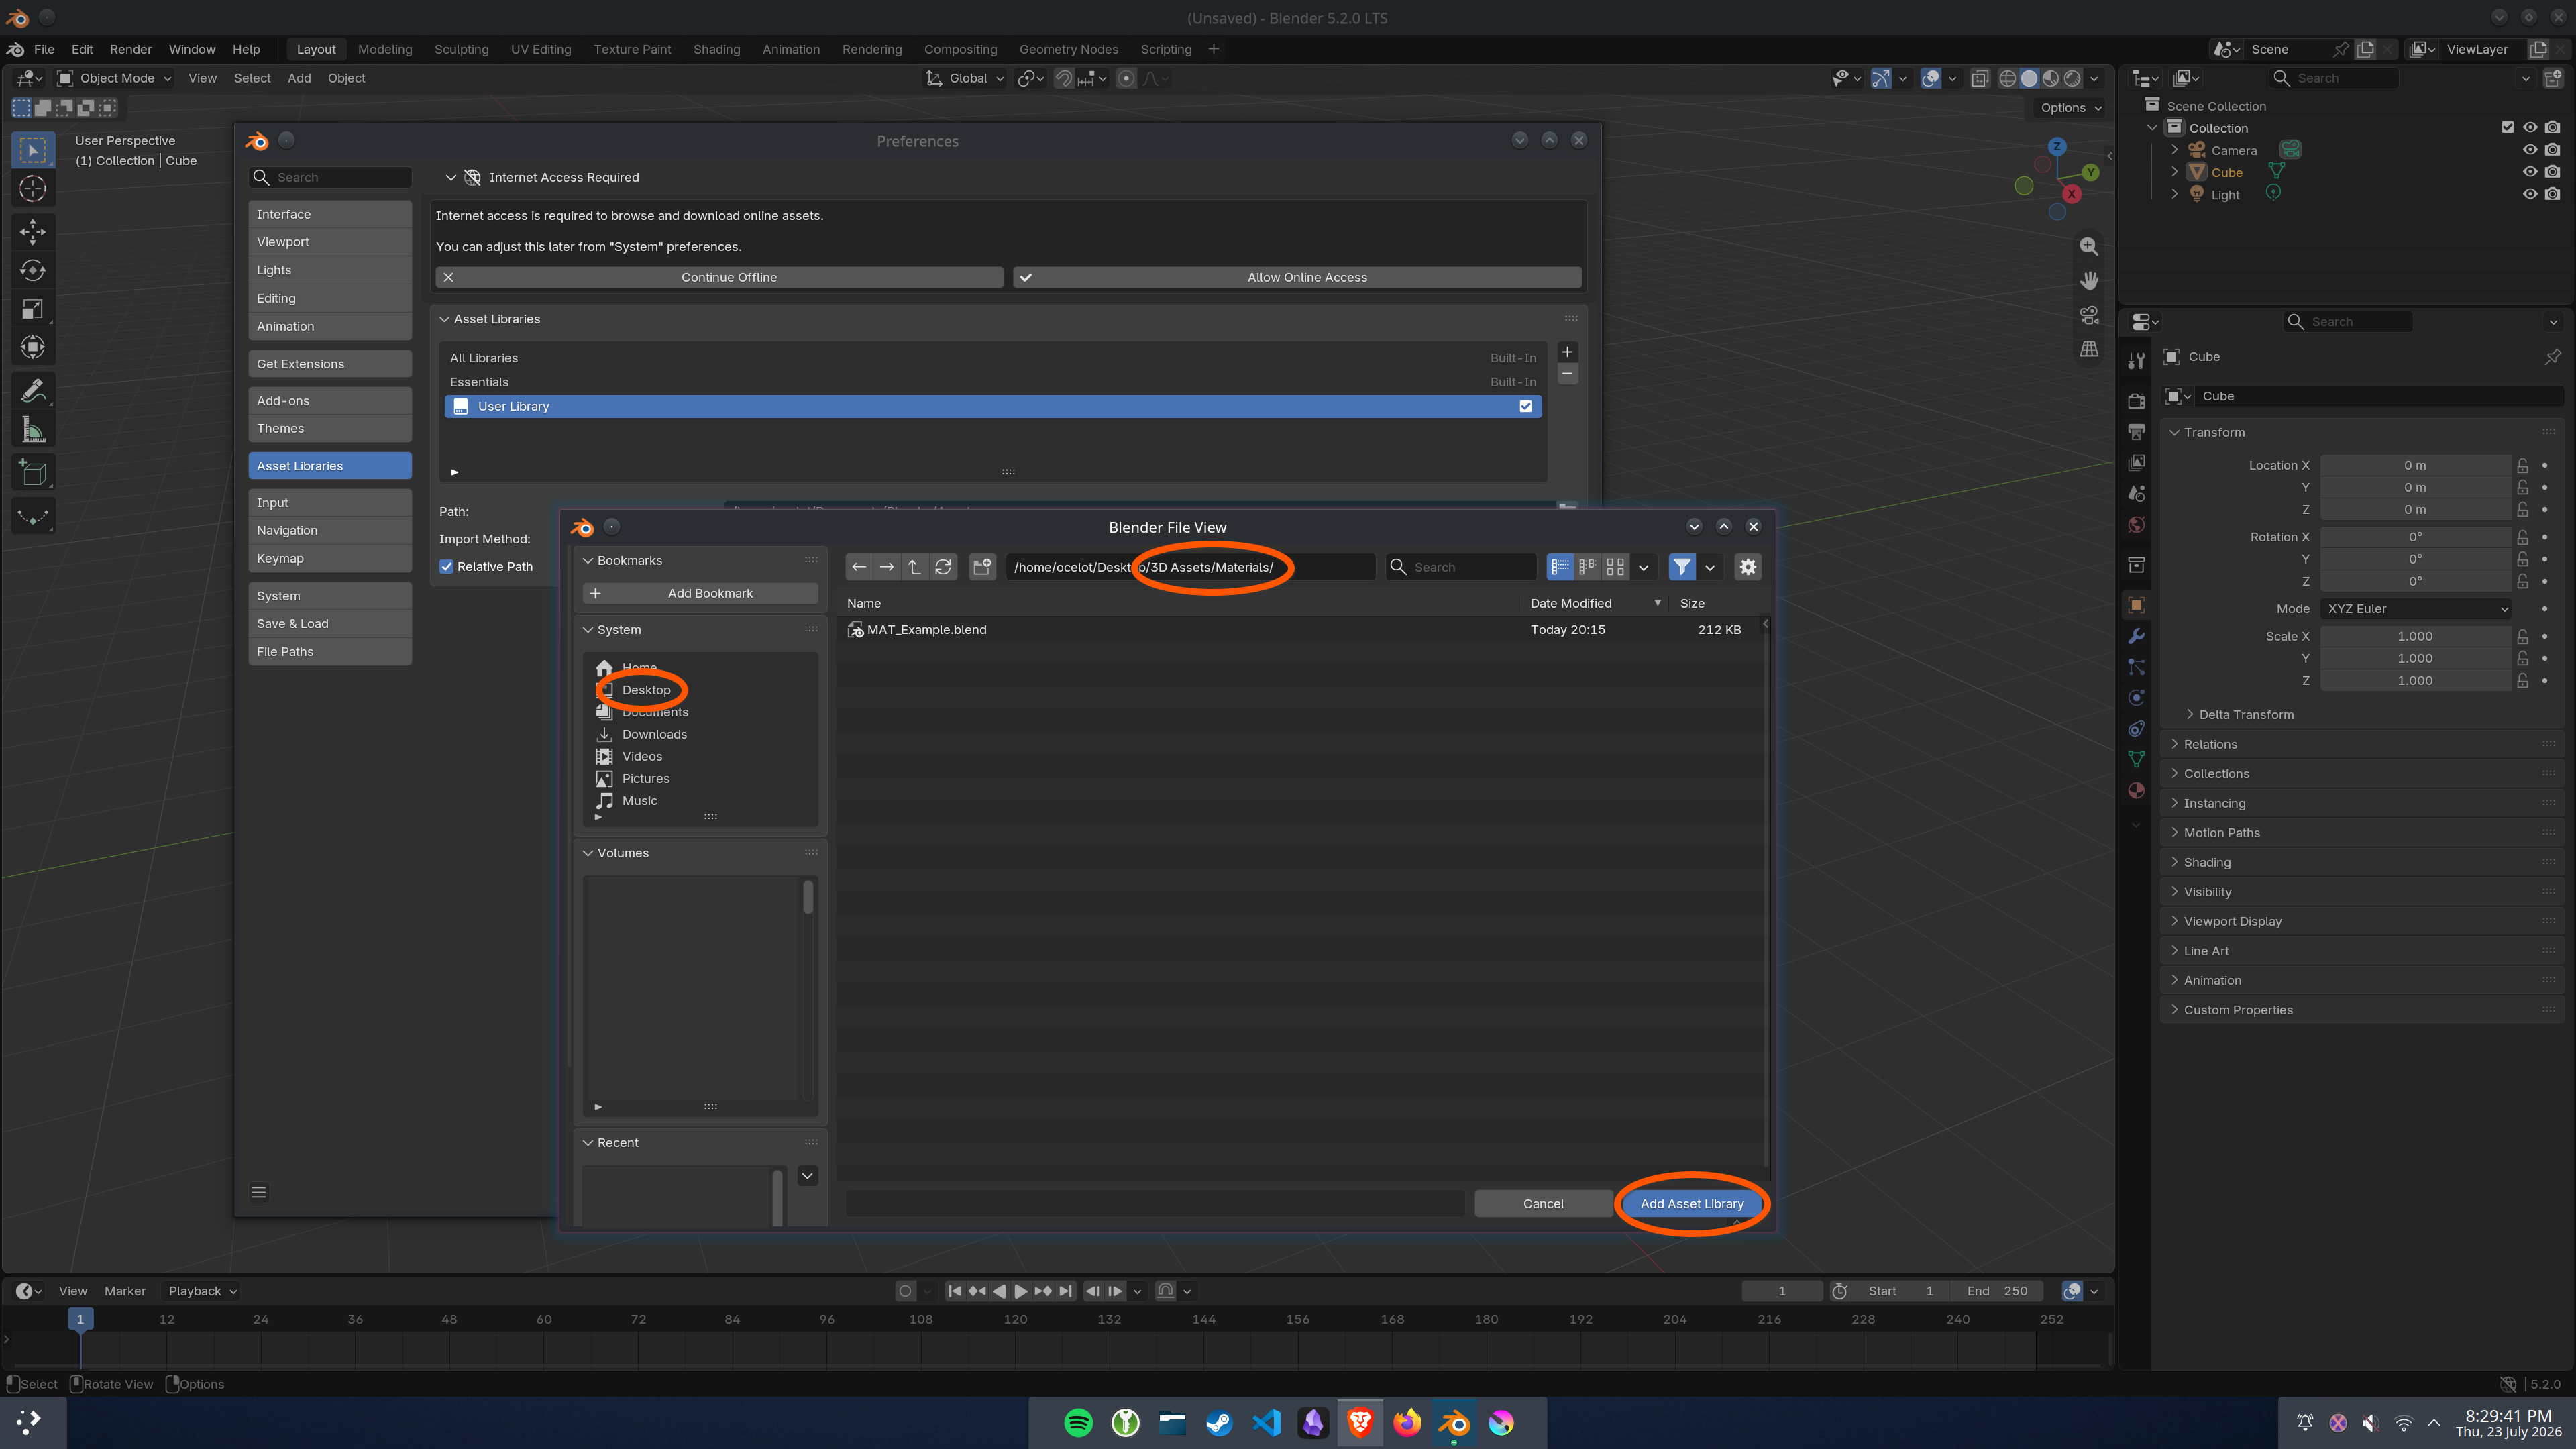
Step 4: Navigate to your folder containing the ".blend" file. Click "Add Asset Library".
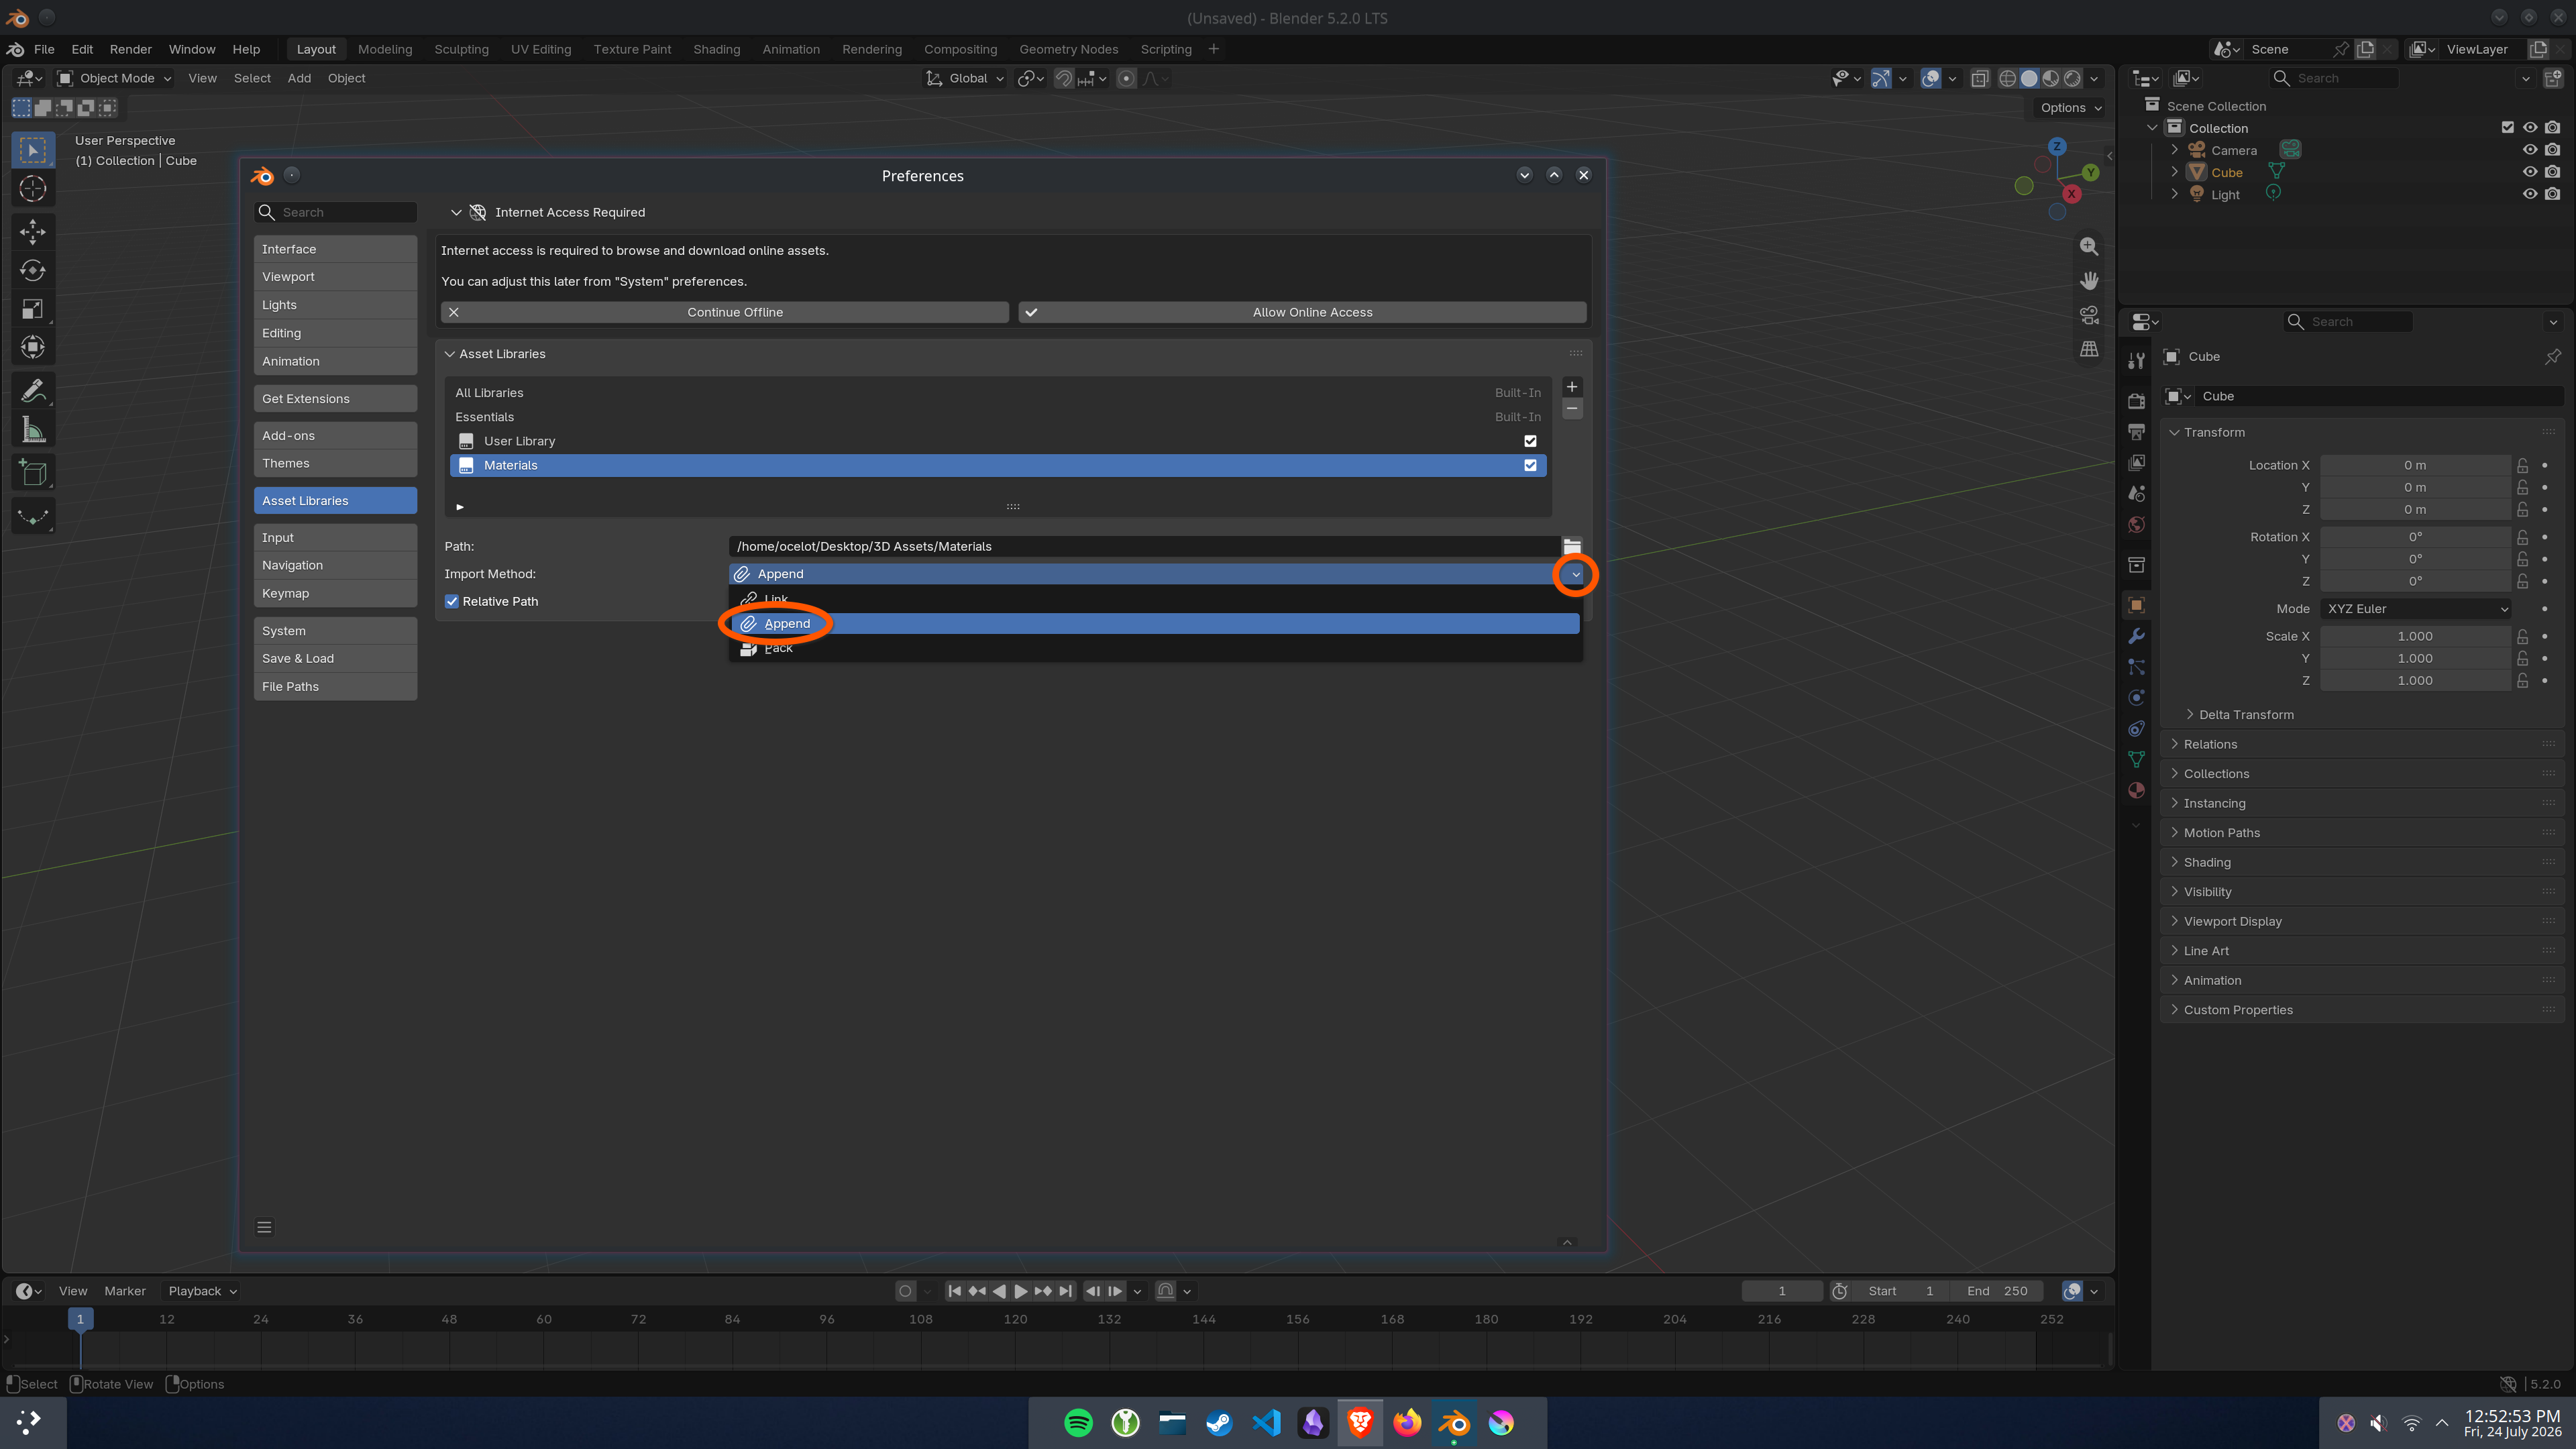
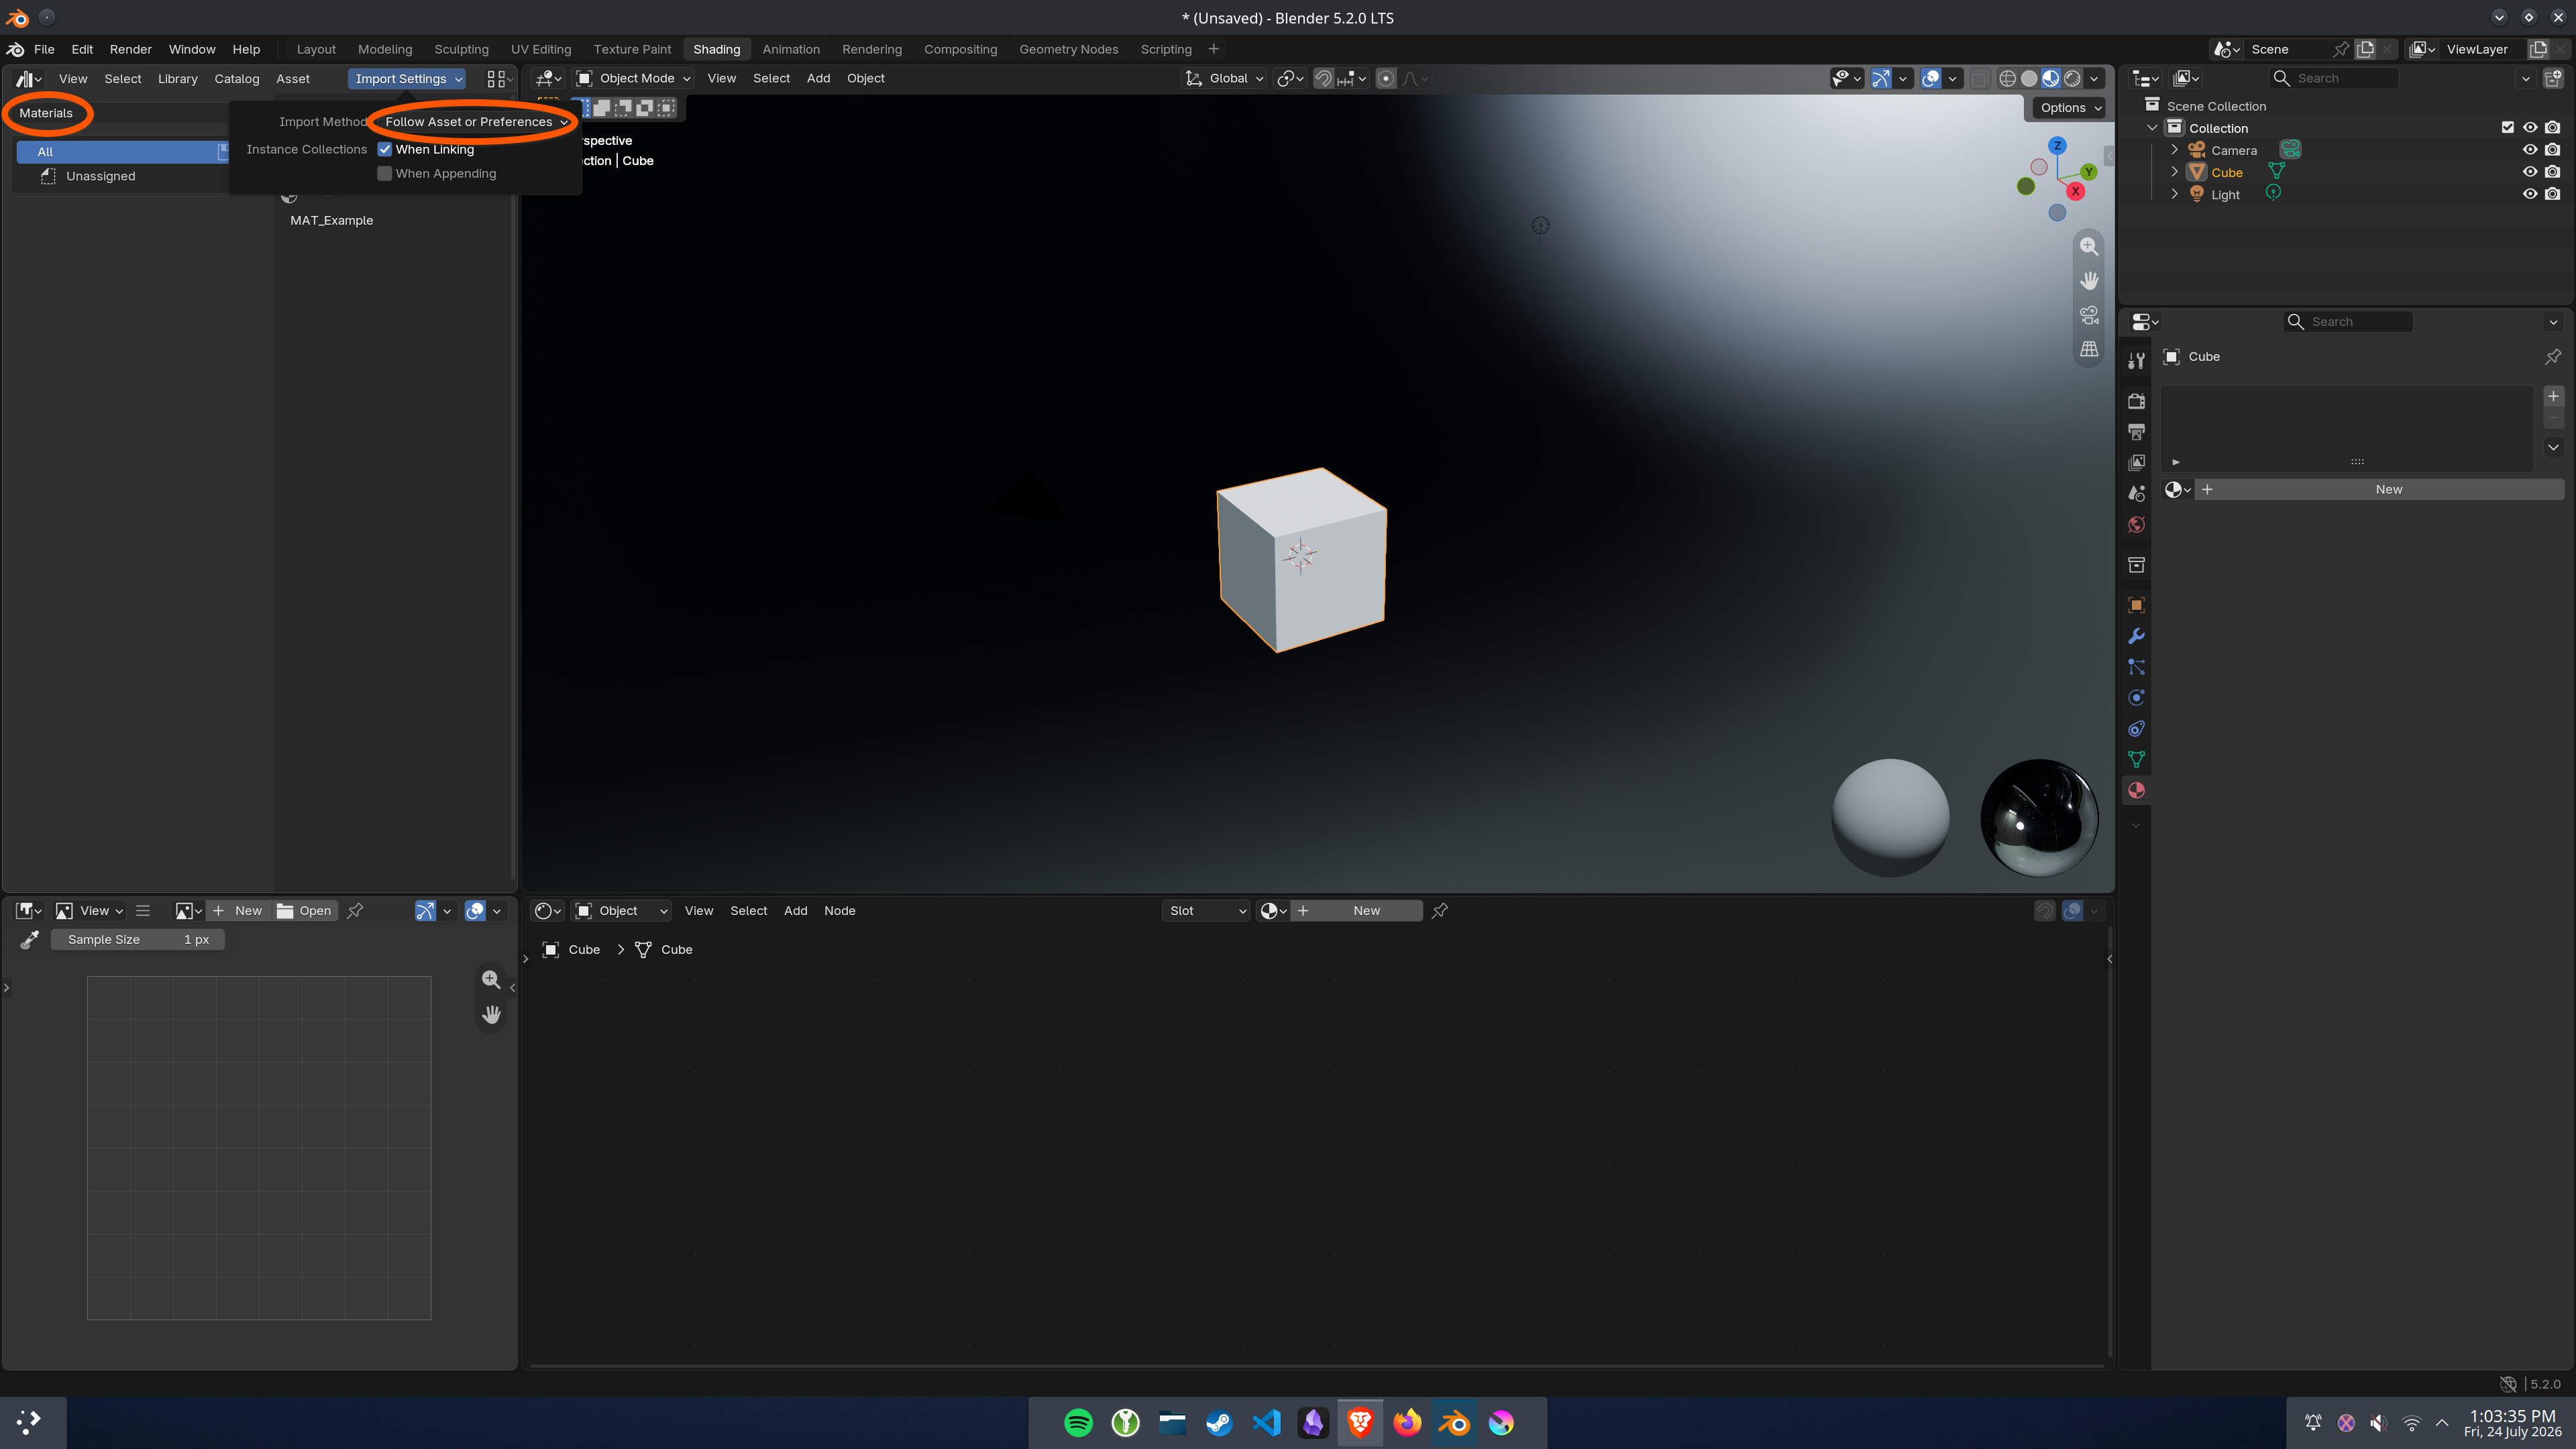
Step 5: Depending on how you plan to use this material in your scene, choose the right setting from the Import Method drop-down. Always use APPEND if you want to customise the material, use LINK only if you want to save memory in large scenes, and use PACK only if you need the material embedded (e.g. sending your file to a render farm).
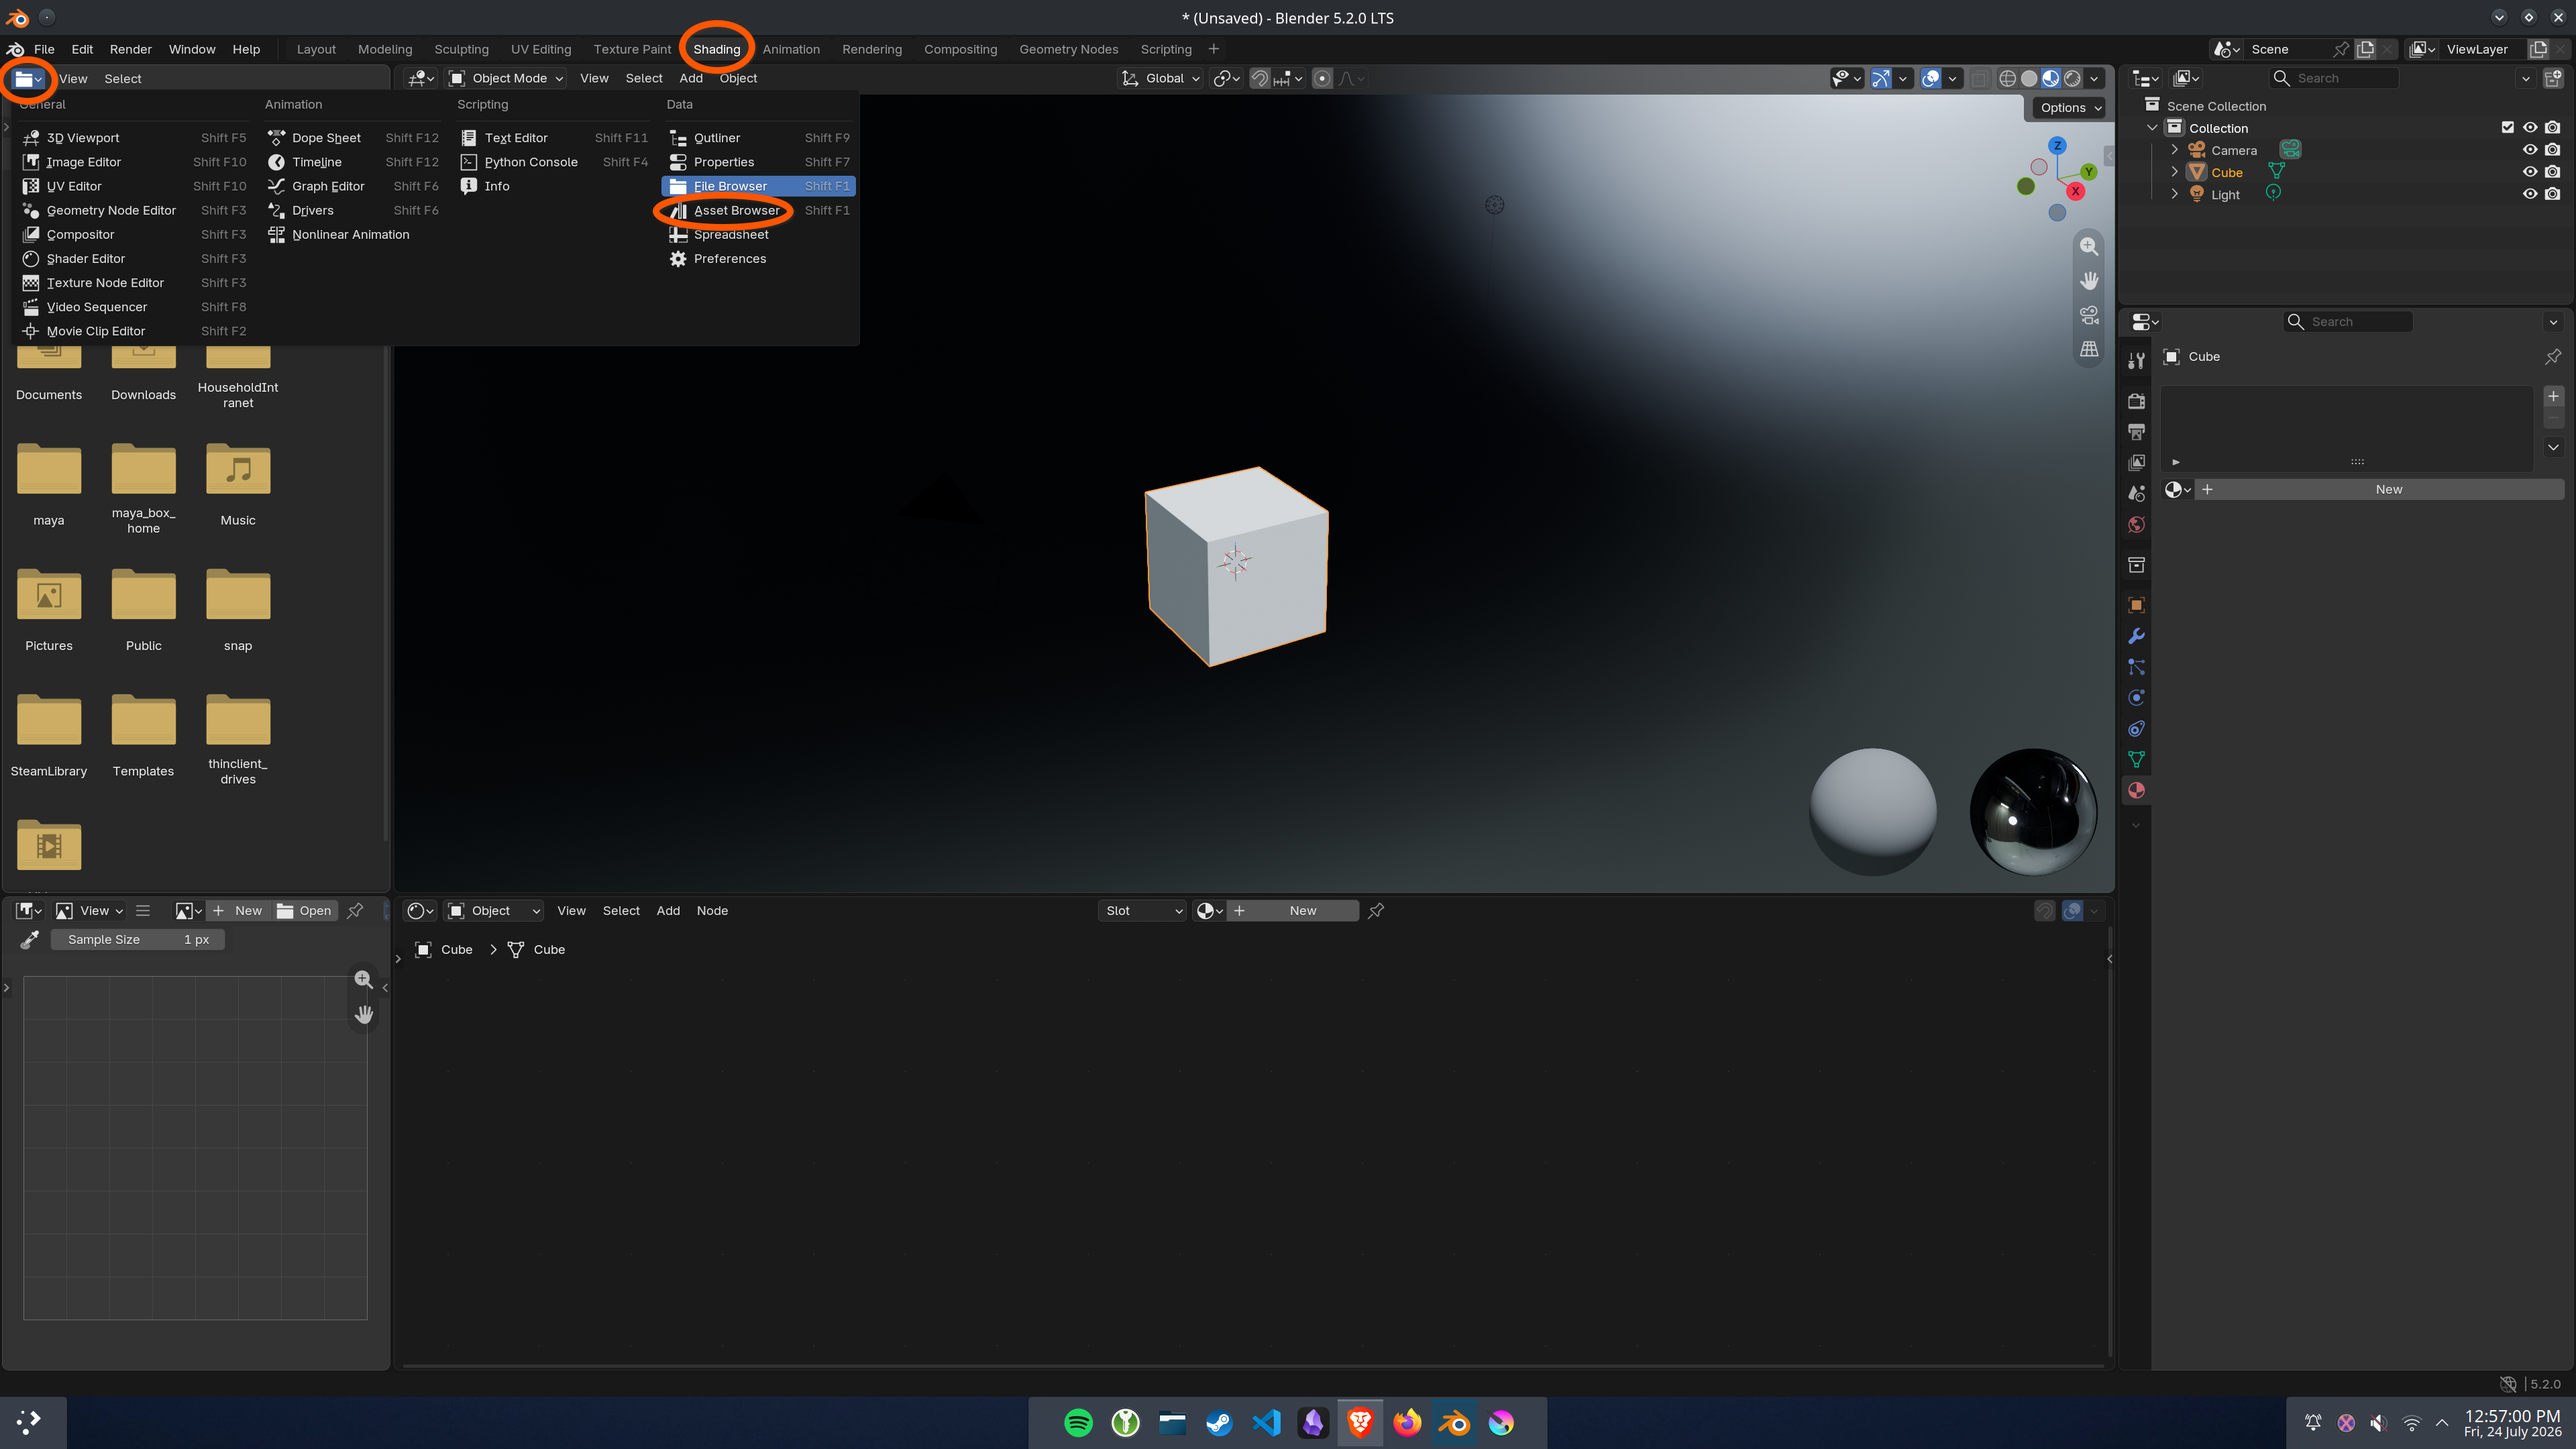
Step 6: Close Preferences, switch to the Shading workspace, and change one of the panels to the Asset Browser.
Step 7: Switch the library selector from "All Libraries" to your created library (e.g. "Materials"), and ensure that Import Settings > Import Method is set to "Follow Asset or Preferences".
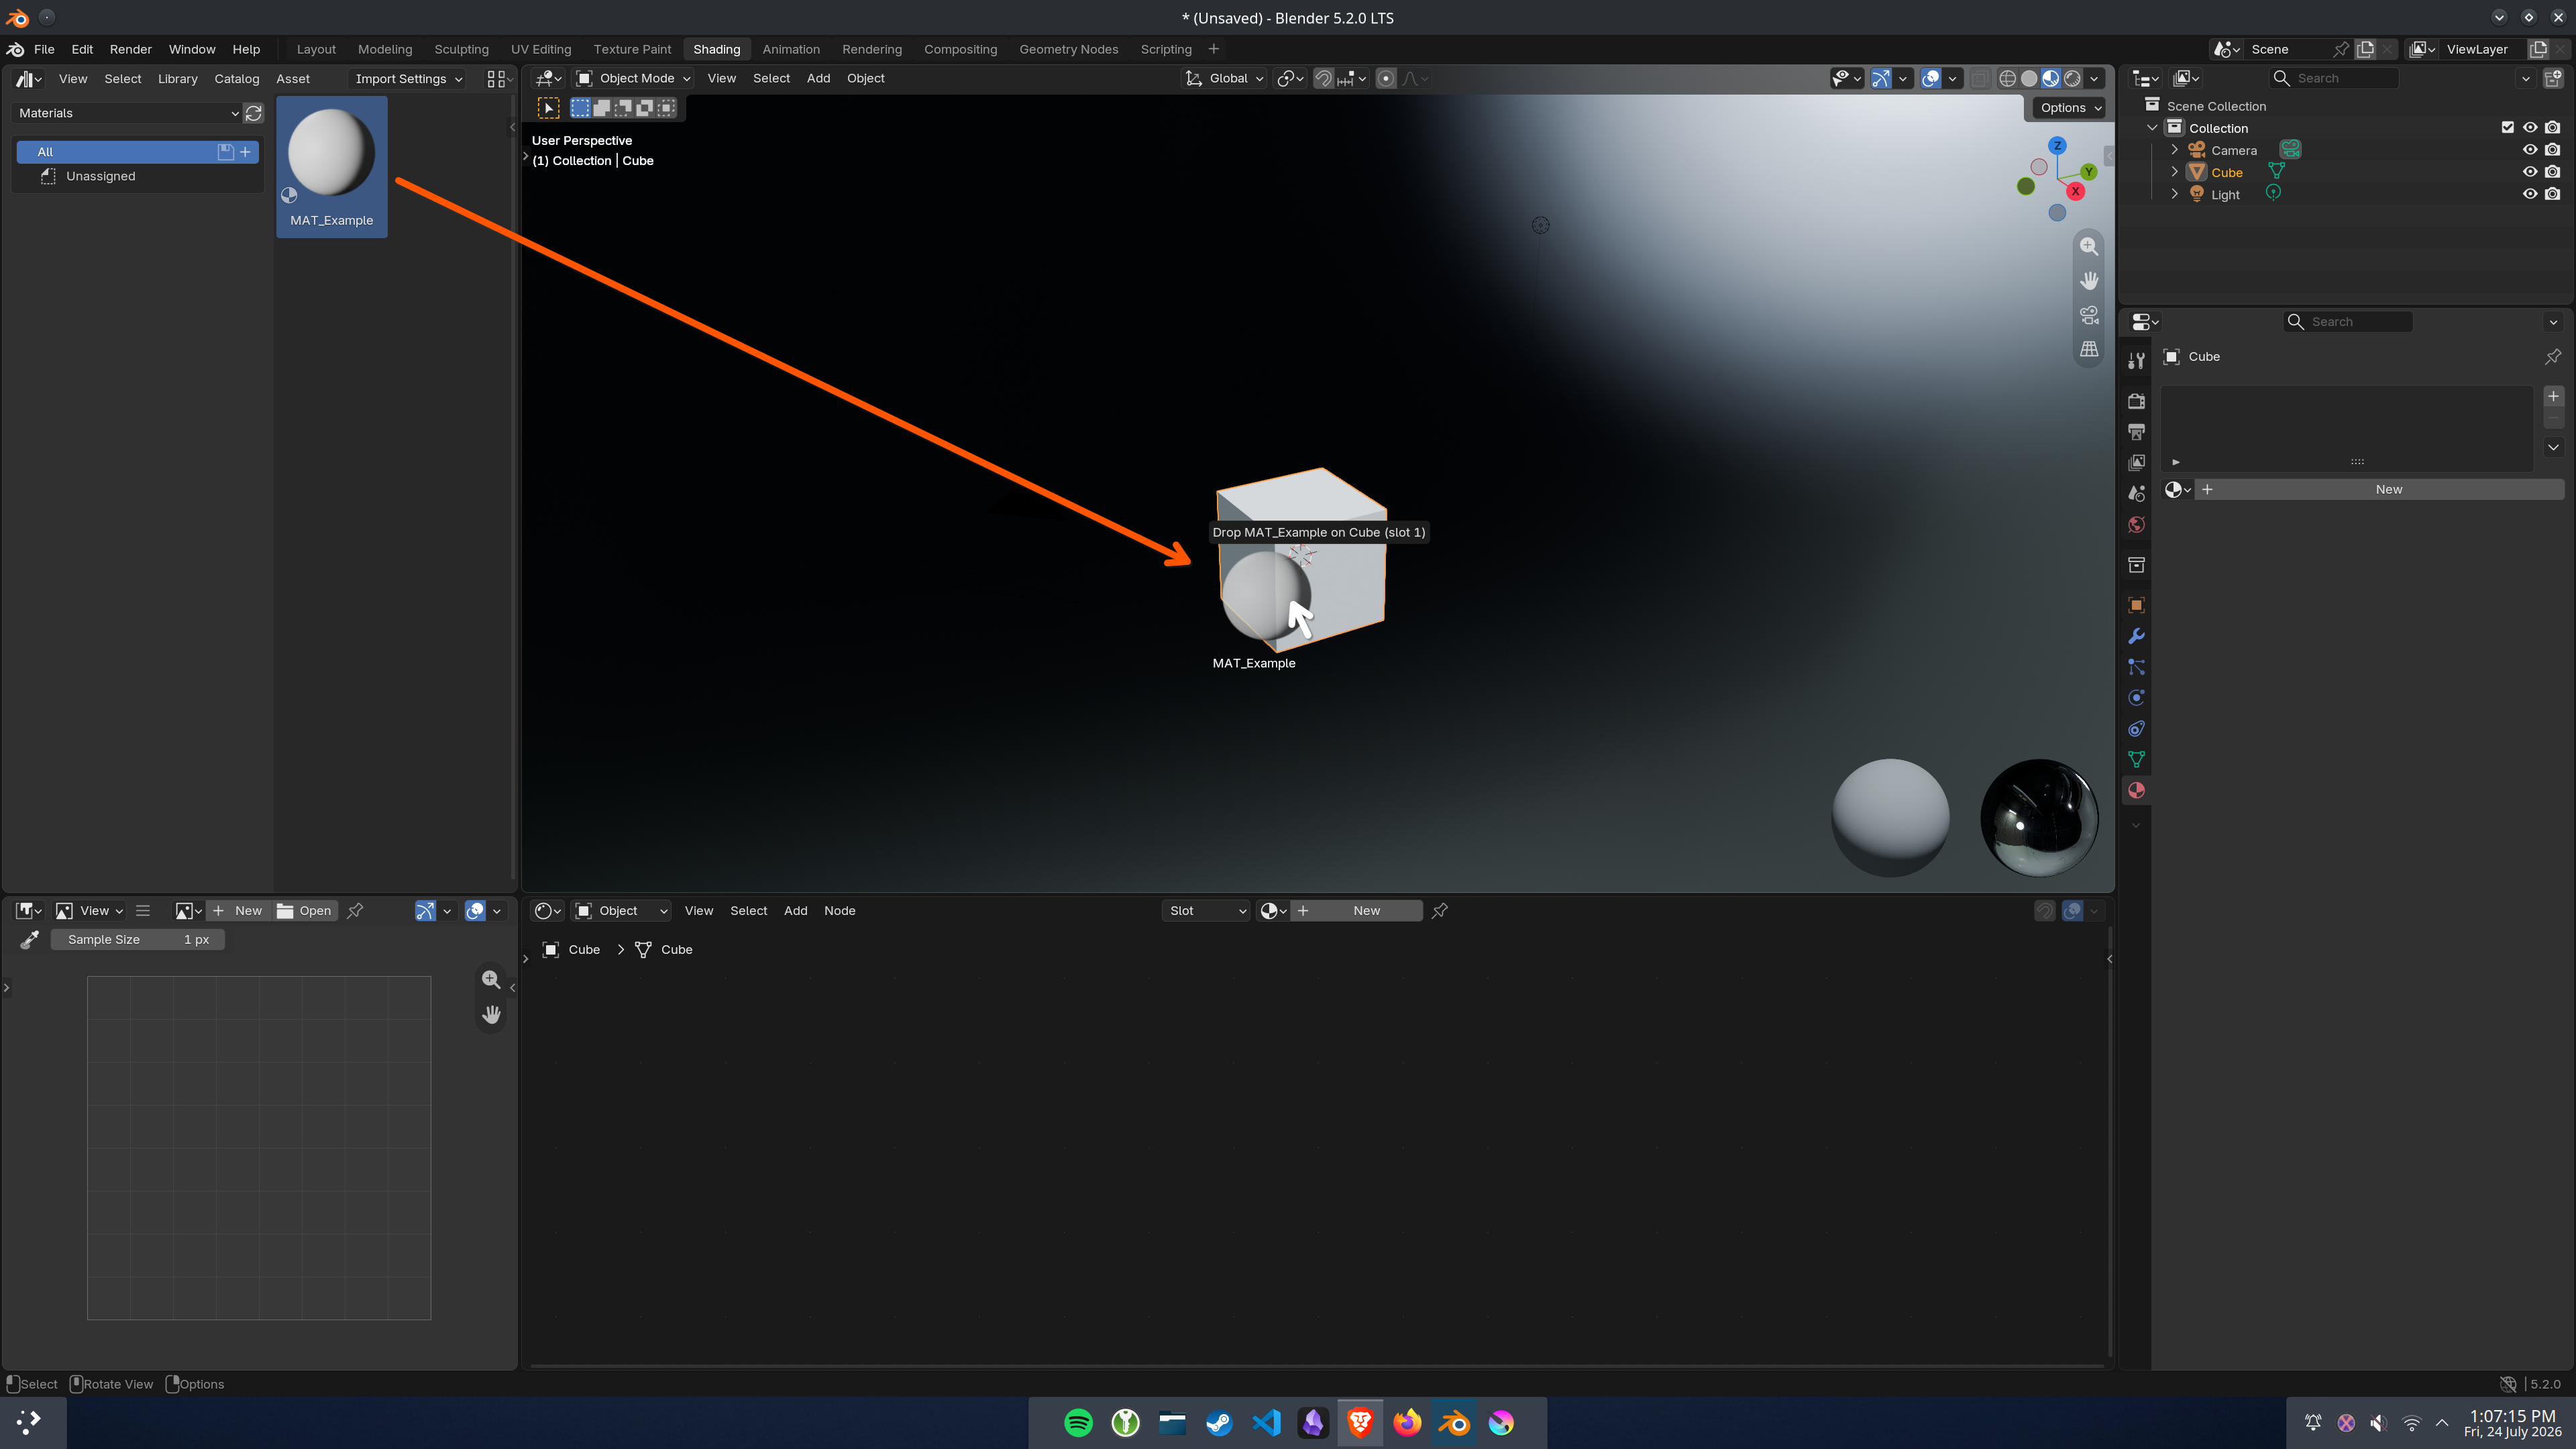
Step 8: Simply drag-and-drop the material directly onto your object.
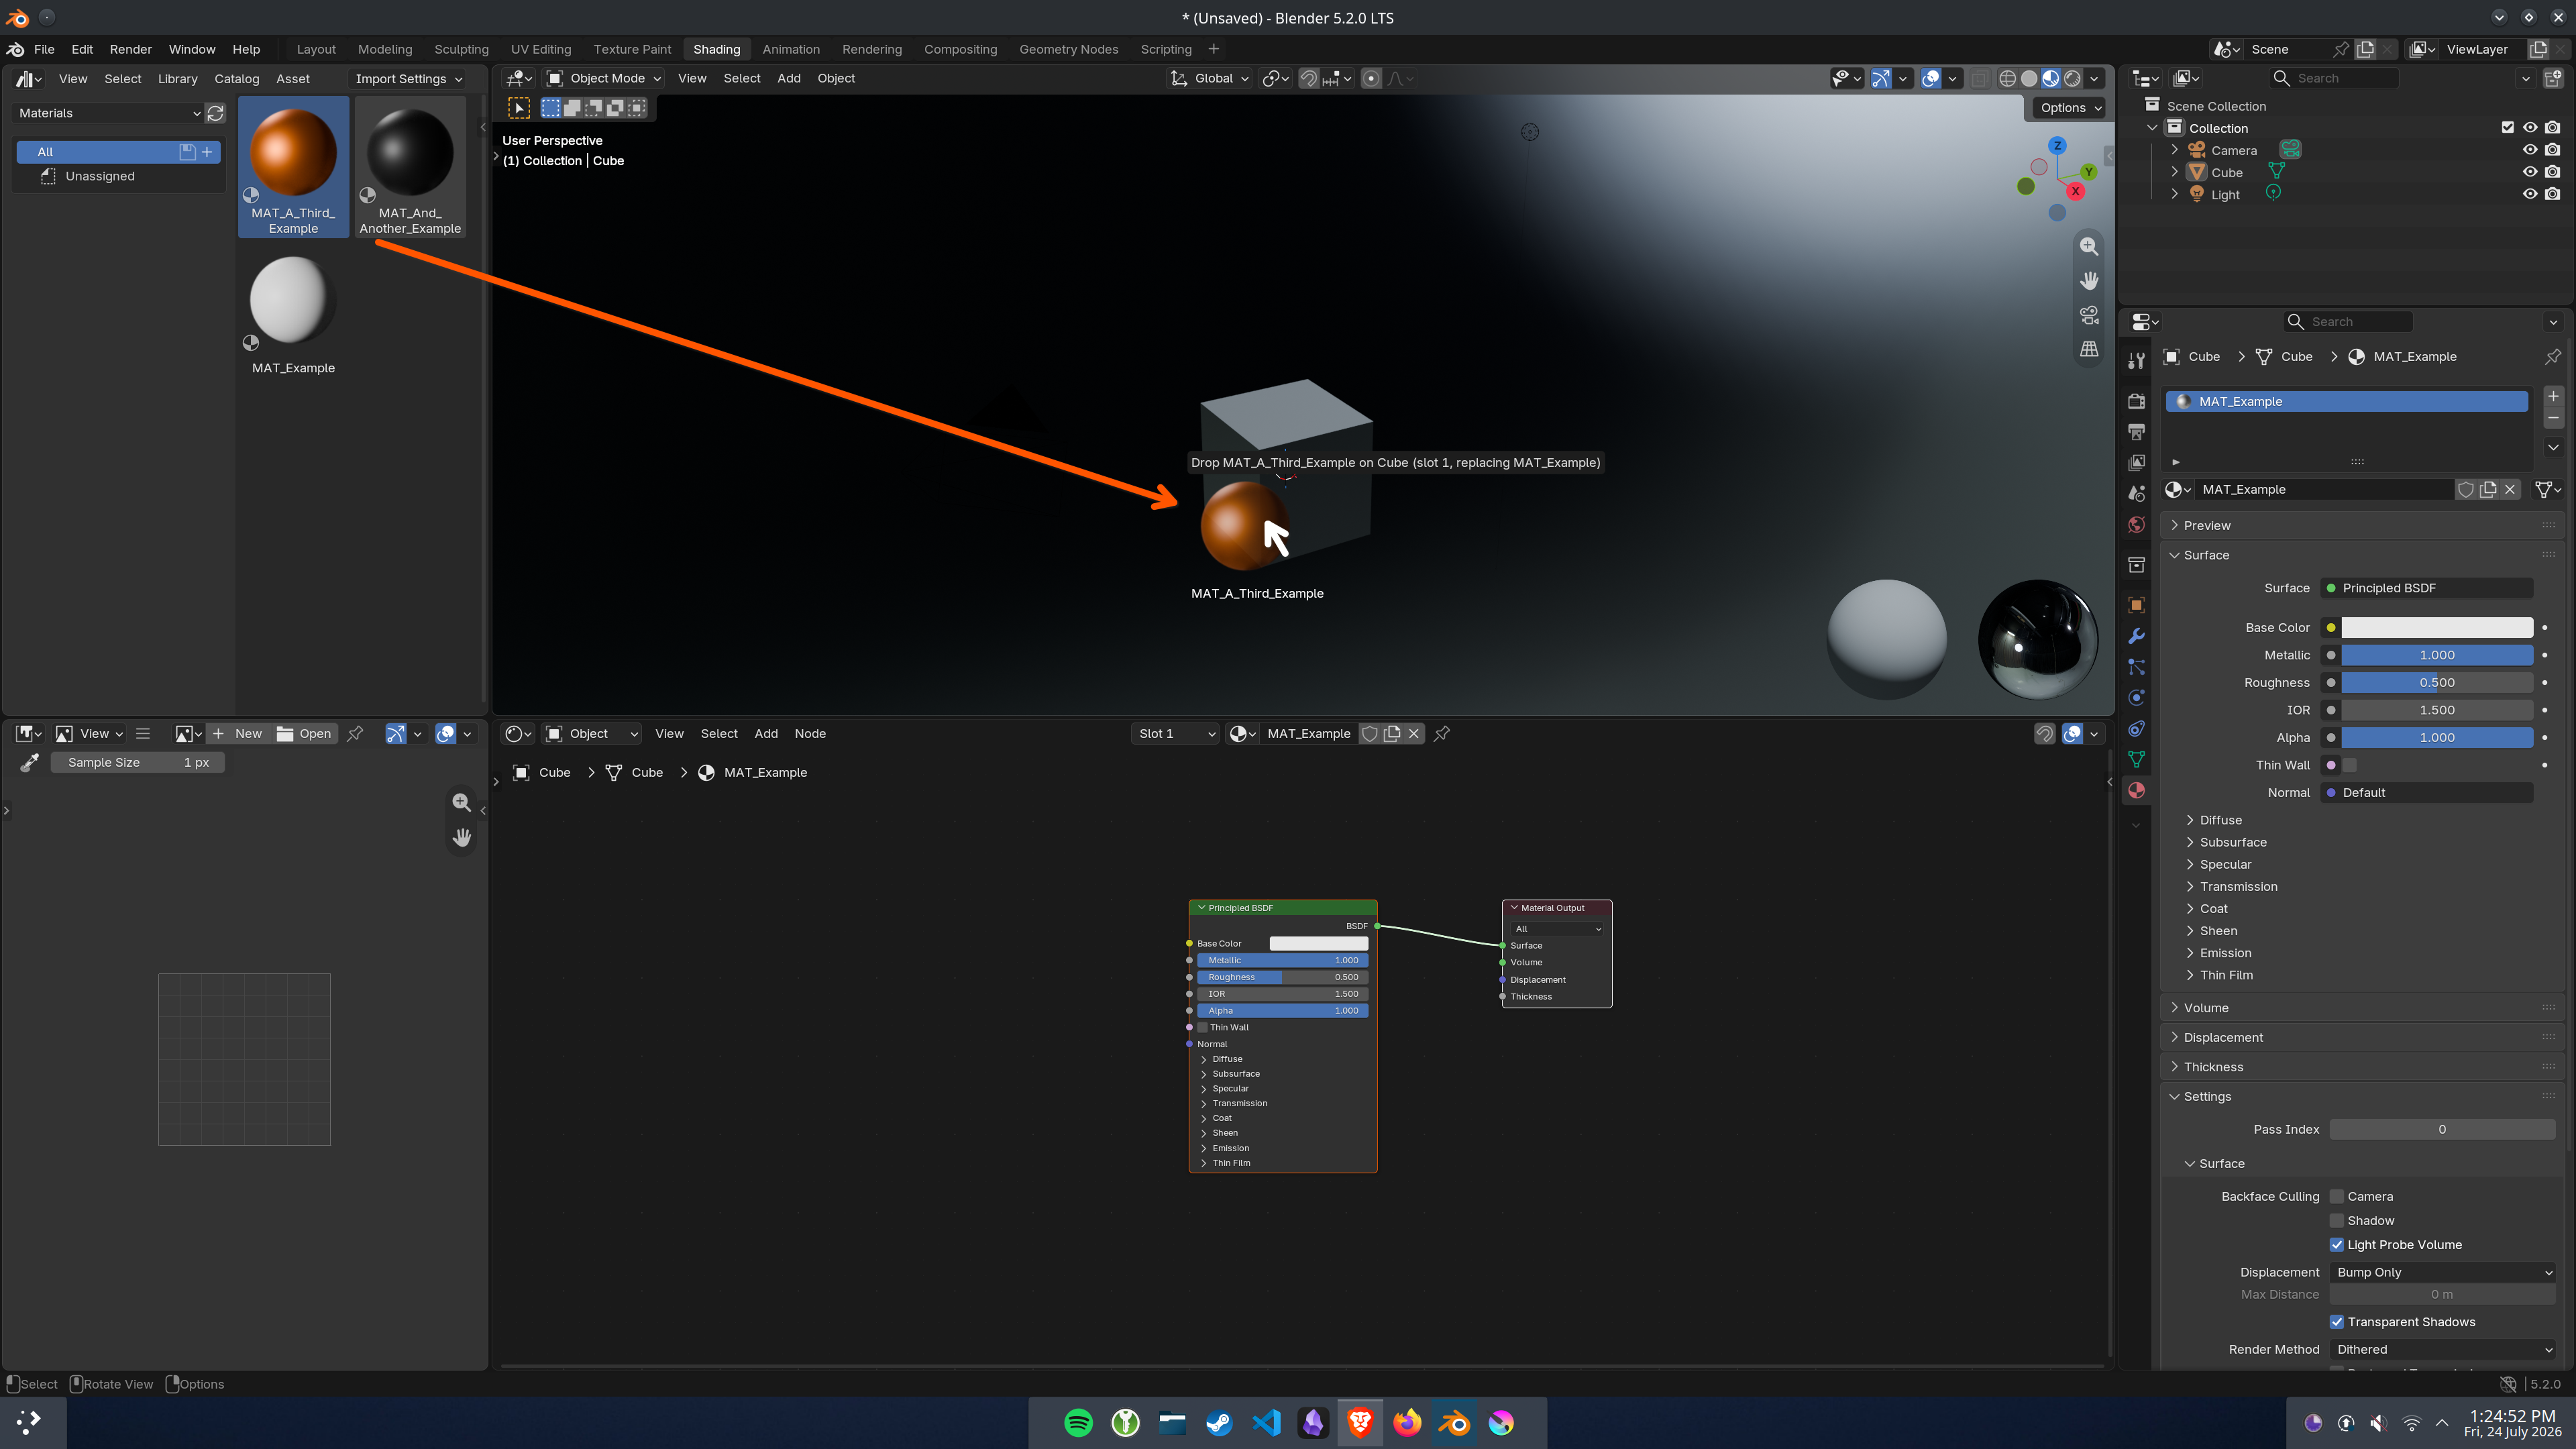
Step 9: From now on, any future material files (must be compatible with the Asset Library) can be added to the same folder, and will be ready to drag-and-drop onto your object.
OPTION 2: QUICK VIEWING / MANUAL IMPORT
If you just want to look at the setup or use the material in a single project:
Method 1
Simply open the provided ".blend" file. It contains a pre-lit sphere setup for quick previewing of the material.
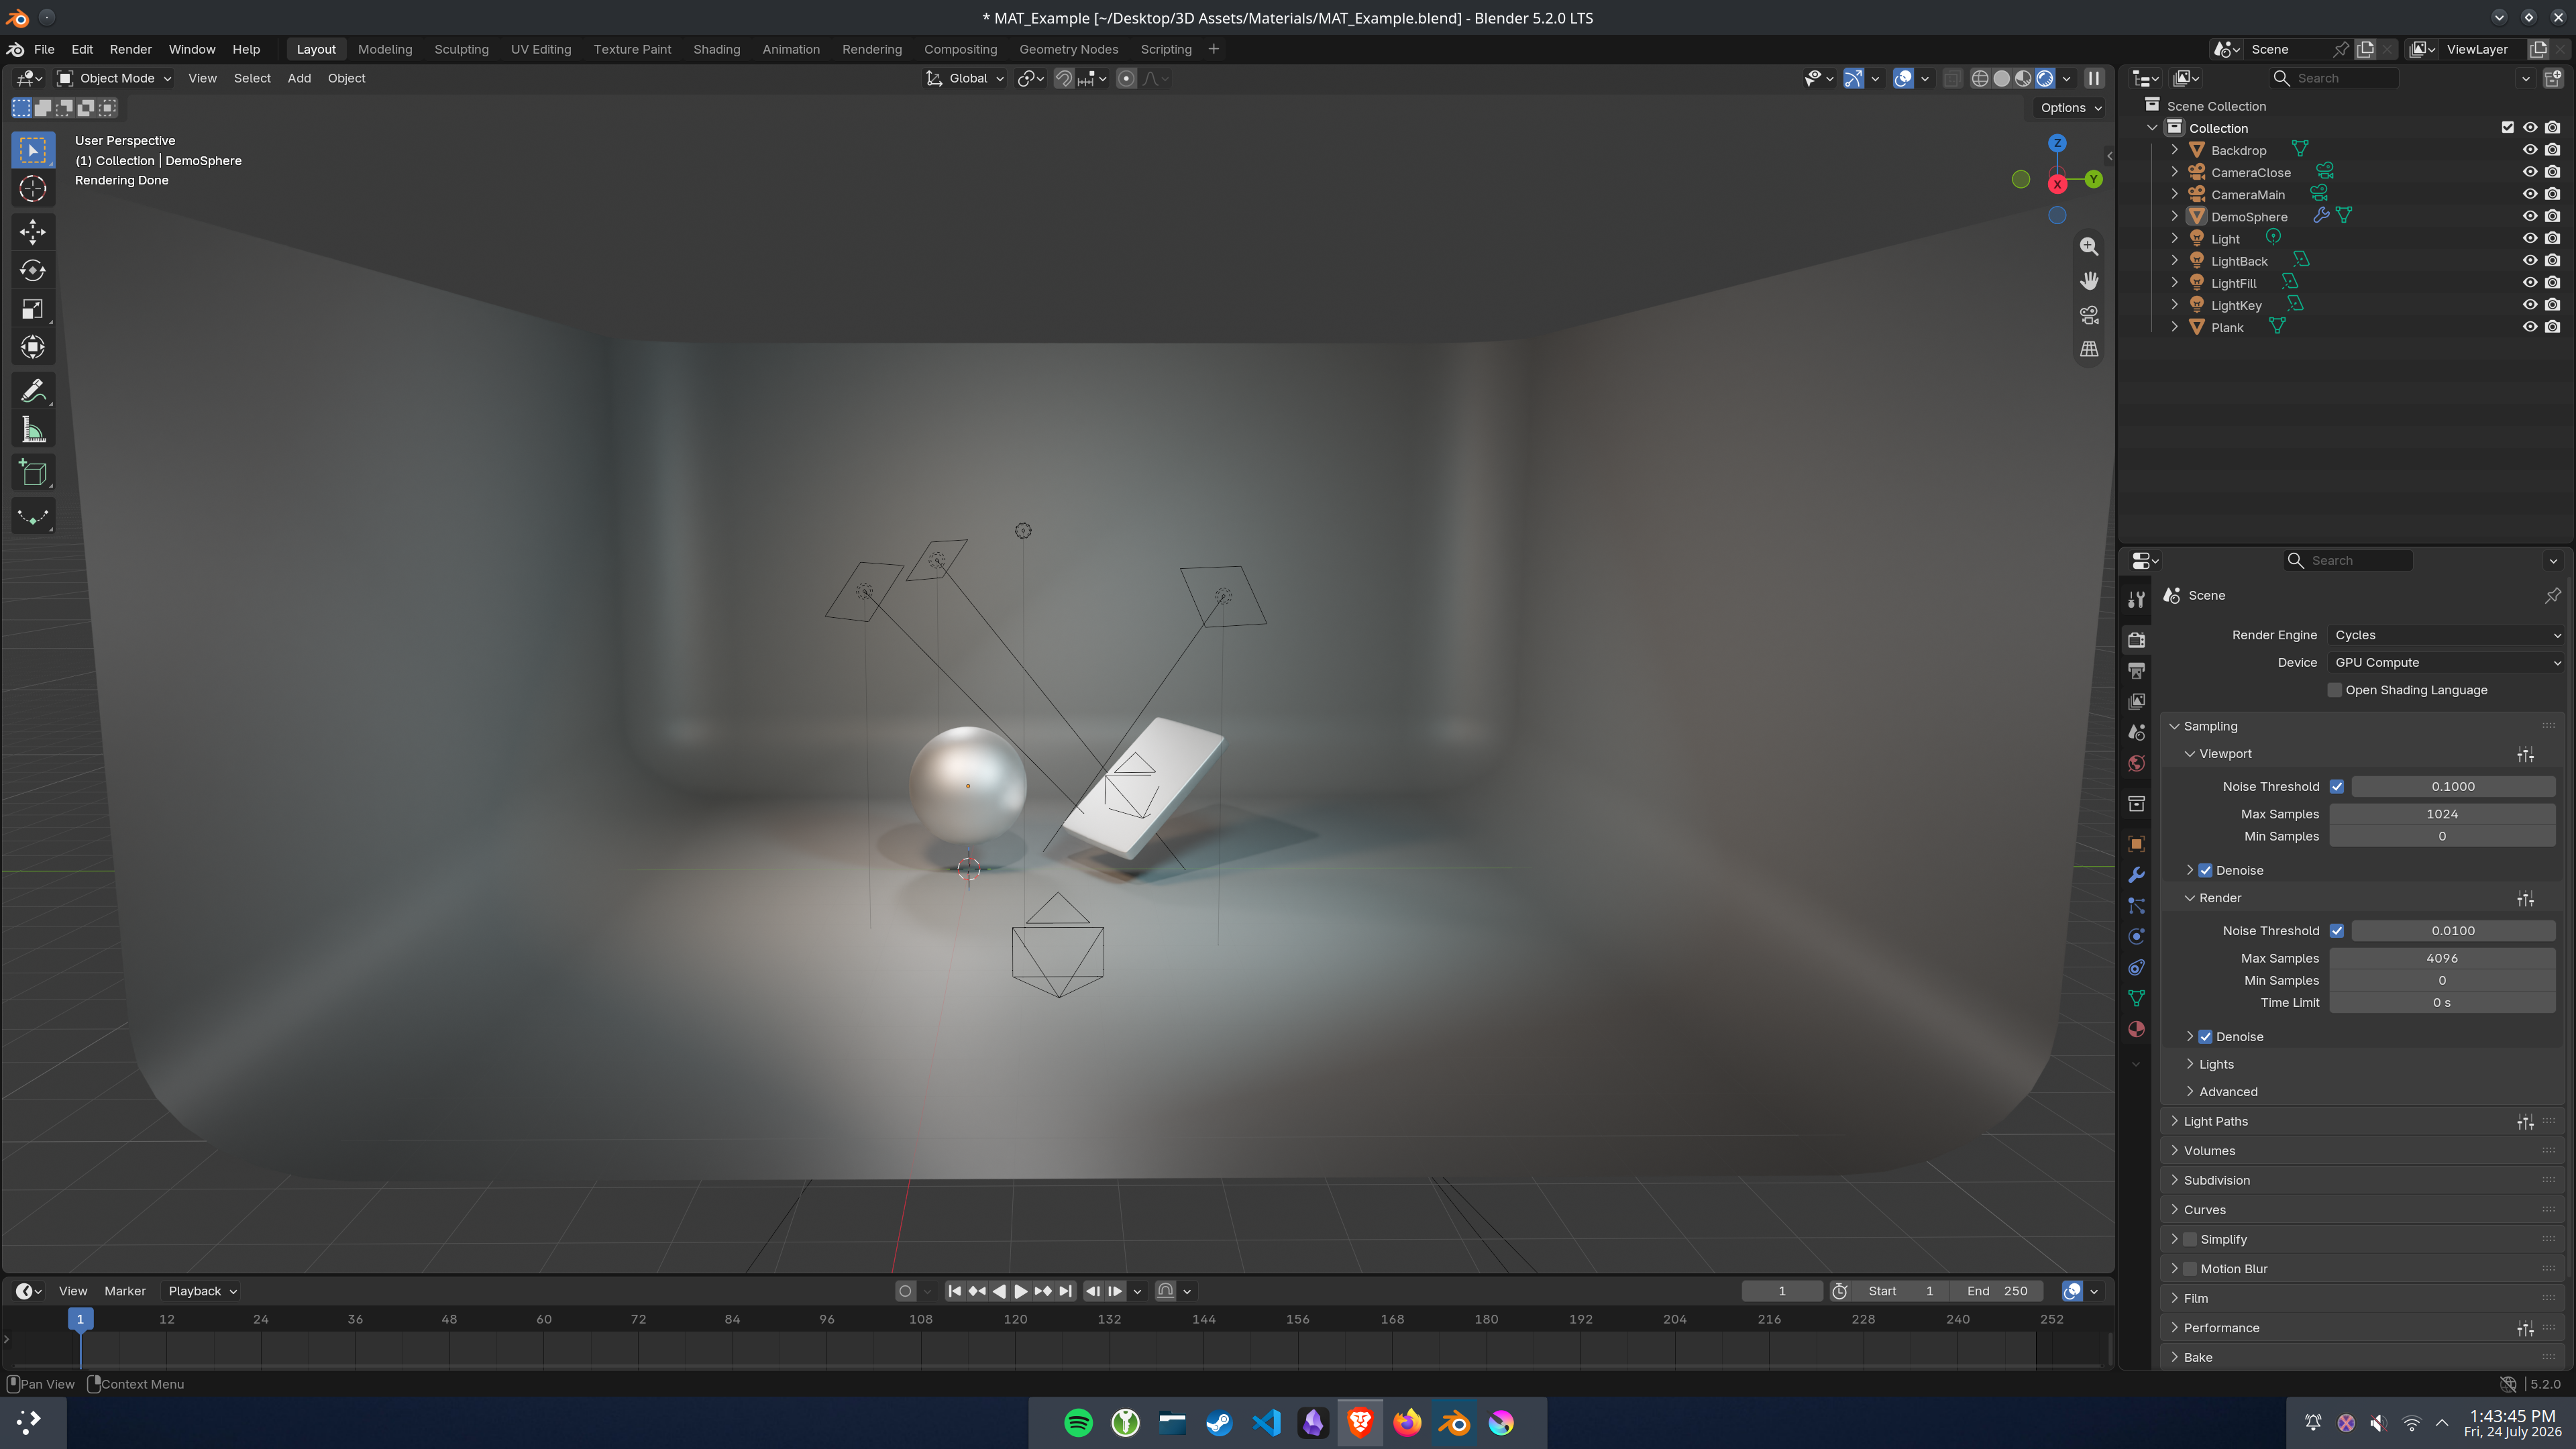
Method 2
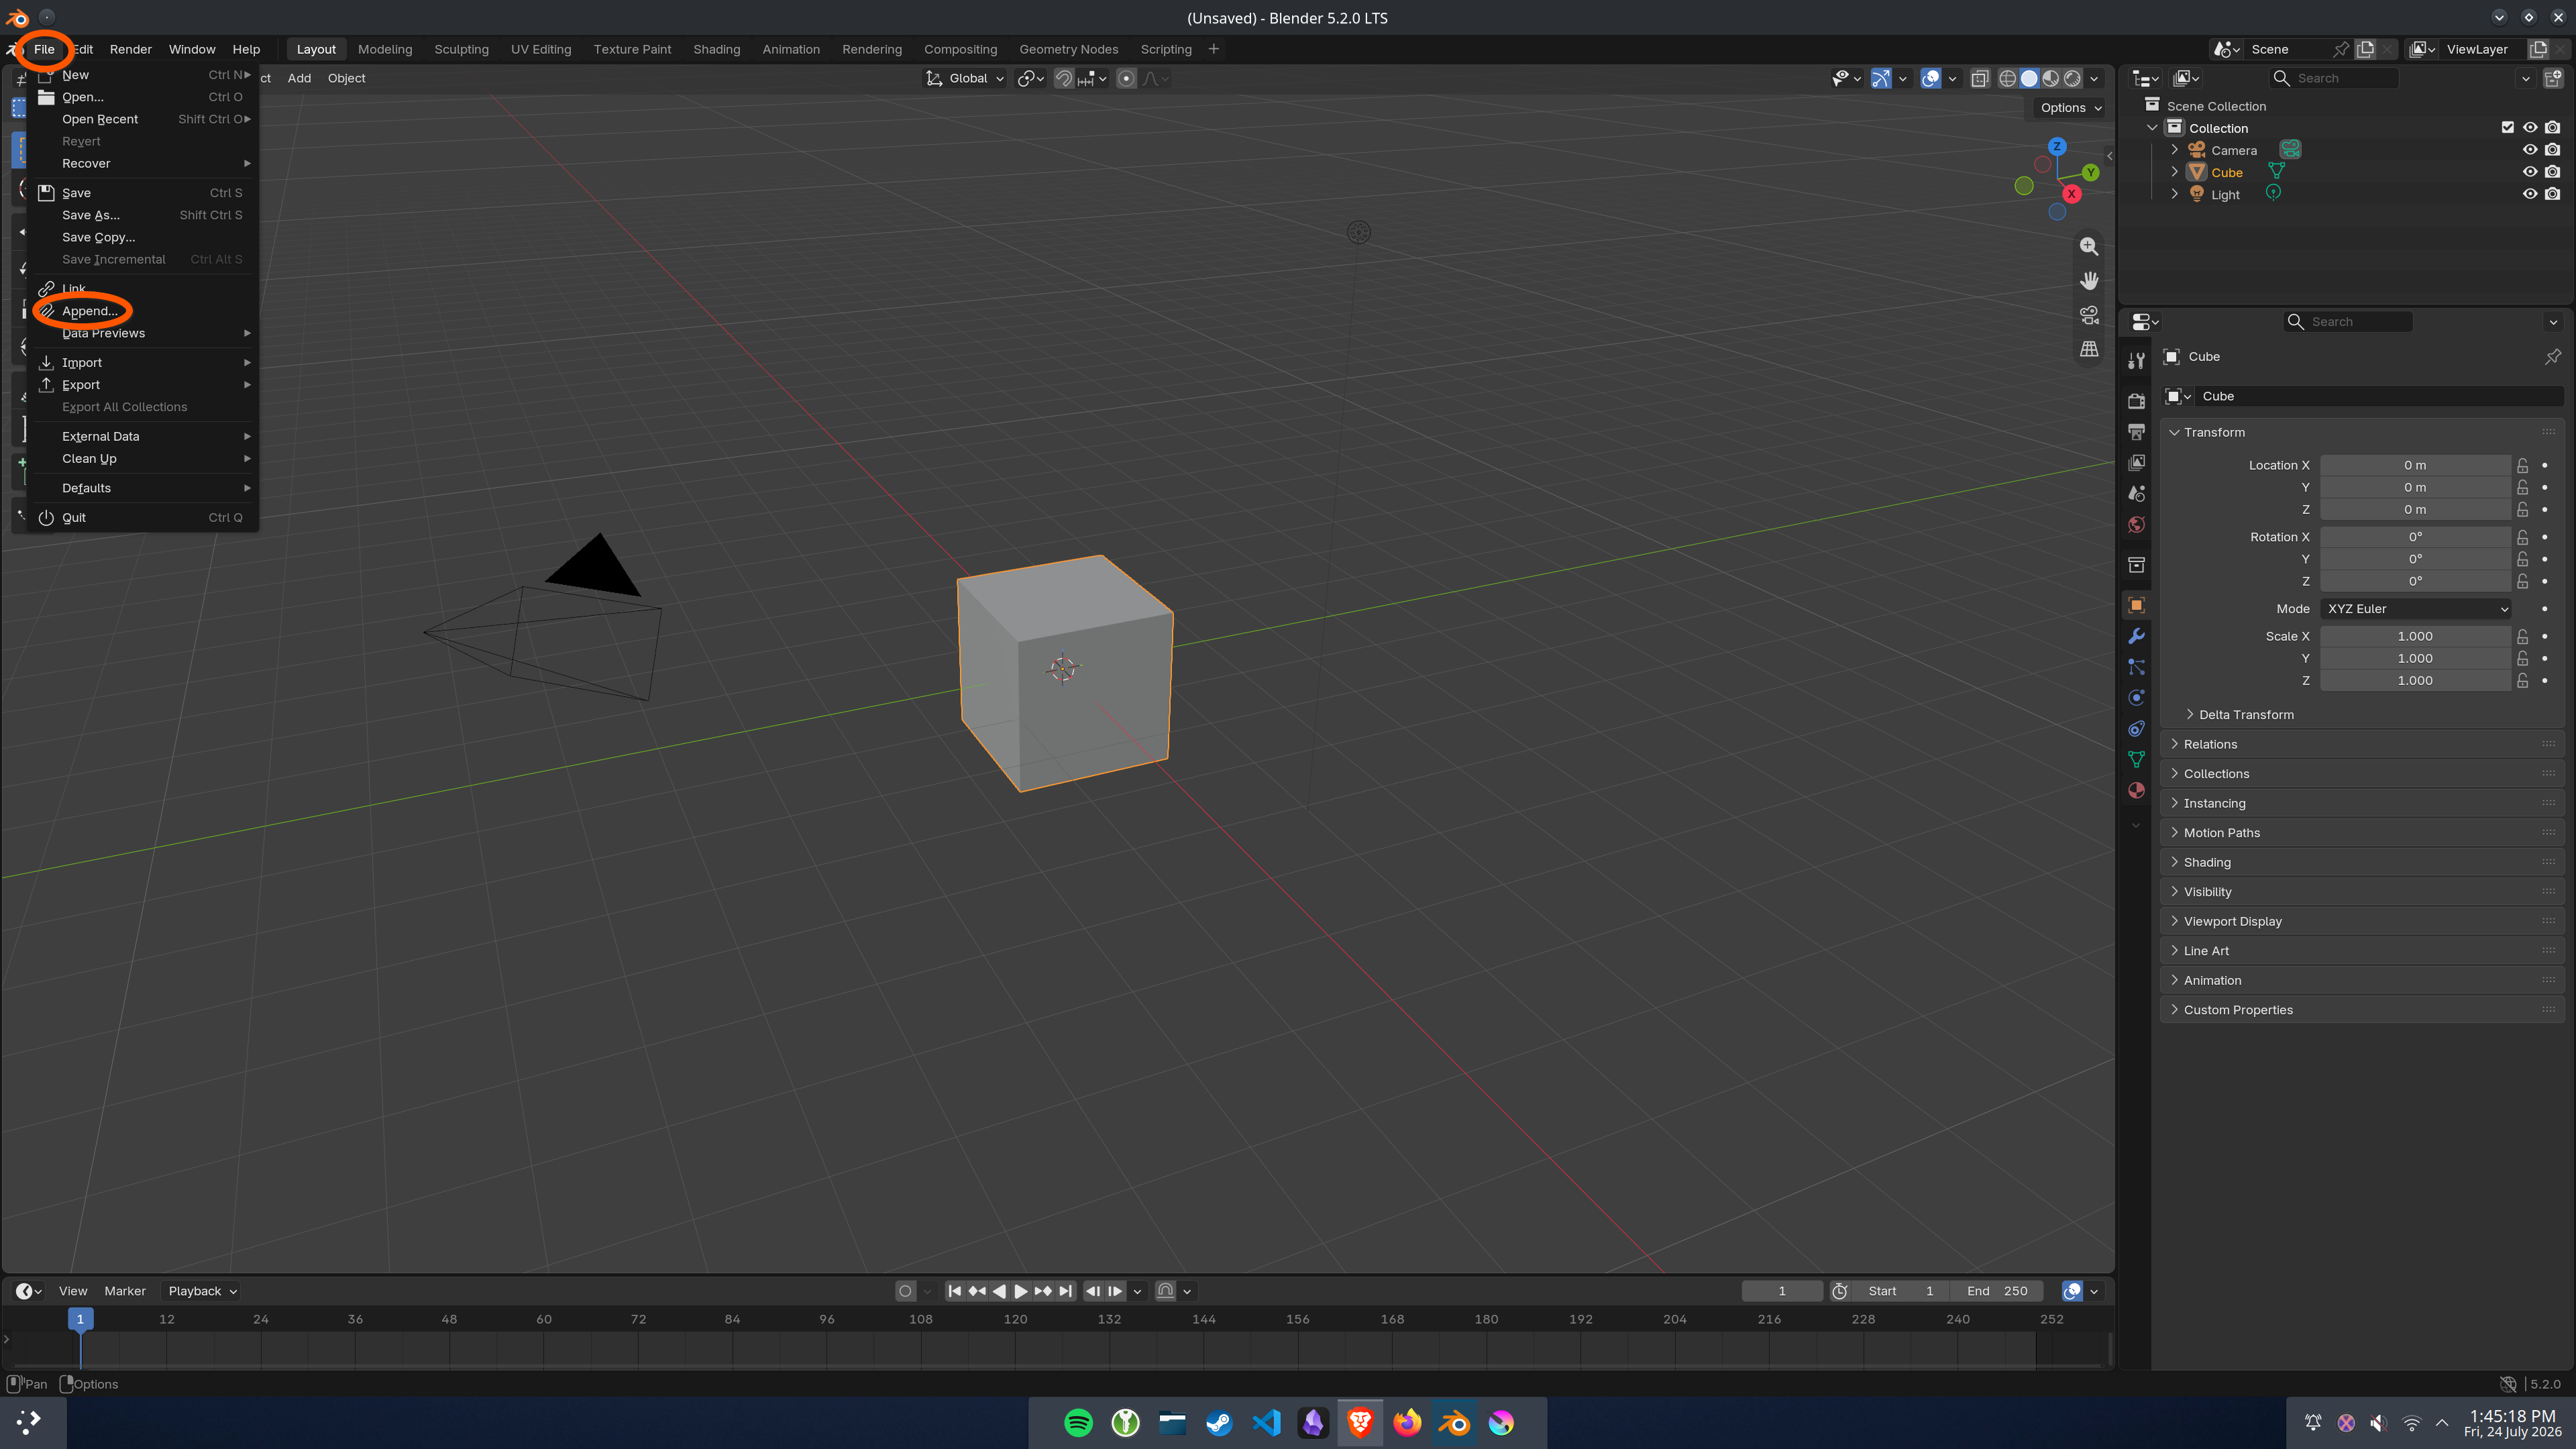
Step 1: In your own project file, go to File > Append.
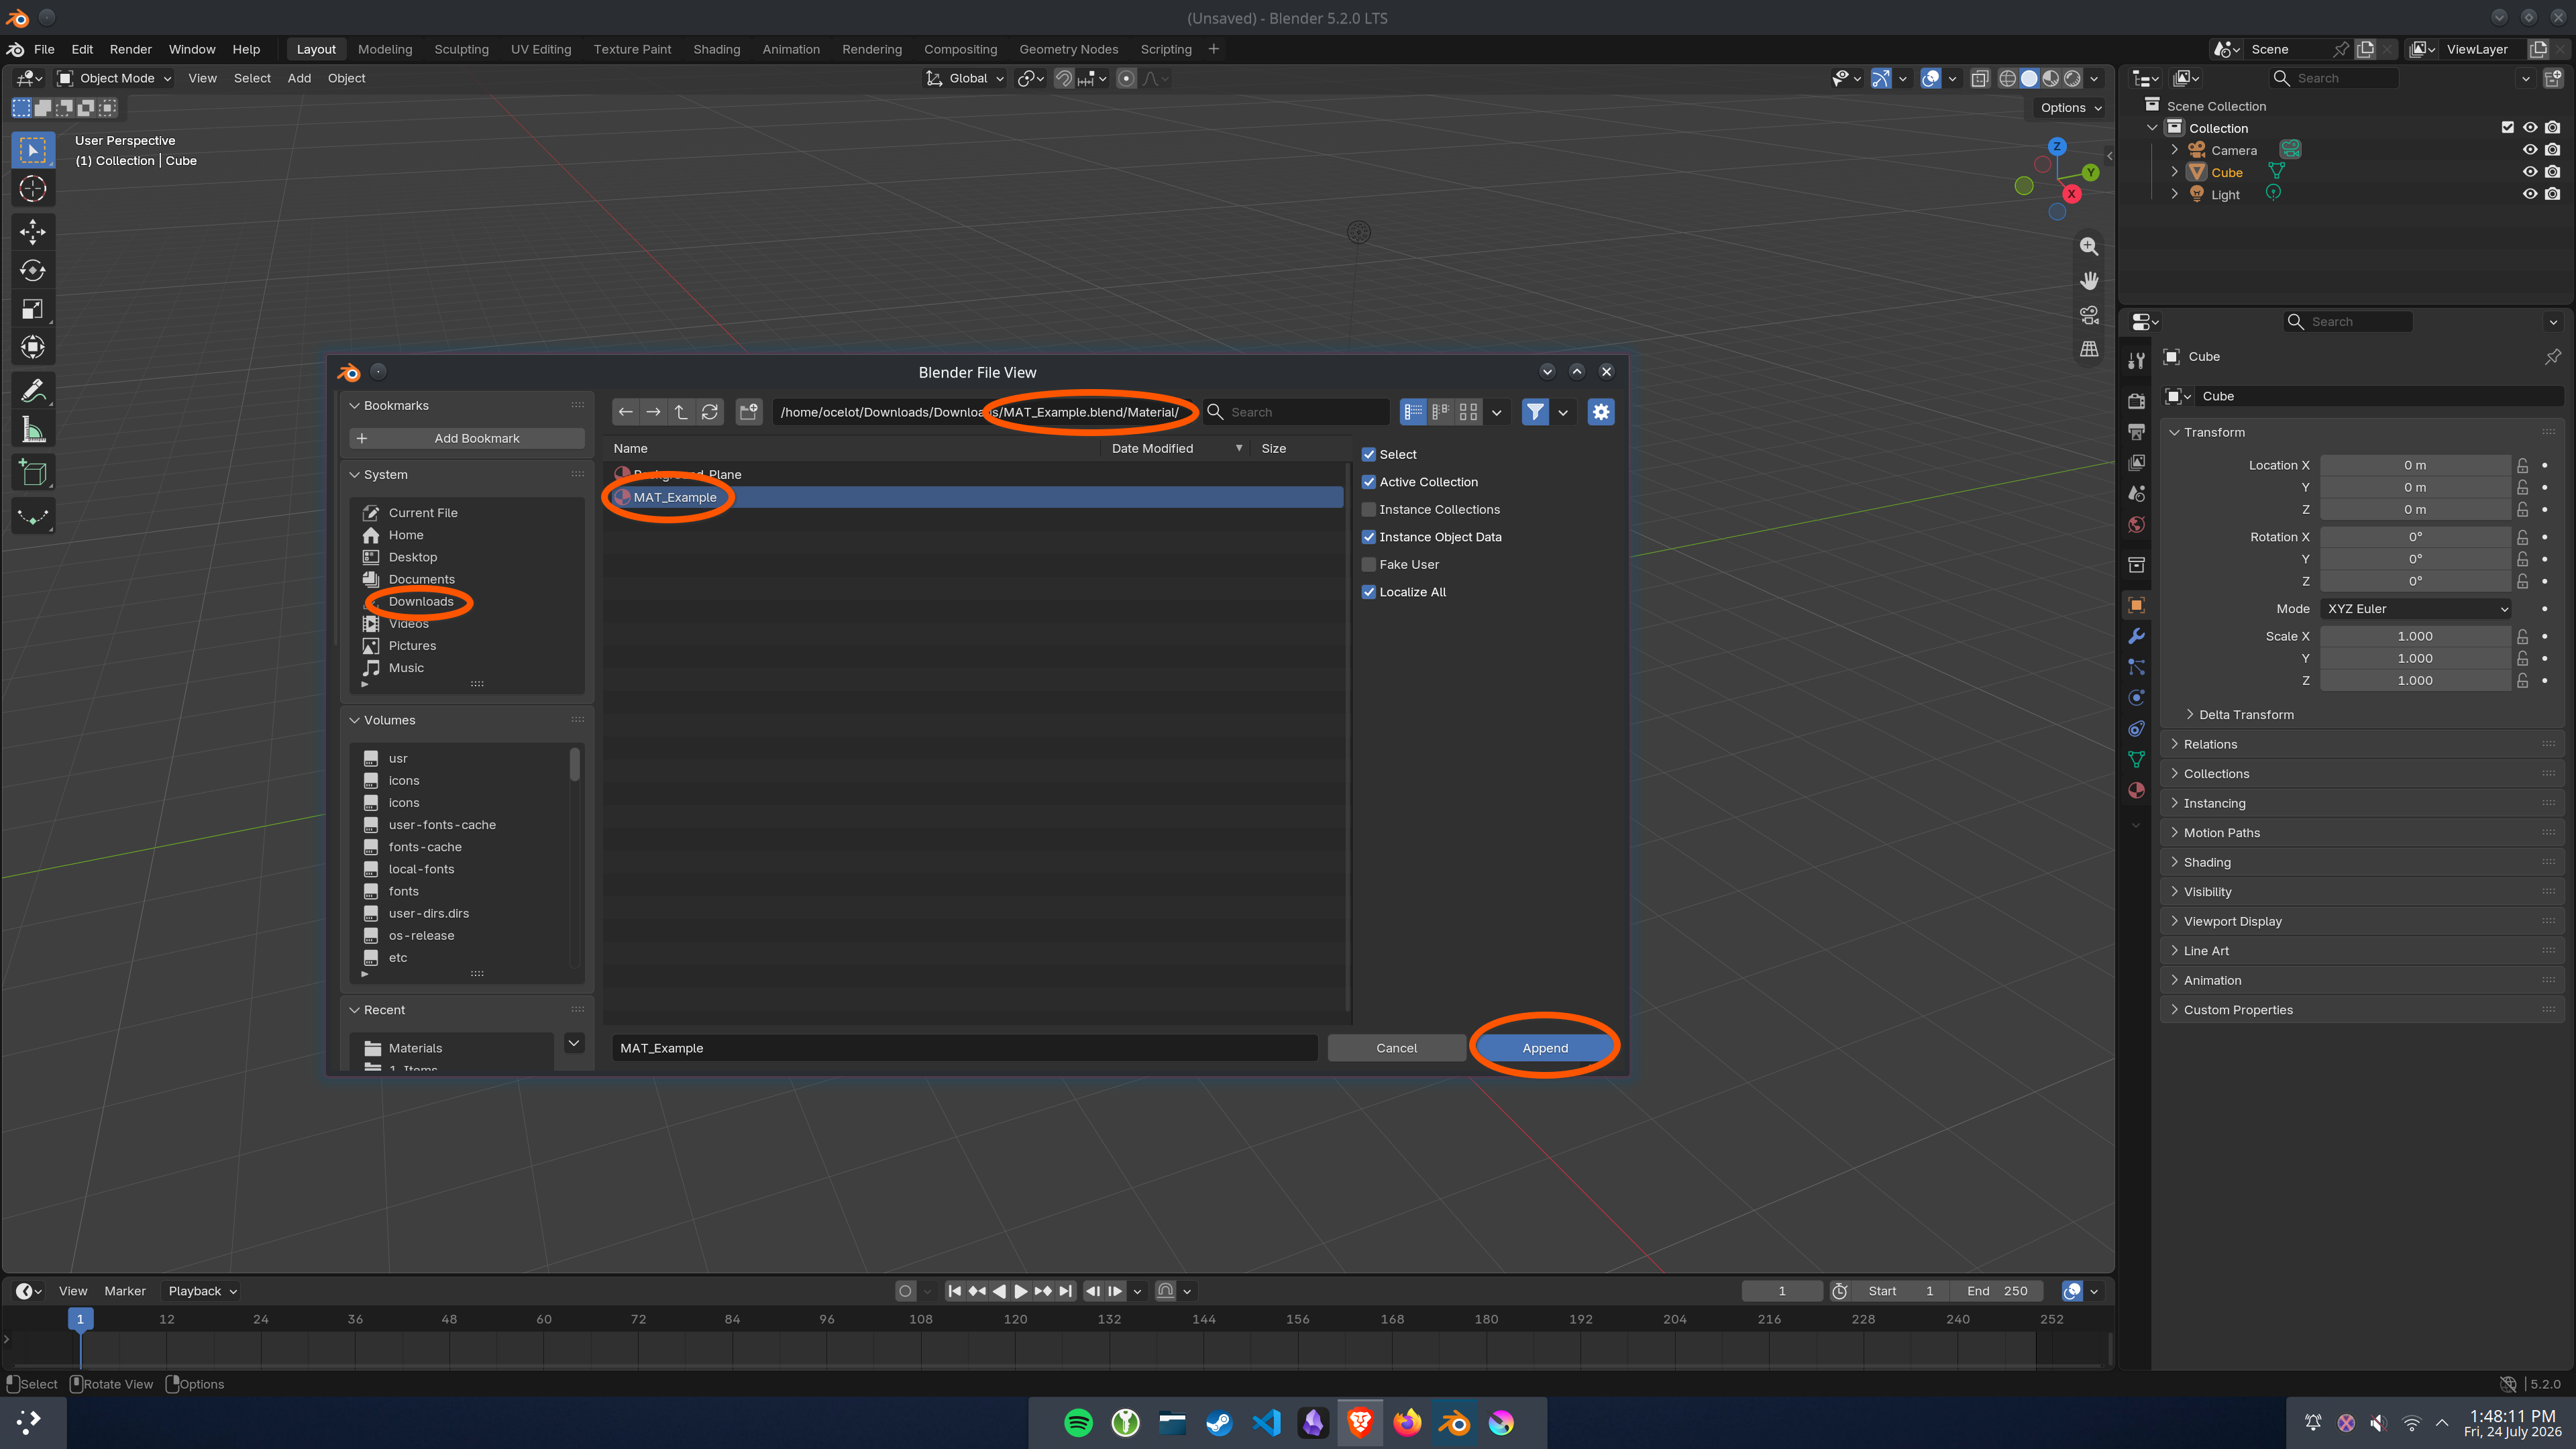
Step 2: Navigate to the downloaded ".blend" file, click on the "Material" folder, select the material/s you want, and click "Append".
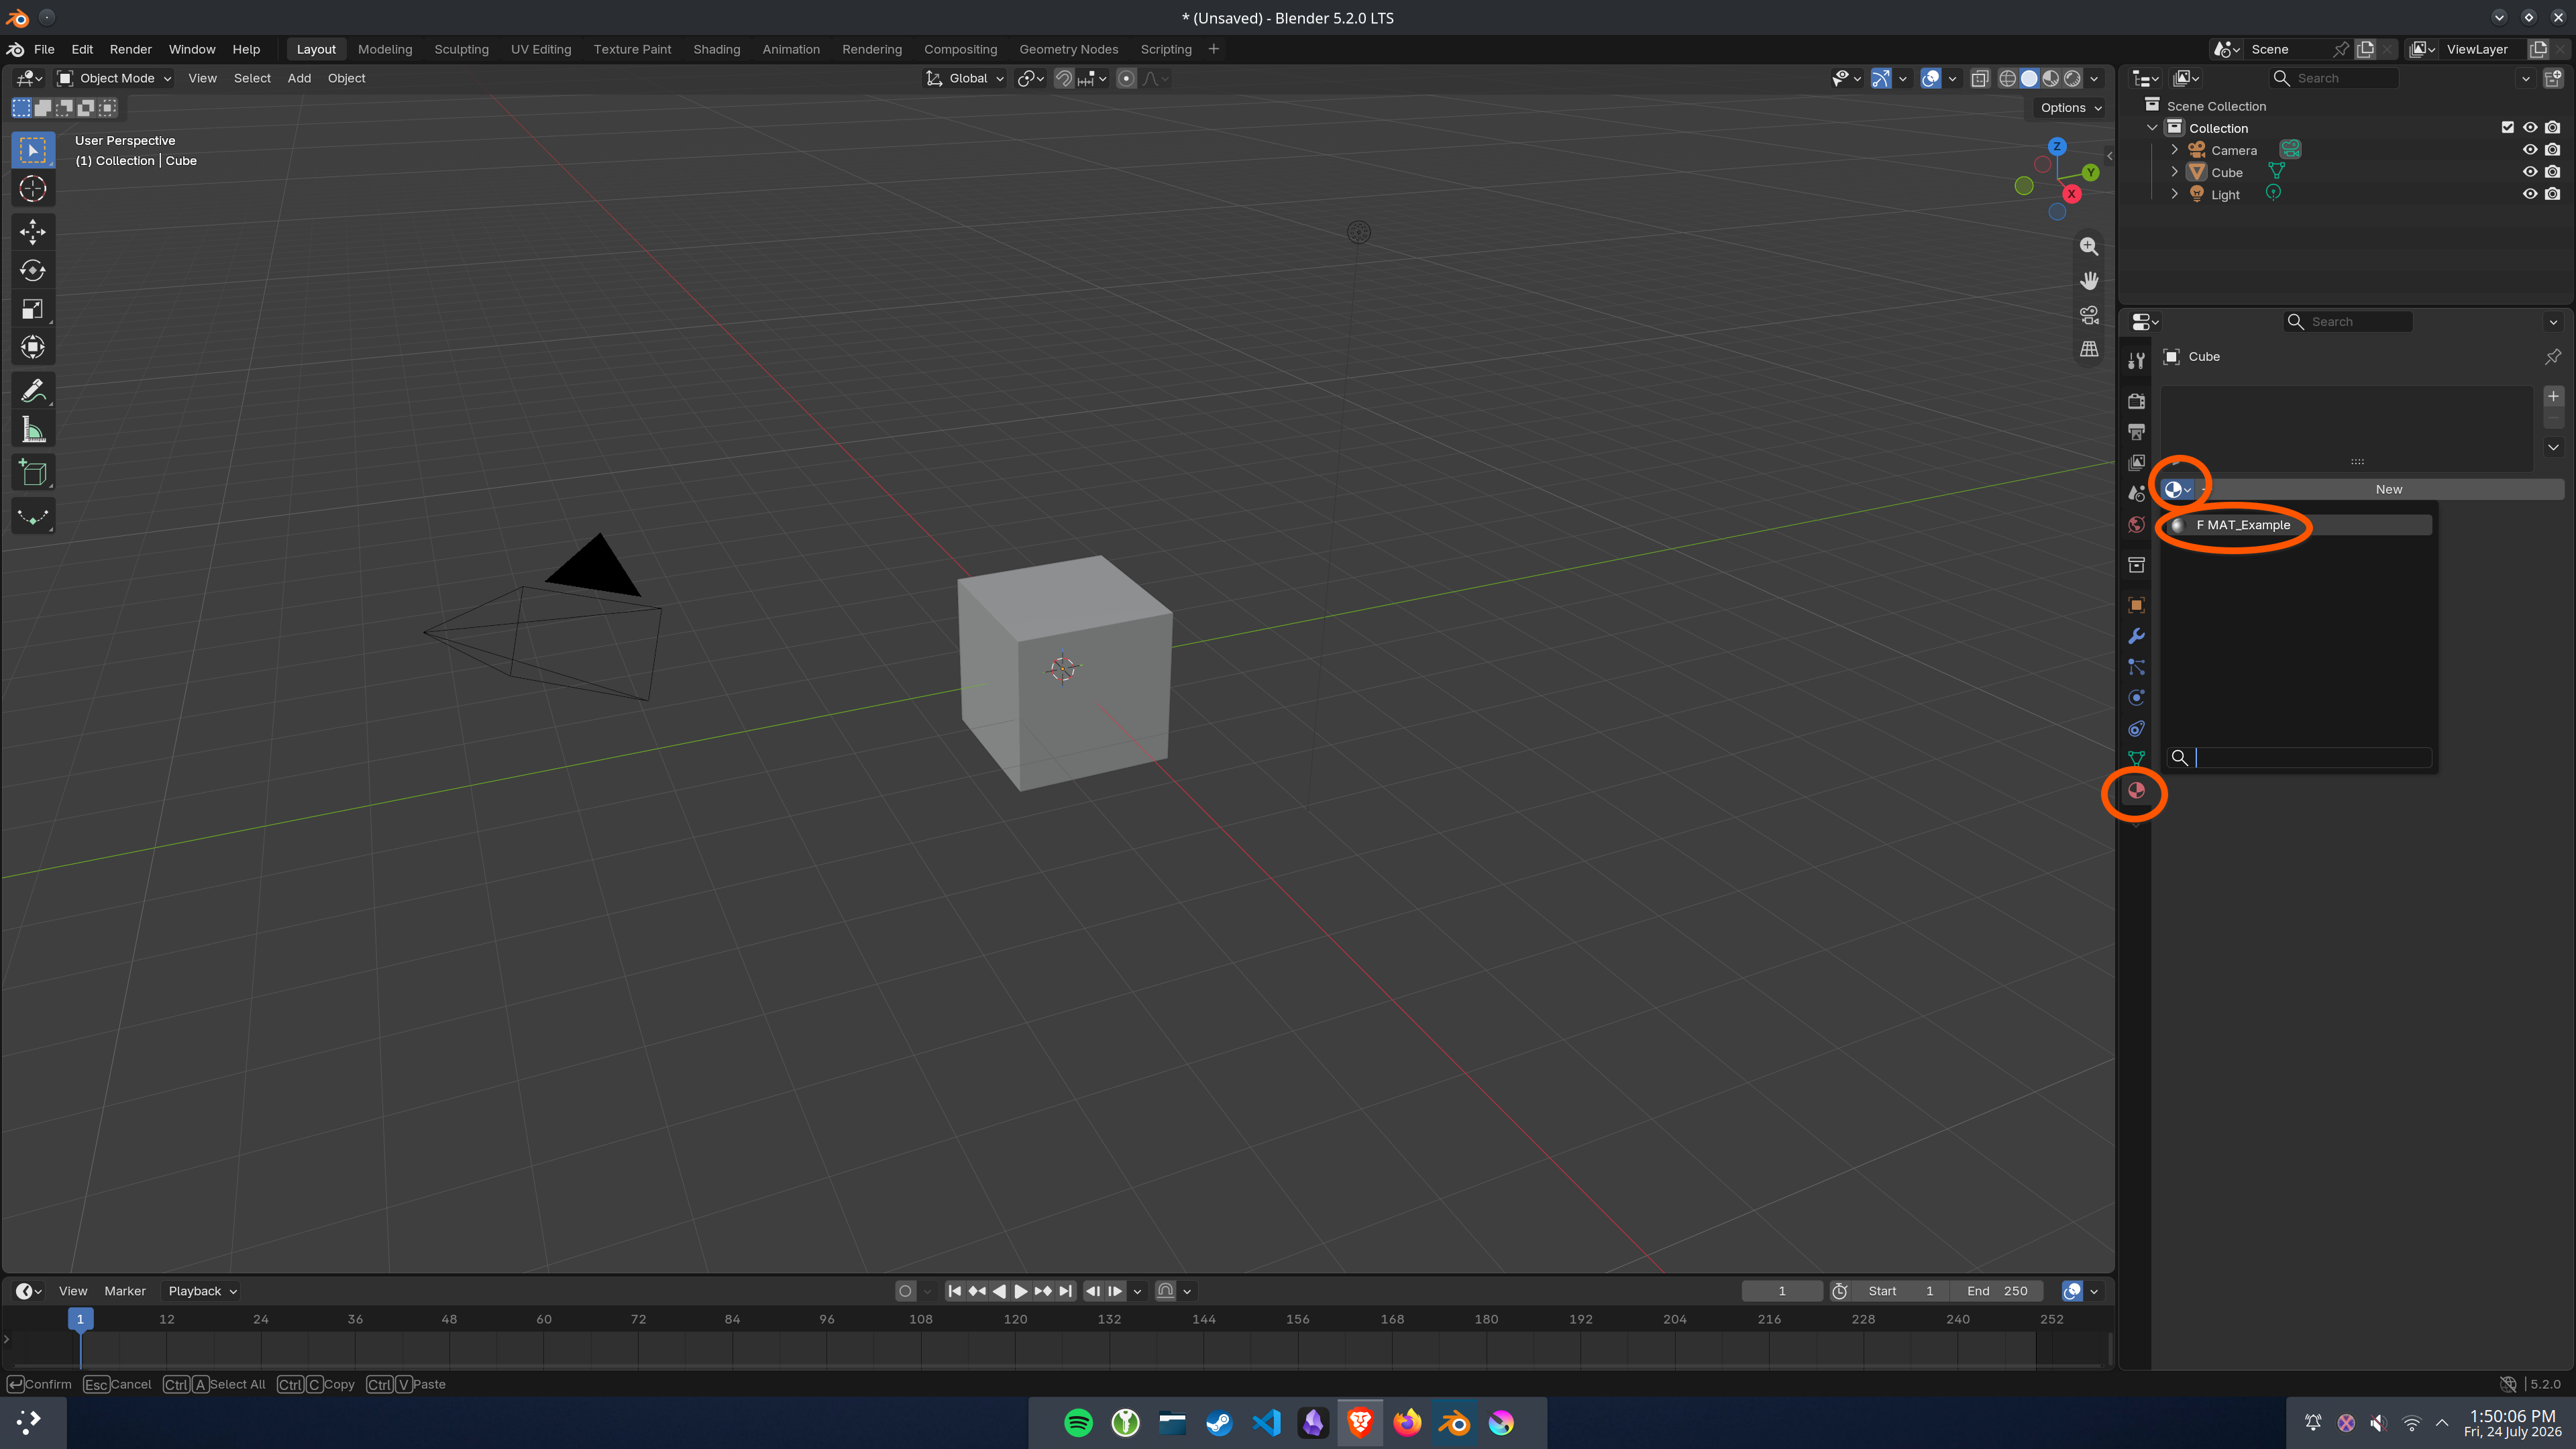
Step 3: Select the material in your material slot drop-down menu.
MATERIAL CUSTOMISATION
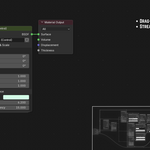
Select your object and go to the Shading tab. The custom node group exposes the primary sliders (such as Scale, Rotation, and key adjustments) to ensure the material is suitable for your scene.
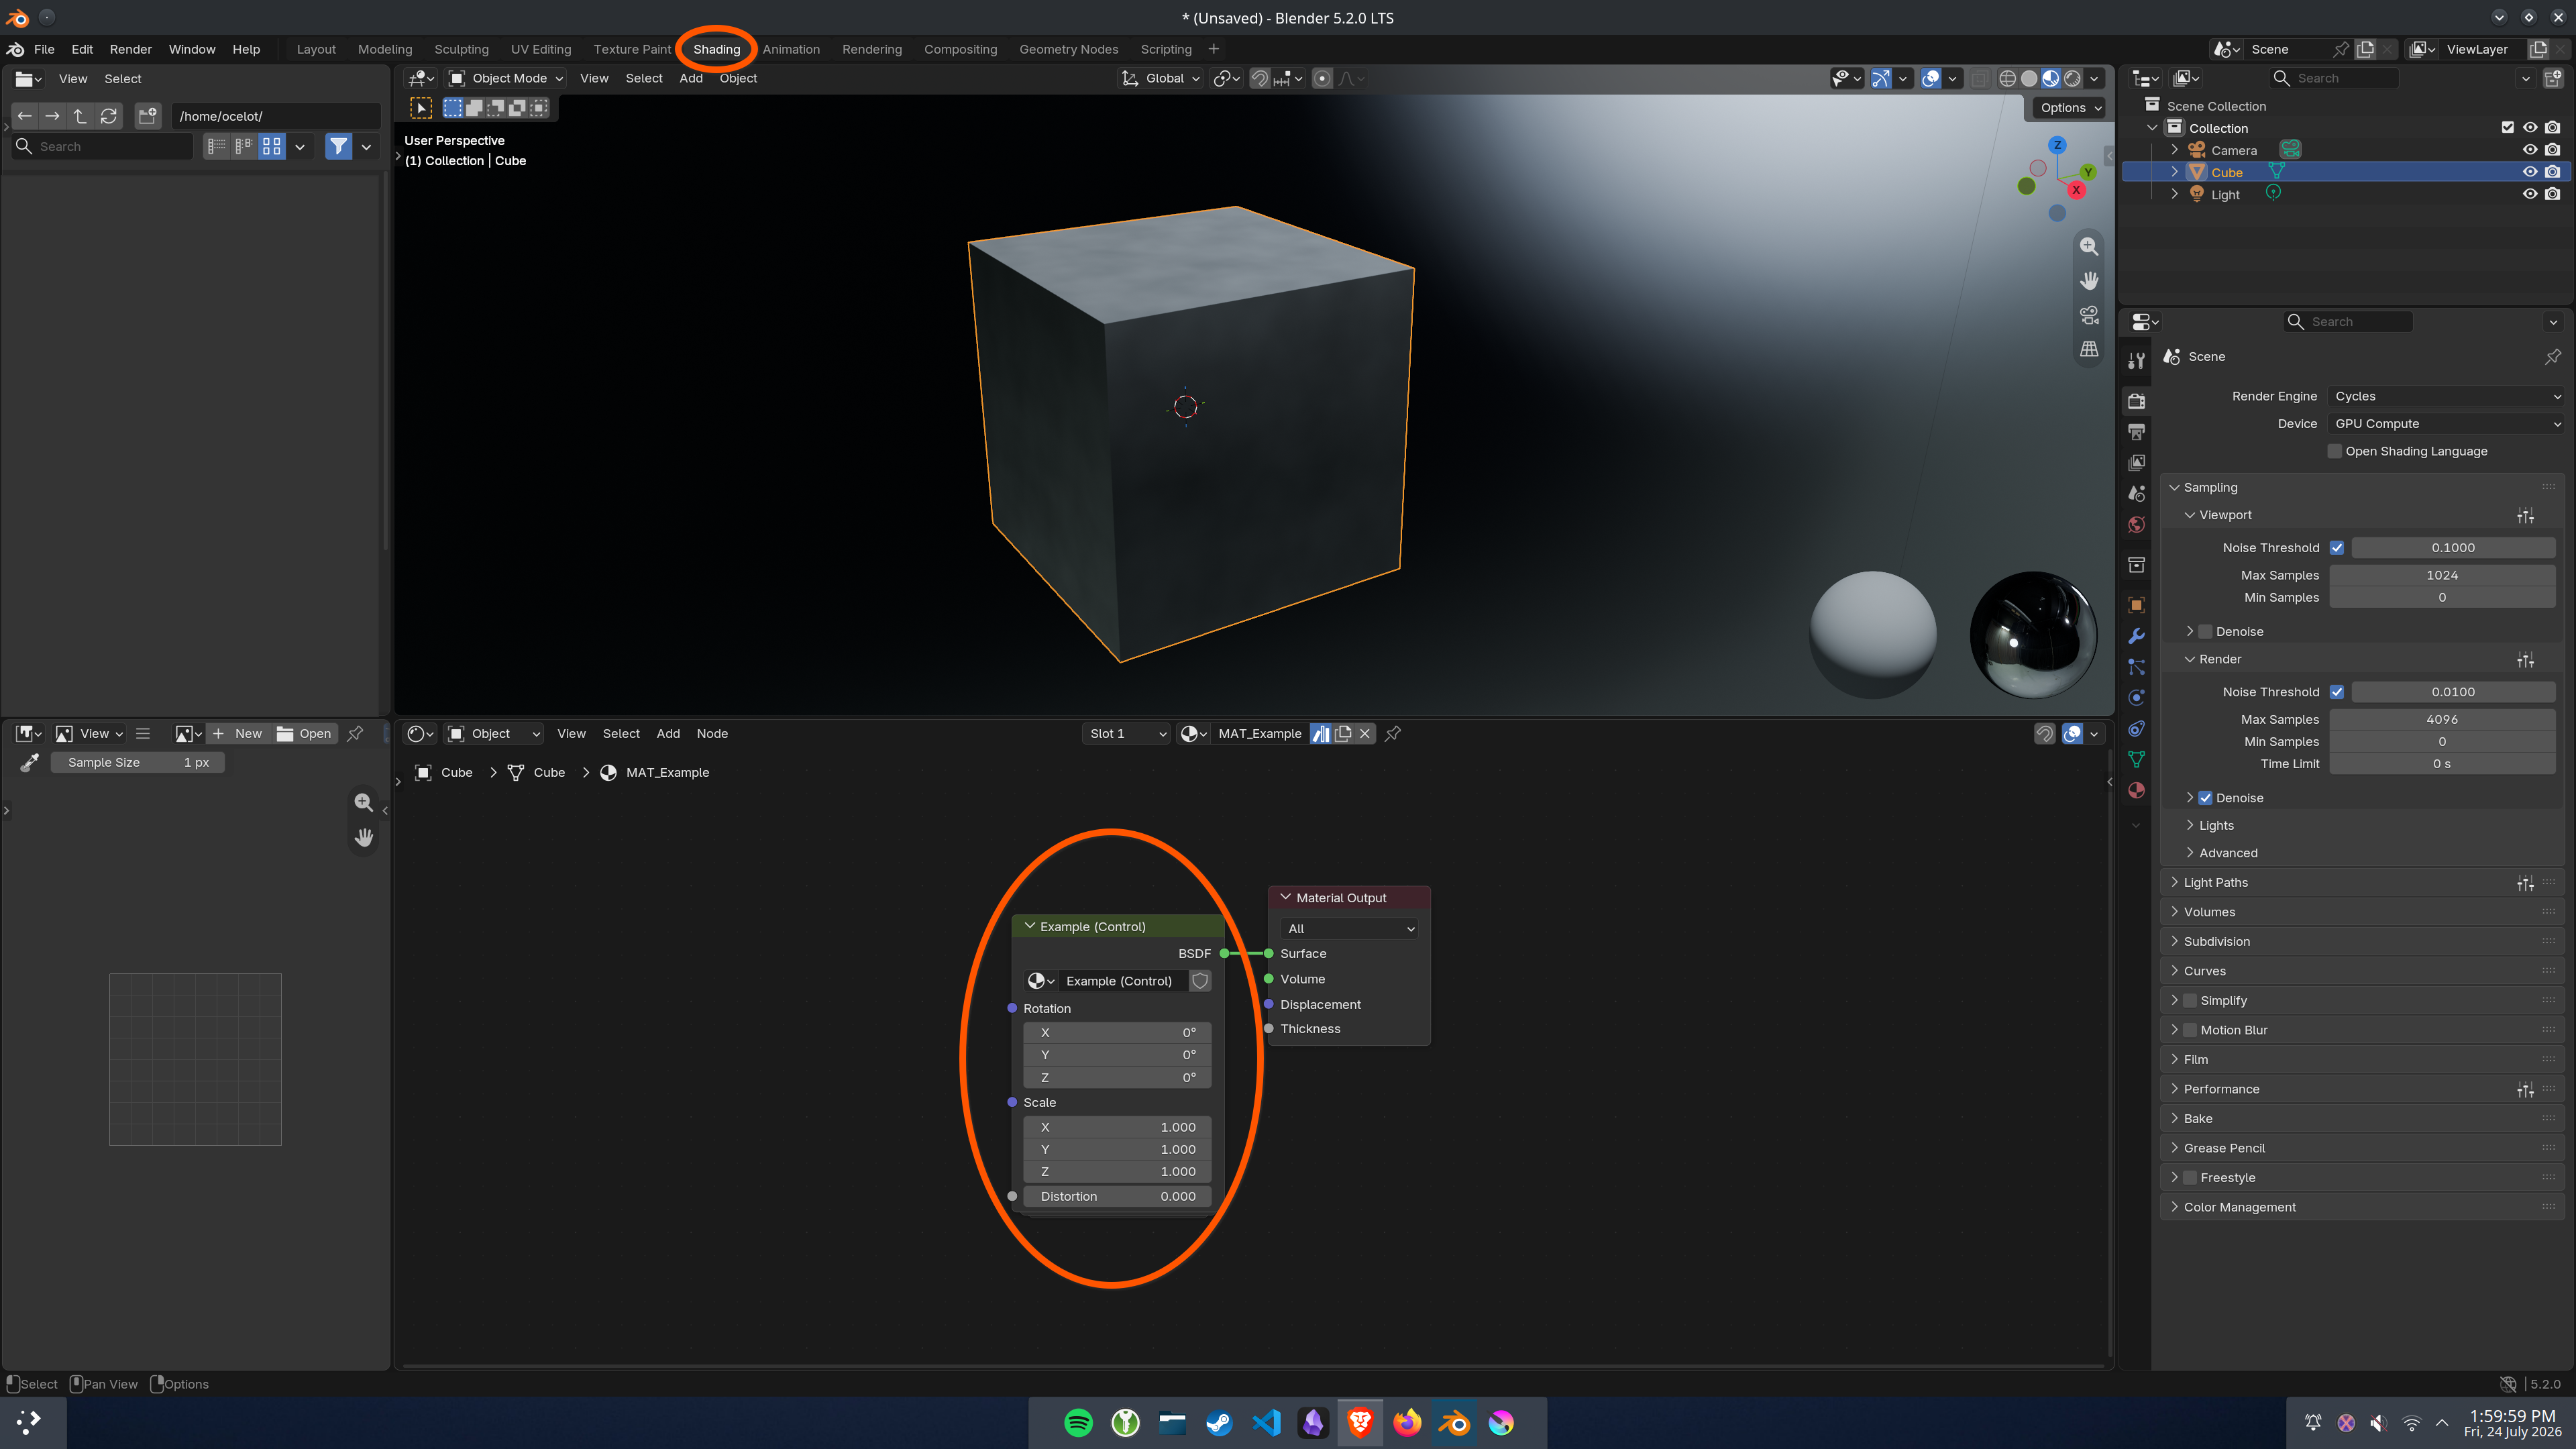
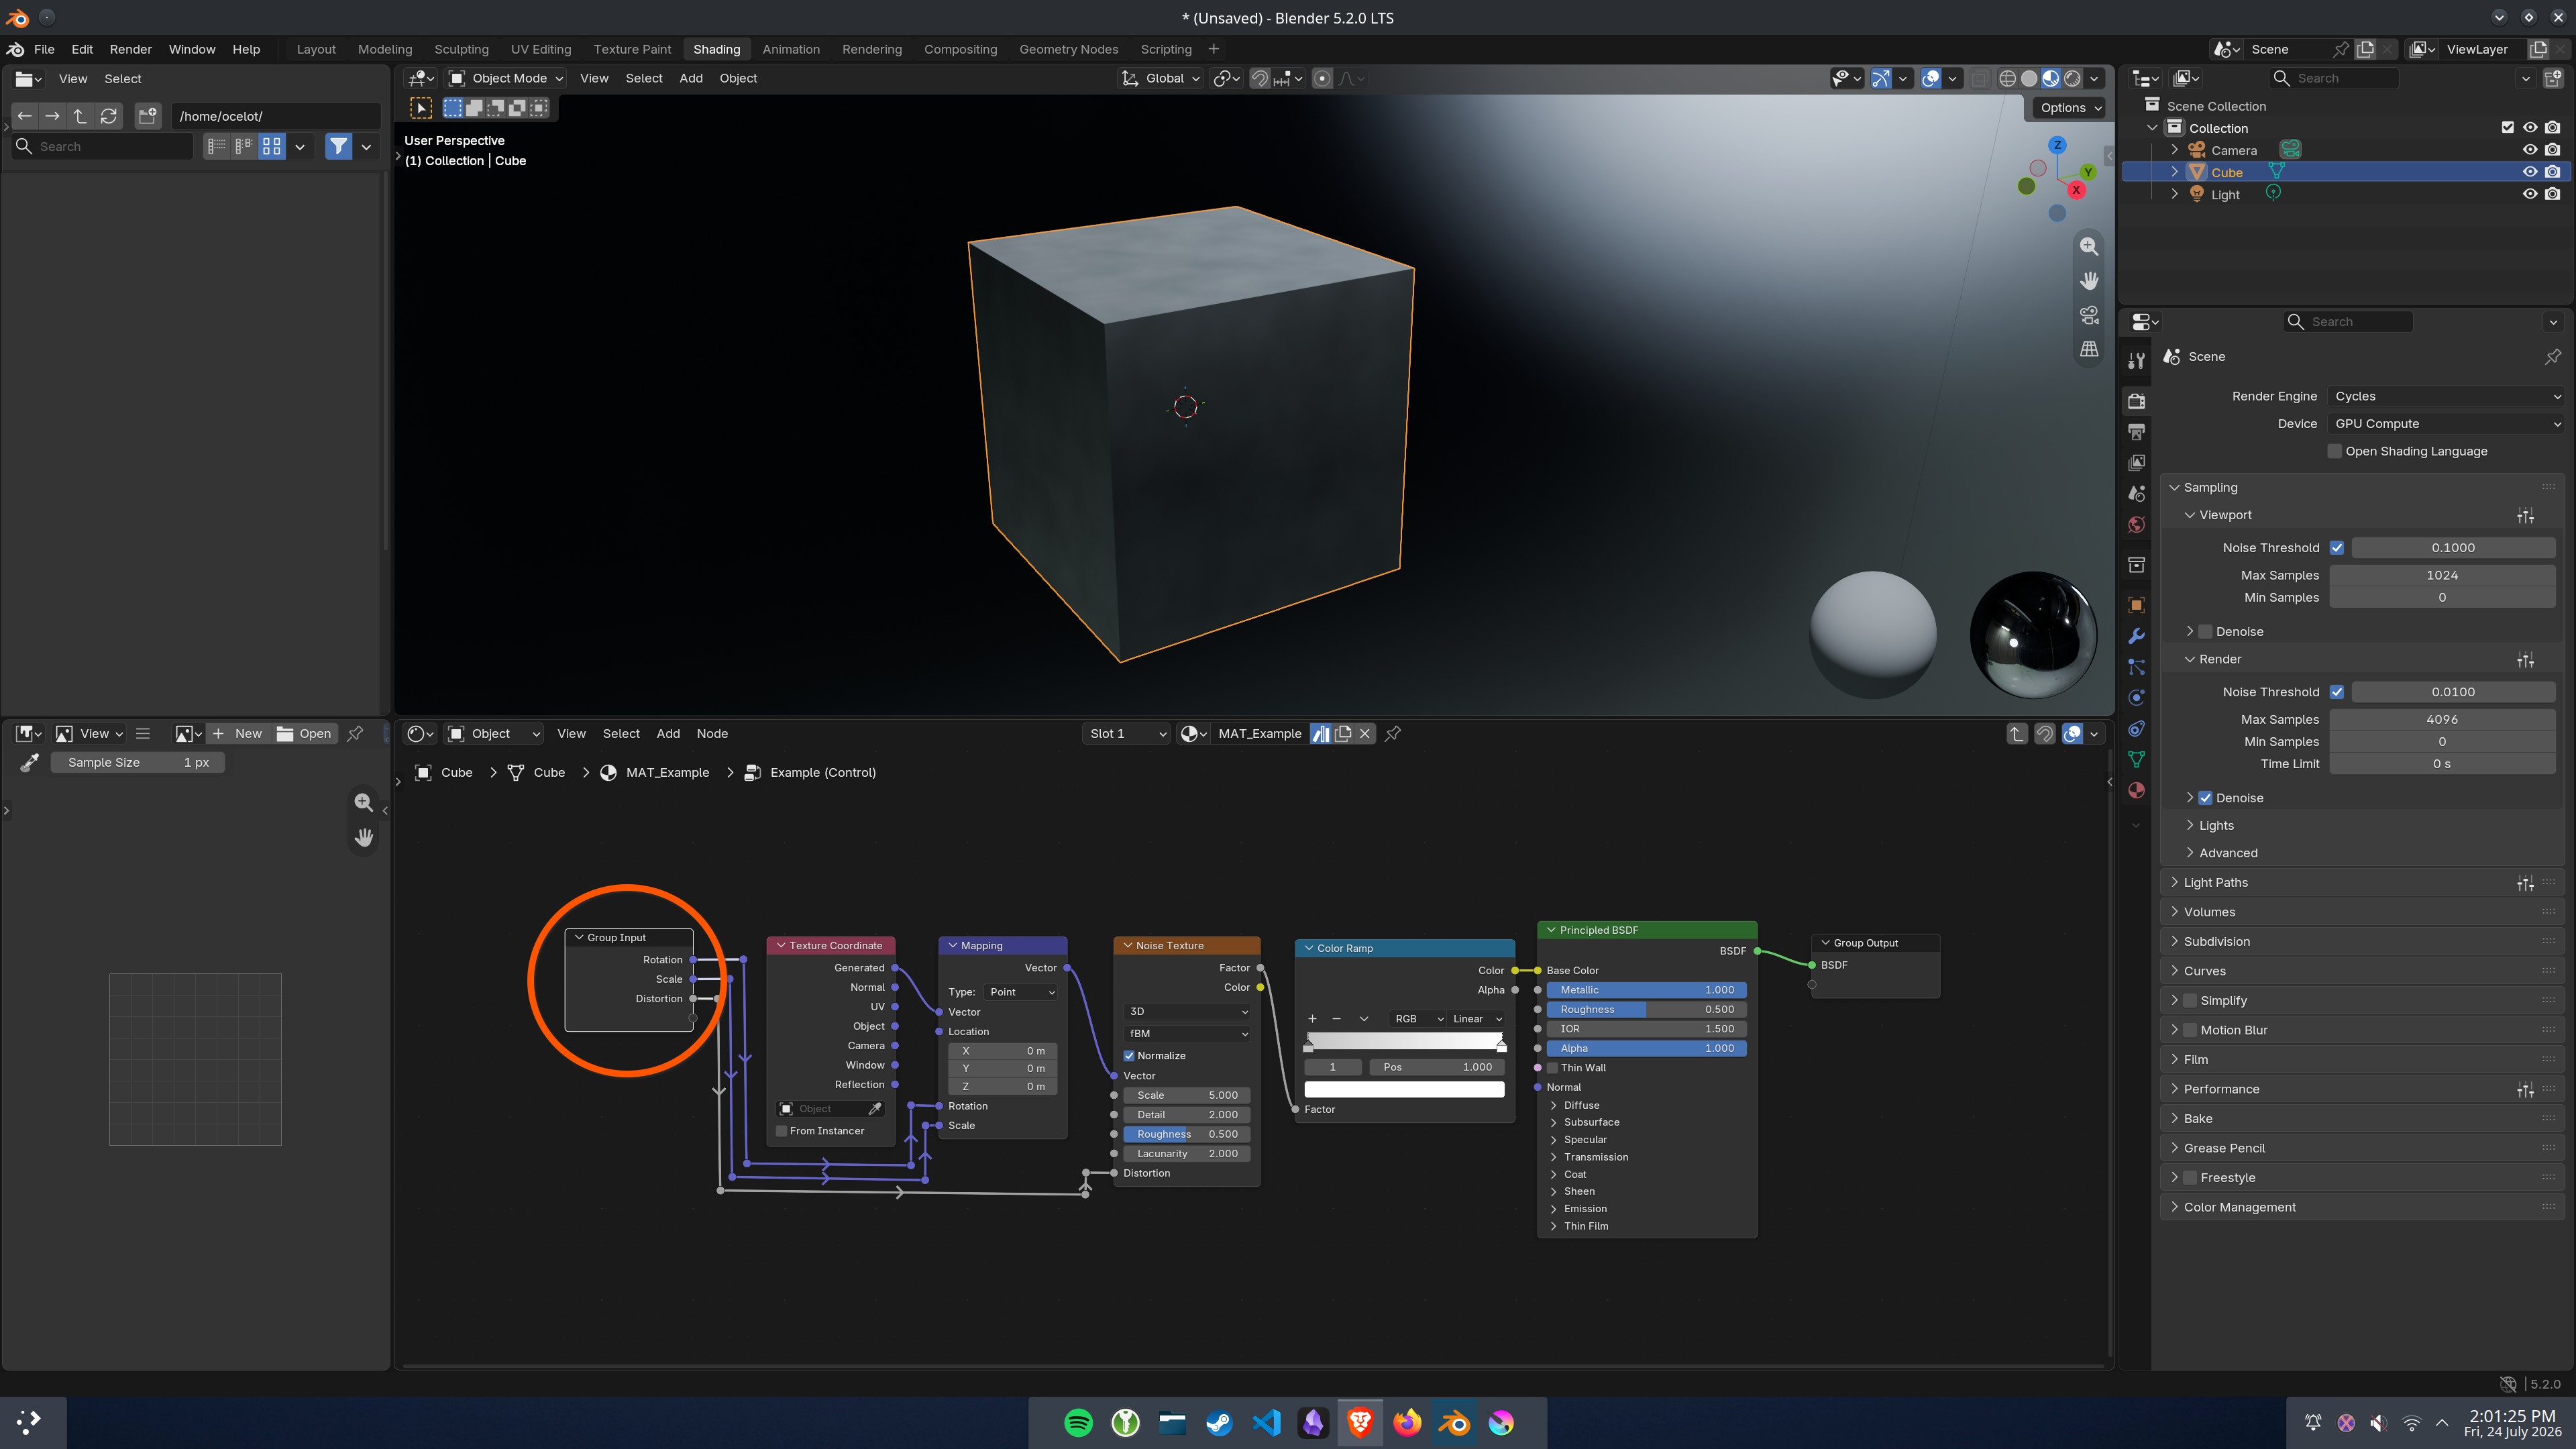
If you want to view the underlying node tree or make intricate changes, select the main green node labelled "[Material-Name] (Control)" and press TAB to enter the group. To exit, click the Group Input node and hit TAB again.
It is highly recommended to make a copy of the material (or save a backup file) before making any significant changes.
SUPPORT & CONTACT
If you encounter any issues or have questions, please reach out to OcelotVFX via the messaging or support system (on the storefront where you purchased this product). If you found these shaders useful, leaving a rating or review helps immensely!
-
$5
For individual artists, students, or indie creators with UNDER $100,000 USD in annual revenue. Valid for unlimited personal or commercial projects within this revenue cap.
-
$15
For freelancers, studios, or corporate entities with OVER $100,000 USD in annual revenue, or teams requiring multi-seat access. Valid for unlimited commercial gain with no revenue restrictions.
 Included
Includes 12 months of
- Support from Ocelot VFX
- Product updates
Extend this product’s Support Period +12 months: 50% of product price
Have questions before purchasing?
Login to message
| Published | about 2 months ago |
| Blender Version | 5.1 - 5.2 |
| Render Engine Used | Cycles |
| License | Royalty Free |
Discover more products like this
customizable stylized procedural Shader realistic 3d shader Material