 Mrs Eliza
Procedural Road & Sidewalk Generator – User Documentation
1. Overview
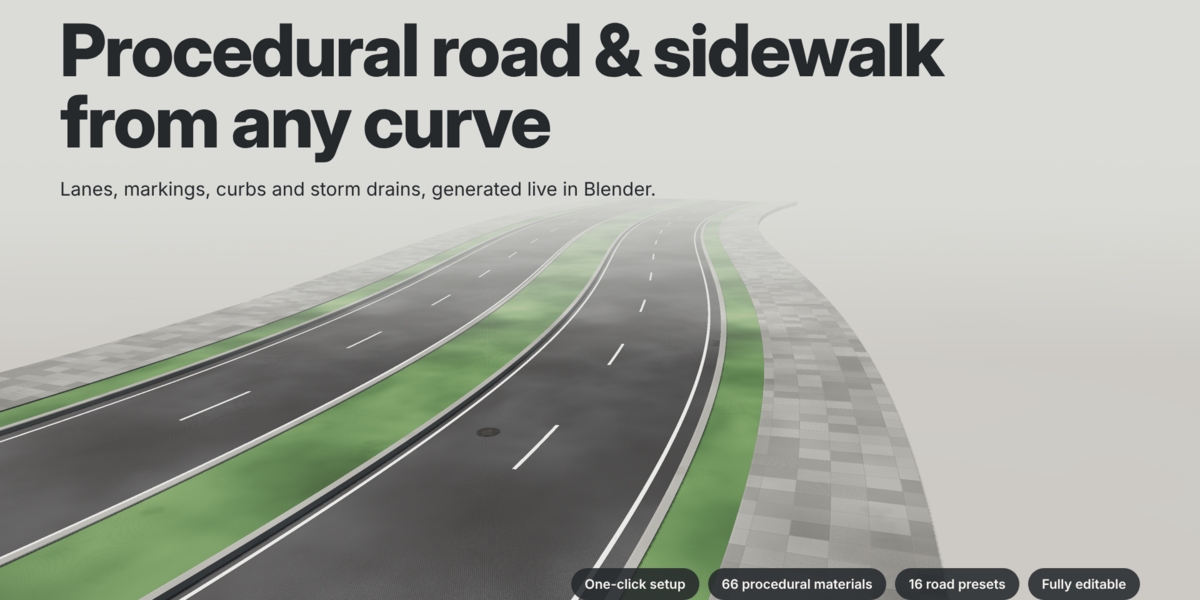
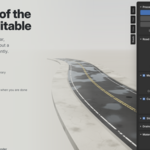
Procedural Road & Sidewalk Generator turns Blender curves into complete, customizable streets. Generate road surfaces, lanes, painted markings, curbs, gutters, sidewalks, planting strips, storm drains, and manholes with just a few clicks.
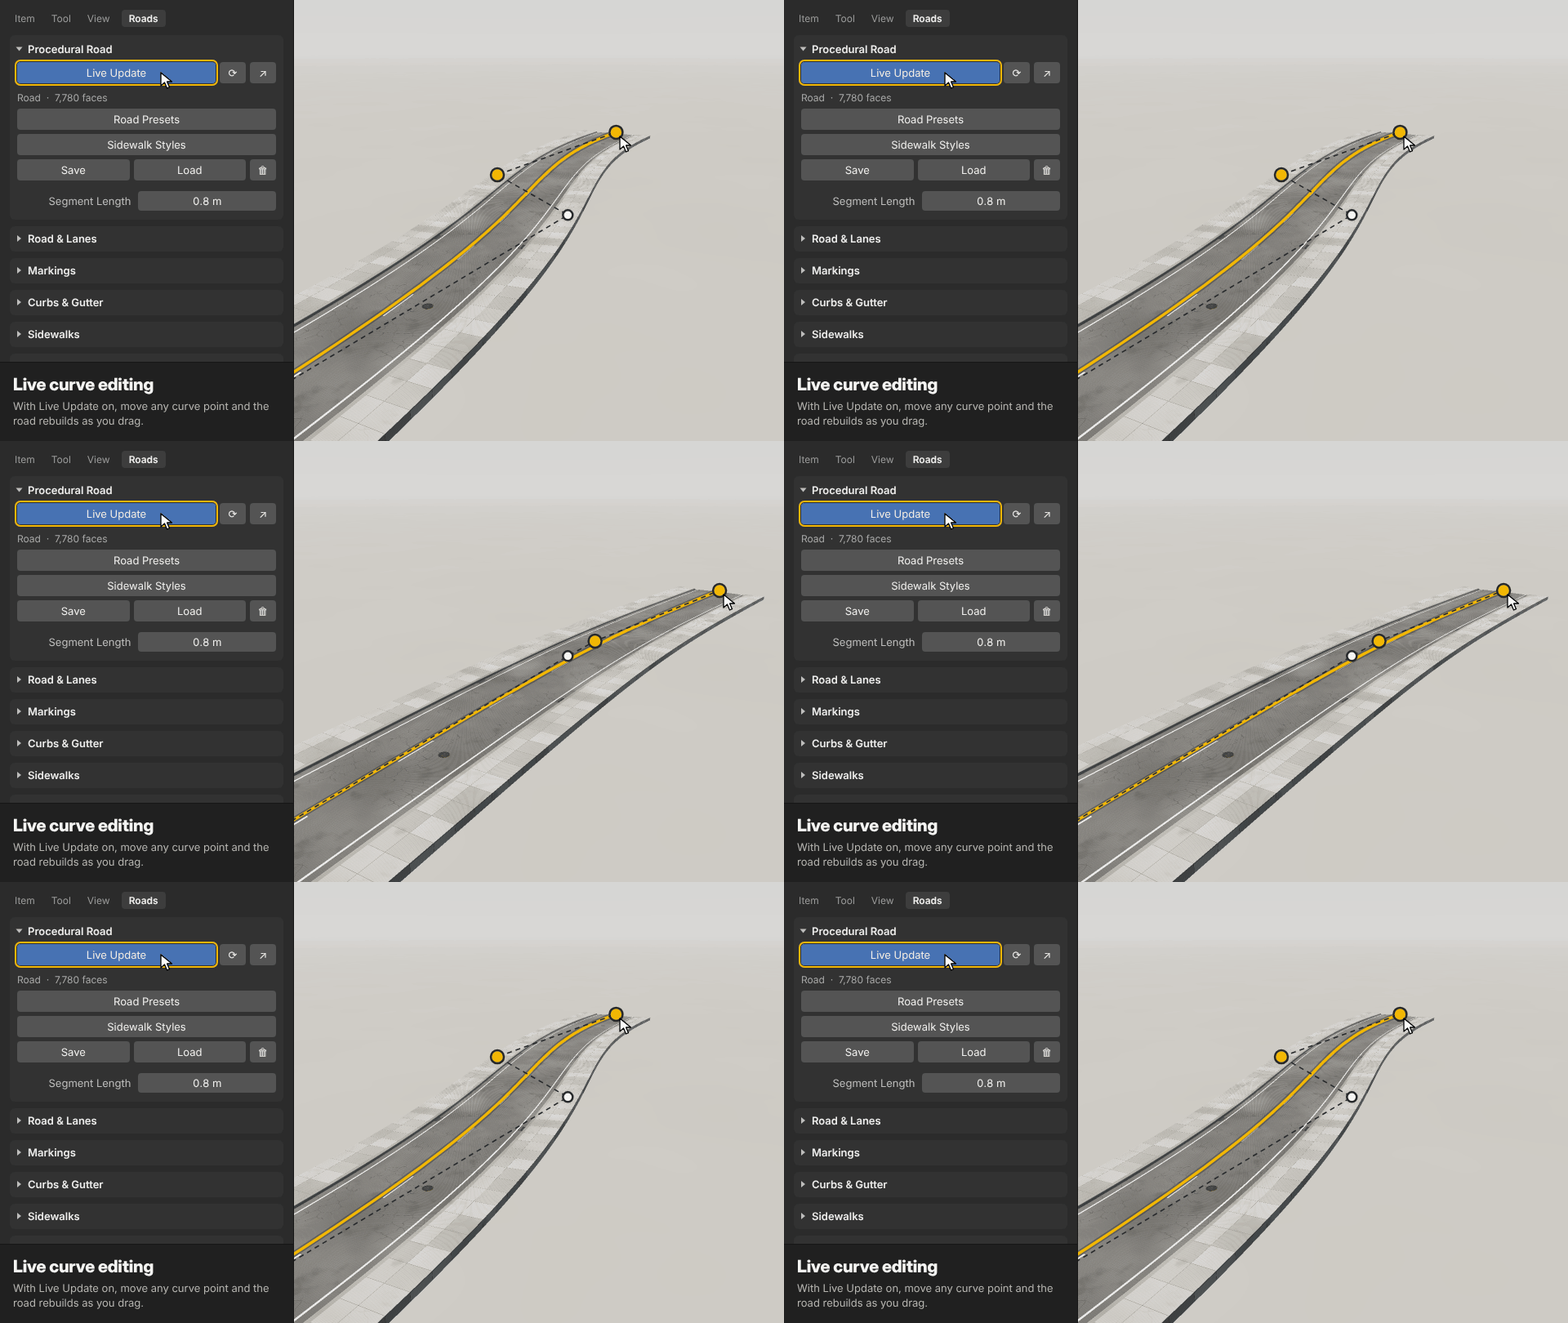
The road remains connected to its original curve, so editing the curve automatically updates the generated street.
Designed for environment artists, architectural visualization, and game development, the add-on creates real geometry with proper UVs and procedural materials. All generated roads work with Cycles and EEVEE and can be exported to other 3D applications.
Key Features
One-click road creation from the sidebar or Add menu.
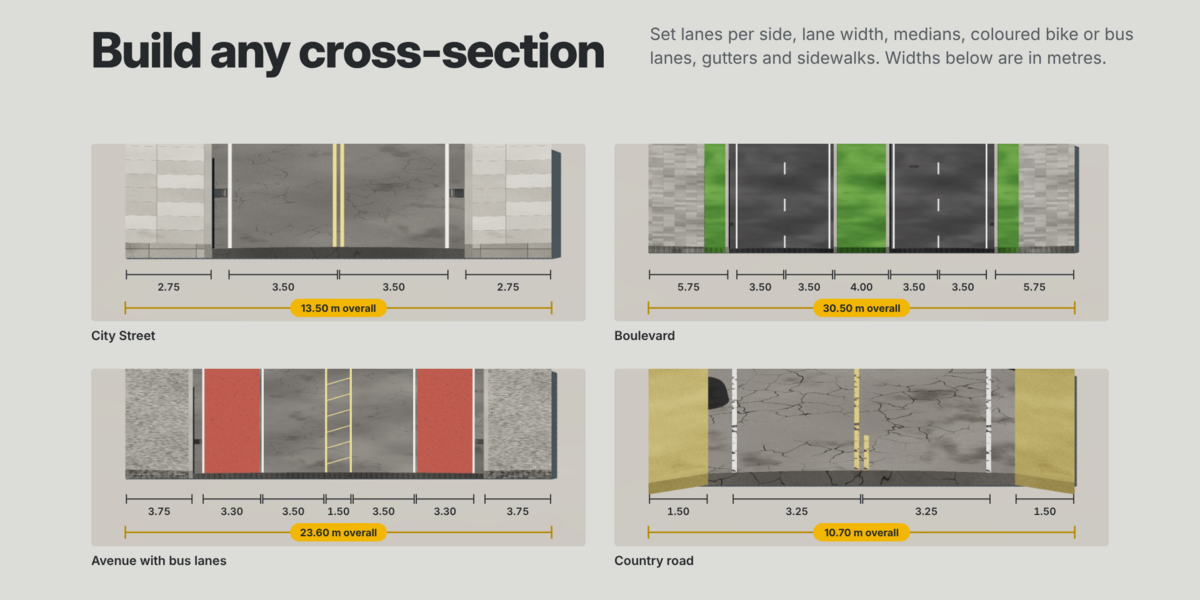
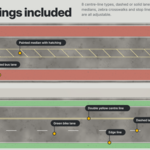
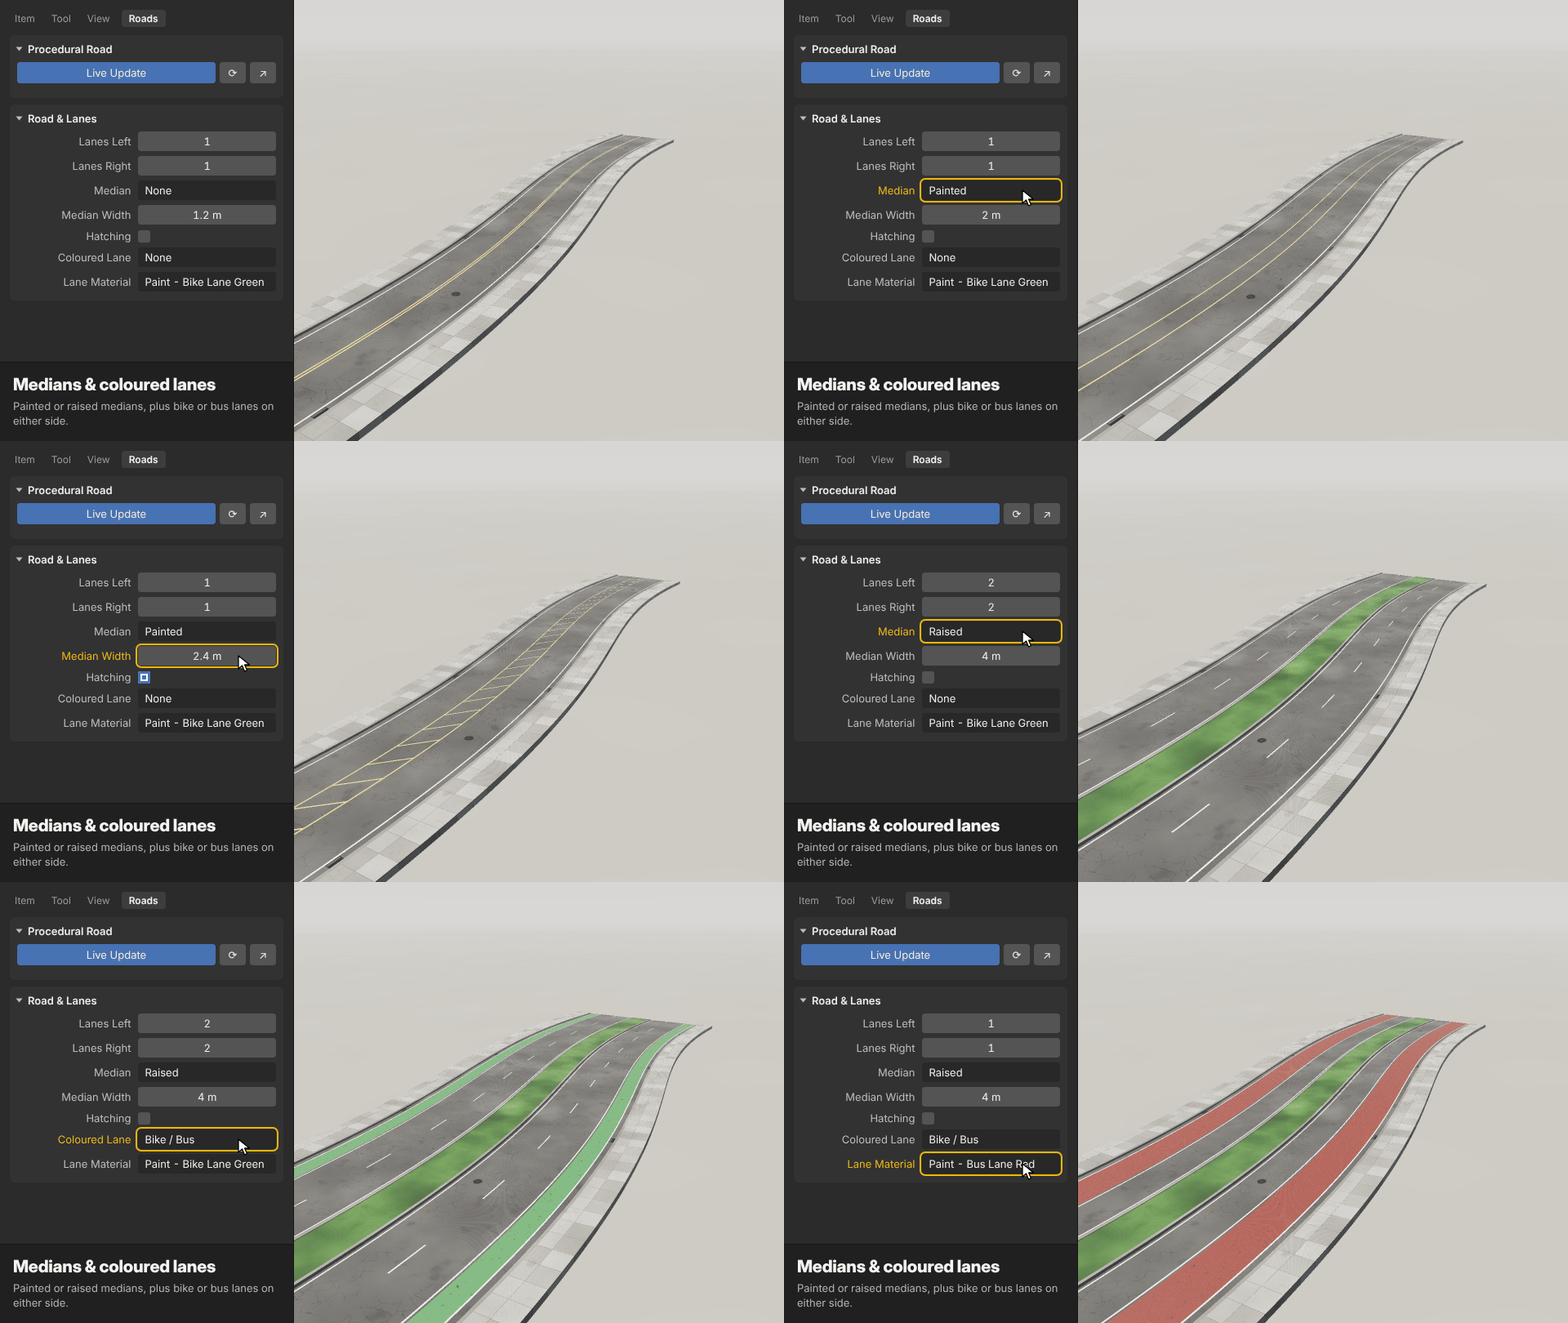
Customizable lanes, medians, bike lanes, and bus lanes.
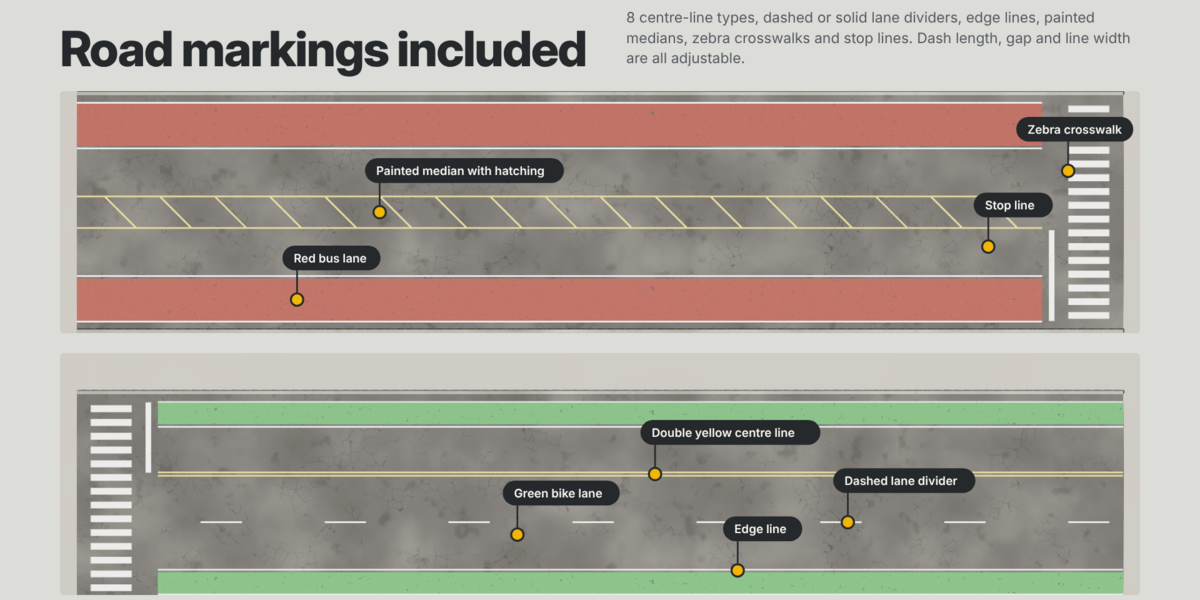
Centre lines, lane dividers, edge lines, crosswalks, and stop lines.
Three curb profiles, sidewalks, planting strips, and grass verges.
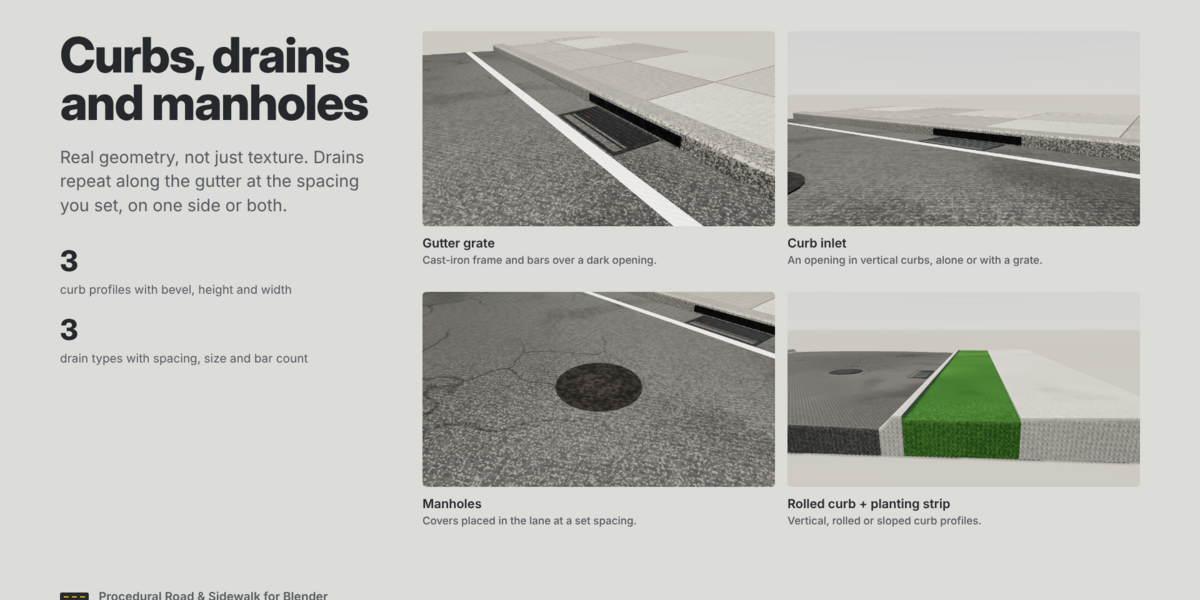
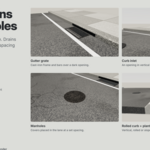
Procedural storm drains, curb inlets, and manholes.
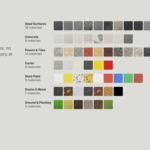
66 procedural materials with customizable wear, wetness, and texture scale.
16 road presets and 9 sidewalk styles.
Save and reuse your own custom presets.
-
Live curve updates and static mesh conversion.
Requirements: Blender 4.2 or newer. No external image textures or additional files are required.
2. Installation
The add-on includes two ZIP packages. Use the recommended extension package for Blender 4.2 and newer.
Recommended Installation
Open Edit → Preferences → Get Extensions.
Click the small arrow menu in the top-right corner.
Select Install from Disk.
Choose
procedural_roads_v1.0.0.zip.The add-on will be installed and enabled.
Legacy Installation
If you use the older add-on installation system:
Open Edit → Preferences → Add-ons.
Click Install.
Select
procedural_roads_legacy_v1.0.0.zip.Enable the add-on using its checkbox.
After installation, press N in the 3D Viewport and open the new Roads tab.
To update the add-on, remove the previous version from Blender Preferences before installing the new one.
3. Quick Start
Create your first road in just a few steps.
Create a New Road
Position the 3D Cursor where the road should begin.
Open the Roads tab in the viewport sidebar.
-
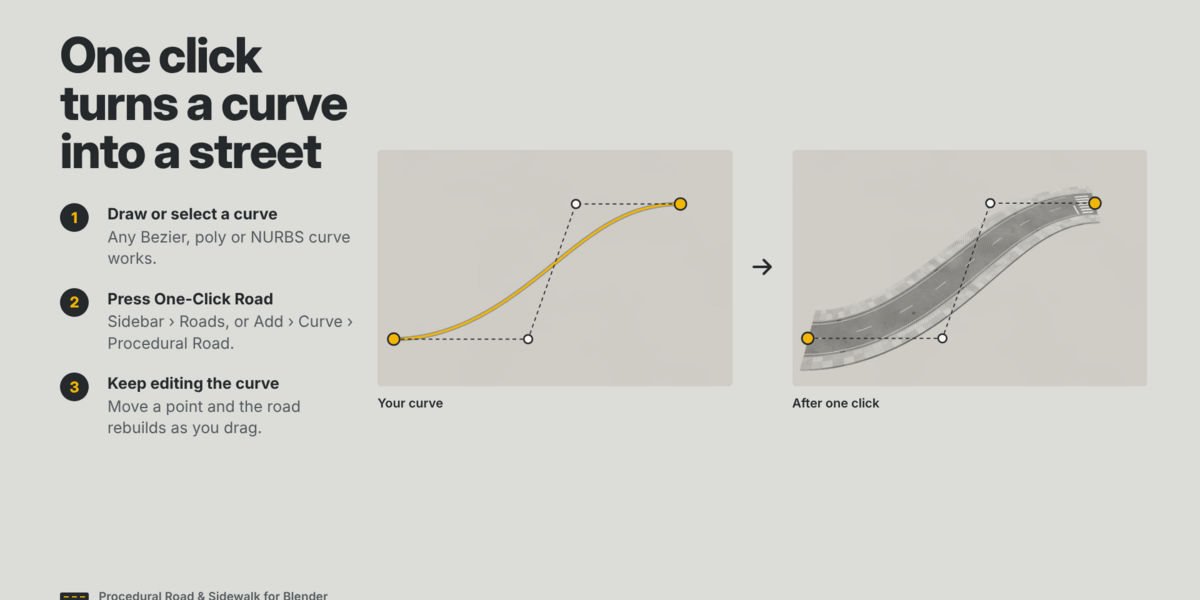
Click One-Click Road.
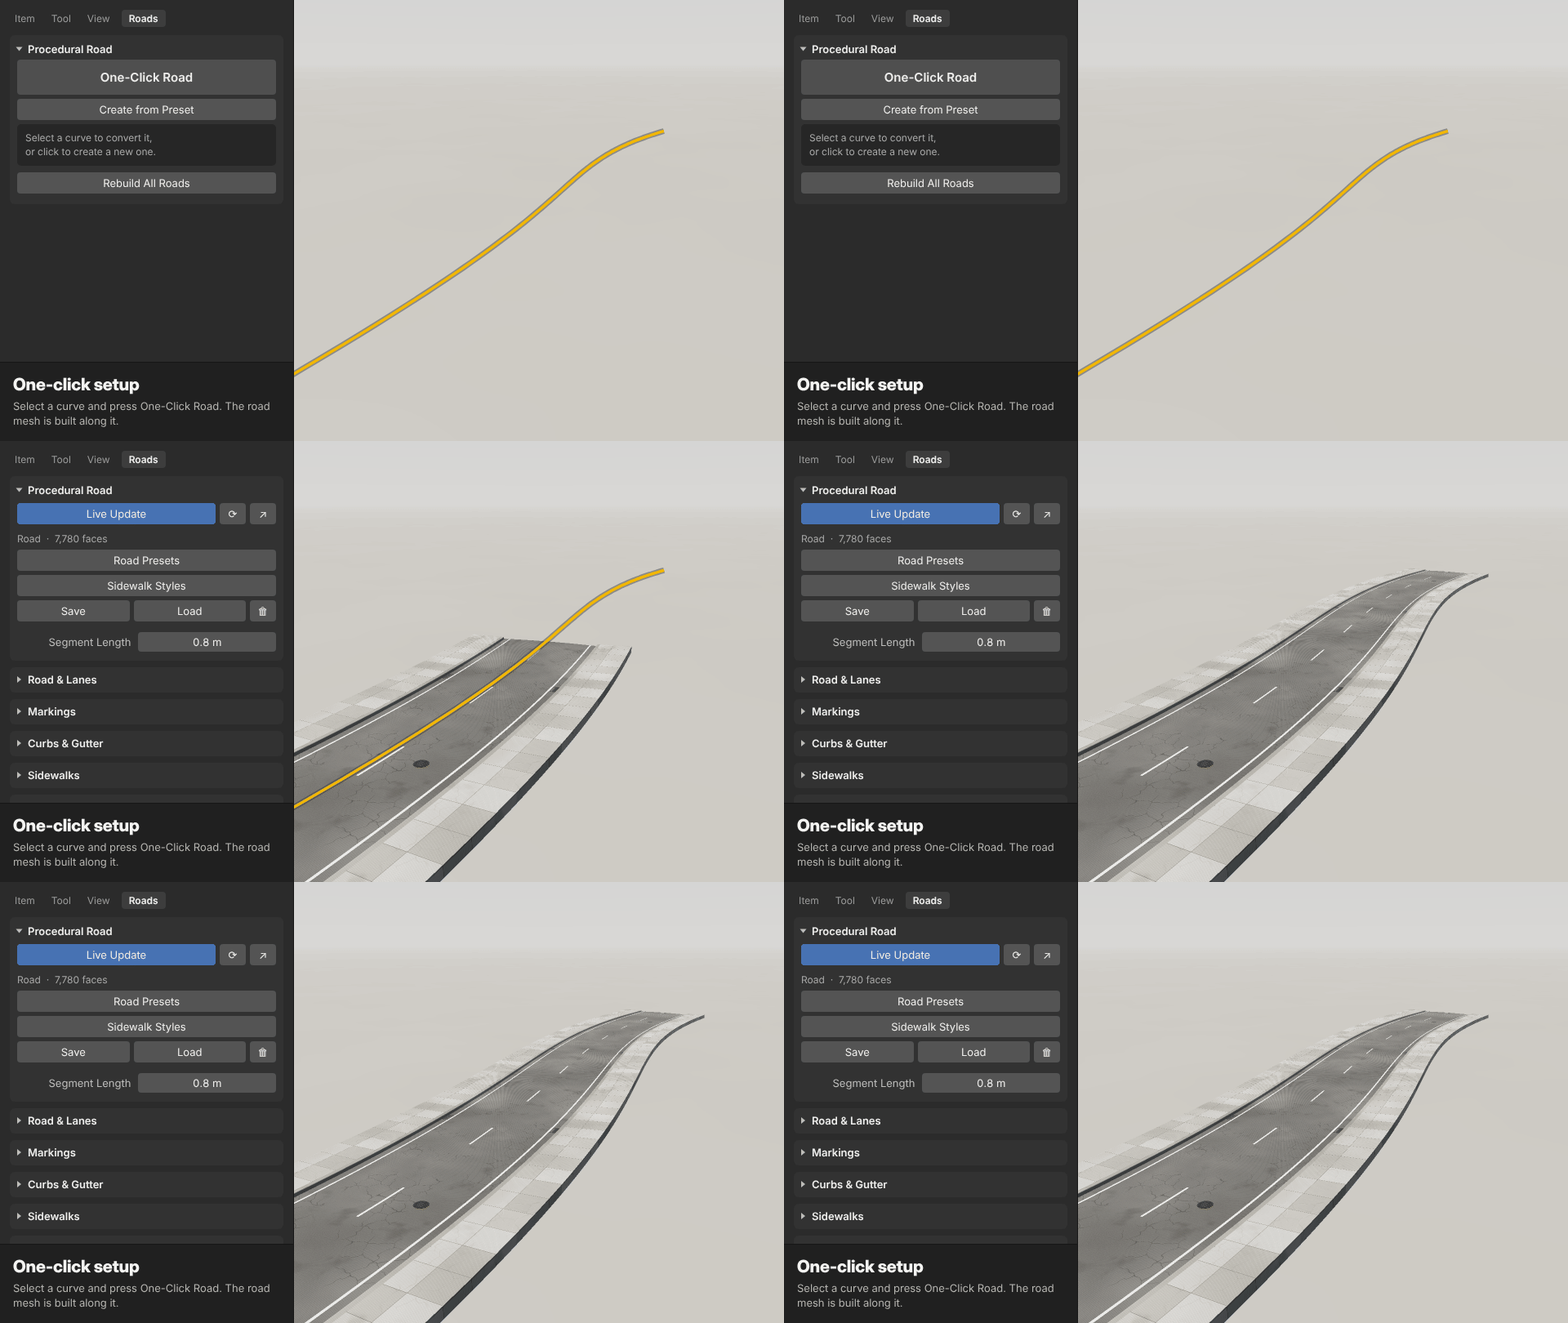
You can also use Shift + A → Curve → Procedural Road.
A 50-metre Bezier curve with a basic two-lane city street will be created automatically.
Create a Road from Your Own Curve
Draw a curve or select an existing one.
Make sure it is the active object.
Click One-Click Road.
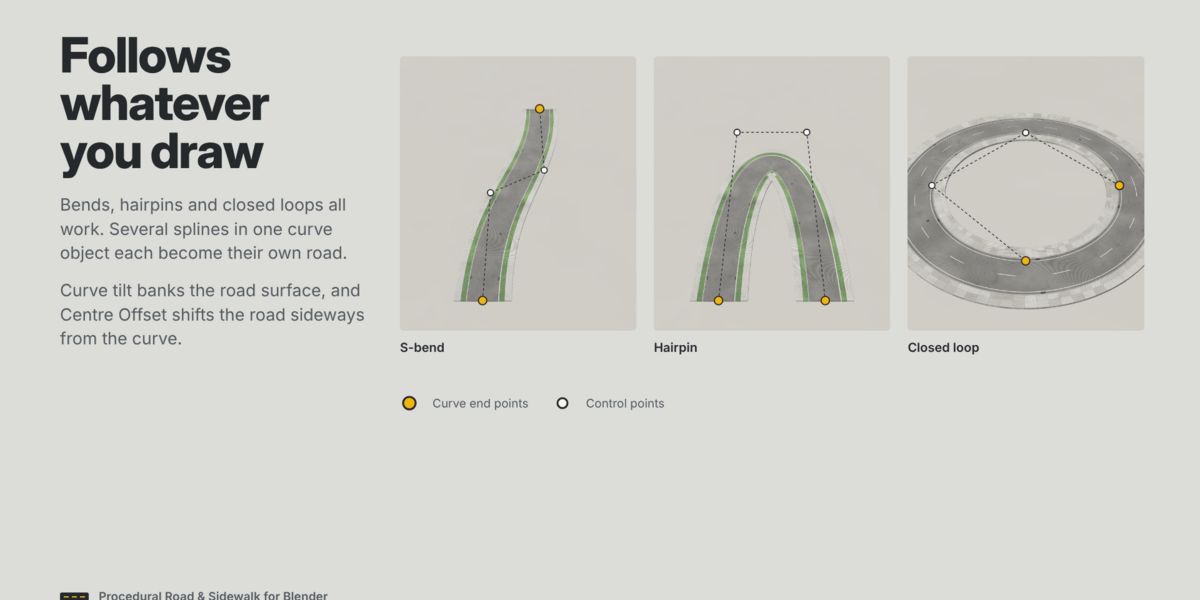
The selected curve becomes the road's centre line.
You can also choose a starting design from Create from Preset, which provides 16 ready-made road presets.
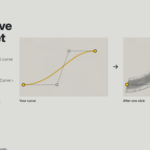
To reshape the road, select its curve, press Tab, and move the control points or handles. With Live Update enabled, the road follows your changes automatically.
4. Understanding the Curve System
The add-on uses the curve to control the road and generates a separate mesh object from its settings.
The generated mesh:
Uses the curve's name with
_Roadadded.Is placed in the same collection.
Is parented to the curve.
Follows the curve when it is moved, rotated, or scaled.
The curve represents the road's centre line. Its direction determines the left and right sides of the road.
To reverse the direction, enter Edit Mode and use Segments → Switch Direction.
Important Behaviours
Live Update: Automatically rebuilds the road when you edit the curve or change settings. Disable it for long roads and use the rebuild button when needed.
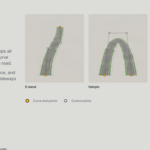
Supported Curves: Bezier, Poly, and NURBS curves are supported. NURBS curves are approximated using smoothed control points.
Multiple Splines: Each spline in a curve object generates its own road using the same settings. Closed splines can create ring roads.
Use Curve Tilt: Allows the road to follow the curve's tilt values. Adjust tilt using Ctrl + T in Edit Mode.
Real-World UVs: UV coordinates are measured in metres across and along the road, helping image textures maintain their intended scale.
The pointer button beside Rebuild switches selection between the curve and its generated road mesh.
5. Road Settings
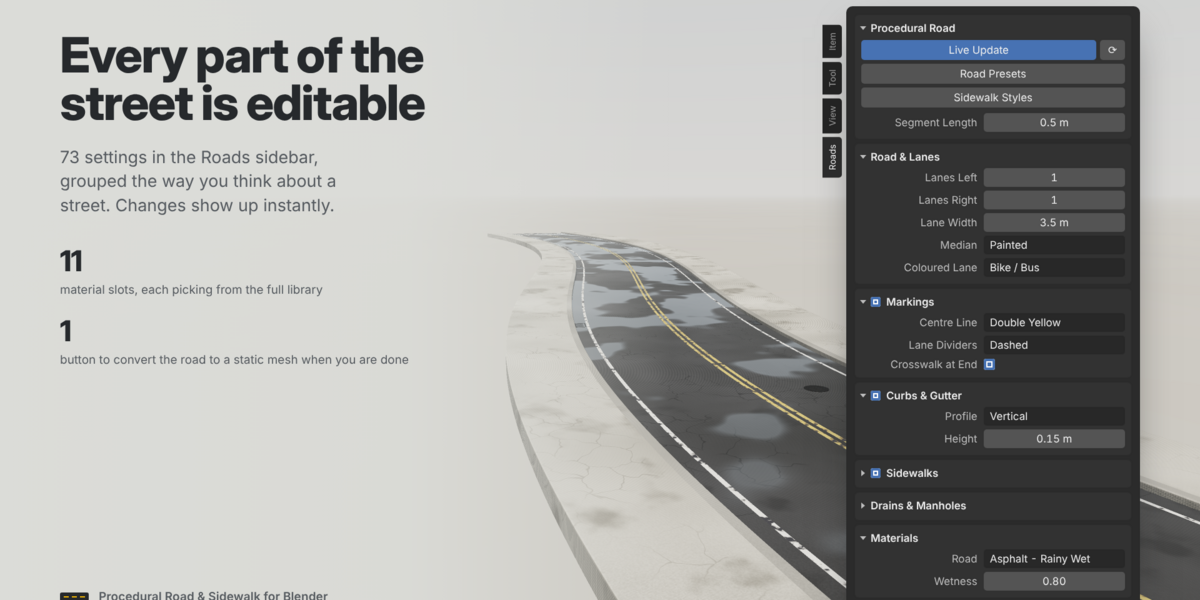
The Roads panel contains several sections for controlling the street, starting from the road centre and moving outward. All distances are measured in metres.
General Settings
Segment Length: Controls the distance between road cross-sections. Smaller values produce smoother bends but increase geometry. Around 0.5 m works well for tight city corners, while 2 m is suitable for highways.
Centre Offset: Moves the entire road sideways from its curve.
Use Curve Tilt: Enables or disables road banking based on curve tilt.
Road & Lanes
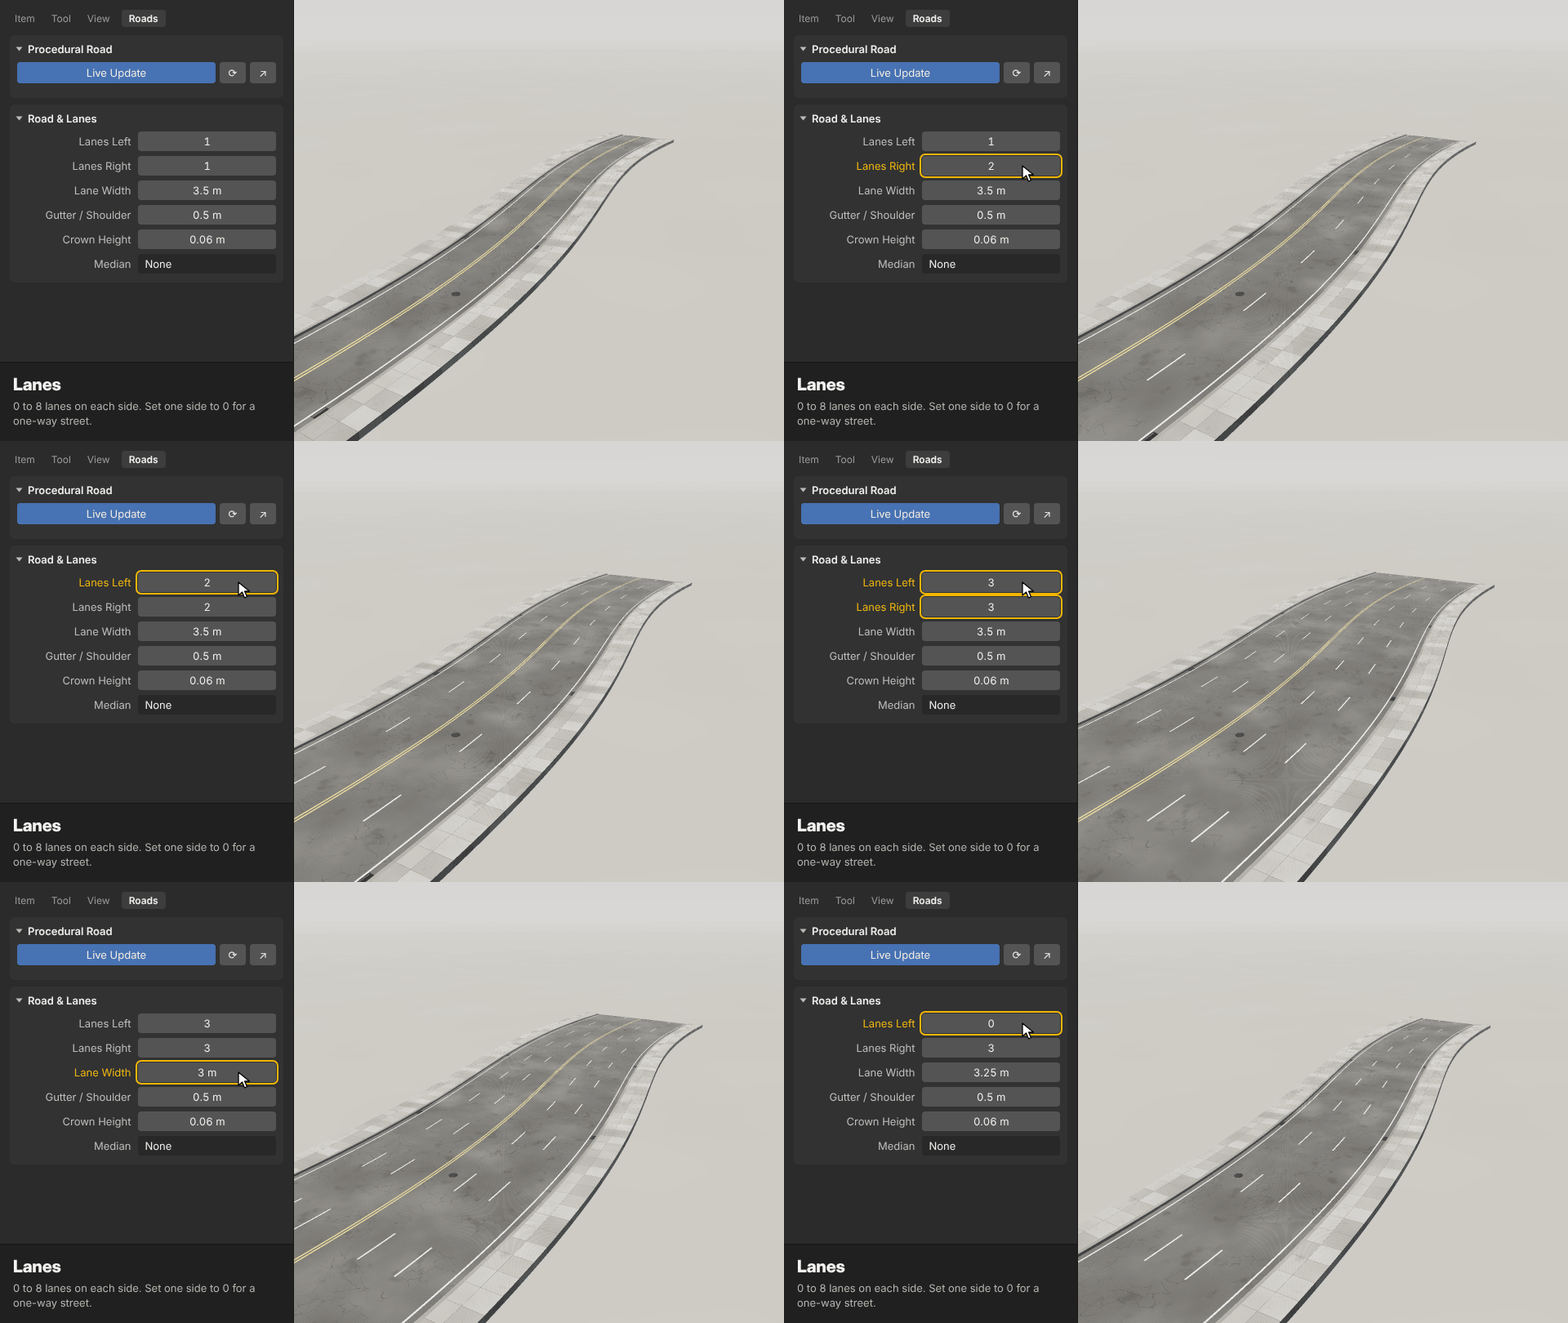
Control the road layout and dimensions:
Lanes Left / Right: Set the number of lanes on each side, from 0 to 8. Set one side to 0 for a one-way road.
Lane Width: Controls the width of individual lanes.
Gutter / Shoulder: Adds paved space between the outer lane and curb.
Thickness: Sets the depth of the road surface.
Crown Height: Raises the road centre to help create a drainage slope.
Cross Subdivisions: Adds geometry across each lane to keep the road crown smooth.
Median Options
Choose between three median types:
None: No median.
Painted: Creates a painted median with two solid lines and optional diagonal hatching.
Raised: Creates a physical median with curbs on both sides and planted fill.
Coloured Lanes
Add dedicated bike or bus lanes outside the main travel lanes.
Choose the left side, right side, or both sides, then adjust the lane width and material.
6. Road Markings
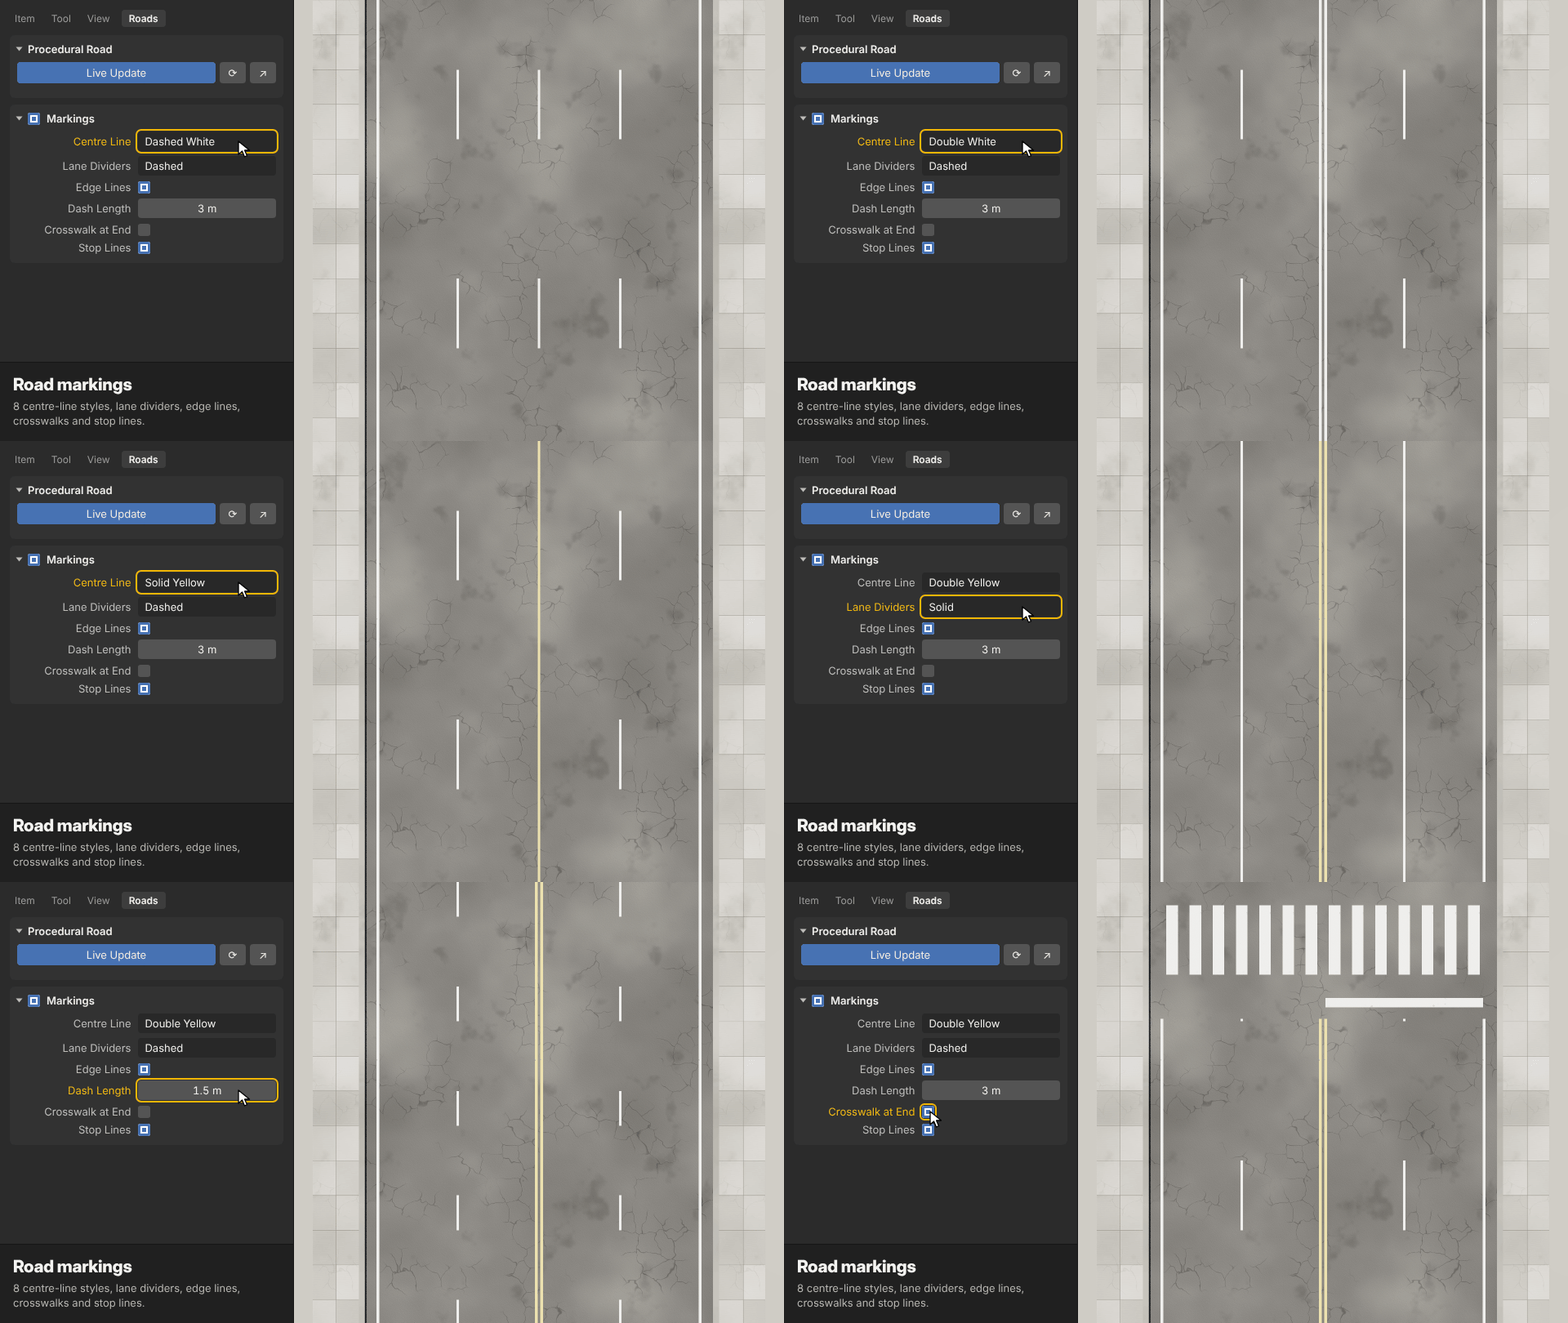
The Markings panel controls all road paint. Use the main checkbox to enable or disable markings.
Available options include:
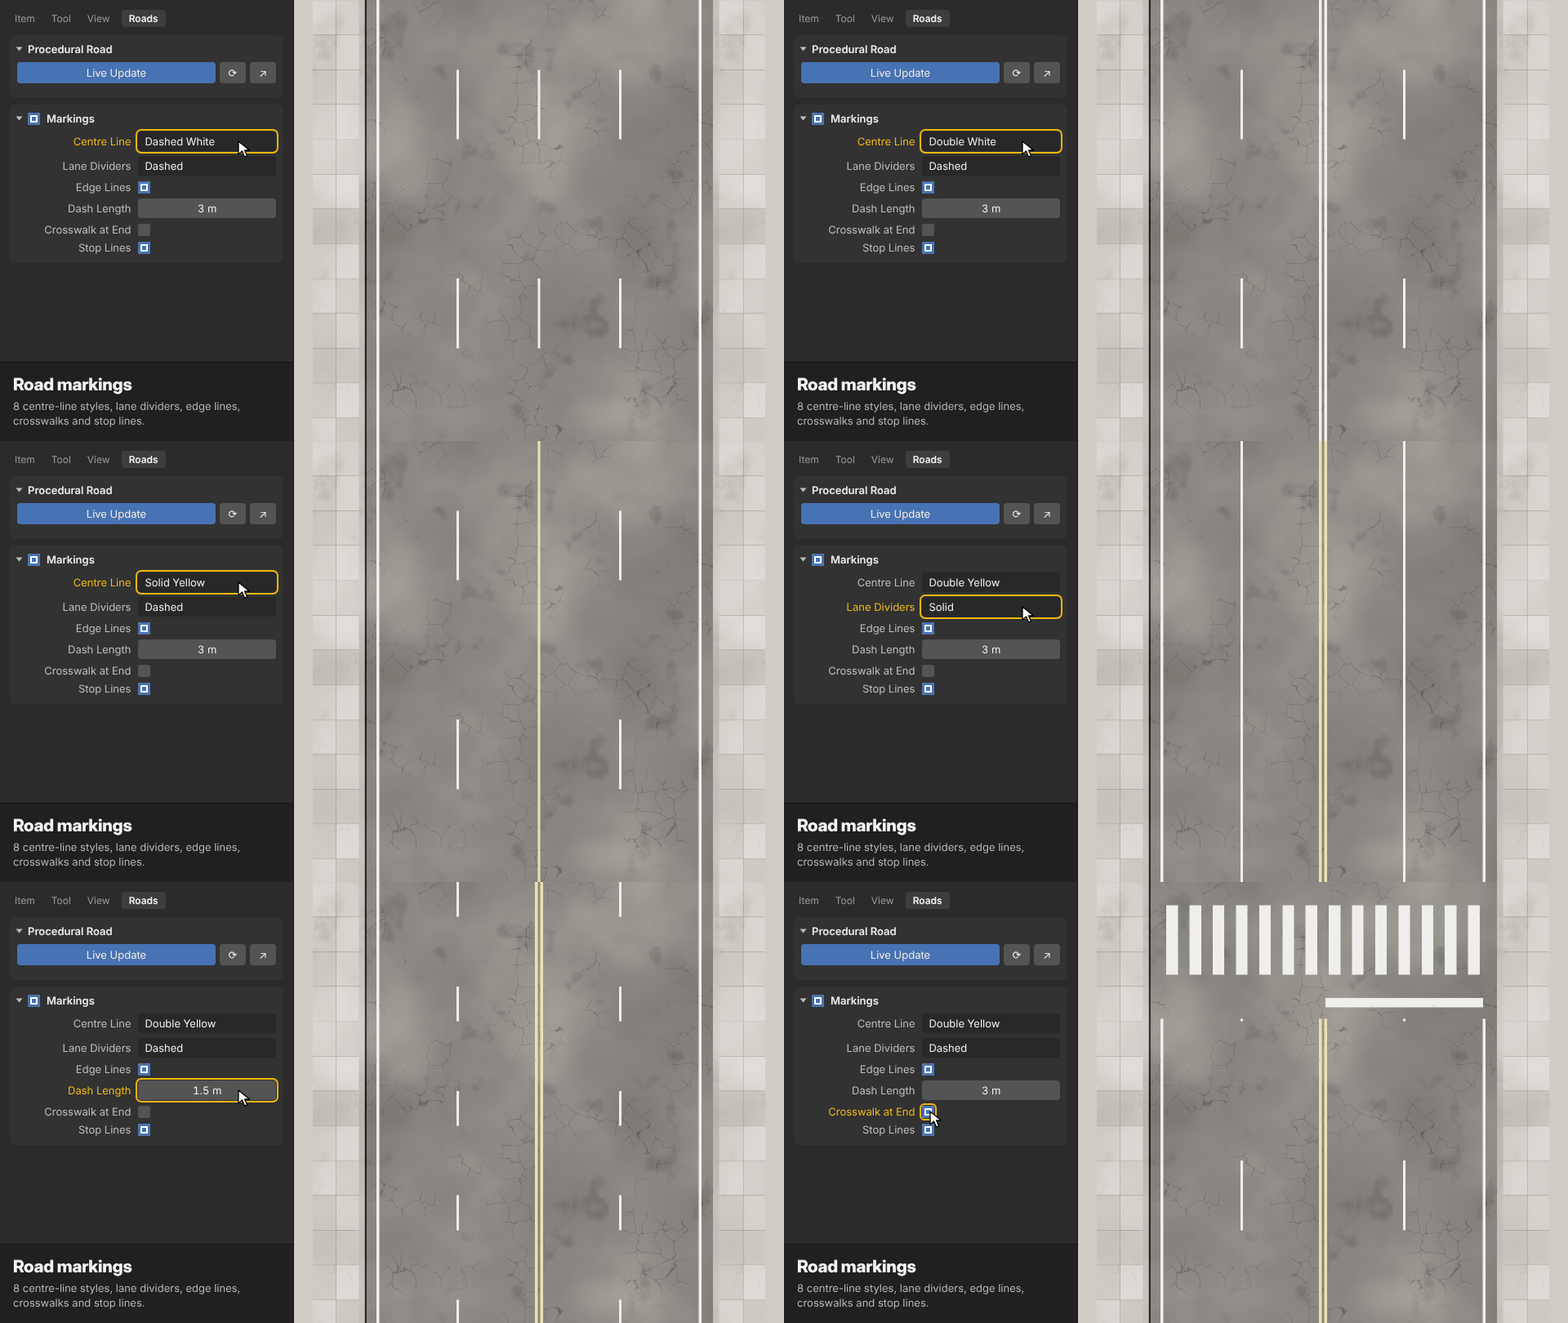
Centre Lines: Choose from eight styles, including dashed or solid white, double white, dashed or solid yellow, double yellow, and combined solid/dashed yellow lines. Centre lines appear only on two-way roads without a median.
Lane Dividers: Use dashed lines, solid lines, or turn them off.
Edge Lines: Mark the outer boundaries of travel lanes and coloured lanes.
Line Controls: Adjust Line Width, Double Line Gap, Dash Length, and Gap Length.
Paint Offset: Raises road markings slightly above the road surface to prevent flickering.
Crosswalks and Stop Lines
Add zebra crossings at the beginning or end of the road using Crosswalk at Start and Crosswalk at End.
Customize:
Crossing depth.
Distance from the road end.
Stripe width.
Stripe gap.
Enable Stop Lines to add stop bars before crossings. Other road markings automatically stop before the crossing area.
7. Curbs, Sidewalks & Verges
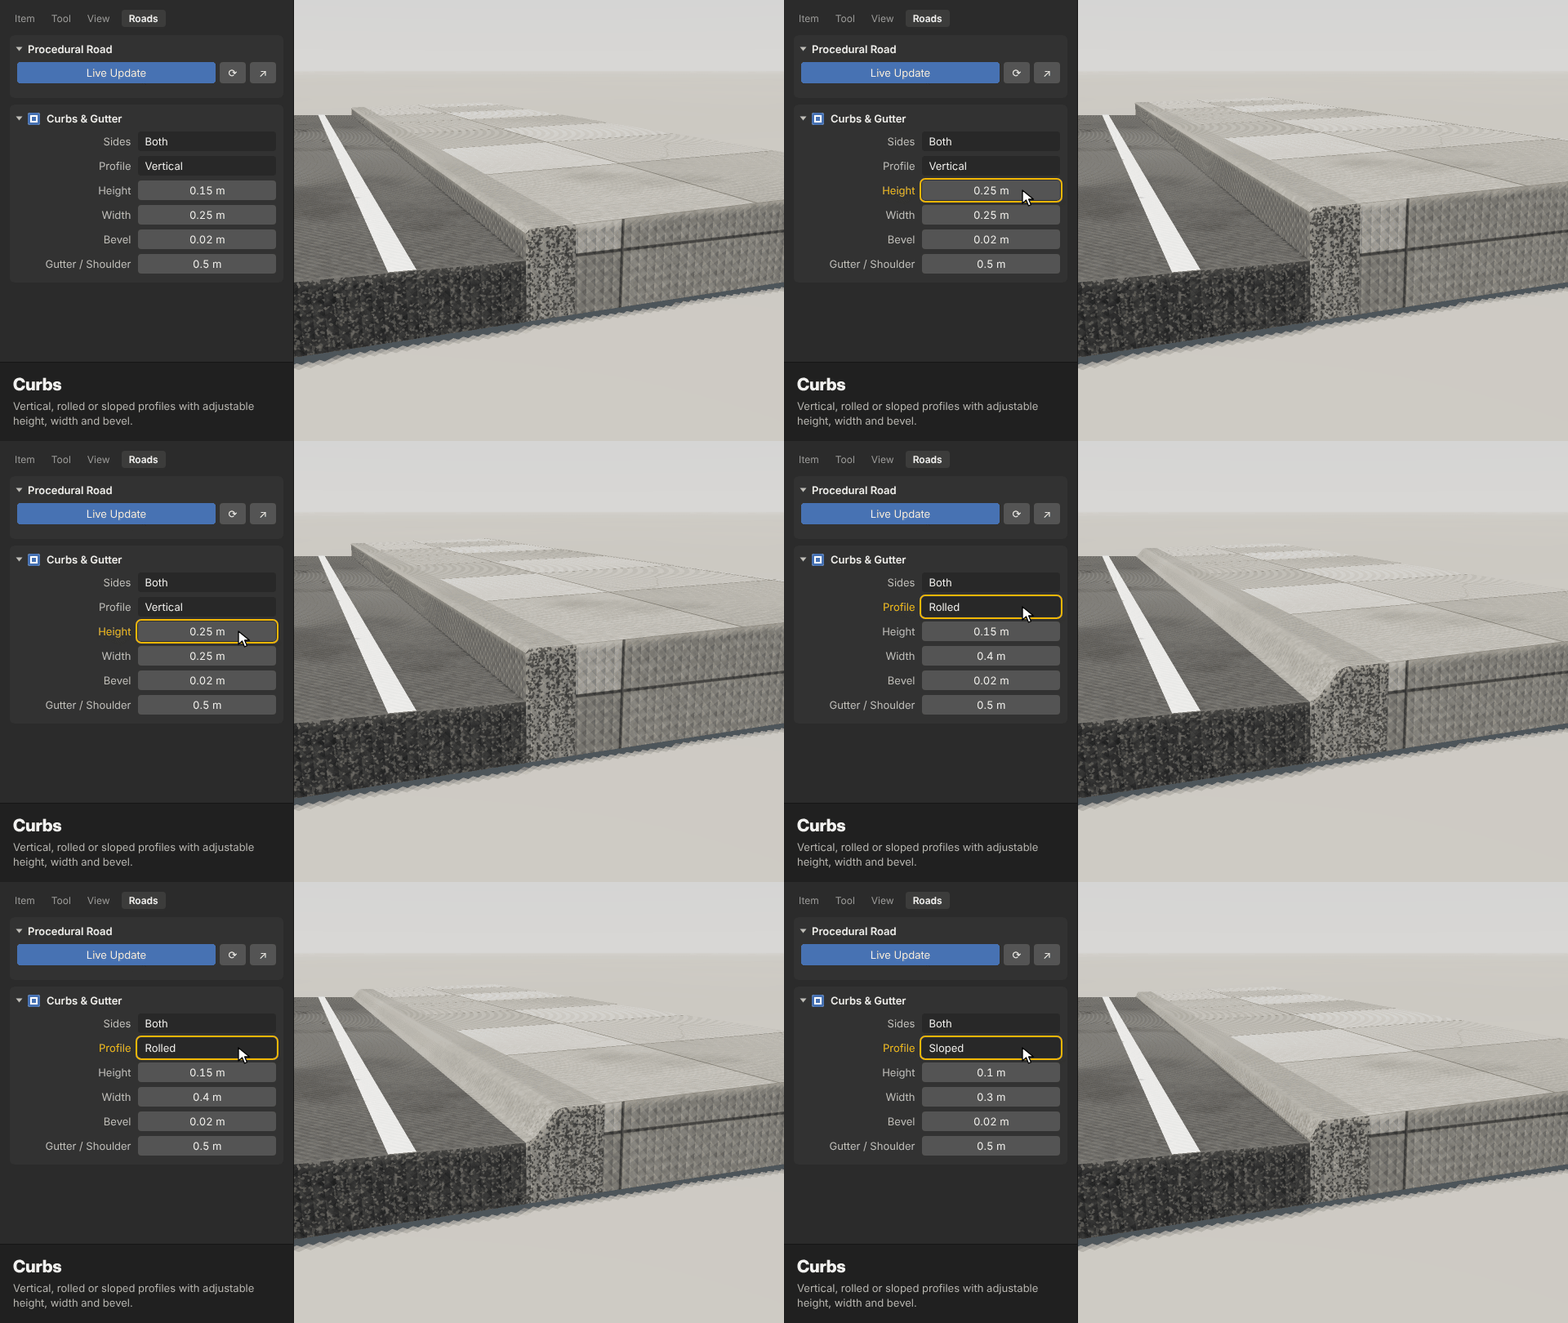
Curbs & Gutters
Create curbs on both sides or only one side of the road.
Choose from three profiles:
Vertical: A traditional barrier curb.
Rolled: A mountable curb.
Sloped: An angled curb profile.
Adjust curb Height, Width, and Bevel to achieve the desired appearance.
Sidewalks
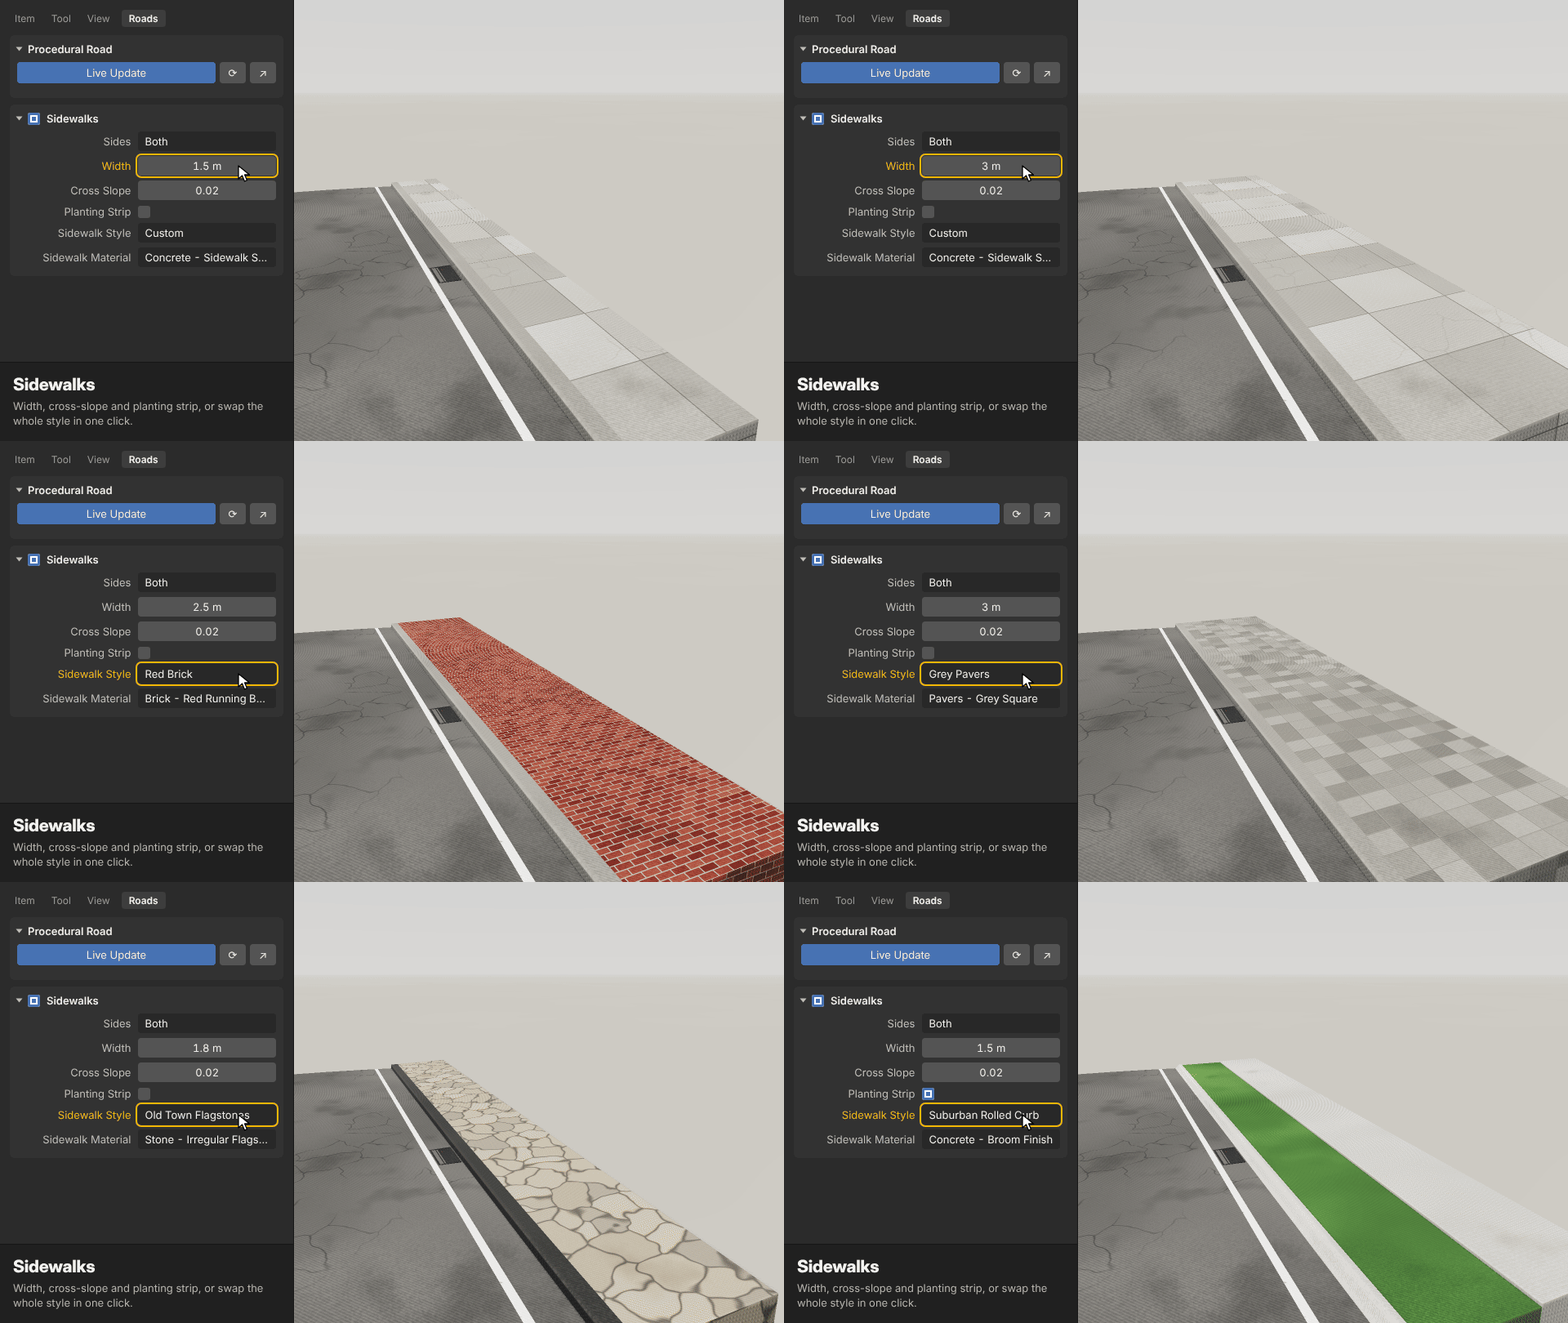
Generate sidewalks behind the curbs on your chosen sides.
Customize the sidewalk Width and Cross Slope for drainage.
Enable Planting Strip to add a grass or soil area between the curb and sidewalk.
Grass Verges
When a road side has neither a curb nor a sidewalk, enable Verge to create a sloped grass shoulder.
Adjust its Width and Drop to create natural road edges for country roads and highways.
8. Storm Drains & Manholes
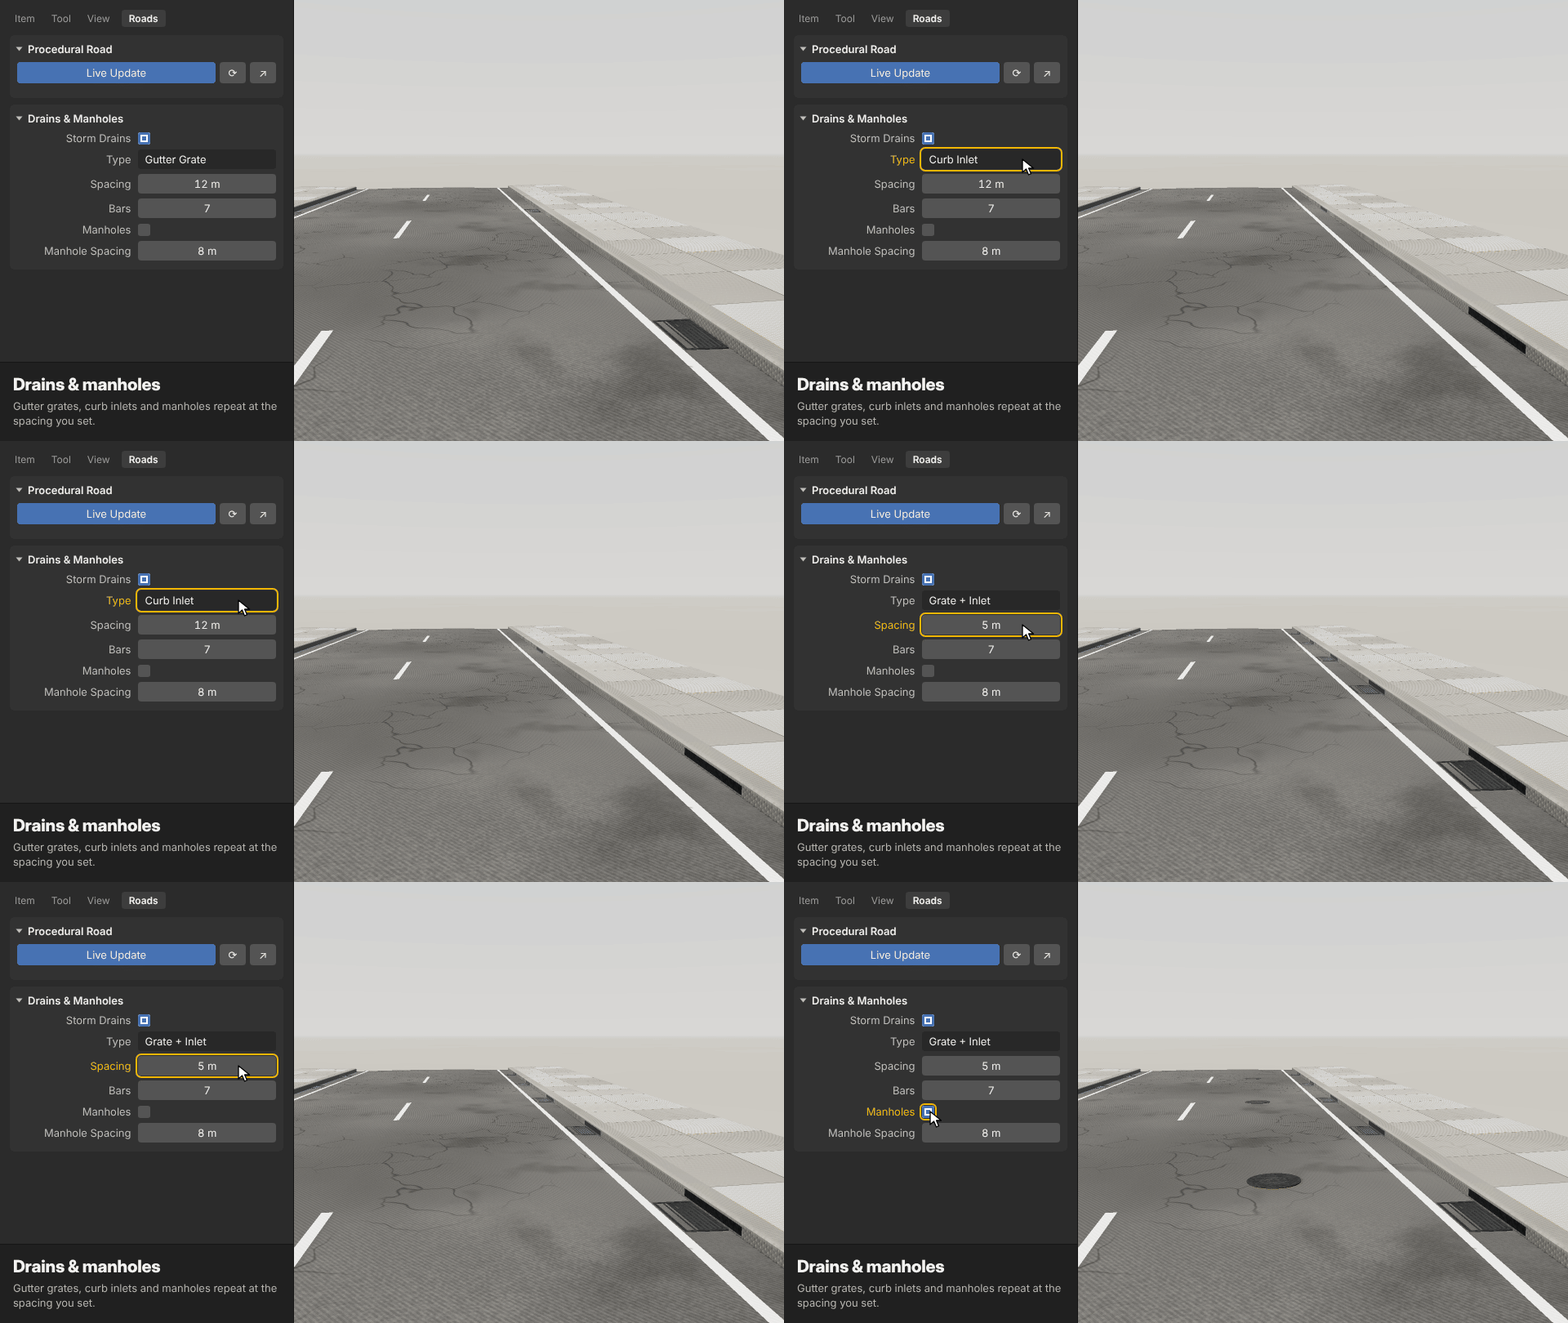
Add road drainage details automatically.
Storm Drains
Storm drains are distributed along the gutter at regular intervals.
Choose between:
Gutter Grate.
Curb Inlet.
Both Together.
Adjust spacing, start offset, length, width, and grate bar count.
Curb inlets are available only when using vertical curbs.
Manholes
Manholes are placed in the middle of the first lane.
Control their spacing, starting offset, and radius to match your road design.
9. Procedural Material Library
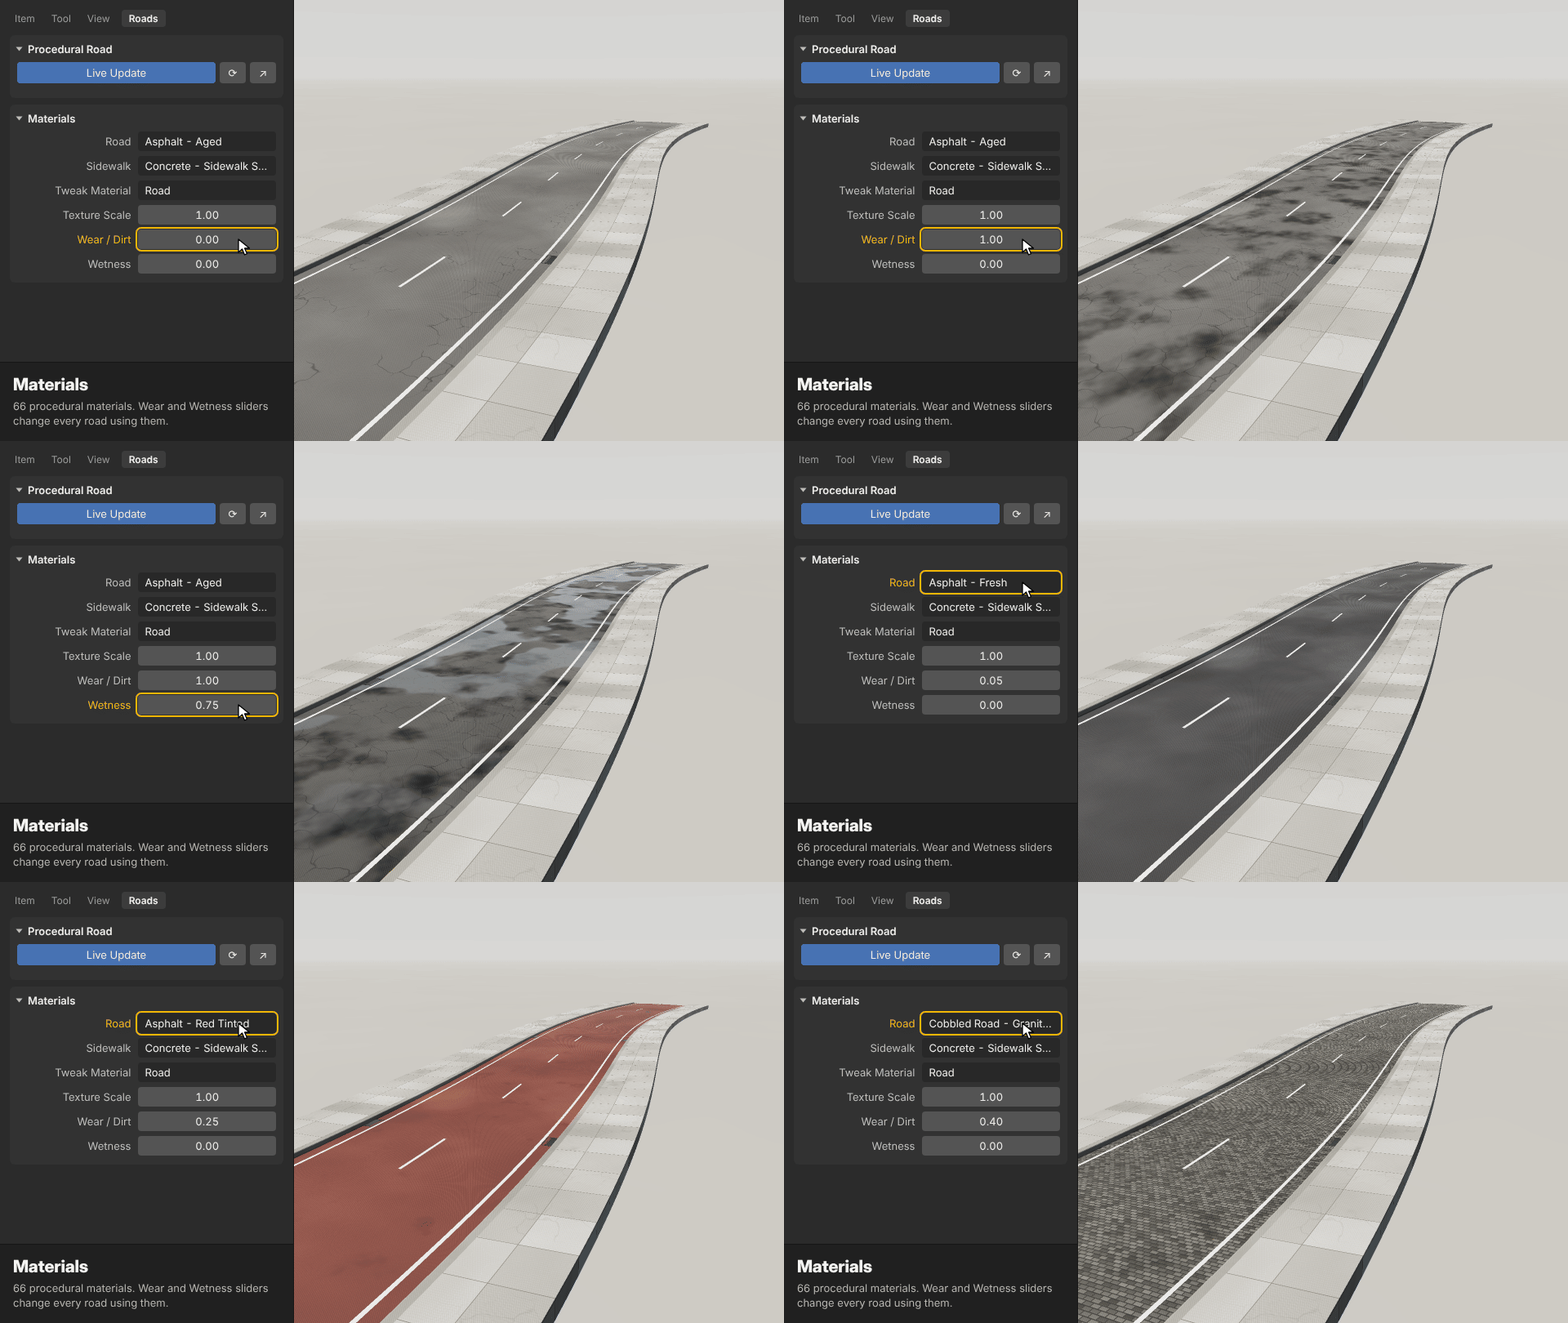
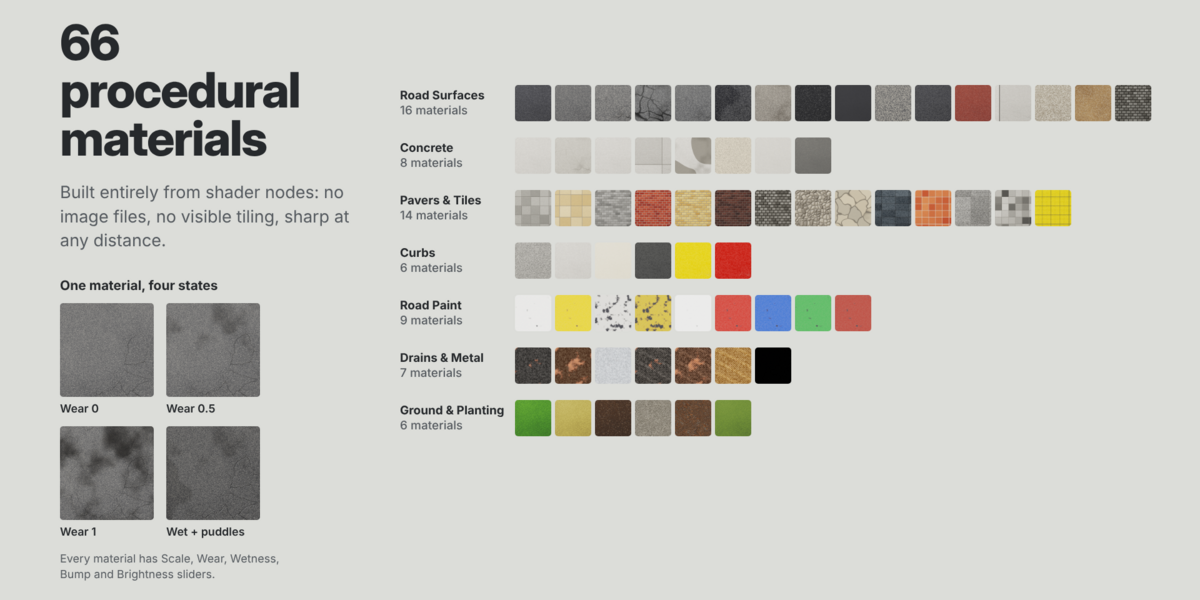
The add-on includes 66 procedural materials created entirely with shader nodes. No external image files are required, so materials remain available when projects are moved between computers.
The library is divided into seven categories:
Road Surfaces – 16 Materials
Includes fresh, aged, worn, cracked, patched, wet, dusty, rubberized, sealcoat, chip seal, porous, red asphalt, jointed concrete, gravel, dirt, and granite setts.
Concrete – 8 Materials
Clean, weathered, broom finish, sidewalk slabs, stained, exposed aggregate, polished, and charcoal concrete.
Pavers & Tiles – 14 Materials
Includes square and interlocking pavers, three brick colours, setts, cobblestone, flagstones, slate, terracotta, large granite, two-tone grid, and yellow tactile paving.
Curbs – 6 Materials
Granite, precast concrete, limestone, basalt, painted yellow, and painted red.
Road Paint – 9 Materials
White, yellow, worn white, worn yellow, reflective thermoplastic, red, blue, bike-lane green, and bus-lane red.
Drains & Metal – 7 Materials
Cast iron, rusty iron, galvanized steel, three manhole finishes, and a dark drain interior.
Ground – 6 Materials
Lawn, dry grass, soil, loose gravel, bark mulch, and moss.
Assigning Materials
The Materials panel provides 11 material slots:
Road.
White Lines.
Yellow Lines.
Curbs.
Sidewalk.
Planting.
Median Fill.
Drain Grates.
Drain Openings.
Manholes.
Coloured Lane.
Each slot can use any material from the library.
Materials are generated when first used, helping keep project files smaller.
Customizing Materials
Use the Tweak Material panel to adjust the appearance of each material.
Texture Scale: Changes the size of the material pattern.
Wear / Dirt: Adds grime, cracks, chipped paint, and rust.
Wetness: Darkens the surface and adds glossy puddle effects.
Bump Strength: Controls surface detail and relief.
Brightness: Makes the material lighter or darker.
Worn road paint becomes partially transparent, allowing the asphalt beneath it to show through.
Material adjustments are shared between roads using the same material. To customize one road independently, duplicate the material in Blender's Material Properties and assign the copy.
Reset Material restores the original library material.
Load All Materials adds the complete material library to your project. Library material names begin with PR.
10. Road & Sidewalk Presets
Presets make it easy to create different street designs without adjusting every setting manually.
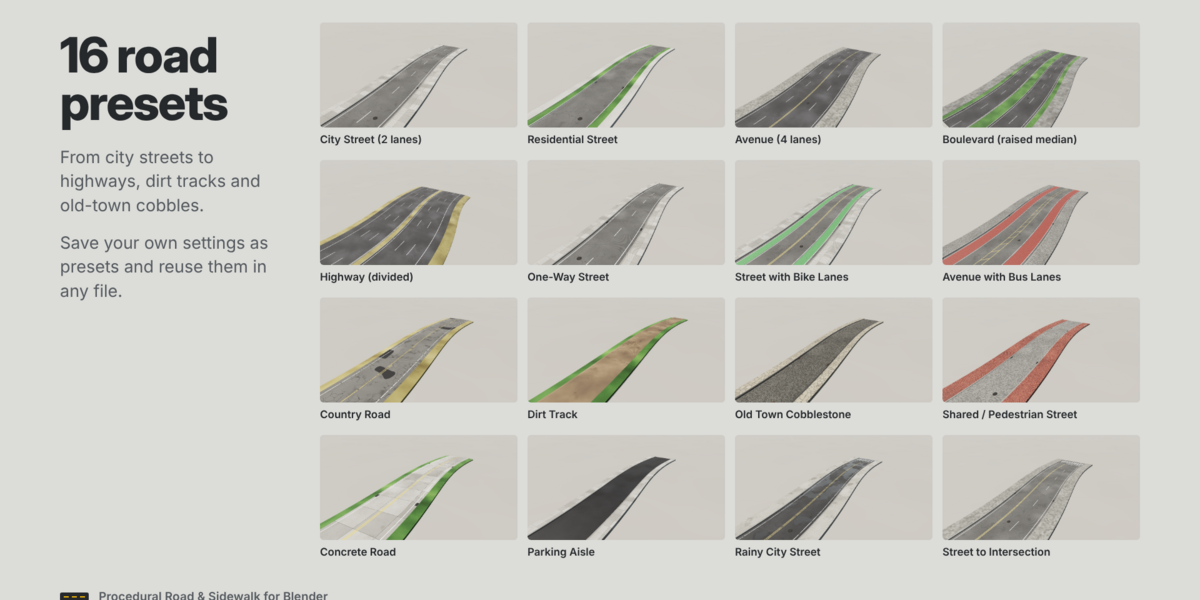
Road Presets
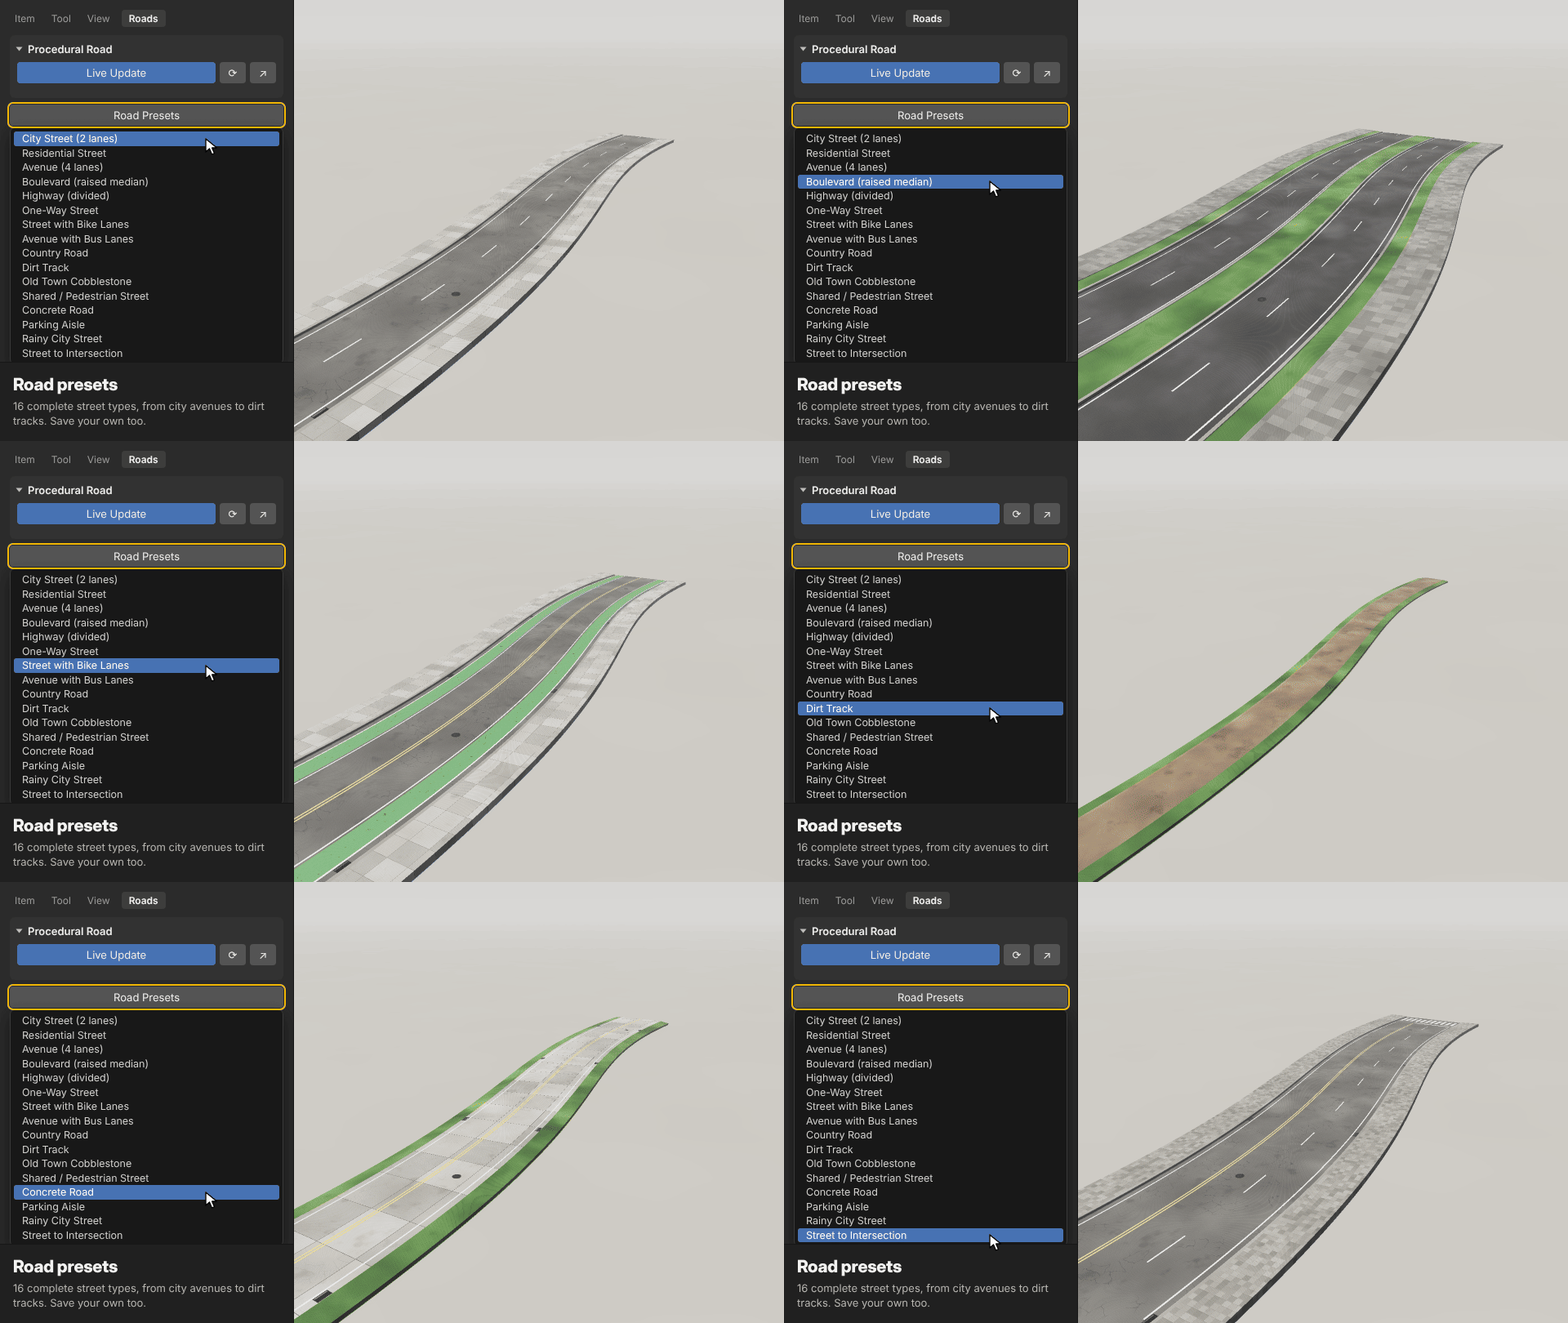
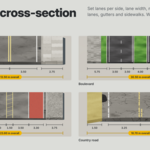
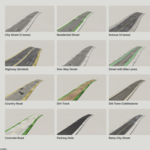
The add-on includes 16 road presets:
City Street
Residential Street
Avenue (4 Lanes)
Boulevard with Raised Median
Highway (Divided)
One-Way Street
Concrete Road
Parking Aisle
Street with Bike Lanes
Avenue with Bus Lanes
Country Road
Dirt Track
Old Town Cobblestone
Shared / Pedestrian Street
Rainy City Street
Street to Intersection
A road preset replaces all road settings, including materials.
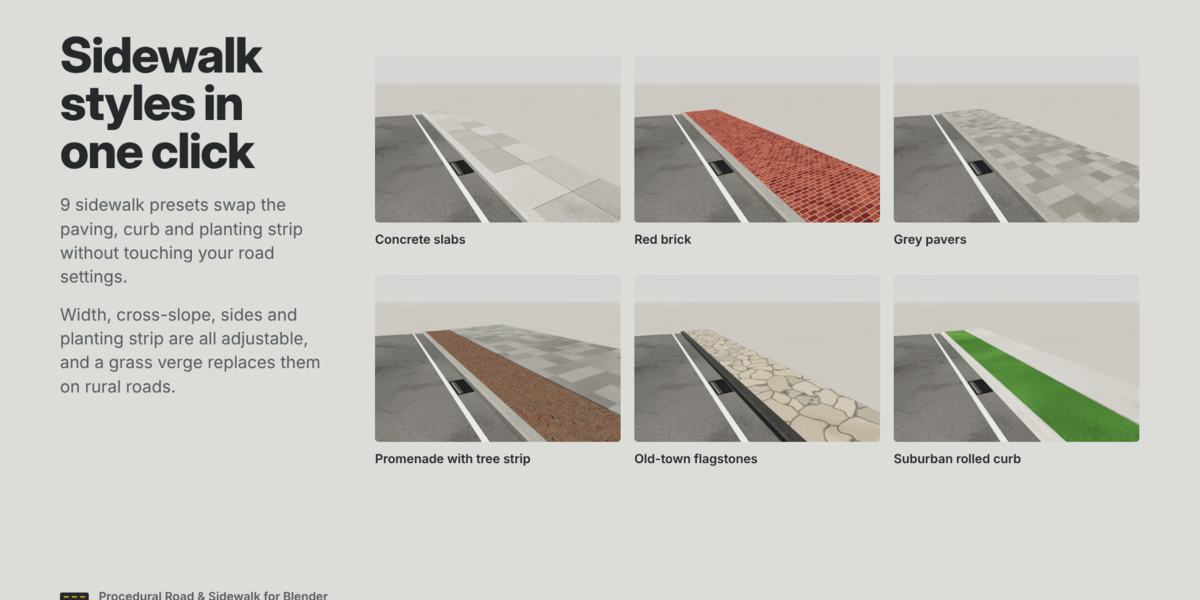
Sidewalk Styles
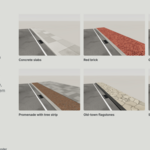
Choose from 9 sidewalk styles:
Concrete Slabs
Concrete + Grass Strip
Red Brick
Grey Pavers
Wide Promenade
Old Town Flagstones
Sandstone
Suburban Rolled Curb
No Sidewalk
Sidewalk styles change the curb, sidewalk, and planting strip without changing the main road settings.
For the best results, choose a road preset first and then apply different sidewalk styles.
Save Your Own Presets
You can save custom road configurations for future projects.
Click Save below the preset menus and enter a name.
Use Load to apply a saved preset to another road.
Use the bin icon to delete a saved preset.
Custom presets are stored in the add-on's user folder, so they remain available across Blender updates and different projects.
11. Finalizing & Exporting
Keep roads procedural while designing so you can continue changing their curves and settings.
When the road is finished, open the Finalize panel.
Convert to Static Mesh
Click Convert to Static Mesh to detach the road from its curve.
The generated mesh:
Keeps its current position.
Receives
_staticat the end of its name.Becomes a regular Blender mesh.
Can be edited directly using normal mesh tools.
After conversion, the original curve no longer controls the road and can be deleted.
Rebuild All Roads
Use Rebuild All Roads to regenerate every procedural road in the current project. This is useful after changing shared materials or opening an older project.
Exporting
Before exporting to a game engine or another 3D application:
Convert the procedural road into a static mesh.
Open File → Export.
Choose FBX, glTF, or OBJ.
Export your road geometry.
Geometry, UVs, and material slots are carried over. However, Blender procedural materials do not transfer directly to other applications. Bake them into image textures in Blender first, or recreate the materials in your target application using the metre-based UVs.
12. Useful Tips
Use smaller Segment Length values for tight bends and larger values for long highways.
Disable Live Update on very long roads to improve editing performance.
Use Centre Offset when the road needs to sit away from its original curve.
Check curve direction if special lanes or one-sided sidewalks appear on the wrong side.
Duplicate shared materials before making road-specific changes.
Keep the road procedural until its layout is finalized.
Use Ctrl + Z to undo road creation, preset changes, rebuilding, and conversion.