Procedural Studio HDRi
 keyboardkungfu


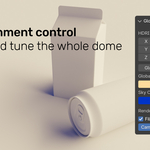
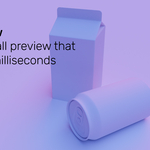
What it does
No HDRI files, no image libraries — the studio is math.
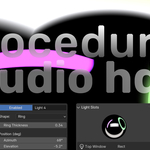
The add-on owns the active World and builds an environment from up to 8 light slots. Each slot is a softbox-style light source with a shape, position, size, softness and color. Everything updates live in the viewport, and a chrome-ball preview in the panel shows the full environment at a glance.
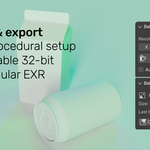
When you want a file instead of a shader, switch to Baked Image mode: the exact same math is rendered into an equirectangular 32-bit image that you can paint on in the Image Editor and save as EXR. Preview, shader and bake share one evaluation core, so what you see is always what you get.
The studio doesn't have to float in a black void: give the sky a vertical gradient, or import an HDRI or photo as the base layer and paint procedural lights on top of it. A template library ships 24 ready-made setups in three categories (Studio, Nature, Urban). And for product shots there is a complete finishing kit — a flat compositing background, a shadow catcher floor and one-click pass export (subject, shadow, background) for layered editing in any compositing tool.
Installation
Two ZIP files, because Blender changed its add-on format in 4.2. Install the one that matches your Blender version — the feature set is identical.
Blender 4.2 and newer (…-extension.zip)
- Open Edit → Preferences → Get Extensions.
- Click the dropdown in the top-right corner and choose Install from Disk…
- Select the extension ZIP. Done — extensions enable themselves.
Blender 3.6 – 4.1 (…-legacy.zip)
- Open Edit → Preferences → Add-ons.
- Click Install… and select the legacy ZIP.
- Enable the checkbox next to Procedural Studio HDRI.
The add-on lives in the 3D Viewport sidebar: press N and open the Studio HDRI tab.
Quick start
- Press N in the 3D Viewport and open the Studio HDRI tab.
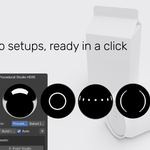
- Pick a template in the welcome box (category tabs + preview browser) and click Create Studio Setup. This creates a tagged World, applies the template and builds the shader in one click.
- That's it. Tweak lights in the Light Slots panel and watch the chrome ball and your viewport update live.
Panel reference
Seven panels in the Studio HDRI tab. All except the main panel appear once a studio world exists.
Procedural Studio HDRI (main panel)
- Live preview — a chrome ball rendered from the current settings (about 2 ms per update). It uses the exact same math as the bake.
- Mode — Procedural (live shader nodes, changes are instant) or Baked Image (the World samples a baked HDR image instead; see Bake mode below).
- Build / Update HDRI — rebuilds the world node tree from the current settings. With Auto enabled this happens automatically on every change.
- Template Library — category tabs (Studio / Nature / Urban) above an icon browser with a rendered preview of every template. Apply Template replaces all current slot values. See Template library below.
- Clear All Slots — disables all lights and resets every slot to defaults. The world itself is kept.
- Remove Studio Setup — deletes everything the add-on created: tagged worlds, its node groups, the baked image and all settings. Asks for confirmation; cannot be undone.
Globals
| Property | What it does |
|---|---|
| Rotation X / Y / Z | Rotate the whole environment. Z is the classic turntable rotation. |
| Global Strength | Overall brightness multiplier for the environment. |
| Global Tint | Color multiplier applied to the whole environment. |
| Sky Color | Color of the dark background between the lights. |
| Sky Gradient | Optional vertical gradient instead of a flat sky: separate Zenith, Horizon and Ground colors with a Power falloff. Used heavily by the Nature and Urban templates. |
| Background Image | Import an HDRI or photo as the base layer of the environment — procedural lights and the sky are drawn on top of it. Strength scales the image's brightness; the X button removes it again. |
| Film Transparent | Render the background as transparent (alpha) while keeping its lighting contribution. |
| Camera / Diffuse / Glossy | Per-ray visibility of the world: hide it from the camera, from diffuse lighting or from reflections. Cycles only. |
Bake
Resolution settings, the Bake to Image button and Auto Re-bake on Change. Details under Bake mode below.
Baked Image (collapsed by default)
Name, size and timing of the last bake, plus Open in Image Editor and Save Image As… (32-bit EXR).
Light Slots
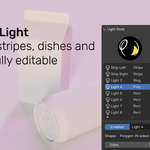
A small copy of the live preview sits at the top, so you can see the result while editing — even when the main panel has scrolled away. Below it, the slot list (scrollable; drag the grip at its bottom edge to resize) and the properties of the selected slot.
Background & Floor (collapsed by default)
Compositing background and shadow catcher floor for product shots. Details under Background & Floor below.
Export Passes (collapsed by default)
Render subject, shadow, background and combined as separate image files. Details under Export Passes below.
Light slot properties
Each of the 8 slots is an area light painted onto the sky. Position and size are angular — think of pointing at the sky dome, not placing objects in the scene.
| Property | What it does |
|---|---|
| Enabled | Include this light in the environment. |
| Label | Display name of the slot (e.g. "Key", "Rim"). |
| Shape | Rectangle/Softbox, Stripe, Ellipse/Circle, Polygon (3–16 sides) or Ring. |
| Sides | Number of polygon sides (Polygon shape only). |
| Ring Thickness | Width of the bright band as a fraction of the ring's radius (Ring shape only): small values give a thin ring, 1 fills the disc. The ring is always circular and uses Diameter in place of separate width/height. |
| Azimuth | Horizontal angle around Z. 0° = +X, 90° = +Y. |
| Elevation | Vertical angle. −90° = straight down, 0° = horizon, +90° = straight up. |
| Width / Height | Angular size of the light in degrees. For a Ring, a single Diameter is shown instead. |
| Roundness | 0 = sharp rectangle/polygon corners, 1 = fully circular. Hidden for already-round shapes (Ellipse, Ring). |
| Feather | Edge softness — the gradual falloff at the light's border. For a ring it softens both edges of the band. |
| Gradient | Brightness falloff inside the light: 0 = flat, 1 = full linear falloff from center to edge. Mimics the hot spot of a real softbox. |
| Color | Light color (alpha is ignored). |
| Intensity | Emission strength of this light. |
Template library
24 ready-made setups in three categories, browsed with rendered preview thumbnails. Applying a template replaces all current slot values — and every template is just a starting point: all lights remain fully editable afterwards.
| Category | Templates |
|---|---|
| Studio | 3-Point Studio · Ring Light · Ring Light (Single) · Beauty Dish · Strip Sandwich · Top Window + Bounce · Rembrandt · Rim / Silhouette |
| Nature | Midday Sun · Golden Hour · Sunset · Overcast · Blue Hour · Moonlit Night · Forest Dapple · Storm Break |
| Urban | Window Wall · Neon · Street Lamps · Night Skyline · Parking Garage · Shop Window · Stadium Floodlights · Tunnel |
Nature and Urban templates also set up a matching sky gradient, so a sunset actually sits on an orange horizon and the neon signs glow against a purple night. A few Studio classics in detail:
3-Point Studio — The workhorse. A warm key softbox high to the right, a large soft cool fill from the left, and a thin warm rim stripe behind the subject for separation.
Ring Light — All 8 slots used: a ring of identical circular lights placed every 45° around the horizon, slightly raised. Even, wrap-around illumination with discrete ring reflections.
Ring Light (Single) — One frontal Ring shape: a bright annulus with a dark center, facing the subject head-on. The classic catch-light look in a single slot — adjust Ring Thickness for a thin halo or a fat donut.
Beauty Dish — One big frontal light at 45° elevation — a 16-sided polygon with heavy feather and gradient, so it reads as a round dish with a soft hot spot. Portrait classic.
Strip Sandwich — Two tall, narrow stripes directly left and right of the subject. Crisp parallel edge highlights — the go-to look for bottles, gadgets and other product shots.
Top Window + Bounce — A wide, cool window light from almost directly above, plus a faint warm bounce from below and behind — like daylight through a skylight hitting a wooden floor.
Bake mode
Turn the procedural setup into a real, editable HDR image.
- Set the Resolution in the Bake panel. Equirectangular images are usually 2:1, e.g. 2048 × 1024. The default is fast; go higher for final renders.
- Click Bake to Image. The environment is rendered to a 32-bit float image and the World switches to Baked mode, sampling that image through an Environment Texture node.
- Open it via Baked Image → Open in Image Editor to paint on it — add gradients, flags, color accents, anything.
- Export with Save Image As… — 32-bit OpenEXR or Radiance HDR for true HDR use, or 16-bit PNG for previews and thumbnails (optionally with the scene's view transform applied, so the PNG looks like your viewport).
Global rotation is intentionally not baked into the image. The shader rotates the lookup instead, so you can spin a baked environment freely without re-baking.
Background & Floor
The product-shot kit: a clean backdrop color and grounded shadows, without touching your lighting.
Background (compositing)
Add Background layers a flat color behind the render via a compositor node group (PSH Background): your objects stay cut out, shadows from the catcher floor are kept, and the studio lighting is completely untouched. Film Transparent is enabled automatically — the color only shows where the render is transparent.
- Color — change it any time in the panel; the render updates without rebuilding anything.
- Editable node group — the group stays open in the Compositor. Plug an image in instead of the color, add a gradient, anything.
- Remove Background — takes the group out again and reconnects the surrounding nodes.
Shadow Catcher Floor
Add Shadow Catcher Floor creates a ground plane set up as a Cycles shadow catcher: the plane itself is invisible in the render, only the shadows falling onto it remain — and they end up in the alpha channel with Film Transparent.
Scenes from older versions that still contain the 3D backdrop object get a Remove 3D Backdrop (old) button. Remove Studio Setup cleans up background, floor and backdrop along with everything else.
Export Passes
One click renders the enabled passes one after another, each saved as its own file — ready to be layered in Photoshop, Affinity or any compositor.
| Pass | What it contains |
|---|---|
| Subject (Alpha) | Only your objects on a transparent background — backdrop and shadow floor hidden. |
| Shadow (Alpha) | Only the shadows on the catcher floor, on a transparent background. The subject is hidden from the camera but keeps casting shadows. Needs Cycles and the shadow catcher floor. |
| Background | Only the backdrop and the environment, without your objects. |
| Combined | One regular render of the scene exactly as it is set up. |
Choose PNG (8-bit with alpha) or OpenEXR (16-bit float linear) and an output folder (// = next to the .blend). Files are named psh_subject, psh_shadow, psh_background, psh_combined. Render settings and object visibilities are restored afterwards — the export never leaves your scene in a different state.
Good to know
- HSV color picking. The type of color picker is a Blender preference, not an add-on setting: Edit → Preferences → Interface → Color Picker Type. Blender also remembers your last used tab (RGB/HSV/Hex) in the picker popup.
- Every control has a tooltip. Hover over any property or button for a short explanation — the texts on this page and in the tooltips match.
- Clear vs. Remove. Clear All Slots resets light values but keeps the world; Remove Studio Setup deletes everything the add-on created, after confirmation.
- Slot list. Click the lamp icon in the list to toggle a light without selecting it; drag the grip below the list to make it taller.
- One source of truth. Preview, shader and bake share the same evaluation core. If the ball looks right, the render will too.
- Eevee & Cycles. The environment works in both engines. The per-ray visibility toggles (Camera/Diffuse/Glossy) and the shadow catcher floor are Cycles features.
Discover more products like this
three point lighting world-shader ring light reflections softbox environment map environment procedural photography Beauty Dish Look dev