Product Visualizer Pro
 Dreamy Art World


The definitive guide to the Product Visualizer Pro ecosystem.
Overview
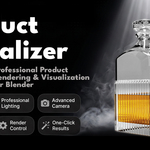
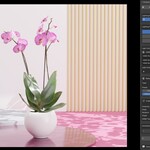
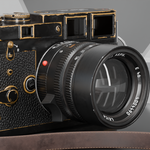
Product Visualizer Pro is a studio-grade Blender extension engineered to automate the complex technical hurdles of professional product rendering. It provides a structured, fail-proof environment that guides you from a raw 3D mesh to a high-end marketing asset.
Unlike generic rendering tools, PV Pro uses intelligent Geometric Analysis to position cameras and lights specifically for your model's unique shape, scale, and material properties.
Interface Options
PV Pro features a clean, integrated interface designed to fit seamlessly into your Blender workspace:
The N-Panel Interface
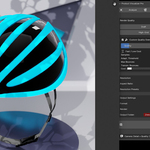
Integrated directly into the Blender Sidebar (press N and navigate to the PV Pro tab). This provides a dockable, persistent workspace that stays open and accessible while you build, tweak, and refine your models.
To Open: Press N in the 3D Viewport to open the sidebar, then select the PV Pro tab.
Installation Guide
-
Install ZIP: Open Blender Preferences > Add-ons > Install... and select the
ProductVisualizerPro.zip. - Enable: Check the box for "Render: Product Visualizer Pro".
📊 Step 1: Analyze
Every professional render starts with data. The Analyze tab performs a deep scan of your selection to calibrate all subsequent steps.
The Analysis Engine
When you click Analyze Model, the following logic is executed:
- Geometry Bounding Calculates dimensions (Width, Depth, Height) and finds the Longest Axis to determine the primary face of the product.
- Grounding Status Checks the distance between the model's lowest point and the world origin (Z=0). Warns if the object is floating or intersecting the floor.
- Material Scan Analyzes "Principled BSDF" nodes to calculate Metallic and Transparency percentages. If high metal is found, it recommends reflective lighting presets.
- Vertex Complexity Counts polygon density. High-poly objects are flagged as complex and may be suggested for "Rim Lighting" to help define their silhouette.
Advanced Overrides
If the automatic detection doesn't match your creative intent, you can force the logic:
- Treat as Glass/Metal: Forces the lighting engine to use caustics or high-contrast reflection logic regardless of the material nodes.
- Override Orientation: Manually set which side is "Front" if the model's local coordinates are incorrect.
📷 Step 2: Camera & Composition
The Camera tab is the "Art Director" of Product Visualizer Pro. It eliminates the frustration of manual framing by using a Centric Alignment Engine that keeps your product perfectly positioned, regardless of its size or shape.
1. Aspect Ratio Control
This setting defines the shape of your final image. Selecting an aspect ratio here immediately updates Blender's resolution settings and adjusts the camera's sensor fit.
- Match Render (Auto-Sync) The camera sensor will automatically scale to match whatever resolution you have set in the Render tab. Use this for standard workflows.
- Industry Standard Presets Quickly switch to 1:1 (Square) for Instagram, 9:16 (Vertical) for mobile ads, or 16:9 (HD) for web headers.
- Free Mode Unlocks manual sensor width/height control for experimental framing.
2. Professional Angle Presets
PV Pro doesn't just move the camera; it calculates a specialized distance to ensure the product fill-factor is consistent across all angles.
- Hero Shot: Positions the camera at a 30° elevation and 45° horizontal offset. This is the industry standard for product packaging.
- 45° Angle: A higher isometric view. Best for industrial parts or furniture where the top surface is critical.
- Front & Top: Perfect flat views. Use Front for labels and Top for "flat-lay" style compositions.
- Detail / Macro: Switches to an 85mm+ focal length. This compresses the perspective and is designed for close-up texture or jewelry shots.
- Custom Camera: If you manually position your view in the 3D viewport and like it, click this button to "freeze" that view into a dedicated PV_Camera.
3. 360° Turntable Engine
Create high-end rotating animations with zero keyframing knowledge.
Step-by-Step Setup:
-
Set Turntable Mode:
- Rotate Product: The lights and camera stay still while the object spins. Best for items with strong directional lighting.
- Rotate Camera: The camera orbits the product. Best for scenes with complex environments or HDRIs.
- Define Duration: Set the Frame Count. A typical 360 loop is 120-240 frames for a smooth result.
- Select Direction: Clockwise or Counter-Clockwise.
- Initialize: Click 360° Turntable. PV Pro will build a "Constraint Rig" that handles the math.
- Preview: Click Play Loop to see the rotation in the viewport.
4. Precision Adjustments (Zoom & Height)
Use these buttons for non-destructive framing tweaks. Unlike manual moving, these preserve the camera's focus and center-lock.
- Zoom In / Out / Reset Increments focal length by 10% per click. Range: 0.5x (Ultra Wide) to 3.0x (Extreme Telephoto). Reset returns to the preset default (1.0x).
- Height Up / Down / Reset Offsets the vertical position by 0.05 units. Use this to shift the horizon line without losing your product in the frame.
5. Depth of Field (DOF) System
Simulate a real physical lens to create a cinematic "Bokeh" effect.
- Auto-Focus Mode Uses geometry analysis to lock focus on the exact center of your model. Use the Focus Offset slider to shift focus forward (toward the lens) or backward.
- Manual Focus Mode Provides a direct distance slider (in meters) for custom focal points.
- Blur Presets (Aperture) Choose from Sharp (Infinite focus), Subtle (Commercial style), Deep (Portrait style), or Macro (Extreme background blur).
6. Camera Clipping Plane
This is a technical safety setting. If your background appears to disappear or "Z-fight" (flicker), adjust these values.
- Start: The nearest point the camera can see. (Default: 0.1m)
- End: The furthest point the camera can see. Increase this if you have a massive studio environment. (Default: 100m)
💡 Step 3: Look & Lighting
The Look tab is where you define the "Soul" of your render. It manages the interplay between illumination, environment, and creative shadows to create a professional studio atmosphere.
1. Lighting Mode Selection
PV Pro provides two powerful ways to light your scene. You can toggle between them using the primary Lighting Mode button.
- Lighting Presets (Physical Rigs) Spawns actual 3D Area and Point lights in a rig around your product. Best for high-contrast commercial shots with specific highlights.
- Smart Studio (HDRI Engine) Uses 32-bit high-dynamic-range images for 360° global illumination. Best for realistic reflections and natural, soft lighting.
2. Working with Lighting Presets
Each preset is a hand-crafted light rig tuned for specific materials and product types.
| Preset | Technical Logic | Best For |
|---|---|---|
| Soft Studio | Large area lights with high diffusion. | General Products / Matte surfaces. |
| Luxury Premium | Narrow vertical strip lights for long highlights. | Watches, Jewelry, Glossy Plastics. |
| Tech Product | High-contrast rim lighting and top-down "fresnel" kiss. | Electronics / Dark Metal. |
| Cosmetic Clean | High-key setup with ground-bounce fill. | Skincare, Perfume, White Packaging. |
| Glass Focus | Back-lit setup to enhance liquid refraction. | Bottles, Glassware, Liquids. |
| Moody Dramatic | Low-key "Chiaroscuro" style lighting. | Artistic / Premium Luxury items. |
Advanced Light Tuning:
After selecting a preset, expand the Advanced Light Settings to control individual intensities. For example, in Soft Studio, you can separately adjust the Key, Fill, and Rim lights to create the perfect balance.
3. Working with Smart Studio (HDRI)
Harness the power of realistic environments with the curated HDRI library.
- Choose a Preset: Select from Dramatic, Clean Studio, Luxury Dark, Soft Outdoor, or Window Light.
- Adjust Strength: Control the overall brightness of the environment.
- Rotate World: Use the rotation slider to move the "Sun" or primary light source around the product until the reflections look perfect.
-
Custom HDRI: Use the folder icon to load your own
.hdror.exrfiles.
4. Environment & Background System
Define what sits behind and underneath your product.
- Studio Backdrop Mode Choose from Podiums, L-Curves, or 360-Seamless geometry.
• Colors: Dynamically adjusts based on the backdrop. Some backdrops support multiple color zones.
• Reflection: Adjust how "shiny" or "matte" the floor is. - Transparent Mode Disables all backgrounds and enables alpha transparency. Mandatory for 360-degree turntable renders that need to be composited onto web-viewers.
5. Creative Shadow (GOBO)
Project intricate shadows onto your scene to add depth and narrative.
Step-by-Step GOBO Setup:
- Enable: Toggle the "Turn ON" button in the Creative Shadow section.
- Pick Texture: Click the texture name to open the visual browser. Choose from Windows, Trees, Railings, or Geometric patterns.
- Scale & Intensity: Adjust the shadow's size and how "dark" or "subtle" it appears.
- Orientation: Use Angle to determine where the light comes from (e.g., a high sun vs. a low window) and Rotation to spin the pattern.
6. Animation Preview
If you have set up a 360° turntable in the Camera tab, use the Play Animation Loop button here to see how your lighting and shadows interact with the movement before you hit render.
🎬 Step 4: Render & Output
The Render tab is the final "Control Room" where you define the quality, resolution, and batch-processing rules for your project. PV Pro automates the technical configuration of the Cycles engine based on your selections.
1. Master Render Quality
Choose your target quality level. PV Pro immediately configures Samples, Noise Thresholds, and Light Bounces for the Cycles engine.
| Preset | Technical Config | Use Case |
|---|---|---|
| Draft | 32 Samples / 0.1 Threshold | Fast lighting & composition tests. |
| Marketing | 256 Samples / 0.01 Threshold | Social media, Web, and Standard HD. |
| High-End | 1024 Samples / 0.005 Threshold | Print-ready assets and detailed hero shots. |
| Ultra | 4096 Samples / 0.001 Threshold | Complex Glass, Caustics, and Jewelry. |
2. Custom Quality Override
For absolute control, enable the Custom Quality Override checkbox. This provides a single "Master Quality" slider from 1% to 100%.
3. Resolution & Aspect Ratio
Define the physical size of your image. This system is dual-linked with the Camera tab for perfect framing.
- Render Aspect Ratio Choose your format (1:1, 16:9, etc.). Selecting FREE unlocks manual Width and Height inputs.
- Resolution Presets Quickly scale your chosen aspect ratio to FHD (1080p), 4K (2160p), or even 8K.
4. Output Settings & Formats
Configure how and where your files are saved.
- File Format Choose from PNG (Standard), JPG (Compressed), EXR (High Dynamic Range), or MP4 (Direct Video Export).
- Render Mode Logic • Single Frame: Renders only the current timeline frame.
• Active Segment / Frame Range: Renders a sequence of images.
Note: Multi-frame modes are automatically restricted unless your background supports 360-degree viewing. - Output Folder & Automation Pick your destination. PV Pro uses a Smart Folder System that automatically sorts your renders into subfolders named by project and date.
5. Executing the Render
Click the large CREATE RENDERS button to start the process.
- Status Monitor: During rendering, a progress bar and "Time Remaining" estimate will appear in the UI.
- Safety Check: If you haven't performed the Analyze step, the addon will warn you to ensure the lights and cameras are correctly calibrated before starting.
Troubleshooting
- "Missing Folder" Error: This happens if you moved the addon files after installation. Reinstall from the ZIP to fix the path links.
- No GPU Detected: Go to Blender Preferences > System and ensure your OptiX or CUDA device is selected. PV Pro defaults to GPU rendering for speed.
-
Pink Textures: This means Blender cannot find the GOBO or HDRI files. Ensure you haven't deleted the
presets/folder inside the addon directory.
© 2026 www.dreamyartworld.com. All Rights Reserved.
Source code licensed under GNU GPLv3. Binary assets (HDRIs, Textures, Backdrops) are All Rights Reserved.
-
$29
For individual creators, students, and hobbyists.
-
$99
For freelancers and professionals creating commercial work.
-
$199
Perfect for small studios and creative teams.
-
$349
Designed for medium-sized studios and production teams.
 Included
Includes 12 months of
- Support from Dreamy Art World
- Product updates
Extend this product’s Support Period +12 months: 50% of product price
Have questions before purchasing?
Login to message
| Blender Extension Compatible | Yes |
| Dev Fund Contributor | |
| Published | 3 months ago |
| Blender Version | 4.2 - 5.2 |
| Extension Type | Add-on |
| Render Engine Used | Cycles |
| License | GPL |
