 R2raghu
R2Armature Node Documentation
What it is
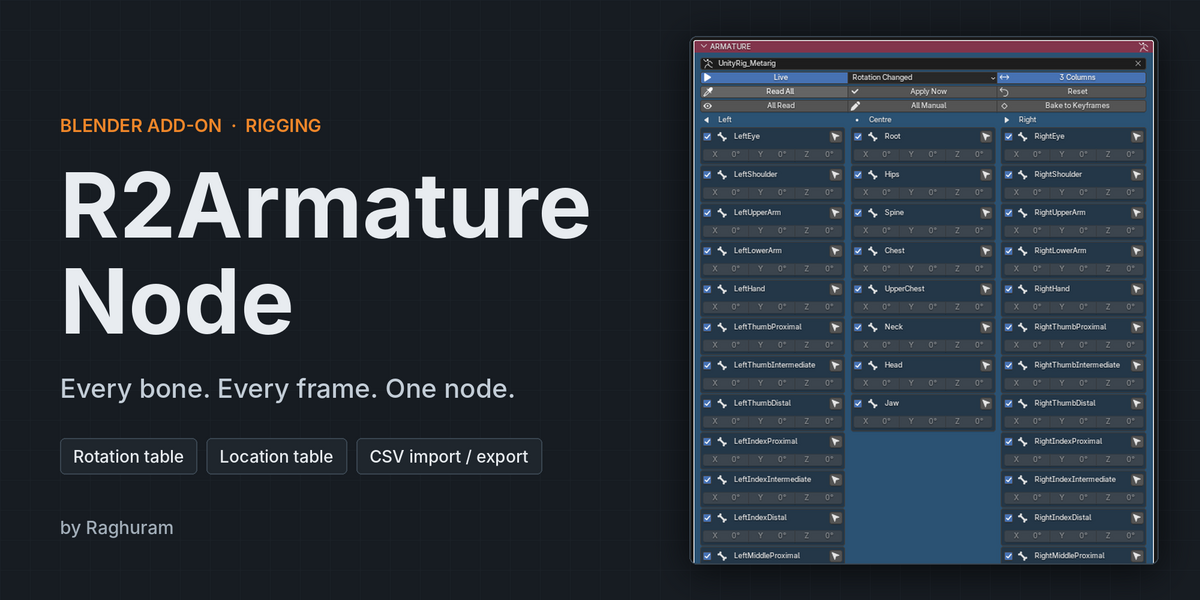
R2Armature Node adds three node types to Blender, in their own editor called Armature Node Tree:
- ARMATURE: lists every bone of one armature and lets you read, edit and play back their rotation and location.
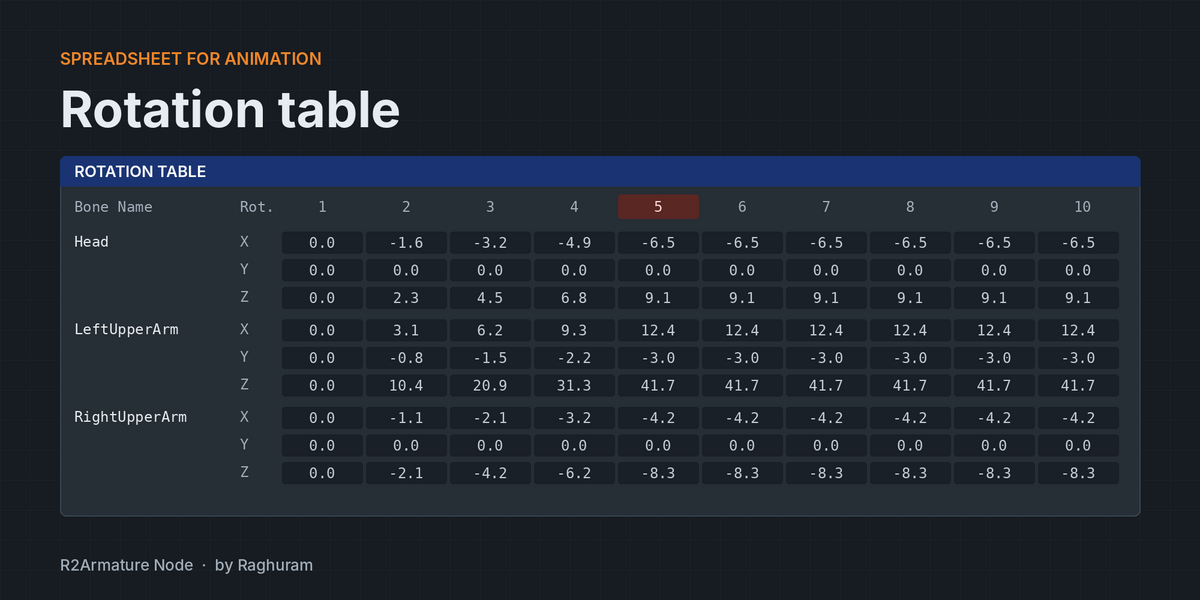
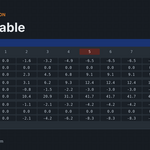
- ROTATION TABLE: a spreadsheet of every bone’s rotation on every frame.
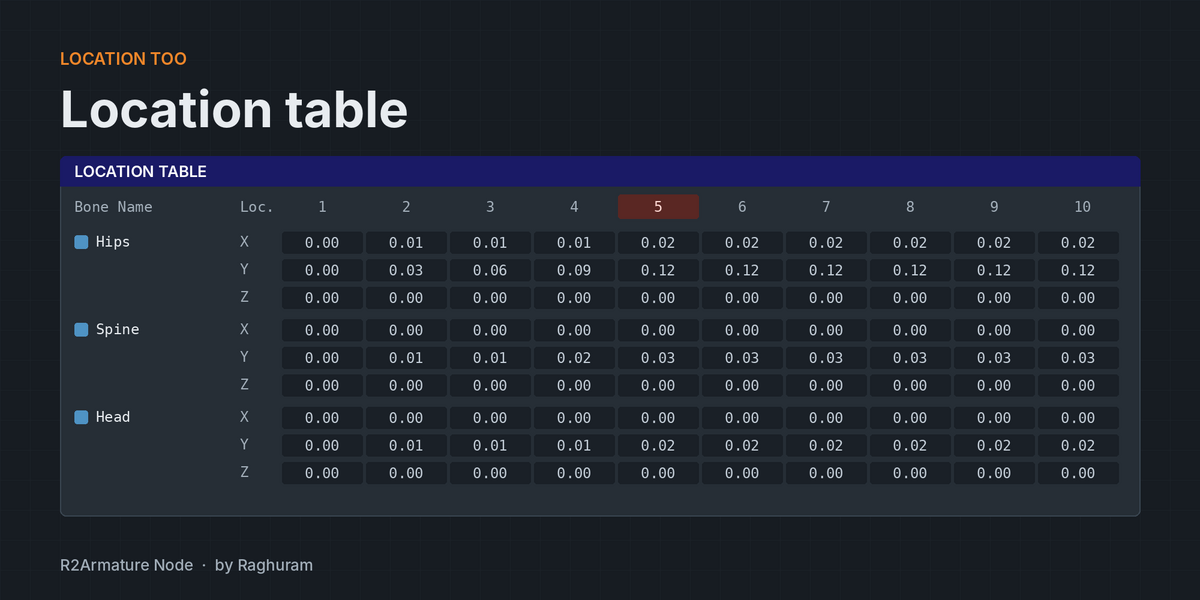
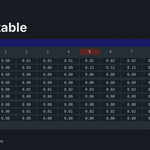
- LOCATION TABLE: the same for location.
Animation is stored inside the node as frame keys. The node writes those keys to your rig on every frame change. When you want regular Blender keyframes, bake them.
Requirements
- Blender 4.2 or newer.
- An armature object in your scene.
Installation
- In Blender, open Edit > Preferences > Add-ons.
- Choose Install from Disk and select the add-on file.
- Enable Armature Node.
The panel appears in the 3D Viewport sidebar (press N), on the Armature Node tab.
Quick start
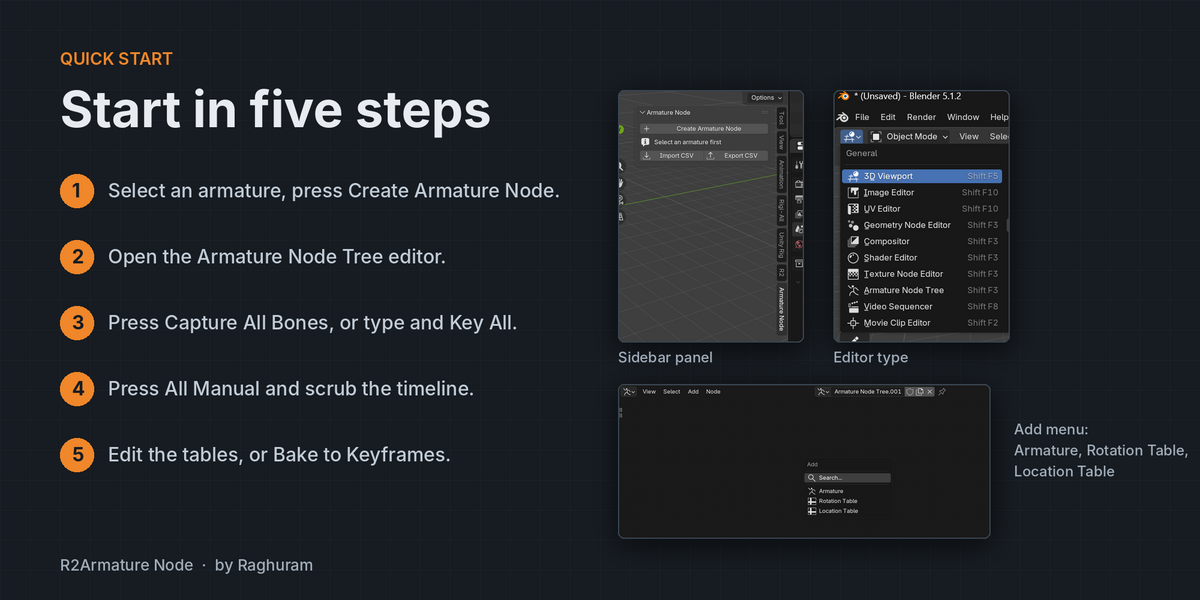
- Select your armature in the 3D Viewport.
- Open the sidebar, go to the Armature Node tab and press Create Armature Node.
- Press Open Armature Node Editor. The area switches to the Armature Node Tree editor, with the ARMATURE node and both table nodes ready.
- Set your scene start and end frames.
- Pose or animate your rig as usual, then press Capture All Bones on a table node. Every bone is stored on every frame.
- Press All Manual on the ARMATURE node. Scrub the timeline and the node now drives the rig.
You can also switch any area to the Armature Node Tree editor from the editor type menu, and add nodes from its Add menu: Armature, Rotation Table, Location Table.
The ARMATURE node
Armature field. Pick the armature to control. Armature objects you have deleted do not appear in the list.
Top row
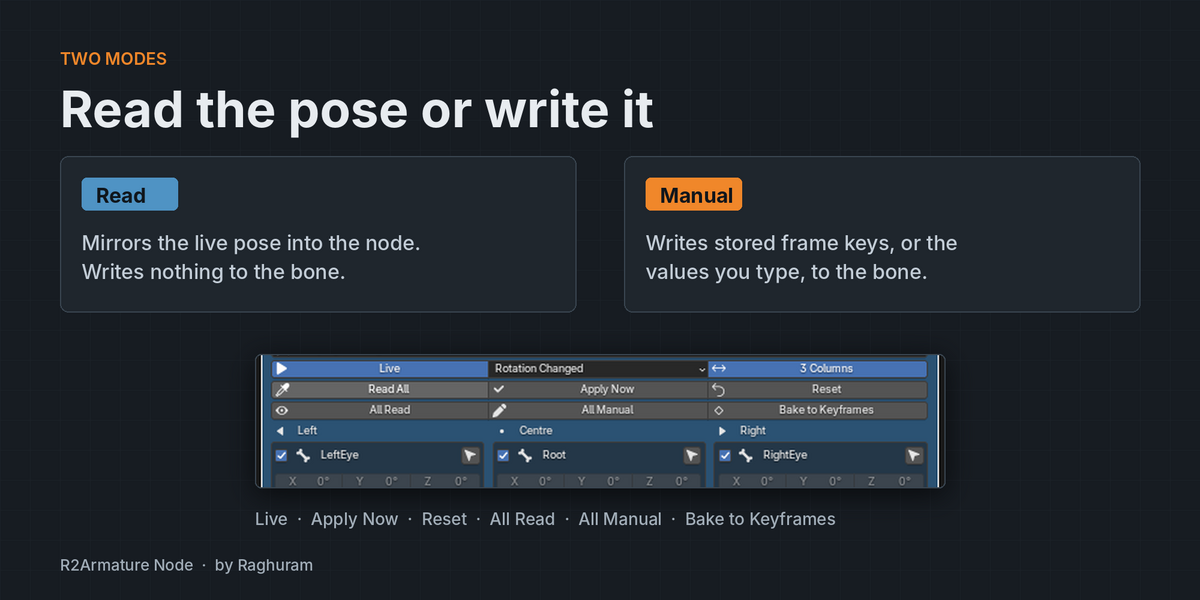
- Live: the node evaluates on every change and every frame change. Turn it off to stop the node writing to the rig.
- Highlight: Rotation Changed, Rotated (not at rest), or Off. Highlighted bones turn red with a keyframe icon.
- 3 Columns: Left, Centre and Right columns. Turn it off for one column, which suits narrow panels.
Buttons
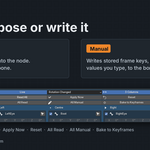
- Read All: copies the current pose rotation and location of every bone into the node.
- Apply Now: writes the node to the bones once, even when Live is off.
- Reset: sets all typed rotations and locations to zero. Frame keys are kept.
- All Read and All Manual: set the mode of every bone at once.
- Bake to Keyframes: see Baking below.
Bones, sides and groups
Bones are listed in the armature’s hierarchy order. Each bone shows:
- an enable tick (unticked bones are skipped),
- its name,
- a select button that makes it the armature’s active bone,
- X, Y and Z rotation fields.
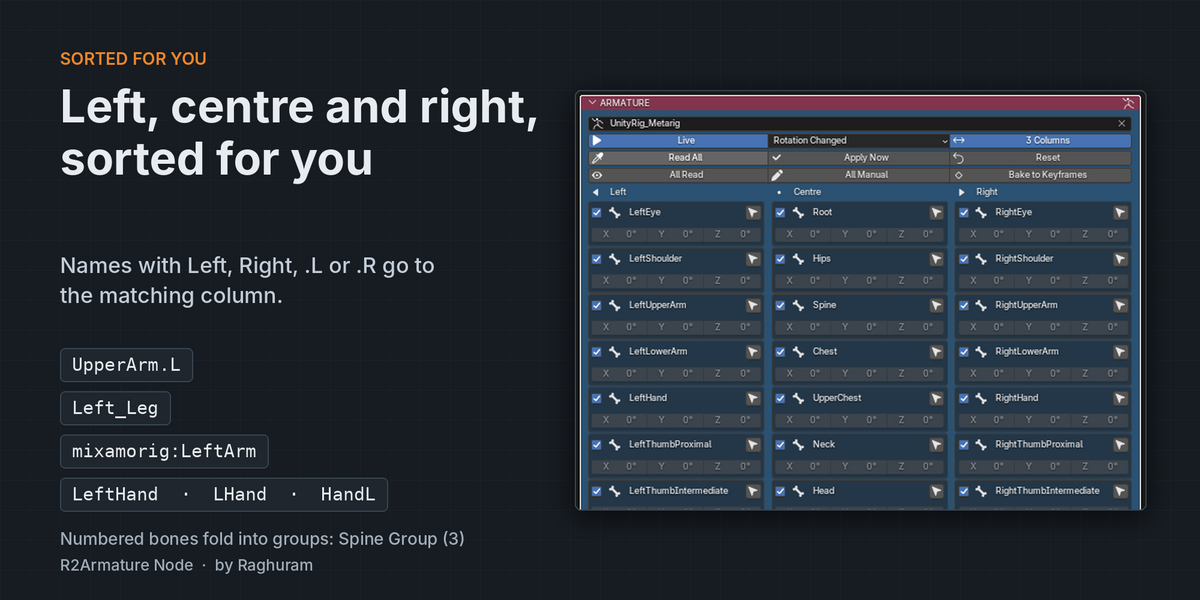
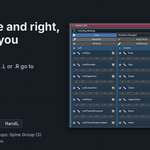
Left and right. In three-column mode, a name containing Left goes to the left column and a name containing Right goes to the right. Everything else goes to the centre. Recognised patterns include UpperArm.L, Left_Leg, mixamorig:LeftArm, LeftHand, LHand and HandL.
Groups. When two or more bones share a base name and differ only by a number, they fold into one group. Spine-1, Spine.002 and Spine 3 become Spine Group (3). Each group has a triangle to expand it and its own Read and Manual buttons for every bone in the group. Left and right bones group separately.
Modes: Read and Manual
Every bone is in one of two modes.
- Read: the node mirrors the live pose. Nothing is written to the bone. The rotation fields update as you pose.
- Manual: the node writes to the bone. If the bone has frame keys, it plays them back at the current frame, interpolating linearly between keys. If it has no keys, it writes the typed values.
Editing a cell in a table switches that bone to Manual.
Rotation and location tables
Each table is a grid: Bone Name, axis (X, Y, Z), then one column per frame. Every bone has three rows. The current frame’s column is highlighted. A dash means the bone has no key on that frame.
Controls
- Capture All Bones: steps through the scene frame range and stores every bone’s rotation and location on every frame. It replaces existing keys. Use Step to skip frames. Bones stay in their current mode, so switch them to Manual to play the keys back.
- Key All (this frame): stores every bone at the current frame.
- Clear All Keys: deletes the keys of every bone.
- Frame range: shows the scene Start and End. Fit Range sets the table to that range.
- From and Columns: the first frame shown and how many columns to show (3 to 240). The arrows scroll by one page. Current Frame jumps to the playhead.
- Filter, Page and Bones: search bones by name and choose how many bones show per page.
- Short Names: hides the text before a colon, so mixamorig:Hips shows as Hips.
- Loc On and Loc Off (location table): turn location writing on or off for every bone.
- Loc tick (location table): tick a bone name to write its location to the bone. Location is only written to ticked bones.
- Export CSV and Import CSV.
Rotation is stored and shown as XYZ Euler. Every rotation mode is read correctly: quaternion, axis angle and all Euler orders. Values are converted back to each bone’s own rotation mode when written.
Baking to Blender keyframes
Press Bake to Keyframes on the ARMATURE node. It evaluates the node over the scene frame range, using the Step value, and inserts normal Blender keyframes for every enabled bone that is in Manual mode. Location keys are inserted for bones with Loc on. When it finishes, Live is switched off so the baked keys play back on their own.
At least one enabled bone must be in Manual mode, or the bake reports an error.
CSV export
Press Export CSV on a table node, in the 3D Viewport sidebar, or use File > Export > Armature Node CSV.
Options:
- Separator: comma or tab.
- Armature + Bone List: bone names, parents, roll, head and tail positions, and connect.
- Rotation Table (degrees) and Location Table.
-
Frames From:
- Blender Keyframes (default): only frames that have keyframes in the armature’s animation.
- Every Frame: every frame of the scene range.
- Node Keys: the keys stored in the node.
The file layout:
Armature Name:,
No of Bone,
Bone name, Parent name, Bone roll, Bone head X ... Bone tail Z, Connect

Animation Data
Bone Name, Rotation, , , ...
, X Rotation,
, Y Rotation, ...
, Z Rotation, ...
, X Location,
...
CSV import
Press Import CSV on a table node, in the 3D Viewport sidebar, or use File > Import > Armature Node CSV. It also works before any armature exists.
Options:
- Create Armature From File: builds a new armature from the bone list. Turn it off to put the animation on the node’s current armature.
- Replace Existing Keys: clears the keys of every bone that appears in the file first.
- Insert Blender Keyframes: also writes real keyframes so the animation plays without the node. Bones are then left in Read mode. If off, bones are left in Manual mode.
- Set Scene Frame Range: sets the scene start and end to the imported frames.
Comma and tab files both work, and blank rows are fine. Bone names are matched exactly first, then ignoring case and any mixamorig prefix. The import message tells you how many bone names were not found.
Tips
- To animate with the node only: Capture, All Manual, then edit table cells.
- To end up with ordinary keyframes: Capture or Import, All Manual, then Bake to Keyframes.
- Switch to a single column when the node is narrow.
- Use Filter and Page to move through rigs with many bones, such as ones with full fingers.
- Use Short Names with Mixamo rigs.
Limitations
- Keys are stored in the node, not in Blender’s action editor, until you bake or import with Insert Blender Keyframes.
- Keys between frames are interpolated linearly.
- Tables show only the frames that have keys.
- The node writes to the pose only. It does not change the armature’s rest pose.
Have questions about this product?
Login to message
| Dev Fund Contributor | |
| Published | 1 day ago |
| Blender Version | 4.2 - 5.3 |
| Extension Type | N/A |
| Render Engine Used | Blender-Internal |
| License | Mit |
