 ZEG
ZEG


RENDER IT ALL
Blender Addon — User Documentation
Version 1.0.0 · Blender 4.2+
by Z.E.G.
Batch-render every camera in every scene from a single dialog.
Stills export as PNG. Animations export as MP4. Automatically.
1. Overview
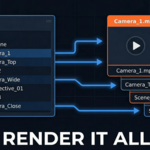
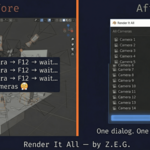
Render It All is a Blender addon that eliminates the repetitive task of switching cameras manually before each render. It provides a single dialog listing every camera across every scene in your .blend file. You choose what to render, click OK, and walk away.
Animated cameras are detected automatically from keyframe data and rendered as MP4 video files. Static cameras are rendered as PNG images. All output is organized into a clean folder structure next to your .blend file — no manual folder setup required.
2. Requirements
• Blender 4.2 or newer (extension format)
• FFmpeg codec support — included in all official Blender builds
• The .blend file must be saved to disk before rendering (required for the export path)
3. Installation
3.1 Install from Blender
1. Download the file: render_it_all_v1.0.0.zip
2. Open Blender and go to Edit > Preferences
3. Click the Add-ons tab (or Extensions tab in Blender 4.2+)
4. Click Install... and select the downloaded .zip file
5. Enable the addon by checking the checkbox next to Render It All
6. Close Preferences — the addon is ready
Note: On Blender 4.2 and newer, extensions can also be dragged and dropped directly onto the Blender window to install.
3.2 Verify installation
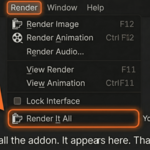
After installation, open the Render menu in the top bar. You should see Render It All listed at the bottom of the menu. If it does not appear, check that the addon is enabled in Preferences.
4. Quick Start
7. Save your .blend file to disk
8. Go to the Render menu in the top bar
9. Click Render It All
10. The dialog opens — all scenes and cameras are listed with checkboxes
11. Uncheck anything you do not want to render
12. Click OK
13. Rendered files appear in the export/ folder next to your .blend file
Important: Your .blend file must be saved before rendering. The addon uses its location to determine where to write output files.
5. The Dialog
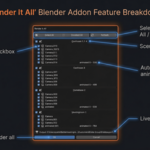
The Render It All dialog opens when you click Render > Render It All. It automatically scans all scenes in your file and lists every camera found.
5.1 Toolbar
• Select All — enables every scene and camera in the list
• Deselect All — disables every scene and camera in the list
• Refresh — re-scans all scenes without closing the dialog, useful if you have added or removed cameras since opening
5.2 Scene rows
Each scene appears as a labelled row with a checkbox and the scene icon. Checking or unchecking the scene checkbox toggles all cameras inside that scene at once. Clicking the scene name button also toggles all cameras.
5.3 Camera rows
Each camera is listed beneath its scene with its own checkbox. Cameras can be toggled independently regardless of the scene checkbox state.
Animated cameras — cameras with keyframe data — display a badge showing their detected frame range, for example: animated 0 – 506. These cameras will render as MP4 video files.
5.4 Output path bar
The bottom of the dialog shows the resolved export path for the current .blend file. If the file has not been saved, a warning is shown instead.
5.5 OK and Cancel
• OK — starts rendering all checked cameras in sequence
• Cancel — closes the dialog without rendering
6. Output
6.1 File types
|
Camera type |
Output format |
File path |
|
Static camera |
.png (PNG) |
export//.png |
|
Animated camera |
.mp4 (H.264/AAC) |
export//.mp4 |
6.2 Folder structure
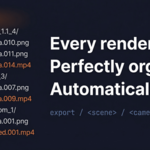
All output is written into an export/ folder created automatically next to the .blend file. Inside, each scene gets its own subfolder, and each camera gets its own file:
export/
Confroom_1.1_4/
Camera.010.png
Camera.011.png
Camera.014.mp4
Confroom_3/
Camera.007.png
Camera.009.mp4
Meetingroom_1/
Camera.001.png
animated.001.mp4
Note: Characters that are invalid in file paths ( < > : " / \ | ? * ) are automatically replaced with underscores in folder and file names.
6.3 Video settings for MP4
• Container: MPEG-4
• Video codec: H.264
• Audio codec: AAC
• Frame range: taken from the camera's detected keyframe range
Note: All render settings (resolution, samples, output format) are taken from the scene's existing render settings. Render It All does not modify your quality or resolution settings.
7. Non-Destructive Operation
Render It All saves and fully restores the following settings after each camera render:
• Active camera
• Output file path
• Output file format
• Frame start and frame end
• FFmpeg container format
• FFmpeg video codec
• FFmpeg audio codec
If rendering is interrupted by an error, the finally block in the code ensures all settings are still restored. Your scene is always left in the state it was in before you clicked OK.
8. Feature Reference
|
Feature |
Description |
|
Scene & camera tree |
All scenes and cameras listed in a hierarchical checkbox dialog |
|
Scene-level toggle |
Click a scene name to enable or disable all cameras inside it at once |
|
Animated camera detection |
Keyframes scanned automatically on open — frame range shown as badge |
|
PNG output |
Static cameras render as .png into export//.png |
|
MP4 output |
Animated cameras render as .mp4 (H.264 / AAC) automatically |
|
Organized export folder |
All files land in export/ next to the .blend file, organized by scene |
|
Non-destructive |
All scene settings restored after each render — nothing left in wrong state |
|
Select All / Deselect All |
Toolbar buttons to quickly check or uncheck everything |
|
Refresh |
Re-scans all scenes without closing the dialog |
|
Live output path |
Shows the export folder path at the bottom of the dialog |
|
Render menu integration |
Accessible via Render menu in the top bar — no panels to hunt for |
9. Troubleshooting
Render It All does not appear in the Render menu
• Confirm the addon is installed and enabled in Edit > Preferences > Add-ons
• Restart Blender after enabling the addon
• Make sure you installed the correct file: render_it_all_v1.0.0.zip
Error: .blend file must be saved first
• The addon cannot determine where to write output files if your project has not been saved
• Go to File > Save (Ctrl+S) before opening the dialog
No cameras appear in the dialog
• Make sure your scenes contain camera objects (type: Camera in the Properties panel)
• Click Refresh in the dialog toolbar to re-scan
• Check that you are not in a scene with cameras hidden by scene-level visibility settings
Animated camera renders as a still instead of video
• The addon detects animation from keyframes on the camera object, its data, and NLA tracks
• If a camera is driven by constraints or drivers without keyframes it may not be detected
• You can verify detection by checking whether the animated badge appears next to the camera name in the dialog
MP4 output fails or is missing
• Ensure FFmpeg support is enabled in your Blender build (it is enabled by default in official builds)
• Check the system console for error details: Window > Toggle System Console
Some cameras rendered, others failed
When some renders fail, the addon reports the count in a warning at the top of the screen and logs details to the system console. Open Window > Toggle System Console to see which cameras failed and why.
10. License & Usage Rights
Render It All is a commercial addon sold under a proprietary End User License Agreement (EULA). By using this software you agree to the terms of that agreement.
You may
• Use the addon in personal projects
• Use the addon in paid commercial client work and productions
• Install it on multiple machines that you personally own or control
You may not
• Resell, sublicense, rent, or transfer the addon to any other person
• Share your copy, download link, or license with others
• Distribute the addon as part of another product or package
• Modify and redistribute the addon in any form
One license per user
Each purchased license covers one individual user. Studios where multiple people will use the addon must purchase one license per user.
The full license text is included in the LICENSE.txt file inside the addon zip.
11. Contact & Support
For bug reports, questions, or licensing enquiries, contact the author:
• Author: Z.E.G.
• License inquiries: contact via the product page where you purchased the addon
When reporting a bug, please include your Blender version, operating system, and the error message from the system console (Window > Toggle System Console).
RENDER IT ALL v1.0.0 · © 2025 Z.E.G. · All Rights Reserved
Have questions about this product?
Login to message
| Blender Extension Compatible | Yes |
| Published | 6 months ago |
| Blender Version | 4.2 - 5.1 |
| Extension Type | Add-on |
| Render Engine Used | Cycles, Eevee |
| License | GPL |

Discover more products like this
pipeline Workflow Render batch render camera Export animation automation multi-camera Scenes