 za studio


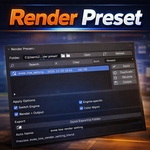
Render Preset Manager
User Guide
Version: v2.5.0 (Compatible with Blender 4.5+ / 5.0) Author: Zekeriya AYAN
|
What it does |
Saves the current scene’s render settings into a separate .blend preset file and re-applies them with a single click. |
|
What it does not do |
It does not move, add, or delete objects/collections. It does not modify your scene content. |
|
Where to find it |
Properties Editor ® Render tab ® panel: Render Presets (.blend). |
1. Installation and Updating
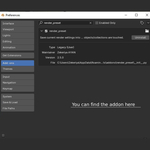
The add-on is installed from a ZIP package. In Blender, go to Edit ® Preferences ® Add-ons ®
Install…, select the ZIP, then enable the add-on in the list.
If you already have an older version installed, installing the new ZIP is usually sufficient. If you use Blender 5.0’s Extensions directory, removing the previous folder before installing can help avoid conflicts.
2. Panel Location and UI Overview
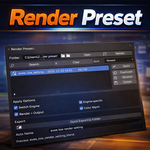
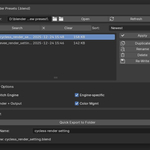
Panel name: Render Presets (.blend). The interface is organized into four practical areas:
|
Folder row |
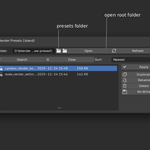
Choose where preset files are stored. Includes a folder picker and an Open button (when available). |
|
Preset list |
Lists preset .blend files in the chosen folder and provides management actions (apply, rename, duplicate, delete, rewrite, refresh). |
|
Apply Options |
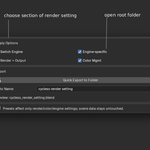
Controls which groups of settings are applied from a preset (engine switch, engine-specific, render + output, color management). |
|
Export |
Quickly saves the current scene settings as a new preset using an auto-name template. |
3. Preset Folder Logic
Preset files are stored as .blend files in the folder you choose. The default folder is:
//render_presets
In Blender, the // prefix means “relative to the current .blend file location”. Therefore, if your project file is not saved yet, the default folder cannot be resolved to an absolute path and some actions (especially Open) are intentionally disabled.
You can define the folder in two ways:
• Save your project and keep the default //render_presets (it will be created next to the .blend).
•
Use the folder picker to select an absolute directory (example: C:\Projects\Presets).
4. What Is a Preset File? What Does It Save?
Each preset is a .blend file containing a Scene. The add-on writes only render-related settings into that scene and reads them back on demand.
Main groups typically included:
• Render: resolution, frame range, output path, film/transparency, sampling, etc.
• Image Settings: format, color depth, compression, etc.
• Color Management: View Transform, Look, Exposure, Gamma, Display Device, etc.
• Engine: Cycles/Eevee selection and engine-specific options (optional, controlled by Apply Options).
When applying a preset, the add-on appends the preset’s scene temporarily, copies settings into your current scene according to the selected Apply Options, then cleans up the temporary data.
5. Recommended Daily Workflow
For fast and safe use, this workflow is recommended:
Step 1: Define your preset folder. If the project is not saved, save it first or choose an absolute folder. Step 2: Set your render settings (engine, resolution, output, color management).
Step 3: Use Quick Export to Folder to save the current setup as a preset. Step 4: Later, select any preset in the list and click Apply to restore it.
6. Preset List and Management Tools
Each row in the list represents a preset file. The action buttons on the right manage the file on disk:
|
Apply |
Applies the selected preset to the current scene (according to Apply Options). |
|
Duplicate |
Creates a copy of the selected preset (useful for fast variations). |
|
Rename |
Renames the preset file on disk. |
|
Delete |
Deletes the preset file. |
|
Re-Write |
Overwrites the selected preset using the current scene settings (use carefully). |
|
Refresh |
Re-scans the folder and updates the list. Use it after copying files into the folder externally. |
|
Search / Clear |
Filters the list by filename text; clears the filter. |
|
Sort |
Sorts by New®Old or Old®New (based on file timestamps). |
7. Apply Options: What Gets Applied?
Before applying a preset, you can control the scope:
Switch Engine: Transfers the preset’s engine selection (Cycles/Eevee) to the current scene. If disabled, the engine is not changed.
Engine-specific: Applies engine-specific details (Cycles or Eevee panels) for the active engine.
Render + Output: Applies render and output settings (Render + Image Settings).
Color Mgmt: Applies color management (View Transform, Look, Exposure, Gamma, Display Device, etc.).
8. Export and Auto-Name Template
Quick Export to Folder saves the current scene settings as a new preset. The filename is built from an auto-name template.
Supported tokens:
{date} (YYYYMMDD), {scene}, {engine}, {w}, {h}, {fps}
Example template:
{date}_{scene}_{engine}_{w}x{h}_{fps}fps
Example output:
20260109_Scene_CYCLES_1920x1080_24fps.blend
If a file with the same name already exists, the add-on automatically appends _1, _2, … to prevent collisions.
9. Common Usage Scenarios
Cycles Final + Eevee Preview: Save two presets in the same scene - one optimized for fast Eevee preview, another for Cycles final. With Apply Options you can switch only the engine or only the output settings when needed.
Multiple deliverable formats: Create dedicated presets for 16:9, 9:16, 1:1, etc. and switch resolution/output settings instantly.
Color management profiles: Manage View Transform/Look (e.g., Filmic vs Standard/ACES pipelines) as presets and swap the render look quickly.
10. Troubleshooting
Open button shows an error / folder does not open
This typically happens when the folder path cannot be resolved. Save your project or choose an absolute folder path. When the required conditions are not met, Open stays disabled and shows a helpful message instead of raising an error.
The preset list is empty
Verify the selected folder and click Refresh. If there are no .blend files in the folder, the list will remain empty.
Some settings did not change after Apply
Check Apply Options. For example, if Color Mgmt is off, View Transform/Exposure will not change.
Permission / access issues
On Windows, you may not have write permission in system folders. Choose a preset folder under your user directory (e.g., Documents).
11. Best Practices
If you want presets to travel with the project, the default //render_presets approach is ideal because the folder lives next to the .blend file.
For teams, use consistent naming conventions (e.g., FINAL_Cycles_4K, PREVIEW_Eevee_HD) and use Re-Write only for intentional updates.
12. FAQ
Can a preset be applied to a different project? Yes. Because it contains render settings, it can be applied across projects.
Does a preset affect my scene objects? No. The add-on does not modify scene content.
Is Color Management saved in Blender 5.0? Yes. View Transform, Look, and Display Device are included when Color Mgmt is enabled.
13. Button Tooltips (English)
All UI actions include short tooltips. The wording below can be used consistently across releases:
|
Folder Picker |
Choose a preset directory (absolute path). |
|
Open |
Open the preset folder in your OS file browser (available only when the project is saved or an absolute folder is set). |
|
Apply |
Apply the selected preset to the current scene. |
|
Duplicate |
Create a copy of the selected preset file. |
|
Rename |
Rename the selected preset file on disk. |
|
Delete |
Delete the selected preset file from disk. |
|
Re-Write |
Overwrite the selected preset using the current scene settings. |
|
Refresh |
Rescan the folder and rebuild the preset list. |
|
Search |
Filter presets by filename. |
|
Clear |
Clear the search filter and show all presets. |
|
Sort |
Toggle sorting (New®Old / Old®New). |
|
Quick Export to Folder |
Save current scene settings as a new preset in the active folder. |
This guide is aligned with the add-on UI labels. If UI wording changes in future versions, it is recommended to update the guide alongside the release.
Have questions about this product?
Login to message
| Sales | 10+ |
| Published | 9 months ago |
| Blender Version | 4.5 - 5.2 |
| Extension Type | N/A |
| Render Engine Used | Cycles, Eevee |
| License | GPL |