Resmax - Upscale Ai
 Playful Pixel


📦 Installation
Using this addon is straightforward. Just follow these steps:
- Download the
.zipfile included with your purchase. - Open Blender, go to Edit → Preferences → Add-ons, and click Install.
- Select the
.zipfile you downloaded and enable the addon.
📍 Addon Location
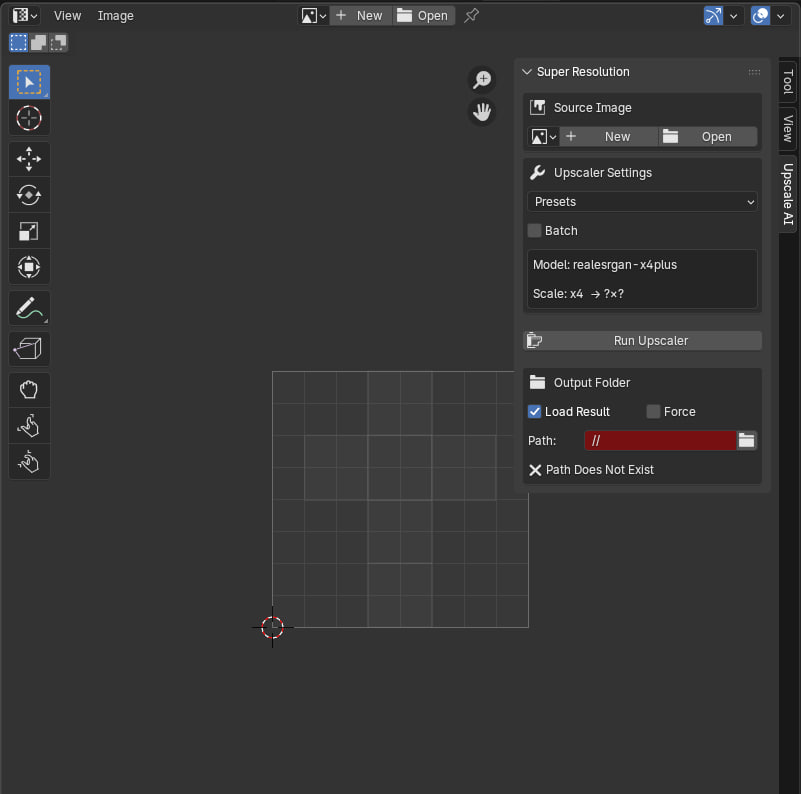
You’ll find the AI Upscale panel in the N Panel of any Image Editor window.
🖼️ Usage Guide
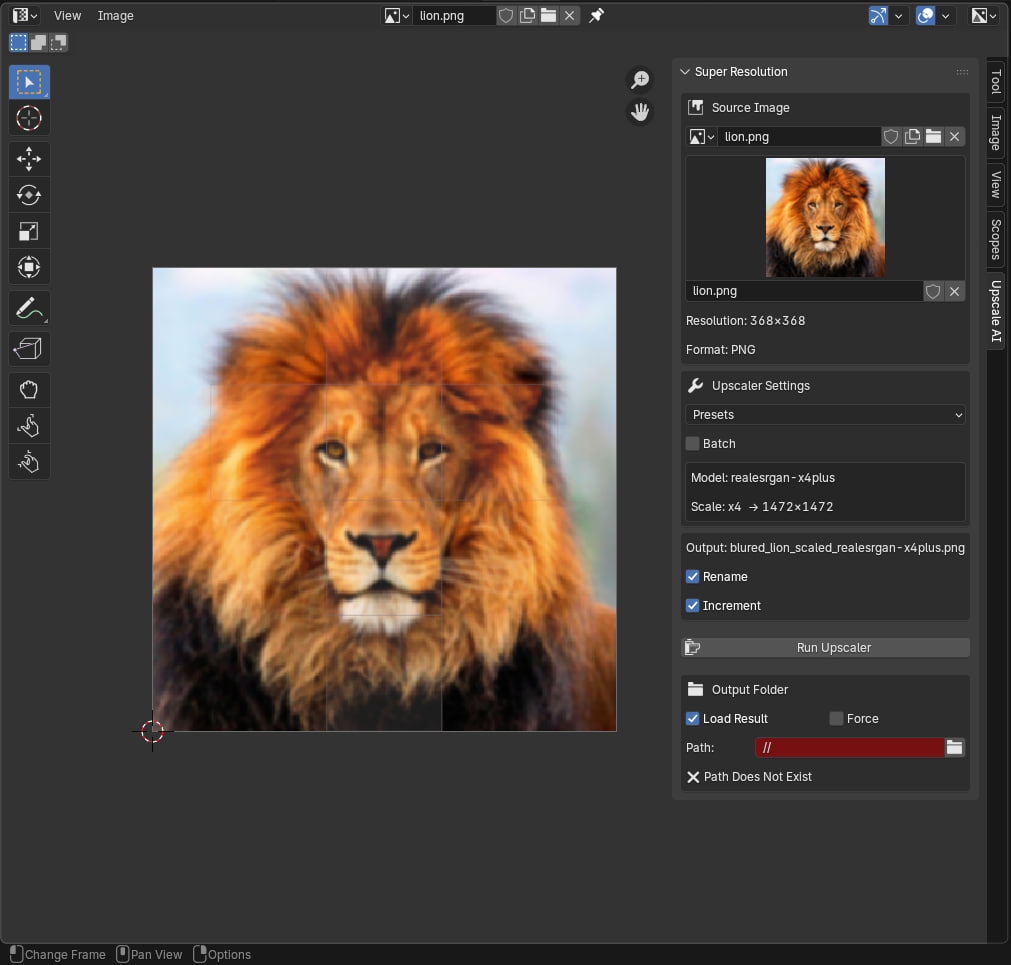
🔹 Source Image
- Select or open any image file.
- The image must be saved on your hard drive. If it's a render, save it first.
🔹 Resolution
Displays the pixel dimensions of the source image.
🔹 Format
Shows the file format of the source image (e.g., PNG, JPEG).
⚙️ Upscaler Settings
🔸 Model Selection
Choose your preferred AI model from the available presets:
- realesr-animevideov3-x2
- realesr-animevideov3-x3
- realesr-animevideov3-x4
- realesrgan-x4plus
- realesrgan-x4plus-anime
🔸 Batch Processing
- Enable the Batch checkbox to process all image files in the selected folder.
- Ideal for upscaling image sequences (e.g., video frames).
- To upscale a video, convert it to an image sequence using Blender’s Video Editor, then use this option.
- Batch mode disables the Rename and Increment options.
- Only
.png,.jpeg, and.jpgfiles are supported. Other formats will cause an error.
🔸 Model & Scale
- Model: Displays the selected AI model.
- Scale: Indicates the scale factor applied (e.g., 2x, 4x).
📁 Output Settings
🔸 Output Name
Set the name for the upscaled image.
🔸 Rename
Adds the model name and scale factor to the output filename.
🔸 Increment
Automatically increments the filename if it already exists (prevents overwriting).
🔸 Output Folder
Choose the folder where the upscaled images will be saved.
📤 Output Options
- Load: Automatically loads the output image into Blender (only available when Batch is disabled).
- Force: Replaces the existing image in Blender with the new one. Use with caution—this will overwrite the current image data.
▶️ Run the Upscaler
Click Run when you're ready—and watch the magic happen!
After clicking, you’ll see:
- A status bar showing progress
- A Cancel button to stop the operation if needed
💡 Tips
- Pay attention to the image resolution and detail.
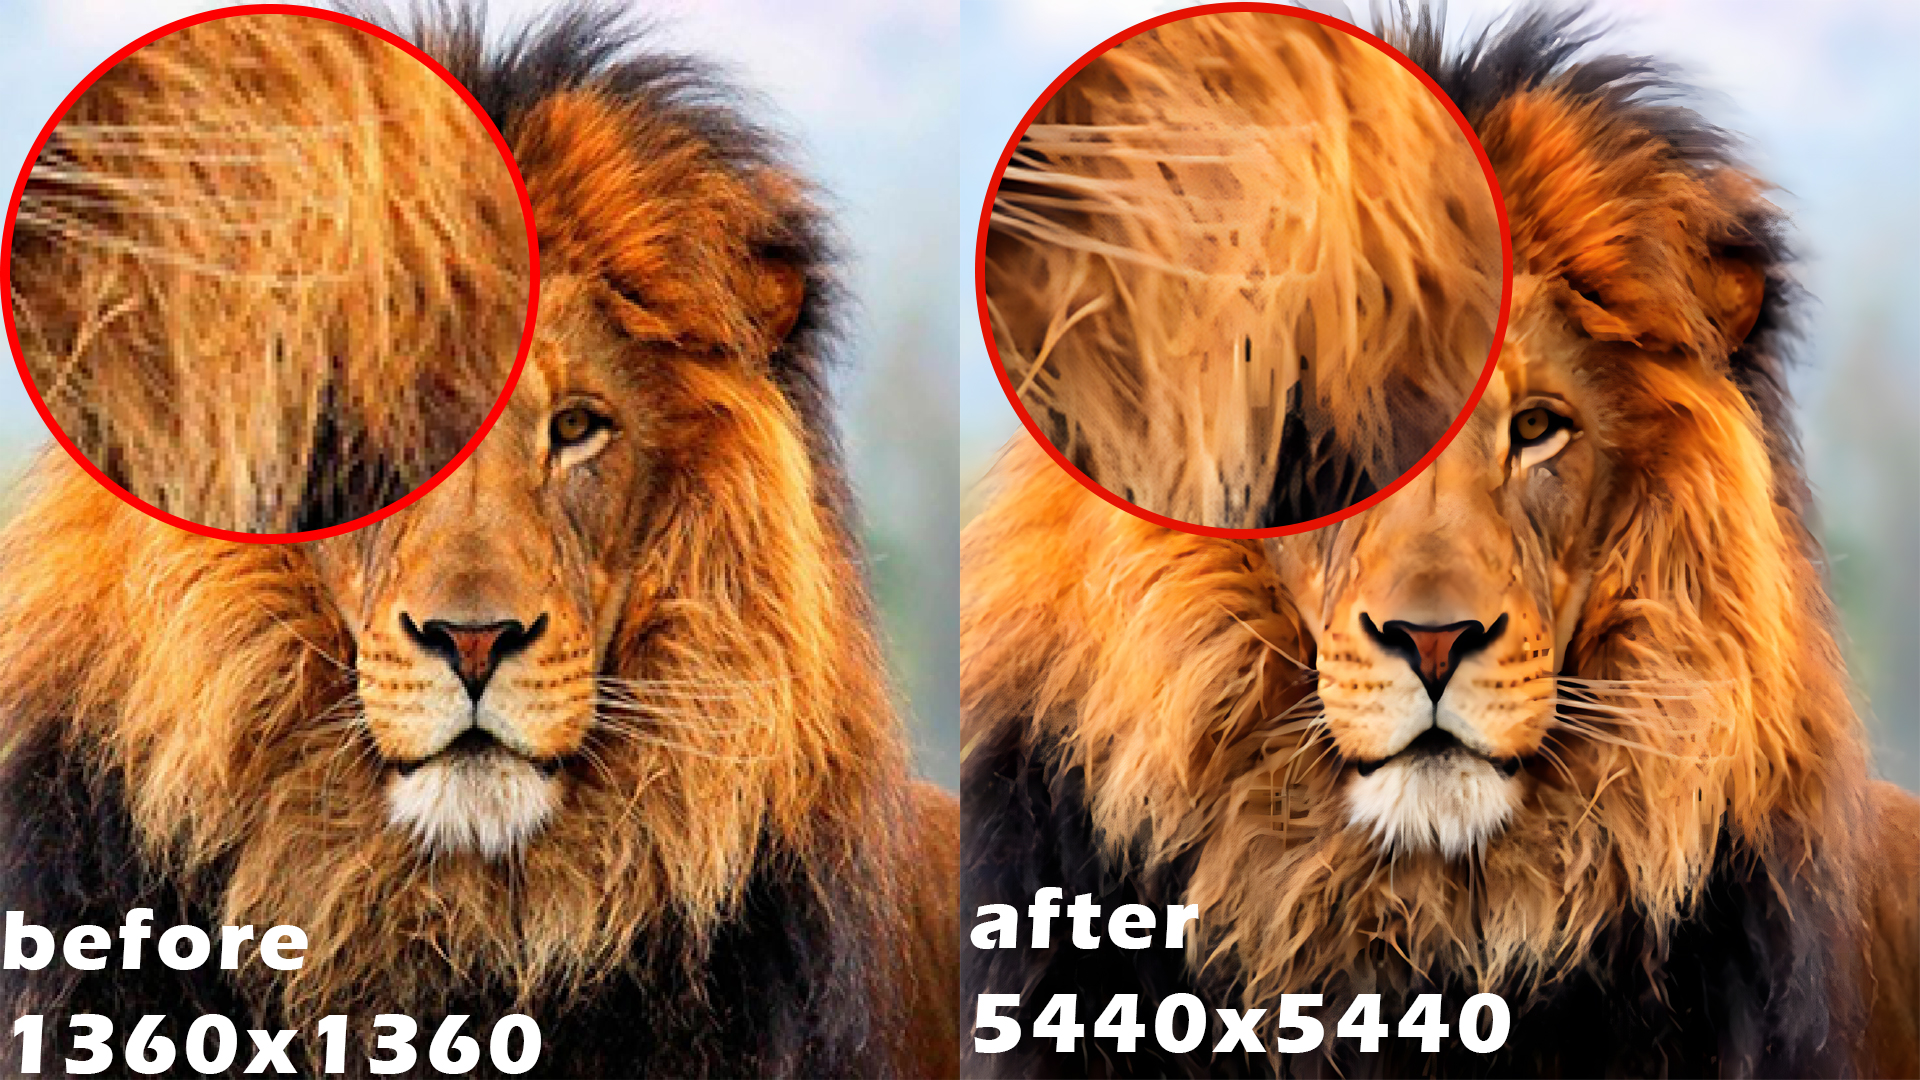
- A blurry image with high resolution may not improve—and could even look worse.
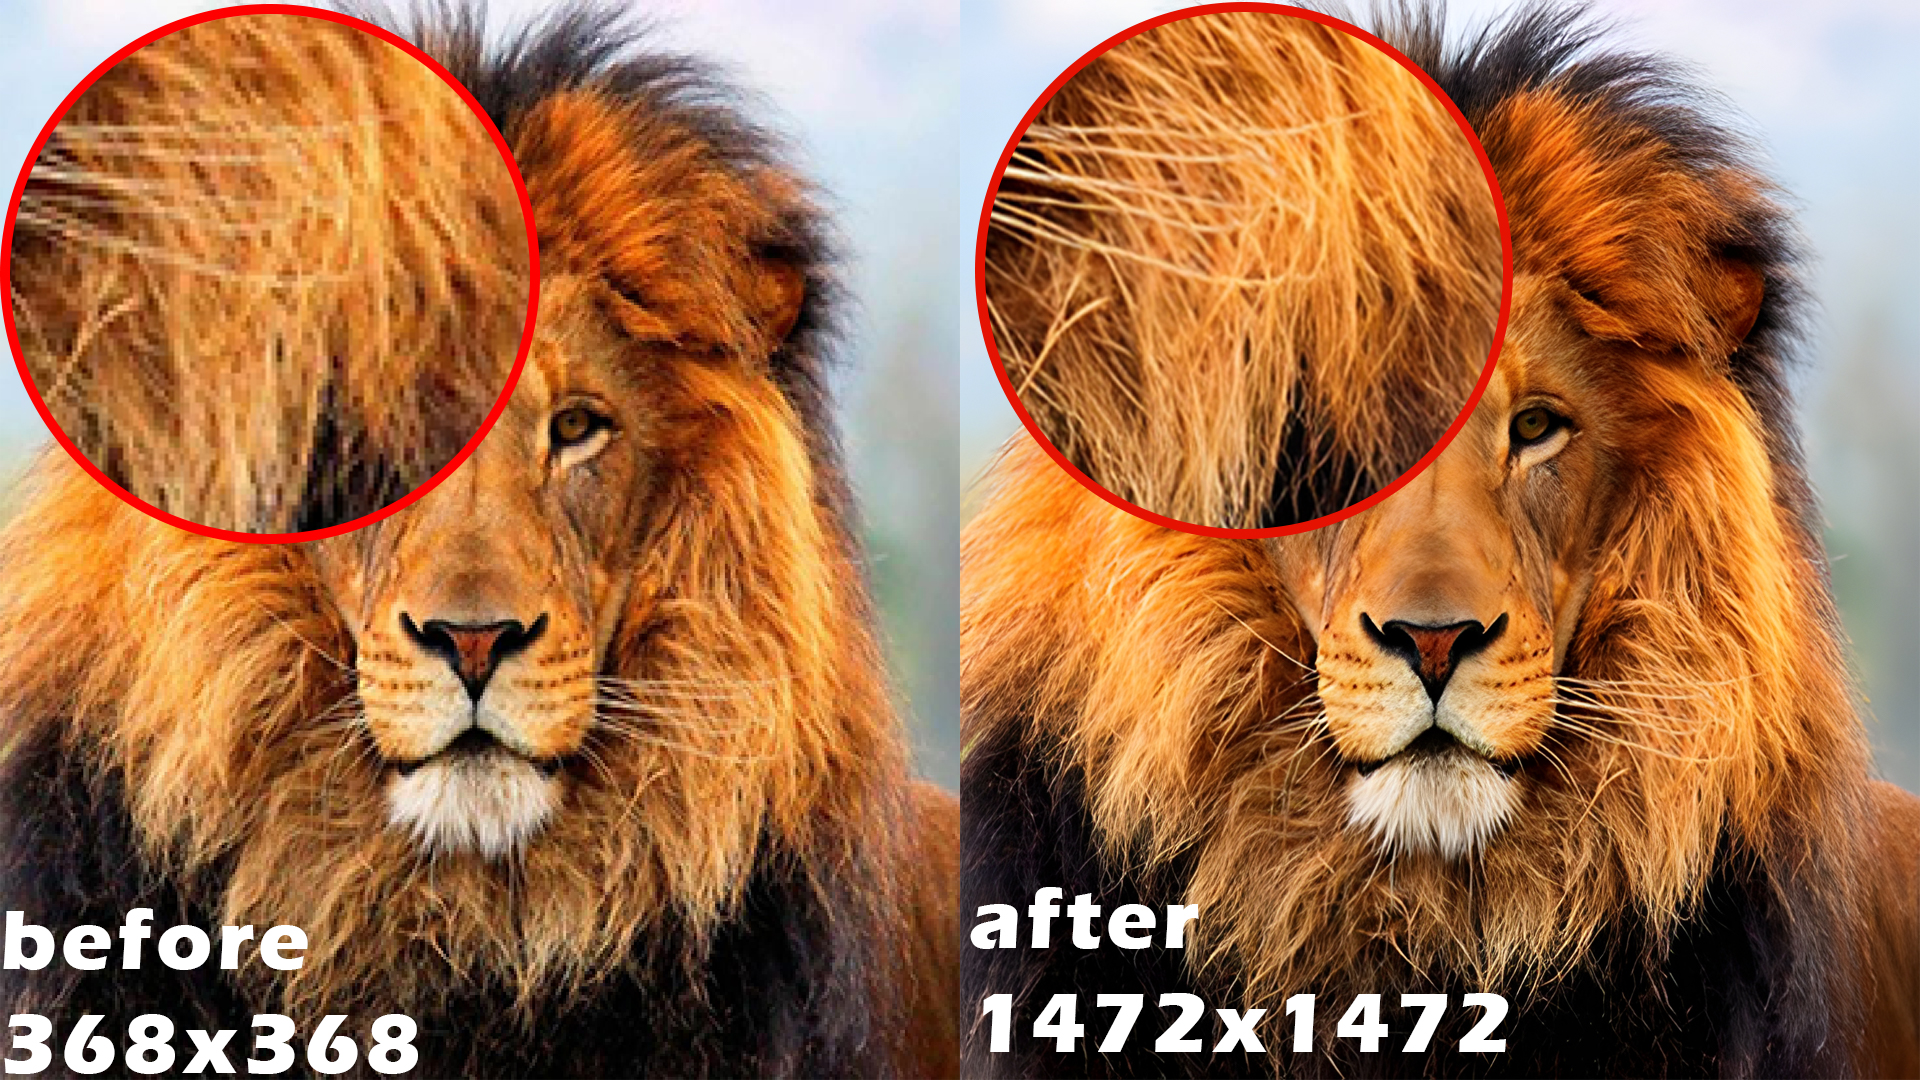
- A low-resolution image that’s sharp can improve significantly.
- ✅ Sharp but Small – Low resolution, high clarity — perfect for AI upscaling.
- ❌ Big but Blurry – High resolution, poor detail — upscaling may worsen the result.
-
$3
Users can use the addon privately, but not for commercial projects or redistribution
-
$15
One-time purchase for use by a single individual on personal or commercial projects
-
$35
Full rights to use in commercial projects, but no redistribution or resale
-
$50
Up to 5 users
-
$250
Up to 20 users
-
$500
Allows use by Unlimited users within a company or studio
Have questions about this product?
Login to message
