Retopomagic
 3D ART TOOLS


RetopoMagic: User Documentation
Welcome to the official documentation for RetopoMagic. This tool was designed to revolutionize your retopology workflow in Blender by offering an intuitive, visual approach directly integrated into the 3D Viewport.
With real-time visual feedback and a design that minimizes complex keyboard shortcuts in favor of mouse gestures, creating clean topology has never been faster.
1. Getting Started & Interface
Accessing the Tool
The tool can be accessed in two primary ways within the 3D Viewport:
- The N-Panel (Right Sidebar): Found under the Retopo-Magic tab.
- The Pie Menu: Press Ctrl + Shift + R to open the quick-access menu anywhere on your screen.
Setting Up the Scene
Before you begin drawing, you need to define the object you will be working on:
- Target Mesh: Select the high-resolution object onto which your new topology will be projected.
- Generate Blank Target Mesh: Click this button to automatically create a new, empty mesh (which will contain your topology) layered over your target object.
- Activate Draw Tool: Click this button to enter the interactive retopology mode. You will temporarily leave Blender's standard modeling workflow to enter RetopoMagic's dedicated workspace.
2. The Floating HUD (Heads-Up Display)
Once the drawing tool is activated, a smart HUD appears on the screen.
- Real-time Information: It displays necessary steps and provides contextual hints based on what you are currently hovering over.
- Opacity Control (Slider): An interactive slider is built directly into this HUD. Click and drag this slider to adjust the opacity (brightness) of your retopology edges in real-time. This is extremely useful for reducing visual clutter when your topology becomes dense.
3. Interactive Tools (Workflow)
The entire interaction design revolves around simple mouse movements and clicks, keeping your other hand resting on a few modifier keys.
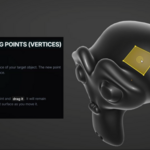
Placing and Moving Points (Vertices)
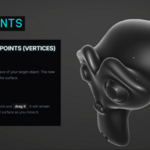
- Add a point: Left Click anywhere on the surface of your target object. The new point will automatically snap to the surface.
- Move a point: Hold Left Click on an existing point and drag it. It will remain continuously snapped to the target surface as you move it.
Auto-Weld (Merging Points)
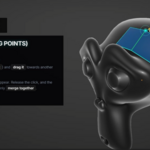
- Merge points: Grab a point (holding Left Click) and drag it towards another existing point. A visual snapping indicator will appear. Release the click, and the points will automatically and cleanly merge together.
Creating Faces (Quads)
- Automatic Preview: Move your mouse cursor into an empty space surrounded by 4 points. The tool will automatically analyze the area and display a transparent preview of the polygon it can create.
- Confirm the Face: Hold Shift and Left Click to generate the quad.
Cutting and Refining (Edge Loops)
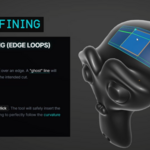
- Preview a cut: Hold the Ctrl key and hover over an edge. A "ghost" line will appear to show you the path of the intended cut.
- Insert the cut: While still holding Ctrl, Left Click. The tool will safely insert the Edge Loop, automatically adjusting the new vertices to perfectly follow the curvature of the original underlying model.
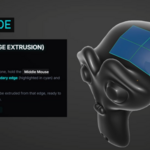
Drag Extrusion (Edge Extrusion)
- Rapid Extrusion: Instead of placing points one by one, hold the Middle Mouse Button (scroll wheel) on a boundary edge (highlighted in cyan) and drag your mouse. New polygons will automatically be extruded from that edge, ready to be adjusted or welded elsewhere.
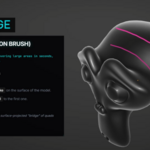
Magic Bridge (Polygon Brush)
This is the most powerful tool for covering large areas in seconds, perfect for limbs or cylindrical shapes.
- Hold down the D key.
- Draw your first freehand stroke on the surface of the model.
- Draw a second stroke parallel to the first one.
- Release the click. The tool instantly generates a clean, surface-projected "bridge" of quads between your two drawn lines.
4. Visual Feedback (UX)
RetopoMagic constantly monitors your geometry to guide you using a clean and effective color-coding system:
- Bright Cyan Edges: This indicates a boundary edge (an open edge on your mesh). It is a crucial visual cue to instantly know where you can extrude new faces or close holes.
- Orange Highlight: Indicates the vertex, edge, or face currently hovered over by your cursor. This highlights the element that will be affected by your next action (moving, deleting, cutting).
5. Navigation and Cleanup
- Delete an element: Press Del (Delete) or X while hovering over a point or edge.
- Undo: Press Ctrl + Z. This internal undo system allows you to correct mistakes smoothly without abruptly exiting the interactive drawing mode.
- Exit / Confirm: Right Click or press Esc (Escape) on your keyboard. The tool will save your topology and safely return you to standard Blender.

Discover more products like this
Auto Retopo pipeline Workflow retopo quads retopologize retopology game-art modeling topology edge flow snapping