
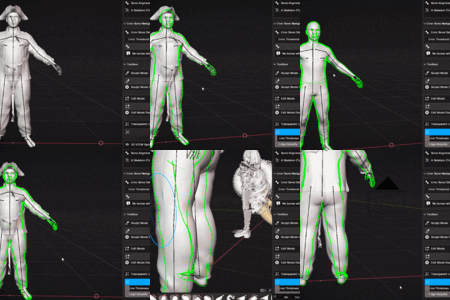
Rig Align User Manual
Blender Skeleton Auto-Matching Tool - Complete Usage Guide
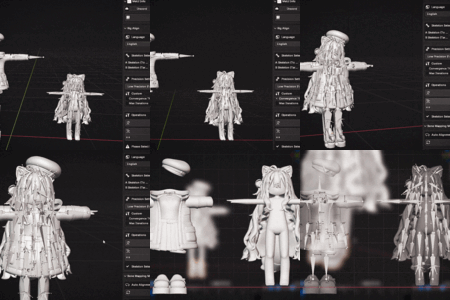
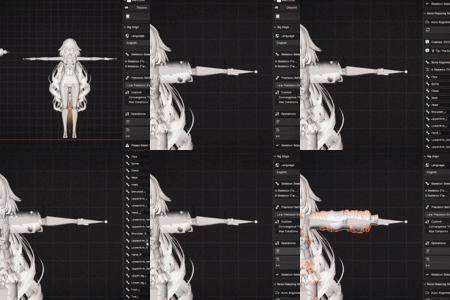
How to Use Rig Align
▲ Watch the full tutorial video for the complete workflow
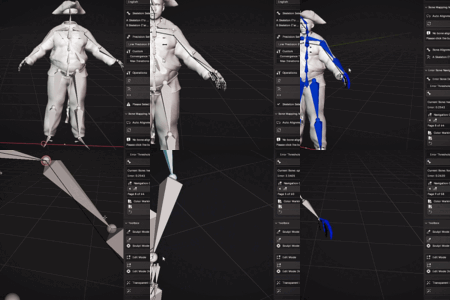
How to address major differences in bone settings between two characters
▲ Watch the full video for the complete workflow
📋 Table of Contents
- 1. Product Overview
- 2. Installation & Setup
- 3. Basic Usage Workflow
- 4. Main Features Explained
- 5. Advanced Features
- 6. Common Issues & Solutions
- 7. Tips & Best Practices
1. Product Overview
🎯 What is Rig Align?
Rig Align is a powerful Blender add-on specifically designed for automatically aligning different skeleton systems. It can:
- One-click automatic alignment of character and clothing skeletons
- Intelligent bone naming rule matching
- Support for multiple game engine formats (Unity, Unreal, VRChat, Roblox)
- Provide precise error detection and correction tools
- Save up to 70% of skeleton alignment time
📋 System Requirements
- Recommended Version: Blender 4.0 or higher
- Minimum Version: Blender 3.0+ (some features may be limited)
- Note: Bone offset marking feature will be disabled for versions below 4.0
2. Installation & Setup
Install Add-on
Install the downloaded Rig Align add-on file into Blender:
Enable Add-on
Search for "Rig Align" in the add-ons list and check to enable it
Locate Panel
Find the "Rig Align" tab in the right panel of the 3D Viewport
3. Basic Usage Workflow
Select Skeletons
In the Rig Align panel:
- A Skeleton (To Move): Select the source skeleton to move (usually clothing skeleton)
- B Skeleton (Target Position): Select the target skeleton (usually character skeleton)
Auto-Generate Bone Mapping
Click the "Generate Bone Mapping" button, and the add-on will automatically analyze and create bone correspondence relationships
Execute Alignment
Click the "Execute Proportional Retargeting" button to start automatic alignment
Sync to Edit Mode
After alignment is complete, click "Sync Pose to Edit Mode" to apply the results to edit mode
Direct Head/Tail Alignment
Finally, click "Direct Align Head/Tail" to complete precise head/tail alignment
4. Main Features Explained
🔧 Core Function Panel
Skeleton Selection Area
- A Skeleton: Source skeleton (skeleton to be moved)
- B Skeleton: Target skeleton (reference position)
Automatic Alignment Functions
- Generate Bone Alignment: Automatically generate bone alignment relationships
- Execute Proportional Retargeting: Execute proportional retargeting
- Match Height: Match skeleton height
🎨 Toolbox Functions
Mode Switching
- Rig Align (Sculpt Mode): Hide skeleton and model, focus on sculpting work
- Edit Mode: Hide skeleton and model, focus on editing work
Visualization Tools
- Transparent Line Display: Transparent line display for easy model inspection
- Show Skeleton Only: Hide other objects, focus on skeleton alignment
- Hide Skeleton: Hide skeleton, focus on other objects
🔍 Error Detection & Correction
Error Bone Navigation
- Unified Bone Debug: Unified bone debugging
- Mark Skeleton A Error Bone Color: Mark error bone color
- Navigate to Error Bone: Navigate to error bone
- Next/Previous Error Bone: Switch to previous/next error bone
5. Advanced Features
⚙️ Custom Bone Alignment
Manually Add Alignment
In the "Bone Alignment list" panel:
- Click "Add Alignment" to add a new alignment item
- Select source bone in "Source Bone"
- Select target bone in "Target Bone"
- Check "Enabled" to enable this alignment
Apply Custom Alignment
Click "Apply Custom Alignment" to use custom bone alignment for alignment
🎛️ Precision Settings
Convergence Settings
- Convergence Threshold: Convergence threshold (smaller = more precise)
- Max Iterations: Maximum number of iterations
- Error Threshold: Error threshold
Precision Presets
Click "Set Precision Preset" to quickly set:
- Fast: Fast mode (lower precision)
- Balanced: Balanced mode (medium precision)
- Precise: Precise mode (high precision)
6. Common Issues & Solutions
❌ Issue: Clothing penetrates character
Solution:
- Ensure clothing weight painting is correct
- Use the add-on's body shape compensation feature
- Use size adjustment tools for fine-tuning
❌ Issue: Cannot align all bones
Solution:
- Check if bone naming follows standards
- Use custom alignment feature to manually set special bones
- Adjust error threshold settings
❌ Issue: Inconsistent poses prevent alignment
Solution:
- Ensure both skeletons use the same pose (A-pose to A-pose, T-pose to T-pose)
- Manually adjust poses to be consistent before alignment
⚠️ Important Notice
This tool cannot guarantee perfect alignment for every character's skeleton. The final alignment result depends on various factors including character body type, bone structure, special naming conventions, and clothing design. The main purpose of the tool is to accelerate the alignment process and improve work efficiency.
7. Tips & Best Practices
💡 Best Practices
- Preparation Phase: Ensure both skeletons are in the same pose (A-pose or T-pose)
- Naming Conventions: Use standard bone naming rules (such as Unity, Unreal standards)
- Step-by-Step Approach: Perform basic alignment first, then use advanced features for precise adjustments
- Backup Files: Backup original files before starting alignment
🎯 Workflow Recommendations
- Import character and clothing models
- Ensure both skeletons have consistent poses
- Use automatic alignment features
- Check errors and make corrections
- Sync to edit mode
- Perform final head/tail alignment
- Test and fine-tune results
🔧 Advanced Tips
- Use Transparent Line Display: Enable during sculpting or editing for easy model inspection
- Error Bone Navigation: Use color marking and navigation features to quickly locate issues
- Custom Alignment: Create custom alignment relationships for bones with special naming rules
- Precision Adjustment: Adjust convergence threshold and iteration count as needed
-
$15
Full Content.
-
$75
Full Content. (Supports up to 10 seats) / 50%off
Have questions about this product?
Login to message