Scenegrade
 Impression Sunrise


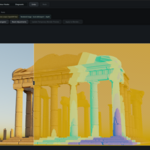
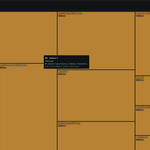
This is a condensed version of the full user guide. The complete PDF, covering every screen and control in detail, is included in your download.
SceneGrade is two pieces: a small add-on inside Blender, and a desktop application that runs alongside it. You need both — neither does anything useful alone. Installation is right below.
Blender - 4.2 or newer. Blender 4.5 LTS or newer is recommended, and is what this release is tested against.
Windows - 64-bit (x86-64).
Linux - 64-bit x86. Ubuntu 22.04+, Linux Mint 21+, Debian 12+, Fedora 36+, or comparable.
Graphics - working OpenGL drivers, as supplied by your system.
1. In Blender, open Edit › Preferences.
2. Go to the Add-ons (or Extensions) tab.
3. Choose Install from Disk and select the supplied scenegrade_addon.zip.
4. Tick the checkbox next to SceneGrade to enable it.
A SceneGrade tab now appears in the 3D viewport sidebar — press N to show it. A cut-down panel also appears in Blender's Image Editor sidebar.
Windows — unzip the package anywhere you like, then run SceneGrade.exe, the one sitting at the top of the folder. That's the one to use and the one to make a shortcut to. Nothing is installed and nothing is added to your system.
Keep the folder together. Move the whole folder, never SceneGrade.exe on its own — it needs the Application folder sitting beside it to run.
Linux — Debian package. For Debian, Ubuntu, Mint, Pop!_OS and similar. This installs SceneGrade properly, so it appears in your applications menu.
sudo apt install ./scenegrade_1.0.1_amd64.deb
Use apt install rather than dpkg -i. Both unpack the package, but only apt also pulls in the system libraries SceneGrade needs. It installs to /opt/scenegrade, with a launcher at /usr/bin/scenegrade so typing scenegrade in a terminal works from anywhere. To remove it later: sudo apt remove scenegrade.
Linux — AppImage. A single portable file. Nothing is installed. You may need to make it executable once, then run it.
chmod +x SceneGrade-1.0.1-x86_64.AppImage
./SceneGrade-1.0.1-x86_64.AppImage
You can also mark it executable through your file manager: right-click, then Properties › Permissions › Allow executing file as program. After that, double-clicking works.
1. Open your .blend file in Blender.
2. Press N in the 3D viewport and open the SceneGrade tab.
3. Click Choose SceneGrade App… and point it at the application. You only do this once.
4. Click Start Bridge.
5. Click Open SceneGrade.
6. In the app, wait a moment. It finds the bridge and scans on its own.
The panel now reads Connected and your scene appears in the app. If nothing happens, click Connect to Blender, then Scan if the scene still doesn't appear.
Most of this happens for you. Open SceneGrade starts the bridge if it isn't already running and hands the app that session's details, so it usually opens already connected. Blender then tells the app whenever the scene changes.
Several Blender windows open? The Home screen shows a project dropdown. Choose deliberately — it starts on the first project in the list and won't stop to ask which one you meant.
Choose / Change SceneGrade App - browse for the application. A tick, warning or information icon tells you whether the path is valid.
Open SceneGrade - launches the app. Only shown once a valid path is set.
Start / Stop Bridge - opens or closes the local connection. The heading reads Waiting for app until the desktop application connects, then Connected.
Copy Token - copies the session token, for connecting by hand or fault-finding.
Capture Render Result - sends the render currently visible in Blender to the app. Needed for the depth and object masking tools.
Refresh Scene - rescans materials, colours, textures and objects. Blender stays usable while it runs.
Restore Preview / Clear Preview Textures - appear only while previews are pending. They put your original images back.
The panel in Blender's Image Editor sidebar is a cut-down version with only Capture Render Result and Refresh Scene.
The top bar carries the sync status (green for In Sync, amber with the reason otherwise), the workspace switch, Undo and Redo, a live Warnings count, and Settings for Rescan, Reconnect and Home. Amber isn't always trouble — Local edits preserved just means a rescan arrived and your staged edits survived it.
Ctrl + 1 - Image Edit workspace — a photographic editor for renders, external images and Blender image textures.
Ctrl + 2 - Colour Nodes workspace — every editable colour in your materials plotted as a map you can drag.
Ctrl + 3 - Diagnostic workspace — texture and mesh weight, plus the mesh health checker.
Ctrl + 6 - Home screen.
Ctrl + F - scene search by material, node, image, path or classification. Inside Image Edit it jumps to the image-list filter instead.
F - fit the view, in Colour Nodes only.
Esc - close the Warnings panel.
Undo and Redo act on whichever workspace you're in. Image Edit and Colour Nodes keep separate histories, and they're the only two that keep one.
Warnings panel. Each warning gives a plain message and a recommended action, errors in red and warnings in amber, with buttons to jump to the item in SceneGrade or reveal it in Blender. Underneath sits a diagnostic log of connection events, bridge messages and job failures, keeping the last 100 entries. Copy All copies the whole panel — send that with any support request.
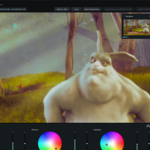
Image list on the left, canvas in the middle, adjustment inspector on the right.
Captured Render Results - sent over with Capture Render Result. These unlock the full toolset. While connected, the add-on watches for a finished render and sends it across on its own.
Scene images - the image textures inside your Blender materials. Graded and sent back, but spatial tools are locked.
External images - any file on disk, via Open Non-Blender Image. PNG, JPG, JPEG, TIF, TIFF, EXR, HDR, TGA, WEBP and BMP.
Badges above the canvas show the source precision and resolution, the output policy (the format and precision that will be written on Apply to Blender), and the workflow state — untouched, edited but unsent, previewing in Blender, or applied and awaiting a .blend save. Preview out of date means you've carried on editing since you last pushed a preview.
The canvas is shown through your scene's colour management — view transform, look, exposure and gamma from Blender's Render properties — so it matches what Blender shows you.
Zoom and pan - the wheel zooms toward the pointer, from 1× (fitted) up to 8×. Past 1×, drag with the left button to pan. Scroll back to 1× to refit.
Before / After - splits the canvas, original left and edited right, with a draggable divider. Turning it on temporarily switches off crop and any active picker.
Navigator - a floating overview window you can move, resize, collapse and zoom from 1× to 8×. Click inside it to jump the main view.
Luminance histogram - at the top of the inspector. Grey fill is your saved state, the red line your unapplied changes, and P50 shows median brightness before and after.
Reset Adjustments - clears every edit on the current image.
Every adjustment section works the same way, so learning one teaches you the rest. The small circular power dial in each section header scales that whole section's effect from 0% to 100% without touching individual sliders — double-click it to flip between off and full. It's the fastest way to audition a section. A reset icon clears just that section, and a blue section title means you've changed something inside it. Crop and Object Masking have no power dial, as there's nothing to scale.
Crop - on-canvas handles, aspect ratio (Free, Original, 1:1, 4:5, 16:9 with a Swap button), Crop Angle from −180 to +180, and an exact pixel resolution capped at the source size — it crops rather than resamples.
General Adjustments - Auto for a one-click starting point, then Exposure (−4 to +4 stops), Contrast, Highlights, Shadows, Whites and Blacks.
Levels - RGB, Red, Green or Blue, with Black Level, White Level, Midtone Gamma, Output Black and Output White. The RGB histogram draws your adjusted result over the source.
Tone Curve - separate curves for RGB, Red, Green and Blue. Double-click to add a point, double-click a point to remove it.
White Balance - presets (Original, Daylight, Cloudy, Shade, Tungsten, Fluorescent, Flash), an eyedropper you click on a neutral area, plus Colour Temperature and Tint. Moving a slider switches the preset to Custom.
Saturation / Vibrance - Vibrance lifts duller colours while leaving saturated ones alone; Saturation affects everything evenly.
Point Colour - click a colour in the image to target it, then adjust Hue Shift, Saturation and Luminance. Hue range, Saturation Range, Luminance Range and Range Softness control how wide it reaches. You can create several at once, each renameable.
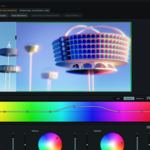
Hue Strip - a curve across the colour spectrum driving Hue, Saturation or Brightness. Quick for jobs like making all the greens less yellow.
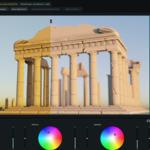
Colour Balance - Shadows, Midtones and Highlights wheels, each with hue, saturation and luminance. Best for gentle tints.
Black and White Mixer - switch to mono, then tune how bright each original colour becomes: Red, Orange, Yellow, Green, Aqua, Blue, Purple and Magenta.
Atmosphere (needs depth) - depth-aware haze, with colour, Thickness and Anisotropy.
Depth of Field (needs depth) - Pick Focus by clicking, or set Focus Distance. Then F-Number, Focal Length, Sensor Width, Max Blur Radius, Scene Unit Scale, Aperture Blades (3 to 12), Blade Rotation, Foreground Protection and Bokeh Highlight Boost. Visualize Focus paints the focal zone.
Depth Brightness (needs depth) - brighten or darken purely by distance from camera, −100 to +100.
Details - Texture, Clarity and Dehaze.
Sharpness - amount plus a Radius in pixels.
Lens Distortion - a Brown–Conrady radial model: Distortion, Edge Shape, Optical Centre X/Y and Image Scale.
Chromatic Aberration - independent Red and Blue Edge Shift, Radial Falloff and a movable Optical Centre.
Soft Glow - Amount, Glow Size, Highlight Threshold, Threshold Softness, additive or screen Blend Mode, Glow Saturation, Glow Warmth, and Anamorphic Stretch.
Vignette - Amount, on-image handles, Centre X/Y, Circularity, Rotation, Size, Feather and Highlight Protection.
Grain - Amount, Size, Roughness, Colour Grain, and separate Shadow and Highlight weighting.
Details, Sharpness and Grain work on any image. Lens Distortion, Chromatic Aberration, Soft Glow and Vignette are for captured Render Results and external images only.
1. Render your scene in Blender as normal.
2. Click Capture Render Result in the Blender panel, if the desktop application doesn't automatically capture it.
3. Select that captured image in SceneGrade.
4. Open Atmosphere or Depth of Field and pick the camera that produced the render.
5. Click Generate Shared Depth.
The depth map is shared between all three depth effects, so you only generate it once per render. If the render changes, SceneGrade discards the old map and tells you - it won't grade a new render through stale depth.
Pixel-accurate masks from real object data, with no fiddly selecting.
1. Select a captured Render Result and turn on Enable object masking.
2. Click Generate Object Map. SceneGrade fetches a cryptomatte from Blender - this does not re-render your image.
3. Click Select Objects on Image, click the objects on the picture, then Done Selecting.
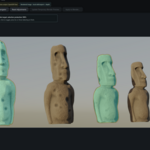
4. Use Show Selection Overlay to check your work. Teal fill with a gold edge means selected.
5. Choose where adjustments land: Outside Selected Objects by default, or Selected Objects Only.
6. Set protection strength from 0 to 100 to control how hard the mask holds the untouched area.
Because the mask comes from object data, edges stay clean even on hair, thin geometry and transparency. If the render or scene then changes, SceneGrade drops the map and switches masking off, so you're never grading through a mask that no longer fits the picture.
Update Temporary Blender Preview - pushes your edit into Blender so you can see it in the viewport. Nothing on disk changes, and it's undone automatically when the app disconnects.
Apply to Blender - the permanent route. A review sheet lists the source texture, target material and node, output path and format, precision policy, and any warnings. Nothing happens until you confirm.
Cancel Temporary Preview / Revert Applied Texture - appears once a preview or applied change exists, and puts the original back.
Applying writes a new image into a scenegrade_outputs folder next to your .blend, then points the material node at it. Your original file is never overwritten. If the .blend has never been saved it goes to your temporary folder instead, so save your project first if you want the output kept with it.
Save the .blend. An applied change only becomes permanent once you save in Blender. SceneGrade reminds you on exit.
Exporting. Tick the images you want, click Export and set the options; they lock while a run is going, so a long batch can't change halfway through. Choose the destination and a filename suffix (default _scenegrade, so exports never collide with your sources), the format and bit depth (Auto, 8-bit, 16-bit, half float or float 32), the size (Original, Long edge, Fit, or Scale percentage), and a safety mode: rename, skip or overwrite existing files. Edit Handling on Auto applies your edits to colour textures while passing technical and data textures through untouched, which is what you almost always want.
Copy Transferable Adjustments, on the right-click menu of an image row, copies the colour and tonal stack only. Paste to Selected applies it to every selected image at once — ideal for grading a set of renders to the same look. Crop, masking and depth are deliberately left behind, because they belong to one specific frame.
Nine sections switch off when a Blender material texture is selected: Crop, Object Masking, Atmosphere, Depth of Field, Depth Brightness, Lens Distortion, Chromatic Aberration, Soft Glow and Vignette. A texture is mapped onto geometry through UVs, so cropping it, or blurring it by distance, is meaningless and would break your material.
Object Masking, Depth of Field, Atmosphere and Depth Brightness need a captured Render Result specifically — only Blender can supply the distance and object data behind them, so an external image won't do.
Takes every editable colour in your materials — solid colour sockets and colour ramp stops — and plots them as a single map, grouped by material. Plot in Hue/Saturation or Brightness/Saturation. Image textures aren't plotted here; they belong to Image Edit.
Click and Drag - drag a single colour to a new position to change it.
Group Drag - drag any colour and every colour in that material moves with it, keeping their relationships intact. The group stops as soon as the first colour reaches the edge, rather than bunching up.
Double-click a colour - opens an inline slider for the third value the map can't show: brightness in Hue/Saturation mode, hue in Brightness/Saturation mode.
Moving around - wheel to zoom, middle or right drag to pan, F to fit. Hover any colour for its name, material, type and role, HSV values, alpha and warning count.
Materials panel - every material with its object and colour counts, amber if library-linked. Click one to zoom to its colours; others fade back rather than hide.
History panel - every edit as a named, timestamped step. Click any step to jump the scene back to that state. Only available when live synchronisation is off.
Live or staged. With Apply Colour Changes Live on, the map updates as you drag and Blender is updated the moment you let go. With it off, edits are staged locally and Apply Colour Edits in the top bar sends them all at once.
Turning live sync on sends what you staged. Flicking the switch on doesn't only change what happens next — it immediately sends every edit staged while it was off. If you've been experimenting with it off, decide whether you want those edits first.
Protected colours. Colours that are library-linked, animated or driven are detected during the scan and marked inspect only. You can hover and read their values, but SceneGrade won't let you drag them. This stops the app silently breaking a rig, an animation or a linked asset.
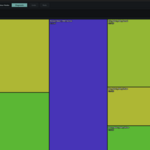
Pick a view from the dropdown at the top. In the three treemaps each block is one item and bigger means costlier; hover for the figure, group and detail.
Bitmap Disk Size Area - which texture files are eating the most disk space.
Bitmap Pixel Count Area - which textures carry the most pixels. This often exposes a 4K texture doing a 512 job.
Object Face Count Area - which objects hold the most geometry.
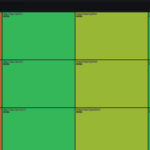
Mesh Checker is a scene-wide mesh health report, one row per object with its face count and one column per check. Cells are colour coded: teal for pass, red for fail, amber for an error during the check, grey for not run or not applicable. Hover a cell for the detail. Export CSV saves the table exactly as configured. It always scans the whole scene, hidden objects included, and needs a live connection and a current add-on.
Manifold - whether the object is a closed, well-joined surface.
Inconsistent Normals - whether neighbouring faces point the same way, so the surface doesn't shade or export inside-out.
Overlap - faces sitting on top of each other, which cause flickering, baking problems and messy exports.
Internal - faces hidden inside the object. Usually invisible, but they confuse booleans, printing and simulation.
Islands - how many separate mesh pieces are inside one object.
Scale - object scale that hasn't been applied, which makes modifiers and exports behave unexpectedly.
Degenerate - zero-area faces, zero-length edges, or faces with repeated vertices.
Dup Verts - vertices in exactly the same place, usually accidental unwelded points.
Bitmap Texture - whether any material slot on the object uses a bitmap image texture.
In Blender under Edit › Preferences › Add-ons › SceneGrade. The defaults are sensible, so you can usually ignore all of this.
Application location - where the application lives, so Blender can launch it. SceneGrade.exe on Windows; /usr/bin/scenegrade or the .AppImage file itself on Linux.
Port - leave at 0 to pick a free local port automatically.
Auto-sync Scene Changes - the app is told when your scene changes. On by default.
Sync Blender Selection to App - off by default.
Sync App Selection to Blender - on by default.
Temporary Texture Output - where working files are written. Blank uses a scenegrade_bridge folder in your system temporary directory.
Preserve Generated UUID Metadata - keeps stable identifiers so the same material is recognised next session. On by default.
Include Unused Materials / Include Hidden Objects - widen what the scan picks up. Both off by default. Mesh Checker ignores the hidden-objects setting and always scans everything.
Local only - the bridge binds to local loopback. No network traffic leaves your machine.
Token protected - every command needs a random session token, generated when you start the bridge.
No code execution - no arbitrary Python or shell commands, only the specific things SceneGrade needs.
Originals are never overwritten - applying or exporting always writes a new file.
Previews are transient - they belong to the connected session and are put back when it disconnects. A temporary preview is never written into your .blend; on save, the add-on swaps the originals back, lets Blender write the file, then reapplies the preview.
Protected values stay protected - library-linked, animated and driven values are locked during the scan.
Blender-safe threading - Blender data is read and written on Blender's own main thread, so scanning and editing won't destabilise your session.
Nothing is silent - applying an image edit, and every export, shows you exactly what will be written first. Colour-node edits go straight to Blender without a review sheet, but they only change values inside the .blend, stay undoable in the app, and aren't permanent until you save.
The app won't connect - check Start Bridge is running in Blender, then click Connect to Blender again, or use Retry Connection in the Warnings panel.
It connected to the wrong project - with several Blender windows open, use the project dropdown on the Home screen before connecting.
Depth or masking is greyed out - you need a captured Render Result; an external image won't do. Render in Blender, then click Capture Render Result.
A crop, mask, lens or depth effect is greyed out - you have a Blender material texture selected. See One important limit above.
Mesh Checker says it needs an update - the Blender add-on is older than the desktop app. Reinstall the supplied add-on ZIP.
The scene looks out of date - click Refresh Scene in Blender, or Settings › Rescan in the app. The sync indicator turns amber when they disagree.
A preview is stuck in Blender - use Restore Preview, then Clear Preview Textures in the Blender panel.
A colour won't move - it's library-linked, animated or driven, so it's protected. Hover it to see its state.
My applied change vanished - applied changes only persist once you save the .blend in Blender.
My object mask reset itself - the render or the scene changed, so the object map no longer matched the picture. Generate it again.
Editing feels slow - close the Navigator when you aren't using it, and leave Before / After off while you work.
The AppImage won't start - run it from a terminal to see the reason. On a minimal system you may need FUSE: sudo apt install libfuse2. Alternatively run it without FUSE, with ./SceneGrade-1.0.1-x86_64.AppImage --appimage-extract-and-run
The AppImage won't run when double-clicked - it isn't marked executable yet. See Step 2 above.
The package installed but won't start - it was probably installed with dpkg -i, which doesn't fetch dependencies. Run sudo apt --fix-broken install.
Blender can't launch the app - check Application location in the add-on preferences. On Linux it should be /usr/bin/scenegrade, or the full path to the .AppImage file.
Still stuck? Open the Warnings panel in the app, click Copy All, and include that with your message. It carries the connection events, bridge messages and job failures needed to diagnose most problems.
Have questions about this product?
Login to message
| Blender Extension Compatible | Yes |
| Dev Fund Contributor | |
| Published | 2 months ago |
| Blender Version | 4.5 - 5.2 |
| Extension Type | Add-on |
| Render Engine Used | Cycles, Eevee |
| License | GPL |
Discover more products like this
Texture editing colour correction art direction lookdev color management material workflow shader tools color grading texture-workflow Material Editing scene colors color correction