Sculptpilot
 GenDex Studios





SCULPTPILOT DOCUMENTATION
OVERVIEW
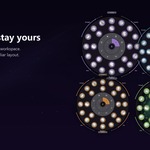
SculptPilot is a radial viewport HUD for Blender sculpting and paint workflows. It keeps brush selection, sculpt tools, page switching, and live controls close to your cursor, so you can work without repeatedly moving through Blender menus and shelves.
SculptPilot includes:
- A multi-page Sculpt Mode wheel with brush thumbnails and sculpt tool shortcuts.
- Live Size, Strength, Flow, and Opacity controls.
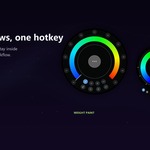
- A dedicated Weight Paint wheel.
- A dedicated Vertex Paint and Image Paint colour wheel.
- Theme, style, background, thumbnail, hotkey, and anti-aliasing settings.
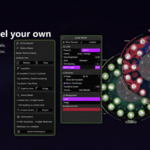
- Workspace Mode for arranging quick-access controls.
- Optional local Ollama features for usage-based brush organisation and mesh optimization suggestions.
COMPATIBILITY
- Minimum Blender version: Blender 4.3.
- Verified in Blender 5.0.
- SculptPilot uses Blender's modern asset-based brush system.
- The core add-on works offline.
- Optional AI features require a local Ollama installation and are disabled by default.
INSTALLATION
1. Download the SculptPilot ZIP from your Superhive purchase.
2. Open Blender.
3. Go to Edit > Preferences.
4. Open Get Extensions and use the menu in the top-right corner to choose Install from Disk.
5. Select the downloaded SculptPilot ZIP file. Do not extract it first unless Blender specifically asks you to.
6. Enable SculptPilot if Blender does not enable it automatically.
7. Close Preferences.
After installation, enter a supported paint mode and use the assigned hotkey. The default hotkey is D.
QUICK START: SCULPT MODE
1. Select a mesh and enter Sculpt Mode.
2. Move the cursor over the 3D Viewport.
3. Press D to open SculptPilot.
4. Move onto a brush or tool slot and release to activate it.
5. Quickly tap D to keep the wheel open, then click items as needed.
6. Press Esc or right-click to close without selecting anything.
The wheel is designed to stay in the viewport while you work, rather than replacing the entire Blender interface.
SCULPT WHEEL CONTROLS
Brush rings
- The outer and inner circular slots contain sculpt brushes.
- Brush thumbnails show the actual Blender brush preview where available.
- Hover a slot to see its label.
- Select a brush by releasing over it or by using click mode.
Tool wedges
- The tool ring provides shortcuts for common sculpt actions.
- Available tools include mask actions, face sets, mesh filters, remesh controls, Dyntopo, symmetry, overlays, gizmos, cloth tools, trim tools, and related sculpt actions.
- Tool availability can depend on the selected object, current Blender mode, and Blender version.
Page switching
- Hover the small page wedges around the centre to switch wheel pages.
- Use the mouse wheel to cycle through pages.
- Use the Lock Page button to keep the current page active until you unlock it.
- Brush library pages are organised for different sculpting needs, including general brushes, cloth brushes, and specialist tools.
Live arc controls
SculptPilot provides four live controls around the outside of the wheel:
- Size: adjusts active brush size.
- Strength: adjusts active brush strength.
- Flow: adjusts brush flow where supported.
- Opacity: adjusts the active brush opacity/strength value where supported.
Click and drag along an arc to change its value. The current value is displayed while hovering the control.
AUTO PILOT PAGE AND USAGE TRACKING
SculptPilot tracks the brushes and supported tools you use. The AutoPilot / AI Usage page can place your frequently used brushes at the front of the wheel, making your everyday layout faster to reach.
Usage tracking works locally and does not require AI.
To view or reset usage data:
1. Go to Edit > Preferences > Add-ons / Extensions > SculptPilot.
2. Open the AI Usage Tracker section.
3. Use Show Usage to view tracked actions.
4. Use Reset to clear the tracked usage history.
OPTIONAL LOCAL OLLAMA AI
SculptPilot can optionally use Ollama, running locally on your computer, to organise the usage-based page and provide mesh optimization suggestions.
AI is optional. The add-on remains fully usable without it.
To enable local Ollama:
1. Install Ollama from https://ollama.com.
2. Install or pull a local model, such as llama3.2.
3. Open SculptPilot preferences.
4. Enable AI (Ollama).
5. Set the local model name if needed.
6. Leave the default local address as http://localhost:11434 unless your Ollama setup uses another address.
7. Use Organize with Ollama to refresh the usage-based layout.
Privacy note:
- SculptPilot's AI connection is intended for a local Ollama server.
- Core SculptPilot features do not send your work to an online AI service.
- AI features can be turned off at any time.
AI MESH OPTIMIZATION
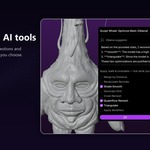
When local AI is enabled, SculptPilot can inspect the active mesh statistics and suggest from a fixed set of Blender optimization operations.
The suggestion dialog lets you choose exactly what to apply. Available operations may include:
- Merge by Distance
- Recalculate Normals
- Shade Smooth
- Decimate 50 percent
- Voxel Remesh
- Quadriflow Remesh
- Triangulate
- Apply Modifiers
The optimizer does not run arbitrary AI-generated Blender code. It only offers known Blender operations, and the selected changes can be undone with Blender's normal Undo command.
WORKSPACE MODE
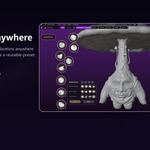
Workspace Mode is a flexible quick-access layout for keeping frequently used brushes and tools available in a custom arrangement.
To use Workspace Mode:
1. Open SculptPilot in Sculpt Mode.
2. Open the AutoPilot / first wheel page.
3. Select Workspace.
4. Use the Workspace panel to access recent brushes, recent tools, cloth items, and custom quick-access slots.
5. Select Return to go back to the normal wheel.
To edit the layout:
1. Enter Workspace Mode.
2. Click Edit.
3. Drag brush buttons to move them.
4. Hover an item and use the mouse wheel to scale it.
5. Click Done when finished.
6. Use Reset if you want to restore that Workspace page's default layout.
Workspace layouts can be saved as named presets in SculptPilot preferences.
WEIGHT PAINT WHEEL
SculptPilot provides a dedicated wheel in Weight Paint Mode.
1. Select a mesh with vertex groups.
2. Enter Weight Paint Mode.
3. Press the SculptPilot hotkey, D by default.
4. Drag around the coloured weight ramp to set the active brush weight from 0.0 to 1.0.
5. Select Paint, Blur, Average, or Smear from the lower controls.
The coloured ramp gives a clear visual reference for low-to-high weights while keeping core Weight Paint tools close to the cursor.
VERTEX PAINT AND IMAGE PAINT WHEEL
SculptPilot also provides a dedicated colour wheel in Vertex Paint and Image Paint modes.
1. Enter Vertex Paint or Image Paint Mode.
2. Press the SculptPilot hotkey, D by default.
3. Drag around the hue ring to choose a hue.
4. Drag inside the central colour field to set saturation and brightness.
5. Select a paint brush from the brush controls below the wheel.
This lets you choose colours and common paint brushes without leaving the viewport.
CUSTOMIZATION
Open Edit > Preferences > Add-ons / Extensions > SculptPilot to adjust the add-on.
Available settings include:
- Wheel Scale.
- Open and hover animations.
- Brush thumbnail visibility.
- Thumbnail zoom.
- New Blender or older thumbnail style.
- AutoPilot page brush density.
- Slot number visibility.
- Theme colour: Green, Blue, Orange, Purple, or Slate.
- Gray brightness.
- Visual style: Standard, Liquid Glass, or Constellation.
- Constellation line width.
- Anti-Aliasing quality.
- Solid colour or image wheel backdrop.
- Backdrop opacity, brightness, and tint.
- Custom hotkey and modifier keys.
- Workspace quick-access slots and saved presets.
- Optional local Ollama controls.
BACKGROUND IMAGES
SculptPilot can use either a solid disc colour or a backdrop image inside the wheel.
To use an image backdrop:
1. Open SculptPilot preferences.
2. Find the Background section.
3. Select Image.
4. Choose a built-in preset or select your own image.
5. Adjust opacity, brightness, and tint to keep controls readable.
HOTKEYS
The default hotkey is D.
To change it:
1. Open SculptPilot preferences.
2. Open the Keybinding section.
3. Choose Press or Hold activation.
4. Click Press a key to rebind and press the desired key or mouse button.
5. Optionally add Ctrl, Shift, Alt, or OS modifiers.
6. Use the reset button to restore the default keybinding.
The same hotkey is registered for Sculpt Mode, Weight Paint, Vertex Paint, and Image Paint. Each mode opens its appropriate SculptPilot wheel.
TROUBLESHOOTING
The hotkey does nothing
- Make sure the mouse is over a 3D Viewport.
- Confirm SculptPilot is installed and enabled.
- Confirm you are in Sculpt Mode, Weight Paint, Vertex Paint, or Image Paint.
- Check whether the hotkey was changed in SculptPilot preferences.
- Restart Blender after updating the add-on if Blender is still using an older installed copy.
A brush does not activate
- Confirm you are using Blender 4.3 or newer.
- Modern Blender brushes are asset-based, and available brush names can vary between Blender releases.
- In SculptPilot preferences, use Discover Brushes and check Blender's System Console for your local brush names.
- Make sure Blender's Essentials assets are available.
Ollama is not reachable
- Confirm Ollama is installed and running locally.
- Confirm the URL in SculptPilot preferences is correct. The default is http://localhost:11434.
- Confirm the selected model is installed in Ollama.
- Disable AI if you do not want to use local AI features. SculptPilot's core features will continue to work normally.
The wheel looks too large or too small
- Adjust Wheel Scale in SculptPilot preferences.
The edges look less smooth
- Increase Anti-Aliasing in SculptPilot preferences.
- Higher settings use more GPU resources. Settings 2 or 3 are a good balance for most systems.
SUPPORT
When requesting support, please include:
- Your Blender version.
- Your operating system.
- Whether the issue occurs in Sculpt Mode, Weight Paint, Vertex Paint, or Image Paint.
- A screenshot or short video of the issue where possible.
- Any error shown in Blender's status bar or System Console.
OPTIONAL LOCAL OLLAMA SETUP
SculptPilot does not require AI. Brush usage tracking and the core sculpt, paint, Workspace, and customization features work without Ollama.
Installing Ollama is recommended if you want the enhanced AutoPilot Page organization and local mesh optimization suggestions.
Important:
- SculptPilot tracks brush and tool use locally whether Ollama is installed or not.
- Ollama does not make the tracking itself more accurate.
- Ollama uses the existing local usage history to provide an additional organization pass, which can improve the relevance of the AutoPilot brush layout.
- No cloud AI account, API key, or subscription is required.
Recommended model:
- Ollama: latest Windows version.
- Model: llama3.2:latest.
- This is SculptPilot's default model setting and currently resolves to the 3B Llama 3.2 model.
Installation:
1. Download and install Ollama for Windows from https://ollama.com/download/windows.
2. Open PowerShell after installation.
3. Run:
ollama run llama3.2
4. Wait for the model download to finish, then type /bye to exit the chat.
5. Open Blender.
6. Go to Edit > Preferences > Add-ons / Extensions > SculptPilot.
7. Enable AI (Ollama).
8. Leave Model as llama3.2:latest.
9. Leave URL as http://localhost:11434 unless you use a custom local Ollama setup.
10. Use Organize with Ollama after SculptPilot has recorded some brush usage.
The llama3.2 model download is about 2 GB for the default 3B model. A smaller model such as llama3.2:1b can be used on lower-spec hardware, but the default 3B model is the recommended SculptPilot option.
Privacy:
SculptPilot sends only the relevant local usage counts or mesh summary to your local Ollama server. It does not upload your sculpt, mesh geometry, image files, or Blender scene to a cloud AI service.
 Included
Includes 12 months of
- Support from GenDex Studios
- Product updates
Extend this product’s Support Period +12 months: 25% of product price
Have questions before purchasing?
Login to message
Discover more products like this
mesh optimization vertex paint Workflow weight paint paint tools brush management Brushes sculpting blender addon customization sculptwheel local ai