Sdf.R | Gpu-Powered Next-Generation Sdf Add-On
 Hugu's Works


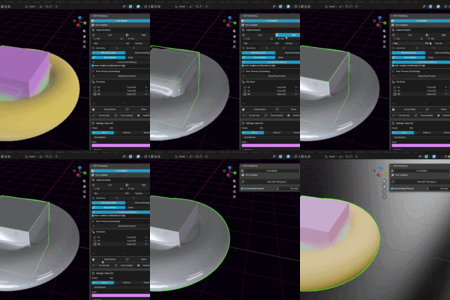
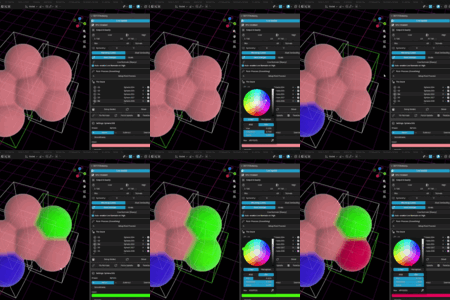
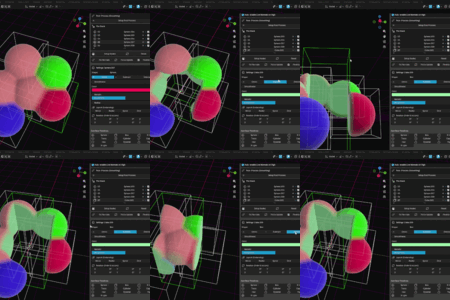
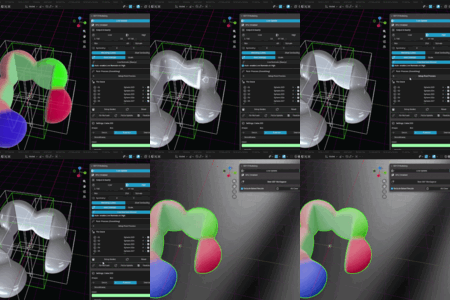
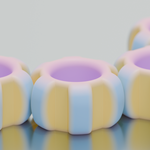
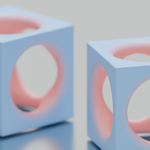
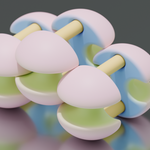
SDF-R (Rust-GPU-SDF) Documentation & User Guide
For V16.2.2
Welcome to the official documentation for SDF-R (Rust-GPU-SDF), a next-generation Signed Distance Field (SDF) modeling engine built using Rust and GPU (wgpu/WGSL) acceleration for Blender.
SDF-R is designed for a direct, non-destructive modeling workflow: add primitive SDF shapes, blend or cut them with boolean operations, preview the result in real time, then generate or bake a standard Blender mesh when you are ready.
What's New in V16.2.2
- The ghost preview drew Mirror Blend backwards, and now it does not. On V16.2.1, raising Mirror Blend made the shape in the preview thinner while the generated mesh got thicker, and past roughly twice the sum of Offset and the shape's own size the shape vanished from the preview altogether. The most likely way to meet this was to raise Mirror Blend looking for a rounder seam, watch the preview shrink or empty out, and conclude the feature was broken. It was the preview that was wrong. Meshing never used the preview's code, so every mesh generated on V16.2.1 was already correct, and so is every file saved with it.
- The preview no longer creases. The rounding is now applied so that both the mirror plane and the outer edge of the rounding stay smooth, so the shading runs unbroken the way the generated mesh does.
- The panel warns when Blend goes past twice the Offset. Beyond that point the whole shape swells rather than just the seam — not a defect, but what joining two halves smoothly does once the blend radius reaches across the gap. If you want a rounder seam without a heavier shape, raise Offset rather than Blend. Mirror Blend stops at 2.0, so at an Offset of 1.0 or more this cannot be reached and the warning never appears.
- Nothing about your meshes or your files changes. At Mirror Blend 0 the preview takes exactly the path it always did. If you have never touched Mirror Blend, this release changes nothing you can see.
- No slow first start. The meshing engine is untouched in this release, so there is no shader cache rebuild to sit through.
What's New in V16.2.1
- A scene can hold several SDF trees. Each tree has its own parts collection, its own settings and its own result mesh, so a model's parts are separate objects from the moment they are built. The panel opens with a Tree row: the dropdown picks the tree you are editing, + adds one, and clicking a part in the viewport switches to that part's tree. Splitting a model across trees is also faster — a 216-sphere model at resolution 128 took 5053 ms as one tree and 1215 ms across eight. See section 3.
- Tree Reference: one tree can read another's shape, in Blend or Subtract mode. Subtract is what you want for a fit — carve the lid's cavity from the jar so the two meet exactly. Blend is exact; Subtract is exact as long as the referenced tree is built from Union alone, and the panel says so when it is not.
- Mirror Blend rounds off the seam that per-primitive Mirror has always left down the middle. Mirror folds space, so the two halves met at a hard minimum that primitive Smoothness could not reach. On a mirrored sphere the crease measured 84°; Mirror Blend removes it entirely, matching what you would get by building two shapes and joining them with a smooth union. It defaults to 0, so existing files are unchanged.
- The ghost preview works again above sixteen parts. This was a regression in V16.2.0: Mirror Blend added one value per part to the preview texture, but the line that works out how many rows to allocate kept dividing by the old row size, so from the seventeenth part the texture no longer matched its data and Blender refused to build it. The count is of parts after layout expansion, so a Collection Divider set to a grid could reach it with few parts placed. Meshing runs on a separate path and was never affected — no file was damaged, and the preview returns as soon as you update.
-
All Clear no longer leaves a hidden result object behind, and no longer deletes objects of your own whose names merely contain
SDF_Result_orSDF_Backup. - A Dual Contouring error saved into a .blend no longer reappears on a machine where DC works. Like the GPU-ready flag, it is now checked against the engine's real state when a file loads.
- Undo after adding a part returns to a clean state, and a 3D view opened in a second window repaints when a mesh finishes.
- Show Result Mesh now clears the mesh when switched off, instead of only hiding the result.
- The panel no longer unlocks while shaders are still compiling. The GPU-ready flag was saved into your .blend, so a file saved after initialisation looked ready on the next launch before the engine actually was.
- Existing files are unaffected. A file with one tree keeps its names, its layout and its output.
What's New in V16.2.0
- Layer Boundary now produces the hard edge people turn it on for. The blend used where a layer met the rest of the scene was read from whichever primitive happened to come first in the group. That value does nothing inside the group, so turning the dial moved only the outer seam — and at the default of 0.2 the group simply fused into the scene, which is the opposite of what the setting is for. The divider now carries its own Layer Blend, defaulting to 0.0: a hard boundary. Primitive Smoothness, and the way a new primitive inherits it, are unchanged.
- A layer now covers the group above its divider. Group layout and parenting always acted on the rows above a divider, while the layer acted on the rows below it — so one divider's settings applied to two different groups. They now agree. A layer also no longer leaks past the next divider.
- Layout on a layer boundary no longer disappears: a divider carrying Radial, Grid or any other group layout threw the layout away entirely when Layer Boundary was switched on. The two can now be used together on one divider.
- Move to SDF: it chose its destination from the first output object it happened to find, sending objects to an unpredictable collection in scenes with more than one SDF output; it could leave the old link behind for an object that belonged to several collections; and it fell back to a sphere in silence whenever the object's name matched none of the shapes it knows. It now uses the active output, relinks cleanly, and tells you which objects it had to guess at.
- If you have files that use Layer Boundary, they may look different. Both of the first two changes alter existing scenes. The new hard default is the behaviour the feature was always meant to have, so the fix is usually to leave it — but Layer Blend is there if you want the old softness back.
What's New in V16.1.3
- Global Symmetry dropped negative-side primitives — fixed: With Symmetry X / Y / Z enabled in Mesh Settings, the Ghost Preview showed the mirrored result correctly, but generating a mesh dropped any primitive whose centre sat on the negative side of that plane — or quietly shrank one that straddled it. Both Marching Cubes and Dual Contouring were affected. Two separate faults caused it: the bounding box the generator searches was clamped to the positive half of each symmetry axis (0 to +max instead of −max to +max), so anything on the negative side was discarded before meshing began; and the two meshing shaders did not fold primitive centres onto the mirrored side the way the preview shader does, so a primitive placed on the negative side was evaluated at the wrong position.
- If you hit this with Booleans, it was the same bug: with a Subtract or Intersect shape on the negative side, the base solid still meshed perfectly and only the cut disappeared — so the preview showed the cut and the final mesh did not. Measured with a Subtract sphere cutting a box under Symmetry X, a cut at X = −2 produced exactly the uncut box (77,748 verts) in V16.1.2 and produces the correct cut result (109,503 verts, identical to placing it at X = +2) in V16.1.3.
- Were you affected? Only if a primitive's centre sat on the negative side of an enabled symmetry plane. Shapes on the positive side, or exactly on the plane, meshed correctly. Note that a matching shape on the positive side could make the result look entirely correct, so the problem could stay hidden in exactly the symmetric scenes Symmetry is used for. Per-primitive Mirror in the Layout section was never affected, and meshes generated with Symmetry off are identical to V16.1.2.
- Verified on Blender 5.1: running the old and new engines side by side, a primitive at X = −2.0 with Symmetry X produced an empty mesh before and a correct −3.0 to +3.0 mesh now, under Marching Cubes and Dual Contouring alike. All three axes together produce a full eight-way symmetric mesh.
- Clicking a layer in The Stack now selects it, wherever you click the row: previously only the layer's name selected the object, so clicking elsewhere in the row moved the highlight while the viewport selection stayed put. Selecting objects in the viewport still drives the panel the other way, and a multi-selection made in the viewport is preserved rather than collapsed to a single object.
- Internal: one loader for all platforms. The Windows, macOS and Linux builds now load the native engine through the same code path and ship byte-for-byte identical Python. No visible change — but the macOS and Linux builds now run exactly the code tested on Windows, rather than a hand-adjusted variant.
What's New in V16.1.2
- macOS crash on adding a primitive — fixed: On some macOS setups Blender crashed the moment a primitive was added. While waiting for the mesh calculation, SDF.R ran a timer that asked Blender for the scene's dependency graph — a request that makes Blender re-evaluate the whole scene if it decides one is due. From a timer that happens at a moment Blender never scheduled, and the evaluator can read past the end of its own object list. The timer no longer forces an evaluation. The fault was in SDF.R, not in any other add-on: with Factory Settings the crash did not appear, which made it look like a conflict, but other add-ons only widened the window.
- Safety limit on the mesh timer: If the dependency graph stays unavailable, the timer gives up on the queued update after about two seconds instead of polling indefinitely. Normal waiting — while you drag an object, or while the engine is still calculating — is unaffected.
- Mesh output is unchanged: V16.1.2 changes neither mesh generation nor the preview. The geometry SDF.R produces is identical to V16.1.1.
What's New in V16.1.1
- Smoother viewport while navigating: The Ghost Preview now renders at a reduced resolution while the camera is moving or an object is being transformed, then snaps back to full resolution the instant you stop. Because this scales down pixel count, it helps regardless of how complex the scene is.
- Faster shading normals during interaction: Surface normals use a cheaper 3-tap estimate while you are moving, halving that part of the cost. Full quality returns as soon as you stop.
- Blender 5.2 support for the Post-Process panel: On Blender 5.2 the Post-Process (Smoothing) section appeared empty. Blender 5.2 changed how Geometry Nodes modifier inputs are stored, and SDF.R now reads them either way, so one build works on both 5.1 and 5.2. This affected every earlier version of SDF.R on Blender 5.2 as well.
- Ghost Preview now works correctly with split viewports: With two or more 3D Viewports open, the preview could fail to appear once the camera came to rest, and stayed locked in its reduced-quality state. Motion is now detected per viewport instead of through a single shared value.
- Reduced-resolution buffers are reused across viewports: With split viewports of differing sizes the drawing buffer was recreated every frame, cancelling out the speed-up above. Buffers are now kept per size.
- Mesh data safety check: Vertex indices coming back from the engine are range-checked before being handed to Blender. Out-of-range data is now rejected with a message in the system console instead of being written into the mesh, where it could corrupt memory and crash Blender later. Valid data is unaffected.
-
Collection cleanup when adding a primitive: An object belonging to three or more collections could be left linked to some of them after being moved into
SDF_Collection. - Mesh output is unchanged: V16.1.1 only affects how the preview is drawn. The geometry SDF.R generates is identical to V16.1.0.
What's New in V16.1.0
- Curve Sync — use native Blender Curves as SDF geometry: Any Blender Curve object can now drive an SDF pipe that blends with the rest of your stack. Add as many curves as you like, each with its own Pipe Radius, boolean Operation, Smoothness, and material values.
- Two ways to attach a curve: Move the curve into the SDF Collection to register it directly, or add a Curve Ref proxy that points at a curve living anywhere else in your scene, leaving the original curve untouched and reusable.
- Edit the referenced curve in one click: The Curve Sync panel has an Edit button that selects the target curve and enters Edit Mode, so you can reshape the path without hunting through the Outliner.
- Bezier Curve primitive: A new 3D quadratic Bezier primitive with independent Start and End radius, for tapered horns, claws, tentacles, and swept accents that are defined entirely by numeric control points.
- Transmission & IOR in the Material section: Add glass-like transmission to the generated SDF material, with a paired IOR control.
- Lightweight Curve Sync preview: Curve Sync draws a fast guide line in the viewport instead of a full raymarched pipe, so adding many curves does not slow the Ghost Preview down. Guide thickness is adjustable, and the exact result is always shown in the generated mesh.
- Instancing accuracy fix: Fixed missing geometry that could appear when Radial or Spiral layouts were combined with Individual/Step Rotation, and when the Radial Axis was set to X or Y. This affects any elongated or asymmetric primitive, not just the new curve shapes.
1. Quick Start & Installation
System Requirements
Before installing, please ensure your system matches the requirements:
- Supported OS: Windows 10/11 (64-bit), macOS (Apple Silicon) and Linux (x86-64). All three are built from the same source in every release — see Platform support below.
- Platform build architectures: The macOS build is compiled for Apple Silicon (arm64) and does not run on Intel Macs. The Linux build is compiled for x86-64.
- GPU: A dedicated graphics card (NVIDIA / AMD) supporting DirectX 12 or Vulkan is highly recommended. Integrated GPUs such as Intel Iris Xe are supported with automated memory optimization, but may have lower performance at very high resolutions.
- Blender Version: Blender 3.6 LTS, 4.x, or 5.x.
Installation Steps
- Download the addon zip file for your OS. Windows users should use the standard package,
SDF_R_16_2_2.zip. On macOS or Linux, use the matching platform zip instead:SDF_R_16_2_2_Darwin.ziporSDF_R_16_2_2_Linux.zip. - In Blender, go to Edit > Preferences > Add-ons.
- Click Install... and select the downloaded zip file.
- Check the box to enable SDF-R (Rust-GPU-SDF).
- Save your preferences.
Platform support
SDF.R ships for Windows, macOS (Apple Silicon) and Linux (x86-64). All three are built from the same source, by the same automated pipeline, in every release. They are not side projects and they are not afterthoughts.
I want to be straightforward about one thing: I develop on Windows, and I do not own a Mac or a Linux machine. I cannot sit down and reproduce a problem on those platforms myself. What I can do is read a crash report and fix what it points to — and that works. The macOS crash fixed in V16.1.2 was found entirely from one user's crash log, and the cause turned out to be my own code, not their environment.
So these platforms improve exactly as fast as people tell me things.
If something breaks, the fastest route to a fix is:
- Launch Blender from Terminal — on macOS,
/Applications/Blender.app/Contents/MacOS/Blender— reproduce the problem, and copy whatever the Terminal printed. - Send
blender.crash.txtfrom your temporary folder. On macOS,open $TMPDIRin Terminal opens it. That file contains the add-on's own line numbers, which is usually all I need.
That is exactly what solved the crash fixed in V16.1.2.
If you are updating from a previous version of SDF-R, or if you have recently changed your GPU or updated your graphics driver, please clear the shader cache before launching Blender with the new version installed. Old cache data can occasionally be incompatible with a new build or a different GPU/driver, which may cause the initialization panel to appear stuck on "Initializing..." indefinitely.
How to clear the cache:
- Close Blender completely.
- Delete the following file. It will be safely rebuilt automatically on next startup:
%APPDATA%\Blender Foundation\Blender\<your version>\datafiles\rust_gpu_sdf\shader_cache.bin - Restart Blender and enable SDF-R. The first startup after clearing the cache will take the full warm-up time again.
V16.1.3 note: This is no longer a required step. SDF-R now detects a failed start, clears the cache itself and retries automatically. Clearing by hand remains harmless if you prefer to — it simply costs one slower startup.
When you first toggle Live Update in the SDF-R panel, you may experience a compilation delay of about 15 to 45 seconds on a discrete GPU. On integrated graphics it can take several minutes — an Intel Iris Xe measured 194 seconds. This is normal and happens once.
-
What is happening? The engine is compiling the high-performance GPU shaders (WGSL) and running a mandatory driver warm-up to optimize the rendering pipeline. The console prints
Compiling MC Pipeline...while this runs, andGPU Engine Ready!when it finishes — if you are unsure whether it has hung, look there. - Do not panic: Blender might seem temporarily unresponsive during this period. Do not close Blender.
- Disk caching: This optimization is cached to your local disk. Subsequent starts take a second or two.
- After updating SDF-R: if the release changed the GPU shader code, the cached pipeline no longer matches and the full wait happens once more. The same applies after clearing the cache by hand.
- Panel not updating? On rare occasions the sidebar panel does not visually refresh once warm-up finishes. Clicking another sidebar tab and switching back to the SDF-R tab will force it to refresh.
2. Interface Overview
Once enabled, you will find the SDF-R tab in the Sidebar of the 3D Viewport. Press N to open the sidebar.
The main panel is organized into these areas:
- Tree: Picks which SDF tree you are editing, adds a new one, and shows that tree's parts collection. See section 3.
- Engine and Output controls: Live Update, GPU status, resolution, domain, preview quality, Curve Sync guide width, algorithm selection, Weld, and Live Normals.
- Post-Process: Optional Geometry Nodes smoothing/remesh setup for the generated output mesh.
- The Stack: Manage primitive order, collection dividers, Curve Sync items, solo mode, visibility, grouping, and layer boundaries.
- Material: Set up shader nodes, reset material attributes, and apply color / metallic / roughness / transmission globally.
- Finalize: Fix normals, force a mesh update, create a snapshot mesh, or finalize the live SDF workspace into a baked mesh.
- Primitive Settings: Shape type, boolean operation, smoothness, edge profile, noise, color, material values, Math Field controls, layout instancing, and deform stack.
- Curve Sync Settings: Appears when a synced Curve or a Curve Ref proxy is selected. Pipe Radius, Subdiv Samples, Operation, Smoothness, Color, Metallic, Roughness, and the Edit button.
- Tree Reference: Appears when a Tree Reference empty is selected, or offers to add one when the scene holds more than one tree. Target tree, Mode, Smoothness and blend Profile.
3. Working with SDF Trees
An SDF tree is one parts collection plus the result mesh it produces. A scene can hold as many as you like, and each tree is independent: its own parts, its own resolution and domain, its own output object.
This is how you get a model's parts as separate objects. Shapes in the same tree always form one connected solid where they overlap — Layer Boundary stops them blending, but the merge is still a Union. Shapes in different trees never meet at all.
The Tree row
The panel opens with a Tree row:
- The dropdown picks which tree you are editing. Everything below — Parts, The Stack, Output & Quality — follows it.
- + adds a new tree without disturbing the one you have.
- Parts: shows which collection the current tree's shapes live in.
You can also click a part in the viewport; the panel switches to whichever tree that part belongs to.
The first tree keeps the names it has always used (SDF_Collection, SDF_Result). Trees added after it are numbered. Finalize applies to the active tree only — baking one leaves the others live and editable, and Live Update stays on until the last one is finalized.
Tree Reference
A tree can read another tree's shape. Select a part, then Add Tree Reference: an empty appears in the stack. Point it at another tree and choose a mode.
| Mode | Result |
|---|---|
| Blend | The referenced tree joins this one as a single merged group |
| Subtract | The referenced tree is carved out of this one |
Subtract is the one to reach for when two parts must fit — carve the lid's cavity from the jar and the two meet exactly. Moving the empty offsets the reference; leave it where it was created and the reference sits exactly on the tree it points at. Editing the referenced tree updates this one.
Blend is exact. Subtract is exact as long as the referenced tree is built from Union alone. If it uses Subtract or Intersect internally, the carve is approximate in those places, and the panel shows a note when that is the case. References go one level deep — a reference inside a referenced tree is not followed.
Performance
Splitting a model across trees is faster, not slower: each request carries fewer primitives, and sparse block detection has less to search. A 216-sphere model at resolution 128 took 5053 ms as one tree, 1904 ms across four, and 1215 ms across eight. There is no limit on the number of trees, because nothing costs more simply for having them.
The live preview draws the active tree only. Domain and symmetry are per-tree settings that cannot be combined into a single pass, and the preview is the one thing that runs on every frame.
Nothing is hidden by this: every tree's result mesh is a real object and is always visible. Only the live editing overlay is limited to the tree you are working on.
4. Core Concept: Dual Contouring vs. Marching Cubes
SDF-R features two mesh generation algorithms which you can choose depending on your model:
Marching Cubes (MC)
- Best for: Smooth, organic, fluid, and clay-like shapes.
- Characteristics: Very stable topology and predictable output, ideal for soft round surfaces and general production modeling.
Dual Contouring (DC)
- Best for: Hard-surface modeling, mechanical parts, and sharp boxy corners.
- Characteristics: Uses a GPU-accelerated Quadratic Error Function (QEF) solver to reconstruct sharp edges and creases that are often rounded off in traditional SDF meshing.
- Note: First-time activation of DC may trigger a brief lazy-compilation warm-up.
5. The Stack, Layers, and Boolean Workflow
SDF-R evaluates shapes through The Stack. The stack order defines how each primitive contributes to the final SDF result.
Boolean Operations
- Union: Adds the selected primitive to the existing shape.
- Subtract: Cuts the selected primitive out of the existing shape.
- Intersect: Keeps only the region shared by the existing shape and the selected primitive.
- Smoothness: Controls the softness of blend or transition areas. Smoothness is especially important for visual unity across a finished piece.
Order matters: Subtract and Intersect act on whatever is already above them in The Stack. If a Subtract item is the very first thing evaluated, there is nothing to cut from, so it has no visible effect. Place a Union base form above your cutters.
Collection Divider
Use Add Collection Divider to add an empty divider item inside The Stack. Divider items can organize primitives into groups, duplicate group structures, and carry group layout settings such as Mirror, Radial, Spiral, Grid, and Jitter.
Layer Boundary
A collection divider can also be marked as Layer Boundary. Normally the whole stack is mixed into one accumulator, so a Subtract or Intersect cuts everything placed before it. A layer boundary gives its group a second accumulator: the group is built on its own, and the finished shape is poured into the scene once.
- A divider closes the group above it. Everything from the previous divider down to this one belongs to the group.
- Subtract and Intersect inside the group reach only the group. Shapes outside it are untouched.
- The finished group is merged into the scene as a single Union, using that divider's own Layer Blend. The default of 0.0 keeps the seam hard; raise it to let the group settle into the scene.
Keeping eyes, eyelids or a shell from melting into the body is the clearest use, and it takes one divider per part. A single layer on its own does almost nothing: the first layer merges into an empty scene, and any shape left outside every layer still blends freely into whatever the layers have merged into. The rule is that everything you want kept apart needs its own group.
- Stack the body, then add a Collection Divider with Layer Boundary on. The body is now a layer.
- Stack the eyes and eyelids. An eyelid set to Subtract carves the eyes and nothing else.
- Add another Collection Divider with Layer Boundary on, leaving Layer Blend at 0.0 for a hard seam.
- Do the same for the shell, in its own divider.
The same shape works for decoration: build the base form and close it with a layer boundary, then stack a Math Field followed by a cylinder or box set to Intersect, and close that with a second layer boundary. The mask trims the pattern only.
Two things to know. Merging a layer is always a Union, so Layer Boundary stops shapes from blending but overlapping shapes still form one connected solid — if you need the eyes as a separate mesh, build them as a second SDF output object. And anything placed below the last divider is in no layer at all, which makes that the right spot for a cut or a detail meant to reach the whole model.
Changed in V16.2.0. The group used to be the rows below the divider, and the strength of the merge was read from the first primitive's Smoothness. Both are now the divider's own settings.
6. Curve Sync: Native Blender Curves as SDF Geometry
New in V16.1.0. Curve Sync lets you draw a path with Blender's own Curve tools and have SDF-R turn it into a solid pipe that participates in the SDF stack like any other primitive. Because it is a real SDF contributor, it blends smoothly with neighbouring shapes and supports Union, Subtract, and Intersect.
Method A: Move the Curve into the SDF Collection
- Create a curve with
Shift+A> Curve. - With the curve selected, press Move to SDF in the Object Utilities row (or drag it into the SDF Collection in the Outliner).
- The curve appears in The Stack as a Curve Sync item.
Use this when the curve exists purely to build the SDF shape.
Method B: Curve Ref proxy (keeps the curve where it is)
- Press Curve Ref in the Add New Primitives grid. This creates a small proxy item in The Stack.
- Select the proxy and pick any curve in your scene under Target Curve. (If a curve was already selected when you pressed the button, it is assigned automatically.)
Use this when the curve is shared with other parts of your scene — for example a curve that also drives an animation or a Geometry Nodes setup — because the original object never moves and is never modified.
A helpful side effect: because the settings live on the proxy rather than the curve, you can point several Curve Ref proxies at the same curve and give each one a different Pipe Radius, colour, or boolean operation.
Curve Sync Settings
- Target Curve (proxy only): The curve object to follow.
- Edit '<curve name>': Selects the target curve and enters Edit Mode immediately.
- Pipe Radius: Thickness of the generated tube.
- Subdiv Samples: How finely the path is sampled. Higher values follow tight curvature more accurately at the cost of evaluation time.
- Operation: Union, Subtract, or Intersect, exactly like a normal primitive.
- Smoothness: Blend softness where the pipe meets other shapes.
- Color / Metallic / Roughness: Per-curve material attributes, carried into the generated mesh.
Supported Curve Types
- Bezier: Fully supported, including handles. Subdiv Samples controls the sampling density.
- Poly: Fully supported; the control points are used directly.
- NURBS: Supported through Blender's own curve evaluation. Note that Subdiv Samples does not apply here — the curve's own Resolution Preview U governs the density instead.
- Cyclic (closed) curves: Supported; the pipe closes back on itself.
- Curves with Bevel or Extrude applied generate surfaces rather than a path, so Curve Sync falls back to a coarser approximation. Keep the curve as a plain path for best results.
Preview Behaviour (please read)
The real-time Ghost Preview draws Curve Sync as a coloured guide line along the curve, not as a fully raymarched pipe. This is deliberate: the preview evaluates every primitive for every ray step, so expanding each curve into a long chain of pipe segments would slow the whole viewport down as you add curves.
- The generated mesh is always exact — thickness, blending, and boolean operations are fully applied there.
- To see the true shape, enable Show Result Mesh or press Force Update.
- The guide line uses each item's colour, and its thickness can be adjusted with Curve Sync Guide Width in the engine settings.
7. Bezier Curve Primitive
Separate from Curve Sync, V16.1.0 also adds a Bezier primitive to the Add New Primitives grid. This is a self-contained 3D quadratic Bezier defined by numeric values rather than by a Blender curve object.
- Point B (Mid) / Point C (End): The two control points. The start point is the primitive's own origin, so moving the object moves the whole curve.
- Start R / End R: Independent radii at each end, producing a smooth taper along the length.
Use Curve Sync when you want to draw a path by hand; use the Bezier primitive when you want a compact, numerically-defined tapered arc that follows the object's transform and works with the Layout and Deform stacks.
8. Math Field Workflow
Math Field is the V16 procedural field primitive with a formula-based design supporting multiple TPMS-style formulas.
- Formula: Choose from available field formulas such as Gyroid, Schwarz P, and Schwarz D.
- Preset: Quickly switch between common field thickness and scale setups.
- Mask: Limit the field with Box, Sphere, or Cylinder style bounds.
- Boundary: Control how the field behaves near the mask boundary.
- Phase: Shift the periodic field without moving the mask.
- Axis X/Y/Z: Adjust field density independently per axis.
- Auto Match Scale: Copy the object's scale into Axis X/Y/Z to help keep the pattern visually consistent after non-uniform scaling.
- Use Previous as Mask: Configure the selected Math Field to intersect with the previous stack primitive for quick filled-pattern workflows.
9. Deformers and Layout Stacking
SDF-R allows you to chain deformations and layout repetitions in real time.
Non-Destructive Deform Stack
Apply Twist, Bend, or Taper deformations by adding items to the Deform Stack.
- Dynamic ordering: You can reorder deformers in the list. Changing the order, such as tapering before twisting versus twisting before tapering, changes the final shape.
- Stacked control: Deformations remain editable while Live Update previews the result.
Layout Stacking
Duplicate your shapes or groups across space using:
- Mirror: Symmetry replication across selected axes. Mirror Blend (V16.2.1) rounds off the seam where the two halves meet — see the note below.
- Grid: Compact repeat patterns.
- Radial / Spiral: Distribute duplicates in a circle or climbing spiral, around the X, Y, or Z axis.
- Jitter: Add randomized offsets for more natural variation.
- Rotation (Indiv & Accum): Give each Radial/Spiral copy a fixed extra rotation, or an accumulating rotation that increases with each copy.
Mirror repeats a shape by folding space, so the two halves always met at a hard minimum. A primitive's Smoothness has never been able to soften that seam: inside folded space there is only one shape, and nothing to blend it against. The crease was real geometry, not shading — on a mirrored sphere it measured up to 84°.
Mirror Blend evaluates the two sides separately and joins them with the primitive's own blend shape, giving the same result as building two shapes and joining them with a smooth union. It defaults to 0, which takes the original path, so raising it is opt-in. Both sides are evaluated when it is above 0, which costs roughly 1.7× on one axis and doubles again per additional axis.
Radial and Grid still crease, since blending across cell boundaries needs the neighbouring cells. Mirror, Radial and Grid on a Collection Divider have never had this problem, because those copy shapes for real and join them with an ordinary smooth union.
The ghost preview (V16.2.2) follows Mirror Blend in the same direction and by close to the same amount as the mesh. It is still an approximation — one evaluation cannot reproduce two exactly — but on a single mirror axis it now tracks the mesh to within about 0.01 across the whole Blend range, and the seam itself is exact. On V16.2.1 it moved the opposite way and emptied out at high values.
Past twice the Offset the whole shape swells, not just the seam, and the panel says so when your settings cross that line. Raise Offset rather than Blend if you want a rounder seam at the same size. Mirror Blend stops at 2.0, so at an Offset of 1.0 or more this cannot be reached.
Radial and Spiral layouts repeat the shape by folding space into equal angular slices. If a copy is rotated far enough that it reaches past its own slice, the part that crosses the boundary can be clipped. In practice this becomes visible when the accumulated rotation approaches roughly
180° ÷ Count. If you see pieces disappearing at high rotation values, reduce the rotation, raise the Count, or use a Collection Divider group instead.10. Attribute & Material Workflow
SDF-R passes material attributes directly from primitives to the generated mesh. The default material node setup reads vertex attributes named Color, Metallic, and Roughness.
- Setup Nodes: Creates a material that reads SDF-R's generated mesh attributes.
- Reset: Rebuilds the default material node setup and resets the shared Metallic, Roughness, Transmission and IOR controls to default values.
- Apply Color All: Applies one shared base color to all SDF primitives.
- Apply Material All: Applies shared Metallic and Roughness values to all SDF primitives, and applies Transmission and IOR to the material.
- Per-primitive control: Individual primitives can still have their own color, metallic, and roughness settings when needed.
- Subtractive painting: When a subtractive operation exposes an inner cut surface, the exposed surface can inherit the color and material properties of the cutting object.
Transmission & IOR (New in V16.1.0)
- Transmission: Adds glass-like light transmission to the generated SDF material. The IOR field becomes available once Transmission is above zero (1.45 is typical for glass).
- Scope: Unlike Color, Metallic and Roughness — which are stored per vertex and can therefore differ per primitive — Transmission is a single value applied to the whole SDF material. You cannot currently make one primitive glass and another opaque within the same SDF object.
- Requires the SDF material: Press Setup Nodes first. Transmission is written into the generated Principled BSDF, so it has nothing to write to if the material has not been created yet.
- Rendering: Transmission is a render property. Use Material Preview or Rendered shading to see it; the Ghost Preview does not simulate refraction.
11. Mesh Output, Snapshot, and Finalize
- Force Update: Manually regenerates the output mesh from the current stack.
- Fix Normals: Recalculates high-quality normals for smoother display and rendering.
- Snapshot Mesh: Creates a static mesh copy from the current SDF result while leaving the live SDF workspace intact. This is useful when you want to test a material, compare variations, or keep a milestone mesh without committing the whole workspace.
- Finalize (Bake): Converts the live SDF setup into a standard mesh workflow and archives the source primitives in the SDF history structure.
12. Performance Optimization & Troubleshooting
How the Ghost Preview adapts while you work
The Ghost Preview is raymarched, so its cost is roughly viewport pixels × ray steps × primitive count. To keep interaction responsive, SDF-R automatically reduces quality only while you are actively moving something, and restores it the moment you stop:
- Ray steps are capped during camera navigation and transforms.
- Render resolution is reduced (50% linear while orbiting, 65% while transforming) and upscaled to fill the viewport. This is why the preview may look slightly soft mid-motion.
- Shading normals switch to a cheaper 3-tap estimate during motion.
All three revert to full quality as soon as you stop, so still frames are always full quality. None of this affects the generated mesh.
Finding your actual bottleneck
Enable Engine Diagnostics > Perf and watch the system console. You will see lines like:
[SDF-PERF] Preview Draw: 75 FPS (avg duration: 0.095 ms), texture rebuilds: 0-
Compare FPS, not
avg duration. That duration measures CPU-side command submission only — the GPU works asynchronously, so it does not include raymarching cost. -
A high
texture rebuildscount means the Python-side rebuild of the preview buffer is your bottleneck, not drawing. This happens when objects or properties are changing, and is not addressed by the resolution reduction above. - If FPS is high while still but drops only during object drags with many rebuilds, the scene is bound by update cost rather than draw cost.
Low VRAM / Integrated GPU Safeguard
If you are running on an integrated GPU like Intel Iris Xe or a low-end laptop GPU:
- The addon dynamically queries hardware limits such as
max_storage_buffer_binding_sizeon startup. - If memory is low, it scales down the maximum active blocks automatically to help prevent Blender from crashing.
- Tip: Keep the mesh generation resolution at a moderate level, such as 128 to 256, for optimal editing speed on integrated GPUs.
Common Troubleshooting
Q: Blender freezes when I first click Live Update.
A: This is normal. It is compiling shaders and caching them. Please wait up to 1 minute. Future activations should be much faster.
Q: The "Initializing..." panel never finishes, even after waiting several minutes.
A: This is most commonly caused by a leftover shader cache file from a previous install, a previous GPU, or a previous driver version that is no longer compatible with your current setup. Close Blender, delete the cache file listed in the "Before Updating to a New Version" section above, and restart Blender.
Q: (macOS) Enabling the add-on is blocked with "cannot be opened because the developer cannot be verified".
A: The macOS build is not notarized, so Gatekeeper blocks it on first use. Click Cancel on the dialog, then open System Settings > Privacy & Security. Near the bottom you will see a message about rust_gpu_sdf.so being blocked — click Open Anyway. Return to Blender and tick the add-on's enable checkbox again.
Q: (macOS) The add-on does not load on my Intel Mac.
A: The macOS build is compiled for Apple Silicon (arm64) only. Intel Macs are not currently supported.
Q: (macOS) Blender crashes as soon as I add a primitive.
A: This was reported on macOS 26.6 with Apple Silicon and Blender 5.2, and it is fixed in V16.1.2. If you are on an earlier version, please update.
The cause was in SDF.R. While waiting for the mesh calculation to finish, a repeating timer asked Blender for the scene's dependency graph — a request that makes Blender re-evaluate the entire scene if it decides one is due. From a timer that happens at a moment Blender never scheduled, and the evaluator can read past the end of its own object list. The timer no longer forces an evaluation.
Note that with Factory Settings and only SDF.R enabled the crash did not appear, which made it look like a conflict with another add-on. It was not. Other add-ons only made the unsafe moment more likely to be hit.
If you still see a crash on V16.1.2 or later, please send the Terminal output and blender.crash.txt as described in the Platform support section — that is what made the original fix possible.
Q: With Symmetry on, my Boolean cut shows in the preview but not in the generated mesh.
A: This is fixed in V16.1.3, and it is the same fault described in the question below. A Subtract or Intersect shape whose centre sat on the negative side of an enabled symmetry plane was dropped from the meshing pass entirely. The base solid still meshed perfectly, so what came out was the uncut shape — no error, nothing visibly broken, and the preview kept showing the cut. Intersect collapsed to almost nothing instead. Placing the same cut on the positive side worked, which is why this could look like a Boolean problem rather than a symmetry one.
Q: I enabled Symmetry X/Y/Z and the preview looks right, but a shape is missing from the generated mesh.
A: This is fixed in V16.1.3. If you are on an earlier version, please update — no setting on your side was wrong.
The preview and the mesh generator are two separate implementations of the same scene, and Global Symmetry was handled correctly only in the preview. The generator's search volume was clamped to the positive half of each symmetry axis, so anything on the negative side was discarded before meshing began, and the meshing shaders did not fold primitive centres onto the mirrored side.
The effect depended on where the primitive's centre sat: entirely on the negative side, it contributed nothing at all; straddling the plane with a negative centre, it came out smaller than it should; on the positive side or exactly on the plane, it was correct. A matching shape on the positive side could also mask the problem completely.
Per-primitive Mirror in the Layout section was never affected by this.
Q: The preview looks slightly blurry or soft while I orbit the camera.
A: That is intentional. Since V16.1.1 the preview renders at a reduced resolution while you are moving and returns to full resolution the instant you stop, which keeps navigation responsive in heavy scenes. If you never want this, the preview quality returns to normal simply by stopping the motion — still frames are always full quality.
Q: My Curve Sync pipe looks like a thin line in the viewport.
A: That is the intended lightweight guide display. Enable Show Result Mesh or press Force Update to see the actual generated pipe. See section 6 for the reasoning.
Q: My Curve Sync item is set to Subtract but nothing is being cut.
A: Subtract needs something to cut from. Make sure at least one Union primitive sits above the Curve Sync item in The Stack.
Q: Subdiv Samples does nothing on my curve.
A: The curve is probably a NURBS spline, which is evaluated by Blender itself. Adjust the curve's own Resolution Preview U in the Curve data properties instead.
Q: I set Transmission but the object still looks solid.
A: Check three things: press Setup Nodes if you have not created the SDF material yet, press Apply Material All to push the value into the material, and switch the viewport to Material Preview or Rendered shading. Transmission is not simulated in the Ghost Preview.
Q: The generated mesh has holes or missing faces under high deformation.
A: Make sure the domain size is large enough to contain the deformed shape, and the mesh resolution is adequate. Also verify that the deform parameters are within reasonable limits.
Q: Copies disappear when I use Radial with a large accumulated rotation.
A: See the note in section 9. Radial repeats space in angular slices, so a copy rotated beyond roughly 180° ÷ Count can cross into the neighbouring slice and be clipped. Lower the rotation, increase the Count, or build the array with a Collection Divider group instead.
Q: MC and DC both show slightly uneven edges in certain areas.
A: SDF meshing converts a continuous field into polygons, so small edge irregularities can appear around steep curvature, intersecting fields, or dense decorative patterns. Use higher resolution, Live Normals, Weld, and optional post-process smoothing when visual finish is more important than raw edit speed.
Q: A Math Field stretches when I scale the object on X/Y/Z.
A: Select the Math Field and use Auto Match Scale. This matches the field's Axis X/Y/Z settings to the object's scale so the pattern density remains closer to the intended look.
Q: I get a shader validation error on startup.
A: Ensure your graphics card drivers are updated to the latest version. Make sure your system defaults to using your dedicated graphics card (NVIDIA/AMD) rather than the motherboard's integrated chip when running Blender. If the error mentions the cache being created for a different device, follow the cache-clearing steps above.
Documented on 2026-08-17 for SDF-R V16.1.3
Discover more products like this
Rust boolean mesh 3dprinting modeling hardsurface tool sculpting SDF GPU conceptart blender