 Alex K
Selection Falloff 1.0 - Documentation
1. Installation and first use
Install
- Download the Selection Falloff Extension ZIP. Leave it zipped.
- Open Edit > Preferences > Get Extensions. Open the top-right menu, choose Install from Disk and select the ZIP.
- Confirm installation and check that Selection Falloff is enabled under Add-ons.
Start
- Select a mesh, enter Edit Mode and select the geometry to edit.
- Choose Selection Falloff in the left toolbar (T), or press Shift+F.
- Position the falloff and use G, R, S or another supported modelling tool.
Temporary and pinned falloffs
Unpinned falloffs are removed when you leave Selection Falloff or switch to Object Mode. This lets you work on another mesh or area without moving the previous falloff or worrying about its unwanted influence. Choose a Default Falloff and Default Influence Curve in the add-on preferences to start each time with the setup you use most.
To reuse a falloff you have positioned and adjusted, pin it in the stack. It remains in the scene and is available when you return to the tool. Pin does not prevent moving the falloff or changing its settings, and it does not save your mesh selection. Groups and all falloffs inside them are kept automatically.
Update
Finish the current operation, close SF popups and leave the tool. Install the newer ZIP with Install from Disk. You normally do not need to uninstall the previous version or restart Blender.
Compatibility
Requires Blender 4.5 or later. Tested on Windows with 4.5.4, 4.5.13, 5.0.1, 5.2.2 and 5.3 preview builds (beta and alpha). macOS and Linux may work, but have not been tested and are not guaranteed. No separate Python or library installation is needed.
2. Preferences and shortcuts
Open Edit > Preferences > Add-ons > Selection Falloff.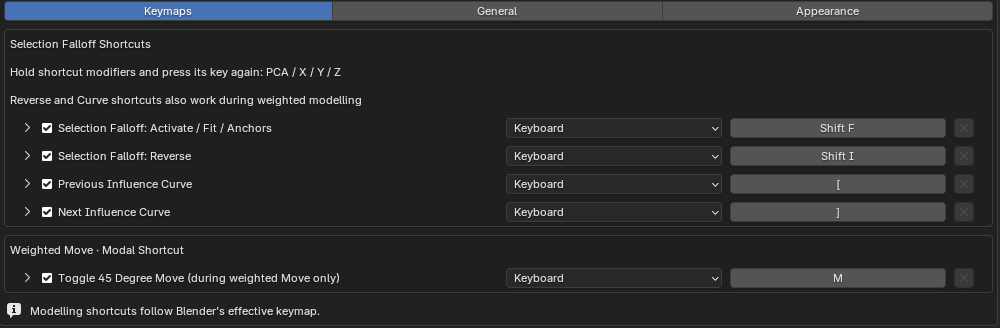
Keymaps, General and Appearance contain shortcuts, default settings and viewport appearance.
General
Choose Default Falloff and Default Influence Curve. With Automatically Add Default Falloff enabled, entering SF or pressing Shift+F can create a default falloff when none in the scene has enabled influence. A falloff hidden with the eye still has influence and prevents this. With automatic creation off, add falloffs manually with + in the stack.
Preset Library sets the folder for saved curves and groups. Back it up separately from the installation.
Keymaps
SF shortcuts can be changed here. Modelling shortcuts follow Blender's keymap. The status bar shows the keys available during an operation.
| Default shortcut | Action |
|---|---|
| Shift+F | Enter SF. Inside SF, fit a selected visible Linear, Radial, Elliptical or Bidirectional falloff, including pinned falloffs. For Topological or Geodesic, capture the selection as anchors. |
| Hold Shift, repeat F | Cycle Fit through Auto, X, Y and Z. Release Shift to reset. If you assign a shortcut with no modifier, use the axis buttons instead. |
| Shift+I | Reverse the selected falloff before or during a supported operation. |
| [ / ] | Previous and next Influence Curve preset, also during an operation. |
| M during Move | 45 Degree Move for a Linear falloff. |
| B during a drag | Set Snap Base when moving a falloff or using supported G, R or S operations. In Inset, B toggles Boundary. |
| F9 | Adjust the previous operation and its influence. |
Appearance
Set colours, opacity and sizes for weight points, falloff handles and labels. Field Handles adjusts handle size and picking area. Volumes & Groups adjusts sphere, ellipsoid and group handles. Snap Picking Radius changes how close the pointer must be to a snap target.
3. Interface
Common settings are in the header. Full settings are in the N sidebar or the Properties editor.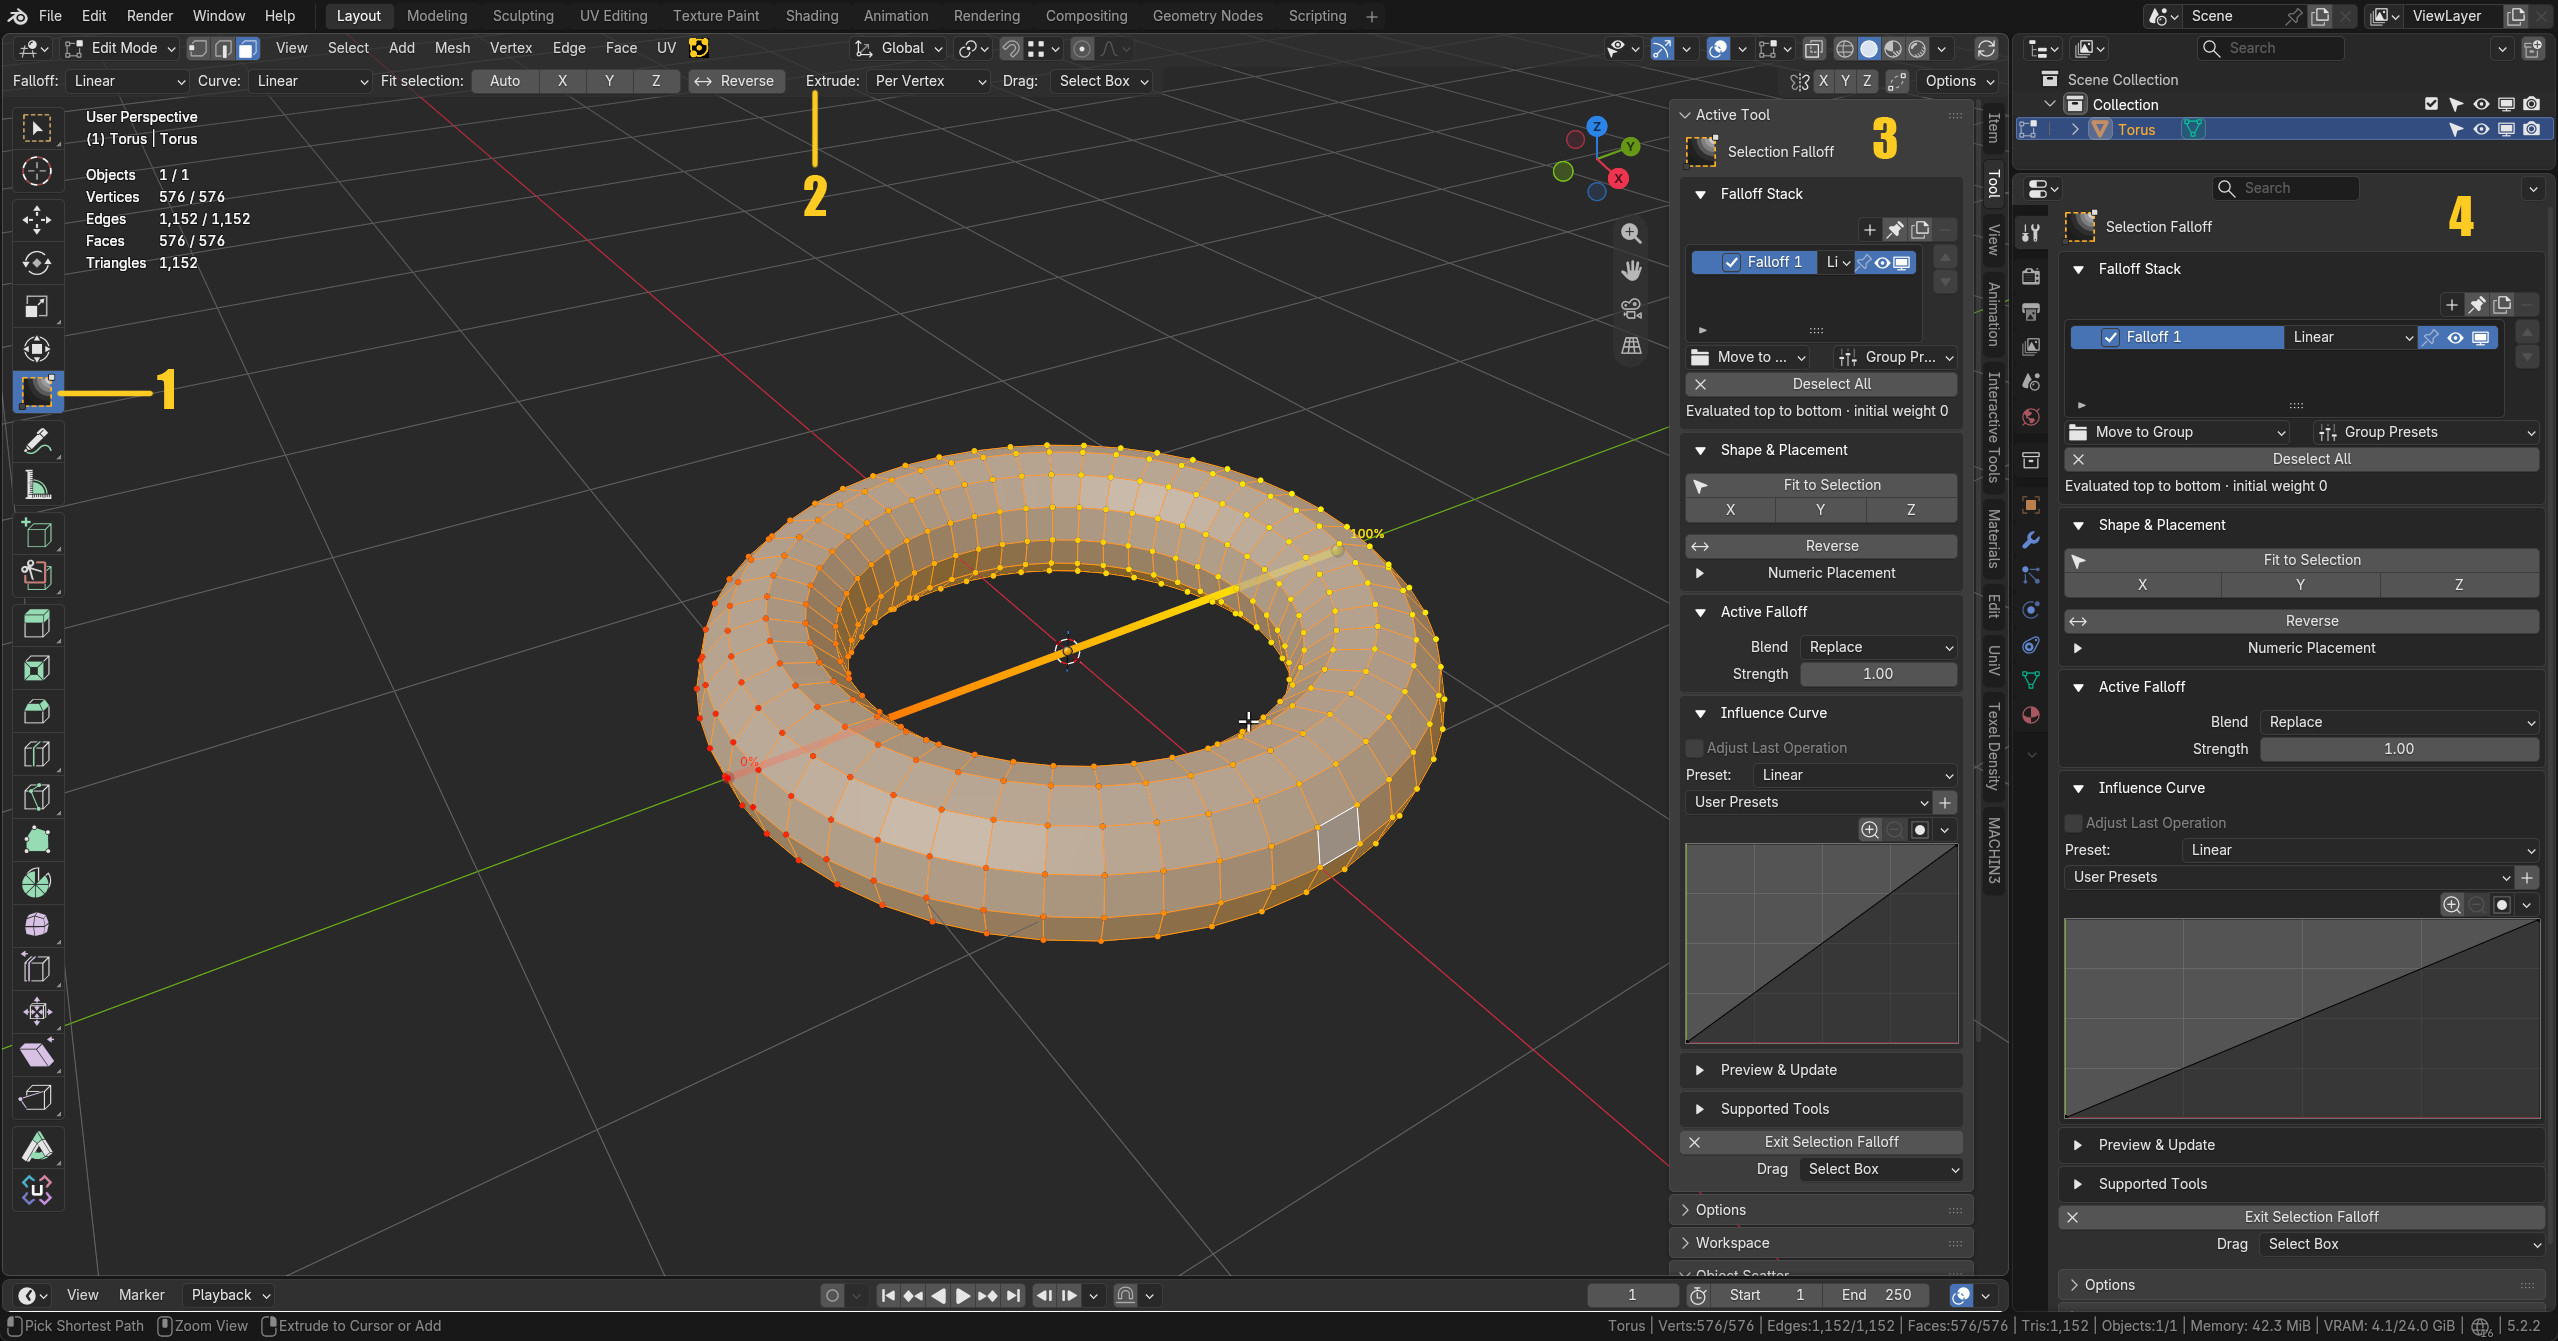
1: SF in the T toolbar. 2: Tool Settings header. 3: N sidebar, Tool tab. 4: Active Tool settings in Properties.
Open the panels
Press T for the toolbar and N for the sidebar. In Properties, use the Active Tool tab. The sidebar and Properties show the same SF settings.
Header
Falloff changes the selected falloff's type. Curve selects its Influence Curve preset. Fit selection fits the falloff with Auto or X/Y/Z, and Reverse changes its direction. Further settings depend on the falloff type.
If the header settings are missing, right-click the viewport header and enable Tool Settings.
Weight colours
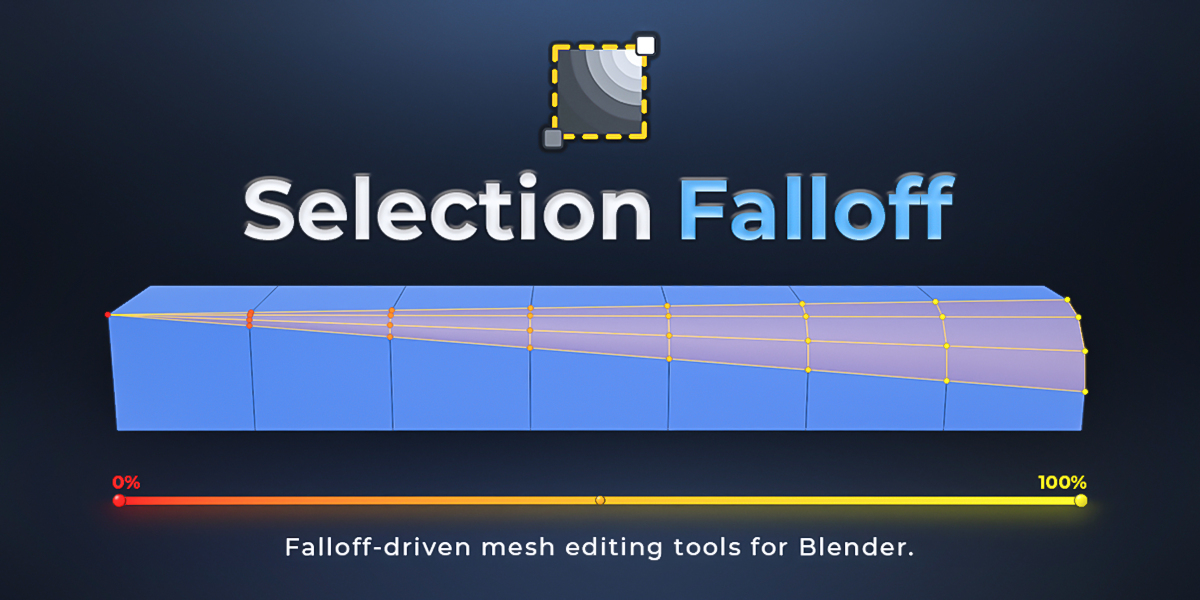
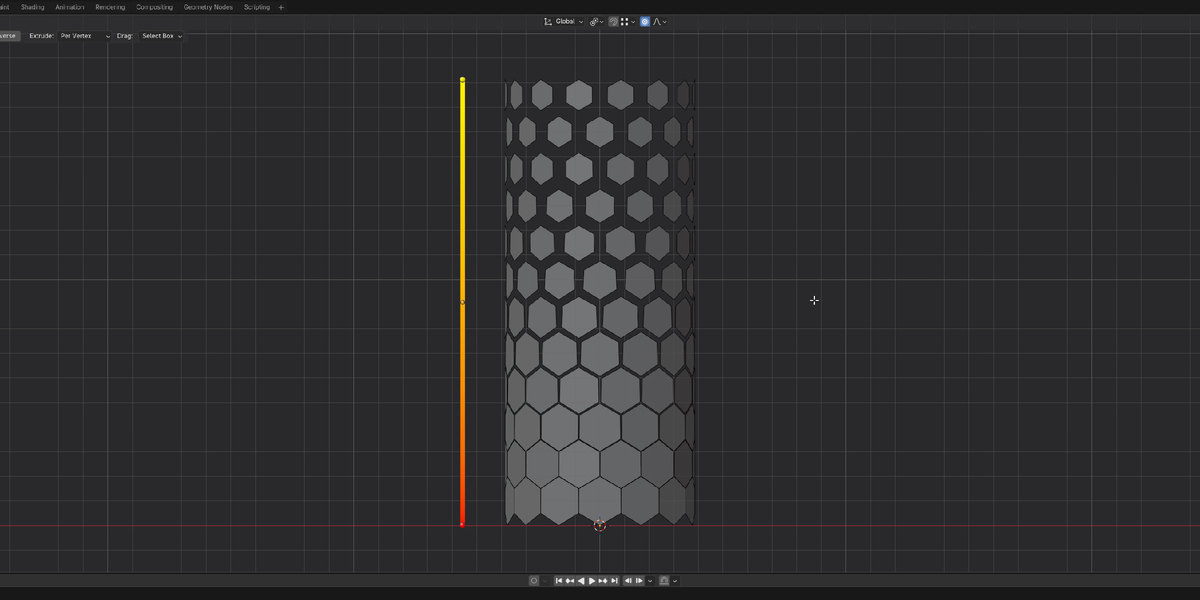
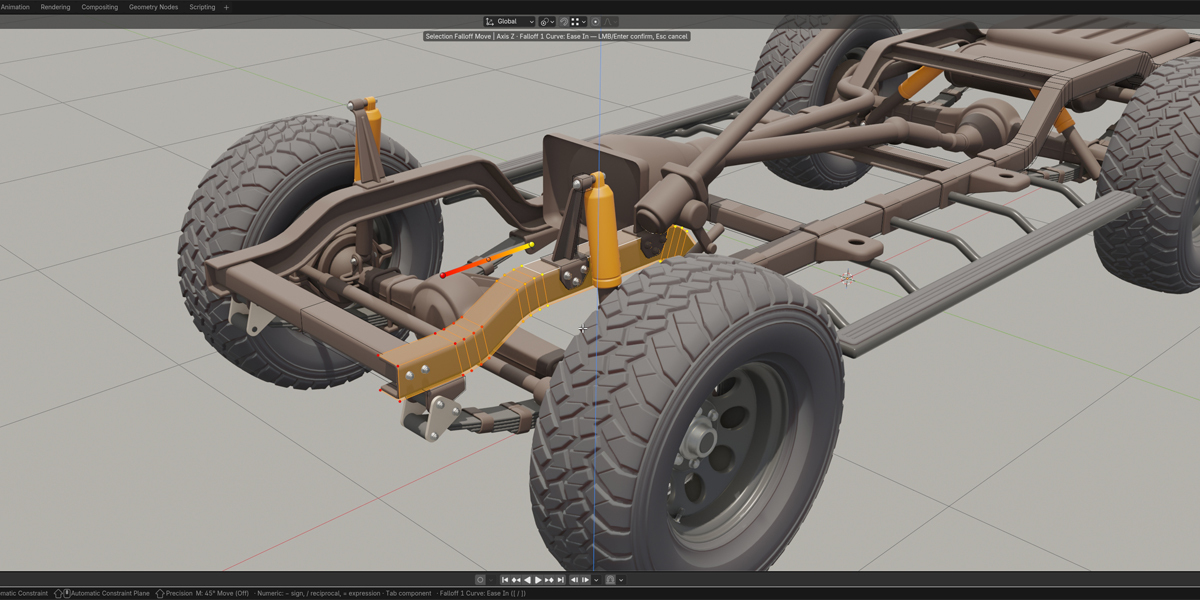
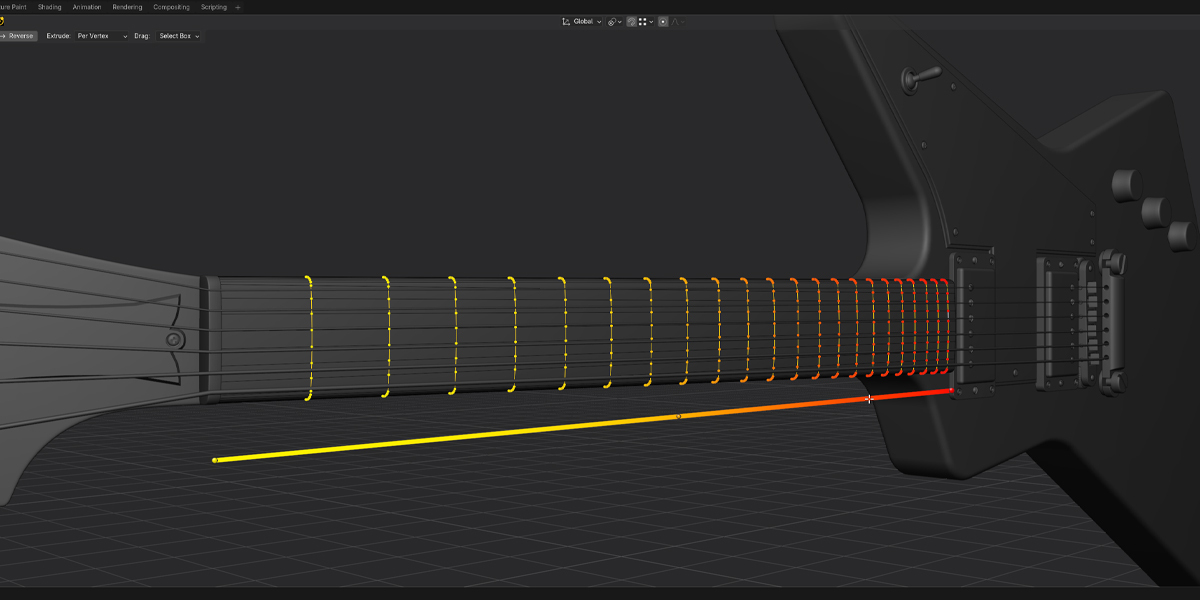
With the default colours, red points mean 0% influence and yellow points mean 100%. Colours between them show intermediate weights.
Selection and fitting
After an operation, the falloff stays in place. Changing the selection does not fit it again. Use Fit to Selection when you want to fit the falloff to a new area.
4. Tool Settings
Sections can be collapsed. Their open or closed state is kept for the session.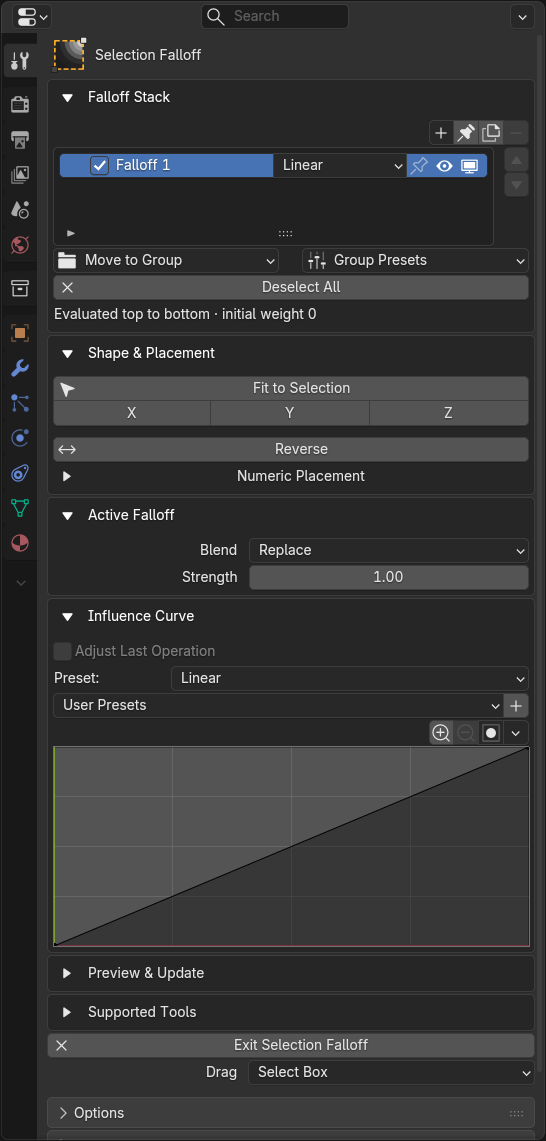
Full settings for a Linear falloff. Shape & Placement changes with the falloff type.
Falloff Stack
Add, select, rename, change type, reorder, group, duplicate, pin, hide or disable falloffs. See Stack and groups below.
Shape & Placement
Fit, Reverse and settings specific to the selected falloff. Numeric Placement lets you enter exact positions.
Active Falloff
Blend sets how the falloff combines with other falloffs in the stack. Strength scales its weights before blending.
Influence Curve
Change how the falloff's weights are distributed. Edit or save curve presets. Adjust Last Operation changes the previous result.
Supported Tools
Lists the modelling tools that work with falloffs. Hover over a tool for its shortcuts. Extrude and proportional-editing settings are here.
Exit Selection Falloff
Leave the tool. Unpinned falloffs are removed, while pinned falloffs and groups are kept.
5. Stack and groups
Select a falloff in the stack to edit its settings. Double-click its name to rename it.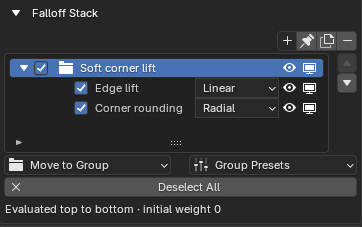
A group containing two falloffs. The name and type are shown separately.
+ adds a falloff or group. The type menu changes an existing falloff. Duplicate copies it, and Remove deletes it. The arrows change the order. Move to Group puts a falloff in a group, and Outside Groups takes it out. Deselect All clears the selected falloff or group.
Blend and Strength
Falloffs combine from top to bottom. Blend sets the blending mode, and Strength scales the falloff's weights. A group combines its falloffs first, then applies its own Blend and Strength.
| Blend | Effect |
|---|---|
| Replace | Replace the combined influence above with this falloff's weights. |
| Add / Subtract | Add or subtract this falloff's weights. |
| Multiply | Multiply the combined influence above by this falloff's weights. As the first falloff, it gives zero influence. |
| Min / Max | Keep the lower or higher weight. |
Stack icons
These clickable icons are beside each falloff in the stack. A group's visibility and influence settings also apply to its falloffs. Auto Pin, above the stack, pins existing and newly added falloffs.
| Icon | Effect |
|---|---|
| Pin | Keep the falloff when leaving the tool. |
| Checkmark | Enable or disable the falloff's influence while keeping it visible. |
| Eye | Hide the falloff in the viewport without disabling its influence. |
| Monitor | Hide the falloff and disable its influence. |
Group Presets
Save a group to reuse its setup in another scene. The preset menu lets you apply, rename or delete it. Presets save falloff settings, not mesh selections or permanent anchors.
6. Spatial falloffs and fitting
Spatial falloffs distribute influence in 3D space according to their position and size, independently of the mesh.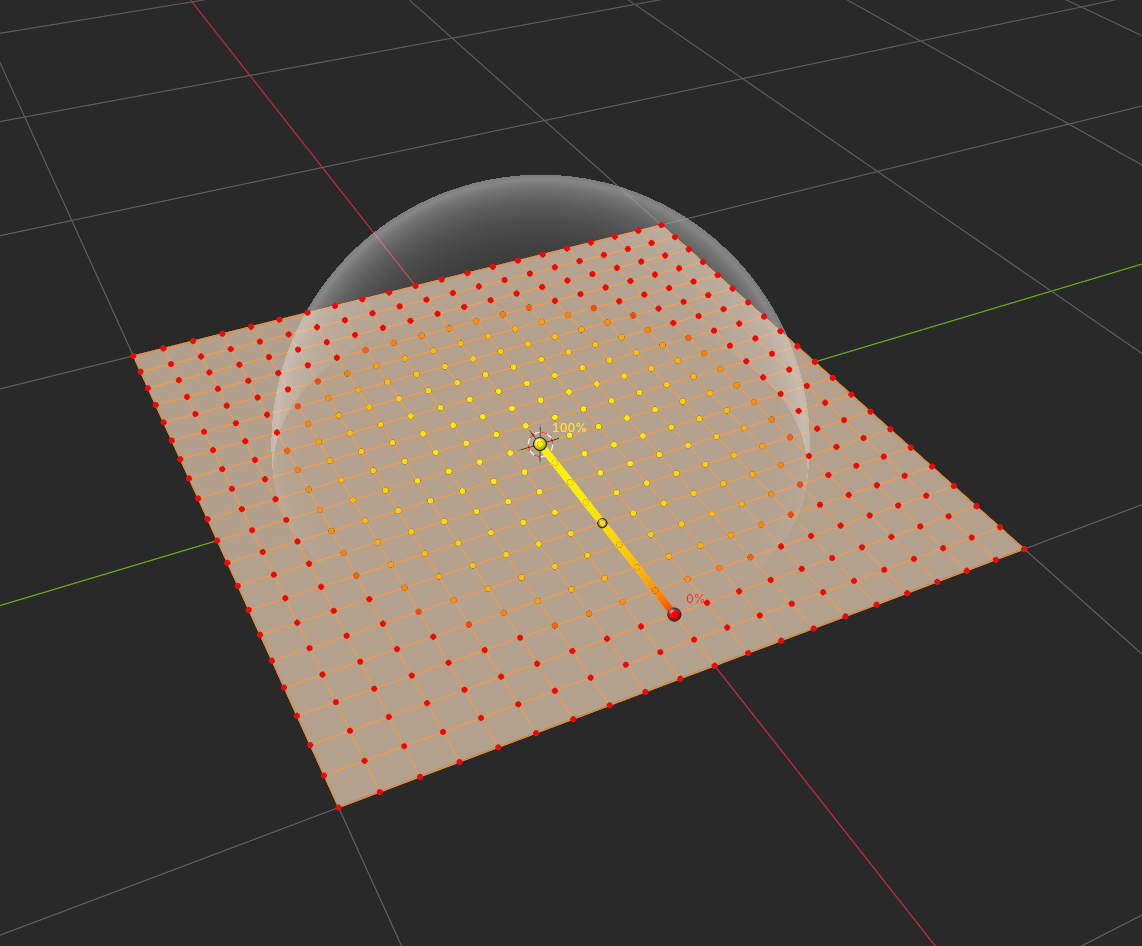
A Radial falloff on a plane. Influence is strongest at the centre and falls to zero at the sphere boundary.
| Falloff | Weight distribution |
|---|---|
| Linear | 0% at Start and 100% at End. Points in a plane perpendicular to the falloff's axis have equal weight. Use it for a gradual lift or taper. |
| Radial | 100% at the centre, falling to 0% at the radius. Use it for a local bulge or dent. |
| Elliptical | A stretched Radial falloff. Radius Y/Z change its proportions, and Roll turns it around its main axis. |
| Bidirectional | 0% at both ends and 100% in the middle. Use it for a central lift along one axis. |
Fit to Selection
Auto finds the main direction of the selection. X/Y/Z fit along the axes of Blender's selected transform orientation.
Reverse
Shift+I reverses the selected falloff. Linear exchanges its endpoints. Other types reverse the direction before applying the Influence Curve, so a custom curve can change the result.
7. Move, rotate and snap falloffs
Drag an endpoint to move it. Drag the middle or body handle to move the whole falloff.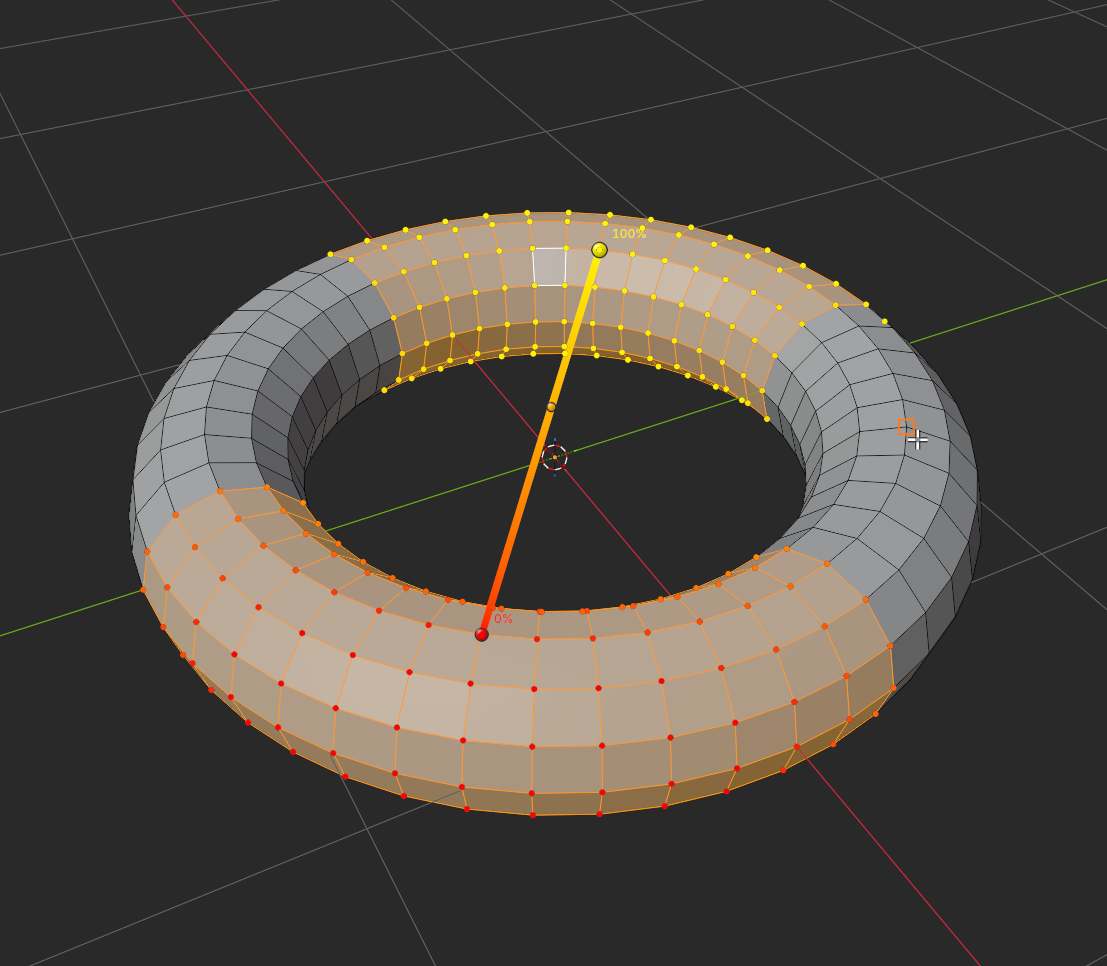
Drag and switch to Rotate or Scale
- Start dragging a falloff handle or a group handle. A group handle moves the spatial falloffs in that group together.
- The drag is already Move (G). While dragging, press R or S to rotate or scale the whole falloff or group. SF cancels the unfinished drag before starting Rotate or Scale.
- A simple drag confirms on release. After switching mode or entering a number, confirm with left click or Enter. Right click or Esc cancels.
Snap Base
During a positional handle drag or supported G, R or S operation, press B. Point at a vertex, edge or face, then click or press B again to set the reference point. Snap that point to the destination and confirm. The reference can be anywhere on the mesh, not just at the handle you grabbed.
Snap Base is not available for radius drags or Normal Offset. Rotate and Scale need a single pivot, so Snap Base is not available with Individual Origins.
While dragging
Use X, Y or Z for an axis constraint and Shift+X, Shift+Y or Shift+Z for a plane. Hold Shift for precision. Ctrl temporarily reverses snapping, and Shift+Tab toggles it. Visible modifier results can be snap targets.
With no mesh vertices selected, G, R and S can transform the selected spatial falloff or group directly. Nonuniform scaling can change a Radial falloff to Elliptical.
8. Topological and Geodesic sources
Choose where distance starts, using an active mesh element or stored anchor points. Paths can pass through unselected geometry.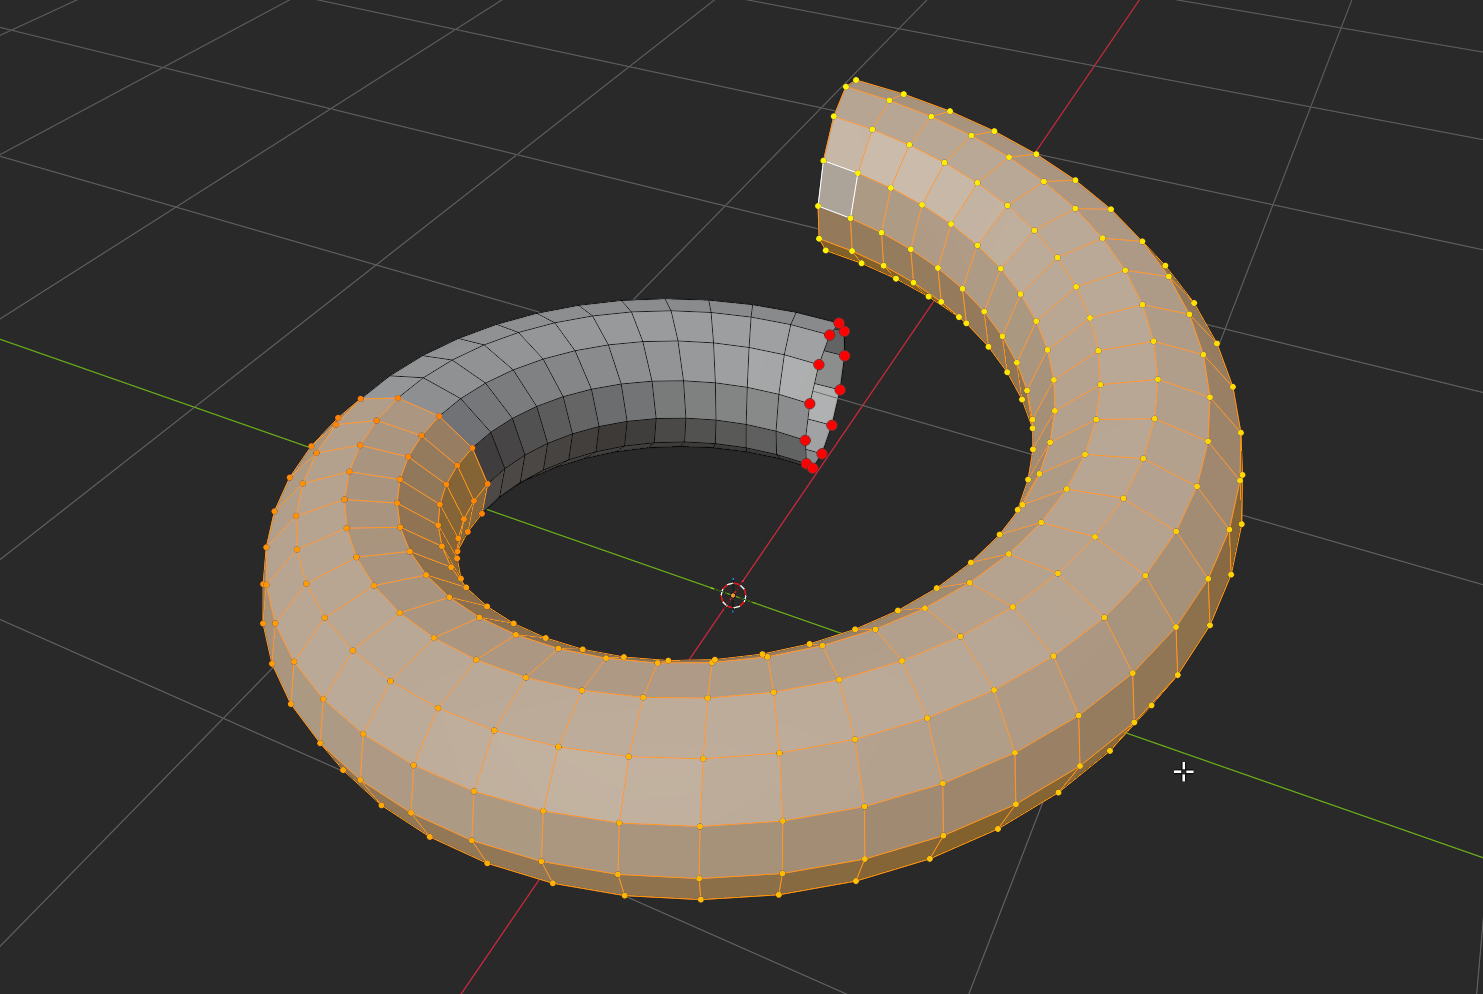
The large red points are anchors on the unselected end loop. Weights spread around the cut torus to the selected region. Anchor colour follows the 0% colour preference.
Source: Active
The active vertex is the starting point. For an active edge or face, all its vertices are starting points. The farthest reachable selected vertex sets the distance for 100% weight, before Reverse and the Influence Curve.
Source: Anchors
- Select the source vertices, edges or faces. Click Use Selection as Anchors to store them.
- Use Add Selection to Anchors to add more sources. Select Anchors selects the stored anchors.
- Select the geometry to modify. Anchors may be inside or outside this selection. Each vertex uses its shortest distance to the nearest anchor.
- Use Reverse or the Influence Curve to change the weight distribution.
Multiple sources
For example, set both poles of a sphere as anchors and select the whole sphere. Distance starts at either pole. The equator is farthest from both and receives the highest weight with a Linear curve.
Keeping anchors
Moving vertices keeps anchors. Topology edits can reset them when SF cannot confirm that the original elements remain. Loading a file or switching meshes can also reset anchors. Pin and presets do not permanently save them. Disconnected areas with no path to a source are ignored.
9. Distance metrics
Topological offers Edge Length and Edge Steps. Geodesic measures approximate distance across the surface.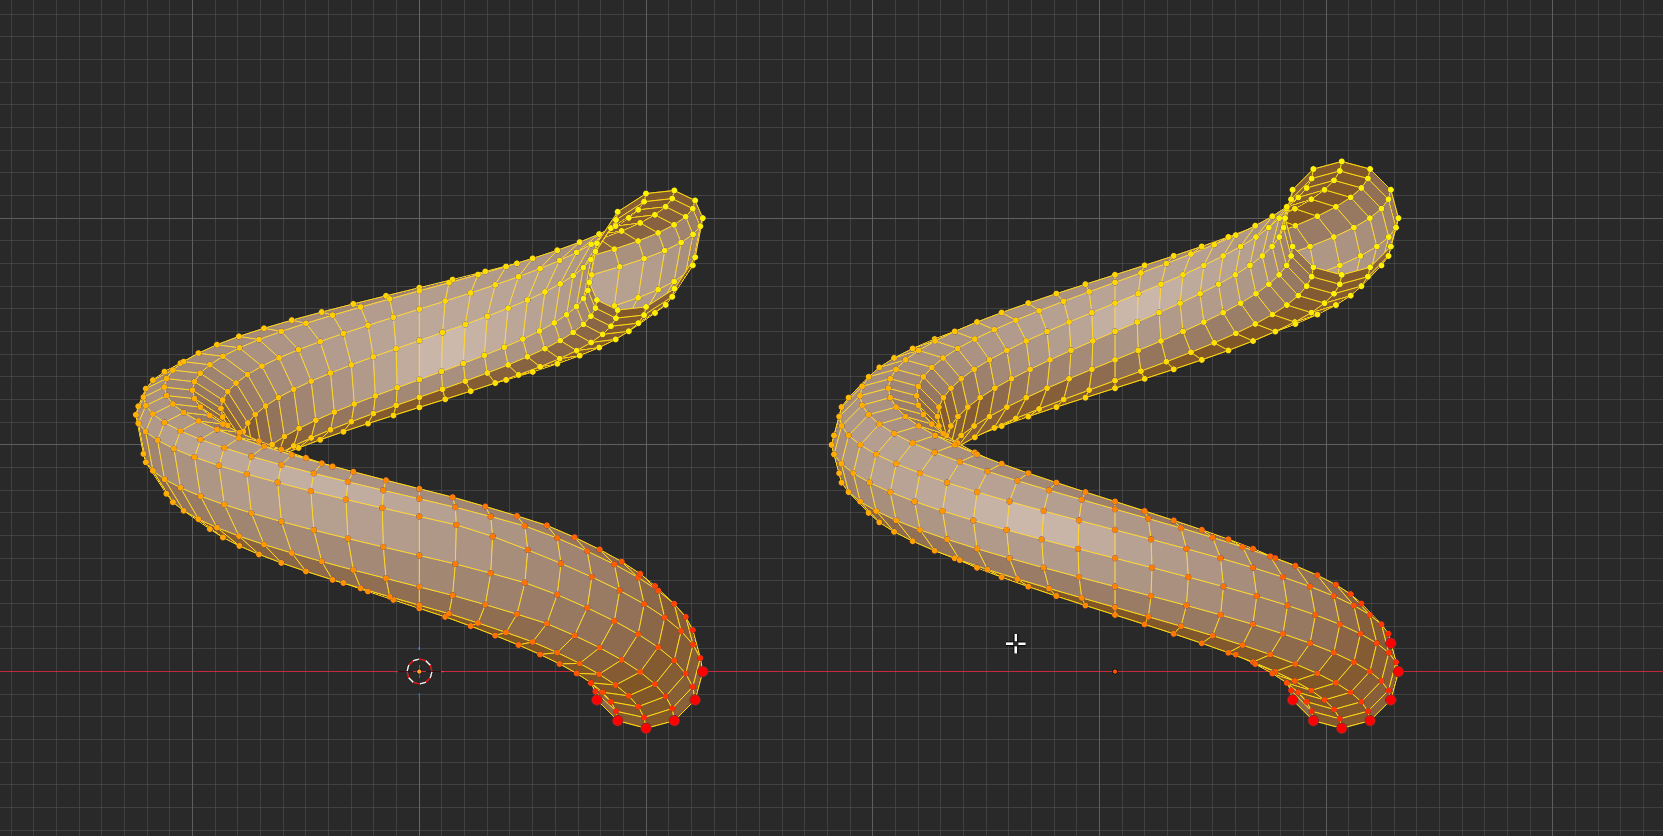
The same cut-torus lift with Topological Falloff and Edge Length distance on the left and Edge Steps on the right. Big red points mark the anchor loop.
Why the results differ
On the left, edges around the inner radius are shorter. Those vertices are closer to the anchors than vertices on the outer radius, so they move less. This stretches the circular section. Geodesic result will be very similar. But on the right, each edge counts equally. Vertices in each corresponding loop have equal weights and move together, keeping the circular section.
| Distance | Measurement |
|---|---|
| Edge Length | Distance along edges, including object scale. |
| Edge Steps | Number of edges passed, regardless of length. Diagonals and extra subdivisions can change the result. |
| Geodesic | Approximate distance through polygon interiors, not only along edges. Usually slower than Topological. |
Multi-Object Edit Mode
Spatial falloffs share one placement across the edited meshes. Topological and Geodesic in Active mode use each mesh's own active element and distance range. A mesh without a source is skipped. Anchors across several edited meshes use a shared maximum distance. Paths cannot cross between separate meshes.
10. Spline falloffs
Spline weights vary along a path and can fade with distance from it. Settings are in Shape & Placement and the header's Spline Settings.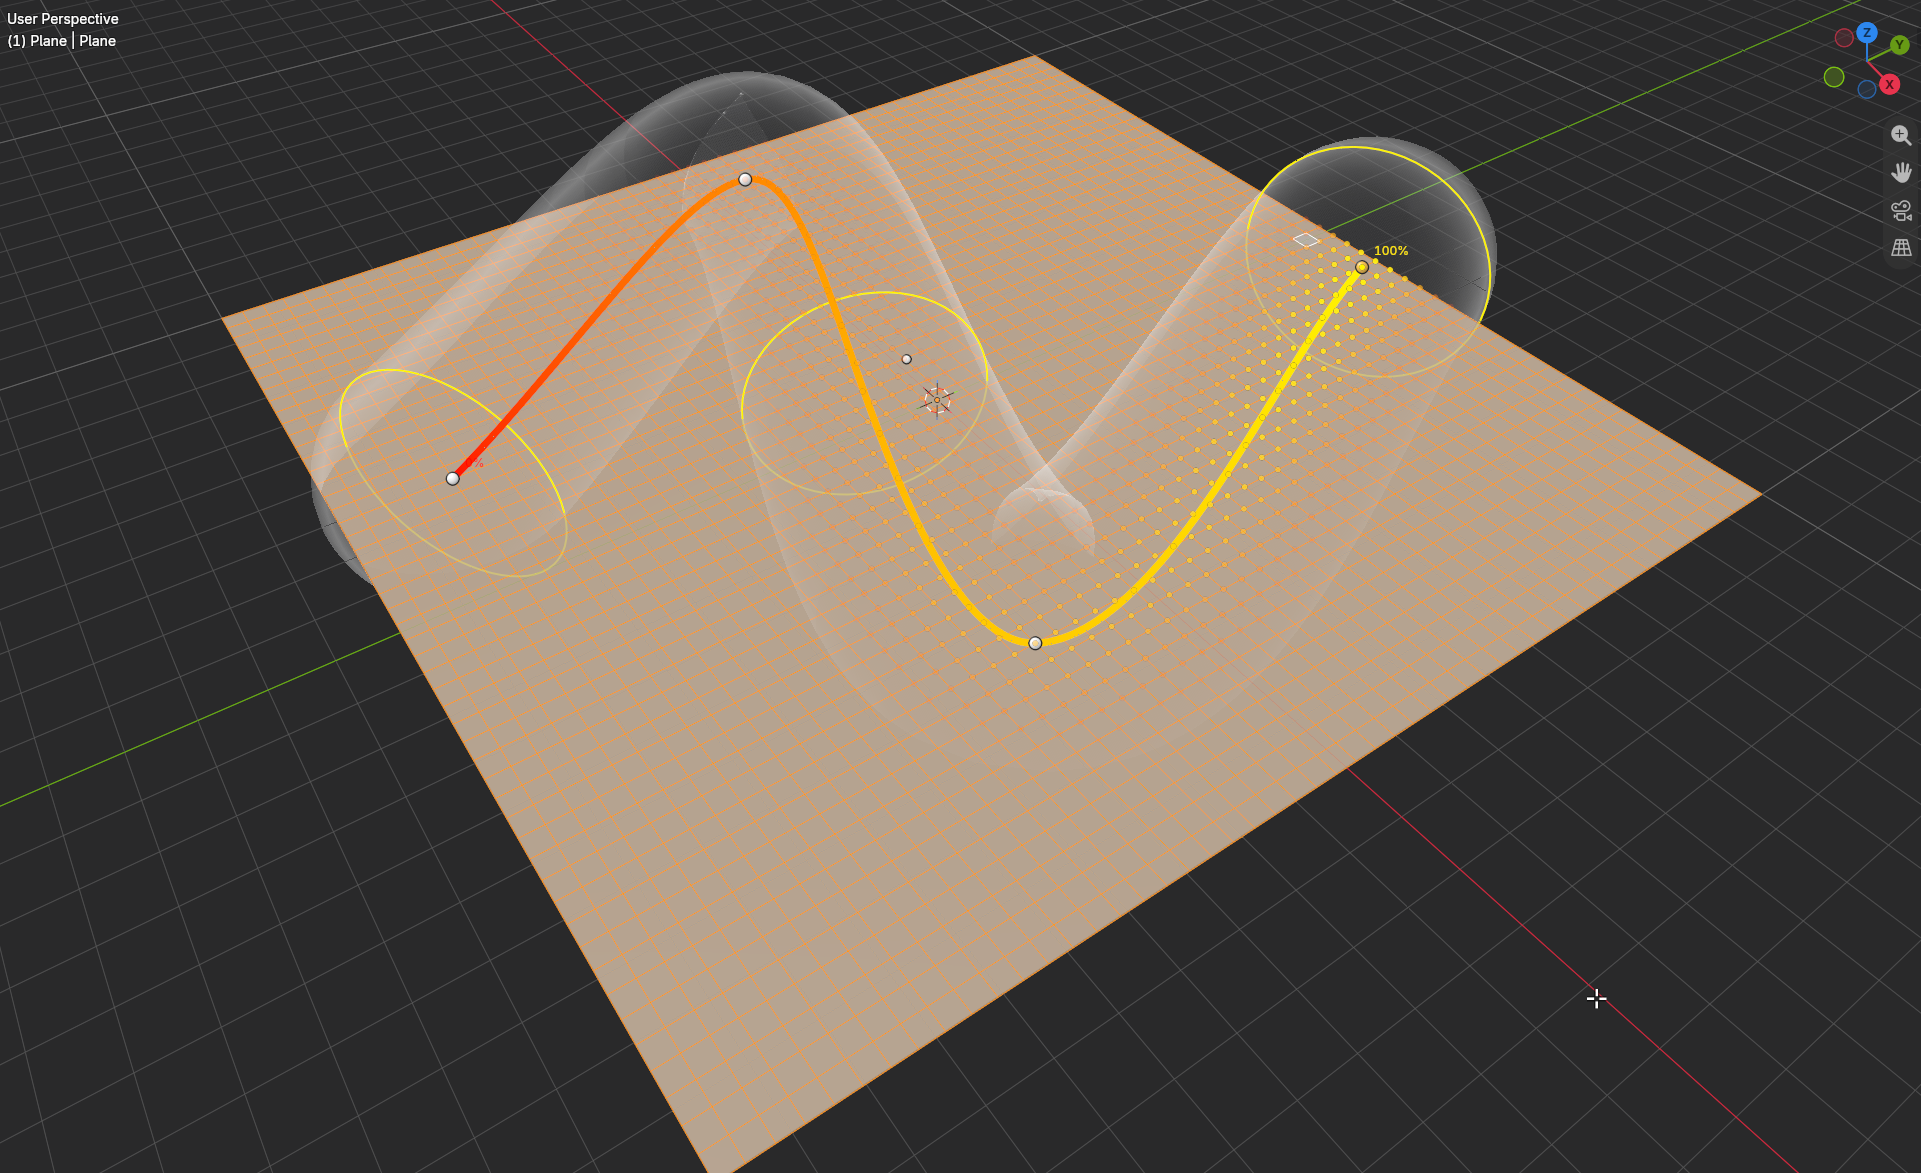
An editable spline with yellow radius rings. For this screenshot, the 0% weight colour has alpha set to zero to make the spline easier to see.
| Setting | Use |
|---|---|
| Edit Spline | Click the path to add a point. Drag points to move them. Press X or Delete to remove a selected point. Turn editing off when finished. |
| Closed Spline / Closed Path Seam | Close the internal path and choose where its ends meet. |
| Link to Guide | Use a Curve or a single edge-only mesh chain or loop. Branches are not supported. |
| Guide Spline Index | Choose a spline inside a Curve object that contains several splines. |
| Use Guide Modifiers | Use the mesh guide's modifier result. It must still be a single edge-only chain or loop. |
| Make Independent | Keep the guide's shape as an editable internal path and unlink the guide. |
| Clear guide link | Return to the falloff's internal path. |
11. Spline radius and direction
Influence Curve changes weights along the path. The radius settings control how far influence spreads to either side.
| Setting | Use |
|---|---|
| Tube Radius | Set the overall radius of influence around the path. |
| Radius Controls | Set the number of radius rings. Drag a ring to change the local width. Changing the count redistributes the radius profile. |
| Radial Falloff | Choose how influence fades from the tube's core to its outer edge. |
| Radial Hardness | Set the part of the radius with full radial influence. Fading begins outside this core. |
| Infinite Radius | Remove the radius limit. Weights still vary along the path. |
| Local Branch Blend Reach | In Infinite mode, adjust blending near neighbouring parts of the path. |
| Reverse | Reverse influence along the path while keeping the radius profile in place. |
| Reverse Path & Radius | Reverse the path order and exchange the start and end radius profiles. |
Two ways to reverse a spline
Suppose the spline is wide at the start and narrow at the end. Reverse changes which end has stronger influence without moving the wide region. Reverse Path & Radius also moves the wide region to the other end.
Small radius rings
A dashed ring makes very small radii easier to grab. Drag it to adjust the radius.
Closed paths
Closed Path Seam moves the point where the path starts and ends. If the influence at those ends differs, there will be a weight jump at the seam.
12. Influence curves and F9
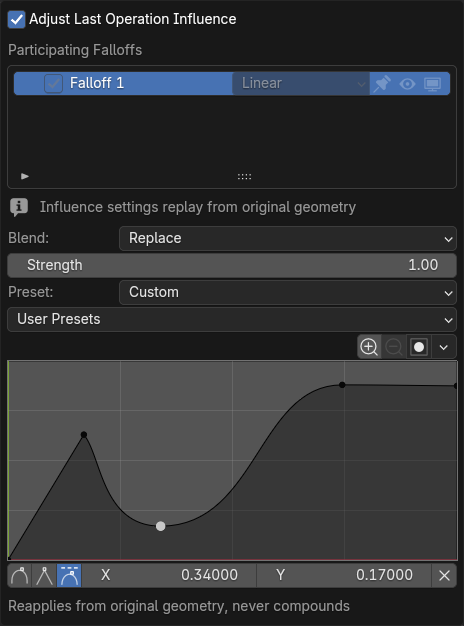
F9 > Adjust Last Operation Influence.
Presets and Custom
Choose Linear, Smooth, Ease In, Ease Out, Sharp, Root or Sphere. Add or drag curve points to edit Custom. Custom keeps your edits while you switch presets during the session.
User Presets
Save a curve to reuse it later. The preset menu lets you apply, rename or delete saved curves.
During an operation
Press [ for the previous preset or ] for the next preset. Shift+I reverses the falloff selected at the start of the operation. These shortcuts also work between operations.
F9 popup
After an operation, press F9 to change its settings or influence. Click outside the popup to finish. You can reopen F9 while Blender still allows adjustment of that operation.
Adjust Last Operation
The checkbox in Tool Settings keeps adjustment active until you turn it off. Some settings are disabled while it is on. Use it to keep editing the previous result without a popup.
13. Modelling tools
The falloff weights control the amount of each operation. Supported Tools in Tool Settings lists the available commands and shortcuts.
| Tool | Default shortcut and modal keys |
|---|---|
| Move / Rotate / Scale | G / R / S. Blender's transform gizmos also use the falloff weights. |
| Normal Offset | Alt+S. S toggles Even. Hold Alt to temporarily reverse Even. |
| Extrude | E. Alt+E starts Extrude Along Normals in SF, rather than opening Blender's extrusion menu. |
| Inset | I. Ctrl adjusts Depth. Tab switches numeric Thickness/Depth. I: Individual. O: Outset. B: Boundary. E: Even. |
| Edge / Vertex Slide | G then G starts the applicable slide. Shift+V starts Vertex Slide. E: Even. F: Flipped where available. C: Clamp. Alt: temporary clamp change. |
| Offset Edge Slide | Ctrl+Shift+R. Creates offset loops and slides them with weights. Cap Endpoints closes open ends where possible. |
| Edge / Vertex Bevel | Ctrl+B / Ctrl+Shift+B. See Weighted Bevel below. |
Extrude influence
Choose Per Vertex for smoothly varying extrusion. Uniform per Island uses one average weight for each selected island, based on face area or edge length. Use it for repeated details that should remain uniform within each island.
45 Degree Move
During Move with a Linear falloff, M toggles 45 Degree Move. It adjusts displacement to create a 45-degree slope across the falloff.
Proportional editing
Proportional settings are in Supported Tools. For supported transforms, nearby unselected vertices receive influence based on the nearest selected weight and the proportional falloff. This extension does not apply to topology-changing tools.
Extrude Cancel
Esc resets extrusion movement but keeps the new geometry. Use Undo to remove the extrusion.
14. Weighted Bevel
Ctrl+B bevels edges. Ctrl+Shift+B bevels vertices. The falloff varies the bevel amount across the selection.
F9 Bevel settings. The graph at the bottom is the falloff's Influence Curve.
Influence Curve and Profile Type
Influence Curve changes how strongly Bevel affects different parts of the selection. Profile Type changes the shape of the bevel itself.
Superellipse uses the numeric Profile setting, which appears when Segments is above 1. Custom opens a separate profile editor. In this screenshot, Segments is 1 and Profile Type is Superellipse. The only visible graph is Influence Curve.
While dragging
Use the wheel or numpad + / - to change Segments. A: Amount. S: Segments. P: Profile. M: Width Type. C: Clamp. V: Affect.
O / I: Outer/Inner Miter. Z: Profile Type. U / K: Seam/Sharp. Hold Shift for precision or Ctrl for increments. Check the status bar if your keys differ.
Profile support
Custom Profile supports Auto and Vector handles, but not Free or Aligned handles. Harden Normals and Vertex Mesh Cutoff are not supported.
15. Troubleshooting and support
No influence
Check the falloff's checkmark and monitor icons, including those of its group. Topological and Geodesic need an active element or anchors connected to the selected area. Multiply or Subtract as the first falloff can leave weights at zero.
A falloff disappeared
Unpinned falloffs are removed when you leave SF or Edit Mode. Pin a falloff to keep it. The eye and monitor icons can also hide it.
Settings are grey
Finish the current operation, close F9 or turn off Adjust Last Operation in Tool Settings. Select the falloff you want to edit.
Anchors disappeared
Topology changes or switching meshes can invalidate anchors. Select the source geometry again and click Use Selection as Anchors.
Slow feedback
Dense Bevel, high Segments, complex corners, Multires and curved Geodesic meshes can be slow. Try fewer Bevel segments while adjusting the result, or switch from Rendered to Material or Solid.
Yellow data warnings
Some rebuilt geometry may not retain all custom normals or sculpt detail. Inspect the result and use Undo if it is unsuitable.
Cannot update or disable
Close SF popups, finish the current operation and leave the tool, then retry. If Blender already unchecked the add-on, enable it and disable it again after closing the popups.
Report a bug
Send a private buyer message to the seller on Superhive. Include Blender and SF versions, operating system, GPU and driver, viewport mode, steps, expected result and the full error text. A short video or a small non-confidential .blend file helps.
Author and license
Oleksandr Koliasa. GNU GPL version 3 or later (GPL-3.0-or-later). Source code is included. See LICENSE.txt and NOTICE.txt in the Extension.
Have questions about this product?
Login to message
| Blender Extension Compatible | Yes |
| Published | about 3 hours ago |
| Blender Version | 4.5 - 5.2 |
| Extension Type | Add-on |
| Render Engine Used | Cycles |
| License | GPL |
Discover more products like this
edge slide multi-object editing Selection Falloff geodesic falloff extrude modeling topological falloff weighted transforms falloff soft selection bevel influence curves