 Aman3D
Set Origins in Edit Mode
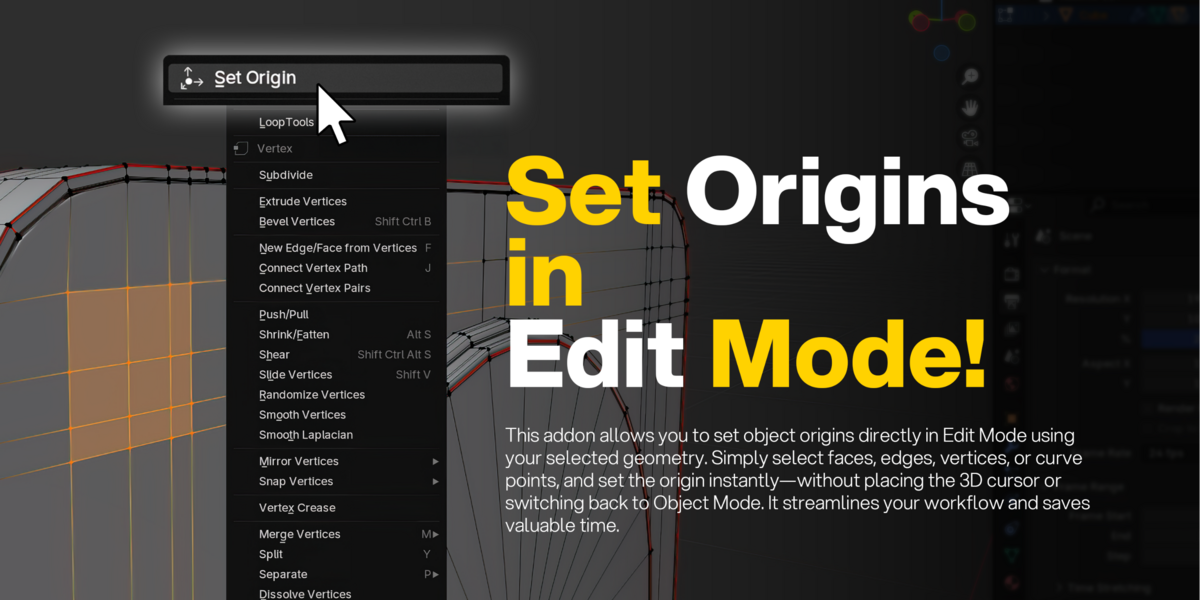
Set Origin adds one item to the Edit Mode right-click menu. Select faces, edges, vertices or curve points, click it, and the object's origin moves to the middle of your selection. No 3D cursor to place, no trip back to Object Mode.
Blender 4.2+Meshes and curvesVersion 1.1.0
◉ Set Origin
Extrude Vertices
Shift Ctrl BBevel Vertices
FNew Edge/Face from Vertices
JConnect Vertex Path
MMerge Vertices
YSplit
Dissolve Vertices
Delete Vertices
▾ The usual way
| 1 | Select the geometry you want as the origin |
| 2 | Press Shift S and choose Cursor to Selected |
| 3 | Switch to Object Mode |
| 4 | Choose Object > Set Origin > Origin to 3D Cursor |
| 5 | Switch back to Edit Mode |
| 6 | Move the 3D cursor back where it was |
▾ Six steps become two
| 1 | Select vertices, edges, faces or curve points |
| 2 | Right-click and choose Set Origin |
The add-on handles the cursor and the mode switch for you, then puts everything back.
▾ Where the origin goes
| ◉ | ||||
| ◎ |
■ Selected faces◎ Previous origin◉ New origin
The new origin is the median, or average position, of every point you have selected. Select one vertex and the origin lands on it. Select a patch of faces and it lands in the middle of the patch.
Edges and faces work too, because their points are selected along with them. Your geometry stays exactly where it is. Only the origin moves.
▾ What you get
Right-click accessSet Origin sits at the top of the Edit Mode context menu, for both meshes and curves.
Works on meshesSelect vertices, edges or faces. The origin goes to the median of the selected points.
Works on curvesSupports Bezier control points, NURBS points and Poly points.
Stay in Edit ModeYou finish exactly where you started, still in Edit Mode.
Your 3D cursor stays putIt moves to your selection for a moment, then returns to its original position.
Undo supportedThe operator is registered with Blender's undo system.
Clear feedbackIf nothing is selected, Blender shows a "No geometry selected" warning and changes nothing.
▾ Install
| 1 | Download the add-on file from your Blender Market purchases |
| 2 | In Blender, open Edit > Preferences > Add-ons and choose Install from Disk |
| 3 | Select the file, then enable Set Origin |
▾ Use
| 1 | Select a mesh or curve and press Tab to enter Edit Mode |
| 2 | Select the points you want as the new origin |
| 3 | Right-click and choose Set Origin |
▾ Details
Version1.1.0
Blender4.2.0 and newer
Works inMesh Edit Mode and Curve Edit Mode
LocationEdit Mode > right-click context menu
CategoryObject
AuthorAman Ullah Burki
Set Origin appears only in Edit Mode on mesh and curve objects. It isn't available in Object Mode or for other object types.
▾ Questions
Does it move my 3D cursor?
No. The cursor is restored to its original position after the origin is set.
How does it handle curves?
For Bezier splines it uses the selected control points, not the handles. For NURBS and Poly splines it uses the selected points.
Can I undo it?
Yes. Use Blender's normal undo.
Set Origin 1.1.0 by Aman Ullah Burki