 Bala
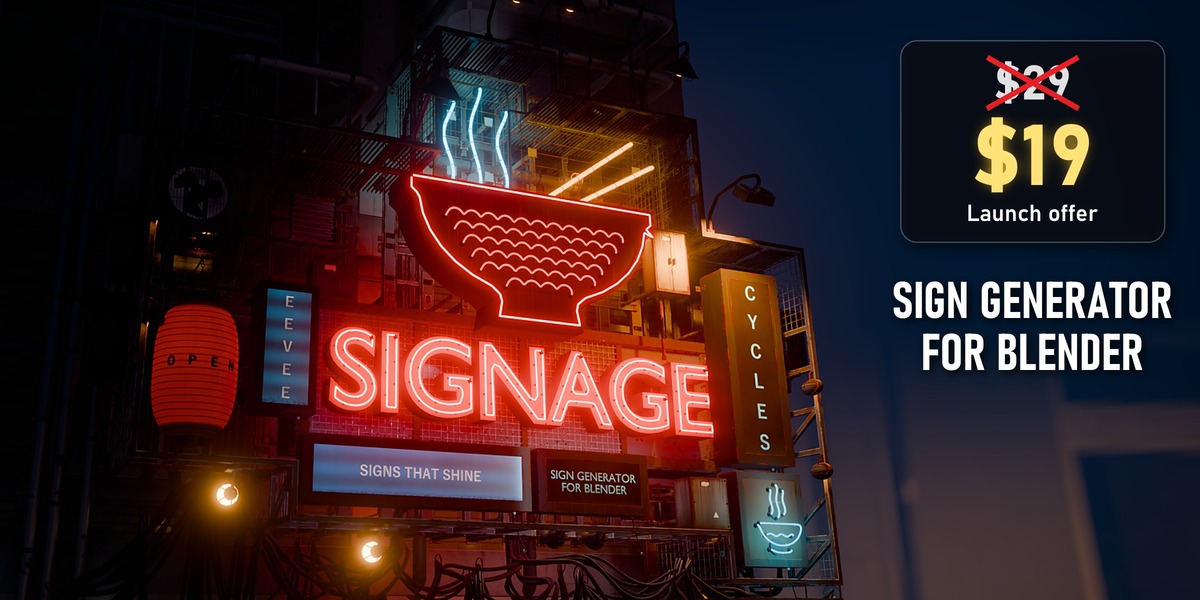
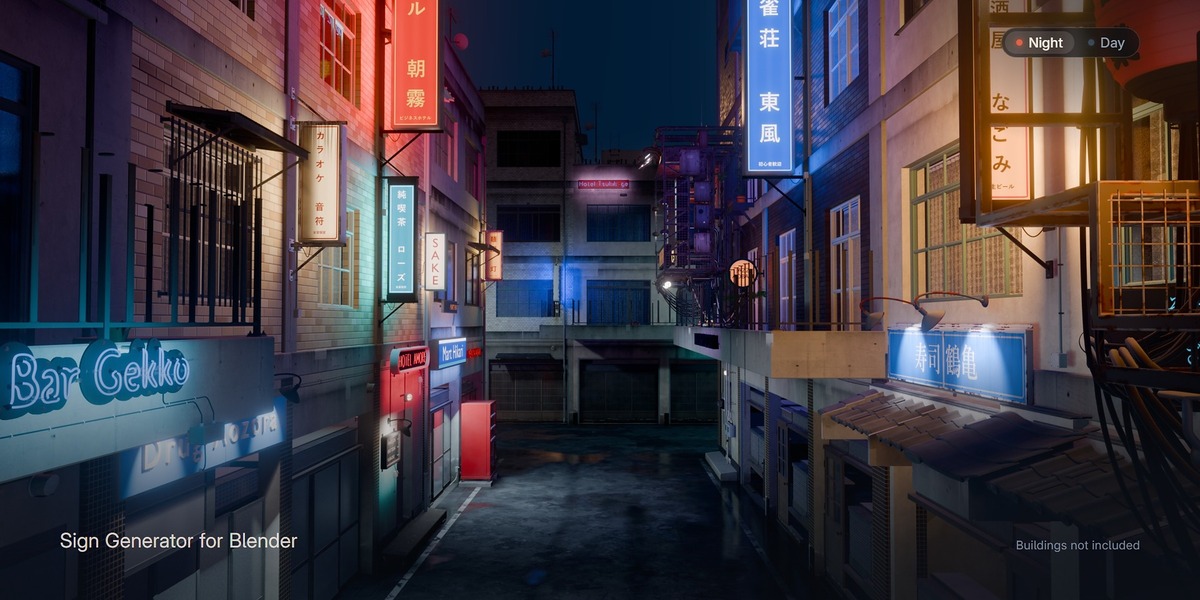
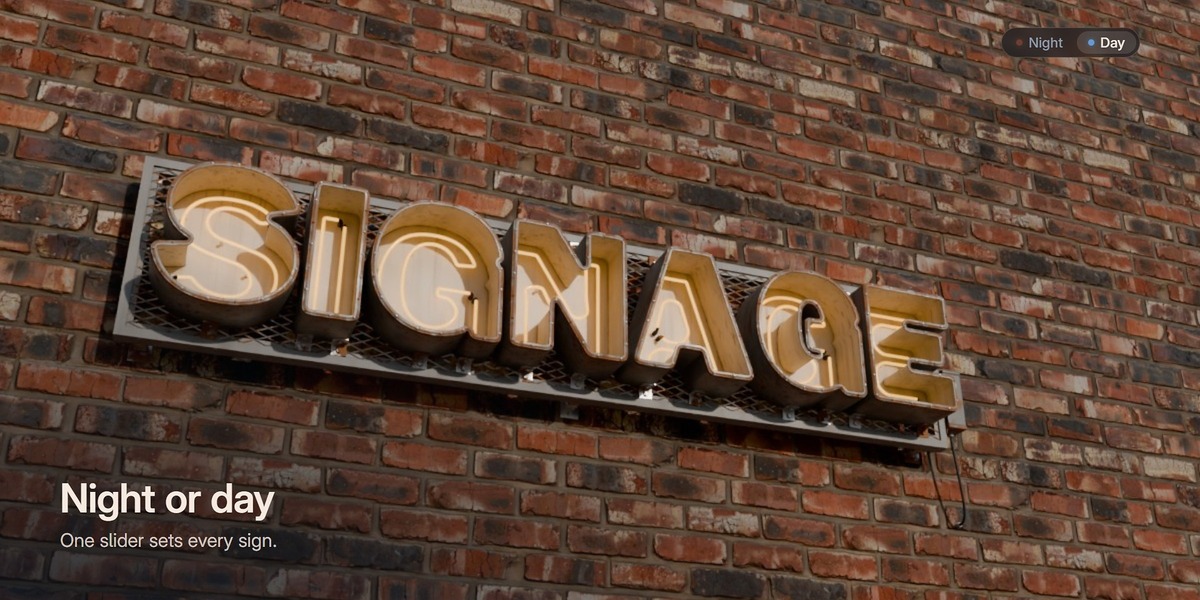
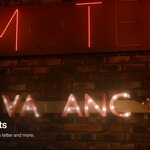
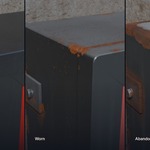
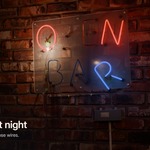
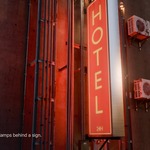
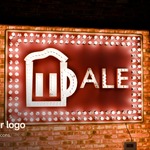
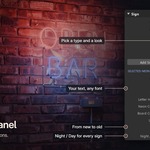
Signage: Signs that shine
User Guide, version 1.0.0
Hi, and thank you for getting Signage.
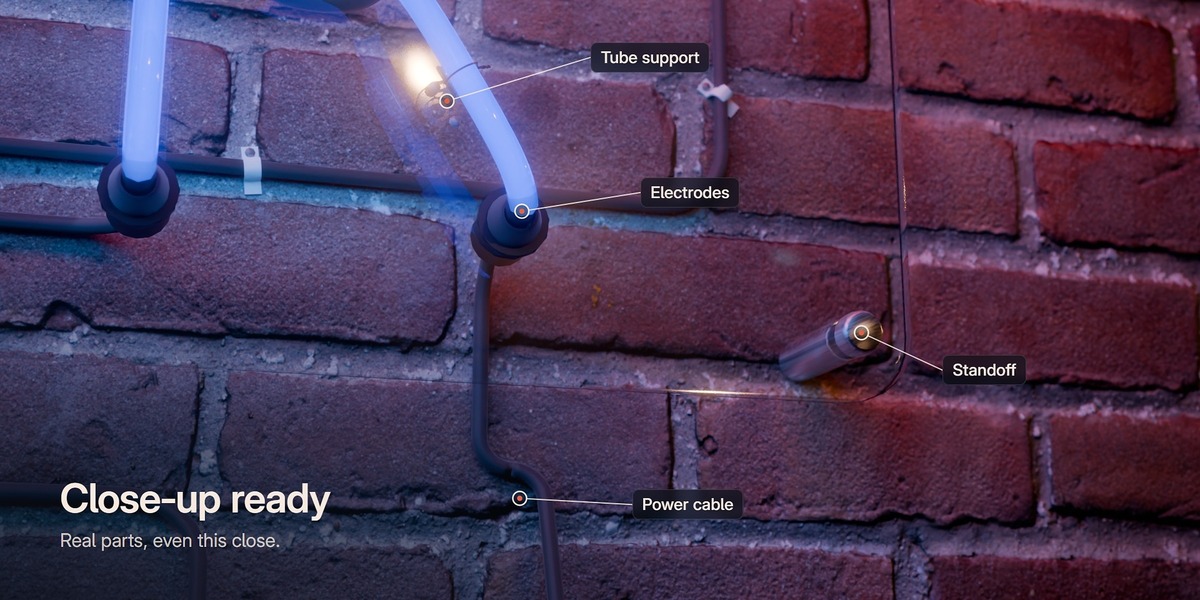
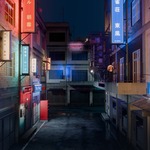
I made Signage because I wanted shop signs that still look real when the camera gets close, that light up the street at night, and that only take a minute to set up. This guide shows you every part of it, from your first sign to a whole street.
If you only have two minutes, read section 3, "Your first sign". The rest is here for when you need it.
Contents
- What you need
- Install, update and remove
- Your first sign
- Where to find everything
- The Sign panel, step by step
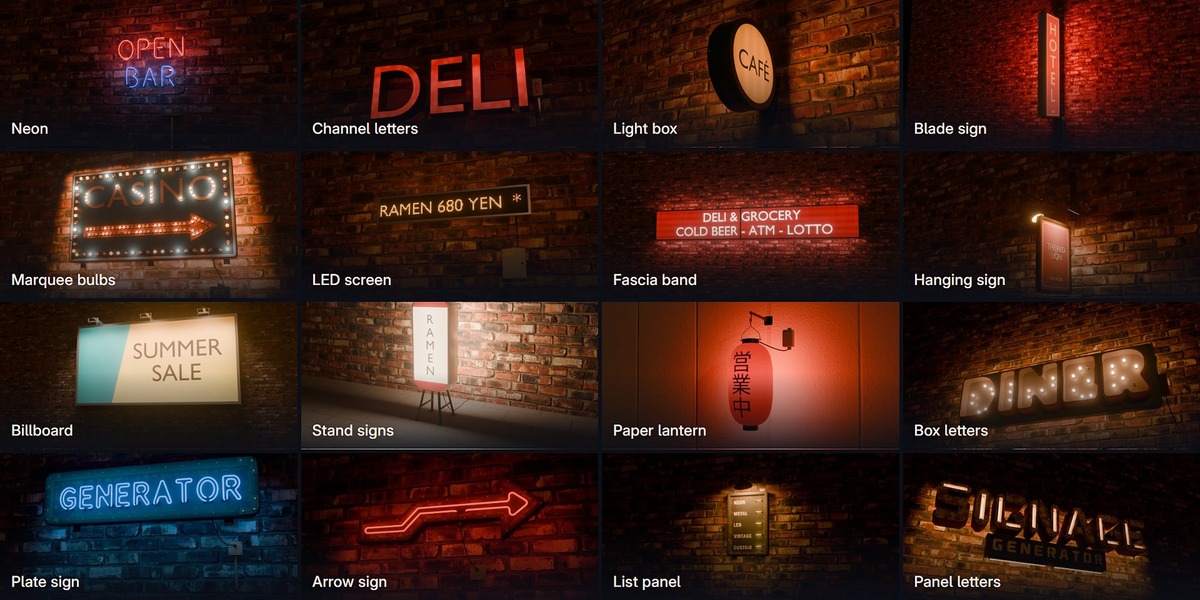
- The 16 sign types and their looks
- Text, fonts and logos
- More Settings: size, shape and mounting
- Night and day
- Effects and single letters
- Wear and damage
- Back Detail
- Clusters and streets
- Convert to Mesh and export
- Your own looks and clusters, parts and the Asset Browser
- Keep Blender fast
- Troubleshooting
- FAQ
1. What you need
- Blender 5.2 or newer. Signage does not install on older versions.
- Cycles or EEVEE. Signs work in both.
- Fonts are optional. Signage uses Blender's built-in font or any font installed on your computer. It does not ship any fonts.
I made and tested Signage in Blender 5.2 and 5.3 on Windows.
2. Install, update and remove
Install
- On Superhive, download the Signage zip. Keep it as it is, you don't need to unzip it.
- In Blender, open Edit > Preferences > Add-ons.
- Click the small arrow at the top right and pick Install from Disk.
- Pick the zip and click the blue Install from Disk button.
You can also drag the zip from your file browser straight into the Blender window.
Signage is now installed and switched on. Close the Preferences and you're ready.
Update to a new version
Install the new zip the same way. It replaces the old version, and your saved looks and saved clusters stay.
Remove
Open Edit > Preferences > Get Extensions. Under Installed, find Signage, click the small arrow at the right end of its row and pick Uninstall.
Two things to know first:
- Uninstalling deletes your saved looks and clusters. Blender removes the add-on's user folder with it. Copy the folder first if you want to keep them (section 15 says where it is).
- Your .blend files keep their signs, as normal Geometry Nodes objects, and they still work without the add-on. Their textures live in the add-on folder though, so pack them before you uninstall (section 17, "Pink textures").
- The Signage library stays in your Preferences. If you clicked Add Signage Library (section 15), also remove the Signage line in Edit > Preferences > File Paths > Asset Libraries.
3. Your first sign
- With the mouse over the 3D Viewport, press N and click the Signage tab.
- In the Sign panel, pick a Type, for example Neon Sign.
- Click the Look picture and pick a look, or keep Default.
- Click Add Sign. The new sign follows your mouse over the walls, floors and roofs of your scene. Move it to where it should go and click. The mouse wheel turns it (hold Shift for small steps).
- Click into Text and type your words. Use | for a new line, for example OPEN|LATE.
- Pick a Font, change the colours, then drag Night / Day to see the sign by night or by day.
- Press F12 to render.
Which way does a sign face? When you place it with the mouse, a wall sign sits with its back flat on the wall you click, upright, and stand signs stand on the floor. If you press Esc instead of clicking, the sign stays at the 3D cursor, facing the front view (Numpad 1), with its origin at the back of the sign. Then rotate it around Z if your wall faces another way (R Z 90, for example), or click Place on Surface in the Sign panel and place it with the mouse after all.
That's it. Everything below is for when you want more.
4. Where to find everything
The Signage tab. Press N in the 3D Viewport and click Signage.
The Add menu. Press Shift + A in the 3D Viewport and open Sign. There is one menu per sign type, with its Default and all its looks. At the bottom, Sign Cluster has Combine Signs, Random Cluster, the 17 ready clusters and your own saved clusters.
The panels. The tab has one open panel and seven closed ones:
- Sign (sections 5 and 15): Add a sign, then change its look, text, font, size, colours, lights and age. Parts and looks to drag in. Night / Day for the whole scene.
- More Settings (section 8): Detail, text layout, shape, more colours and mounting.
- Lights and Effects (sections 9 and 10): Light colour, glow on the wall, flicker, animations and single letters.
- Wear and Damage (section 11): Dirt, rust, sun fade, broken parts and the abandoned look.
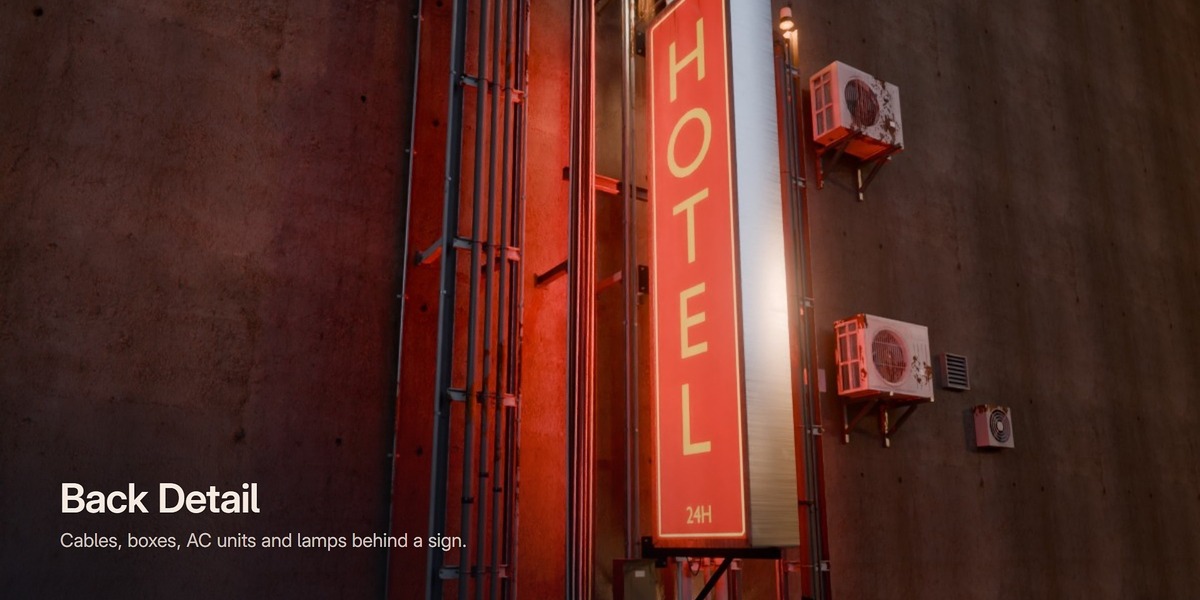
- Back Detail (section 12): Cables, frame, boxes, AC units and lamps behind the sign.
- Logo and Icons (section 7): Your SVG logo or a built-in icon (neon, channel letters and marquee only).
- Clusters and Streets (section 13): Several signs on one frame, and streets full of random signs.
- Export (sections 14 and 15): Convert to Mesh, FBX and GLB, Save My Look and Save My Cluster.
With nothing selected you see Sign, Clusters and Streets and Export. More Settings, Lights and Effects, Wear and Damage and Back Detail show up when you select a sign, and Logo and Icons when you select a neon, channel letters or marquee sign.
Every control has a tooltip. Rest the mouse on it to read what it does.
Tip: Ctrl + click a panel header to open that panel and close all the others.
On the modifiers. All these controls also live on the sign's Geometry Nodes modifiers (Properties editor, Modifiers tab): the sign itself, and Damage, Back Detail and the effects each on a modifier of their own. A few have plainer names in the panel. For example Glow on Wall is called Light Spill on the modifier, Variation is Seed and Animation is Effect.
5. The Sign panel, step by step
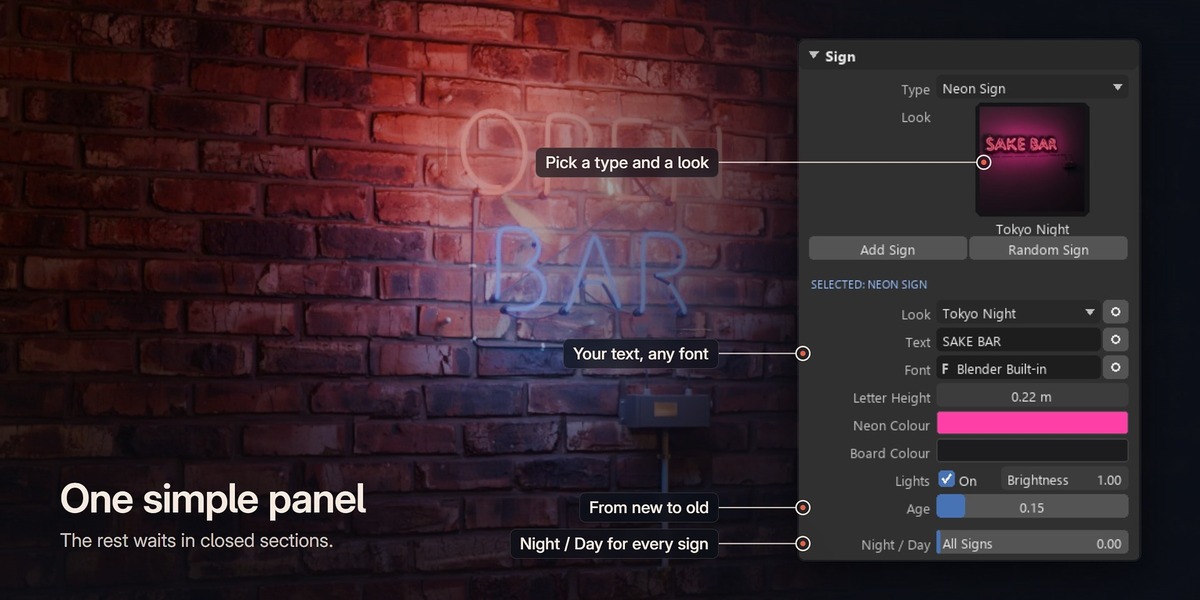
Adding a sign (top of the panel)
- Type: the kind of sign. There are 16 (section 6).
- Look: click the picture to see every look of this type. Default is the plain version. Your own saved looks are in the list too, marked (mine).
- Add Sign: adds the sign, then it follows your mouse over any surface until you click (section 3). Esc keeps it at the 3D cursor. If you would rather always add at the 3D cursor, untick Place new signs on surfaces in Edit > Preferences > Add-ons > Signage.
- Random Sign: adds a random sign at the 3D cursor: a shop name with a fitting type, look and colours, and often the symbol of that kind of shop (section 13).
- Add Signage Library: the first time only. After that click the same place says Parts and Looks and opens the parts and looks you can drag into your scene (section 15).
With nothing selected, the panel says "Select a sign to change it".
Changing the selected sign
When a sign is selected, the panel shows SELECTED: and the type, then:
- Look: gives the sign another look of its type. Your text, font, logo and Variation stay. A look you saved yourself brings its own font and logo, if it has them. The round arrow next to it is New Variation: same look, new random details (wear, broken parts, flicker and damage). Back Detail and the effects get a new variation too.
- Place on Surface: the selected signs follow your mouse over any surface again, so you can move a sign to another wall. Click to place, the wheel turns, Esc puts them back where they were.
- Text: the words on the sign. | starts a new line. The small button at the right end of the Text row is Random Name: it gives the sign a random shop name (section 7).
- Font: type a few letters to search the fonts on your computer. The folder button opens a font file (section 7).
- Size: Letter Height on letter signs, Width and Height on boxes and boards, Height on the blade sign and the paper lantern, Length on the arrow sign.
- Colours: the two or three main colours of the type (section 6). More colours are in More Settings.
- Lights: On switches the lights, Brightness sets how bright they are (1 = normal).
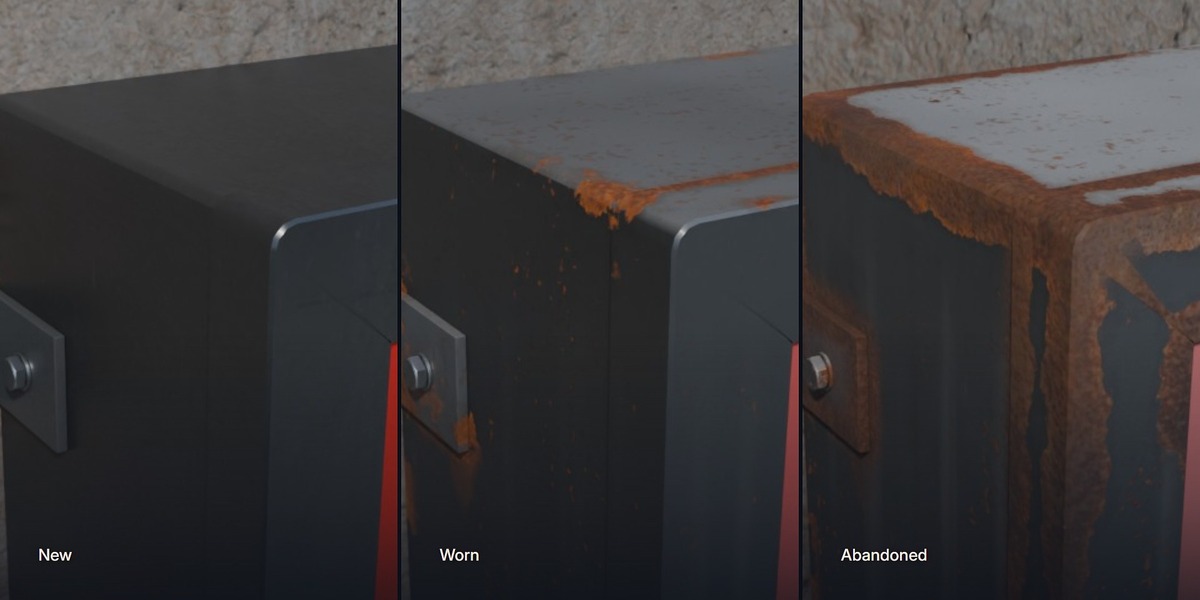
- Age: 0 = brand new, 1 = very old, with dirt, rust and faded paint.
If the sign belongs to a cluster, a line Part of ... has a Select Cluster button.
Night / Day
At the bottom: 0 = night, 1 = full daylight. It changes every sign in the scene at once (section 9).
When a cluster is selected
Click a cluster's frame and the panel shows the cluster instead: Frame Kind, Place on Surface, Layout, Spacing, the main frame settings and a Shuffle button (section 13).
When a part is selected
Select a part from the library and the panel shows SELECTED: PART, the part's name and Place on Surface (section 15).
Several signs at once
These work on every selected sign: Font, Detail, the Damage and Back Detail boxes, Animation, Icon, New Variation, Random Name, Reset Night Lights, Convert to Mesh and Export. The other rows change the active sign (the one you clicked last).
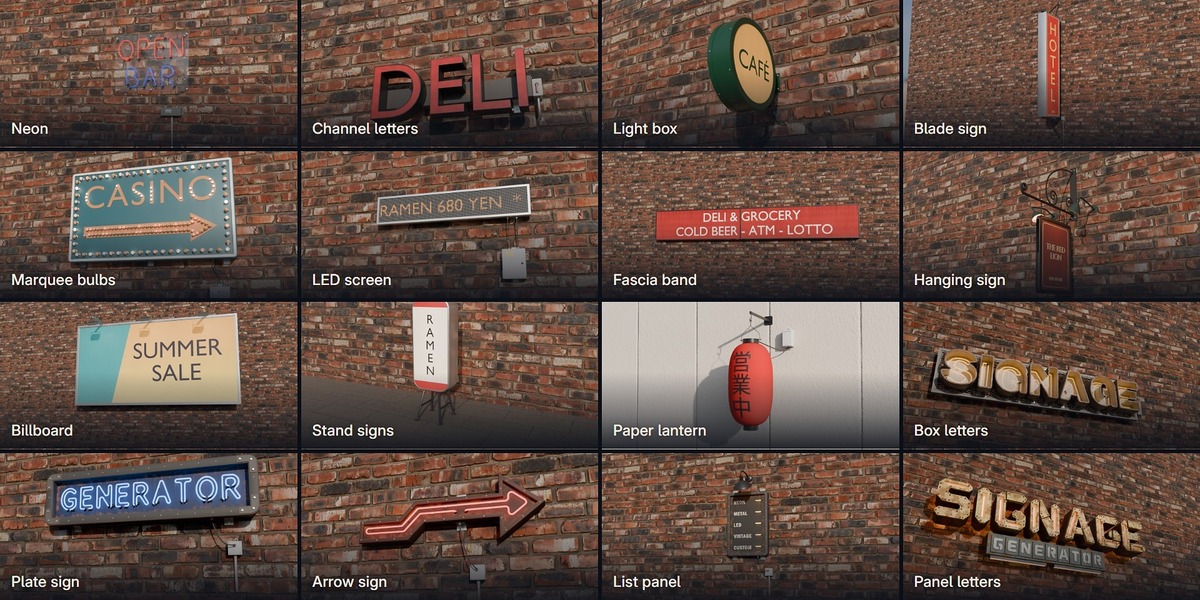
6. The 16 sign types and their looks
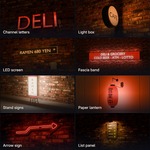
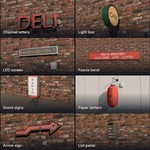
Signage has 16 sign types with 111 ready looks. Every type has an Abandoned look, and 13 types have a Cyberpunk look.
For each type: what it is, what the Sign panel shows for size and colours, and its looks.
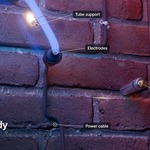
Neon Sign: glass tubes made from your text or any curve, with electrodes, tube supports, a transformer box and its cable. Sign panel: Letter Height, Neon Colour, Board Colour. Looks: New York Bar, Tokyo Night, Paris Hotel, Retro Motel, Window Grid, Abandoned, Cyberpunk, Flickering Bar.
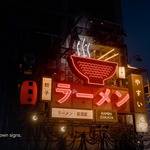
Channel Letters: 3D shop letters, front lit, halo lit, both, open face with bulbs or neon, or not lit, with or without a neon outline, on wall studs or a rail. Sign panel: Letter Height, Face Colour, Side Colour, Light Colour. Looks: New York Deli, Tokyo Ramen, Paris Halo, Retro Diner, Neon Bar, Abandoned, Cyberpunk, Dying Diner.
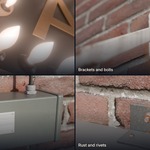
Light Box: a lit wall cabinet with a printed face, tubes or LEDs inside, brackets and a cable. Flat on the wall or sticking out, single or double face, rectangle, rounded or round. Sign panel: Width, Height, Face Colour, Text Colour, Frame Colour. Looks: Tokyo Izakaya, New York Deli, Paris Cafe, Retro Diner, Modern Studio, Abandoned, Cyberpunk.
Projecting Blade Sign: a double face light box or painted board on wall bracket arms. It can be wide, or tall with vertical text like the signs of Tokyo and Hong Kong. Sign panel: Height, Face Colour, Text Colour, Frame Colour. Looks: Tokyo Vertical, Hong Kong Tower, New York Deli, Paris Bistro, Showa Retro, Abandoned, Cyberpunk.
Marquee Bulb Sign: a painted cabinet with bulbs around the border and along the letters, or an arrow, with a bulb chaser. Sign panel: Letter Height, Cabinet Colour, Letter Colour, Bulb Colour. Looks: New York Theatre, Las Vegas Arrow, Tokyo Arcade, Paris Cabaret, Old Fairground, Abandoned, Cyberpunk.
LED Screen: an LED pixel board with modules and a cabinet, on wall rails or a pole. It shows text, a picture, a video, a colour wave or a test pattern, and it can scroll. Sign panel: Width, Height, Text Colour, Background Colour, Frame Colour. Looks: Tokyo Shop Scroller, New York Big Screen, Europe Pharmacy, Retro Red Ticker, US Roadside Message Board, Abandoned, Cyberpunk, Glitch Screen.
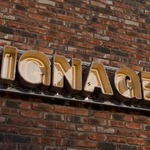
Fascia Sign Band: a long shop sign over a shopfront: a painted panel or a lit box, with trims, joints, screws and gooseneck lamps. Sign panel: Width, Height, Panel Colour, Text Colour, Trim Colour. Looks: Tokyo Konbini, New York Deli, Paris Boutique, Retro Hardware, London Modern, Abandoned, Cyberpunk.
Hanging Bracket Sign: a double face pub or shop board on a wrought iron bracket, on chains, S hooks or rings, with lamps if you want them. Sign panel: Width, Height, Board Colour, Text Colour, Frame Colour. Looks: English Pub, Paris Bistro, New York Barber, Tokyo Kissa, Old Tavern, Abandoned.
Billboard / Rooftop Sign: a poster billboard on a steel frame: on legs, on a pole or on a wall, with catwalk, ladder and flood lights. Sign panel: Width, Height, Poster Colour, Text Colour, Structure Colour. Looks: New York Rooftop, Tokyo Rooftop, Europe Gable Wall, Retro Roadside, Abandoned, Cyberpunk.
Stand Sign: a street A-frame chalkboard, a lit andon stand or a wall menu case. Sign panel: Width, Height, Board Colour, Text Colour, Frame Colour. Looks: Tokyo Andon, New York Deli, Paris Bistro, Tokyo Kissaten, Retro Menu Case, Abandoned.
Paper Lantern: a Japanese paper lantern (chochin): tall, round or barrel, one or a row, on a bracket, a rod or a string. Sign panel: Height, Paper Colour, Ink Colour, Band Colour. Looks: Izakaya Red, Ramen White, Festival Row, Izakaya Row, Festival Gold, Old Torn, Abandoned.
Box Letters: every letter in its own riveted steel box with neon or bulbs inside, on a diamond mesh, a painted box or bare brackets. Sign panel: Letter Height, Box Colour, Letter Colour, Light Colour. Looks: Signage Yellow, Rusty Red, Orange Dense, Retro Diner, Clean Modern, Abandoned, Cyberpunk.
Plate Sign: a fabricated plate box with a bolted rim and neon, lit, painted or bulb letters. Sign panel: Width, Height, Panel Colour, Frame Colour, Light Colour. Looks: Blue Neon Plate, Dark Plate White Letters, Hotel Pill, Round Bulb Badge, Painted Workshop, Abandoned, Cyberpunk.
Arrow Sign: an arrow box with a neon outline, marquee bulbs, a lit face or paint. It can chase and blink. It has no text. Sign panel: Length, Box Colour, Face Colour, Light Colour. Looks: Red Neon Step, Bulb Arrow Down, Neon Line on Plate, Casino Chaser, Exit Lit Arrow, Abandoned, Cyberpunk.
List Panel: a tall framed panel with lines of text and neon dashes, bulbs or LED bars, like a menu or a price board. Sign panel: Width, Height, Panel Colour, Text Colour, Dash Colour. Looks: Side List Neon, Centre List Dashes, Price Board, LED Floor Guide, Abandoned, Cyberpunk.
Panel Letters: heavy industrial letters made of riveted steel plates: block or stencil, colour blocks, honeycomb, louvre and light slot inserts, and an optional second line on a riveted plate. Sign panel: Letter Height, Body Colour, Plate Colour, Accent Colour. Looks: Machine Yellow, Hazard Red, Military Grey, Rusted Machine, Clean Industrial, Cyberpunk Panels, Abandoned.
Good to know
- Letter signs grow with the text: neon, channel letters, marquee, box letters and panel letters.
- Boxes and boards keep their size and fit the text inside: light box, blade sign, LED screen, fascia, hanging sign, billboard and stand sign. Turn on Box Grows with Text (More Settings) and the box grows with the text instead, between a smallest and a largest size you set. The plate sign and the list panel have it on from the start. The paper lantern keeps its size.
- White Tone (Lights and Effects) makes the light white, from warm to cold, instead of the light colour. While it is on, the Light Colour row in Lights and Effects hides. The colour rows in the Sign panel stay where they are.
- The light box has a third detail level, Hero, for very close shots (section 8).
7. Text, fonts and logos
Text
- Type in the Text row of the Sign panel. | starts a new line.
- The small button at the right end of the Text row is Random Name. It gives the selected signs a random shop name. Each click gives a new name for the same kind of shop and the same place: the sign keeps the kind of shop and the country it got from Random Sign or from its first random name. Right after you click, the **Adjust Last Operation panel at the bottom left of the 3D Viewport lets you pick another Country or City or Shop Kind**, a Variation number and Local Script (Japanese, Chinese).
- More Settings > Text Layout has Align, Letter Spacing and Line Spacing. Most boards and boxes add the letter Size, Text Margin, Shrink Text to Fit (Fit to Face on the blade sign) and Box Grows with Text. Some types have more:
- Blade sign and paper lantern: Vertical Text and Column Order (right to left or left to right) for Japanese style vertical signs.
- Blade sign and hanging sign: Sub Text, a smaller second line, with Sub Size.
- Paper lantern: Both Sides, Back Text, and Row Text (the same text on every lantern of a row, or split by |).
- Stand sign: Title, Prices, Title Scale, Auto Wrap, Hand Drawn and Line Colours for chalkboard menus.
- Light box: Print (Text, Image, or Image + Text) and Image, to print a picture on the face.
- Fascia band: Text Style (Vinyl or Raised), Letter Depth and Letter Finish (Paint or Metal).
- Plate sign: Text Style (Neon, Lit Letters, Painted or Bulbs) and Tube Shape.
- Panel letters: Alphabet (Block, Stencil, or your Font).
- Billboard: Text Fill and Text Offset X and Y.
On the hanging sign and the LED screen, Box Grows with Text is in Shape and Colours instead.
Fonts
- The Font row lists the fonts installed on your computer. Type a few letters to search. Blender Built-in is Blender's own font.
- The folder button next to it opens a font file from disk, for example a .ttf or .otf file.
- A new font goes on every selected sign.
- Signage ships no fonts. Your .blend points to the font file on your computer, and Blender does not pack it by itself. Pack it (File > External Data > Pack Resources) if the file goes to another computer.
- Neon signs have two more choices at the top of the list:
- Neon Letters (built-in): Signage's own tube letters. This is the default.
- Your Own Curve: the tube follows any curve object you draw. Pick the curve in More Settings > Text Layout > Curve. If you drew it in the top view, turn on Curve Drawn from Top in More Settings > Advanced.
- Any other font: the tubes follow the outline of that font.
- Japanese and Chinese text works with Blender's built-in font in Blender 5.2. For a different style, pick a font that has these characters, for example Yu Gothic or Meiryo on Windows.
Logos and icons (Logo and Icons panel)
Only neon, channel letters and marquee signs take a logo, so this panel only shows for them.
- Show: Text, Logo, or Logo + Text.
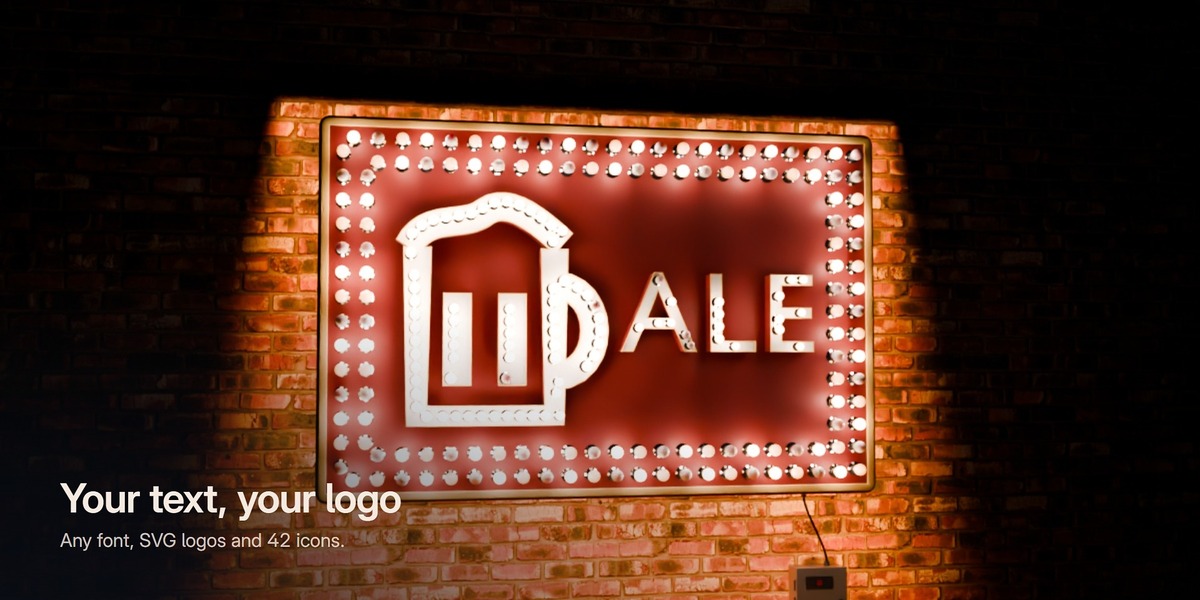
- Icon: 68 built-in icons I drew: food, drinks, arrows, symbols and a symbol for every kind of shop, like a croissant for a bakery, a washing machine for a laundry, a tooth for a dentist or a cleaver for a butcher. On a neon sign the icon also brings its own neon colours, and you can change them afterwards. Marquee signs only list the 18 closed shapes, because the bulbs need an area to sit in.
- Import SVG Logo: pick an .svg file. Signage joins all its paths into one curve (holes stay holes) and puts it on the selected signs. If Show was Text, it switches to Logo + Text. The file browser also has a Show option: Logo + Text or Logo Only.
- Logo Position (Left, Right, Above or Below), Logo Size and Logo Gap. Channel letters and marquee also have Logo Line Width.
The logo is built like the letters: glass tubes on neon, real letters with sides and trim on channel letters, bulbs on marquee. Lines that are not closed shapes become outlines on channel letters and marquee (Logo Line Width sets how wide) and tubes on neon. Blender tells you how many open lines your file has.
Imported logos and icons go into a collection called SG Logos, which is hidden (excluded from the view layer). To edit a logo, tick the collection on in the Outliner and edit the curve; the sign follows.
Any curve object of yours can be a logo too: pick it in the Logo field on the sign's modifier.
8. More Settings: size, shape and mounting
At the top is Detail:
- High: full detail for close ups. This is the default.
- Low: a lighter model for signs far from the camera. Small hardware is left out and curves get fewer segments. It also sets Damage and Back Detail to Low. On 12 of the 16 types Low has between a twentieth and a seventh of the triangles of High, and the marquee and the stand sign have even fewer: a default marquee sign goes from about 150,000 to about 6,200. Channel letters keep almost a third and the LED screen about a seventh.
- Hero (light box only): extra fine detail for very close shots.
Below are closed sections:
Text Layout: see section 7.
Shape and Colours: the rest of the shape and the colours. A few examples:
- Neon: Tube Diameter, Glass (Clear, Coloured or Phosphor), Two Colours, Cable Colour.
- Channel letters: Letter Style (Front Lit, Halo Lit, Front + Halo, Open Face, Non Lit), Letter Depth, Edge Trim, Open Face Lamps (Bulbs or Neon), Neon Outline (Off, Inside Face, On Face or Double: a glass tube along each letter) and Fewer Triangles. On Open Face letters with Bulbs, Inside Face keeps the bulbs where a stroke has room for a bulb and the tube side by side: big letters (about 1.4 m and up with the Retro Diner look) and wide shapes like the motel arrow. On smaller letters the tube takes the place of the bulbs, as with Double. Fewer Triangles keeps the look at Detail High with fewer triangles in the neon outline, its supports and the wall studs (Neon Bar: 29,000 to 17,000): the outline tube keeps a ring only where it bends, and the tube, its supports and the wall studs get 8 sides instead of 12 or 14. The big neon symbols of the clusters use it.
- Light box: Shape (Rectangle, Rounded, Round), Faces (Single or Double), Lamps (Fluorescent Tubes or LED Modules).
- Blade sign: Box Style (Light Box, Painted Metal, Painted Wood), Text Style (Printed or Lit Letters).
- Marquee: Bulb Shape (Sign Bulb, Globe, Candle, Clear Filament), Border Pattern, Border Rows.
- Stand sign: Kind (A-Frame Chalkboard, Andon Light Box, Wall Menu Case).
- Paper lantern: Shape (Tall, Round, Barrel), Skin (Paper or Vinyl), and Count and Spacing for a row of lanterns.
Mounting: how the sign is fixed. For example:
- Neon: Mount (Clear Acrylic, Painted Board, Bare Wall, Wire Grid), Power Supply, Supply Feed.
- Channel letters: Mount (Wall Studs or Raceway), the rail colour and size, Disconnect Switch, Conduit.
- Light box: Mount (Flat on Wall or Projecting), Brackets, Cable.
- Blade sign: Bracket (Square Tube, Angle Steel, Round Pipe), Braces, Middle Arms, Conduit.
- LED screen: Mount (Wall Rails or Pole).
- Hanging sign: Bracket Style (Scroll, Diagonal Stay, Tube and Rod), Hanger (Chain, S Hook, Ring), Swing, Lamps.
- Billboard: Mount (Legs, Monopole, Wall), Catwalk, Railing, Ladder.
- Paper lantern: Mount (Wall Bracket, Rod, String, Hook Only).
- Box letters: Backing (Expanded Mesh, Painted Box, Bare Brackets).
Sections of one type:
- LED screen > Screen: Show (Text, Image, Image + Ticker, Colour Wave, Test Pattern), Colour Mode, Image, Play Video with Video Frame, Scroll with its speed and position, the ticker, Dead Pixels, Refresh Banding and the colour of the glow on the wall. To play a video, load an image sequence or a movie in Image and turn on Play Video; the screen then follows the timeline.
- Arrow sign > Arrow: Arrow Shape (Straight, Elbow, Step, Bent, Curved, Double), Direction, Mirror, Shaft Width, Head Length, Head Width, Rise.
- Panel letters > Inserts: Inserts (None, Plain, Honeycomb, Louvres, Light Slot, Grille, Mixed) with their amount, depth and colours, and Slot Lamp. Second Line: a riveted plate under the letters with a second line of text, Plate Style and Second Line Light.
Advanced:
- Variation: the random number behind the wear, the broken parts and the flicker. New Variation sets it for you.
- Cycles Glow Helpers (neon, channel letters, box letters, plate sign, arrow sign, list panel): hidden helpers that make the glow show on the wall and the ground in Cycles. Leave them on. Signage's Convert to Mesh and Export remove them by themselves; if you export with Blender's own exporters, turn them off first.
- Pixel Mode (LED screen): Geometry is a real LED for every pixel, for close ups. Shader draws flat pixels and is much lighter, for far or big screens. Auto picks by detail and screen size.
- Curve Drawn from Top (neon with your own curve).
- On the newer types, separate variation numbers for the lights, the wear, the inserts and the colours.
Rows that do nothing with your current choices stay hidden. For example Min Width and Max Width only show once Box Grows with Text is on, and Glass Colour only shows when Glass is Coloured.
9. Night and day
The Night / Day slider
At the bottom of the Sign panel. 0 is night and 1 is full daylight, and it changes every sign in the scene. By day the light the signs throw on the wall and the ground drops to about a twentieth of its night strength. Values in between work for dusk.
Night / Day only changes the signs. The sun and the sky of your scene are up to you, so for a day render light the scene for day too, for example with an HDRI.
Night Look, the button under the slider, gives the scene the look of our own renders in one click: punchy colours and a soft glow around the lit parts of the signs, in final renders and in the viewport (Material Preview and Rendered view), in EEVEE and Cycles. It sets the AgX Punchy look and a Glare node in the compositor. If your scene already has a compositor, it only puts its Glare node just before the output. Click it again and your own settings come back. It works per scene and never changes the world, the lights, the signs or the render engine.
Each sign brings its own light
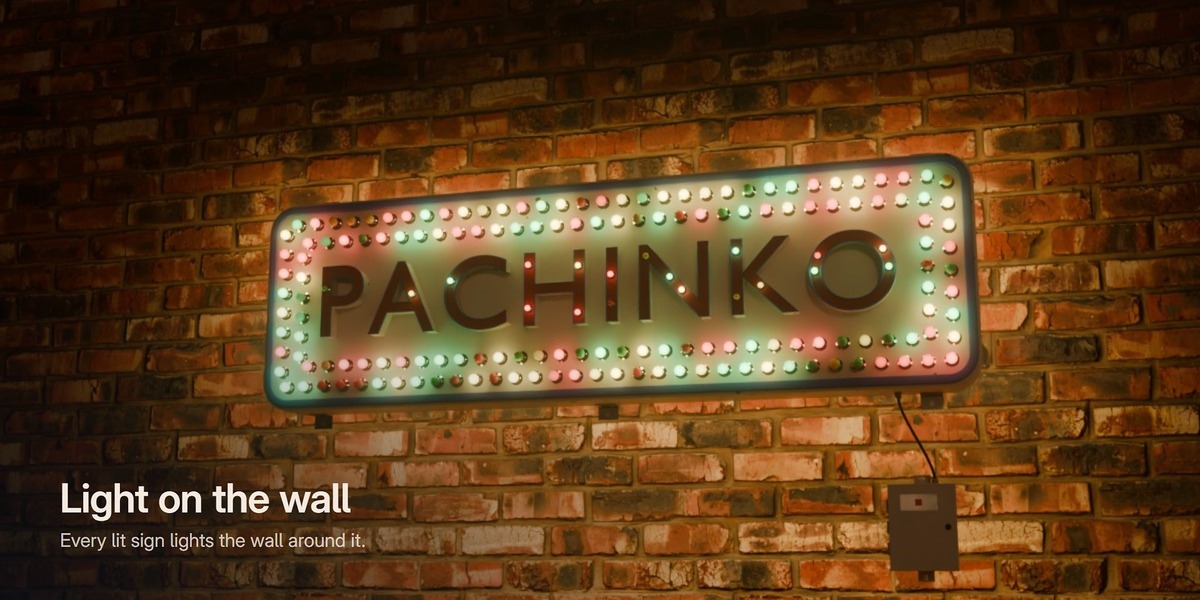
Every lit sign adds real lights (area or spot lights) that light the wall and the ground around it. They are sized and placed from the sign, so they follow the text, the size, the colour and the effects. They are children of the sign and you can't select them, so they stay out of your way. Neon and channel letters use these lights in EEVEE; in Cycles their Cycles Glow Helpers light the wall instead (section 8).
- Copy a sign with Shift + D or Alt + D and the copy gets its own lights.
- Delete a sign and its lights go with it.
- If you moved or deleted the lights by hand, click Reset Night Lights at the bottom of Lights and Effects.
Lights and Effects: the light rows
In the Sign panel, Lights has On and Brightness. Lights and Effects has the rest:
- Light Colour, when it is not already in the Sign panel. It hides while White Tone is on.
- White Tone and K: a white light instead of the light colour, from warm to cold, for example 2700 K for warm and 6500 K for cold.
- Glow on Wall: how much the sign lights up the wall and the ground.
- Flicker: the share of lights that flicker, with Flicker Speed.
- Dead Lights: the share of lights that are dead.
- Rows of the type, for example Halo Strength and LED Hot Spots on channel letters, Lamp Style, Lamp Count and Face Glow on the billboard, Hot Spot on the paper lantern, Wall Glow on the LED screen and Edge Light on panel letters.
Glow Lights in Viewport
Near the bottom of Lights and Effects. It only changes how the signs' lights show in the viewport while you work:
- Off: no glow lights in the viewport. The fastest.
- No Shadows: the lights work but cast no shadows. This is the default.
- Full: with shadows, like the final render. The slowest.
Final renders, stills and animations, always get the full lights, whatever you pick here: the same night scene rendered with all three settings gives the same picture. Saved files keep the full lights too.
10. Effects and single letters
Animation
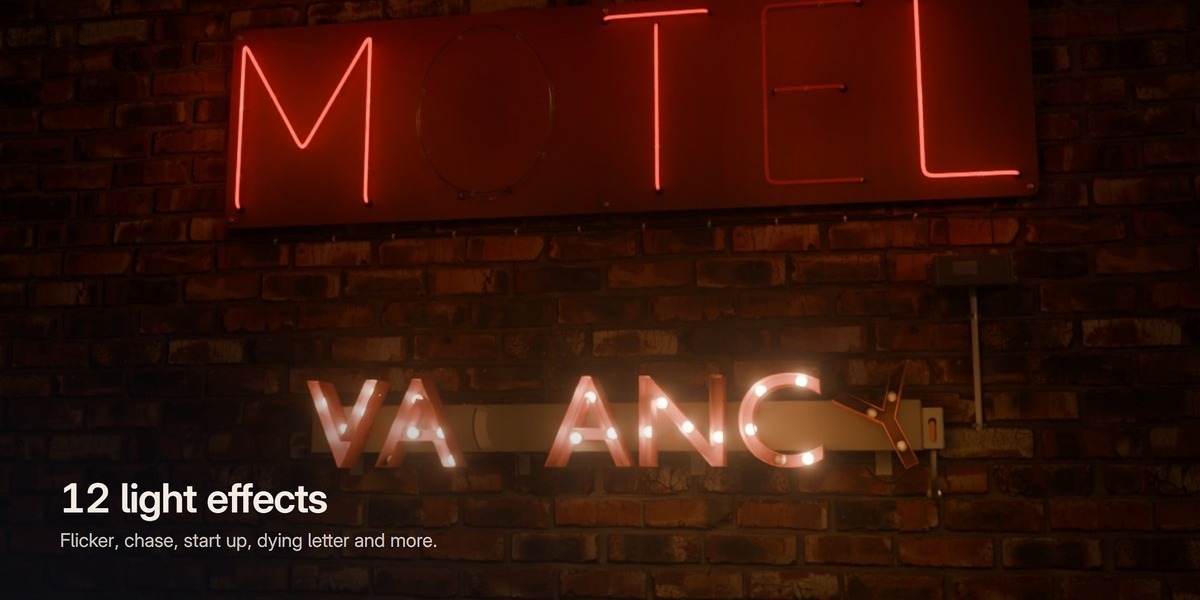
In Lights and Effects, pick an Animation. Steady (off) is the default. There are 12 effects:
- Flicker / Buzz: a faulty light that flickers and buzzes.
- Glitch Bursts: short bursts of glitches now and then.
- Start Up: the sign switches on part by part.
- Blink: the whole sign blinks on and off.
- Pulse: the brightness swells up and down.
- Strobe: fast flashes.
- Letter by Letter: letters light up one after the other.
- Wipe: the light sweeps across the sign.
- Chase: lit parts run along the sign.
- Colour Cycle: the light colour changes over time.
- Dying Letter: one letter keeps failing.
- Broken Tube: one tube or part flickers as if broken.
Then:
- Speed: how fast it runs (1 = normal).
- Effect Options (closed): Time Offset (seconds added to the scene time, for example to choose when Start Up begins), Randomness (0 = every letter, tube or bulb in step, 1 = each on its own clock), Intensity (0 = steady), Lowest Brightness (how bright a light stays in its off moments), Share of Parts (for Flicker, Dying Letter and Broken Tube: how many parts fail), Chase Length (one part on in every group of this many) and Animate (Auto, Letters or Parts).
Effects run on the timeline: press Space to play, or scrub. They are part of your animation, so they render like anything else in the scene, and the glow lights on the wall follow the effect.
Only signs that move follow the frame. A still sign is not rebuilt when the frame changes, so it never slows down playback.
To turn an effect off, pick Steady again.
Bulb Chase (marquee and arrow sign)
These two types also have their own bulb animation in Bulb Chase:
- Marquee: Chaser (Off, Chase, Alternate, Twinkle, Fill), Chase Speed, Chase Length, Reverse, Lowest Brightness, and Letter Animation (Steady, With Border, Letter by Letter, Blink).
- Arrow sign: Chaser (Off, Chase, Fill, Blink, Flash Head), Chase Speed, Chase Steps, Chase Length, Lowest Brightness.
Screen Glitch (LED screen)
Once an LED screen has an animation, Screen Glitch shows (the Glitch Screen look has it from the start): Screen Glitch (how often the picture glitches), Pixel Blocks, Block Size, RGB Split, Scan Lines, Roll Bar and Dead Pixels.
Single Letters
Open Single Letters in Lights and Effects and click Control Single Letters. You get one button per letter (spaces are skipped). Click a letter to see its own controls:
- State: On (lit, follows the effect), Off (switched off), or Dead (a dead tube or lamp with grey glass).
- Animation: Same as Sign, or an effect of its own with Speed, Variation and Time Offset.
- Own Colour with its Colour, and Brightness (1 = normal).
- Physical letter:
- Tilt: tilts the letter, in degrees.
- Hang: the letter hangs from one top stud. Plus hangs it from the left stud, minus from the right; 1 puts its centre straight below the stud.
- Offset: moves the letter: X right, Y out of the wall, Z up, in metres.
- Scale: the letter's size (1 = normal).
- Missing: the letter is gone. Its studs, a clean paint ghost of its outline and a cut wire stay on the wall.
A dot on a letter button means that letter has its own settings. Clear Letter resets the picked letter, **Clear All** resets all of them.
The settings stay with the letter's place in the text: if you change the text, the third letter keeps the third letter's settings.
Where they work:
- State, own animation and colour work on letters that light up.
- Tilt, Hang, Offset, Scale and Missing work on neon, channel letters, marquee, box letters, plate sign, list panel and panel letters, and they also move the letters of the blade sign, fascia band, stand sign and paper lantern. On the light box, LED screen, billboard and the painted hanging sign the text is printed on the face, so these five do nothing there.
11. Wear and damage
Wear
Age in the Sign panel ages the whole sign: 0 = brand new, 1 = very old. Wear and Damage fine-tunes it:
- Dirt and Rust: how much dirt and rust the Age adds (1 = normal, 0 = none).
- Sun Fade: how much the sun fades the paint with Age.
- Broken Parts: the share of broken parts.
- The paper lantern adds Tears, Stains and Sag, the billboard adds Poster Wear.
Damage
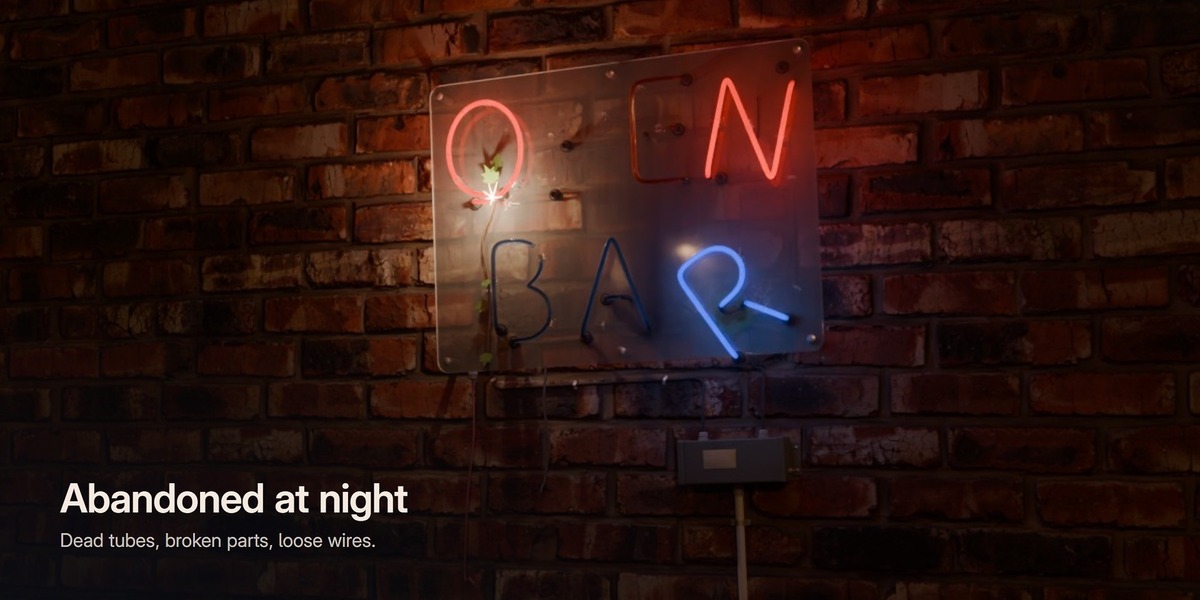
Tick Damage for the abandoned look on top of the wear. Amount scales every kind of damage (0 = a clean sign); it starts at 0.6. Damage Details has closed sections:
- Lights: Extra Dead Lights, Sparking (broken lit parts that spark and buzz instead of going dark), Spark Speed.
- Faces: Broken Faces, Missing Faces, Board Holes, Hole Size, Cracks.
- Tubes: Broken Tubes, Gap Length, Shards (glass and acrylic shards on the ledges below).
- Letters: Hanging Letters, Hang Angle, Drop, Missing Letters, Ghost (the clean shape left where a letter was), Stud Holes.
- Frame: Bent Frame (failed fixings: the sign hangs crooked, ground signs lean, arms droop), Tilt, Droop.
- Wiring: Loose Wires, Wire Count, Hanging Length, Wire Thickness, Glands.
- Surface: Burn and Soot, Bullet Holes, Rust Through and Dust and Grime, with counts and sizes.
- Plants: Plants (vines over the sign), Vine Count, Vine Length, Leaf Size, Moss Patches, Moss Size.
Rows that do nothing on the selected type are hidden. A channel letters sign has no Broken Tubes, for example.
Broken lights go dark or spark, and the light on the wall follows. On lit signs a spark also flashes a small real light.
Every type has an Abandoned look to start from, and New Variation gives you new damage with the same settings.
12. Back Detail
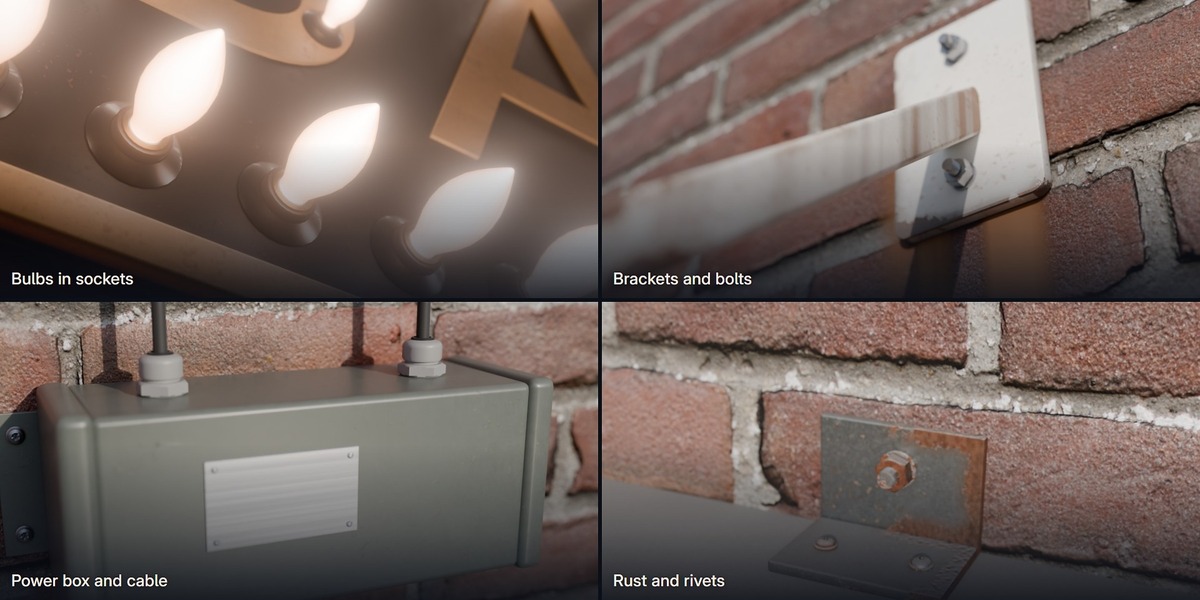
Real signs have clutter behind them. Tick the box in the Back Detail header to add cables, a frame, boxes, AC units and lamps behind and under the sign.
- Style: Clean, Service or Cyberpunk Mess.
- Amount: scales every count below.
- Four buttons: Frame (a steel scaffold frame; flat signs are pushed off the wall by its depth), Boom (a box truss boom, for signs that stick out from the wall), Catwalk and Lamps (work lamps on or off).
Back Detail Details has closed sections:
- Frame: Layers, Bays Across, Bays Up, Depth, Extend Left, Right, Top and Bottom, Tube Size, Bracing, Frame Colour, Rust, Frame Style (Scaffold Grid or Utility Rack), Pipe Bundles, Small Conduits, Underbelly Tray.
- Cables: Cable Bundles, Cables per Bundle, Thickness, Hanging Length, Sag Variation, Spread, Loose Ends, Loose End Drop, Drip Loops, Tie Spacing, Route (To Wall, To Pole or Down the Facade), Pole Distance, Cable Colours.
- Gear: AC Units, Junction Boxes, Lamps on Arms, Flood Lights, Beacons, Conduits, Vents, Antennas, Conduit Drop.
- Truss Boom: Boom Extra, Truss Depth, Truss Width, Panel Length, Chord Size, Tie Rod, Hangers.
- Catwalk: Catwalk Width, Railing, Ladder, Ladder Length.
- Lamps: Lamp Strength, Lamp White Tone and Lamp Temperature, Lamp Colour, Beacon Colour, Beacon Speed (flashes per second, 0 = steady), Lamp Flicker, Dead Lamps.
- Placement: Mount (Auto, Flat on Wall, Projecting), Find Street Level (finds the street below the sign by itself), Street Height, Ground.
- Advanced: Variety, Own Age, Rack Variation.
The Frame, Truss Boom, Catwalk and Lamps sections hide while their button is off.
Every lamp and beacon gets a real light that lights the sign, the wall and the street: spot lights for the lamps and small point lights for the beacons. They follow Lamp Strength, the colour, the flicker, the dead lamps and Night / Day.
The Back Detail follows the sign's Detail, and New Variation gives it a new variation together with the sign.
13. Clusters and streets
Clusters
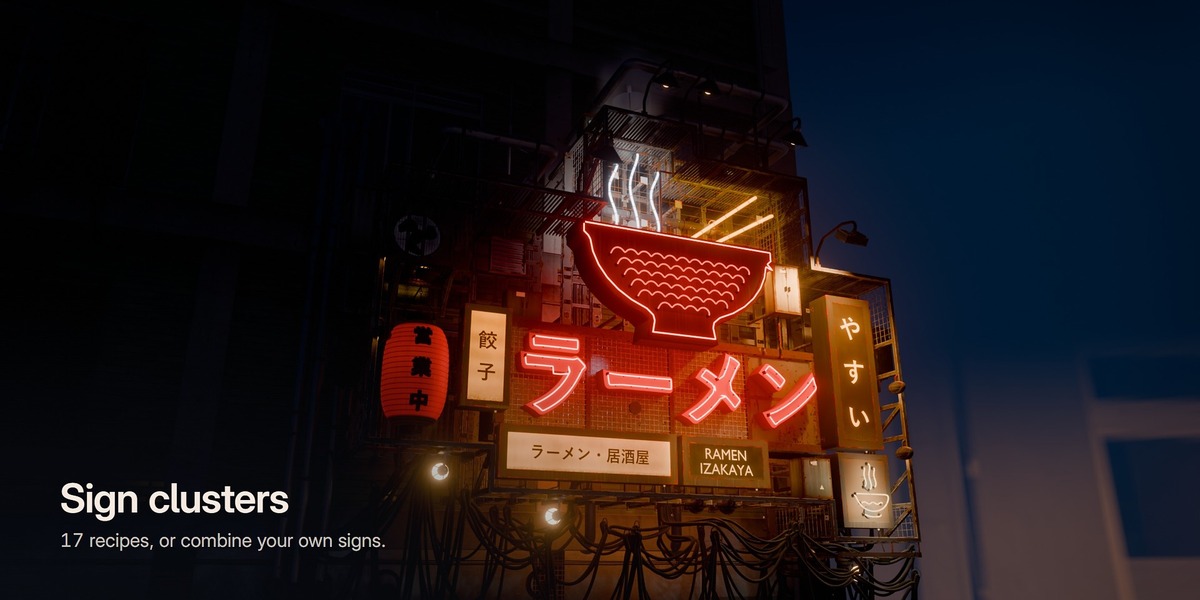
A cluster is several signs of one shop on one frame: the crowded signs of a Tokyo side street on a steel rack, or a whole shop front from New York, Las Vegas, Paris or London.
In Clusters and Streets, pick a cluster in the gallery and click Add Cluster. Like a new sign, the cluster then follows your mouse until you click: clusters that hang on a wall sit flat on the wall you click, a pole sign stands on the street and a roof sign on a roof (Esc keeps it at the 3D cursor). There are 17 ready clusters:
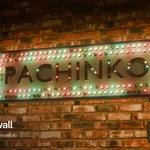
- Tokyo and Hong Kong (on the steel rack): Ramen, Yakitori, Izakaya, Karaoke, Pachinko, Hong Kong Noodles, Abandoned and Clean.
- New York: New York Deli, New York Bar and New York Pizza (shop fronts with a sign band, window neon and a blade sign) and Broadway Theatre (a theatre canopy with its marquee and bulbs).
- Las Vegas: Las Vegas Casino and Las Vegas Motel (pole signs) and Las Vegas Diner (a roof sign).
- Paris: Paris Cafe. London: London Pub (timber fronts with gilt letters, lamps and a hanging sign).
A big cluster takes a moment to build: the Ramen cluster has 14 signs and takes up to about half a minute.
Many clusters carry a big symbol of the shop over the name, like the Ramen bowl: a deep metal can in the shape of the thing with neon on its face, and neon parts in it, on it or behind it, each one a sign of its own. There are 11: pizza slice, coffee cup, beer mug, hot dog, martini glass, motel arrow, casino starburst, theatre masks, croissant, burger and the ramen bowl. The city clusters have them too, for example the hot dog on the New York Deli, the masks on Broadway Theatre and the arrow with its shooting star on the Las Vegas Motel.
- Random Cluster adds matching signs for one kind of shop. The menu next to the button picks the City: Any City, Tokyo, Hong Kong, New York, Las Vegas, Paris or London. Each city has its own kinds of shop, sign looks, frame, names and colours, and a new name each time (a name that is already in your scene does not come back while there are free ones). Right after you click, Adjust Last Operation lets you change the City, the Shop Kind and the Variation:
- Tokyo: ramen, noodles, yakitori, izakaya, sushi, karaoke, pachinko, bar, cafe or arcade.
- Hong Kong: noodles, dim sum, tea house, mahjong, pawn shop, pharmacy, electronics, bar or hotel.
- New York: deli, pizza, bar, jazz bar, diner, theatre, cinema, liquor store, laundry or barber.
- Las Vegas: casino, motel, hotel, diner, steakhouse, bar, pawn shop or liquor store.
- Paris: cafe, bar, diner, bakery, hotel, pharmacy, florist, bookshop or tea house.
- London: bar (the pub), cafe, bakery, barber, bookshop, diner or hotel. On the Tokyo and Hong Kong racks, a shop with a big symbol of its own gets it over its name (always for the kind it is made for, often for kinds it fits too). In the cities the New York delis, bars, pizza places, theatres and diners, the Las Vegas casinos, motels and diners, the Paris cafes and bakeries and the London pubs and bakeries get theirs, as in the ready clusters: the New York diners get the burger and the bakeries the croissant.
- Combine Signs opens a small window with a Name, the Layout, the Spacing, the Frame Kind and Use the Selected Signs:
- If two or more signs that are not in a cluster yet are selected, Use the Selected Signs is ticked and those signs go on one frame. Their places come from their types. The main sign is the biggest fascia band, or the biggest light box without its own text; without one of these it is the biggest channel letters sign, else the biggest sign.
- Otherwise the window has 8 rows, 6 of them ticked from the start. Tick a row and pick its Type, its Look and its Place in the cluster.
A cluster has three parts:
- an empty on the wall: move or turn it to move the whole cluster, or click Place on Surface in the cluster panel and move it with the mouse;
- the member signs: normal signs. Select one and change it in the Sign panel like any other sign;
- one frame that builds the scaffold, the backing plates, the brackets, the boxes, the AC units, the lamps, the pipes, the steam and the hanging cables around the signs. It follows the signs as you change them.
Frame Kind is the kind of frame that holds the signs, and you can switch it on any cluster:
- Tokyo Rack: the steel rack of the Tokyo and Hong Kong clusters, with its cables, boxes, AC units and lamps.
- Storefront: a shop front. The main sign goes on the sign band, the small signs hang in the shop window, blade signs stand off the wall at the band ends, and Paris and London fronts get their cornice, consoles and lamps.
- Theatre Canopy: a canopy over the door. The marquee and the readers sit on its front, with bulbs under it.
- Pole Sign: one or two poles on the street with the signs on cabinets, channels and backers.
- Roof Frame: a steel frame on a roof with a catwalk, for roof letters.
Switch back and forth as you like: each frame kind keeps its own settings in the cluster, and the signs get back what a frame turned off. The frame's own on and off switch is still called Frame.
With a cluster selected (click its frame), the Sign panel shows Frame Kind, Place on Surface, Layout (Main + Satellites, Stack, Row, Tower or Free), Spacing, the main settings of the frame (on the Tokyo rack: Frame Style, that is Utility Rack, Scaffold Grid, Truss or Riveted Plates, Gear Amount and Age) and Shuffle. Clusters and Streets shows:
- Frame Kind and Place on Surface: the whole cluster follows your mouse until you click. Pole signs and roof signs stand on the floor or roof you click, the others go flat on a wall.
- Overlap: how far the side signs overlap the main sign (they sit in front).
- Glow on Frame: coloured light from the signs on the frame, the boxes and the wall (0 = off).
- Align: for the Stack and Row layouts.
- Detail: High or Low for the whole cluster, every sign and the frame.
- Lay Out Again.
- Signs in this cluster: click a name to select that sign, change its place, or remove it with X (it stays in the scene). A sign placed as Attached rides on another sign, its anchor, like neon inside a bowl box.
- New Sign and Add Selected.
- Rust, and the buttons Frame, Lamps and Steam.
- Frame Details: closed sections for the frame, the mounting, the cables, the gear, the steam, the lamps and Advanced.
- Delete Cluster: deletes the signs, the frame and the lights. Keep the Signs in Adjust Last Operation deletes only the frame.
The places a sign can have: Main Box, Main Letters, Icon, Plaque, Vertical, Small Box, Lantern, Extra and Attached. Free is the layout that never moves the signs, so you can place them yourself.
Japanese and Chinese text in clusters. The ready clusters use Japanese or Chinese text when your computer has a font with these characters: Signage looks for Yu Gothic, Meiryo, BIZ UDGothic, MS Gothic, Microsoft JhengHei, Microsoft YaHei, Noto Sans CJK, Hiragino, Droid Sans Fallback or WenQuanYi Micro Hei. Without one they switch to Latin letters (RAMEN, OPEN and so on). To get Latin letters anyway, press Esc while the new cluster follows the mouse (it stays at the 3D cursor), untick Local Script (Japanese, Chinese) in Adjust Last Operation, then move it with Place on Surface.
Save your own cluster with Save My Cluster in the Export panel (section 15).
Streets
- Fill Street puts a row of random wall signs along X, starting at the 3D cursor. By default it makes 6 signs with 0.8 m between them, each a little higher or lower than the cursor. Change Count, Gap and **Height Variation** in Adjust Last Operation.
- Re-roll Selected swaps the selected signs for new random ones. The three buttons below it keep the Type, the Colours or the Text. Selected empties get a new random sign each, so you can place empties where you want signs and fill them all at once.
Random Sign, Random Name, Fill Street and Re-roll Selected share their options in Adjust Last Operation: **Country or City (Any, Generic, Hong Kong, Japan, Las Vegas, London, New York or Paris), Shop Kind** (52 kinds of shop), Variation (the same number and settings give the same result; 0 = a new one each time) and Local Script.
There are about 5,800 shop names, all made up: around 900 to 1,000 each for Japan, Hong Kong, New York, London and Paris, about 1,100 in a general list and a small list for Las Vegas. A name never comes back in the same scene while the list still has free ones.
Every kind of shop has its own symbol now, and the random tools show it on the signs that can carry a logo: a cup for a cafe, a sandwich for a deli, a taco for a taco shop, a cleaver for a butcher and so on.
The random tools pick from 11 types: neon, channel letters, light box, blade sign, marquee, LED screen, fascia band, hanging sign, billboard, stand sign and paper lantern. Fill Street leaves out stand signs and billboards, because it makes wall signs.
14. Convert to Mesh and export
Convert to Mesh
Convert to Mesh turns the selected signs into plain mesh objects. Every part becomes real geometry and the Cycles glow helpers are removed. After that the sign can no longer be changed with Signage, so do it last.
With a cluster selected, Convert to Mesh makes plain meshes of every sign and the frame under a new empty. **Join into One Mesh** in Adjust Last Operation makes it one object.
Good to know about the lights:
- The glow lights on the wall are copied as plain lights, with the strength they have when you convert. In a cluster the lamps and the glow lights of the frame are copied too.
- The lights of the Back Detail lamps and beacons and the spark light of Damage are copied too. Beacons keep flashing.
- Neon and channel letters: in Cycles their glow on the wall comes from the glow helpers, which Convert to Mesh removes. The converted sign gets the glow lights of EEVEE instead, so its wall glows in Cycles and in EEVEE.
Export FBX and Export GLB
These save the selected signs, or the selected cluster, as a file for game engines and other apps. The signs in your scene stay as they are. The file browser has three options:
- Format: FBX or GLB.
- Light Version: exports the Detail Low model (small hardware left out, fewer segments).
- Game Materials (on by default): simple PBR materials. The glow is kept as an emissive colour and strength. Printed faces (light box print), LED screen pixels and image textures are baked into a colour picture and a glow picture, which the GLB carries inside and the FBX embeds. Turn it off to keep Blender's own materials.
Some sizes, so you know what to expect: a default neon sign is 3.6 MB as GLB and 0.86 MB as FBX. A light box with its baked print is 5.3 MB as GLB and takes about 10 seconds because of the bake. The whole Ramen cluster at full detail is about 90 MB as GLB and takes a few minutes; with Light Version it is about 50 MB. So tick Light Version for games.
Export Signs takes signs and clusters. Parts keep their texture maps only inside Blender: Blender's own File > Export writes a part as a plain mesh, without its maps.
15. Your own looks and clusters, parts and the Asset Browser
Save My Look
Made a sign you like? Select it and click Save My Look in the Export panel, then give it a name. Signage saves the sign's settings with its text, its Damage, Back Detail and Animation settings, the font (as a link to the font file) and the logo or icon. It also makes a small picture.
Some things are not saved: the Variation, Night / Day, the Single Letters settings, pictures you picked (like the Image of a light box or an LED screen) and a curve you picked (like the curve of a neon sign with Your Own Curve).
Your look then shows in the Look gallery of that type, marked (mine), and under My Looks in the Look menu of the Sign panel. When you give a sign your look, its text comes along too, unless you typed your own text on that sign. To delete a look, open that Look menu on a sign of the same type and click the X next to it.
Save My Cluster
Select a cluster and click Save My Cluster in the Export panel. It shows in the cluster gallery, marked (mine), and in Shift + A > Sign > Sign Cluster.
Where they are kept
In the add-on's user folder, in my_presets.json, my_clusters.json and a thumbs folder:
- Windows: %APPDATA%\Blender Foundation\Blender\5.2\extensions\.user\user_default\sign_generator\
- macOS: ~/Library/Application Support/Blender/5.2/extensions/.user/user_default/sign_generator/
- Linux: ~/.config/blender/5.2/extensions/.user/user_default/sign_generator/
On macOS and Linux the .user folder is hidden; show hidden files to see it.
They stay when you update Signage. Blender deletes this folder when you uninstall, so copy it first if you want to keep your looks and clusters.
Parts
Signage comes with the parts I built for the signs: air conditioners, junction boxes, meters, breaker and fuse boxes, control boxes, power boxes, cabinets, sockets and switches, cable trunking, pipes, lamps, vents, fans, roof parts like a satellite dish and an antenna mast, and a few wall fittings. There are 185 of them, in 16 groups. They are built like the parts behind the signs, with the same materials and wear, so they fit right in next to your signs.
The first time
Open the Signage tab in the N panel. In the Sign panel, under Add Sign, click Add Signage Library. Signage adds its parts and looks to Blender as an asset library called Signage (you can see it in Preferences > File Paths > Asset Libraries). You only do this once. Signage never changes your preferences without that click.
Added the folder by hand? Then the Sign panel may show Set Signage Library to Append. Click it once: Blender's own default (Pack) brings the parts in linked, and linked parts can't be placed or edited.
Drag a part onto your wall
- In the Sign panel click Parts and Looks. A window opens with all the parts and looks. On the left you pick a group, like Parts > Air Conditioners or Parts > Lamps.
- Drag a part onto a wall and let go. It sits flat on the wall, upright, its back right on the surface. Drop it on a floor or a roof and a part that stands (the dish, the antenna mast, the rooftop air conditioners, the roof vent cap, the warning beacon) stands on it. Wall parts dropped on a floor lie flat on it.
- Want to move it again? Select it and click Place on Surface in the Sign panel. Move the mouse over any surface, turn it with the mouse wheel (Shift for small steps) and click to place it. Esc puts it back.
You can also click a part instead of dragging it. It then follows your mouse over the surfaces until you click, just like a new sign after Add Sign.
Looks work the same way
The looks of every sign type are in the same window, under Looks. Drag one onto a wall and it becomes the real sign with that look, flat on the wall. A sign that stands on the ground, like a Stand Sign, stands on a floor; drop it on a wall and its back rests against the wall. Signage needs to be switched on for this.
The Asset Browser and the asset shelf
The same library shows in Blender's own Asset Browser: change any editor to Asset Browser and pick Signage at the top left. In the 3D Viewport you can also open the asset shelf at the bottom (View > Asset Shelf, or the small arrow at the bottom of the viewport); in Object Mode it shows the Signage parts and looks.
Good to know
- Parts are plain mesh objects. They keep working when you switch Signage off, and in a file you share (pack its textures first, section 17).
- They come in at their real size. Scale them if you like; the textures scale with them.
- Lamps come switched off. Add a light of your own if you want one to shine.
- Every part already has some wear: a little dirt, sun fade and rust, like the parts behind a sign. Two copies of the same part never look exactly alike.
- All parts share the materials and textures of your signs, so a wall full of parts stays light. Each copy you add, dragged or clicked, has its own mesh, so you can edit one without changing the others.
16. Keep Blender fast
A street full of signs can get heavy. These help the most:
- Detail Low for far signs. More Settings > Detail. On most types it has a seventh of the triangles or fewer. Clusters have their own Detail for every sign and the frame at once: the Ramen cluster goes from about 770,000 to about 60,000 triangles.
- Glow Lights in Viewport on No Shadows or Off while you work (Lights and Effects). Final renders still get the full lights.
- Convert finished signs to mesh. A converted sign is no longer rebuilt. Until then you can still change everything, so only convert what is done.
- Animate only what needs it. Signs with an effect, a flicker or a chaser follow the frame. Still signs don't cost anything when you play the timeline.
- Back Detail and Damage where the camera sees them. They add many parts. Back Detail takes a default blade sign from about 33,600 to about 47,700 triangles, and to about 62,600 with Frame and Catwalk on as well.
- Pixel Mode Shader for LED screens that are far away or very big (More Settings > Advanced).
- Fewer Triangles on channel letters (More Settings > Shape and Colours): the same look at Detail High with fewer triangles in the neon outline, its supports and the wall studs (Neon Bar: 29,000 to 17,000).
- Light Version when you export for games (section 14).
17. Troubleshooting
I can't find the Signage tab. Check that Signage is ticked in Edit > Preferences > Add-ons. Then put the mouse over the 3D Viewport and press N. Signage needs Blender 5.2 or newer.
I only see Sign, Clusters and Streets and Export. The other panels show when a sign is selected. Click a sign in the viewport.
There is no Logo and Icons panel. Only neon, channel letters and marquee signs take a logo.
My SVG logo doesn't show. Select a neon, channel letters or marquee sign before you import. Show must be Logo or Logo + Text. The SVG needs shapes or paths; text and pictures inside an SVG are not read.
The marquee icon list is short. Marquee signs only list the closed shapes (18 of the 68 icons), because the bulbs need an area.
My sign looks dark, or too bright. Check Night / Day, Lights On and Brightness in the Sign panel, and Glow on Wall in Lights and Effects. By day the glow on the wall is meant to be faint.
The lights of a sign are gone or in the wrong place. Select the sign and click Reset Night Lights at the bottom of Lights and Effects.
The effect doesn't move. Press Space to play the timeline, or scrub. Check that Animation is not Steady and Intensity is above 0 (Effect Options).
Pink textures, or textures missing, after I moved the file or removed Signage. The 2K textures of the signs live in the add-on folder, and your .blend points to them. On another computer, or after you uninstall Signage, they are missing. Before you send a file somewhere, or before you uninstall, use **File > External Data > Pack Resources**. A scene opened without the add-on keeps every sign working; only the textures go missing.
Japanese or Chinese letters don't look the way I want. Pick a font with these characters in the Font row, for example Yu Gothic or Meiryo.
The viewport is slow. See section 16.
Random Sign never makes box letters, plate signs, arrow signs, list panels or panel letters. That's right: the random tools pick from the 11 types listed in section 13. Add these five yourself.
There is no Parts and Looks button. Click Add Signage Library in the Sign panel once; the button is in the same place after that. If the panel shows Set Signage Library to Append, click it: the library was added with Blender's default import (Pack), which brings the parts in linked, so they can't be placed or edited.
A new sign or cluster follows my mouse. I want it at the 3D cursor. Press Esc (or right click) while it follows the mouse: it stays at the 3D cursor. To always add at the 3D cursor, untick Place new signs on surfaces in Edit > Preferences > Add-ons > Signage.
My pole sign is under the floor, or floats. Click Place on Surface in the cluster panel and click the floor: the pole's foot goes on the floor you click.
I can't find where to uninstall Signage. It is in Edit > Preferences > Get Extensions, not in the Add-ons tab (section 2).
My exported sign doesn't glow in my game engine. The glow is an emissive material. Turn on bloom or glow in the engine, and raise the emission strength there if needed.
18. FAQ
Are the buildings in the pictures included? No. Signage makes the signs. The buildings and streets in the pictures come from my own scenes.
Can I use my own font? Yes. Pick any font installed on your computer, or open a font file.
Does Signage come with fonts? No. It uses Blender's built-in font or the fonts you already have.
Can I add my own logo? Yes, on neon, channel letters and marquee signs. Import an SVG or pick one of the 68 built-in icons.
Can I change a sign after I add it? Yes, everything, until you click Convert to Mesh.
Do the effects show in renders? Yes. They are part of your animation, so they render like anything else.
Do I need Signage to open my .blend files later? No. The signs are saved in your file as normal Geometry Nodes objects with their lights, and they keep working without the add-on. Pack the textures if the file leaves your computer (section 17). Signage itself is only needed to change the signs, to add new ones, and for the extras that need Python, like new lights for copied signs.
Does it work in Cycles and EEVEE? Yes, both.
Will many signs slow Blender down? Use Detail Low for far signs and keep Glow Lights in Viewport on No Shadows or Off. Section 16 has more.
Can I use the signs in a game engine? Yes. Export FBX or GLB from the Export panel. The glow is kept as emission.
Can I use the parts without a sign? Yes. The parts are plain meshes with their own materials, so you can use them anywhere in your scene, and they keep working without Signage (section 15).
Can I copy a sign? Yes, with Shift + D or Alt + D. The copy gets its own lights.
Where are my saved looks? In the add-on's user folder (section 15). Copy it before you uninstall.
Can I use Signage in commercial work? Yes. You can use what you make with Signage, like renders, animations, films and games, in personal and commercial work, and you don't need to credit Signage. The files of the add-on itself (the .blend files, pictures and lists) are for you only: you can't sell or share them. The Python code is under the GPL. LICENSE.txt has the details.
Something doesn't work. What do I do? Message me on Superhive and tell me your Blender version and what you did. A screenshot helps a lot.
Have questions about this product?
Login to message
| Blender Extension Compatible | Yes |
| Dev Fund Contributor | |
| Published | about 19 hours ago |
| Blender Version | 5.2 - 5.3 |
| Extension Type | Add-on |
| Render Engine Used | Cycles, Eevee |
| License | GPL |
Discover more products like this
city geometry nodes marquee channel letters signage storefront street sign Billboard Shop Sign cyberpunk neon