Simple Object Cutter
 5 Minutes Blender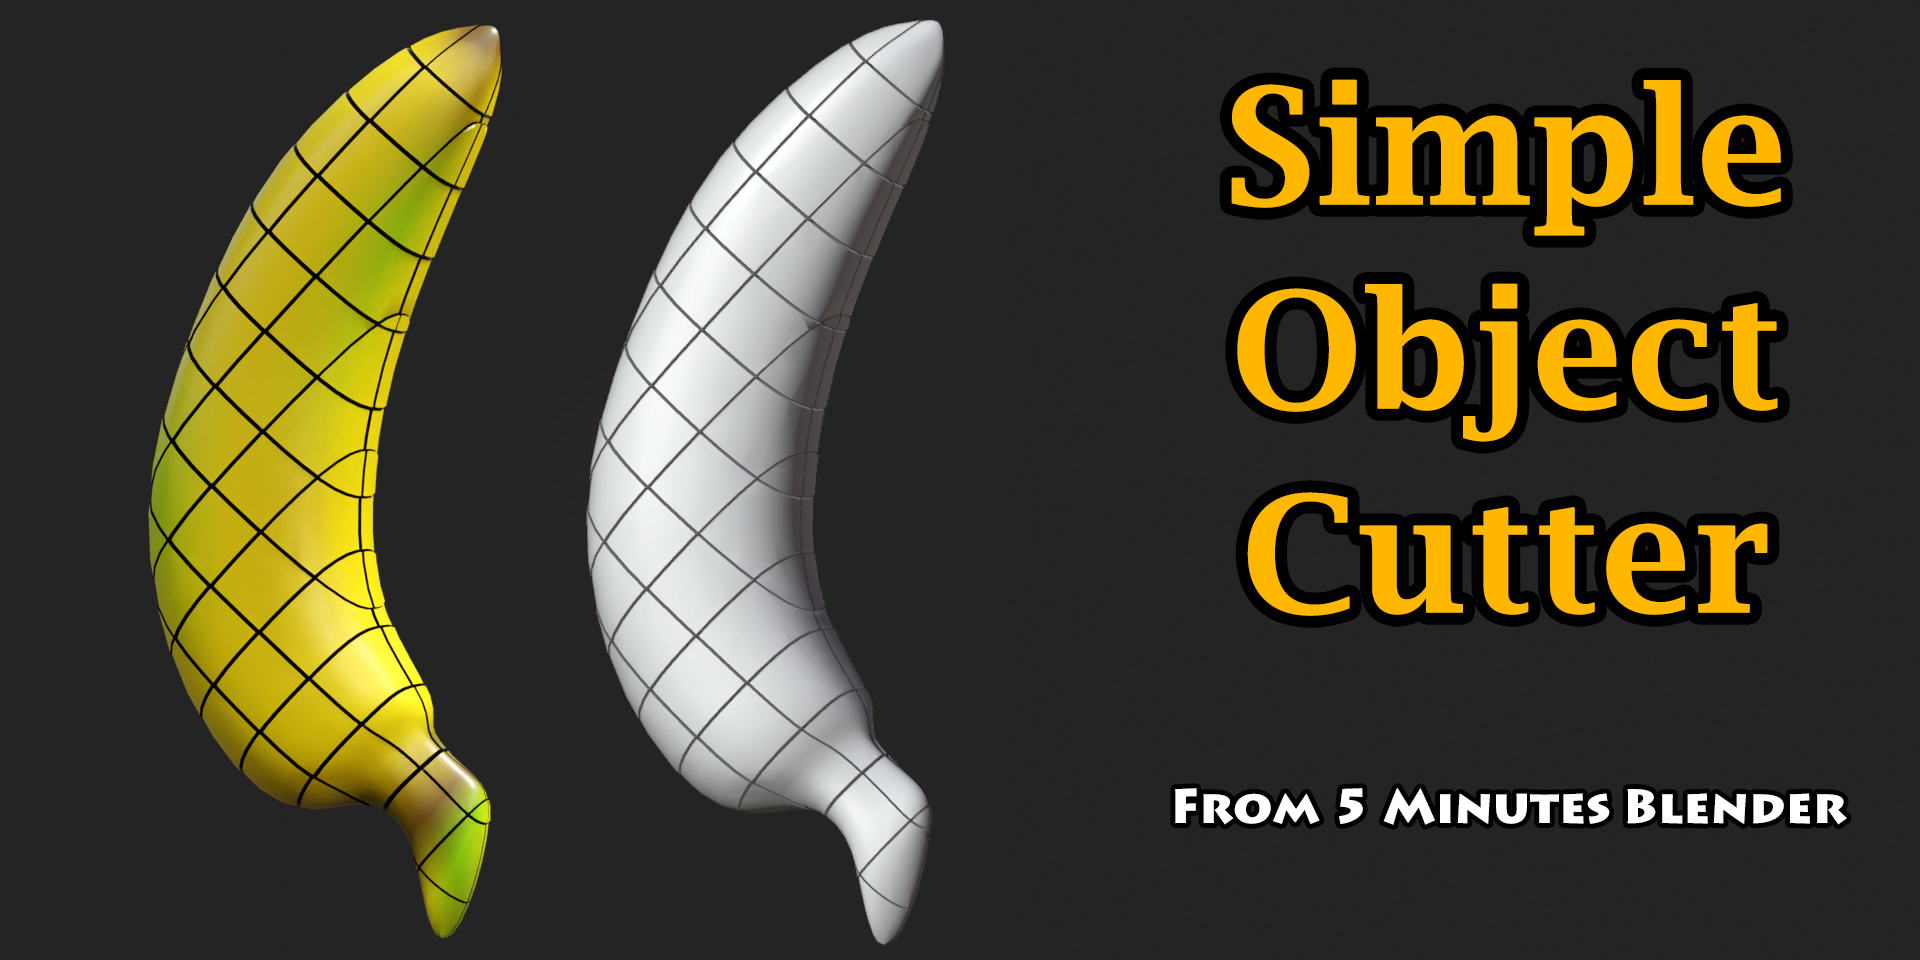
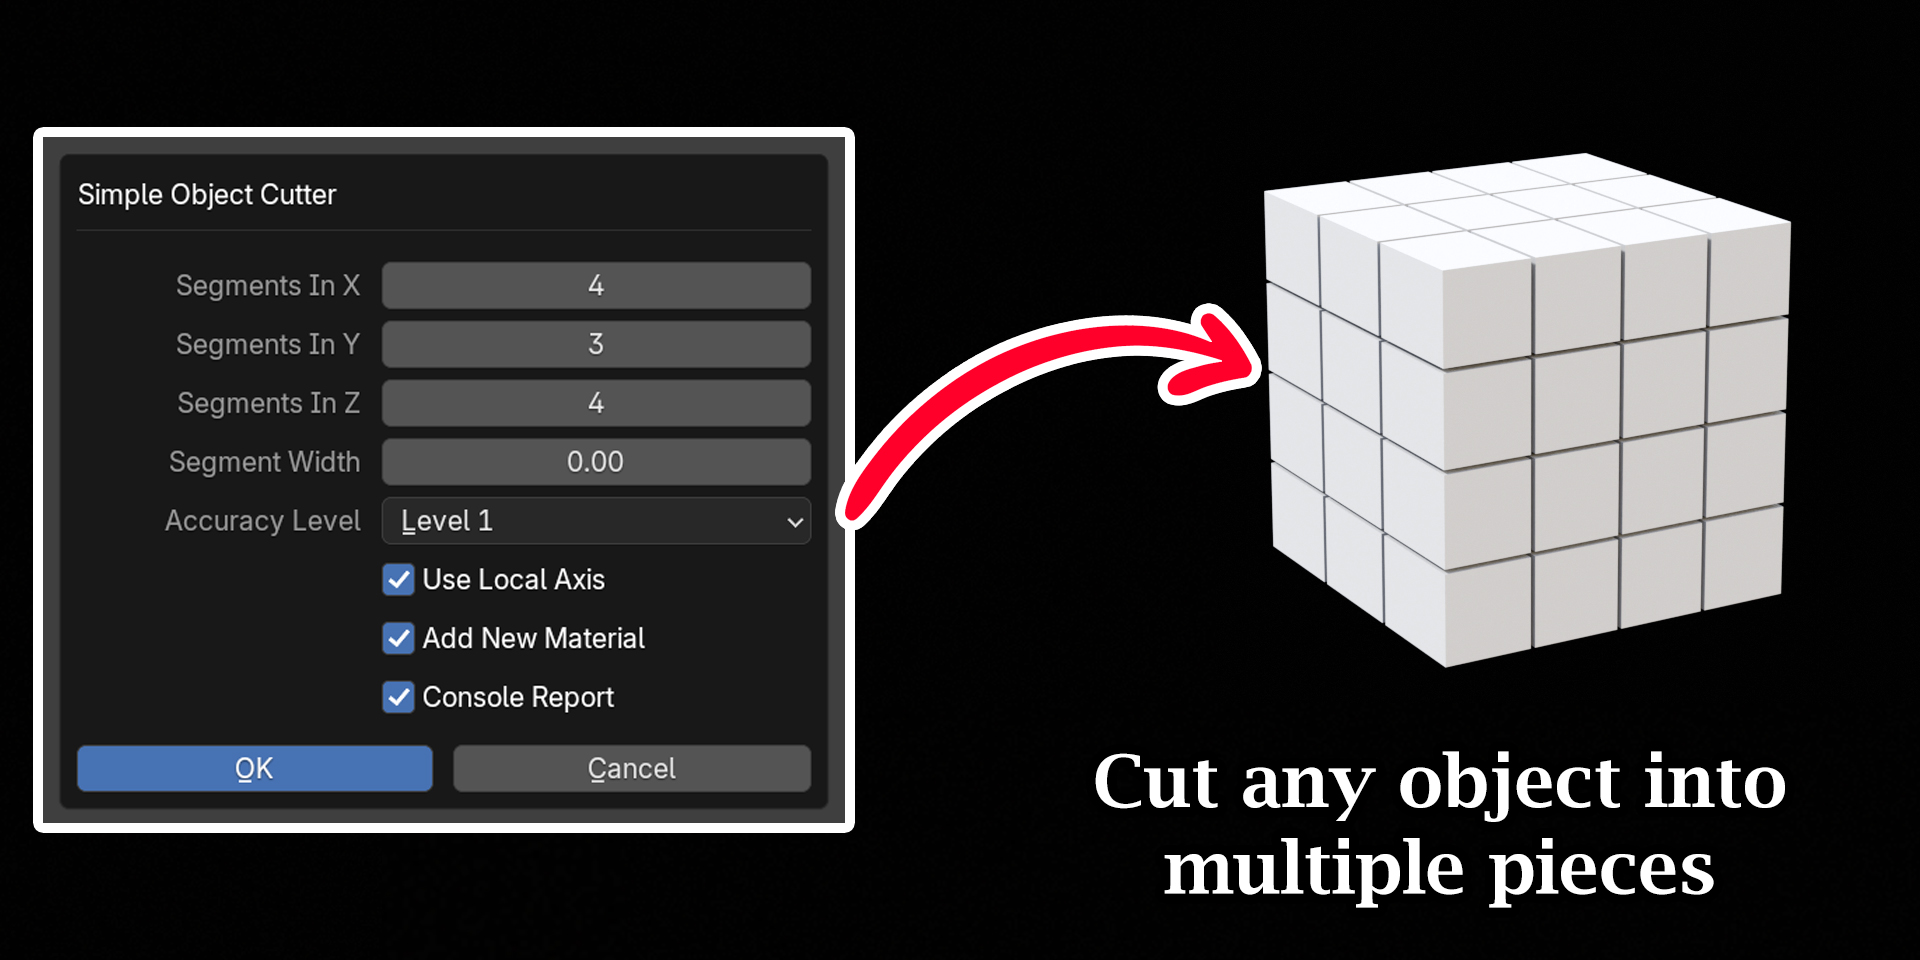


How to use the Simple Object Cutter Add-on
1. After you download the add-on
package, open blender and go to Edit -> Preferences.
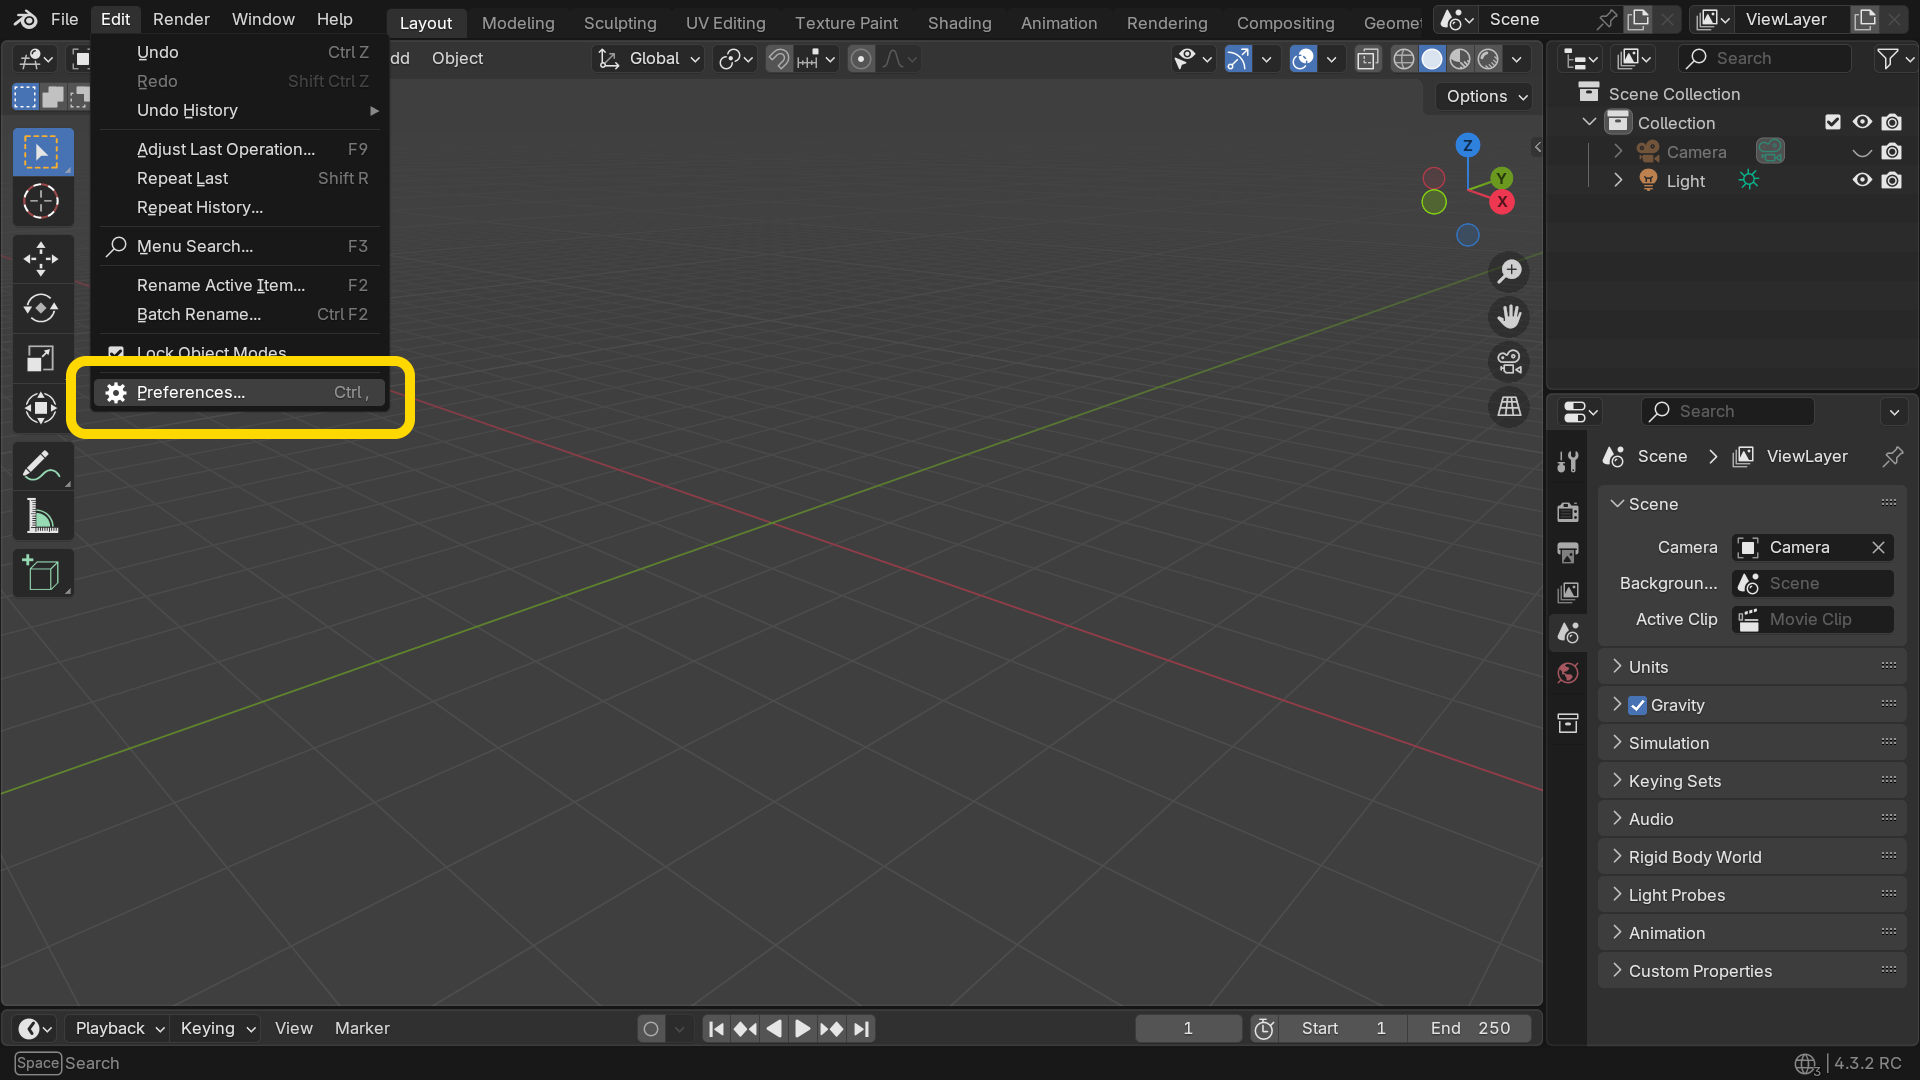
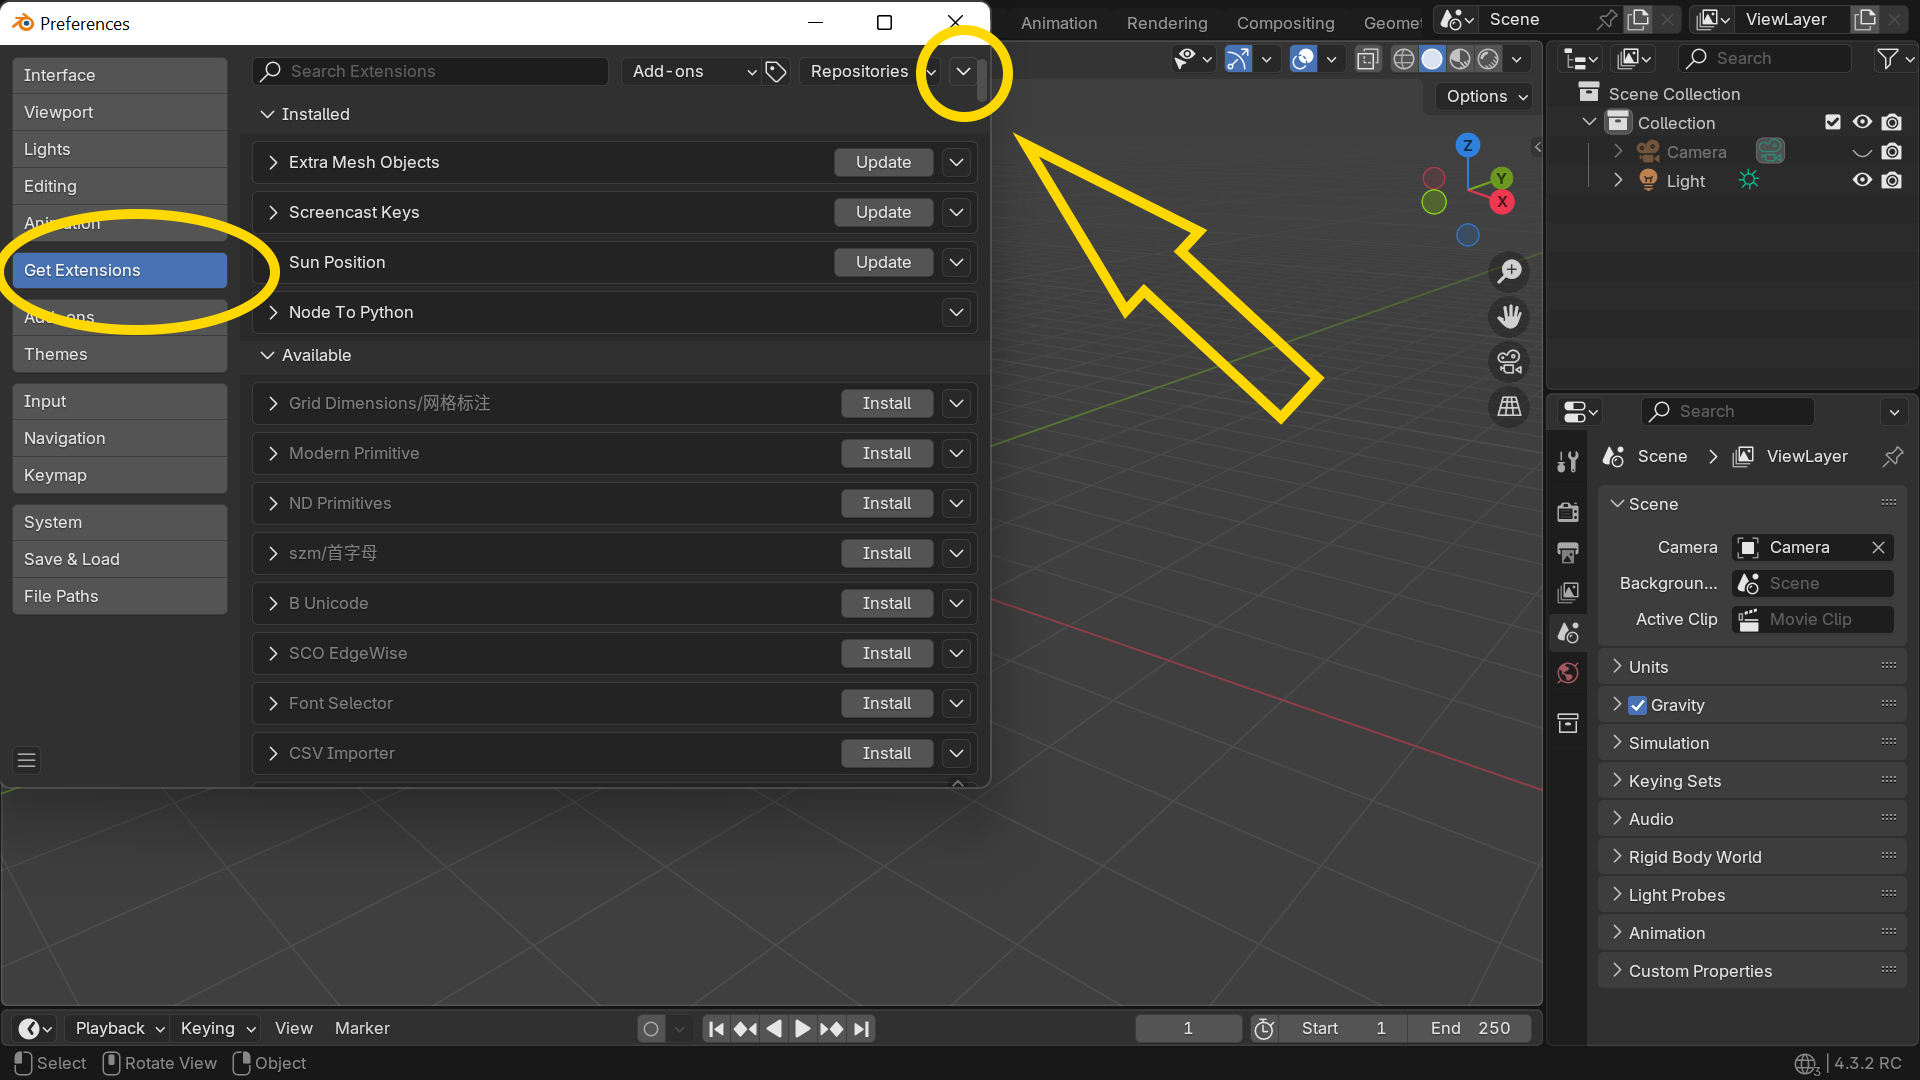
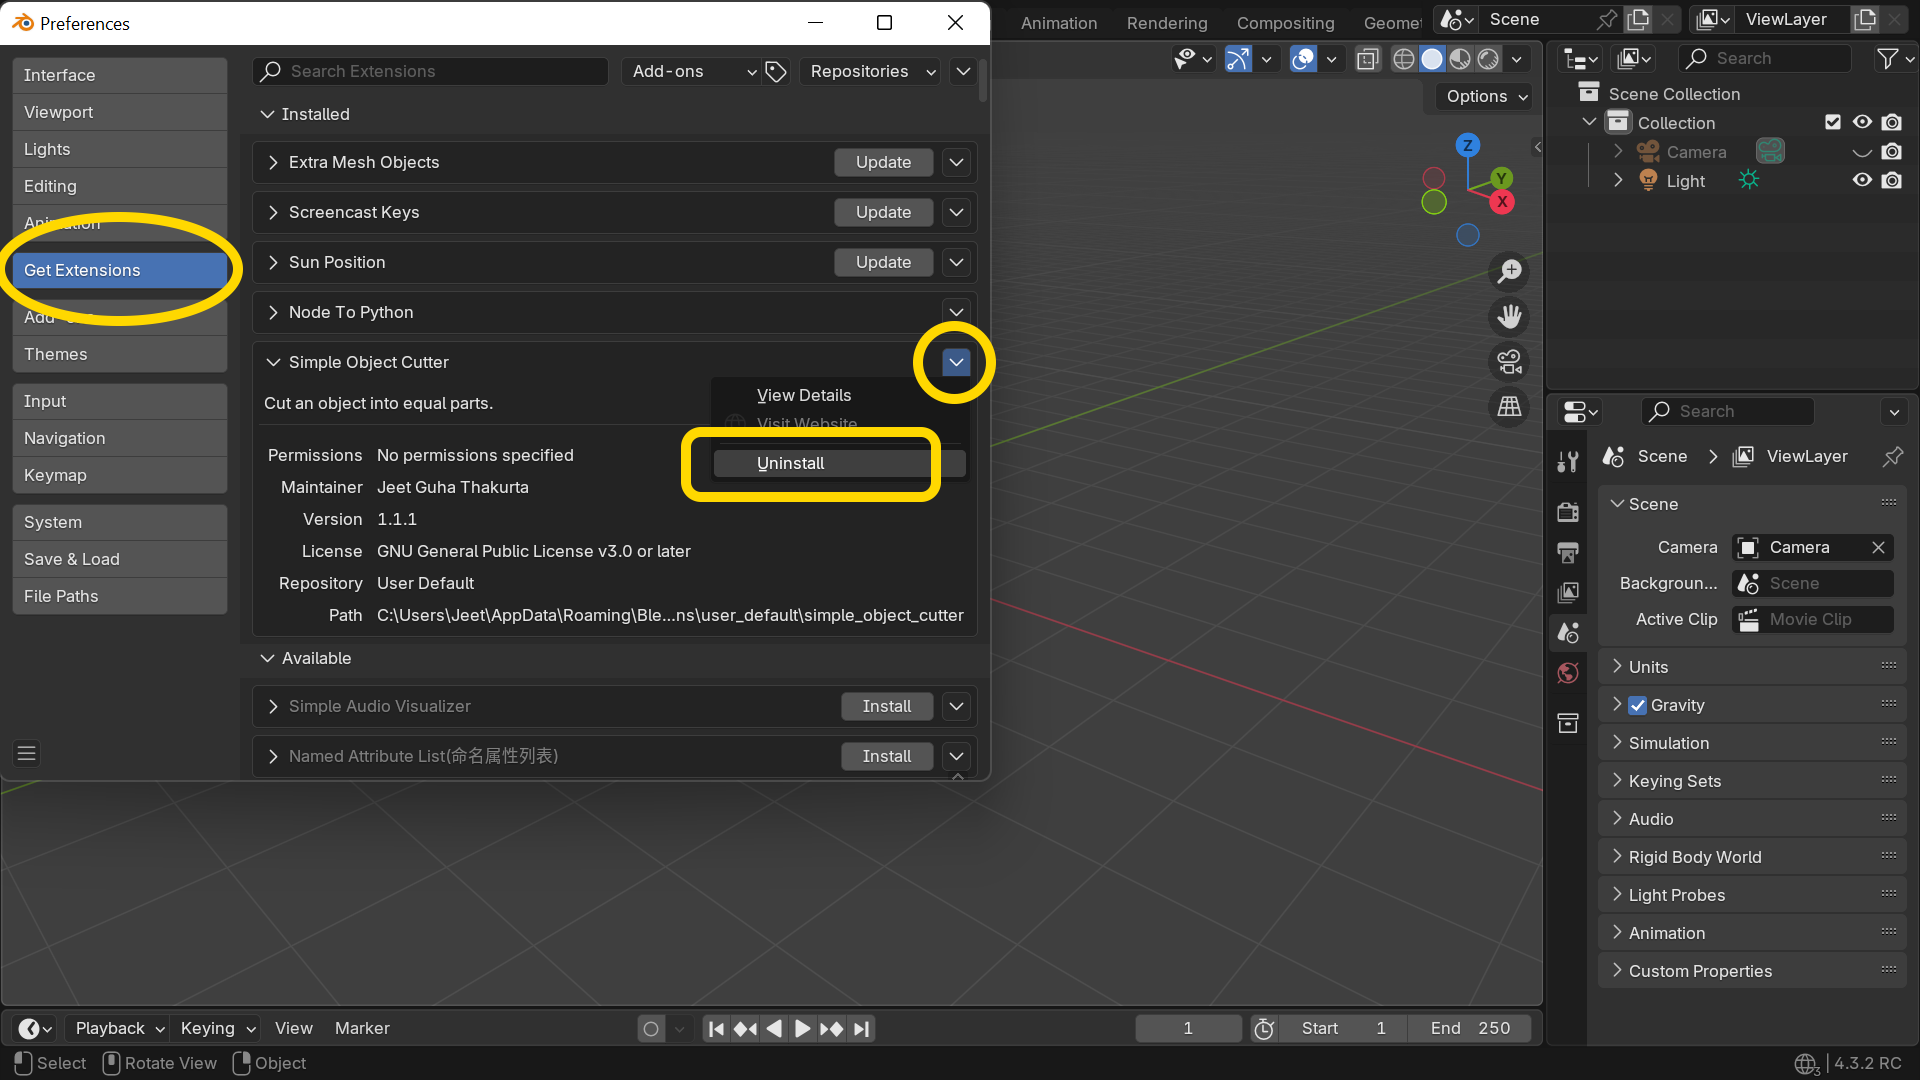
2. Go to the tab Get Extensions
and click on this dropdown button for more options:
3. Then you need to select the “Install from Disk…” option from the following choices:
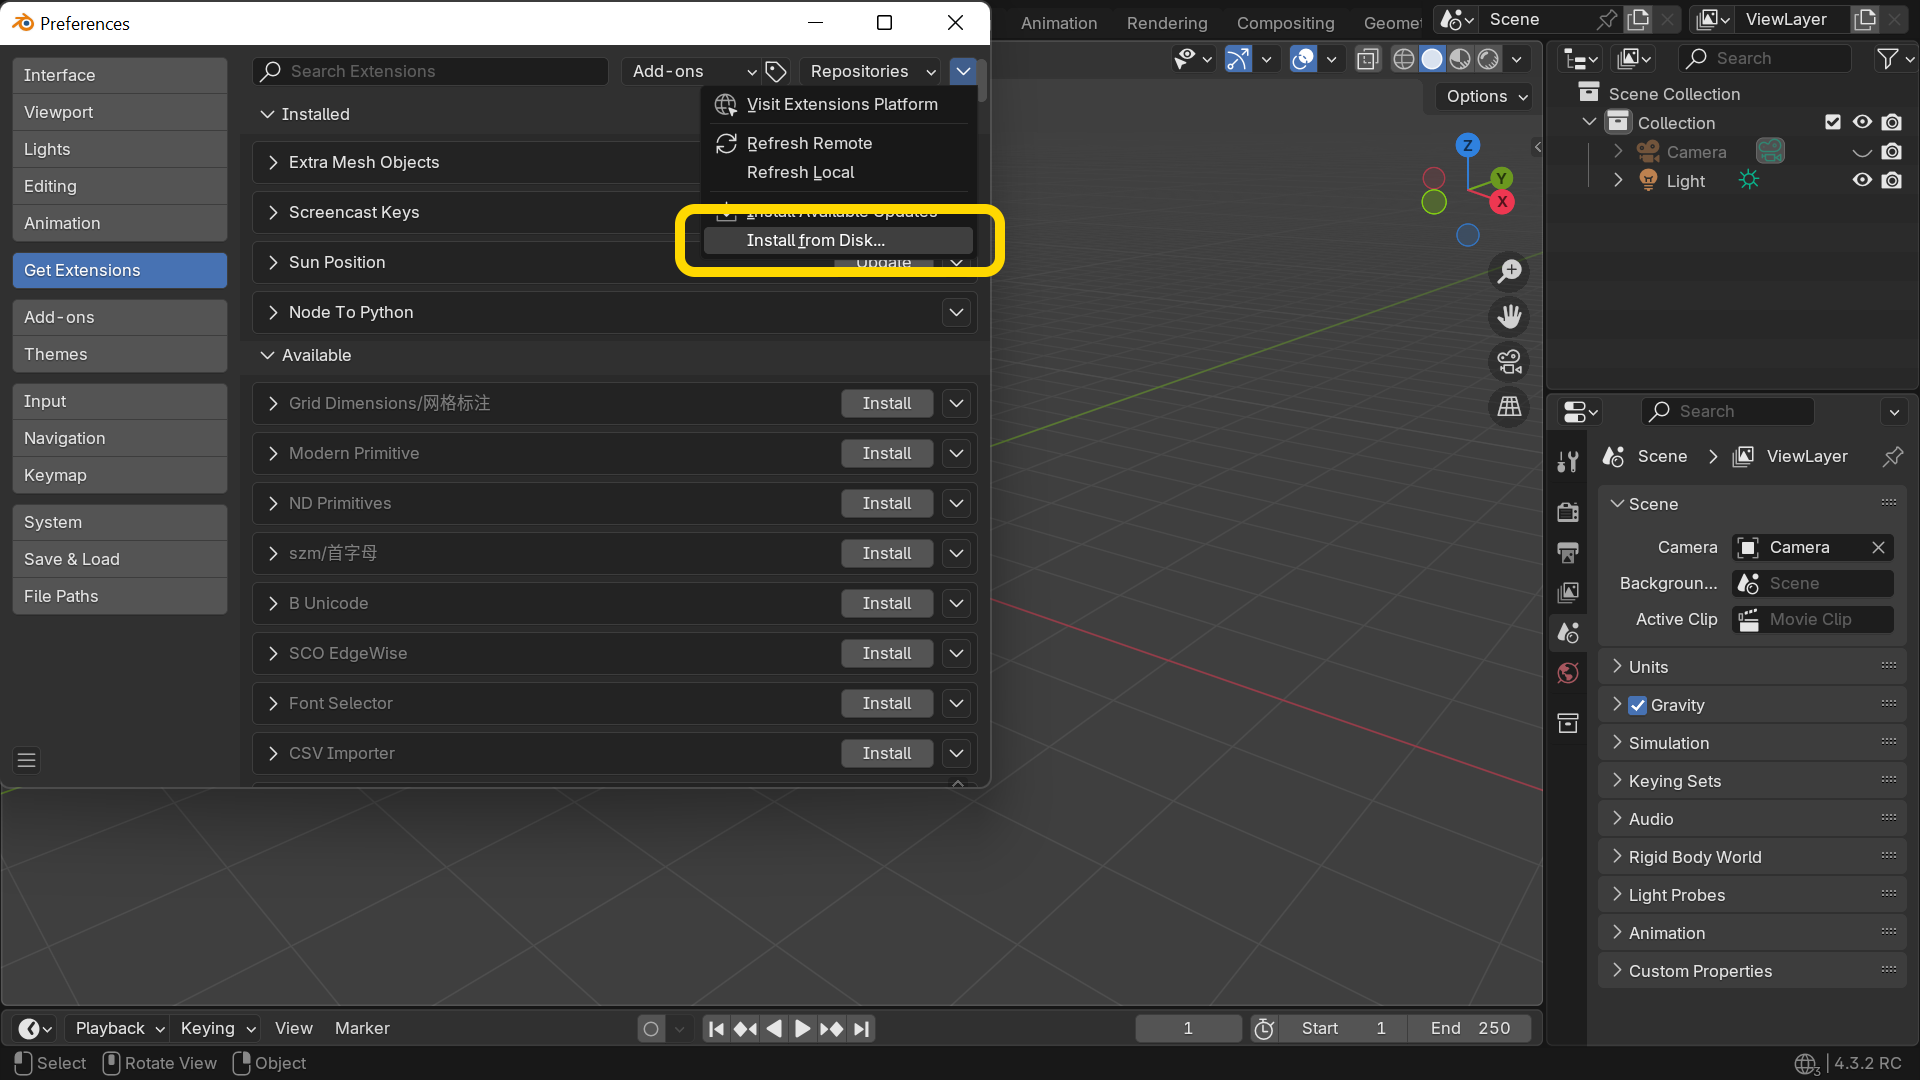
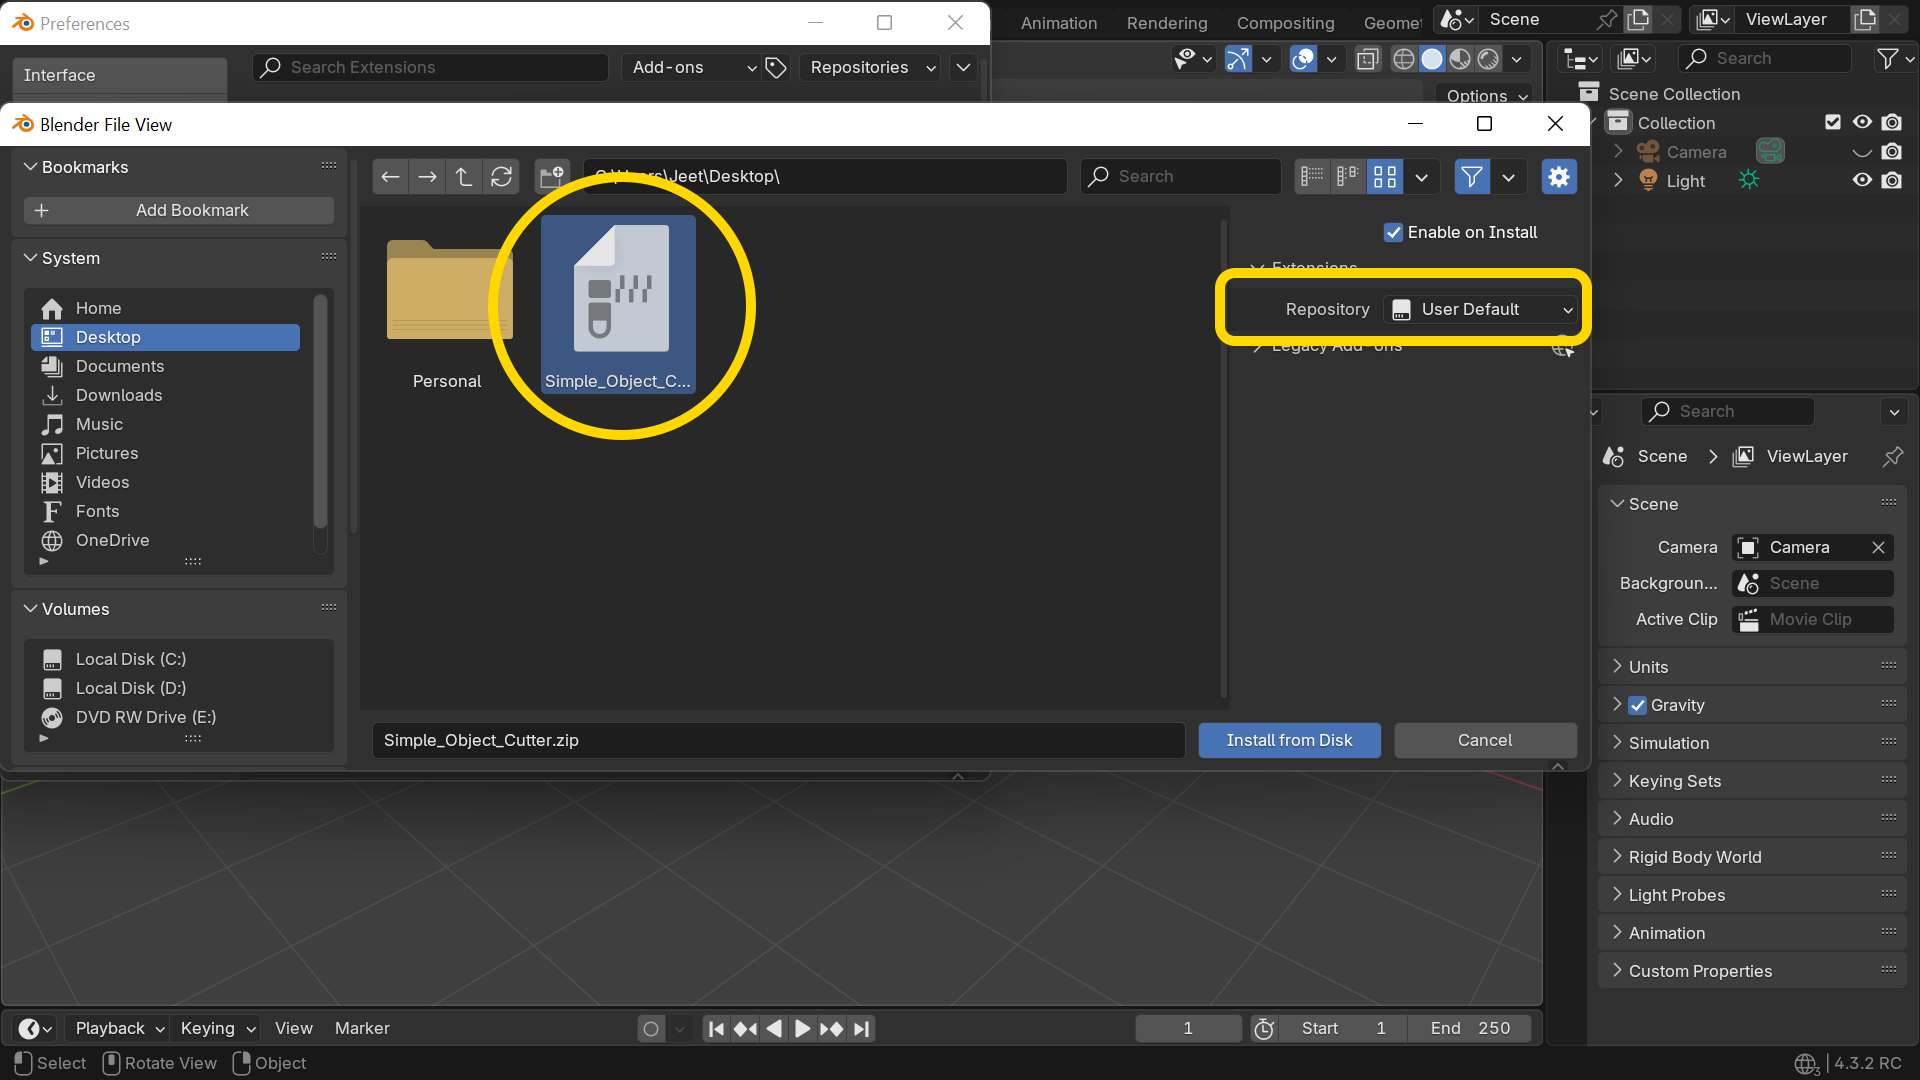
4. Select the downloaded zip file (Simple_Object_Cutter.zip) & install it.
No need to unzip the file. And ensure that the repository “User Default” is
selected as shown below:
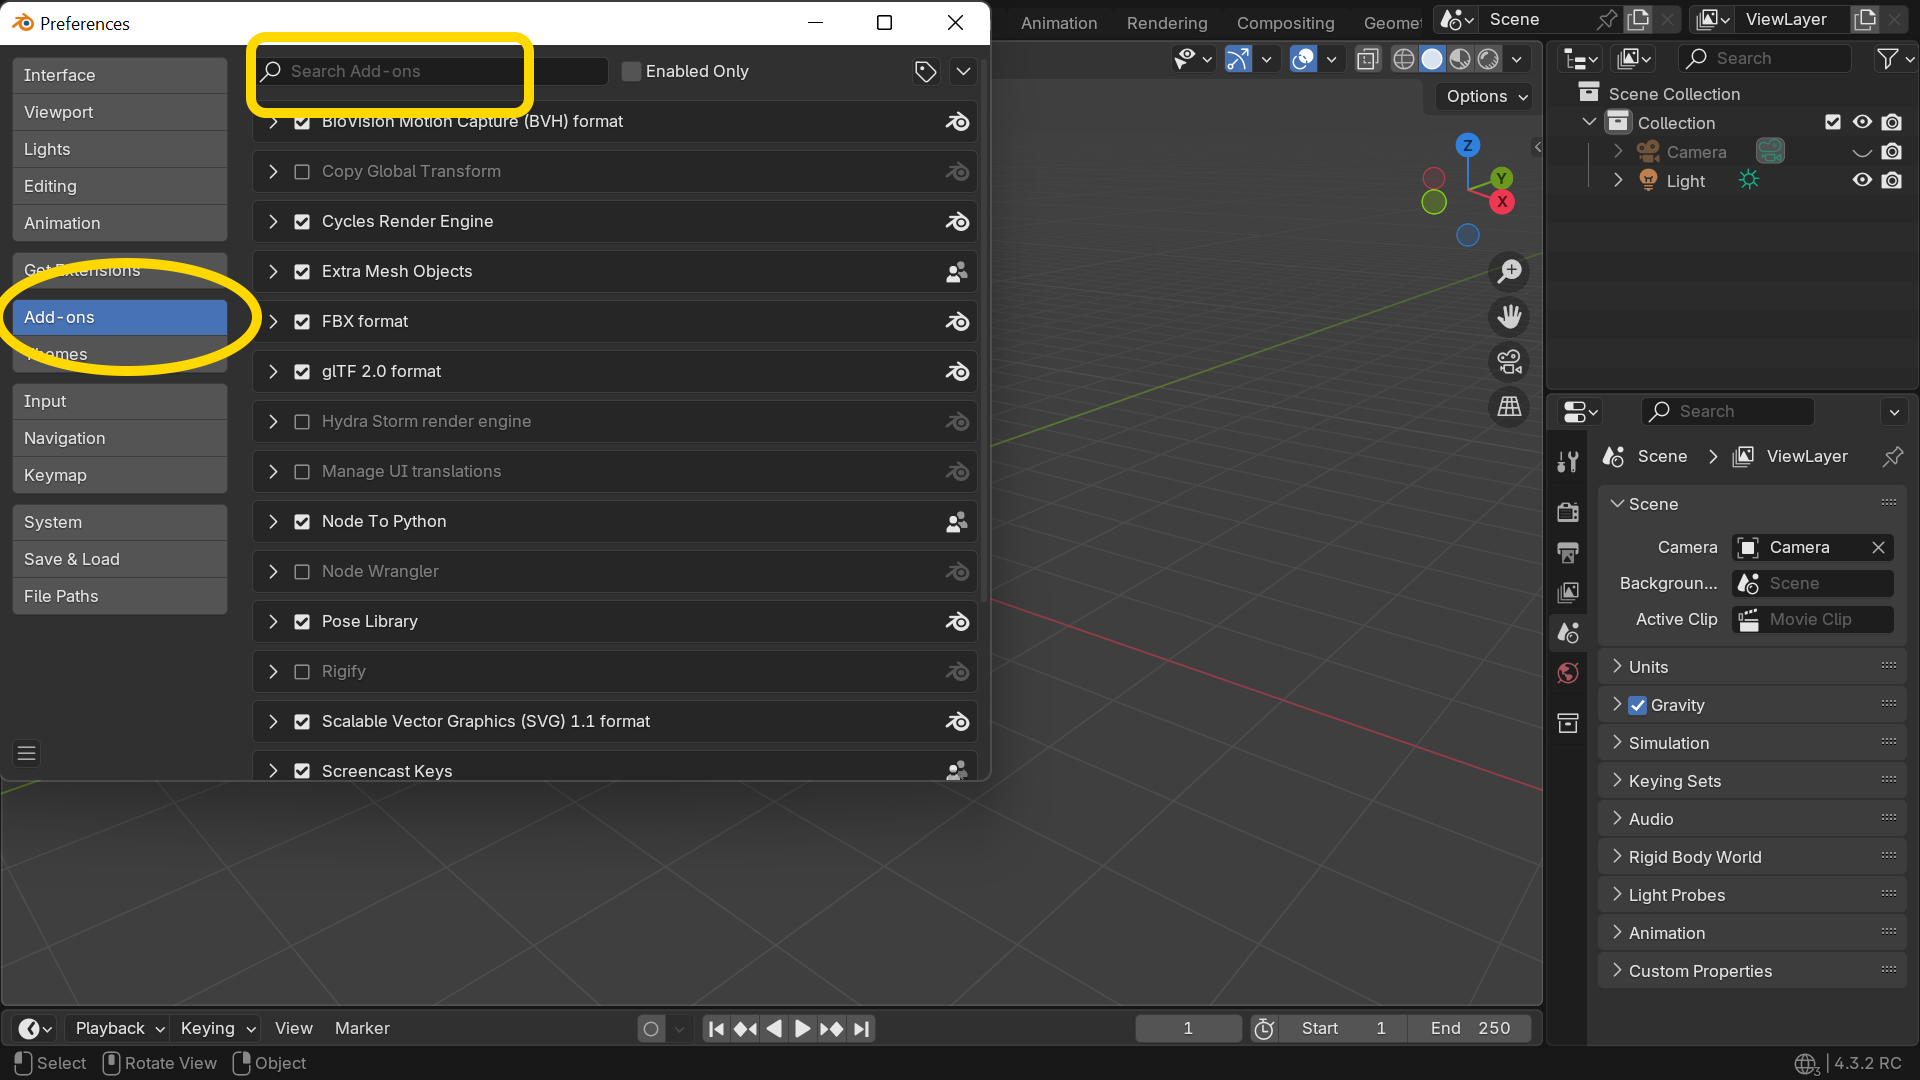
5. After it is installed, go to the
Add-ons tab and search for Simple Object Cutter.
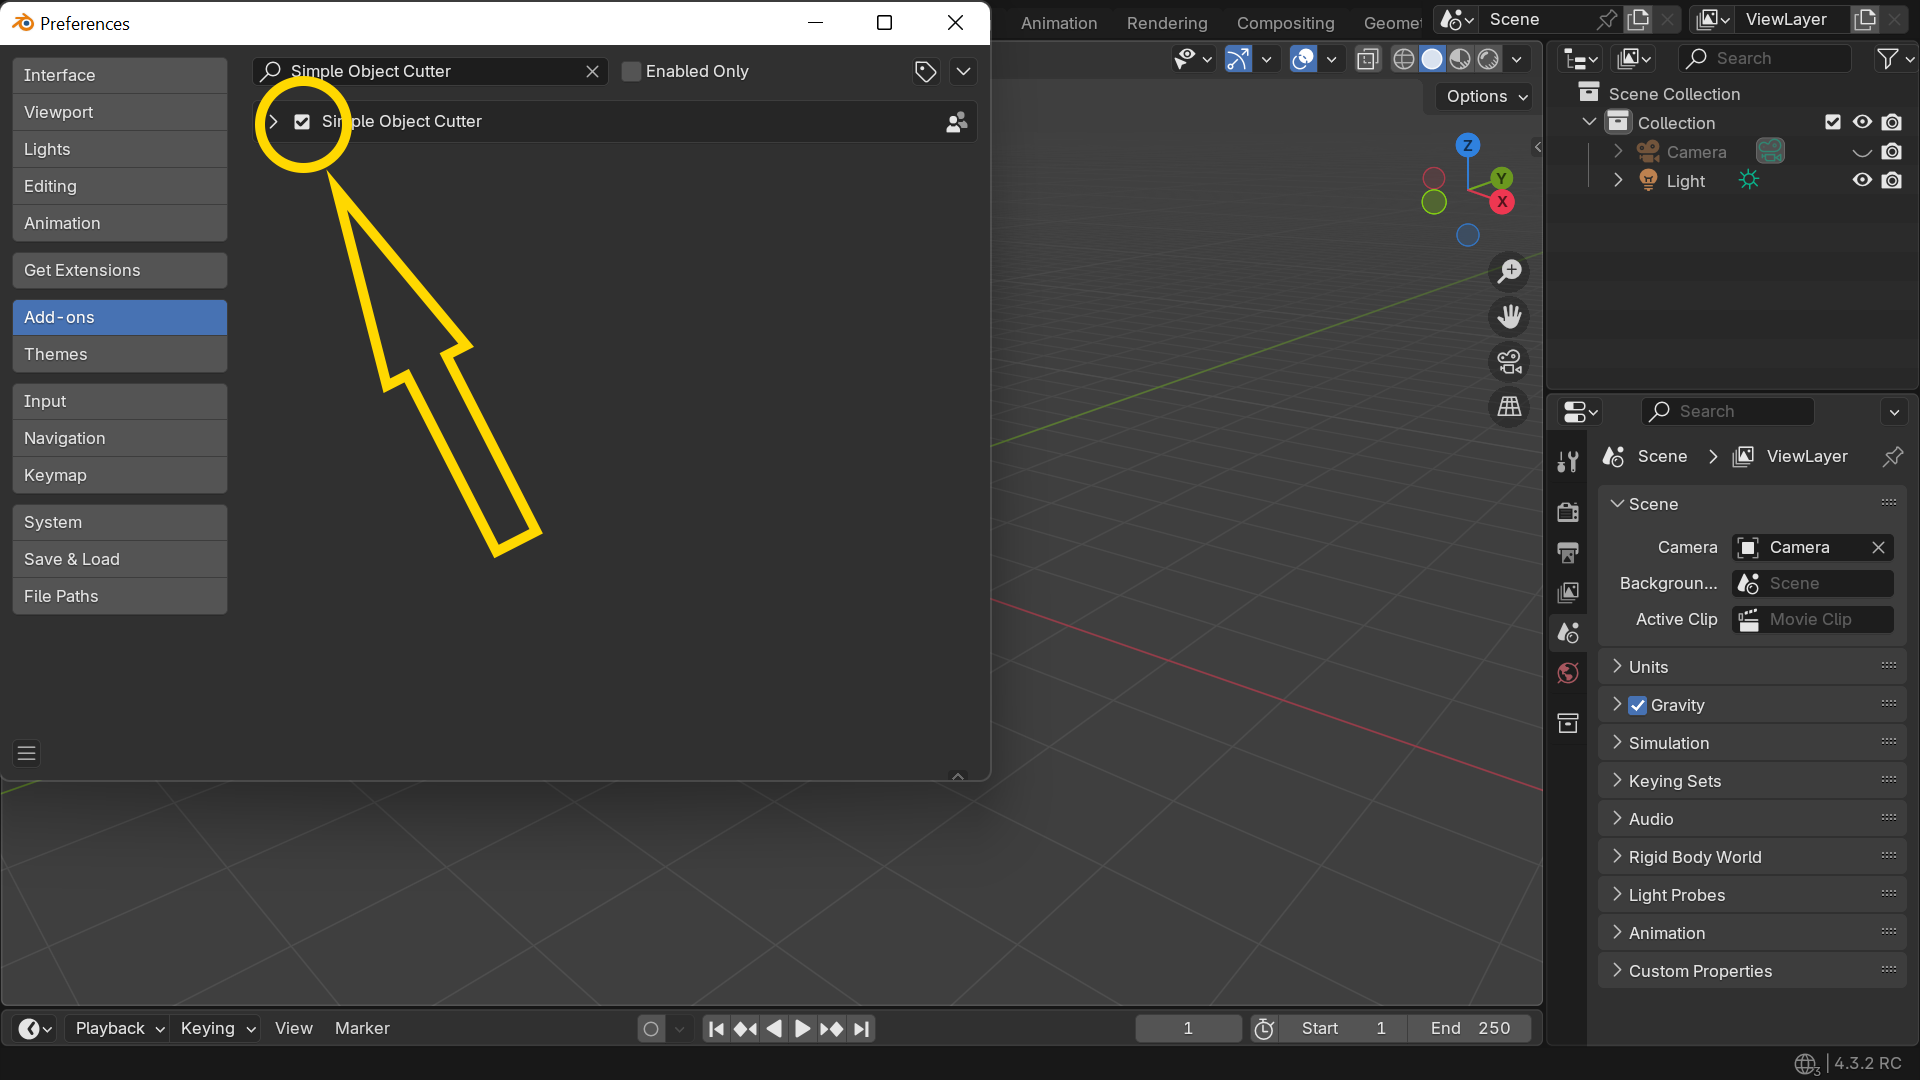
6. Once you
see the add-on, enable it by selecting this checkbox (if it is not already
selected):
7. If you want to uninstall the
add-on, you can do so in the Extensions tab as shown below.
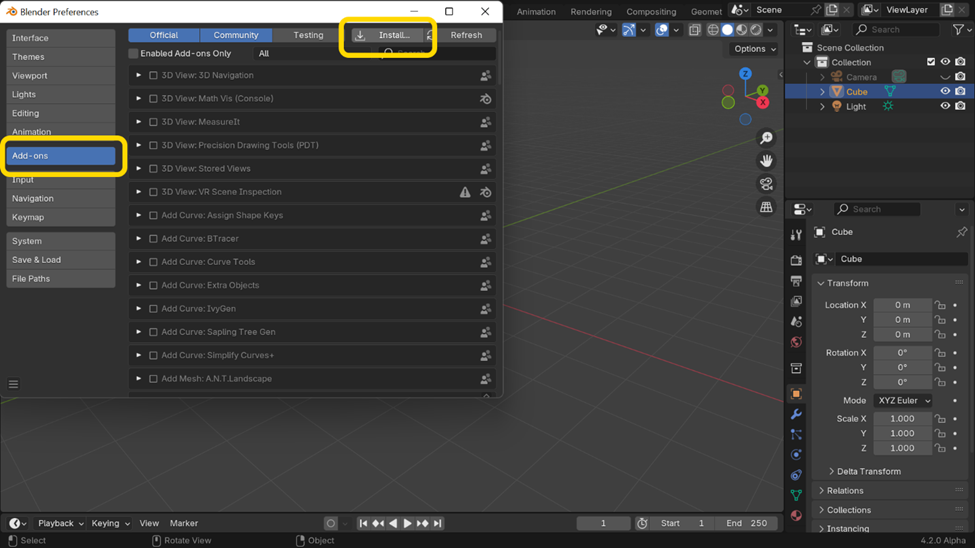
Note: If you are using an older version of Blender, you can get the Install option in the add-ons tab itself as shown below. Follow the same steps to install and then enable the add-on.
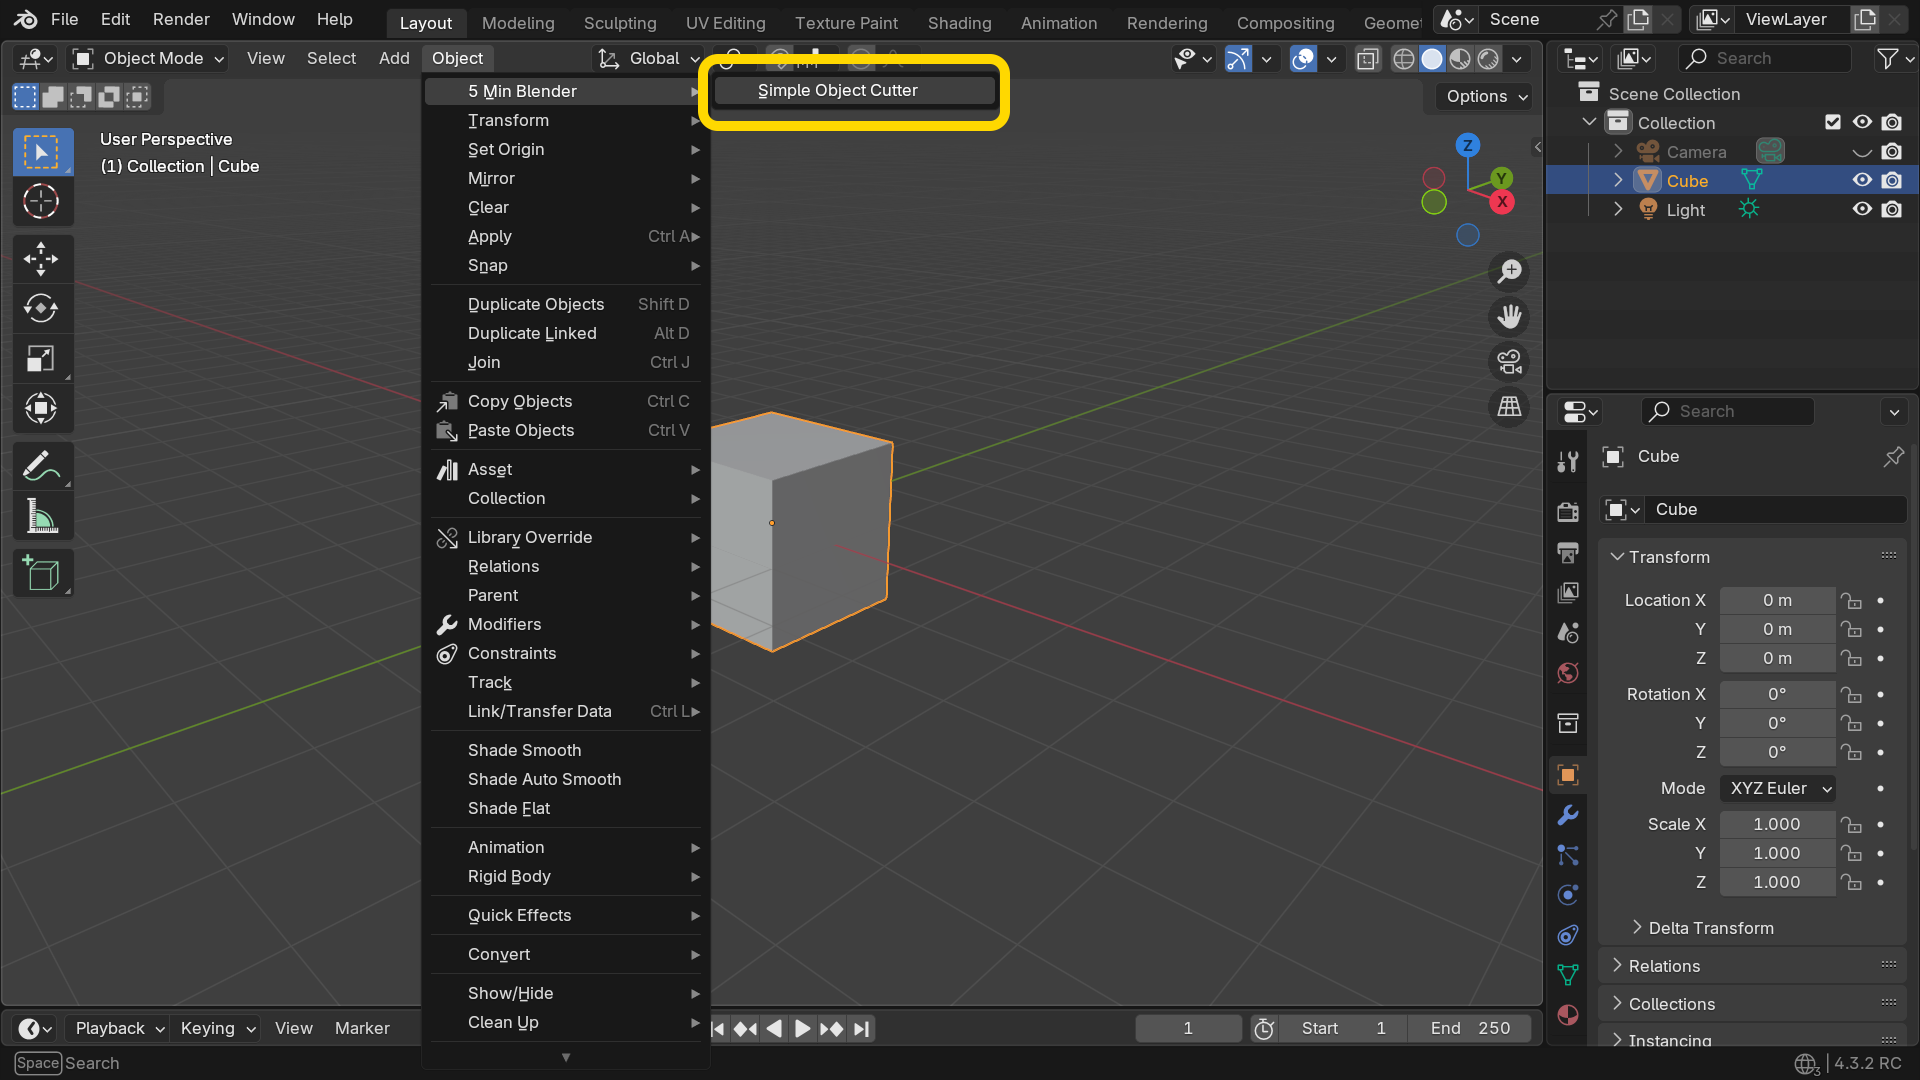
8. Now restart Blender (just close
Blender and open it again). You’ll get a menu option called Simple Object
Cutter under Object -> 5 Minutes Blender.
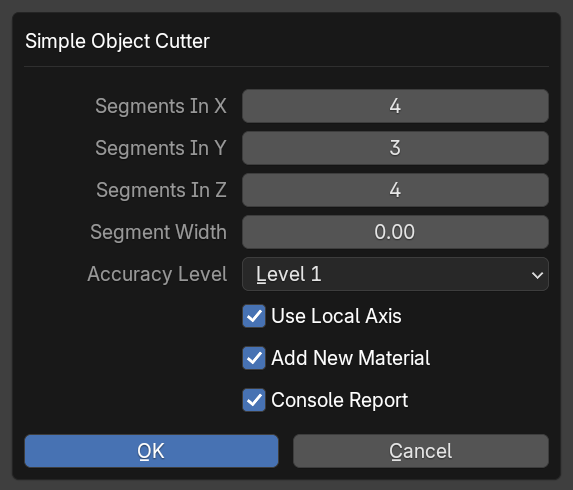
9. It will bring this operator. Later we
have discussed the purpose of each of these fields.
In order to use Simple Object Cutter,
you need to first select an object. Then either 1) enter the number of segments
along the X, Y, Z dimensions, OR 2) mention a segment width. If a segment width
is mentioned, the number of segments get auto-calculated by the add-on.
Segments In X, Y, Z:
You should enter the number of segments you need after the cut. Enter 1 for no cut in any particular dimension. However, if a segment width is entered, the add-on will ignore the number of segments entered, it will auto-calculate the number of segments in each dimension. So you should keep the segment width as zero if you want to specify the number of segments.
Segment Width:
If you enter a segment width, the number of segments will be auto-calculated and each piece will have almost the same width, depth and height (i.e. we will get cubical pieces).
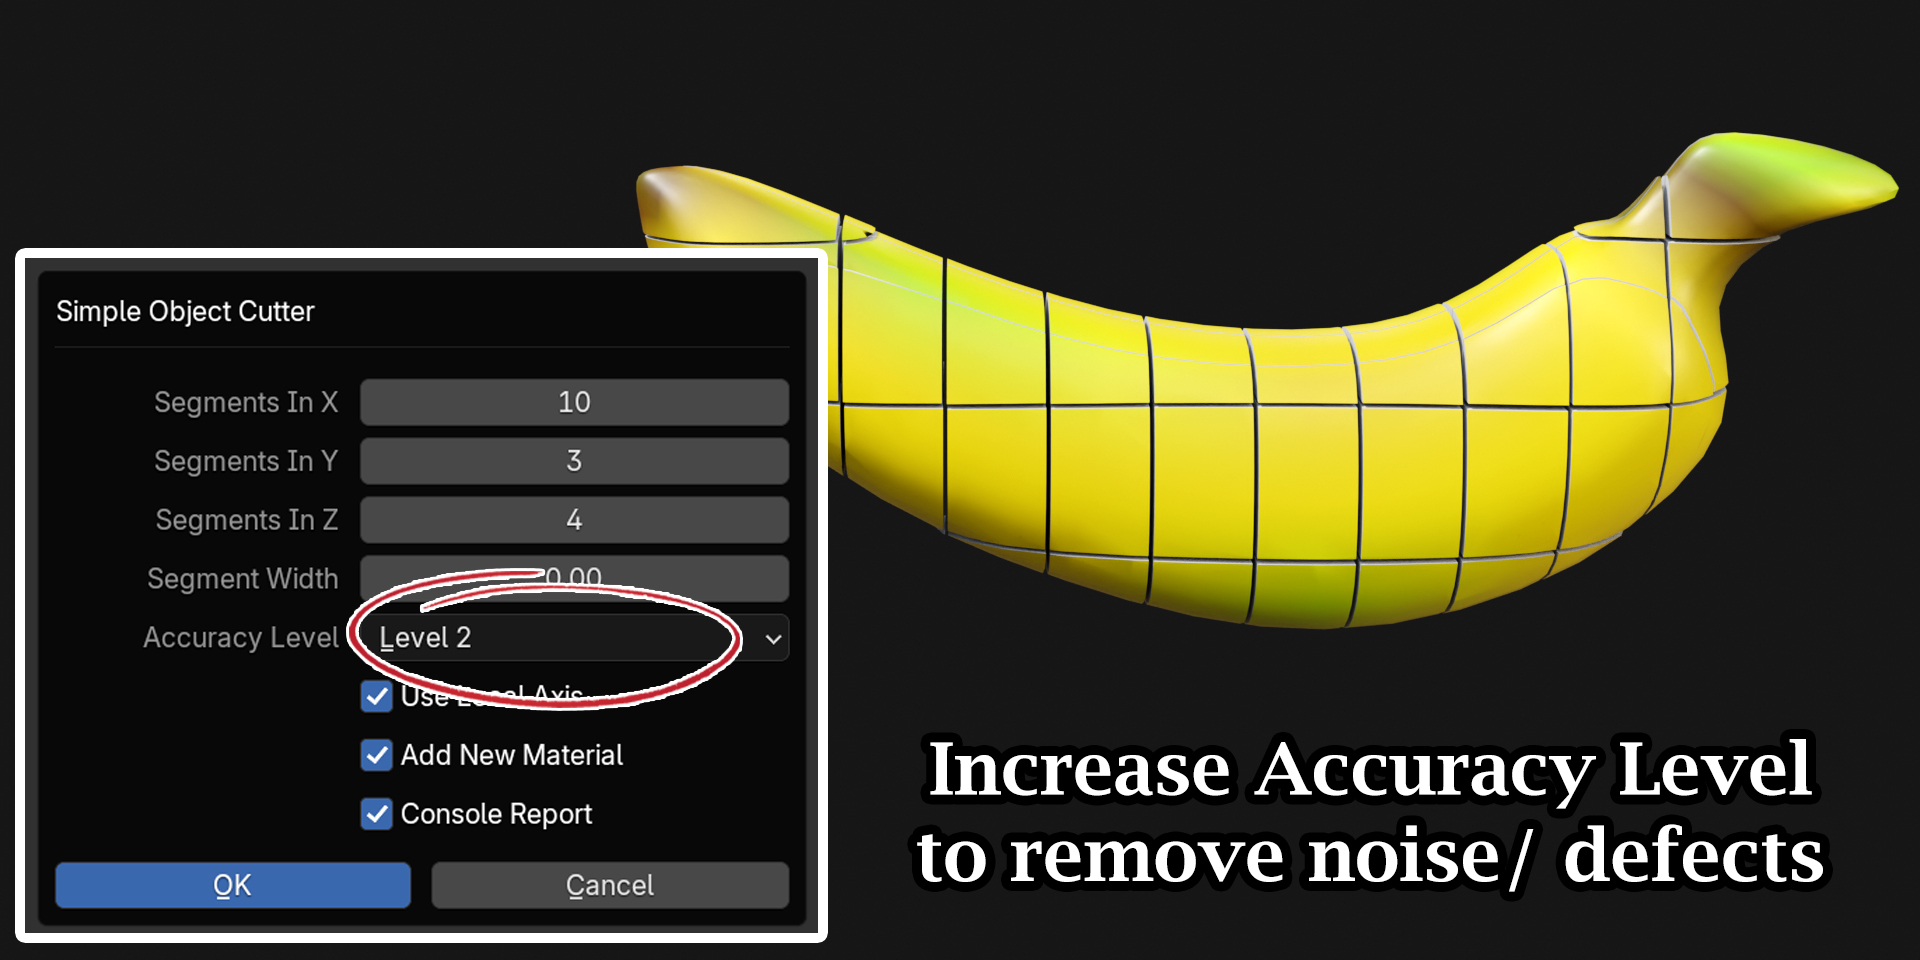
Accuracy Level:
Sometimes a complex
geometry may need some delicate handling. There are five levels of accuracy (0
to 4) for the cut operation. As you increase the level, the result of the
cutting operation is expected to be more perfect, but the processing time will also
increase heavily. If you get an artifact or error in the final result, try to
increase the accuracy level to fix the issues, otherwise the default level of 1
(or even 0) may work for simpler objects.
Use Local Axis:
If this option is enabled, the cutter will ignore the object rotation & perform the cuts along the local XYZ axes of the selected object. This is usually the prefered option, but if you want to slice an object strictly along the global axes, you can disable this option.
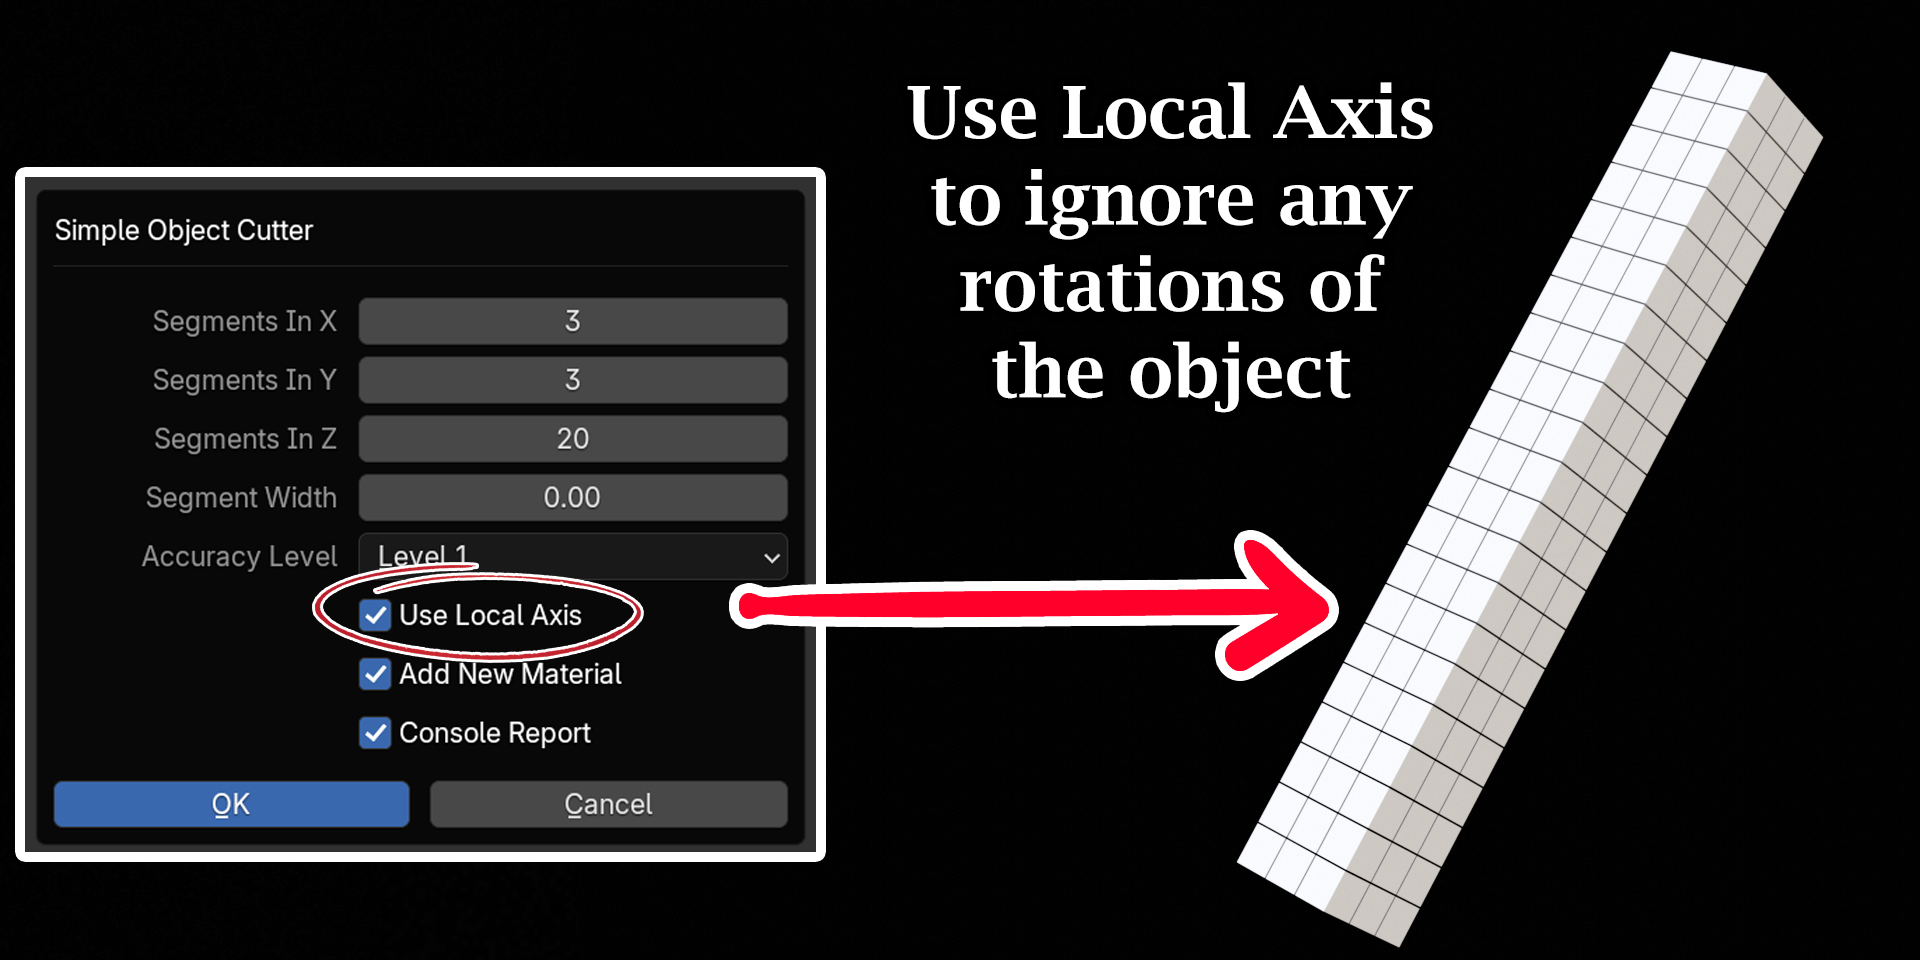
An option to slice the target object along its local axis
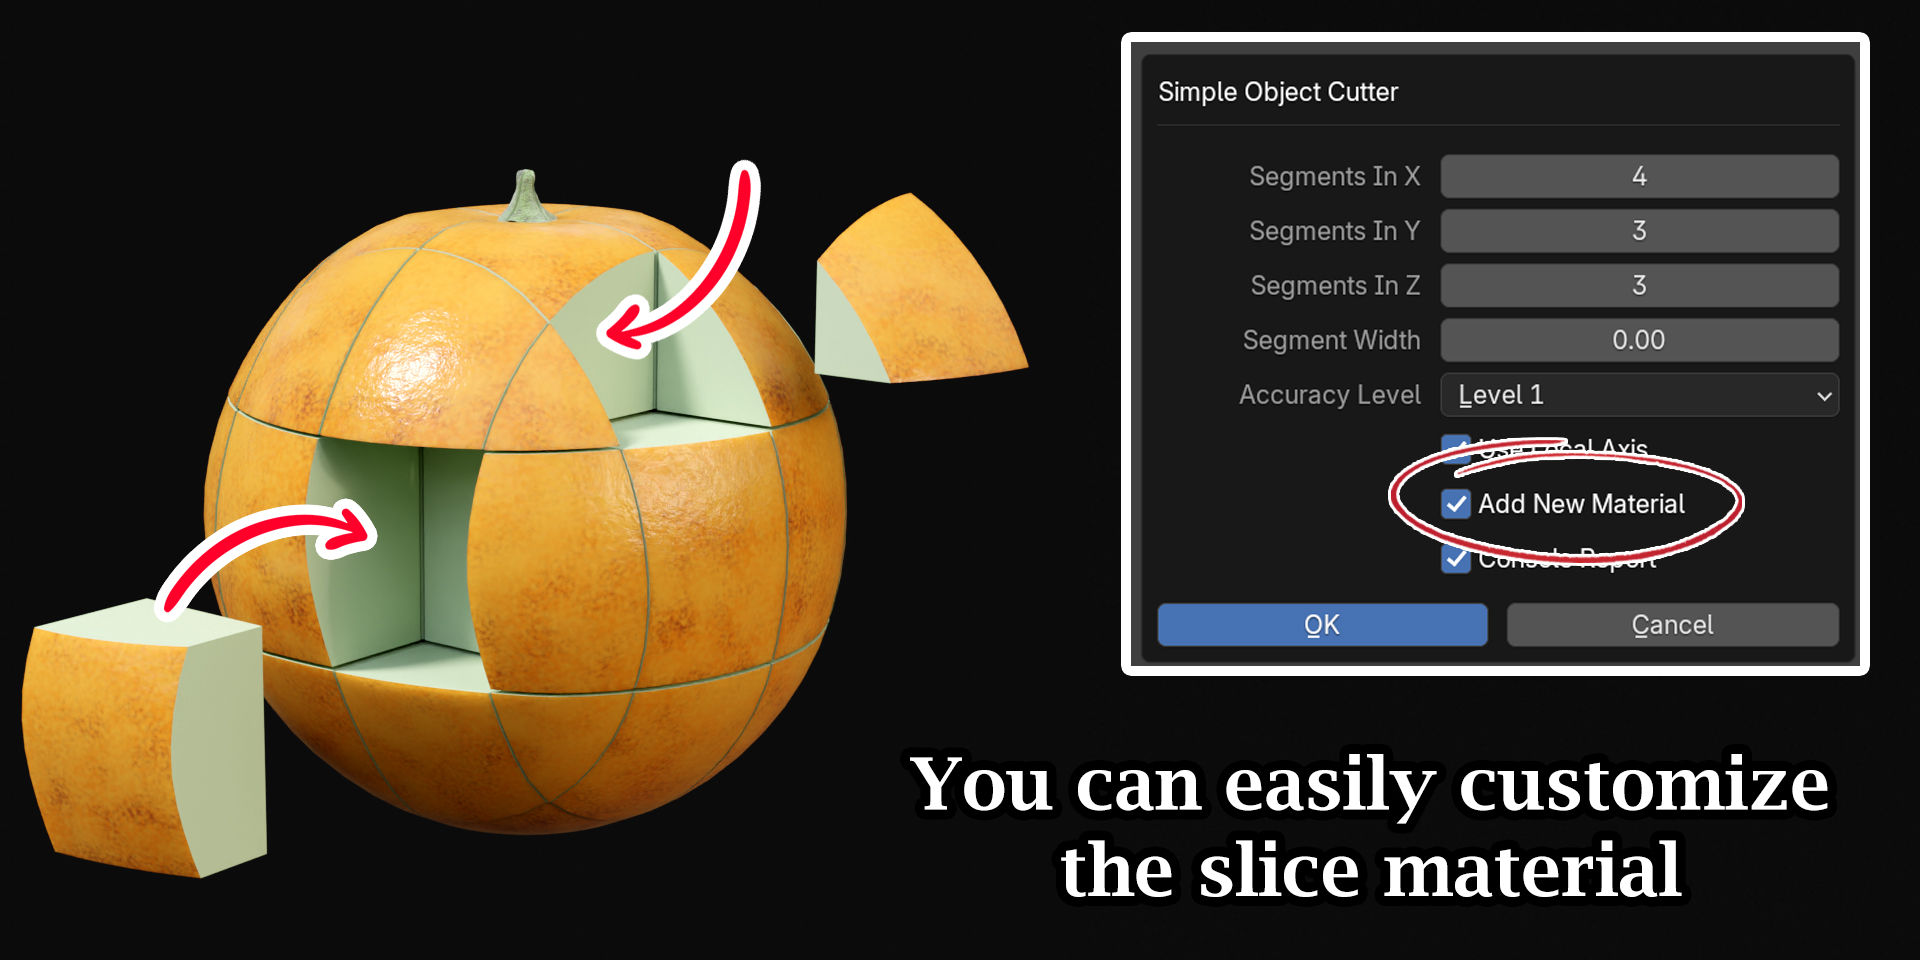
Add New Material:
If this option is
enabled, the cutter will add a new material for the inside faces of the
resulting pieces. You can later customize the property of this material (look
for “Slice Material” in any of the resulting pieces, you can customize this
material as you wish). If this option is disabled, the target object’s default
material is automatically applied to the inside faces.
Console Report:
If this option is enabled, the add-on will generate a report in the console window where you can see the live progress of the add-on. The screen will freeze for some time when the add-on is run, so you should open the console window beforehand from Window Menu > Toggle System Console and then enable this option in the add-on.
Note: What
if the object is not cut correctly?
One possible reason for incorrect cuts can be the object’s rotation & scales. If you see incorrect cuts, you can Apply all transforms from the Object menu and try to cut it again.
Note: What
if the add-on takes too long to execute?
This add-on uses a great amount of cpu power. Hence, the screen may freeze for some time depending upon the complexity of the target geometry and the number of cuts. Please wait patiently until the operation is complete. It is always better to try with a lesser number of cuts to get an estimate about the processing time, and then go for the real kill.
You can also watch a
video tutorial of this add-on from here: https://youtu.be/ABCDEFGHIJKL
For any assistance on how to use this add-on & for any bug reporting, please feel free to send a mail to [email protected] or connect to us via our YouTube channel. Thank you!
Have questions about this product?
Login to message
| Blender Extension Compatible | Yes |
| Sales | 40+ |
| Dev Fund Contributor | |
| Published | over 2 years ago |
| Blender Version | 3.4 - 5.0 |
| Extension Type | Add-on |
| Render Engine Used | Arnold, Blender-Internal, Blender-Game-Engine, Cycles, Eevee, Freestyle, Luxrender, Mental-Ray, Octane, Vray, Yafaray |
| License | GPL |

Discover more products like this
3d modeling slice-object easy-object-cutter easy-cutter cutting-tool cut-object modelling tool