Skew Painter
 Egret Studios LLC


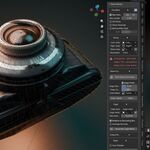
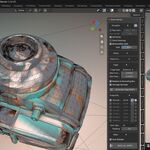
Skew Painter : User Documentation
Version 1.0.0 · Blender 4.2 LTS and newer versions!
Contents
- Installation
- Concepts: what skew is
- Quick start
- The panel, section by section
- Painting
- Keyboard reference
- Cages
- Edge Protection
- Auto-Skew
- Output maps
- Overlays
- Working with other software
- Presets
- Preferences
- Troubleshooting
- Performance
- Limitations
1. Installation
- Edit → Preferences → Add-ons
- Click the ▾ button (top right) → Install from Disk…
- Choose
skew_painter-1.0.0.zip - It enables itself. The panel appears in the 3D View sidebar(press N) under the Skew Painter tab.
To update, uninstall the old version first, then install the new one.
Requirements: Blender 4.2 or newer. Nothing else — no wheels, no pip, noper-platform builds.
2. Concepts: what skew is
When you bake a high-poly onto a low-poly, Blender fires a ray from each texelof the low-poly and records whatever the ray hits on the high-poly.
Those rays travel along the low-poly's interpolated vertex normals. On aflat face, the normals across that face all point the same way, and everythingbakes correctly.
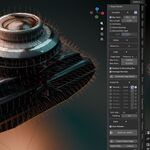
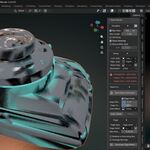
On a curved surface, chamfer or bevel, the interpolated normals fanoutward. A ray leaving the middle of a chamfer is tilted relative to thesurface it's actually sampling, so a bolt standing straight up on thehigh-poly gets recorded as if it leans. Panel lines shear. Screw heads smear.
This is skew. It is not a bug in your model, your UVs, or your cage — it'sa consequence of how ray direction is derived.
A skew map fixes the ray direction, per texel. It's a tangent-spacetexture, encoded exactly like a normal map. Neutral (0.5, 0.5, 1.0) means "usethe vertex normal, unchanged". Painting tilts the ray away from that.
Two things worth internalising:
- Skew is low-frequency. It changes gradually across a surface. That's whythe default map is 1024 and 512 is often enough — and it's what makes livepainting affordable.
- The skew map is relative to the cage, not a replacement for it. Changeyour cage distance later and your painted skew stays valid.
3. Quick start
You need two meshes: a low-poly (the thing you're baking onto) and ahigh-poly (the detail).
- Put the high-poly object(s) into a collection.
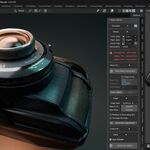
- Select the low-poly. Open the sidebar (N) → Skew Painter.
- Under Setup:
- Low-poly → your low-poly object
- High-poly → the collection
- Skew map → click + to create one
- Under Output Maps, make sure Normal (Tangent) is ticked.
- Click BAKE ALL MAPS. Look at the result — find the leaning detail.
- Click Paint Skew Correction. Drag across the leaning detail in thedirection it should point.
- The affected region rebakes as you paint. Keep going until it looks right.
That's the whole loop.
4. The panel, section by section
Setup
| Field | What it does |
|---|---|
| Low-poly | The object being baked onto and painted. Setting this also creates the output map slots. |
| High-poly | Collection holding the detail meshes. Instances, modifiers and nested collections are all respected. |
| Skew map | The tangent-space skew texture. + creates a neutral one. |
| Resolution | 256 / 512 / 1024 / 2048. Default 1024. Skew is low-frequency — bigger is rarely better. |
Skew Correction
- Paint Skew Correction — activates the Skew Paint tool.
- Edge protection + its two sliders — see §8.
- Auto-Skew — one-click estimate. See §9.
- Clear — resets the whole map to neutral. Asks first.
Cage
See §7.
Output Maps
See §10.
Visualize
See §11.
Bake
- Auto rebake — rebake affected regions automatically while painting.
- BAKE ALL MAPS — full bake of every enabled map. Esc cancels.
- Export Skew Cage / Import & Export Skew Map — see §12.
- Presets — see §13.
5. Painting
Click Paint Skew Correction. This activates a tool in Object mode — youstay in Object mode, so you can still see your high-poly while you work.
The tool header (top of the viewport) carries brush type, radius, strength,falloff and symmetry.
The brushes
Comb (default, key 1)Rotates the skew vector toward your stroke direction. Drag across a leaningbolt in the direction it should stand. It builds up gradually with repeatedstrokes and never snaps — like combing hair. This is the brush you'll use most.
Pull (key 2)Rotates every skew vector in the footprint toward the point under your cursor.Use it to aim a whole region of rays at one feature — hover over the centre ofa bolt head and paint around it.
Smooth (key 3, or hold Shift)Blurs the skew field inside the brush. Use it whenever a region looks blotchy.Uneven skew produces visible banding in the bake, so this matters more than itsounds.
Erase (key 4, or hold Ctrl)Blends back toward neutral. Non-destructive escape hatch.
Brush settings
| Setting | Notes |
|---|---|
| Radius | In world units, not pixels — so the brush covers the same physical area regardless of how densely that island is packed in UV space. |
| Strength | How far each dab rotates the vector. |
| Falloff | Smooth / Sphere / Root / Sharp / Linear / Constant / Custom curve. |
| Spacing | Distance between dabs as a fraction of radius. Default 12%. |
| Pressure | Tablet pressure can drive radius, strength, or both. |
| Symmetry | X / Y / Z, in object space. Enable two axes and you get three mirrors; three axes gives seven. |
Symmetry mirrors in object space, then re-projects onto the surface — soit works on models whose two halves don't share a mirrored UV layout.
What happens while you paint
While the mouse is down, the painted region rebakes at quarter resolutionroughly every 60 ms. When you let go, the full-resolution rebake runs after ashort pause.
The skew map lives in memory during a stroke and is written to its Imagedatablock when the stroke ends, when you save, and when you click Flush.This is deliberate — writing the whole image on every mouse-move would be fartoo slow.
6. Keyboard reference
Active only while the Skew Paint tool is active.
| Key | Action |
|---|---|
| LMB drag | Paint with the active brush |
| Shift + LMB | Smooth |
| Ctrl + LMB | Erase to neutral |
| F drag | Radius |
| Shift + F drag | Strength |
| 1 / 2 / 3 / 4 | Comb / Pull / Smooth / Erase |
| R | Toggle ray visualization |
| Alt + R | Toggle before/after split |
| Esc or RMB | Cancel the current stroke |
| MMB / scroll | Passes through — orbit and zoom mid-stroke |
To leave the tool: click Exit Skew Paint (the same button you used toenter — it toggles), or pick any other tool from the toolbar. The brush cursordisappears when you do.
The brush cursor is a circle that follows your pointer and sits on thesurface, sized to the real brush radius at that depth. It turns grey when thepointer is off the mesh, where a stroke would do nothing.
7. Cages
The cage defines where rays start and which way they point before your skewmap perturbs them.
Distance-based (default)
| Setting | Meaning |
|---|---|
| Max frontal distance | How far outside the surface each ray starts. Default 0.03. |
| Max rear distance | How far past the surface it continues. Default 0.01. |
| Relative to bounding box | On by default. Multiplies both distances by the low-poly's bounding-box diagonal, so the defaults work at any object scale. |
| Average normals | On by default. Averages normals across split and hard edges so the ray envelope is watertight. |
Leave Average Normals on. With it off, a hard-edged mesh gets a separateoffset plane per face, and the gaps between them show up as cracks in thebake. The panel warns you if you turn it off on a mesh that has sharp edges.
Frontal too short → rays start inside the high-poly and miss detail.Frontal too long → rays start so far out they catch the wrong surface.Turn on ray visualization and you can see which is happening.
Cage mesh
Supply your own mesh. It must have identical topology and vertex order tothe low-poly — duplicate the low-poly and move only vertices.
- Generate Cage Mesh builds one for you from the current distance cage,ready to sculpt where the distance is wrong in one spot.
- The ✓ button validates the cage and tells you exactly what mismatches.
A cage that merely has the right vertex count but a different order producesrays that point in plausible-looking but completely wrong directions, which iswhy this is checked rather than assumed.
8. Edge Protection
Combing rays near the edge of a detail drags that detail's silhouettesideways. You fix the lean and introduce a smear.
Edge Protection fades painted skew back to neutral as it approaches a detailboundary. Boundaries are found from three sources combined: high-poly normaldiscontinuities, the low-poly's hard edges and UV seams, and an optional maskimage of your own.
| Setting | Meaning |
|---|---|
| Edge distance | How far from an edge the skew is restored to full strength, as a fraction of the map. Default 0.15. |
| Edge contrast | Reshapes the falloff. Low is a gradual ramp; high is an abrupt cut. Default 0.5. |
| Extra Mask | Optional image; white marks additional protected areas. |
Setting Edge distance to 0 is exactly identical to turning the feature off.
Turn this on when combing near a bolt starts smearing its rim. Leave it offfor broad, gentle corrections across a large curve.
9. Auto-Skew
Casts a small spread of candidate rays per texel — nine directions within a25° cone around the cage direction — scores each on how close it hits and howwell the high-poly surface it lands on faces the low-poly, then keeps the best.The result is smoothed and edge-protected.
Treat it as a starting point. It handles the obvious cases and leaves thejudgement calls to you. Run it, then refine by hand where it guessed wrong.
Blend With Existing mixes the estimate into what you've already paintedinstead of replacing it.
10. Output maps
Skew affects anything derived from a projected ray, so all of these bakethrough the corrected rays:
| Map | Notes |
|---|---|
| Normal (Tangent) | The primary target. |
| Normal (Object) | Object-space normals. |
| Ambient Occlusion | Hemisphere sampling from each hit. |
| Curvature | Derived from the baked object-space normals. |
| Thickness | Distance through the high-poly along the inverted ray. |
| Position | Hit position normalised to the bounding box. |
| Material/Object ID | Flat colour per source object. |
Each row has an enable tick, a resolution, and a ⟲ auto-rebake toggle. The⚙ button expands per-map bit depth and quality overrides.
Shared settings at the bottom:
- Anti-aliasing — 1× / 2× / 4× supersampling.
- Padding — UV island dilation in pixels, default 16. Prevents backgroundcolour bleeding across island borders when the texture is filtered ormipmapped.
11. Overlays
Overlays only appear once you have explicitly chosen a low-poly and given ita skew map. Adding an unrelated mesh to your scene will never trigger them.
| Overlay | Shows |
|---|---|
| Ray vectors | The bake ray for a sparse grid of texels. Green = hits the high-poly, red = misses. Faded where edge protection has reduced the skew. |
| Hit points | A dot where each ray meets the high-poly. |
| Skew heatmap | The low-poly shaded by how far its ray has been bent from its normal. |
| Before/after split | A screen-space wipe between the neutral bake and the corrected one. Drag the slider to move the divider. |
Density controls how many rays are drawn. Ray Length scales their drawnlength.
To turn everything off: the eye icon in the Visualize section header,or the Skew Painter entry in the standard viewport Overlays popover.
Red rays are your main diagnostic. A field of red means your rays aren'treaching the high-poly — increase frontal distance, or check the high-polycollection is set.
12. Working with other software
Marmoset Toolbag
Skew Painter uses the same skew map encoding as Marmoset Toolbag, sointerchange is lossless in both directions.
- Import Skew Map — load a map made in Marmoset. Colorspace is forced toNon-Color automatically; you'll get a warning if the file was tagged sRGB.
- Export Skew Map — writes a 16-bit (or 8-bit) PNG you can load inMarmoset.
Any baker that accepts a cage
Export Skew Cage converts your painted skew map into a displaced cagemesh. It adaptively subdivides a copy of your low-poly where the skew fieldvaries, then displaces each vertex along its corrected ray direction.
The result works with Blender's own Selected to Active bake and withexternal bakers.
This is an approximation. A cage carries one direction per vertex; a skewmap carries one per texel. Skew detail finer than the local edge lengthcannot survive the conversion. Raise Max Subdivision to recover more, atthe cost of vertices. Use it to hand results to a pipeline that isn't SkewPainter — not as a substitute for baking here.
Colorspace
Skew maps are always Non-Color. An sRGB-tagged map decodes to badly wrongdirections — mid-grey neutral becomes about 0.216 linear, so every texel readsas steeply combed. Skew Painter enforces this on creation and re-asserts it onload.
13. Presets
Presets saves the whole settings block — cage, edge protection, output mapconfiguration and brush settings — as JSON.
Pointers (images, collections, cage objects) are deliberately not saved.They're scene-specific, and a preset that silently repointed your high-polycollection would be a trap.
Presets live in the add-on's presets/ folder, or a folder of your choosingset in Preferences.
14. Preferences
Edit → Preferences → Add-ons → Skew Painter
| Setting | Purpose |
|---|---|
| Accent Colour | Viewport accent used by overlays and the heatmap. |
| Raycast Backend | Automatic / GPU / CPU. Automatic uses the GPU when its shaders compile and falls back to numpy when they don't. Force CPU if you suspect a driver problem. |
| Tile Size | Bake dispatch tile edge. Smaller keeps the UI responsive and avoids tripping the OS GPU watchdog. |
| Traversal Step Cap | Hard limit on BVH traversal steps per ray — guarantees a shader cannot hang. Exceeded rays are counted in the bake report. |
| BVH Leaf Size | Triangles per BVH leaf. Capped at 4 by the node packing format. |
| Max High-poly Triangles | Refuses to build a BVH larger than this rather than exhausting memory. |
| Preview Divisor | Resolution divisor for the live rebake while painting. Higher = faster, blurrier preview. |
| AO Samples | Hemisphere rays per texel for AO and thickness. |
| Overlay Vertex Budget | Hard cap on overlay geometry. High ray densities reduce quality rather than stalling. |
| Debug Logging | Verbose timing and GPU diagnostics to the system console. |
| Show Timings in Report | Adds per-stage timings to the bake report panel. |
15. Troubleshooting
The bake is full of holes / lots of red rays
Rays aren't reaching the high-poly. In order of likelihood:
- High-poly collection not set, or empty. The panel warns about this.
- Frontal distance too short. Increase it until the rays clear thehigh-poly surface.
- Relative to bounding box is off on a very small or very large object,so 0.03 is the wrong order of magnitude.
- Rays hit the traversal step cap — the report tells you if so. Raise itin Preferences.
Cracks or seams along hard edges
Average Normals is off. Turn it on.
Detail smears sideways when I comb near it
Turn on Edge Protection. Start at the defaults.
Banding or blotchiness in the corrected area
The skew field isn't smooth. Go over it with the Smooth brush.
"Overlapping UVs" warning
Two or more faces occupy the same UV area. The bake writes whichever face therasteriser reaches last — not a blend. Fix the UV layout; the warning tellsyou what fraction of texels are affected.
"Skew map is tagged sRGB"
Click through the fix, or set the image's colorspace to Non-Color manually.
The panel says a cage mesh doesn't match
Your cage has different topology or vertex order to the low-poly. Duplicatethe low-poly and move only vertices — don't add, delete or merge anything. UseGenerate Cage Mesh to get a guaranteed-valid starting point.
The bake is slow
- Check the report for the backend. If it says
cpu, the GPU shaders didn'tcompile — the console has the reason. - Reduce anti-aliasing, output resolution, or high-poly triangle count.
- AO and thickness are the expensive maps; disable the ones you don't need.
Painting feels laggy
Lower the skew map resolution (512 is usually plenty), raise the PreviewDivisor, or turn off Auto rebake and bake manually.
16. Performance
Skew Painter raycasts on the GPU through a fragment shader, falling back to avectorised numpy implementation when the GPU path is unavailable. Both producethe same answer — they agree to within 7.45 × 10⁻⁸ in testing.
Caches are keyed by content, so:
- Painting does not invalidate the G-buffer, the BVH, or the edge distancefield — none of them depend on the skew map.
- Changing a cage setting invalidates the bake but keeps the edge field.
- Editing geometry invalidates what depends on it, automatically.
If a stage misses its performance target, it's reported in the bake reportrather than silently stalling.
Known shortfall: BVH construction for very large high-polys. A 500k-trianglebuild meets its 1.5 s target (~1.2 s measured); a 2M-triangle build takes about10 s against a 6 s target. The build is bandwidth-bound. If you're routinelyabove ~1M triangles, decimating the high-poly before baking is the practicalanswer.
17. Limitations
- No UDIM support in 1.0. Planned for 1.1.
- It fixes baked maps, not mesh shading. If your model shades badly in theviewport, that's Weighted Normal / Shade Auto Smooth territory.
- It needs both a high-poly and a low-poly. Skew correction re-aims the raythat goes looking for detail. It cannot repair an existing normal map texture.
- Skew cage export is an approximation, bounded by vertex density.
- Not a general texture painting suite. Skew maps only.
- The high-poly triangle limit is 4,194,304, imposed by the BVH node packing format.
Support
Contact me on my inbox for support.
 Included
Includes 12 months of
- Support from Egret Studios LLC
- Product updates
Extend this product’s Support Period +12 months: 100% of product price
Have questions before purchasing?
Login to message
| Blender Extension Compatible | Yes |
| Published | about 2 months ago |
| Blender Version | 4.2 - 5.2 |
| Extension Type | Add-on |
| Render Engine Used | Cycles, Eevee |
| License | GPL |
