 Trinumedia


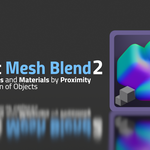
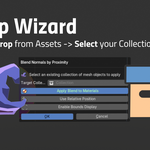

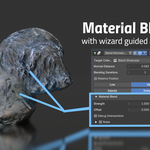
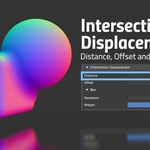

A drag-and-drop Blender/Bforartists Geometry Nodes Collection asset to apply from the Asset Browser as a solution for blending Normals and Materials by proximity on all target meshes — including a setup wizard, normal blending distance and blur controls, material blending and intersection displacement with an easy installation.
🚀 Get Started:
💎 Feature Overview
- • Blends normals of all mesh objects in a collection
- • (New!) Blur blend normals and materials seams
- • Blends materials of all mesh objects in a collection, and reapply the blend to new meshes with the Wizard
- • Iterate on mesh islands or instances at the same time
- • View and debug material intersections
- • Mesh displacement at intersections for fake "SDF" workflows
- • Includes an easy to apply asset to drag and drop to the 3D View from the Asset Browser
- • Includes a setup Wizard to ease setting up on an existing collection and objects
- • Contains flexible blending distance, offset and blurring controls
- • Preserves and blends existing materials of the collection, or can use a material override
- • Easy asset library installation (drag and drop extension installation)
- • Bonus: Apply and Join, Apply and Remesh and Apply and Boolean on selection Operators
💡 Why this is Helpful
- • 🛠️ Drag and drop use, setup wizard, and quick library installation
- • 🏃♀️➡️ Fast blending application of normals and materials on a collection of objects
- • 💊 Useful for blending and prototyping blobby characters, terrain pieces, machine parts — and more
- • 📦 Keeps focus on visual impact out of the box, not node complexity
- • 💡 Helps visualize and blend objects before committing to retopology, booleans or remeshing
Feature Comparison Chart
| Feature | Smart Mesh Blend | Others |
| Material blending that can be baked | ✅ Optional | ❌ Compositor only |
| Amount of blended objects | ✅ Unlimited, defined by collection | ❌ Maximum 2 |
| Intersection Displacement | ✅ Optional | ❌ None |
| Blurring controls | ✅ Built-in | 🟡 Sometimes |
| Setup | ✅ Drag and Drop wizard prompt | 🟡 Manual Setup from the modifier stack or node trees |
| Asset Thumbnails | ✅ Illustrative feature designs Color Coding Silhouette Line Form | ❌ Not included or Monochrome No feature designs Flat |
🧙♂️ Wizard Setup – Documentation
Setup begins the moment the asset is dragged into the viewport. Here is an overview of what happens:
-
Drag the Asset into the Scene
- Use the Asset Browser/Shelf to either Link, Link Override (Bforartists) or Append. Append mode is recommended.
Tip: If you plan to use multiple instances of the same asset and store and edit in file, use the Append Packed mode. If you plan to not edit the source node group, then use link and then override.
Note: The Asset Shelf in Object Mode only exists in Bforartists right now, a GUI fork of Blender available free. - Go into the "Geometry Nodes Library" in the Library selector to the top left of the Asset Browser/Shelf or use the "All" category.

- Use the Asset Browser/Shelf to either Link, Link Override (Bforartists) or Append. Append mode is recommended.
-
Locate and Drag the Asset
- To do this, drag from the Asset Browser or Asset Shelf into the 3D View (this is a collection asset).

- Once placed, this triggers the Setup Wizard popup.
-
Setup Wizard Dialog Appears
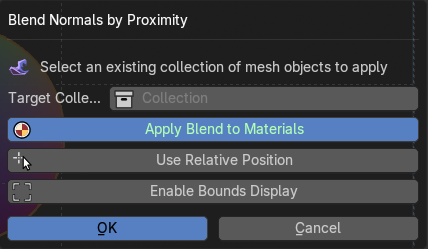
- Select a collection of mesh objects to apply: the Target Collection is the group of mesh objects that will blend normals and make a new blended mesh object. The blended mesh object in a purple collection is where the blending settings are.
-
Define Additional Properties (optional):
- Toggle the Apply Blend to Materials so that the target collection objects include an alpha blend at the intersection of all materials in the target collection. If you run this wizard again, this will add the blend to new materials added to the target collection. If you disable this and run the wizard again, it will remove the material intersection blend.
- Toggle the Use Relative Position if you want the blended mesh to spawn at the origin point of the referenced collection. If off it will spawn at where you place the collection.
- Toggle the Enable Bounds display so that the target collection objects show a bounding box when overlays are toggled in the viewport. This is best used in Lookdev viewport mode.
-
Confirm to Apply
- OK: Appends the geometry nodes asset referencing the Target Collection.
- Cancel: Exit without applying, the asset will add to the scene and reference a default child collection, also in purple called "Default Blend Collection".
- Once confirmed, this will add a purple collection with a mesh object that contains the Geometry Nodes setup. This will also contain the Default Blend Collection if you would like to reference this.

-
Post-Setup Editing
- Settings can be adjusted later via the Modifier Stack in the Properties Editor.
- You can also modify and use the Geometry Nodes asset directly from the Geometry Nodes editor. You'll see some frames explaining how this works.
- You can also "bake" the normals to the joined mesh object by applying the modifier stack that has the Geometry Nodes.
🧩 Addon Installation
Quick Install:
- Download the Addon Extension – Ensure you have the latest version.
- Drag and drop the *.zip file into Blender/Bforartists.
- Confirm that you want to install it when the Install Wizard pops up.
- Restart Blender/Bforartists.
Alternatively:
- Download the Addon Extension – Ensure you have the latest version.
- Open Blender/Bforartists – Navigate to Edit > Preferences > Add-ons.
- Click 'Install' – Select the downloaded .zip file.
- Enable the Addon – Search for the name of the addon in the addon list and check the box to enable it. Typically it may already be enabled and filtered after installation.
- Save Preferences – Click 'Save Preferences' at the bottom left of the Preferences window to keep it enabled after restarting.
- Restart Blender/Bforartists.
🧩 Asset Browser Use
Open the Asset Browser in Blender or Bforartists
- Open Blender and split the 3D View and switch to the Asset Browser editor.
- To the top right library selector, select the "Default Geometry Nodes" or "All" library to access the assets under the "Normal" category.
Using the Asset Workspace in Bforartists
- In Bforartists, go to the Asset Workspace tab.
- To the top right library selector, select the "Default Geometry Nodes" or "All" library to access the assets under the "Normal" category.
Using the Asset Shelf in Bforartists
- In Bforartists, open the Asset Shelf from the 3D View editor View header menu or from the bottom right arrow of the 3D View to open.
- To the top right library selector, select the "Default Geometry Nodes" or "All" library to access the assets under the "Normal" category.
Dragging and Dropping Assets
- Locate the desired asset in Asset Browser or Asset Shelf (Bforartists Only).
- Left click on the asset, then drag and drop it into the 3D viewport editor.
💙 Invest in Support
Or get this for free with the Blender fork Bforartists. Each sale guarantees alternative free availability, future support and new features!
🌍 Official Website
🪟 Windows App
🧡 Blender Launcher v2
🖥️ Source Code
✨ What's New
Version 2.0.2
- Improved initial warning on empty collection
- Fixed Type error and wizard socket
- Exposed Normal Blur controls
- Fixed inherit material, nodegroup was missing
- Fixed library confusion for the asset shelves
- Created For Each instead of Repeat for x2 performance update
- Removed normal blur, it was redundant (👀 then added it back!)
- Removed low quality normals, no longer useful
- Added blur to material to material intersections
- Improved Material intersections settings
- Added control to remove intersecting geometry (⚠️ only removes faces, keeps edges and vertices for now)
Version 2.0.1
- Swapped process Islands/Instances around
- Added better intersection blur controls
- Improved Wizard instructions and defaults
- Improved UX warnings
- Improved performance and added a cheap quality mode
- Added Island and Instance iteration for performance
- Fix: Defaulted the material override to off
- Collapsed normal blur as this is now secondary
- Added a better default collection UX
Version 2.0.0
- Fixed and improved the High quality normals to work on all instances or islands correctly, now more robust
- Fixed blending iterations to work better, this does affect performance but it runs more reliably now
- Fixed the normal blending mask to not affect original normals, now it only blurs at the intersections
- Added the option to iterate on all mesh islands or instances
- Added the ability to apply a material blend with an alpha to all target collection materials
- Added a global noise controls to the intersection material blend
- Added the ability to remove the material blend when re-running the wizard without the Mesh Blend option
- Refactored the addon to be compatible with future Smart assets, allowing to install, uninstall and use a central library for all future assets
- Refactored the Wizard to be able to be run multiple times after adding an asset
- Added the Wizard button to discoverable areas
- Improved the wizard guide to have buttons instead of checkboxes
- Improved the application of the bounding box instead of wireframe mode for better usability
- Added the ability to remove or rerun the other wizard options on the Target Collections when re-running the wizard
- Improved the relative position toggle and tooltips
- Added a performance "Low" option for fast normals, can be 25-50% faster
- Added a material intersection debug toggle
- Added option to turn off Displacement intersections
- Added better modifier feedback for island processing and warnings
- Added change notes inside the geometry nodes asset
- Bonus: Added new Apply and Remesh, Apply and Join and Apply and Boolean on selected object operators
Version 1.0.0
- Initial Release 1.0.0