Smart Normals Fix For Blender -- Mesh Shading Cleanup
 blenderVfxMaster



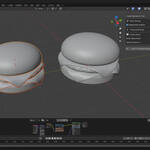
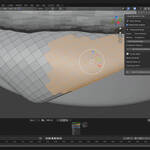
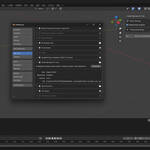
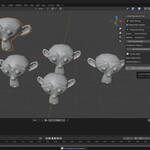
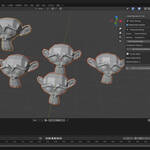

Smart Normals Fix Tool - User Documentation
Requirements
-
Blender 3.0+
-
Python 3.7+ (bundled with Blender)
Installation Steps
-
Download the
fix normals.pyfile -
Open Blender
-
Go to Edit > Preferences > Add-ons
-
Click Install
-
Select the
fix normals.pyfile -
Enable the add-on (check "Smart Normals Fix Tool")
-
The tool will appear in the 3D Viewport sidebar under the Normals tab
Getting Started
Quick Start
-
Select your mesh object(s), or enter Edit Mode and select faces
-
Open the Normals panel in the 3D Viewport sidebar (N-key)
-
Click Smart Fix
-
Done! Your normals are now properly oriented and smoothed
First Time Setup
-
Works out of the box with default settings
-
Smart Mode is enabled by default
-
Advanced settings are collapsed for a clean interface
Interface Overview
Main Panel Sections
-
Smart Settings
-
Enable Smart Analysis for automatic detection and fixing
-
-
Advanced Settings (collapsible)
-
Scope: Choose target (Selected Faces / Objects / All Meshes / Smart Detection)
-
Method: Auto Smooth, Recalc Normals, or Complete Fix
-
Auto Smooth Angle: Threshold for smoothing
-
Merge by Distance & Merge Distance: Vertex merging controls
-
-
Current Status
-
Shows active mode (Edit/Object)
-
Displays selection details (faces/objects count)
-
Provides live feedback
-
-
Action Buttons
-
Smart Fix Selected Faces
-
Smart Fix Selected Objects
-
Smart Fix All Meshes
-
Basic Usage
Fix Selected Faces
-
Enter Edit Mode (Tab)
-
Select faces
-
Click Smart Fix Selected Faces
Fix Entire Object
-
Select mesh object(s)
-
Click Smart Fix Selected Objects
Fix All Meshes
-
Click Smart Fix All Meshes
-
All mesh objects in the scene will be processed
Advanced Features
Smart Detection Mode
-
Edit Mode + Selected Faces → Processes selected faces
-
Object Mode + Selected Objects → Processes selected objects
-
No Selection → Processes all meshes
Processing Methods
-
Auto Smooth Only → Quick smoothing, no normal recalculation
-
Recalc Normals Only → Recomputes outward normals, clears custom data
-
Complete Fix (Recommended) → Combines both for the most robust cleanup
Vertex Merging
-
Merge by Distance merges overlapping vertices
-
Default threshold: 0.0001 units (very precise)
-
Useful for cleaning imported models
Smart Analysis
Detected Issues
-
Flipped faces
-
Duplicate vertices
-
Custom split normals
-
Geometry complexity
Automatic Recommendations
-
Fine geometry (< 30°) → Auto Smooth 30°
-
Medium geometry (30–60°) → Auto Smooth 60°
-
Coarse geometry (> 60°) → Auto Smooth 80°
-
Duplicate vertices → Enable Merge by Distance
-
Custom normals → Clear split normals
Feedback Examples
-
"Smart Detection: Using SELECTED_FACES mode" -
"Found 5 potentially flipped faces" -
"Processed 12 selected faces"
Troubleshooting
Common Issues
-
"Please enter Edit Mode and select faces" → Enter Edit Mode (Tab) and select faces
-
"No faces selected" → Ensure faces are selected (use 3-key face selection)
-
"Current object is not a mesh object" → Select a mesh, not a light/camera
-
"No mesh objects found with the chosen scope" → Check selection or scope
Performance Tips
-
For large meshes: use face-level processing
-
For multiple objects: process individually
-
For complex scenes: use "Selected Objects" scope
FAQ
-
What’s the difference between Smart Mode and Advanced Settings?
Smart Mode auto-optimizes, Advanced Settings allow manual control. -
When to use face-level vs object-level processing?
Use face-level for local fixes, object-level for full cleanup. -
What does Merge by Distance do?
Merges overlapping vertices within a set distance. -
Why recommend different Auto Smooth angles?
Angles depend on geometry complexity—smaller for detailed, larger for coarse. -
Can I undo changes?
Yes, Ctrl+Z works with this tool. -
Does it work with modifiers?
Works on base mesh only. Apply modifiers first if needed. -
Is it compatible with other normal tools?
Yes, but run this tool first to clear problematic custom normals.
Tips & Best Practices
Workflow Integration
-
Import models → Clean up normals first
-
Before UV mapping → Fix normals to avoid shading issues
-
Before rigging → Ensure proper normals on character models
-
Before rendering → Final normals check
Performance Optimization
-
Use face-level processing on large meshes
-
Process objects in batches instead of all at once
-
Use Smart Mode for automated optimization
Quality Assurance
-
Always check in rendered view
-
Enable Face Orientation overlay for verification
-
Test under different lighting setups
Support & Updates
Getting Help
-
Review Troubleshooting section
-
Ensure Blender 3.0+
-
Verify add-on installation and activation
Updates
-
Improved smart analysis
-
New processing options
-
Performance enhancements
-
Bug fixes
Compatibility
-
Blender 3.0+ → Full support
-
Blender 2.93 → Limited support
-
Future versions → Updates provided
Have questions about this product?
Login to message
| Sales | 60+ |
| Rating | 1 ratings |
| Published | about 1 year ago |
| Blender Version | 3.6 - 5.2 |
| Extension Type | N/A |
| License |
Discover more products like this
3d printing geometry repair Workflow Optimization mesh cleanup Game asset auto-smooth normal fix face selection vertex merge CAD import smart analysis Batch processing