Smart Pie Menus 2
 Trestle Trotter


Smart Pie Menus
Documentation.
V2 Complete Tutorial
Update about the "refresh menus" button.
It is no longer necessary to use the button to save hotkey preferences.
It's only used to update the dynamic layout of menus, sometimes necessary when importing presets.
Installation
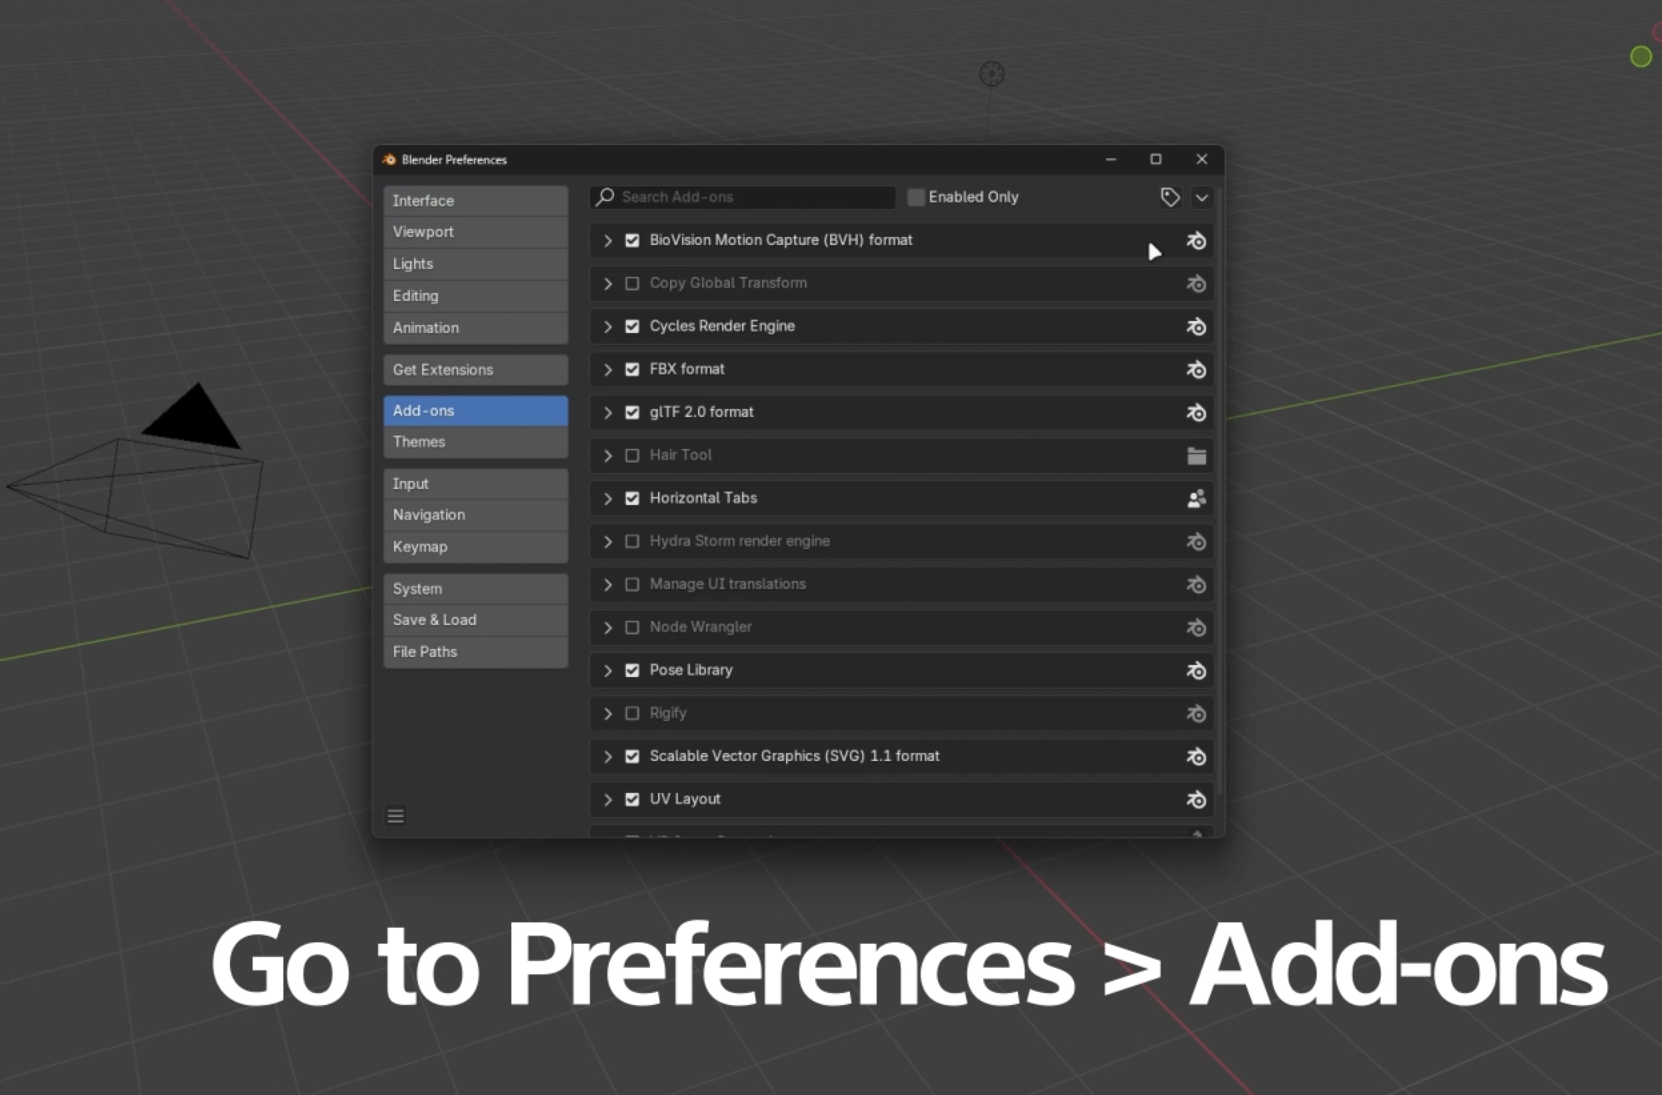
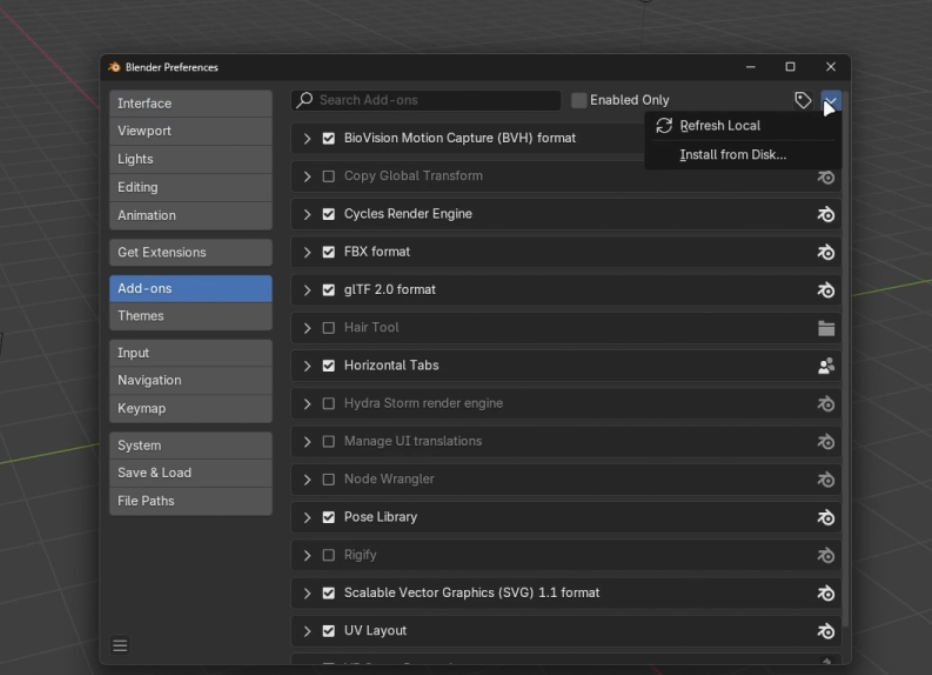
1. Open Blender Preferences
Go to Edit > Preferences and navigate to the Add-ons section.
2. Install From Disk
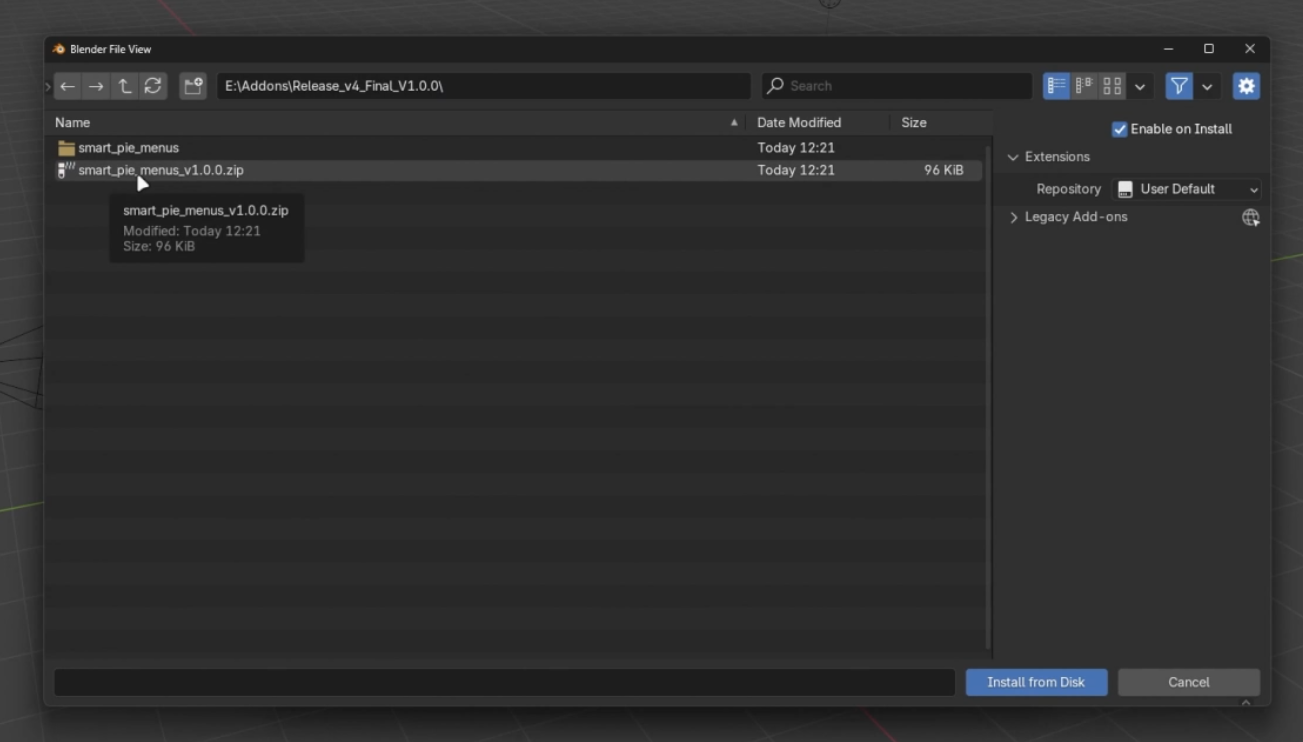
Click the drop-down arrow in the top right and select "Install from disk...".
3. Locate and Enable the Addon
Find the downloaded `.zip` file for Smart Pie Menus and click "Install from Disk". Then, make sure to check the box to enable it.
New Features V1.4.0
Version 1.4 focuses on faster setup, more reliable hotkeys, and smarter context-aware actions when working across Blender modes.
1. Premade Action: Rescan Blender UI
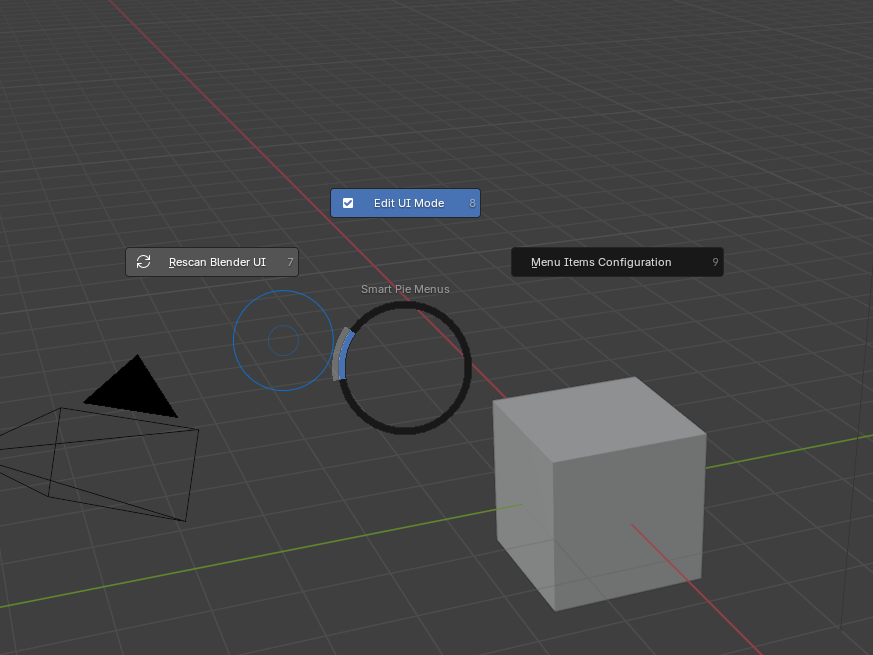
A new premade Rescan Blender UI action refreshes Smart Pie's discovered menus, panels, operators, UILists, brushes, and Horizontal Tabs without restarting Blender or reloading the addon.
This is especially useful after enabling another addon, because newly loaded interface elements can become available for Smart Pie capture immediately.
2. Hotkey System Improvements
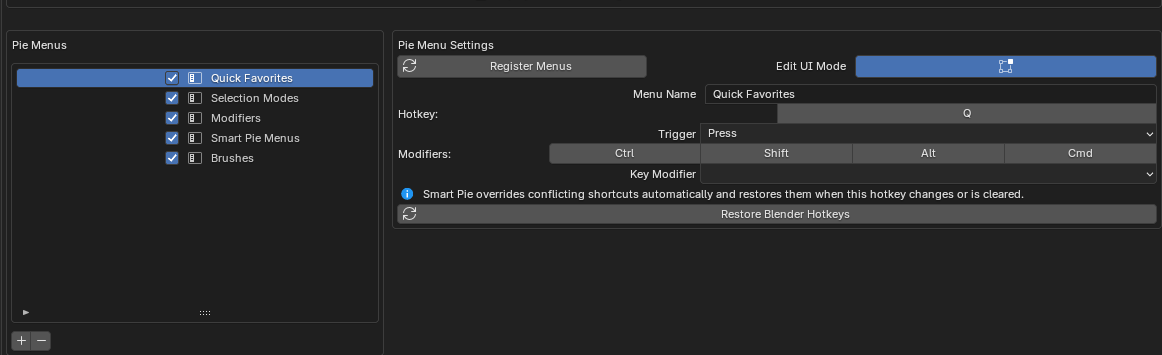
Hotkey handling is now more robust. Smart Pie keeps track of each menu's assigned shortcut, and helps avoid duplicate assignments between menus.
When a Smart Pie shortcut conflicts with Blender defaults, the addon can override conflicting shortcuts automatically and restore them again when the Smart Pie hotkey is changed or cleared.
Important: To correctly change the hotkeys use "Restore Blender Hotkeys" which will unbind the smart pie menu hotkey from all blender native actions manually.
3. Context Properties: Toggle To Mode
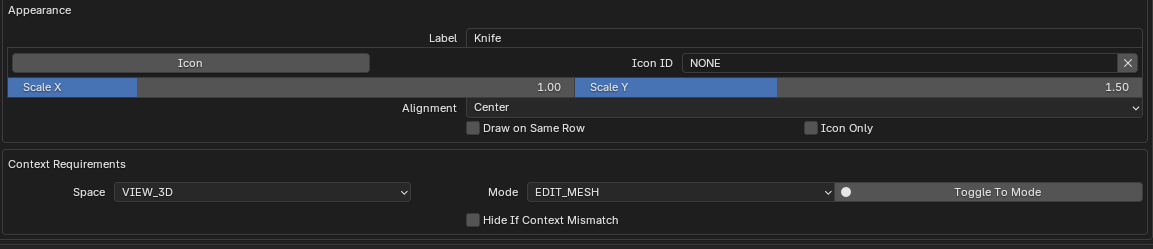
Actions can now switch to the required object mode before they run. In Context Requirements, enable Toggle To Mode on the base mode or on an additional allowed context entry.
This makes it much easier to build actions that need a specific mode first, such as jumping to Object Mode before executing a command captured from the Properties editor.
4. New Premade Brushes Action Type
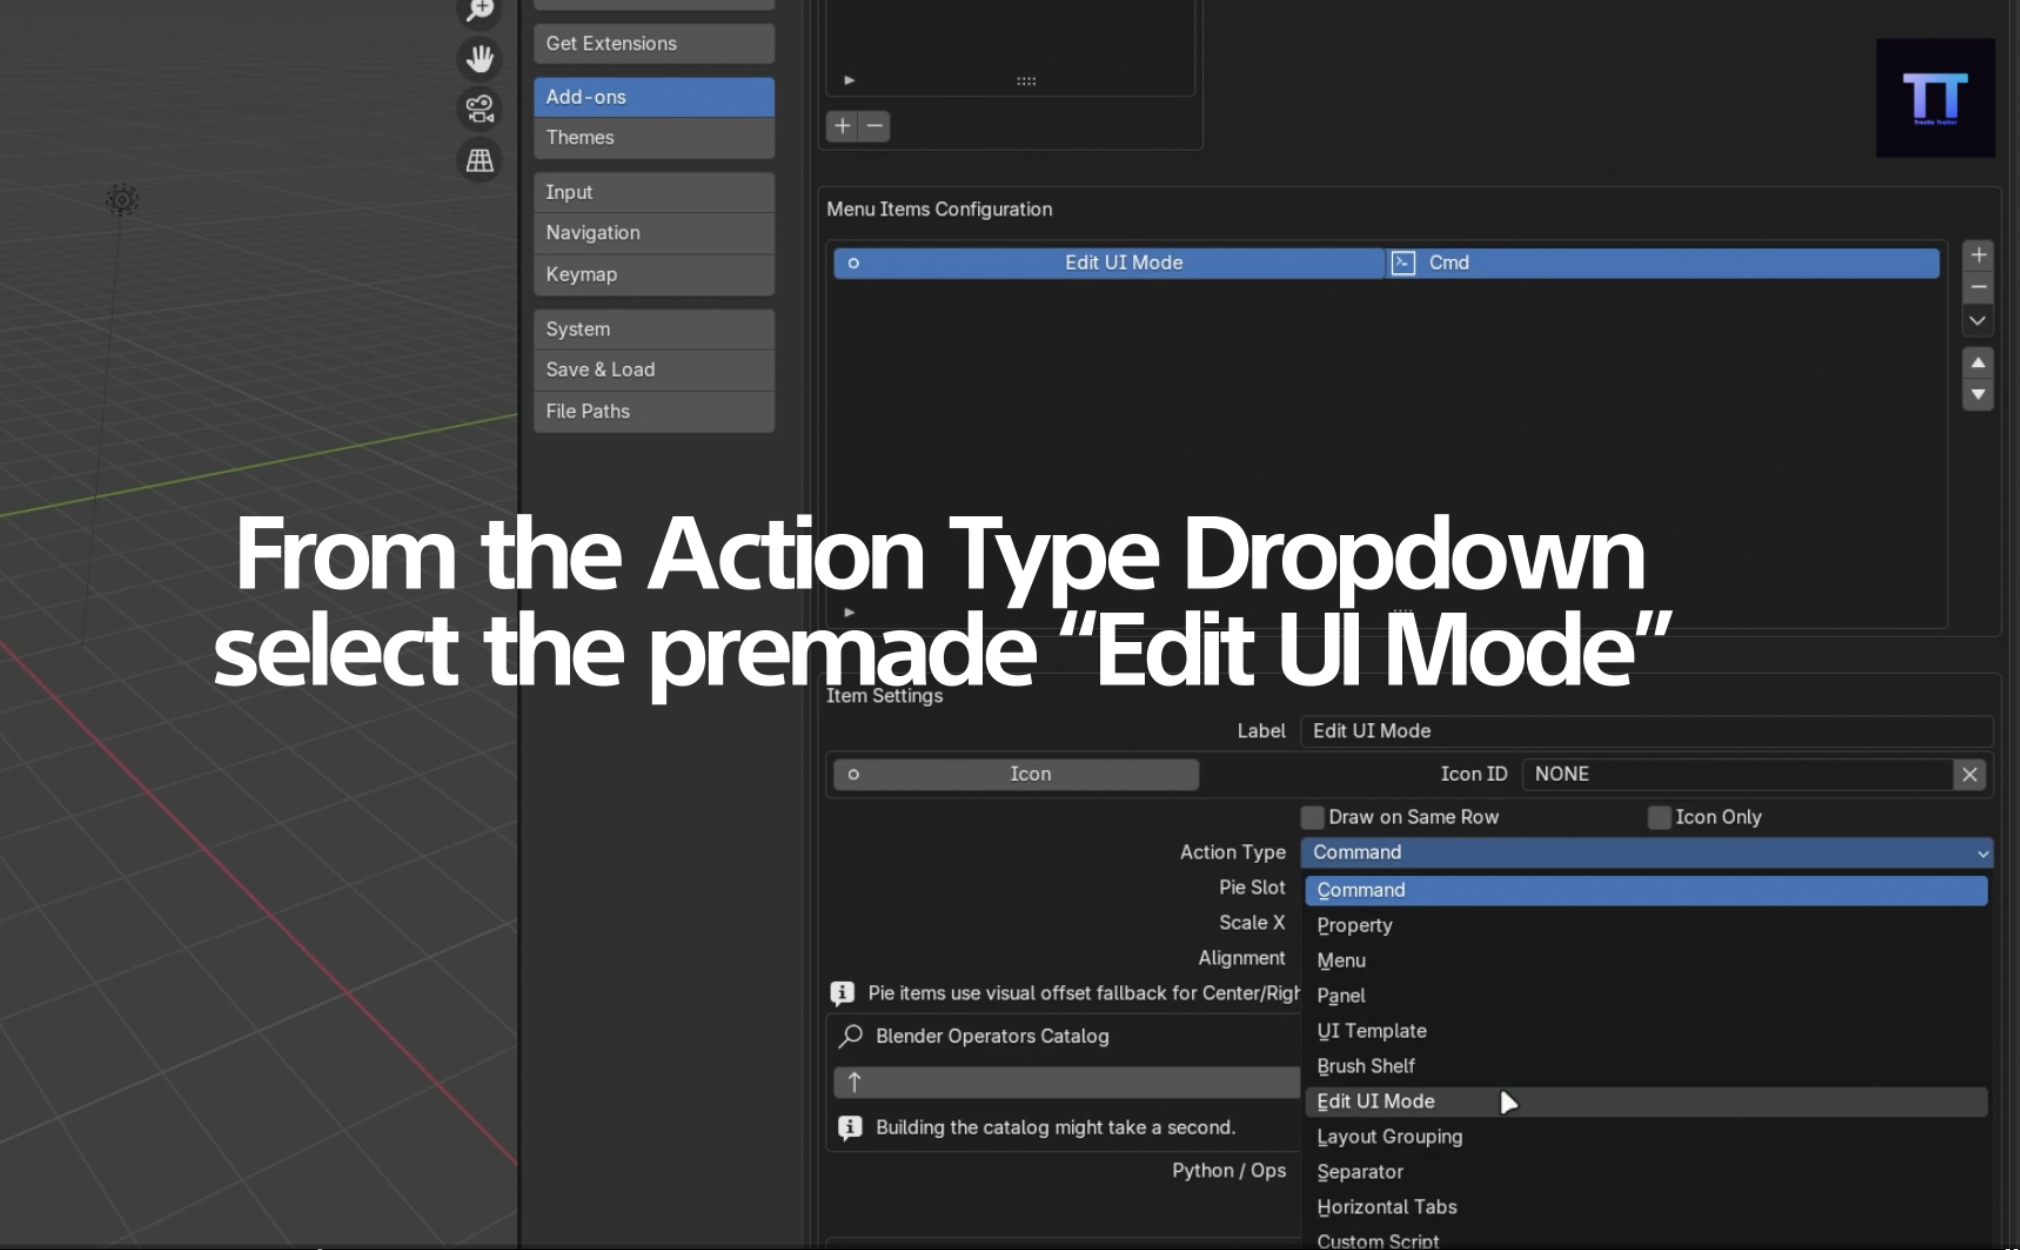
A new Menu Items Configuration action to add brushes from the editor is now available. Select a brush or add it with the edit ui mode context menu.
The brush actions have "Toggle To Mode" Sculpt automatically selected.
Basic Usage: Getting Started
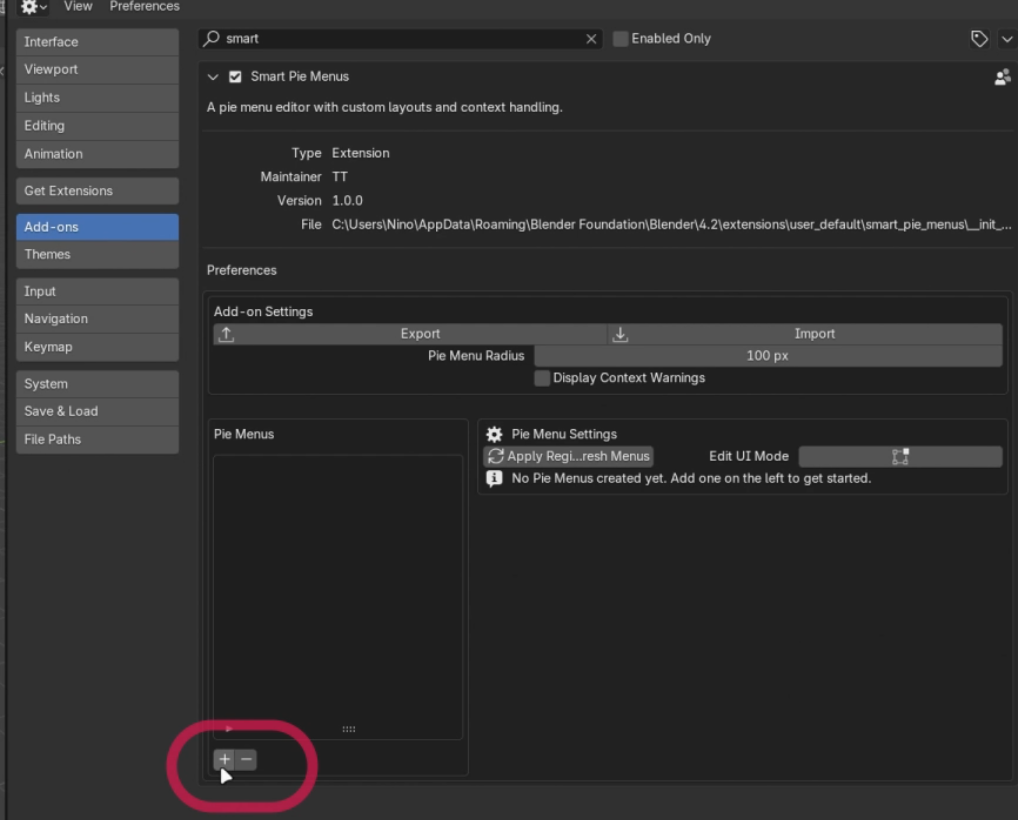
1. Create a New Pie Menu
Click the '+' button below the Pie Menus list inside the Smart Pie Menus panel to create your first menu.
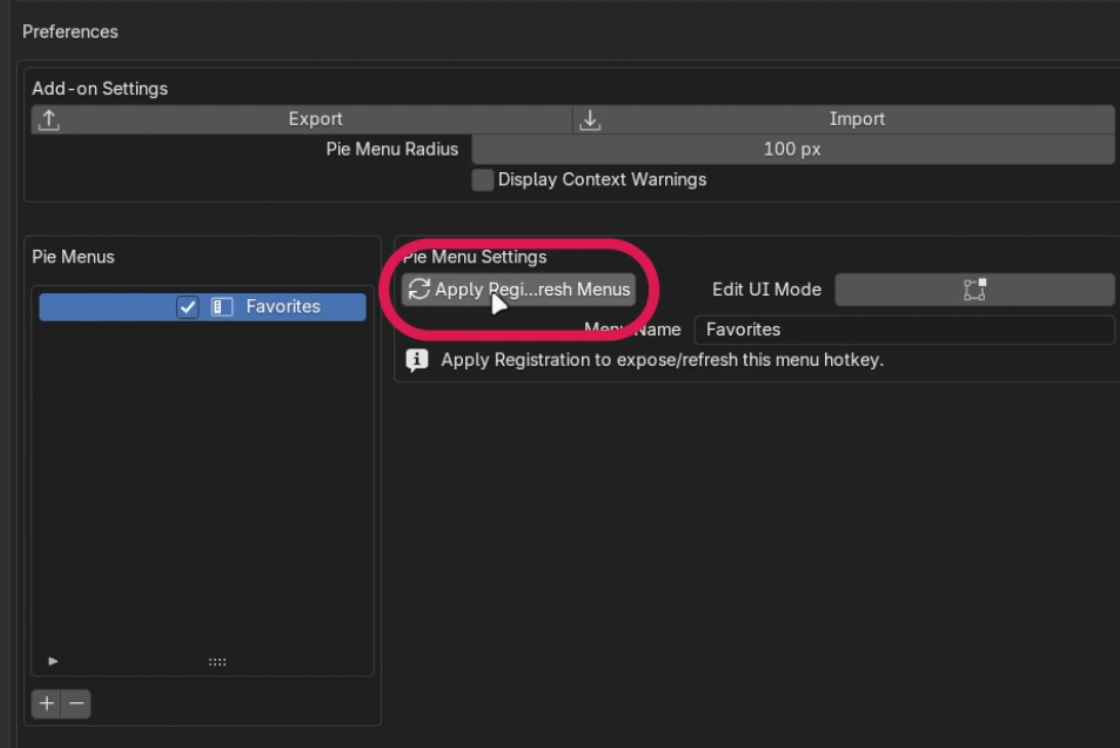
2. Name and Register
Give your new menu a custom name and click "Apply/Register Menu". Then click the refresh button to update the available menus.
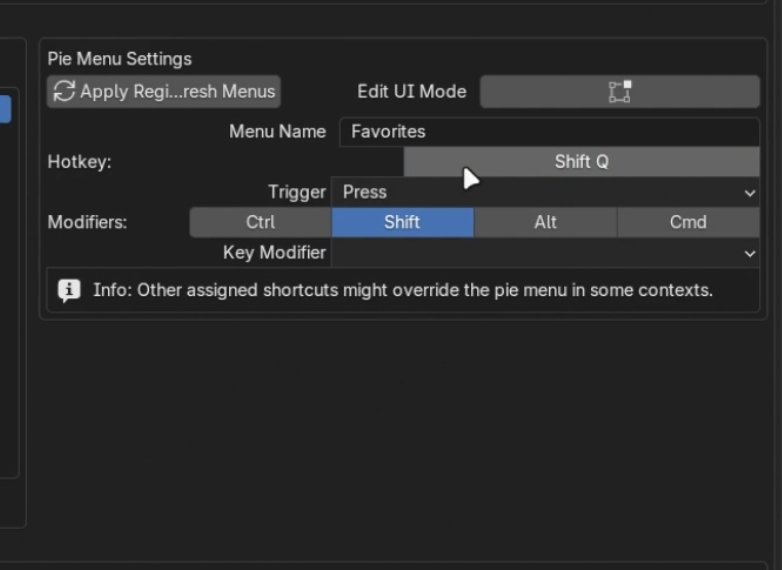
3. Set a Hotkey
Bind your pie menu to a hotkey so you can quickly access it anywhere in the viewport.
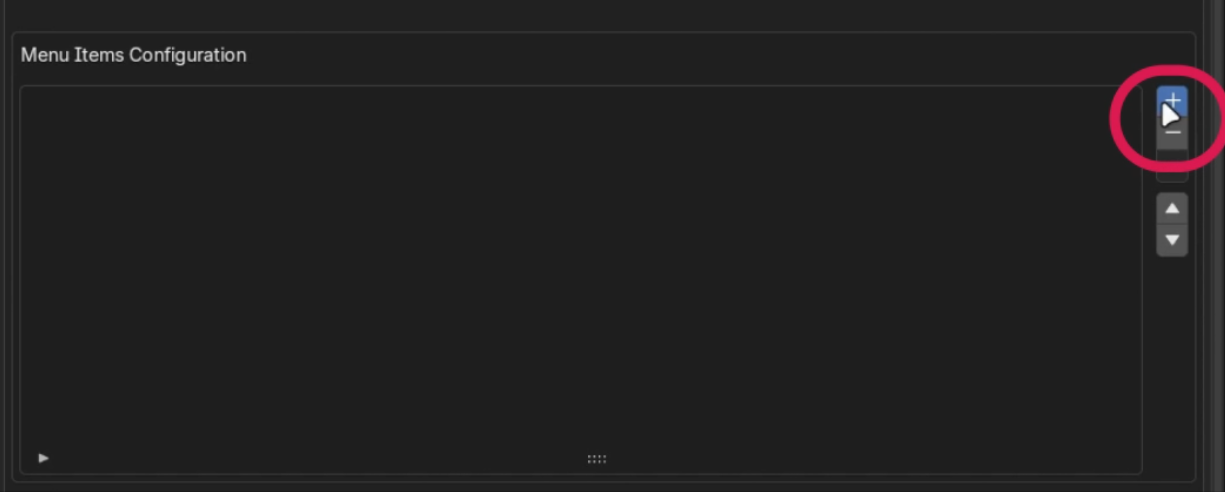
4. Add an Item
Click the '+' button next to the Menu Items list to create a new slot in your pie menu.
5. Configure Item Action
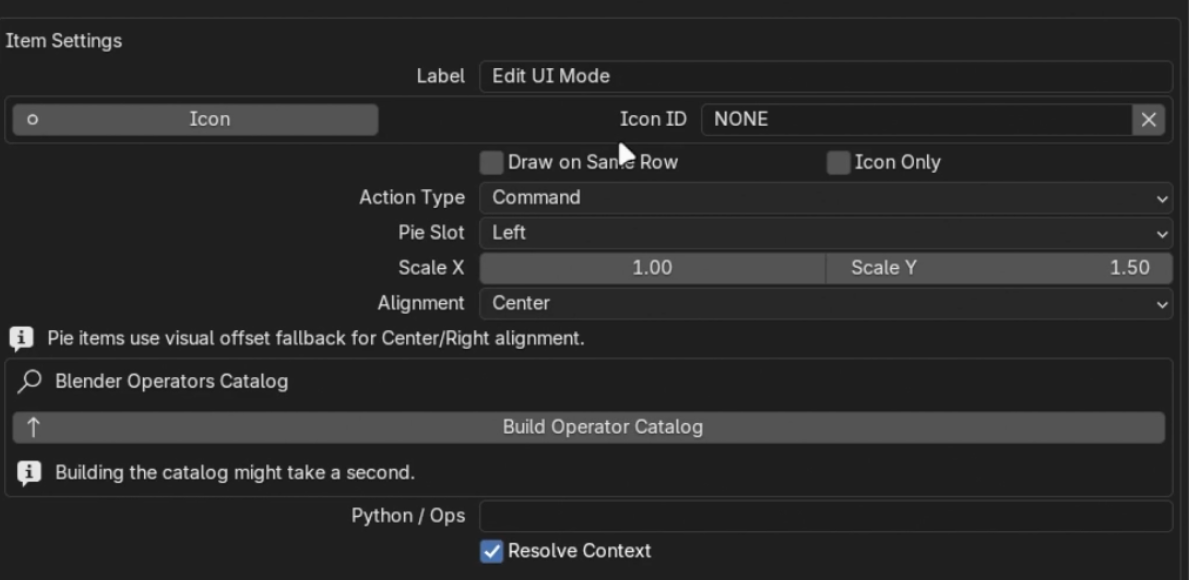
Name the action and select its type using the Item Settings menu. You can choose whether it works as a standard operator, a UI element, or more.
6. Set Custom Icons
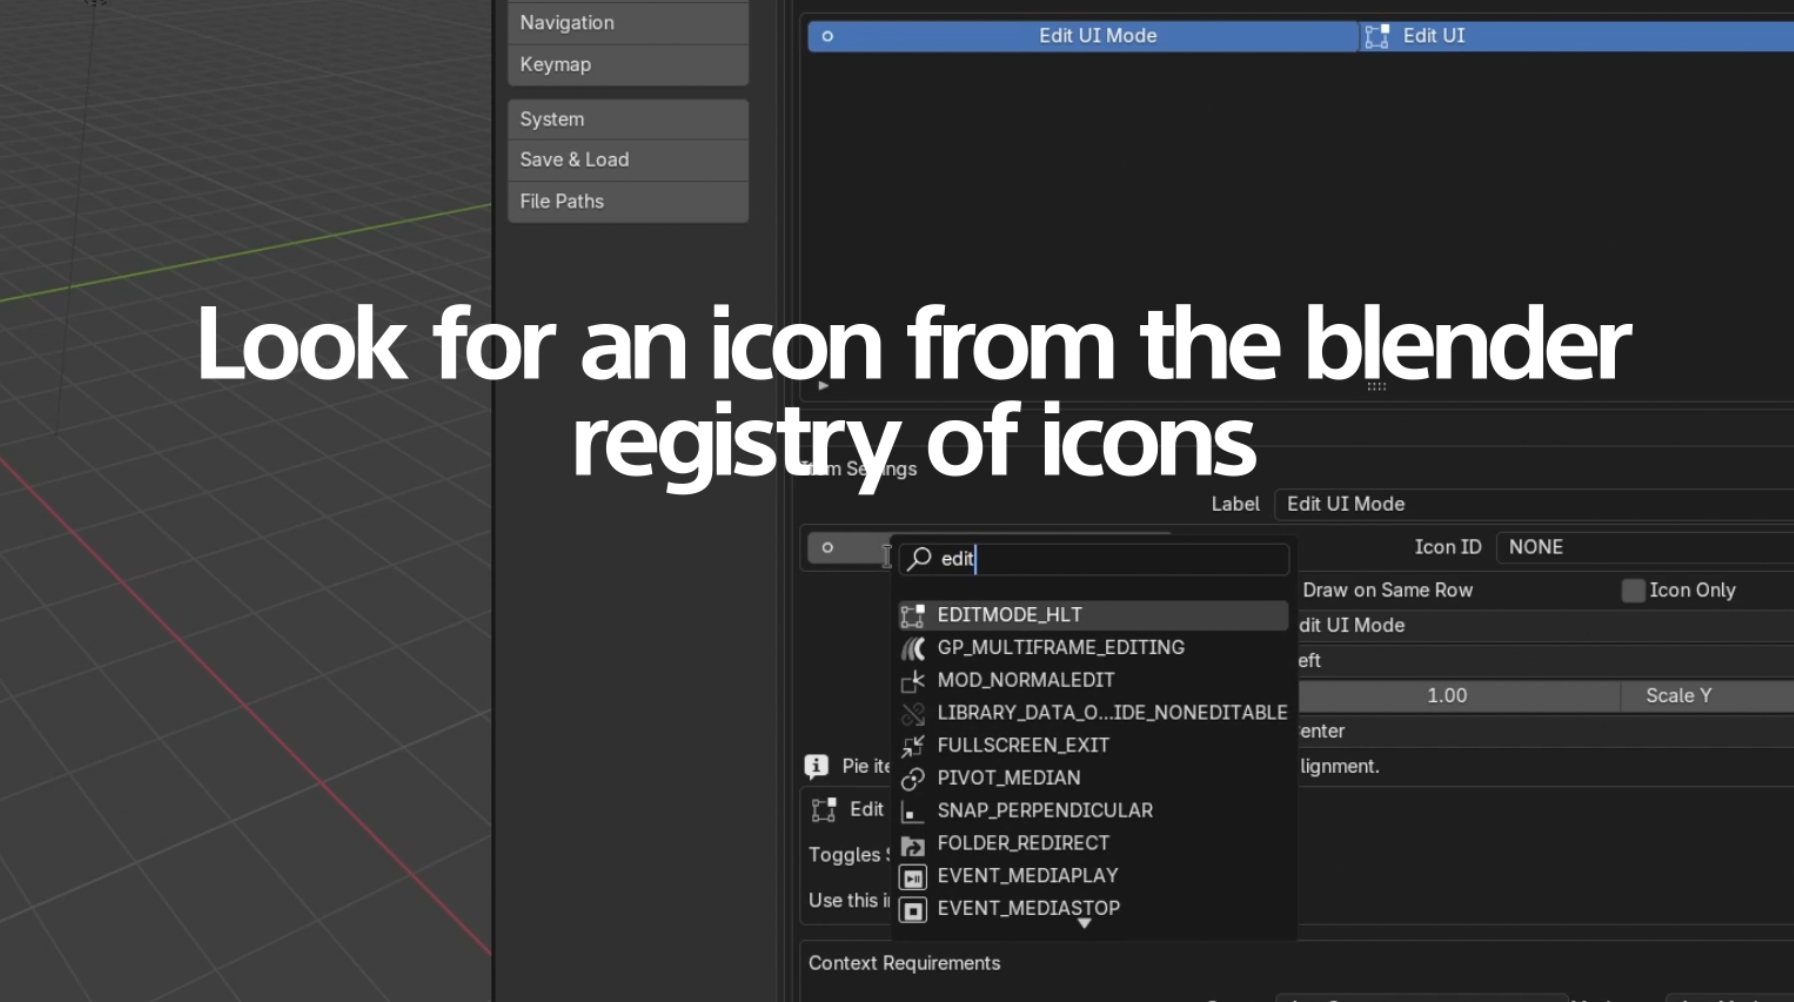
Use the icon dropdown selector to give your custom action an easily identifiable visual.
Easily Adding Items
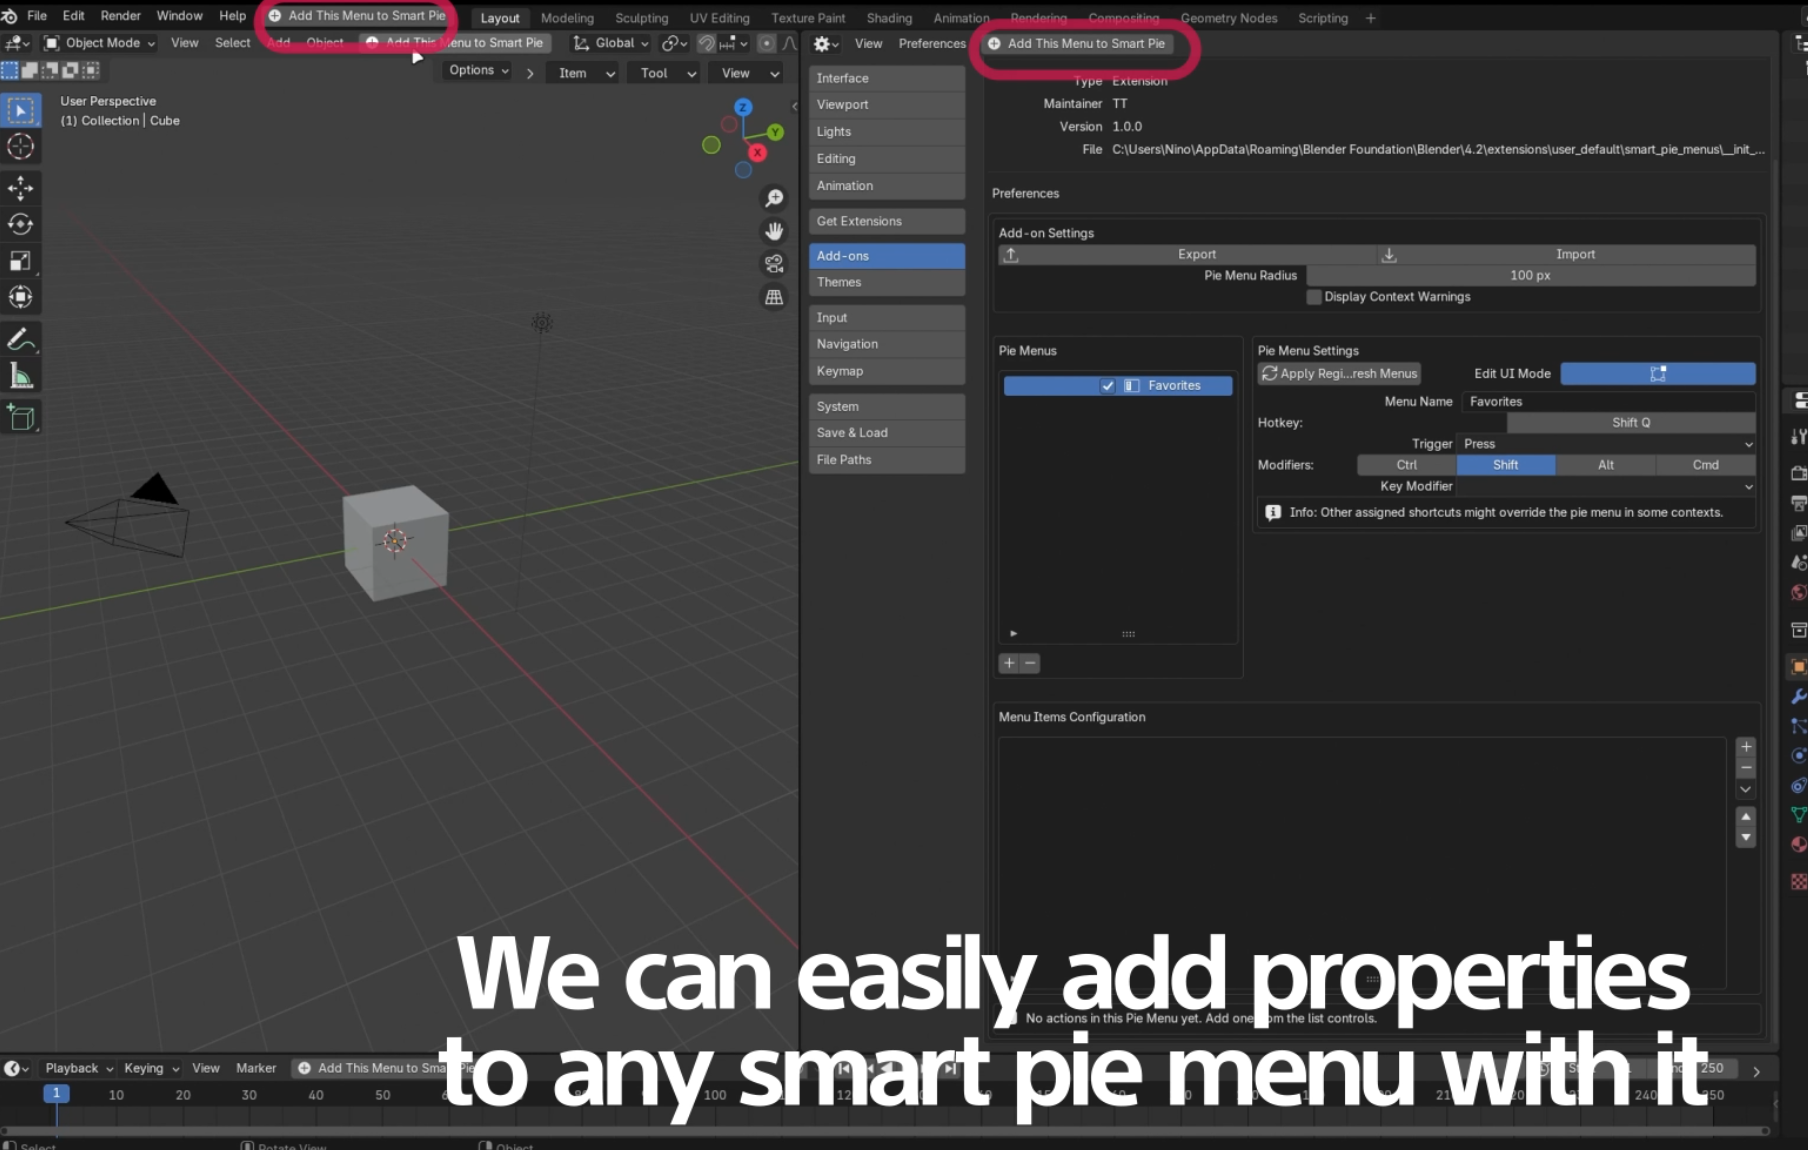
1. Enable Edit UI Mode
Turn on 'Global UI Edit Mode' to enable the easy addition of interface items straight into your list.
2. Add Recommended Actions
Once active, you can easily use pre-made action types and the highly recommended "Add to Pie Menu" option via the right-click context menu.
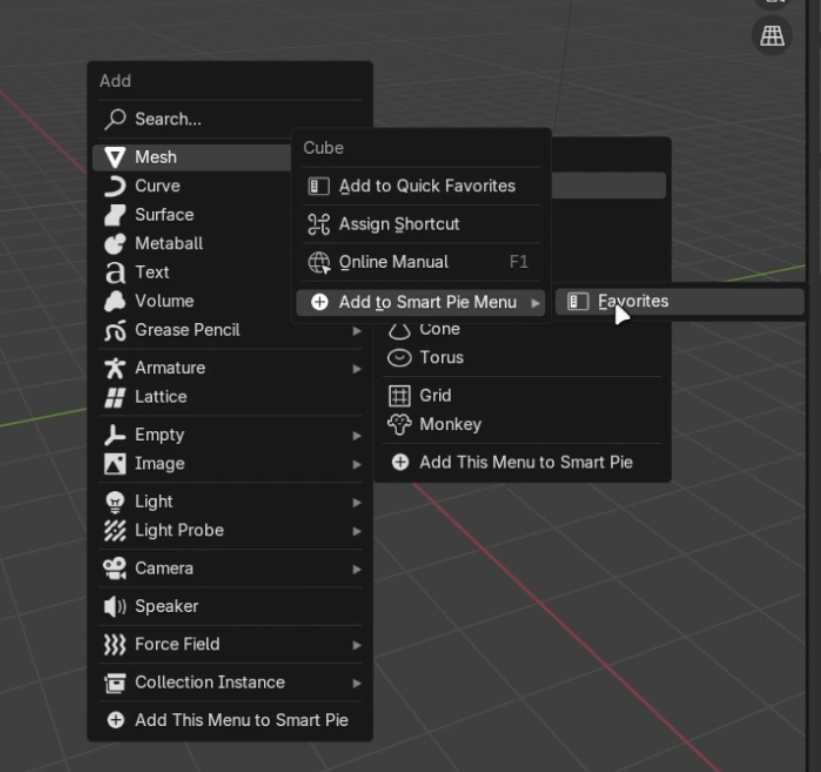
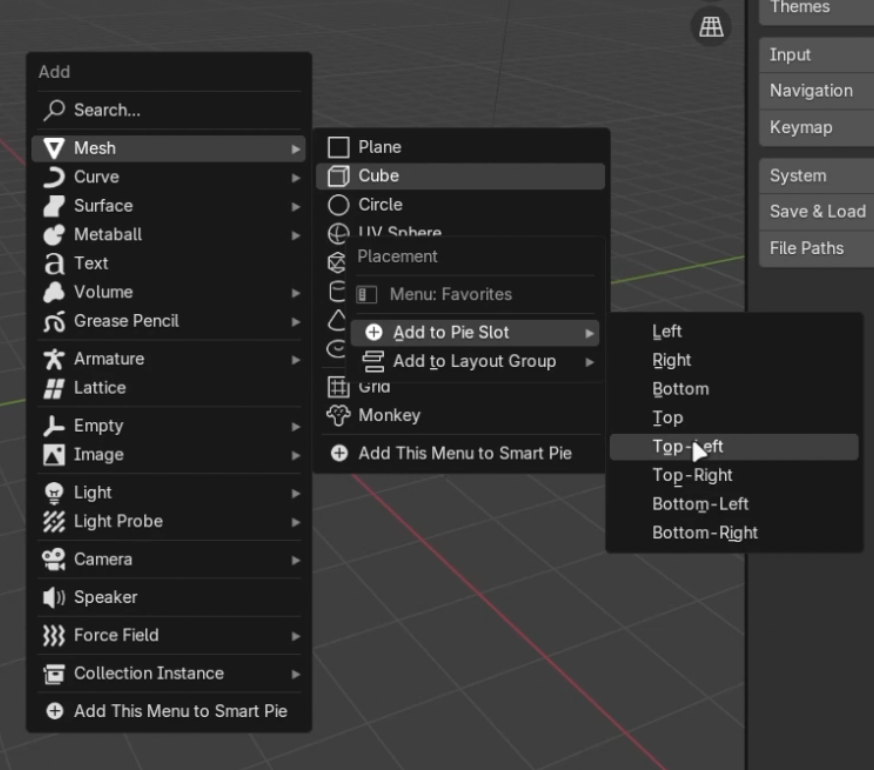
3. Context Menu Capture Flow
Here is the full flow of capturing an item via Right-Click:
Right click on any operator or property.
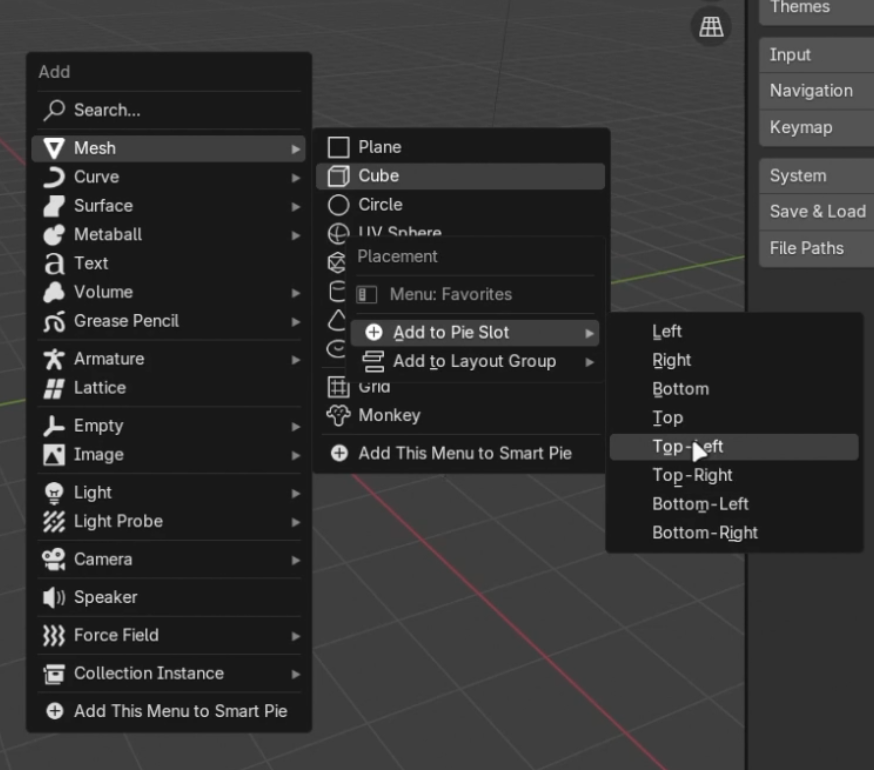
Choose the Pie Direction Slot (e.g., Top, Left, Bottom).
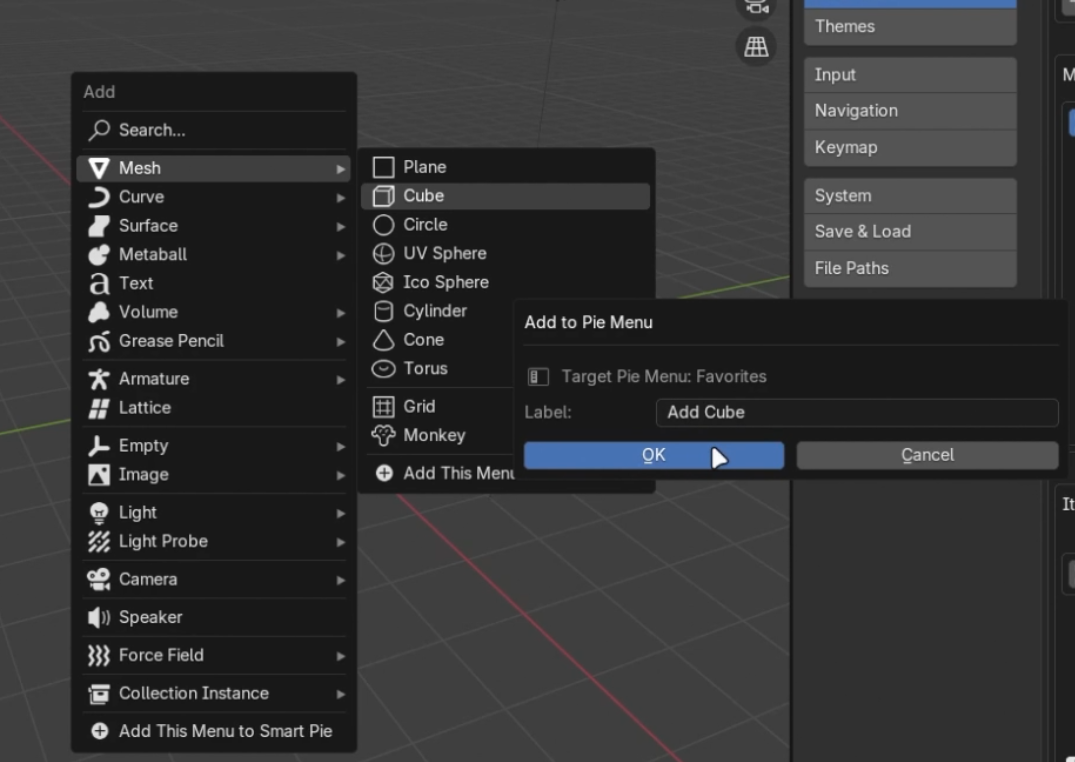
Provide a custom label for the entry.
Action Open Modes
When creating complex actions like nested menus or popovers, Smart Pie Menus provides several "Open Modes" to control how these elements are displayed to the user.
1. Click Popup
This mode requires the user to click the item, which then opens a floating popup containing its content. It's ideal for keeping the initial pie menu clean while offering extended options on demand.
2. Click Panel Popover
Similar to Click Popup, but it opens a Blender Panel-style popover instead. This seamlessly integrates with Blender's native UI feel and is great for grouping properties.
3. Hover
Hover mode allows the sub-menu or layout to open automatically when the user places their mouse over the item, without requiring a click. This enables a rapid, fluid workflow.
4. Nested Pie
This mode treats the action as a gateway to another completely separate Pie Menu. When activated, the current pie menu closes, and the new nested pie opens at the cursor location.
Layout Groups
Layout elements allow you to create complex column, row, and box structures inside your pie slices instead of just single buttons.
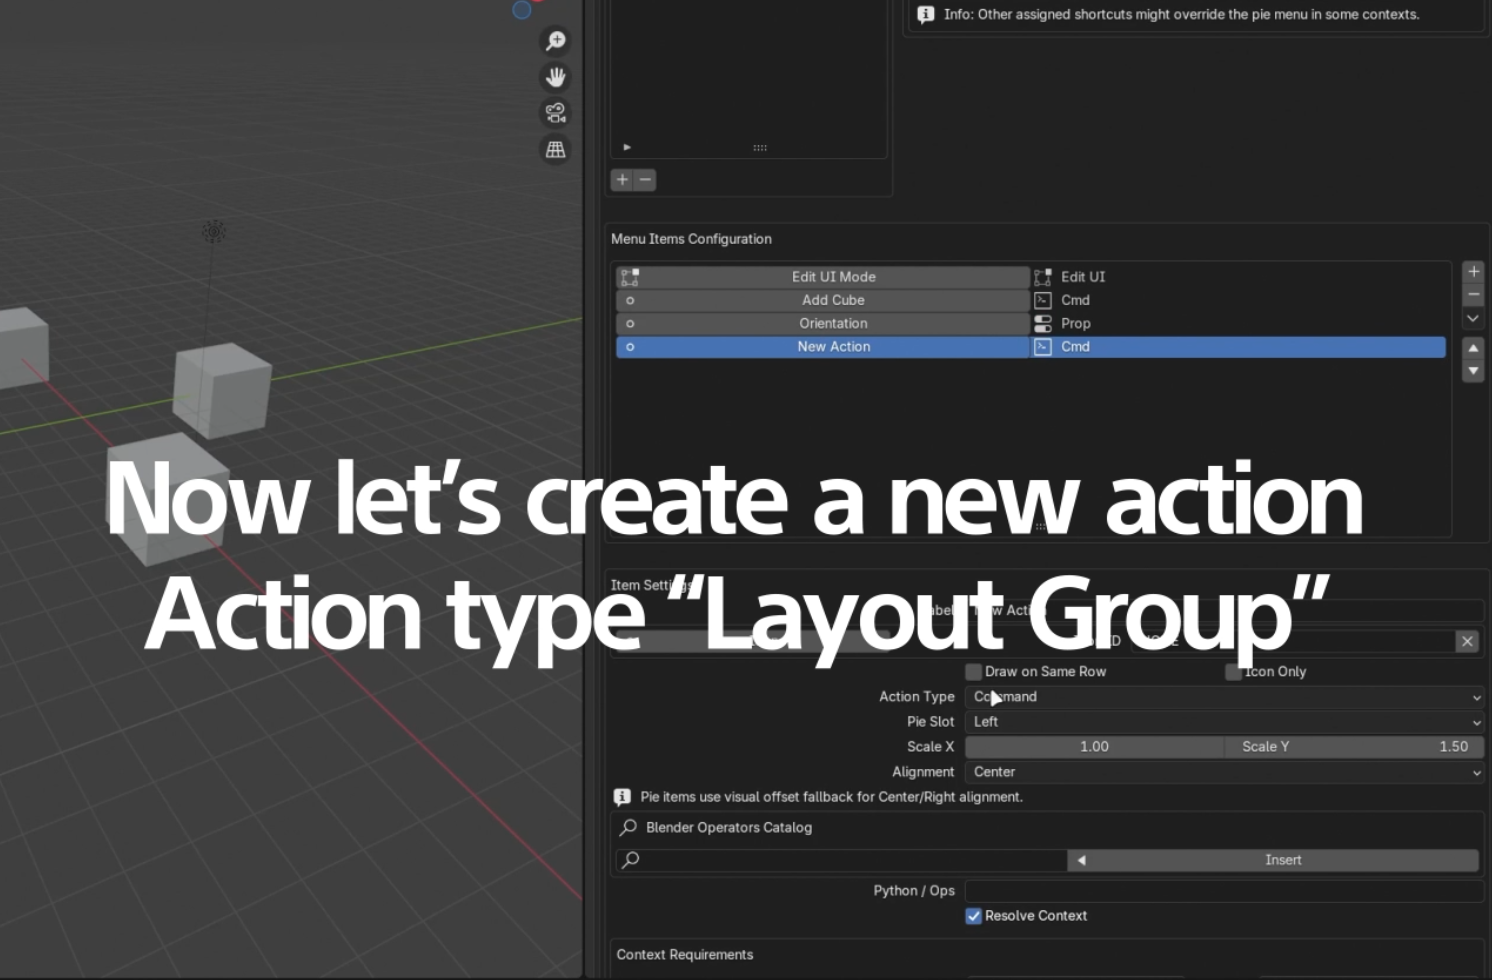
1. Selecting the Action Type
To create a layout group, simply change an item's Action Type to a Layout Type (e.g., Row, Column, Box, Panel).
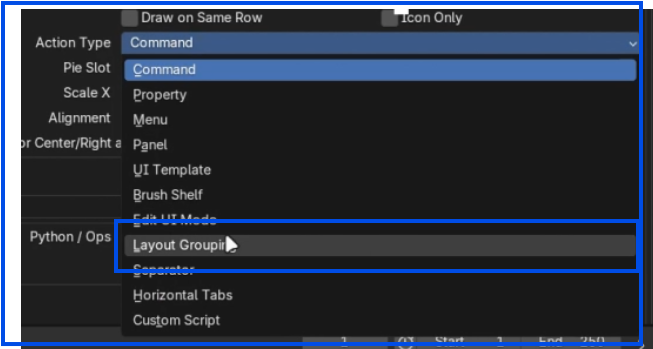
2. Automatic End Groups
When you create a Layout Group starting node, the addon automatically adds an 'End Group' item to close the structural block.
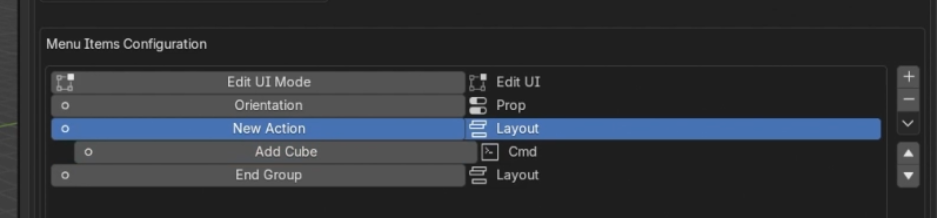
3. Wrap Items Between Layout Nodes
Move your actionable items between the start and end layout group nodes to encapsulate them within that UI structure.
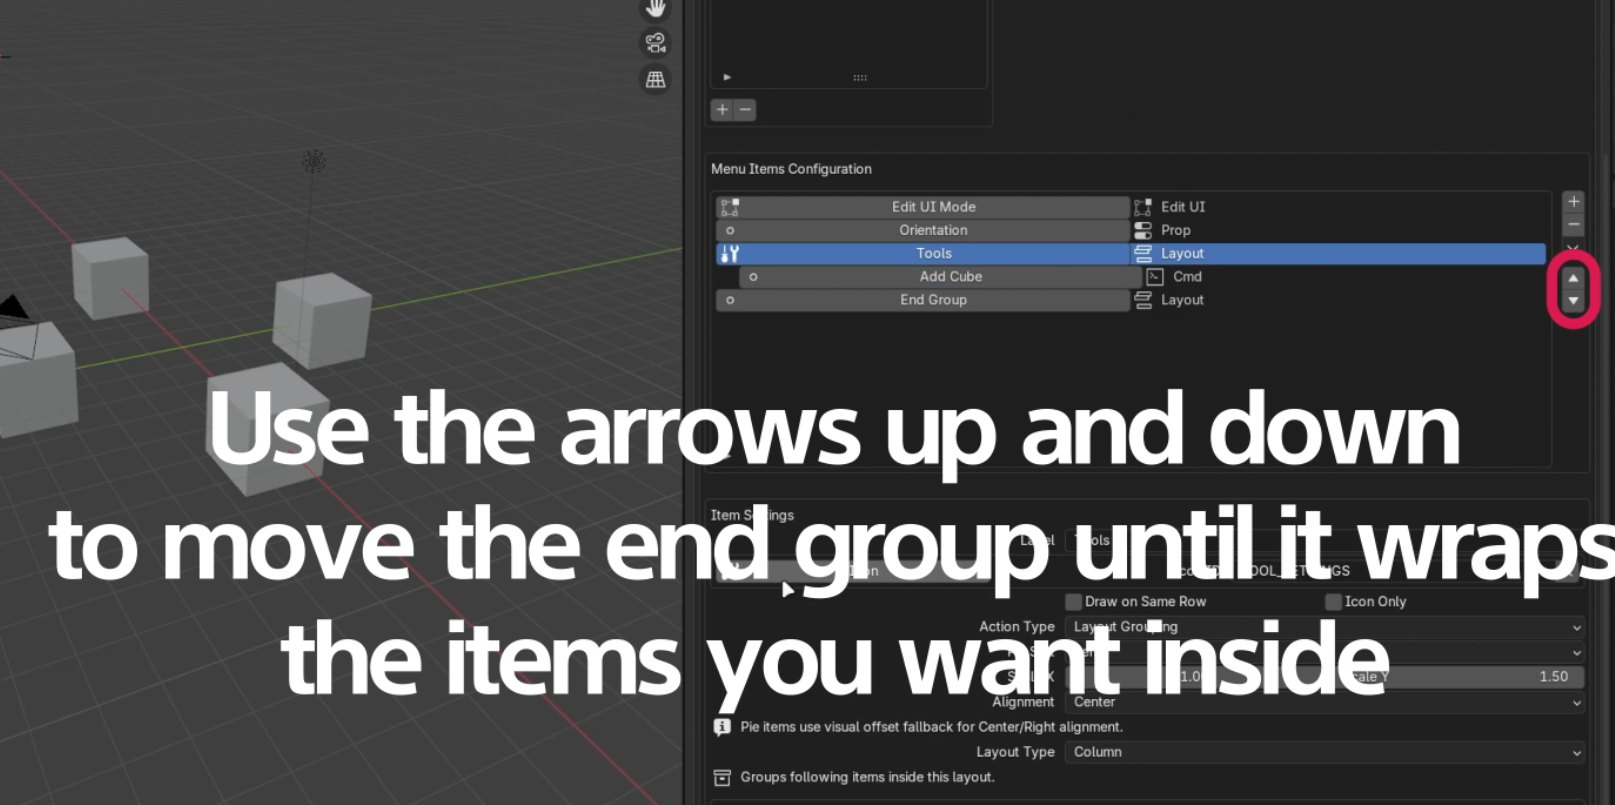
4. Add Contextually
When selecting a Layout Group node, items added via the Context Menu are intelligently placed inside that group automatically.
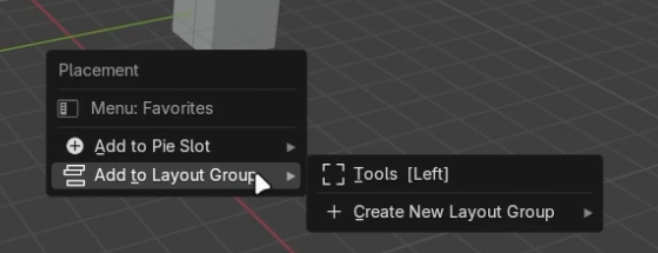
5. Exploring Group Types: Box and Nested Groups
Boxes add a nice background shading. You can even nest layout groups inside other layout groups to build very intricate interfaces!
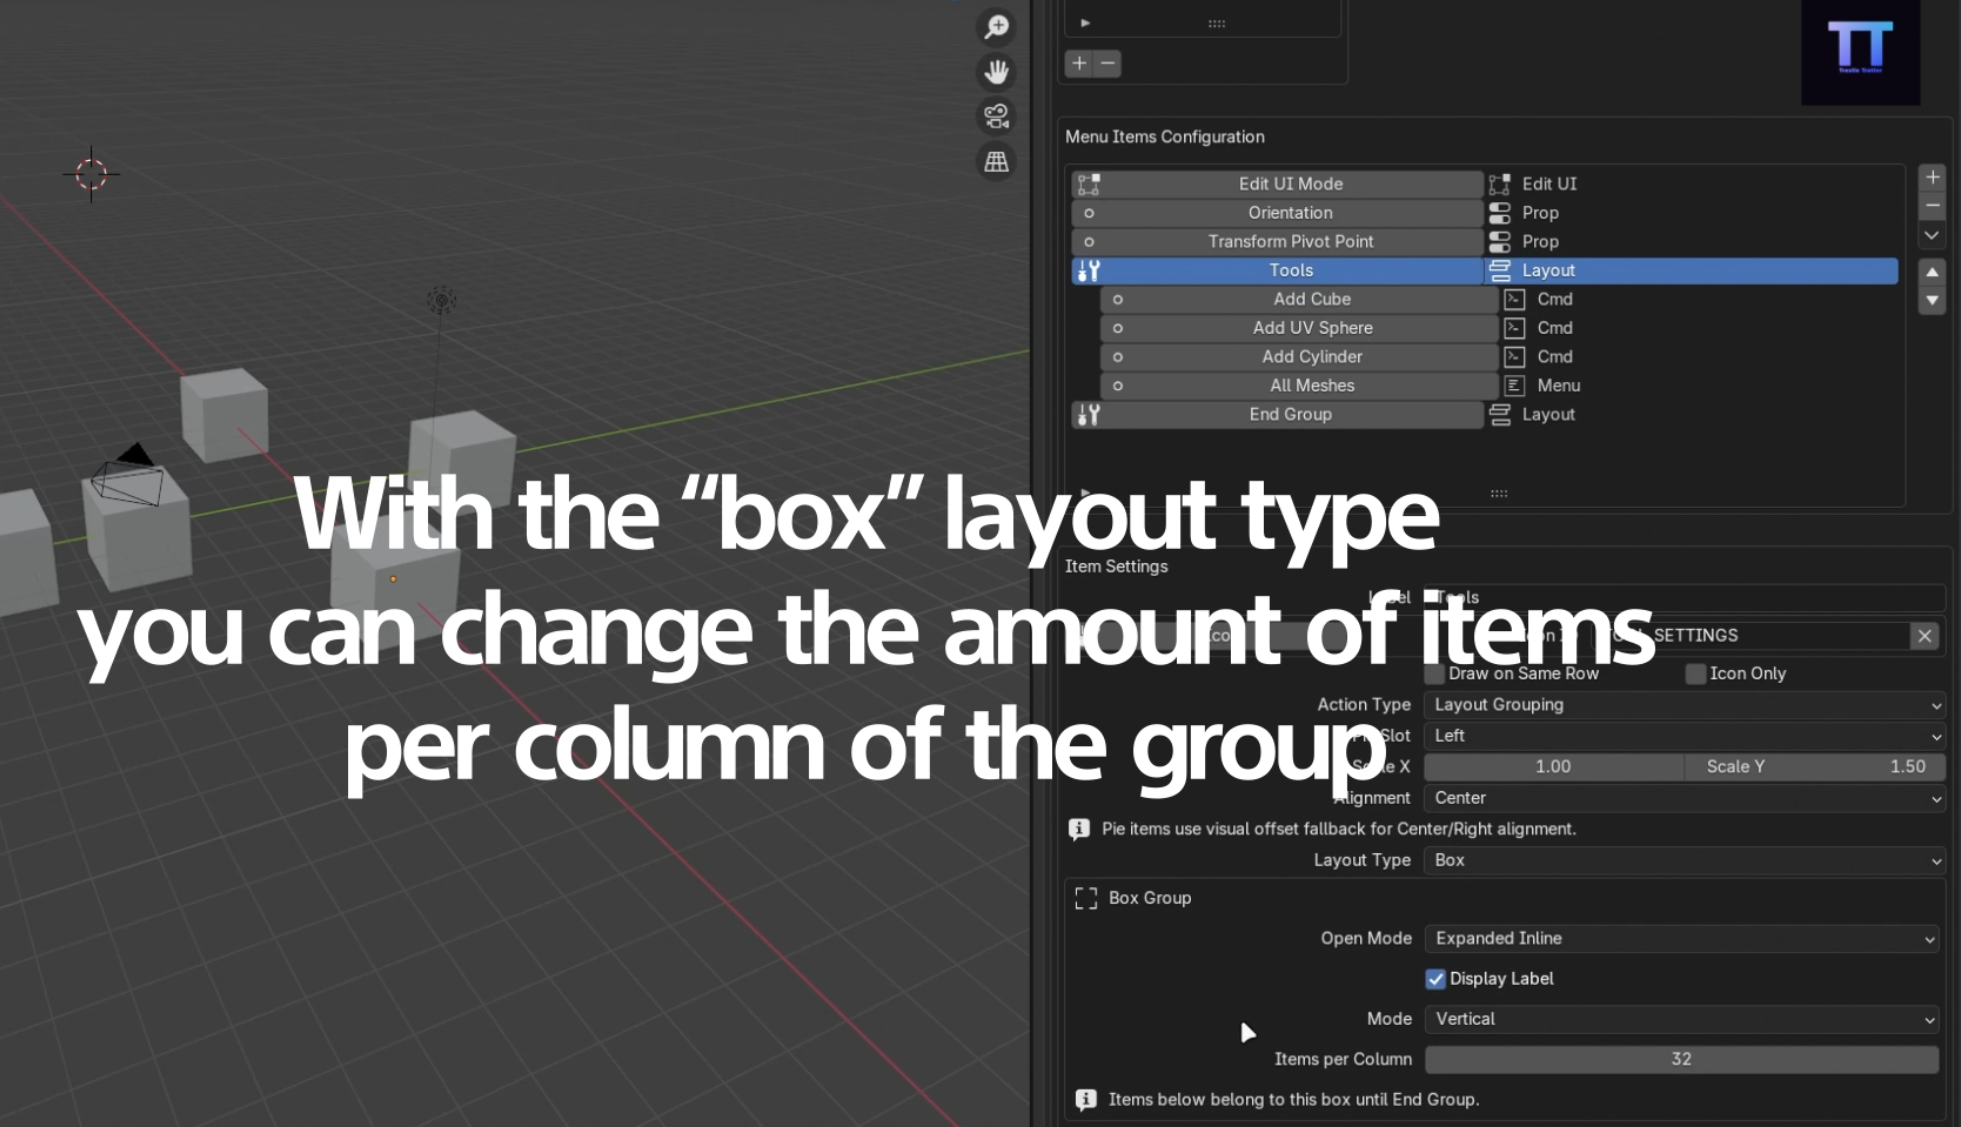
The Box Layout Group in action.
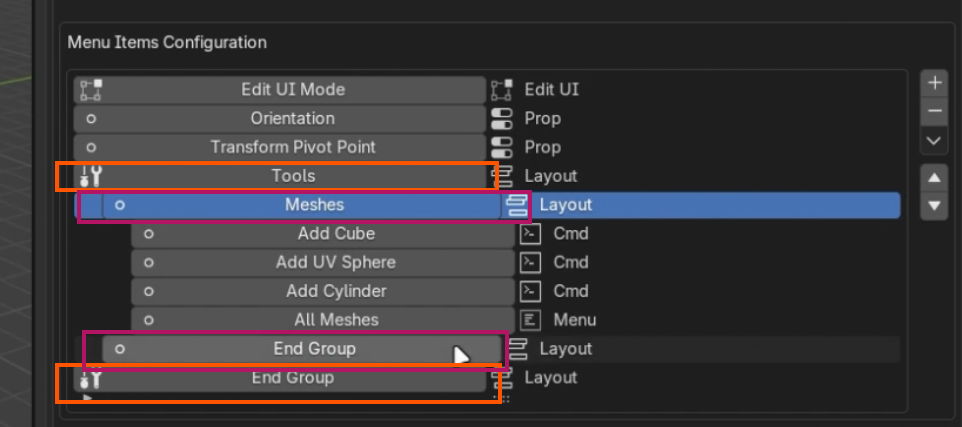
Nesting rows inside a column, or vice-versa.
Layout Orientation
When organizing elements within Layout Groups, you have full control over the direction in which items flow depending on your design needs.
1. Vertical Mode (Columns)
Setting your layout to vertical mode stacks items strictly from top to bottom. This is ideal for list-like properties, large buttons, or sequential options that need to be read downwards.
2. Horizontal Mode (Rows)
Horizontal mode aligns items side-by-side from left to right. Use this orientation to group multiple small icons, color swatches, or toggle buttons tightly together on a single line to save vertical space.
Context Requirements
Make your menus "Smart" by deciding exactly when and where they show up based on Blender's current state.
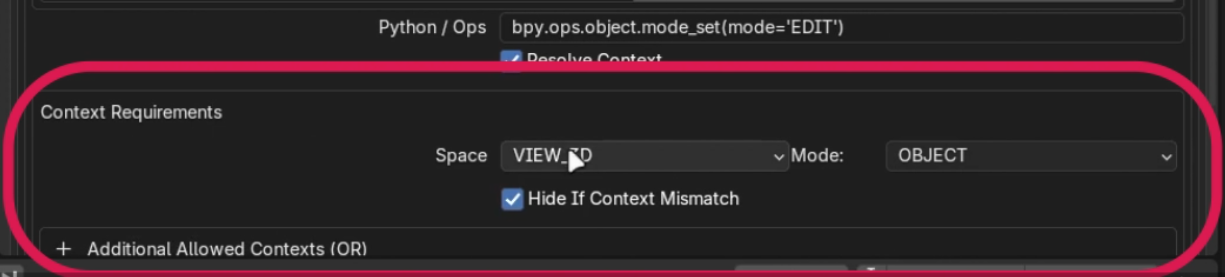
1. Choose Space and Mode
Define which editor workspace (e.g., 3D Viewport) and what object mode (e.g., Edit Mode, Object Mode) must be active for this item to appear.
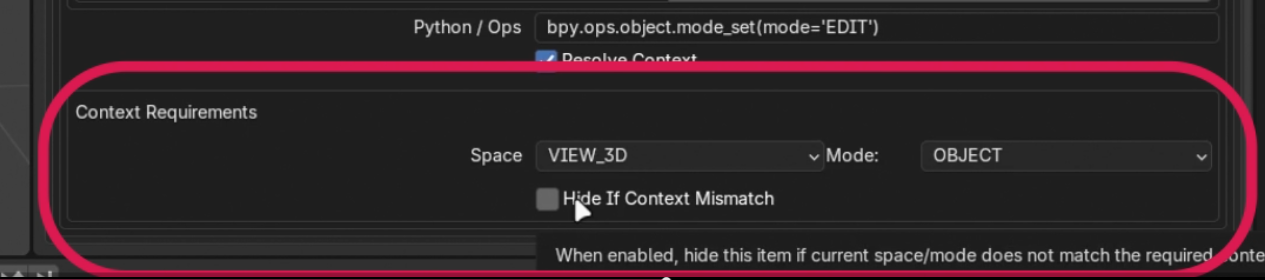
2. Hide Mismatched Items
Turn on 'Hide if Context Mismatch' so the button completely disappears when circumstances aren't met, keeping your pie menus clean rather than graying them out.
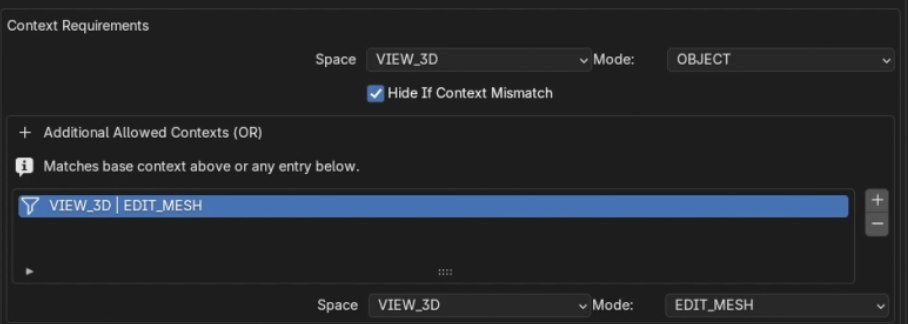
3. Additional Contexts
Add additional contexts in which you want to see the pie menus. You can always choose Space (The space the action belongs to, and object mode; Edit, Sculpt, etc.)
Advanced: UI Templates
For rendering complex interface elements like lists or unique native layouts directly inside your pie menus.
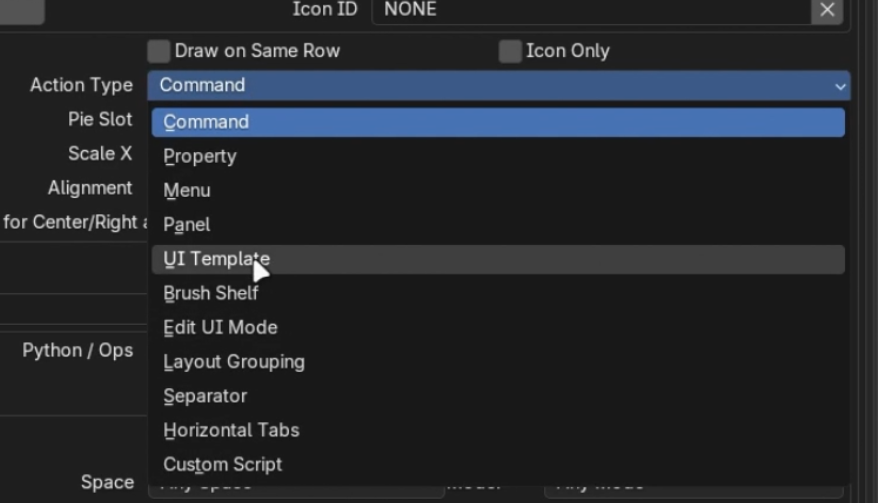
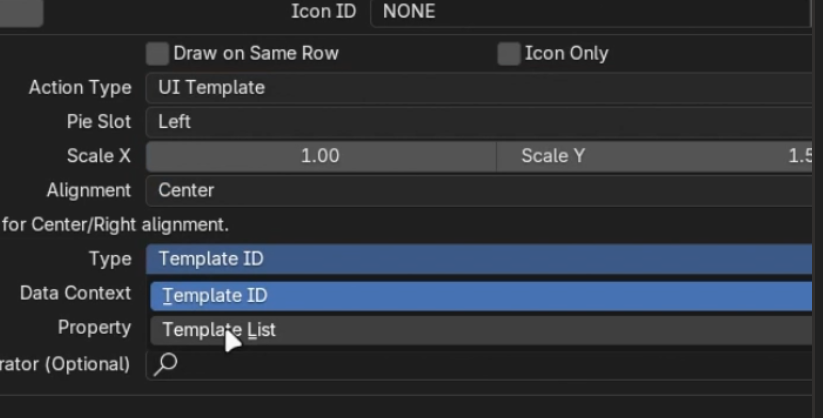
1. Select UI Template Action
Change your action type to 'UI Template'.
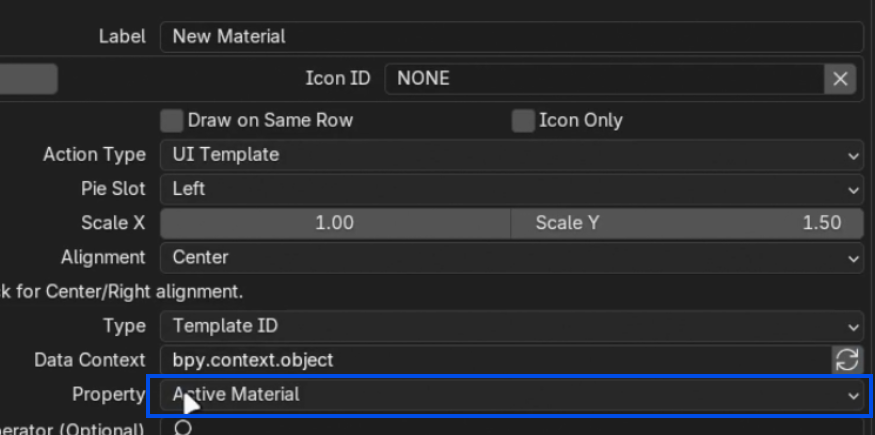
2. Expose Active Material/Properties
By defining the template property targets, you can elegantly expose things like the 'Active Material' selector.
3. Template Lists
Need a full scrollable material slot list? Set the Template Type to `TemplateList`, then specify catalog references and data paths (e.g., Material Slots).
Importing & Exporting
Smart Pie Menus allows you to easily share your custom tools with others or back them up securely using the built-in Import and Export functionality.
1. Exporting Menus
To back up a menu, navigate to the Smart Pie Menus panel and look for the Export button. This will package your pie menu's entire structure, including its items, context conditions, and layout groups, into a single file.
2. Importing Menus
To bring in a menu created by someone else, simply click the Import button and select the corresponding file from your disk. The addon will automatically register the new pie menu, complete with all its configured items and shortcuts. Included with the offline documentation is a test configuration file "smart_pie_config_example.json" you can import it to test some menus we made.
-
$11.40 $19
The full flow editor edition upgrade. Free for users that have Smart Pie Menus 2 and Horizontal Tabs. This edition provides additional features: - Docks and Actions editor. - Enables combined workflows between docks and pie menus.
-
$5.40 $9
Have questions about this product?
Login to message
