Automatic Wood & Brick | Smart Placement System | Blender Addon
 Blender Procedural


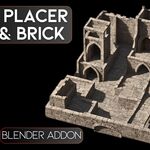
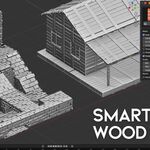
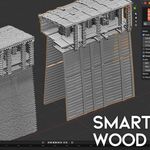
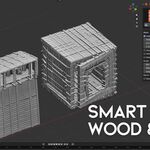
Smart Wood & Brick Placer Documentation
Installation
- Download the addon ZIP file.
- Open Blender.
- Go to Edit > Preferences > Add-ons.
- Click Install.
- Select the downloaded ZIP file.
- Enable the addon from the addon list.
How To Use
- Select the object you want to add bricks or wood pieces to.
- Open the Smart Wood & Brick Placer panel in the Blender sidebar.
- Choose either Brick or Wood.
- Select the mesh object you want to use as the brick, stone or wood piece.
- Adjust the settings from the modifier panel or addon UI.
- Change scale, UV scale, rotation and random variation until you get the result you want.
Settings
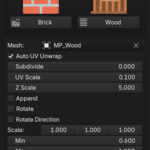
Mesh
Select the source mesh that will be placed on the target object. This can be a brick, stone, plank, wood piece or any custom modular mesh.
Auto UV Unwrap
Automatically unwraps the generated placement for easier material and texture usage.
Subdivide
Controls the surface subdivision amount used by the placement system. Higher values can create denser placement, but may also increase scene complexity.
UV Scale
Controls the scale of the UVs. Use this to adjust how textures appear on the generated pieces.
Z Scale
Controls the height or depth scale of the placed pieces. Increase this value for stronger surface depth.
Append
Adds the generated brick or wood details while keeping the original object visible. This is useful for non-destructive workflows.
Rotate
Enables rotation control for the generated pieces.
Rotate Direction
Changes the direction used for rotating the placed elements.
Scale
Controls the X, Y and Z scale of the generated pieces. Use this to stretch or shrink the bricks, stones or planks.
Min / Max
Controls random scale variation. Use smaller variation for clean architectural surfaces and higher variation for ruins or stylized organic results.
Weight
Controls the influence or distribution strength of the placement system.
Random Rotate
Adds random rotation to the placed pieces for a more natural and less repetitive result.
Recommended Workflow
- Start with a simple base mesh such as a wall, house, castle or roof.
- Apply object scale with Ctrl + A > Scale for more predictable results.
- Add the Smart Brick or Smart Wood setup.
- Choose your source mesh.
- Adjust UV Scale and Z Scale first.
- Then tweak random scale and rotation values.
- When you are happy with the result, you can keep it procedural or apply/convert it if needed.
Tips
- Use low-poly brick or wood meshes for better performance.
- Apply scale on your target object before using the tool.
- Use small random values for clean buildings.
- Use higher random values for ruins, broken walls and stylized fantasy assets.
- Try different source meshes to create different looks.
- For roofs, use flatter plank or tile meshes.
- For castle walls, use rectangular brick or stone pieces.
Does it work with any object?
It works best with clean mesh surfaces such as walls, houses, roofs, floors, ruins and architectural models.
Is it destructive?
No. The main workflow is procedural through Geometry Nodes. You can keep editing the settings at any time.
Why does the result look too dense or too heavy?
Lower the subdivision, scale or density-related settings. Also try using a simpler source mesh.
Why does the placement look stretched?
Apply the scale of your target object with Ctrl + A > Scale, then adjust the UV Scale and object scale settings again.
Have questions about this product?
Login to message
| Blender Extension Compatible | Yes |
| Sales | 20+ |
| Dev Fund Contributor | |
| Published | 3 months ago |
| Blender Version | 4.4 - 5.2 |
| Extension Type | Add-on |
| Render Engine Used | Cycles, Eevee |
| License | GPL |
Discover more products like this
placer medieval wood stylized procedural brick environment wall generator geometry nodes auto blender addon