 ZibadMend



📖 Smart Room Arranger: User Guide 📖
This guide will walk you through the process of using the Smart Room Arranger add-on to automatically arrange furniture in your Blender scenes. We'll cover everything from the basic setup to advanced rule creation. 🛋️
1. Installation & Initial Setup 🚀
- Prepare the Add-on File: Ensure you have the add-on's compressed (ZIP) file—do not extract it—saved on your system. 📁
- Launch Blender. 💻
-
Access Add-on Preferences: From Blender's top menu, navigate to
Edit > Preferences. -
Install the Add-on: In the Preferences window, select the
Add-onstab. Click theInstall...button and choose the downloaded ZIP file. - Activate the Add-on: Locate "Smart Arranger" in the add-ons list (you can use the search bar 🔎) and check the box next to it to enable the add-on in Blender. ✅
2. Core Concepts 🧠
The add-on requires you to define three main components in your scene for it to work correctly:
- Room Object: This must be a single, enclosed mesh object that represents the room itself. The add-on uses its boundaries to determine where objects can be placed. 🏡
- Furniture Collection: This is a collection containing all the individual furniture objects you want to arrange. These objects will be scattered throughout the room based on the rules.
- Fixed Objects Collection (Optional): This is a collection for objects that should not be moved, such as a fireplace or built-in cabinets. The add-on will avoid placing furniture where these objects are located. 📌
3. Layout Settings ⚙️
These properties control the overall feel of your scene's arrangement and are found in the panel's Layout Settings box.
- Min Wall Spacing: The minimum distance objects will be placed from the room's walls.
- Min Spacing: The minimum distance between individual furniture objects.
- Density: A factor that influences how many of the furniture pieces will be placed. A higher density will attempt to fit more furniture into the room.
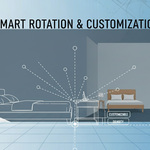
- Enable Smart Rotation: When enabled, the add-on will automatically try to find the best-fitting rotation for each object. 🔄
4. Placement Rules ✨
This is the most powerful part of the add-on, allowing you to create custom rules that guide the placement logic. You can manage two types of rules directly from the UI.
Placement Rules (by name) 🏷️
These rules dictate where an object should go based on a keyword in its name. Click "Add Rule" to create a new one.
- Name Part: The keyword to match in an object's name (e.g., "Bed", "Sofa").
-
Placement Rule: How the object should be placed relative to the room boundaries.
CORNER_PLACEMENT: Places the object in a corner of the room.BACK_TO_WALL: Places the object with its back facing a wall.WALL_PARALLEL: Places the object parallel to a wall, allowing it to face either direction.FREE_PLACEMENT: Places the object anywhere in the room. This is the default if no other rule is matched.CLUSTERING: Places the object near other objects.
-
Rotation Snap: Snaps the object's rotation to a specific angle (
90°,45°, orNone).
Linked Placement Rules 🔗
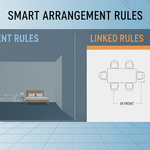
These rules define a relationship between two objects. For example, a chair to a table. Click "Add Rule" to create a new one.
- Main Part: The keyword for the main object (e.g., "Table").
- Linked Part: The keyword for the object that will be linked to the main one (e.g., "Chair").
-
Placement Type: How the linked object should be placed relative to the main object.
IN_FRONT: Places the linked object directly in front of the main one.BESIDE: Places the linked object to the side of the main one.NEAR: Places the linked object within a certain distance of the main one.
- Approximate Spacing: The desired distance between the two objects.
5. Using the Add-on ▶️
- Select the Room Object, Furniture Collection, and Fixed Objects Collection in the UI panel.
- Review your Layout Settings and Placement Rules.
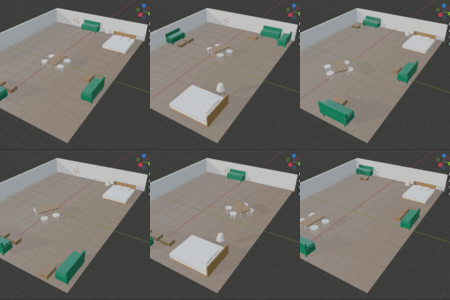
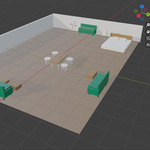
- Click the "Randomize Layout" button. The add-on will then attempt to find a valid and non-overlapping arrangement for all your furniture based on your rules.
- If the result isn't to your liking, simply click "Randomize Layout" again to generate a new arrangement. 🔁
6. Troubleshooting & Tips 💡
- Ensure Correct Naming: Make sure your object names contain the keywords you've set in your rules (e.g., "Sofa.001" or "Dining_Table").
- Room Object: The room object should be a single, solid mesh with no holes.
- Object Scale: Apply the scale (Ctrl+A -> Scale) to all your furniture objects to avoid unexpected placement issues.
- Iterate: If the add-on fails to find a valid arrangement after several attempts, try adjusting the density or min spacing settings, as the space might be too constrained.
-
Advanced Customization: For full control, you can manually edit the
rules.jsonfile located in the add-on's installation folder. 📁
-
$18
-
$79
5 Users
-
$279
20 Users
Have questions about this product?
Login to message
| Published | about 1 year ago |
| Blender Version | 3.6 - 4.5 |
| Extension Type | N/A |
| License | GPL |
Discover more products like this
Interior Design furniture room arranger smart arranger automation room design automatic design Workflow smart design