 multlabs




Getting Started
Installation
- Download the add-on ZIP file
- In Blender, go to Edit > Preferences > Add-ons
- Click "Install From Disk..." and select the ZIP file
- Enable the add-on by checking the box next to "Smart Simplify PRO"
Accessing the Add-on
Once installed, you'll find Smart Simplify PRO in:
-
3D Viewport Sidebar: Press
Nin the 3D viewport to open the sidebar, then look for the "Smart Simplify" tab
Creating Your First LOD System
You can take a look at this introduction video
Step 1: Select a Collection
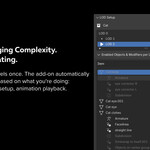
The LOD system works on collections. The add-on will automatically find the collection from your active object.
Step 2: Create the LOD System
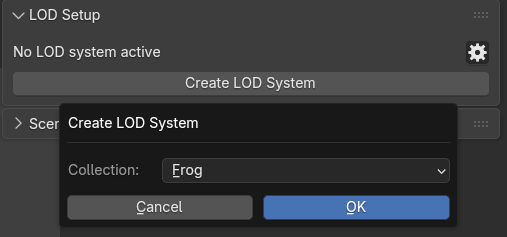
- In the 3D Viewport sidebar (Smart Simplify tab), select an object from a collection that you want to manage. You'll see a "Create LOD System" button
- Click and then select the parent collection where you want to use a LOD system in the popup.
- The system will create the LOD system and the first LOD level (LOD 0)
Step 3: Add More LOD Levels
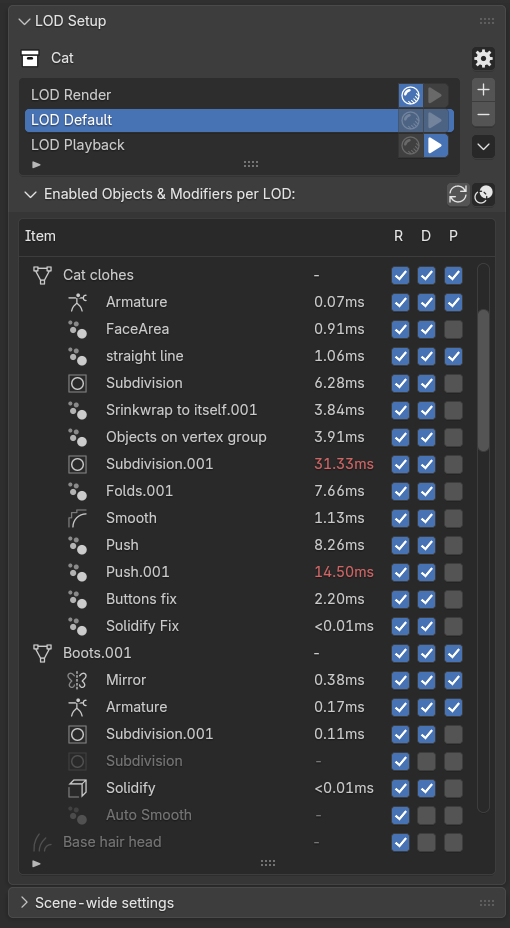
- Click the "+" button next to the LOD list to add a new LOD level
- New LOD levels automatically copy settings from the currently active LOD
- Rename LOD levels by clicking on their names in the list
Step 4: Configure Each LOD Level
For each LOD level, you can:
- Enable/disable objects: Toggle visibility of objects in the unified table
- Enable/disable modifiers: Toggle visibility of modifiers per object
- Set switcher targets: Configure which LOD level activates for each switcher
Managing LOD Levels
Adding LOD Levels
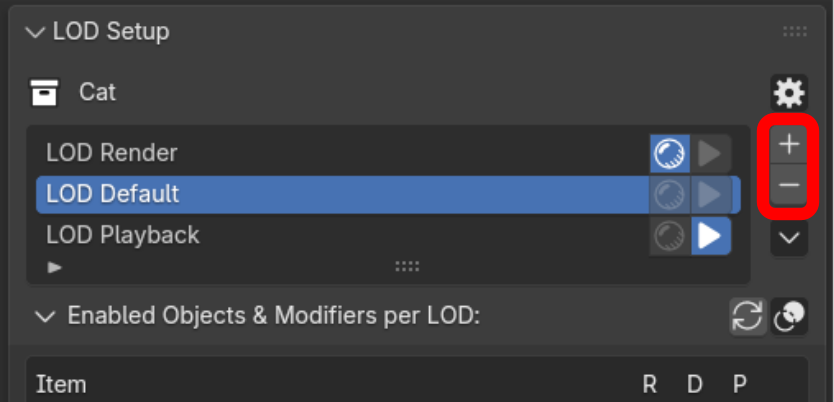
Click the "+" button in the LOD list to add a new level. The new LOD will:
- Copy all object and modifier settings from the currently active LOD
- Be named automatically (LOD 0, LOD 1, etc.)
Removing LOD Levels
- Select the LOD level you want to remove
- Click the "-" button in the LOD list
Renaming LOD Levels
Doubleclick on the LOD name in the list to rename it. You can use descriptive names like "Playback", "Render", "Lightning Setup", etc.
Active LOD
The active LOD determines what's currently visible in the viewport. You can:
- Click on a LOD level in the list to make it active
- Use switchers to automatically activate LODs based on context
Configuring Objects and Modifiers
Enabled Objects & Modifiers per LOD
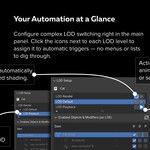
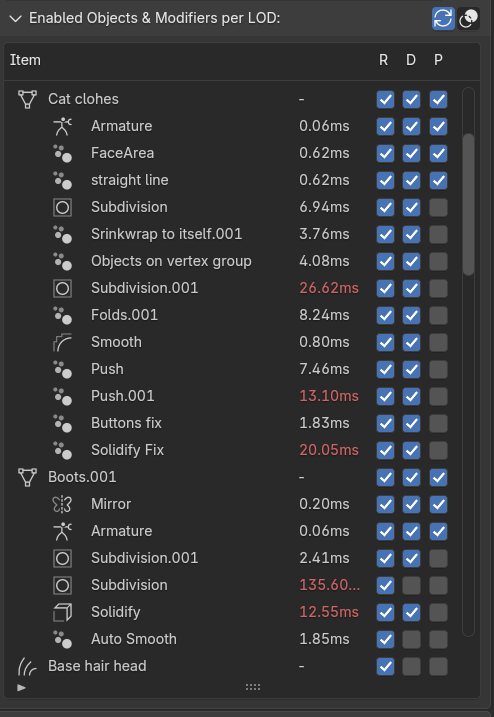
Enabled Objects & Modifiers per LOD table shows all objects and their modifiers in a single view. This makes it easy to see and configure what's enabled in each LOD level.
Execution Time Display
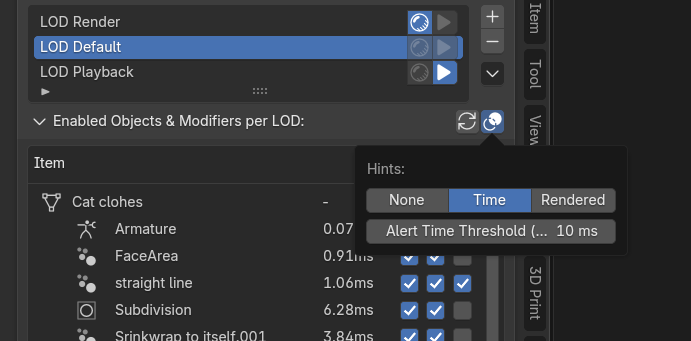
The unified table can show modifier execution times:
- Open the unified list settings popover (overlay icon next to auto-refresh)
- Set "Overlay Type" to "Time"
- Turn on auto-refresh if it is not enabled
- Modifiers will display their execution time in milliseconds
- Modifiers exceeding the alert threshold will be highlighted in red
Rendered State Display
To see which objects/modifiers are rendered:
- Open the unified list settings popover
- Set "Overlay Type" to "Rendered"
- Icons will show whether each item is rendered or hidden
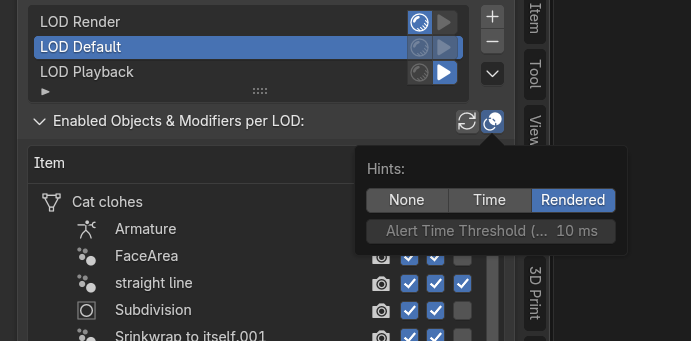
Note: This icons is just for reference. Add-on doesn't change rendered state. And you can't change it here.
Auto Refresh
Enable "Auto Refresh" to automatically sync objects and modifiers whenever the collection is modified and updates execution times.
Note: Auto refresh only updates execution times for library overrides.
Switchers
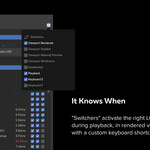
Switchers are rules that automatically activate specific LOD levels based on context. Multiple switchers can be active simultaneously, but only one LOD level can be active at a time.
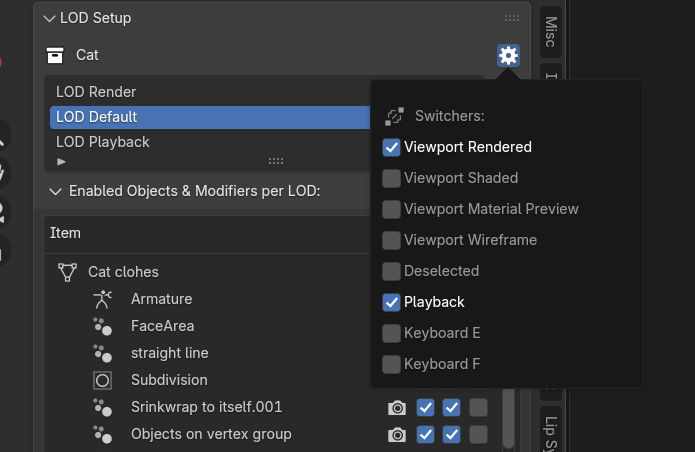
Enabling Switchers
- Open the settings popover (preferences icon in the LOD table header)
- Enable the switchers you want to use
- Configure which LOD level each switcher should activate
Available Switchers
Viewport Mode Switchers
These switchers activate based on viewport shading mode:
- Viewport Rendered: Activates when viewport is in Rendered mode (enabled by default)
- Viewport Shaded: Activates when viewport is in Shaded mode
- Viewport Material Preview: Activates when viewport is in Material Preview mode
- Viewport Wireframe: Activates when viewport is in Wireframe mode
How it works: When you switch viewport modes, the appropriate LOD activates. When you switch away, the previous LOD is restored (unless another switcher is active).
Playback Switcher
Activates a LOD level during animation playback or scrubbing (enabled by default).
How it works:
- When you press play or scrub the timeline, the configured LOD activates
- When playback stops, the previous LOD is restored
- Works with both animation playback and timeline scrubbing
Deselected Switcher
Activates a LOD when the active object is not in the LOD collection (or any of its child collections).
Use case: Show simplified geometry when working on objects outside the main collection.
Keyboard Switchers
Keyboard switchers toggle LOD levels with keyboard shortcuts.
Keyboard E Switcher: Press E in object or pose mode to toggle between LODs.
Note: Keyboard switchers only work in specified modes to avoid conflicts with other operations (e.g., extrude in edit mode).
Configuring Switcher LOD Levels
For each enabled switcher, you need to specify which LOD level it should activate. Click the switcher icon button next to the LOD name
Per-collection: Each collection can have different LOD levels for the same switcher. This lets you have different simplification strategies for different collections (for example: characters / environment).
Setters
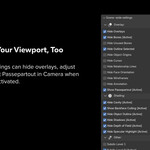
Setters automatically adjust viewport settings when switchers activate. They extend the LOD system beyond just object/modifier visibility.
Enabling Setters
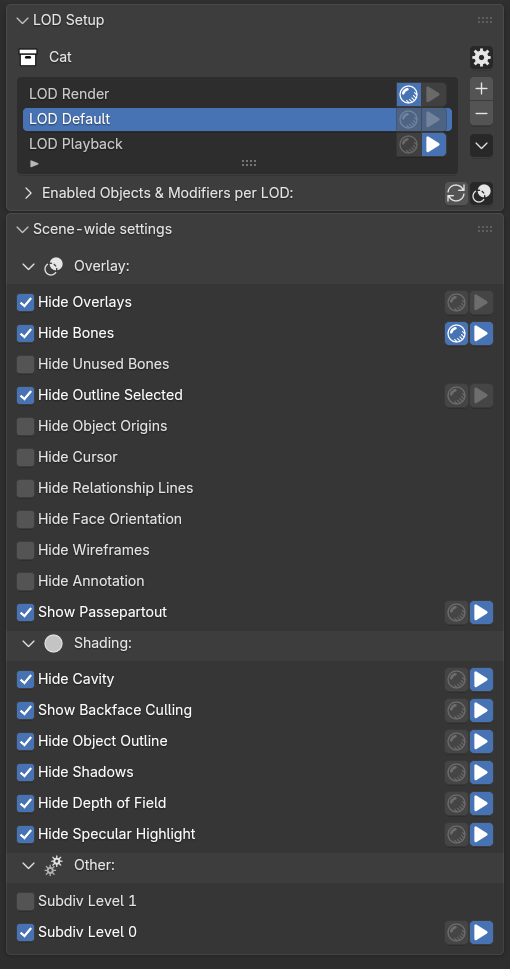
- In the main panel, expand the "Scene-wide setters" section
- Enable the setters you want to use
- Configure which switchers should trigger each setter
Overlay Setters
These setters control viewport overlay elements:
- Hide Bones: Hides bone visibility in 3D viewport
- Hide Outline Selected: Hides outline around selected objects
- Hide Overlays: Hides all overlay elements
- Hide Object Origins: Hides object origin indicators
- Hide Cursor: Hides 3D cursor
- Hide Relationship Lines: Hides relationship lines between objects
- Hide Face Orientation: Hides face orientation overlay
- Hide Wireframes: Hides wireframe overlay
- Hide Annotation: Hides annotation overlays
- Show Passepartout: Shows passepartout on all cameras (alpha = 1.0)
Shading Setters
These setters control viewport shading settings:
- Hide Cavity: Disables cavity shading
- Show Backface Culling: Enables backface culling
- Hide Object Outline: Hides object outline in shading
- Hide Shadows: Hides shadows in viewport
- Hide Depth of Field: Disables depth of field
- Hide Specular Highlight: Hides specular highlights
Other Setters
- Subdiv Level 0: Sets render simplification subdivision to level 0
- Subdiv Level 1: Sets render simplification subdivision to level 1
Note: Subdivision setters also enable use simplify automatically.
Example: Enable "Hide Bones" setter, then enable it for the "Playback" switcher. Bones will be hidden during animation playback.
Advanced Features
Library Overrides
Smart Simplify PRO works with Blender's library override system:
- If a collection is a system override, you'll see a warning and button to create a full override. Full overrides allow full LOD system functionality
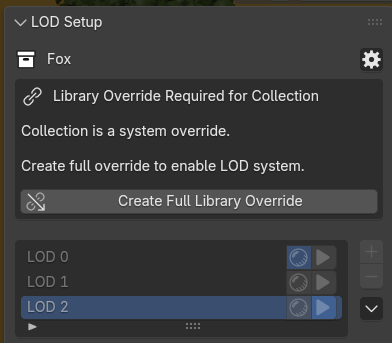
- Structure Preservation: For library overrides, the add-on only updates execution times, preserving the override structure
Execution Time Tracking
The add-on tracks modifier execution times to help identify performance bottlenecks:
- Execution times are displayed in the unified table when "Overlay Type" is set to "Time"
- Modifiers exceeding the alert threshold are highlighted in red
- Times are updated automatically when auto-refresh is enabled
Driver Management
The add-on automatically handles Blender drivers that might conflict with LOD visibility
Keyboard Shortcuts
Keyboard switchers can be assigned to any key:
- "Keyboard E" switcher uses the
Ekey - "Keyboard F" switcher uses the
Fkey - Only works in specified modes (object/pose mode)
- Toggles between active and restored LOD states
Per-Collection Configuration
Each collection can have:
- Different LOD levels
- Different object/modifier configurations
- Different switcher LOD assignments
- Independent active LOD state
This allows you to have completely different simplification strategies for different collections in the same scene.
Tips and Best Practices
Setting Up for Animation
- Create a "Playback" LOD with simplified geometry
- Create a "Render" LOD with full detail
- Enable Playback switcher → set to "Playback" LOD
- Enable Viewport Rendered switcher → set to "Render" LOD
- Add setters to hide overlays during playback
Performance Optimization
- Use execution time overlay to identify slow modifiers
- Disable heavy modifiers in playback LOD
- Use subdivision setters for additional simplification
Multiple Collections
You can have LOD systems in multiple collections:
- Each collection operates independently
- Switchers apply to all collections with LOD systems
- Different collections can have different LOD configurations for the same switcher
This is useful for complex scenes with multiple character rigs and environment setups.
Creating a Custom Keyboard Switcher
You can create your own keyboard switcher by creating a new Python file in the smart_simplify_pro/switchers/switchers/ directory. Here’s how:
Copy exsisting keyboard switcher (e.g., keyboard_f_switcher.py) in the switchers/switchers/ folder:
"""
Keyboard E switcher for Smart Simplify PRO add-on.
Activates LOD when E key is pressed in object mode.
"""

from ..keyboard_switcher_base import KeyboardSwitcherBase


class KeyboardESwitcher(KeyboardSwitcherBase):
    """Switcher that activates LOD when E key is pressed in object or pose mode."""

    def __init__(self) -> None:
        super().__init__(
            name="Keyboard E",
            description="Activates LOD when E key is pressed in object or pose mode",
            key='E',
            icon='EVENT_E',
            weight=200,
            show_in_setters=True,
            default_enabled=False,
            working_modes=['OBJECT', 'POSE']
        )
Change parameters:
-
name: Display name for the switcher (shown in UI)
-
description: Tooltip description
-
key: The keyboard key to trigger (e.g., ‘F’, ‘E’, ‘Q’, ‘F12’)
-
icon: Blender icon name (usually ‘EVENT_’ + key name)
-
weight: Priority order (lower numbers appear first)
-
show_in_setters: Whether to show this switcher in the setters section
-
default_enabled: Whether the switcher is enabled by default
-
working_modes: List of Blender modes where the switcher works (e.g., ['OBJECT'], ['OBJECT', 'POSE'])
Restart Blender to see your new switcher
Important Notes:
-
The switcher will automatically register/unregister its operator and keymap
-
The switcher toggles between active and restored LOD states
-
Make sure the key doesn’t conflict with Blender’s default shortcuts
-
The switcher only works in the modes specified in working_modes
Have questions about this product?
Login to message
| Blender Extension Compatible | Yes |
| Sales | 10 |
| Published | 10 months ago |
| Blender Version | 4.5 - 5.2 |
| Extension Type | Add-on |
| Render Engine Used | Cycles, Eevee |
| License | GPL |