 Amir
Amir


Smart Align Addon Documentation
Version 1.1.0
Author: Amir_ab36studio (ab36 studio)
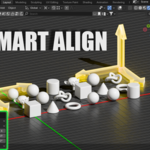
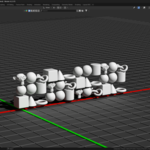
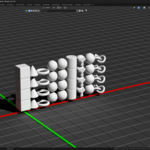
Description: SmartAlign is an advanced Blender addon designed to simplify object alignment. It allows you to precisely arrange selected objects based on various alignment modes, including linear, grid, and diagonal layouts, with options for spacing, rotation, and bounding box-based vertical alignment.
Legal Notice
IMPORTANT: By using or installing this addon, you agree to the following terms:
You MAY NOT resell, redistribute, sublicense, or share this addon in any form, whether modified or unmodified, without explicit written permission from the author.
You MAY NOT modify, alter, or create derivative works of this addon for the purpose of resale or redistribution.
Personal use and modification for your own projects is permitted, but you MAY NOT distribute or sell the modified versions.
Unauthorized copying, distribution, or commercial use of this addon is strictly prohibited.
The author provides this addon "as-is" without any warranty. Use at your own risk.
By proceeding to use this addon, you acknowledge and agree to comply with these terms.
Installation
How to Install the SmartAlign Addon
To install the SmartAlign addon in Blender:
Download the Addon: Obtain the
smart_align.pyfile (or the.ziparchive if provided).Open Blender: Launch Blender.
Go to Preferences: Navigate to
Edit > Preferences.Install Addon: In the Preferences window, click on the "Add-ons" tab. Then, click the "Install..." button.
Select File: Browse to the location where you saved the
smart_align.pyfile (or.zip) and select it. Click "Install Add-on".Enable Addon: After installation, the SmartAlign addon should appear in the list. Check the box next to "Object: SmartAlign" to enable it.
Save Preferences (Optional but Recommended): Click "Save Preferences" at the bottom left of the Preferences window to ensure the addon remains enabled across Blender sessions.
Features
SmartAlign offers the following key features to enhance your workflow:
Multiple Alignment Modes: Align objects along the X, Y, or Z axis, in a comprehensive grid, or diagonally.
Customizable Spacing: Precisely control the distance between aligned objects for perfect arrangements.
-
Advanced Grid Layout Control:
Define the number of objects per row/column with a custom "Grid Size" or let the addon auto-calculate for even distribution.
Choose from various grid planes (
XY,XZ,YZ) and their negative counterparts (-XY,-XZ,-YZ) to align in any direction.
Local Z-Axis Rotation: Apply a uniform rotation to all selected objects around their individual local Z-axes, useful for quick orientation.
Bounding Box Vertical Alignment: Accurately align objects based on their bounding box's top or bottom extremum to the 3D cursor's Z-height, ensuring consistent floor or ceiling placement.
Reset Functionality: Easily revert objects to their exact positions and rotations prior to the last SmartAlign operation, providing a safe undo option.
Usage
Once installed and enabled, the SmartAlign addon provides two convenient access points within Blender:
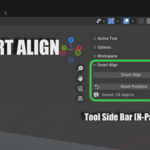
In the 3D Viewport's Tool shelf (N-panel): Press
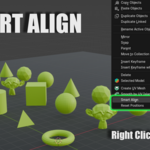
Nin the 3D Viewport, and navigate to the "Tool" tab. You will find the "Smart Align" panel with all its settings.In the Right-Click Context Menu: While in Object Mode with objects selected, right-click in the 3D viewport to bring up the context menu. The "Smart Align" and "Reset Positions" operators will be available directly for quick access.
Aligning Objects
Follow these steps to align your objects using SmartAlign:
Select Objects: In the 3D Viewport, select the objects you wish to arrange.
Position the 3D Cursor: The alignment operation uses the 3D Cursor's location as the origin for alignment. Place your 3D cursor precisely where you want the alignment to begin (by default, this is done with
Shift + Right-Click).Access SmartAlign: Open the SmartAlign panel via the N-panel ("Tool" tab) or select "Smart Align" from the right-click context menu.
-
Choose Alignment Options: Within the SmartAlign panel, configure your desired alignment settings:
Align Mode: Select your preferred layout (e.g.,
Xfor horizontal,Yfor vertical,Zfor depth,Grid, orDiagonal).Grid Plane (if Grid mode selected): If "Grid" mode is active, choose the plane for the grid layout (
XY,XZ,YZ). The negative options (-XY,-XZ,-YZ) reverse the alignment direction along that plane.-
Grid Size (if Grid mode selected):
Enter
0for auto-calculation (Blender will intelligently try to create a square-ish grid based on the number of selected objects).Enter a positive number to specify the exact number of objects per row/column, giving you precise control over grid dimensions.
Spacing: Adjust this value to control the distance between each aligned object.
Rotation (Degrees): Enter a numerical value (in degrees) to rotate each object around its own local Z-axis.
-
Vertex Alignment: This option controls the vertical positioning relative to the 3D Cursor's Z-height:
None: No vertical alignment based on the bounding box. Objects retain their relative Z position.
Top: Aligns the topmost point of each object's bounding box to the 3D cursor's Z-height. Ideal for aligning objects to a ceiling or a common upper surface.
Bottom: Aligns the bottommost point of each object's bounding box to the 3D cursor's Z-height. Perfect for aligning objects to a floor or a common base.
Execute Alignment: Click the "Smart Align" button in the panel to apply the chosen settings, or select the "Smart Align" operator directly from the right-click context menu.
Resetting Positions
To revert objects to their state prior to the last SmartAlign operation:
Select Objects: Select the objects whose positions and rotations you wish to reset.
-
Access Reset Function:
Via N-Panel: In the SmartAlign panel (N-panel, "Tool" tab), click the "Reset Positions" button.
Via Right-Click Context Menu: While in Object Mode with objects selected, right-click in the 3D viewport to bring up the context menu, then select "Reset Positions."
Note: This functionality only works for objects that were part of the immediately preceding SmartAlign operation and whose original positions were successfully stored. The SmartAlign panel will display an info label indicating how many objects have stored positions.
Important Considerations
-
Grouped Objects / Multi-Part Models: If you are working with an object composed of multiple separate parts that you intend to keep together and treat as a single unit for alignment purposes, please ensure they are prepared using one of the following methods:
Joined: Select all the individual mesh parts in Object Mode, then press
Ctrl + J(or navigate toObject > Join) to combine them into a single mesh object. This makes them a unified entity for alignment.Parented to an Empty: A non-destructive alternative is to parent the parts to an Empty object. First, create an Empty object (
Add > Empty > Plain Axes,Cube, etc., depending on your preference). Then, select all the parts of your model, and finally select the Empty (ensuring the Empty is the active object, indicated by a brighter orange outline). PressCtrl + P(or navigate toObject > Parent > Object) to establish the parent-child relationship. You can then select and align only the Empty, and its child objects will move and rotate cohesively along with it. This method allows you to retain individual part accessibility while still aligning them as a logical group.
Troubleshooting
"No objects selected" Warning: This message indicates that no objects are currently selected in the 3D Viewport. Please ensure you have at least one object selected before attempting to align or reset.
-
Objects not aligning as expected:
3D Cursor Position: Always double-check the 3D Cursor's location. This is the fundamental reference point for all SmartAlign operations. If it's in an unexpected place, your alignment will be off.
Alignment Mode & Grid Plane: Verify that you have selected the correct "Align Mode" (e.g.,
X,Y,Z,Grid,Diagonal) and the appropriate "Grid Plane" if you are using "Grid" mode.Spacing Value: Adjust the "Spacing" value. If it's too small or too large, objects may overlap or be too far apart.
Valid Mesh Data: Ensure your objects have valid mesh data. Bounding box calculations (used for "Vertex Alignment") rely on this data. Empty objects or objects without geometry will not align correctly using bounding box options.
"No original positions stored" Warning: The reset functionality is designed to revert the last alignment operation. This warning means that no original positions were recorded for the currently selected objects (e.g., they haven't been aligned with SmartAlign in the current Blender session).
Object rotation issues: The "Rotation (Degrees)" parameter applies rotation around each object's local Z-axis. If the object's local Z-axis is not oriented as you expect, the rotation might not produce the desired visual effect. You might need to apply rotations or adjust the object's origin if this becomes a persistent issue.
Contact
If you encounter any issues, discover bugs, or have suggestions for improvements or new features, please don't hesitate to contact me. Your feedback is highly appreciated!
Have questions about this product?
Login to message
| Sales | 10 |
| Published | about 1 year ago |
| Blender Version | 4.2 - 4.4 |
| Extension Type | N/A |
| Render Engine Used | Arnold, Blender-Internal, Blender-Game-Engine, Cycles, Eevee, Freestyle, Luxrender, Mental-Ray, Octane, Vray, Yafaray |
| License | GPL |
