SplatWorks - Synthetic Gaussian Splat Capture for Blender
 Ben Hornibrook


SplatWorks Documentation
A complete reference for installing and using SplatWorks. For questions not covered here, contact bhornib[email protected] or message via the marketplace.
Installation
- Purchase and download SplatWorks 2.2.6.zip.
- In Blender, open Edit → Preferences → Add-ons.
- Click the dropdown arrow in the top right of the Add-ons panel and choose Install from Disk.
- Browse to the downloaded zip and select it.
- Tick the checkbox next to SplatWorks to enable it.
- Open the 3D Viewport sidebar (press N). You'll see a new SplatWorks tab.
The add-on runs entirely offline. No telemetry, no licence-server pings, no third-party services.
Quick start — your first capture in five clicks
- Open the SplatWorks sidebar tab.
- Click Create Target Empty at the top of the panel.
- Set Cameras to e.g. 100 and click Generate Cameras.
- Set Output to a folder of your choice, then click Render All Cameras.
- Click Generate Sparse PLY, then Write COLMAP.
You now have a complete training-ready dataset in your output folder. Drop it into your Gaussian Splat trainer of choice.
Camera placement modes
Sphere mode (default)
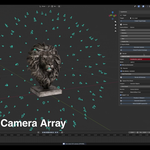
Cameras are distributed evenly around a target empty using a Fibonacci-sphere algorithm. Ideal for object-centric captures — busts, props, single objects on a turntable.
- Target: an Empty that acts as the centre of the rig
- Radius: distance from target to each camera. Live-adjustable — drag the slider and the rig expands or contracts in real time
- Jitter: small random offset to break perfect spiral regularity (leave at 0 for most cases)
Proxy Surface mode
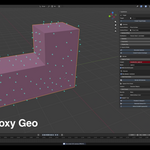
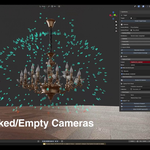
Cameras distribute across the surface of any mesh you choose, each facing inward. This is the key feature for awkward subjects — L-shapes, ring shapes, hollow geometry, large environments.
- Camera Proxy: any mesh in your scene. Best results with a mesh whose surface normals face outward (Mesh → Normals → Recalculate Outside)
- Surface Offset: how far cameras sit from the proxy surface along its normal. Live-adjustable — push cameras outward without regenerating
- Distribution:
- Poisson (best-candidate) — visually even spacing across the surface. Recommended.
- Random (area-weighted) — faster, may cluster
Use Proxy mode whenever a sphere would waste angles. An L-shaped proxy puts cameras on both legs of the L. A toroidal proxy gives ring captures with cameras facing the centre of the ring.
Cameras section reference
Generate Cameras
Creates N cameras based on the current mode. Existing SplatWorks cameras are cleared first (unless Append Mode is on).
Append Mode
When enabled, Generate Cameras becomes Append N Cameras — preserves existing positions and adds N more, using Mitchell's best-candidate to fill the largest gaps. New cameras get continuing index numbers, so any frames you've already rendered stay valid.
A warning appears when Append + Sphere mode are active together: distribution will be approximate (not a fresh Fibonacci layout). Proxy + Append is mathematically clean — the Poisson algorithm fills gaps without disturbing existing cameras.
Check Frustum Coverage
Validates that every camera can actually see your subject before you commit to a long render.
The check uses:
- A 9×9 grid of rays per camera, walking past SplatWorks "scaffolding" (camera proxy, bounds object) but stopping at real occluders (floors, walls)
- An area-weighted surface-sample probe as a rescue check for thin/peripheral subjects the ray grid may miss
Cameras that don't see the subject are automatically selected in the viewport. Per-camera detail prints to the System Console (Window → Toggle System Console).
Clear Cameras
Removes all cameras in the SplatWorks_Cameras collection.
Display Size
Cosmetic-only slider that resizes camera icons in the viewport. Does not affect rendering. Live-updates all cameras.
Rendering
Render All Cameras
Renders every camera to PNG at the current scene's render settings, one image per camera, into /<capture_name>/images/.
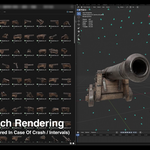
The render runs asynchronously — Blender's UI stays responsive. It's also resumable: if Blender crashes or you cancel mid-batch, just run it again with Skip already-rendered enabled and it picks up where it left off.
Resume controls
- Skip already-rendered — checks the output folder before each render and skips cameras whose image already exists
- Start From Index — force re-render starting at camera N (overrides the skip check from index 0 to N-1)
Capture frame
The scene frame to render every camera at. SplatWorks captures static datasets — one chosen frame across all cameras. Drivers, simulations, and rigged animations are evaluated at this frame.
Sparse Point Cloud section
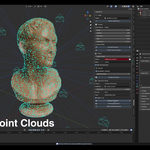
This section produces the sparse point cloud your Gaussian Splat trainer needs to initialise. Without one, most trainers reject the dataset or train from random noise (slower convergence, worse quality).
Subject
Determines which objects' surfaces get sampled:
- Selected Objects — only what's selected in the viewport. Quickest for one-off captures
- Collection (recursive) — everything inside a chosen collection, including nested children. Best for complex multi-part subjects (rigs, assemblies)
- Visible in Render — every non-hidden object in the scene. Best when you've already set up render visibility for your shot
Hidden objects (hide_render = True) and SplatWorks cameras are always excluded.
Bounds
A spatial filter applied after sampling, rejecting points outside the chosen volume:
- Camera Sphere — keeps points inside the camera orbit (target + radius). Use with Sphere camera mode
- Custom Mesh — keeps points inside an arbitrary mesh proxy via a BVH inside-test. The mesh must be closed (manifold)
- None — no spatial filter; every sampled point is kept
Point Count
Number of points written to the sparse PLY. Defaults to 50,000.
- 10k — very simple subjects, fast
- 50k — good default for a single subject (bust, prop)
- 200k — complex multi-object scenes
- 500k+ — diminishing returns; mostly file bloat
Colour
- Material Base Color — each point gets the colour of the material at its surface position. The resolver walks Principled BSDF Base Color through RGB nodes, Image Textures (sub-sampled and averaged), ColorRamps, Mix nodes, and common pass-through nodes
- Off (Grey) — every point written as mid-grey. Use if your shader networks don't expose a meaningful base colour
Output Y-Up
Postshot's PLY viewer expects Y-up world space. Blender is Z-up. When checked (default), points are rotated -90° around X on export so the PLY matches Postshot's display. Disable if your downstream tool expects Blender Z-up.
Preview in Viewport
Generates the sparse cloud as a viewport-only mesh (SplatWorks_SparsePreview). Lets you verify coverage, colour, and bounds before committing to disk. Re-clicking refreshes; the trash icon clears the preview.
Generate Sparse PLY
Writes sparse_points.ply (binary PLY format, RGB) to the capture folder. Compatible with all major Gaussian Splat trainers.
Write COLMAP
Writes the three COLMAP-format files (cameras.txt, images.txt, points3D.txt) into re>/sparse/0/. Use this when training with Inria 3DGS, Nerfstudio, gsplat, or any COLMAP-consuming pipeline.
Required: cameras must already exist; subject + bounds configured. Does not require rendering to have happened first.
Output folder structure
After a complete capture, your folder looks like this:
your_capture/
├── images/
│ ├── SplatWorksCam_000.png
│ ├── SplatWorksCam_001.png
│ └── ...
├── sparse/
│ └── 0/
│ ├── cameras.txt
│ ├── images.txt
│ └── points3D.txt
├── capture_info.json
├── sparse_points.ply
└── transforms.json
- images/ — one PNG per camera
- transforms.json — NeRF-format camera intrinsics + extrinsics for every rendered image
- sparse_points.ply — binary PLY of seed points for splat initialisation
- sparse/0/*.txt — COLMAP-format equivalent (intrinsics, extrinsics, sparse points)
- capture_info.json — human-readable snapshot of all settings used: camera mode, count, focal length, render resolution, samples, frame range, subject filter, point count, colour mode, and timestamps. Updated automatically each time you render or export
Importing into Gaussian Splat trainers
NeRF-style trainers (transforms.json + PLY)
Drag the images/ folder, transforms.json, and sparse_points.ply into the trainer's import dialog. Set Camera Poses to "Import" if the option exists.
COLMAP-based trainers (Inria 3DGS, Nerfstudio, gsplat)
Point the trainer at the capture folder root:
python train.py -s /path/to/your_capture
The trainer auto-detects images/ and sparse/0/ and proceeds with training. No manual file selection required.
Troubleshooting
Cameras appear in wrong positions / scaled wrong inside
the trainer.
You may be on a very old version. SplatWorks 1.3.0+ strips scale
from matrix_world before writing poses. Current versions (2.x) handle
this correctly.
Sparse cloud appears rotated 90° relative to the rendered
splats.
Postshot expects Y-up world. Check Output Y-Up in the Sparse
Point Cloud section. For other trainers (Blender Z-up), uncheck it.
Frustum check flags cameras that visibly see the subject.
Make sure your Subject filter actually includes the subject.
If you have a large environment object (floor, walls) and use Subject = Visible
in Render, the check correctly treats them as occluders. The bounds object and
camera proxy are automatically treated as "scaffolding" and walked
past — anything else is a real occluder.
Render All produces no images.
Confirm scene render output settings are sensible (PNG, valid resolution). The
add-on uses Blender's normal render pipeline — if F12 works on your
scene, SplatWorks will too.
Postshot rejects the import with "Add sparse point
import or set Camera Poses to Compute From Images".
You're missing the sparse PLY. Generate it with Generate Sparse PLY and
re-import all three (images + JSON + PLY) together.
COLMAP-using trainer rejects the dataset.
Make sure cameras are generated and render is complete (or skipped via the
resume option). The COLMAP images.txt references image filenames —
they must exist on disk by the time training starts.
Tips and best practices
- Use Proxy mode for non-spherical subjects. Sphere mode wastes angles for L-shapes, rings, and long thin objects.
- Preview before exporting. The viewport preview costs nothing and catches subject-filter mistakes before you write files.
- Run the frustum check before rendering. Catching coverage gaps before a 4-hour render saves time.
- Match camera count to subject complexity. A bust needs ~80–150 cameras; a full vehicle or rig may need 300+.
- Keep Single Lens & Focal Length ticked in your trainer. All SplatWorks cameras share intrinsics — your trainer should know this.
- For Postshot: set Camera Poses to Import (not Compute From Images). Drag in the images/ folder, transforms.json, and sparse_points.ply together.
- Use the capture metadata log. If you re-open an old capture in six months, capture_info.json tells you exactly which settings were used.
Compatibility
- Blender 4.2 or later (tested on 5.1.1)
- Windows, macOS, Linux
- Cycles and Eevee both supported
- Works with any Gaussian Splatting trainer that accepts NeRF-style transforms.json or COLMAP sparse/0/ folders, including Inria 3DGS, Nerfstudio, gsplat, and most modern research pipelines
Updates
Minor updates and bug fixes within the same major version (2.x.x) are included with your purchase. Major version upgrades (e.g. a future 3.0) may be a separate purchase.
Support
Email: bhornib[email protected], or message via the marketplace where you purchased SplatWorks.
Studio-tier purchasers receive priority handling.
 Included
Includes 12 months of
- Support from Ben Hornibrook
- Product updates
Extend this product’s Support Period +12 months: 25% of product price
Have questions before purchasing?
Login to message
| Sales | 10+ |
| Published | 5 months ago |
| Blender Version | 4.2 - 5.2 |
| Extension Type | Add-on |
| Render Engine Used | Cycles, Eevee |
| License | GPL |
Discover more products like this
3dgs Radiance Field Synthetic Data colmap point cloud Gaussian Splat gaussian splatting nerf 3d-scanning Postshot photogrammetry camera rig