Subpixel Normals
 subpixel llc


Subpixel Normals Documentation
Overview
Subpixel Normals provides a simple, selection-based workflow for controlling hard and soft shading in Blender.
Unlike Blender’s standard sharp-edge workflow, Subpixel Normals works whether your mesh begins with flat or smooth shading. Select the components you want to change, right-click, and choose the desired result.
Requirements
- Blender 5.0 or newer
- A mesh object
- Edit Mode
Installation
- Download the Subpixel Normals ZIP file.
- Do not extract the ZIP.
- Open Blender.
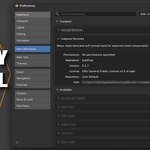
- Go to Edit → Preferences → Add-ons.
- Open the dropdown menu in the upper-right corner.
- Select Install from Disk.
- Choose the downloaded ZIP file.
- Enable Subpixel Normals if it is not enabled automatically.
Accessing the Tools
- Select a mesh object.
- Enter Edit Mode by pressing Tab.
- Select vertices, edges, or faces.
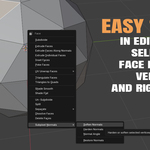
- Right-click inside the 3D Viewport.
- Open the Subpixel Normals submenu.
The following tools are available:
- Soften Normals
- Harden Normals
- Normal Angle
- Restore Normals
Selection Support
Subpixel Normals supports Blender’s three primary mesh selection modes.
Vertex Selection
When vertices are selected, the operation affects edges connected to those vertices.
Edge Selection
When edges are selected, the operation affects those edges directly.
Face Selection
When faces are selected, the operation affects the boundaries of those faces.
Soften Normals
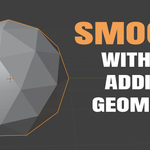
Soften Normals creates smooth shading across the selected components.
When the connected faces are flat-shaded, the add-on automatically prepares them for smooth shading while preserving their other visible hard boundaries. This allows selected edges to become soft without requiring the entire object to be smoothed first.
To use it:
- Enter Edit Mode.
- Select vertices, edges, or faces.
- Right-click.
- Open Subpixel Normals.
- Choose Soften Normals.
Harden Normals
Harden Normals creates a hard shading boundary along the selected components.
To use it:
- Enter Edit Mode.
- Select vertices, edges, or faces.
- Right-click.
- Open Subpixel Normals.
- Choose Harden Normals.
The selected edges are marked sharp using Blender’s native sharp-edge system.
Normal Angle
Normal Angle evaluates the selected edges using the angle between their connected faces.
Edges above the chosen angle are hardened. Edges below the chosen angle are softened.
To use it:
- Enter Edit Mode.
- Select the components you want to evaluate.
- Right-click.
- Open Subpixel Normals.
- Choose Normal Angle.
- Open Blender’s Adjust Last Operation panel in the bottom-left corner.
- Adjust the Normal Angle value.
Only the selected components are evaluated. Unselected areas are left unchanged.
Boundary edges without two connected faces cannot be evaluated using a face angle and are skipped.
Restore Normals
Restore Normals returns the selected area to Blender’s default flat-shaded appearance and clears related sharp-edge markings.
To use it:
- Enter Edit Mode.
- Select vertices, edges, or faces.
- Right-click.
- Open Subpixel Normals.
- Choose Restore Normals.
Restore Normals is a reset to flat shading. It does not recover a historical shading state from before the add-on was used.
Understanding Blender’s Blue Edges
Blue or cyan edges are Blender’s built-in indication that an edge is marked Sharp. This color is controlled by Blender’s theme and is not generated by Subpixel Normals.
To change it:
- Open Edit → Preferences.
- Select Themes.
- Open 3D Viewport.
- Change the Edge Sharp color.
You can also control whether sharp markings are displayed through the 3D Viewport Overlays menu.
Undo
All Subpixel Normals operations support Blender’s standard Undo command.
Press Ctrl + Z immediately after an operation to undo it.
Troubleshooting
The Subpixel Normals menu does not appear
Make sure that:
- The add-on is installed and enabled.
- A mesh object is active.
- You are in Edit Mode.
- You are right-clicking inside the 3D Viewport.
The operation reports that nothing is selected
Select at least one vertex, edge, or face before running the operation.
A softened edge still looks hard
Check for:
- Duplicate or disconnected geometry
- Overlapping faces
- Non-manifold geometry
- Modifiers affecting the final shading
- Custom normals created by another tool
- Unapplied geometry that does not share vertices
Merging duplicate vertices with Blender’s Merge by Distance tool may resolve some shading problems.
Normal Angle does not change an edge
Normal Angle requires an edge with two connected faces. Open boundary edges do not have a face angle to compare and are skipped.
The blue sharp-edge marking is distracting
Disable the Sharp edge display in Blender’s Viewport Overlays or change its color in the Blender theme preferences. The blue line is only a viewport indicator and does not appear in renders.
Removing the Add-on
- Open Edit → Preferences → Add-ons.
- Find Subpixel Normals.
- Disable or uninstall the extension.
Removing the add-on does not automatically reverse shading changes already applied to your meshes. Use Restore Normals or Blender’s native shading tools before uninstalling if you want to change those results.
Quick Reference
Soften Normals
Smooths selected components while preserving surrounding hard boundaries.
Harden Normals
Marks selected components as hard.
Normal Angle
Hardens or softens selected components according to an adjustable face-angle threshold.
Restore Normals
Returns the selected area to flat shading and clears related sharp-edge markings.
Have questions about this product?
Login to message
| Blender Extension Compatible | Yes |
| Published | about 2 months ago |
| Blender Version | 4.2 - 5.2 |
| Extension Type | Add-on |
| License | GPL |