 za studio


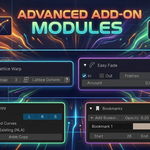
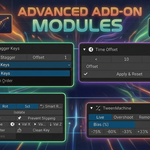
The Ultimate Animation & Graph Editor Workflow Suite for Blender
Designed to eliminate the biggest time-sinks in animation, Super Graphic Editor Tools brings industry-standard workflows (like Maya-style ReTime, TweenMachine, and Lattice deformations) directly into Blender's Graph Editor. Whether you are cleaning up mocap, staggering keys for overlapping action, or transferring rigs, SGET turns hours of tedious work into a few clicks.
📍 Where to find it:
Installation: Edit > Preferences > Add-ons > Install, select the .zip file, and enable it.
Location: Open the Graph Editor or Dope Sheet, press N to open the Sidebar, and click the Super Tools tab.
🛠️ Feature Breakdown & Usage Guide
1. Grab & Bake (Dynamic Parenting)
Instantly parent and unparent objects or pose bones without messy constraints or visible popping. Perfect for holding weapons, picking up cups, or passing objects between characters.
Grab: Select the child object/bone, then Shift-select the parent. Click Grab. It instantly snaps and holds the world transform.
Drop: Go to the frame where the object is released and click Drop. The object stays exactly where it was left.
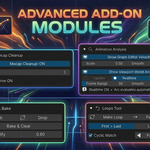
Bake & Clear: Once your animation is done, click this to bake the constraint-driven motion into raw keyframes and automatically delete the constraints.
Simplify: Reduces the baked keyframes based on the Ratio slider to keep your curves clean.
2. Bookmarks
Visually organize your timeline by marking specific animation phases (e.g., "Jump," "Anticipation," "Fall") with colored blocks.
Add Bookmark: Creates a new colored marker at your current frame.
Controls: * Change opacity (Opacity) and text size (F) globally.
Ctrl + Left Click on the bookmark body to move it.
Ctrl + Left Click on the edges to resize it.
3. Tools (Quick Utilities)
A collection of essential, one-click workflow accelerators.
Loc / Rot / Scl: Instantly toggle the visibility of Location, Rotation, or Scale channels in the Graph Editor.
Smart Reset: Clears transforms (Location, Rotation, Scale) for the selected objects/bones based on the active toggles next to it.
Isolate: Select a keyframe and click Isolate to hide all other F-Curves, letting you focus on one curve at a time. Click again to reveal all.
Copy / Prevent Slipping: Copies the active object's global transform and pastes it over a range to lock feet or hands in place perfectly.
Mirror Time: Flips selected keyframes horizontally (in time) based on the current cursor position or selection midpoint.
Val X / Y / Z: Inverts the curve values (flips them upside down) for the selected axis.
Euler Filter & Clean Key: Fixes gimbal lock and removes redundant keyframes.
Flip Bones: Pastes copied keyframes to the symmetrically opposite bone (e.g., from .L to .R).
4. Lattice Grid
Deform your animation curves using a 2D grid, just like a mesh lattice. Perfect for proportionally scaling or reshaping large chunks of animation.
Usage: Select keyframes, set your grid resolution (e.g., 3 Columns), and click Lattice Grid.
Shortcuts inside Lattice Mode:
Left Click: Select/Drag a point.
Shift + Click: Select multiple points.
G: Move selected points.
X / Y: Lock movement to Time (X) or Value (Y).
Arrow Keys: Increase or decrease grid columns/rows dynamically.
Ctrl + Z: Undo your last lattice drag.
Enter: Apply changes. Esc: Cancel.
5. Scale Cage / ReTime
A powerful suite for stretching, squashing, and warping timing.
Scale Cage (One-Shot): Click the button, drag a box over your timeline, and release. The selected keys instantly scale to fit the box.
Scale Box (Interactive): Draws a persistent box. Hover over the left or right edges to drag and interactively scale the timing. Press Enter to confirm.
ReTime (Maya-Style): * Click to add vertical time markers.
Drag the markers to warp time between them (slowing down or speeding up the animation).
Press R to toggle Ripple (shifts outside keys).
Press S to toggle Snapping.
Press Backspace/Delete to remove a hovered marker.
6. TweenMachine
Generate breakdown poses instantly. Instead of posing character limbs manually, use the slider to favor the previous or next keyframe.
Live: When checked, simply dragging the slider will automatically insert or update the breakdown keyframe in real-time.
Overshoot: Expands the bias slider up to +/- 150%, allowing you to push poses past their extremes for instant anticipation or follow-through.
7. Loops Tool
Seamlessly loop animations (like walk or run cycles).
Make Loop: Copies the first frame to the last (or vice versa).
Cyclic Match: Automatically adjusts the entry and exit tangents so the curve flows perfectly without a noticeable "hiccup" at the loop point.
Paste Loop / Paste Reversed: Automatically repeats the selected keys forward in time. "Paste Reversed" mirrors the curve, which is perfect for generating the second half of a walk cycle.
8. Pose Fix
Adjusting an existing animation without destroying the curves has never been easier.
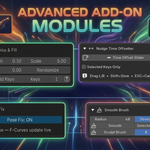
Usage: Turn Pose Fix: ON. Your auto-keying is temporarily suspended. Move your character in the viewport—the F-Curves will shift visually in real-time to show your new baseline. Turn it OFF to permanently apply the offset to the entire curve.
9. Mocap Cleanup
Bake down dense, uneditable motion capture data into clean, manageable keyframes.
Usage: Set the interval (e.g., keep 1 key every 5 frames). Toggle it ON to see a real-time preview of the cleaned curve. Turn it OFF (or click Apply) to commit.
10. Smart Easing Presets
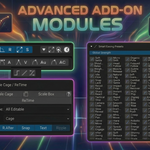
Dozens of mathematical easing formulas tailored for animation. Instantly give your curves character without touching a handle.
Categories: Includes presets for Organic Motion, Game/Snappy, Cinematic Cameras, Mechanical, and Basic Easing.
Usage: Select keyframes, adjust the Global Strength slider, and click an icon (e.g., "Soft Settle" or "Elastic Snap") to instantly reshape the curve tangents.
11. Stagger Keys
Create overlapping action effortlessly by offsetting animations across multiple objects or bones.
Usage: Select multiple objects/bones. Set the Offset (e.g., 2 frames). Click Stagger. The first object stays at frame 0, the second moves to frame 2, the third to frame 4, etc.
12. Easy Fade
Gradually fade the intensity of an animation in or out.
Usage: Select your curves. Check In or Out, define the number of Frames the fade should take, and drag the Amount slider for a real-time preview. Click Apply & Reset to bake it.
13. Smooth Brush
Iron out jittery mocap data by literally painting over your curves.
Usage: Click Smooth Brush. Hold LMB and drag over the curves in the Graph Editor.
Shortcuts: Hold F and drag to change brush radius. Hold Shift + F and drag to change smoothing strength.
14. Noise & Fill
Add procedural camera shake, trembling, or organic noise to any channel.
Add Keys: First, click this to bake a keyframe on every frame so the noise has data to deform.
Noise Sliders: Adjust Strength, Scale, and Phase. If keys are selected, you will see the noise applied in real-time. Enable Randomize to give each axis (X, Y, Z) a slightly different noise pattern.
15. Anim Copy
A robust tool to copy animation from one object/bone/rig to another.
In Place: When enabled, it calculates the offset between the source and target, allowing the pasted animation to play exactly where the target currently stands.
NLA Support: Check "Merge with Existing (NLA)" to push the copied animation into a new Non-Linear Animation layer set to 'Combine', keeping the target's original animation intact.
16. Time Offset
Slide your selected keys forward or backward in time precisely.
Usage: Use the < and > buttons to bump keys by the set amount, or drag the Offset slider to slide them interactively. Click the checkmark to apply.
17. Nudge Time Offsetter
A unique tool that slides the values of the curve underneath the fixed positions of your keyframes.
Usage: Click the button to enter modal mode. Drag your mouse left/right. The physical keyframes won't move on the timeline, but the animation pattern will slide through them like a conveyor belt. Enable Cyclic to make the pattern loop around.
18. Animation Analysis
Professional visualizer tools to verify the physics and spacing of your animation.
Show Graph Editor Velocity: Draws a color-coded speed curve directly over your F-Curves. Spikes indicate abrupt speed changes (Red = Fast, Green = Slow).
Show Viewport World Arc: Draws the actual 3D motion trail of the selected object/bone in the viewport.
Turn on Realtime to see the arc bend and update live as you drag the object in the 3D view.
Discover more products like this
lattice wrap easing preset animcopy blender graph editor tweenmachine smooth key brush bookmark time offset easy fade in and out mocap analysis nudge time offsetter pose fix