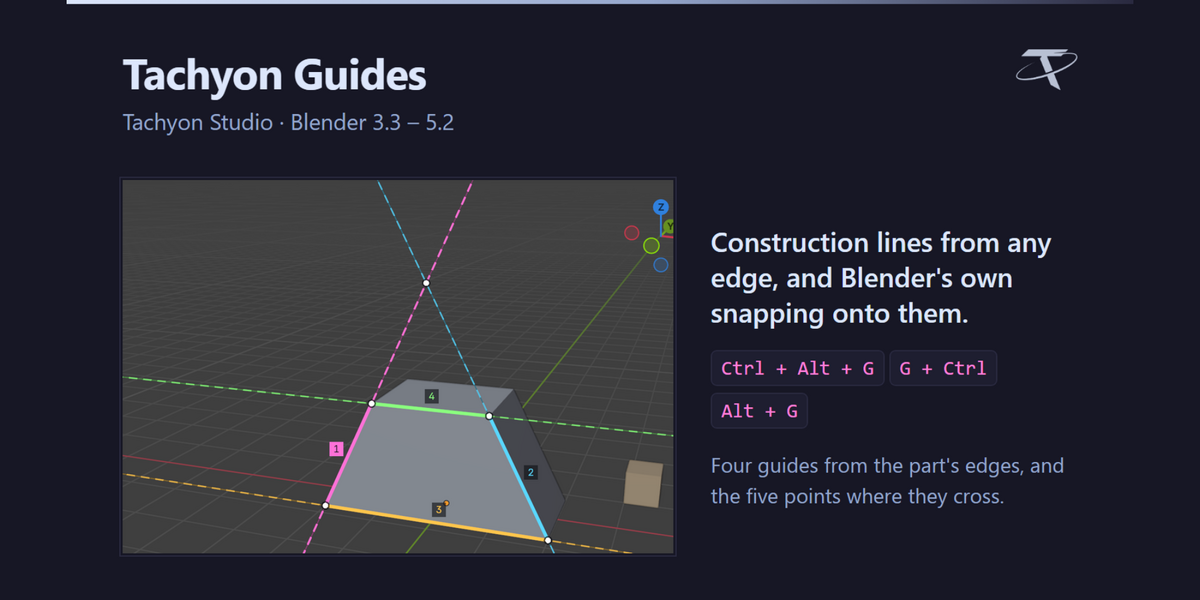
The guides you know from CAD software, in Blender. In a CAD program you draw construction lines that aren't part of the model, and snap to them; Tachyon Guides brings that way of working to Blender. Every edge you pick becomes an endless guide; where guides cross there is a point; and Blender's own snapping, or the add-on's Move to Guides, puts your geometry exactly there.
It appears in Blender's add-on list as Tachyon Guides, so it groups with the other Tachyon Studio tools there.
Version: 1.0.0
Blender: 3.3 – 5.2, one package for all of them — a modern extension on 4.2+, a classic add-on on 3.3 – 4.1
Platform: Windows, macOS or Linux. No native code, nothing platform-specific
Network use: None
Licence: GPL-3.0-or-later
Getting started
1. Install it
Edit ▸ Preferences ▸ Add-ons ▸ Install from Disk, pick the zip, and enable Tachyon Guides. On Blender 4.2 and newer you can also drag the zip onto Blender's window. The add-on's home is the 3D Viewport sidebar: press N, then the Guides tab.
2. Make a guide
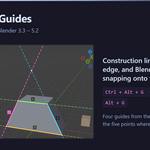
In Edit Mode, select an edge and press Ctrl + Alt + G. An endless line runs along it, in its own colour, with its number beside the edge it came from. Select two edges that meet, or lean towards each other, and press it again: where their guides cross there is a white dot.
3. Snap to it
Select what you want to move and press G, then hold Ctrl. Blender's own snapping slides it along the guides and lands it on the crossings, as long as Vertex and Edge are ticked in Blender's Snap menu. If they aren't, the Guides tab shows a button that turns them on.
4. Or move to it
Alt + G in Edit Mode is Move to Guides: the selection follows the pointer along the guides and snaps to a crossing as soon as the pointer is near it. Click to place it.
Guides
A guide is an infinite straight line through the two ends of the edge it was made from, in world space. Like a construction line in CAD it stays where it was drawn: moving or editing the mesh afterwards doesn't move the guide, which is what lets you line the mesh up with it.
-
Colour and number. Each new guide takes the next of eight colours and the next number. Numbers are never reused, so deleting Guide 2 doesn't rename Guide 3. You can change a guide's colour and name in the classic panel's list.
-
How it's drawn. The edge it came from is drawn solid with the number beside it, and the rest of the line dashed, across the whole view. Guides are drawn over everything, so a guide is never hidden behind the mesh it's there to line things up with. The active guide is drawn a little bolder.
-
Saved with the file. Guides belong to the scene. Each scene has its own.
-
One line, one guide. An edge that lies along a guide that already exists doesn't make a second one. Instead that guide is shown again, if it was hidden, made the active one and lit up for a moment, so you can see which it is.
Where guides cross
Wherever two visible guides meet there is a white dot. Edges of a real mesh are seldom exactly in one plane, so two guides that pass within the Meeting Tolerance (0.0001, a tenth of a millimetre in metres; set it in the preferences) count as crossing, at the point halfway between them. Three or more guides through one point make one dot, not three.
Making guides
From the selection
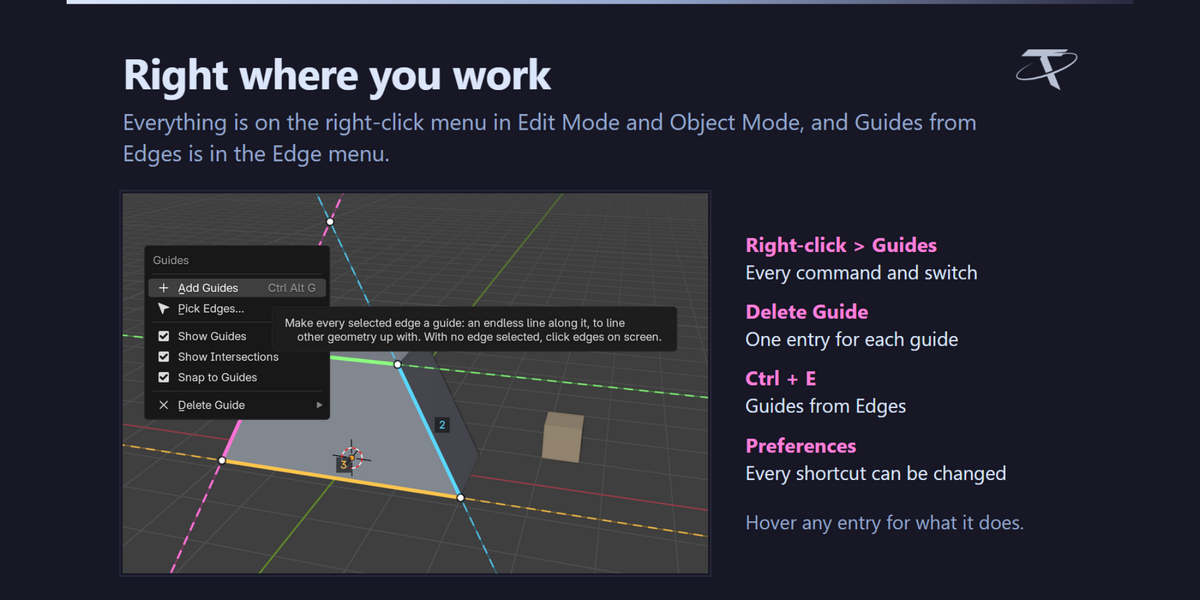
Ctrl + Alt + G (or Add Guides on the card, the panel and the right-click menu, or Guides from Edges in the Edge menu, Ctrl + E) makes a guide of every selected edge of every mesh in Edit Mode.
-
Vertex and Edge select mode: every selected edge counts, even four that close a face, which Blender then selects too.
-
Face select mode: a face's own edges come selected with it and would make a guide of every side, so only edges outside the selected faces count.
- At most 64 edges at once. A larger selection is refused with a message, so a whole loop selected by accident doesn't fill the view with lines.
-
Nothing selected (or Object Mode): Pick starts instead, and says so.
The shortcut works with the pointer anywhere over the 3D Viewport, the sidebar and the toolbar included.
Pick: click edges on screen
Pick Edges on the card or panel, or Ctrl + Alt + G with nothing selected, lets you click edges anywhere on screen. Every edge of every visible mesh can be picked: meshes in Edit Mode as they are being edited, and every other mesh as it's drawn, modifiers and all. An edge behind a face is skipped unless X-Ray is on. The edge under the pointer is previewed as the guide it would make.
| Key |
What it does |
| Click an edge |
It becomes a guide |
| Click a guide |
It becomes the active guide |
|
X (or Delete, Backspace) |
Deletes the guide under the pointer |
| H |
Shows or hides all the guides |
| M |
Goes on to Move to Guides, when something is selected in Edit Mode |
|
Esc, right-click, Enter or Space
|
Done |
The middle mouse button, the wheel and the numpad still move the view while you pick.
Snapping with Blender's own move
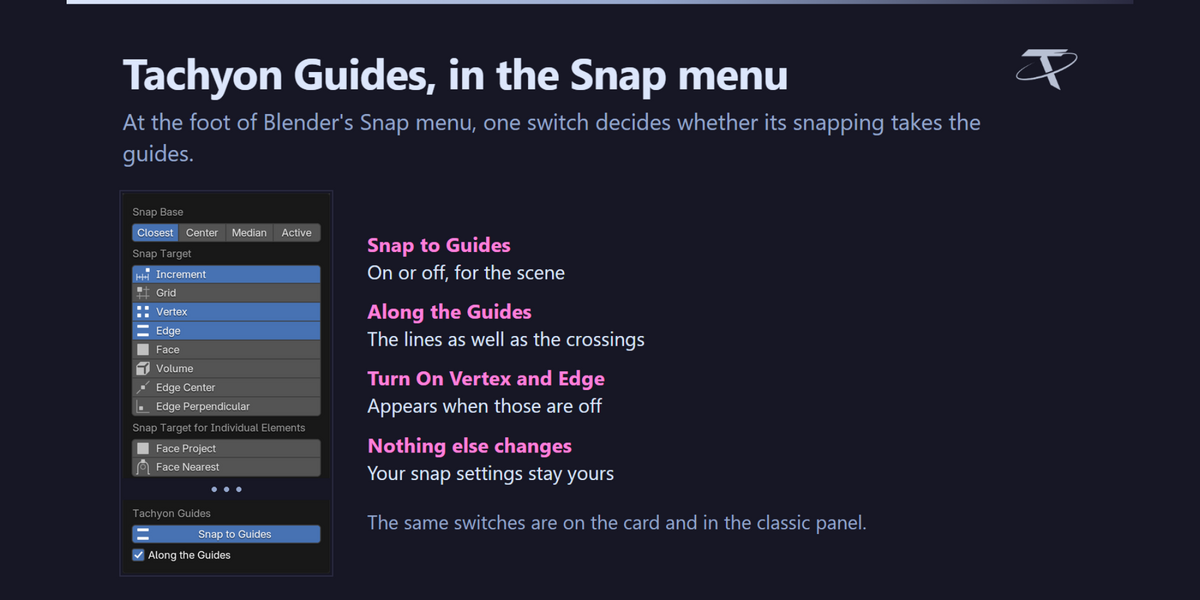
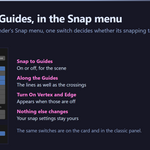
Snap with G + Ctrl (on the card and the panel, and Snap to Guides at the foot of Blender's Snap menu, under Tachyon Guides) lets Blender's own snapping land on the guides: press G, hold Ctrl, and the selection snaps to them like to any mesh. It's on by default.
| Blender's Snap Target |
What snaps |
| Vertex |
The points where guides cross, and the ends of the edges they came from |
| Edge |
Anywhere along a guide (needs Along the Guides, on by default) |
It works in Edit Mode and Object Mode, with every Snap Base (Closest, Center, Median, Active), and with the magnet on instead of holding Ctrl.
What makes it work
Blender snaps only to geometry, and its list of snap targets can't be added to. So a scene with guides gets a stand-in mesh, Tachyon Guides (snap), which the add-on keeps in step with them: a point where guides cross, and long edges along each guide.
- It can't be selected: a click, A or a box never takes it.
- It's never rendered, and it's left out of Pick.
- It's rebuilt whenever a guide is added, deleted, shown or hidden, and removed when there's nothing to snap to, when snapping to guides is off, and when the add-on is turned off.
- It's saved with the file like any object, and you'll see it in the Outliner.
- Outside Edit Mode Blender draws no loose points, so the crossings can't be seen on it. Its edges show as a thin line inside each guide's dashes, which the add-on tints with the guide's colour.
When it doesn't snap
-
Vertex or Edge isn't ticked in Blender's Snap menu: the Guides tab and the Snap menu show a Turn On Vertex and Edge button. It adds only those two and leaves the rest of your snap settings alone.
-
Exclude Non-Selectable is on in the Snap menu: the stand-in can't be selected, so it's skipped. The Guides tab says so.
-
Include Non-Edited is off, in Edit Mode: the stand-in isn't being edited, so it's skipped. The Guides tab says so.
- The guides are hidden, or the guide is: hidden guides aren't snapped to.
-
Local View (numpad /) shows only the objects you take into it, so the stand-in isn't there.
Move to Guides
Alt + G in Edit Mode, or Move to Guides on the card, panel and right-click menu. The selection follows the pointer along the guide under it, and lands on a crossing as soon as the pointer comes within the Crossing Magnet: 30 pixels by default, set in the preferences. While it runs, a faint ring around each crossing shows that reach.
| Key |
What it does |
| Click |
Places the selection |
| C |
Moves by the selection's centre instead of its nearest vertex (press again to go back) |
| B |
Click one of the selected vertices to move by that point |
| V |
Moves only the vertex that lands on the target; the rest stay |
| P |
Lays every selected vertex straight onto the guide under the pointer |
|
Esc or right-click
|
Cancels, and the mesh goes back exactly as it was |
By default the selected vertex nearest the target lands on it and the rest move with it. After placing, the redo panel (F9) can change Move By, Only That Vertex and the target itself.
Put on Guide
Put on Guide moves every selected vertex to the nearest point of a guide, so an edge laid on a guide lines up with it exactly. On the card, each guide's row has a button for it while something is selected in Edit Mode; in the panel and the right-click menu it's Put on Active Guide.
The Guides tab
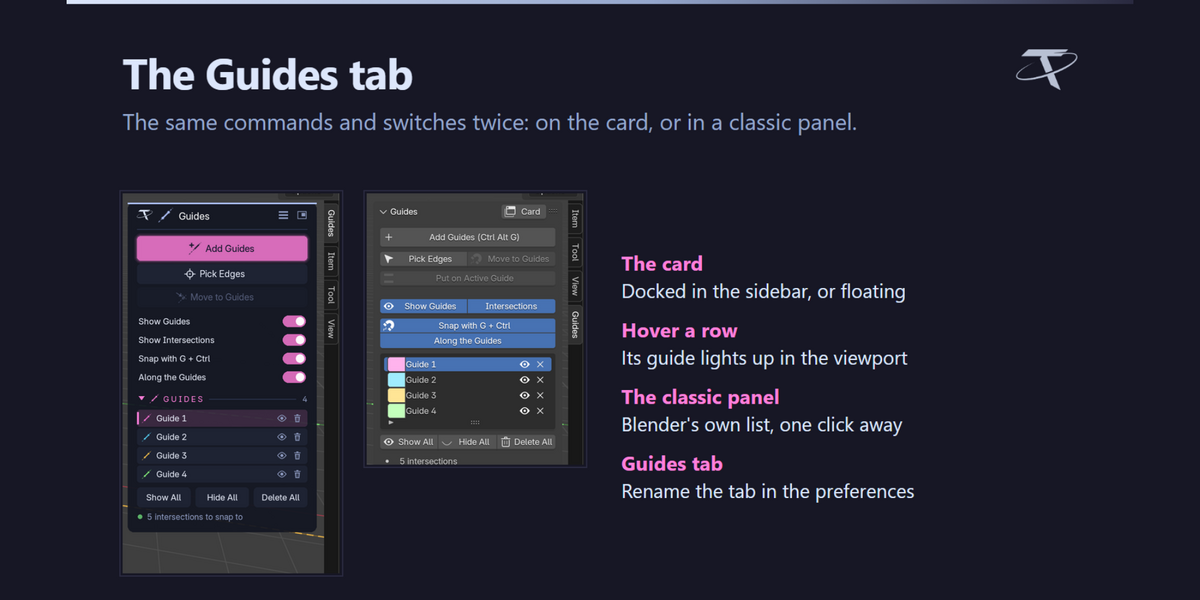
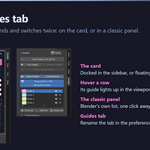
The 3D Viewport sidebar (N) has a Guides tab; you can rename it in the preferences. It shows the card, or the classic panel; the button at the top right switches between them. Both hold the same commands and switches.
-
Add Guides, Pick Edges and Move to Guides.
-
Show Guides and Show Intersections; Snap with G + Ctrl and Along the Guides.
-
The list. Each row has the guide's colour, name, an eye to show or hide it, and a button to delete it. Click a row to make that guide the active one.
-
Show All, Hide All and Delete All (Delete All asks first).
- How many crossings there are.
On the card, hovering a row lights its guide up in the viewport, and hovering any control shows a short tutorial of what it does. The card docks in the sidebar or floats over the viewport, and Ctrl + Shift + Alt + D brings it back if you close it. In the classic panel, which is Blender's own list, the active guide is the one drawn bold.
Menus
-
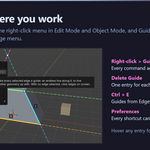
Right-click ▸ Guides, in Edit Mode and Object Mode: Add Guides, Pick Edges, Move to Guides and Put on Active Guide (Edit Mode), Show Guides, Show Intersections, Snap to Guides, and Delete Guide ▸ with one entry per guide.
- Edge menu (Ctrl + E) ▸ Guides from Edges.
-
Blender's Snap menu ▸ Tachyon Guides: Snap to Guides and Along the Guides.
Shortcuts
| Shortcut |
Where |
What it does |
| Ctrl + Alt + G |
Edit Mode, Object Mode, and over the sidebar |
Add Guides from the selection; Pick when nothing is selected |
| Alt + G |
Edit Mode |
Move to Guides |
|
G, then Ctrl
|
Edit Mode and Object Mode |
Blender's own move, snapping to the guides |
| Ctrl + Shift + Alt + D |
3D Viewport |
Show or hide the card |
Ctrl + Alt + G is Remove from Vertex Group in Blender's Edit Mode and Remove from Collection in its Object Mode. The add-on's shortcut takes it; both commands are still in their menus. Alt + G isn't used by Blender in Edit Mode. Every shortcut can be changed in Preferences ▸ Add-ons ▸ Tachyon Guides ▸ Shortcuts.
Preferences
| Setting |
What it does |
| Sidebar Tab |
The sidebar tab the card and the panel live in (Guides) |
| Line Width |
How thick guides are drawn, in pixels |
| Numbers |
Draw each guide's number beside the edge it came from |
| Crossing Magnet |
How near the pointer must come to a crossing for Move to Guides to land on it (30 pixels) |
| Meeting Tolerance |
How close two guides must pass to count as crossing, and two edges to count as one line |
| Shortcuts |
Every shortcut above, rebindable |
| Card |
Dock or float, colour, opacity, width, and the tutorials |
Undo
Guides belong to the scene. In Object Mode, Ctrl + Z undoes adding or deleting a guide like anything else. In Edit Mode, Blender's undo steps hold only the mesh, so Ctrl + Z there doesn't take a guide away: delete it from the list, the menu, or with X while picking. Moving geometry onto guides undoes as usual in both modes.
Support
Questions, ideas or a problem? Ask on the Tachyon Studio Discord, or through Superhive's messages. Tell us your Blender version and, if you can, what was selected when it happened.
 Tachyon Studio
 Included