Tile Animator
 3dartbox
in Animation


Installing
- In Blender, open Edit > Preferences > Add-ons.
- Open the drop-down at the top right and choose Install from Disk.
- Pick AB_Tile_Animator.zip. Don't unzip it first.
- Make sure the tick next to AB Tile Animator is on.
In the 3D viewport, press N and open the AB Tile Animator tab. The card appears in the viewport.
The card
The rail on the left has three tabs: Tiles, whose number is how many faces the source has, Result, whose number is how many tiles are in the scene, and Settings. The steps on a tab are numbered. Click a step's title to open it; opening one closes the others. The big button at the bottom does the tab's main job. Rest the pointer on any control for a tip, many of them with a small moving picture.
Quick start
- Select a mesh in the viewport, open step 1 Source and press Use the selected mesh.
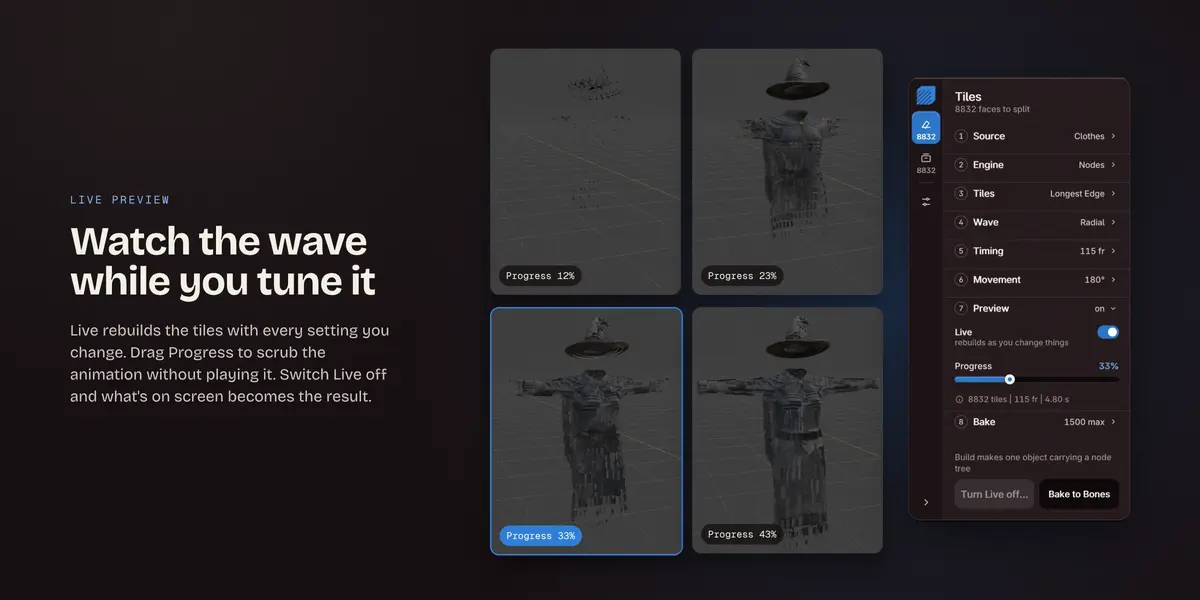
- Open step 7 Preview and turn Live on. The result appears and follows every setting.
- Change the wave, the timing and the movement while you watch, or drag Progress to scrub.
- Turn Live off to keep what's on screen as the result. With Live off, Build makes the result in one go.
- For a game engine, press Bake to Bones and export with File > Export > FBX (see the last section).
Tiles tab
1 Source
- Mesh: the mesh that gets split. Click it for a list of the meshes in the file; the funnel at the top searches part of a name.
- Use the selected mesh: puts the mesh selected in the viewport into the Source. Selecting a mesh alone never picks it.
- Use Modifiers: reads the mesh with its modifiers taken into account.
- Show the model: hides or shows the original mesh. With a result on top of it, it's usually hidden.
- Rebuild from the model: reads the mesh again and makes the result from it as it stands now. Editing the model changes nothing until you press it.
2 Engine
- Nodes: one object and a small node tree. Nothing is keyed, so a heavy mesh builds in a moment.
- Objects: one real object per tile, each with its own keyframes. Heavier, but it exports straight to FBX and glTF. This engine shows the Tile Limit too (see step 8).
3 Tiles
- Merge Flat Areas: neighbouring faces that share a plane become one tile. Flat Within sets how much they may differ, and Cut On Seams never merges across UV seams or sharp edges.
- Hinge: the edge each tile turns on. Longest Edge, Shortest Edge, Aligned (the edge facing along the wave axis, so every tile flips the same way), Random (driven by Seed) or First Edge.
- Match Shading: copies the source's own normals onto every tile, so each tile shades exactly as that patch of the model did. It steps aside while Thickness is on.
- Copy UVs: keeps the texture on each tile. Turn it off for a faster build on a heavy mesh that doesn't need UVs.
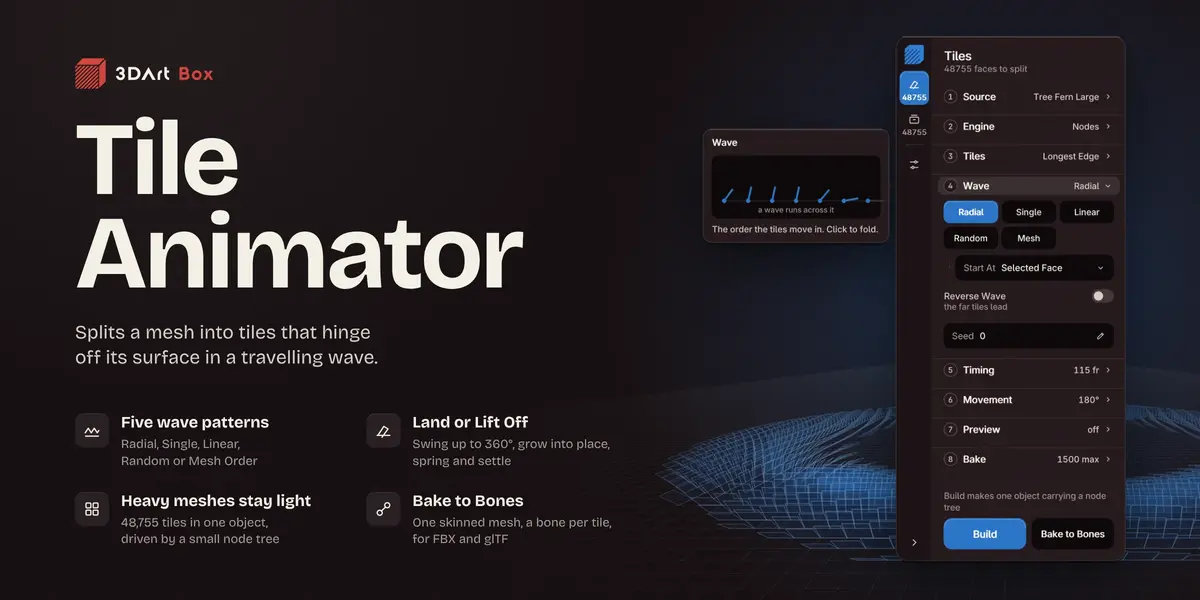
4 Wave
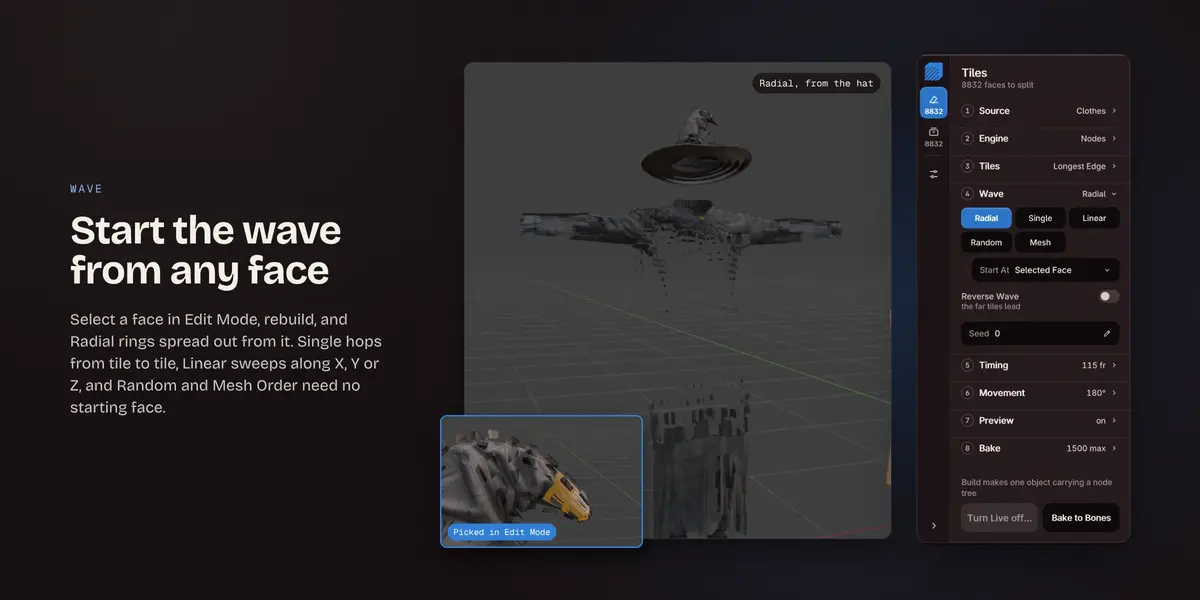
- Radial: rings spreading out from the start tile.
- Single: one tile at a time, hopping to a neighbour, so the wave snakes across the surface.
- Linear: a straight front along X, Y or Z.
- Random: no pattern, driven by Seed.
- Mesh: the order the mesh stores its faces in.
- Start At, for Radial and Single: Selected Face, Lowest Face, Largest Face or First Face. For Selected Face, select a face in Edit Mode, go back to Object Mode and press Rebuild from the model.
- Reverse Wave: the tiles the wave would reach last go first.
- Seed: a different shuffle for Random waves, random hinges and Random Spread.
5 Timing
- Start: the frame the wave starts on.
- By Delay or By Total: set how long the wave takes to cross and the total follows, or set the total length and the speed follows.
- Duration: the frames one tile takes to swing into place.
- Spread, with By Delay: the frames between the first tile starting and the last one starting.
- Total, with By Total: the length of the whole animation, in Frames or Seconds at the scene frame rate.
- Random Spread: extra random frames per tile, to break up the front.
- Set Scene Range: matches the scene's start and end frames to the animation.
- The line underneath shows the total in frames and seconds, and the frame it ends on.
6 Movement
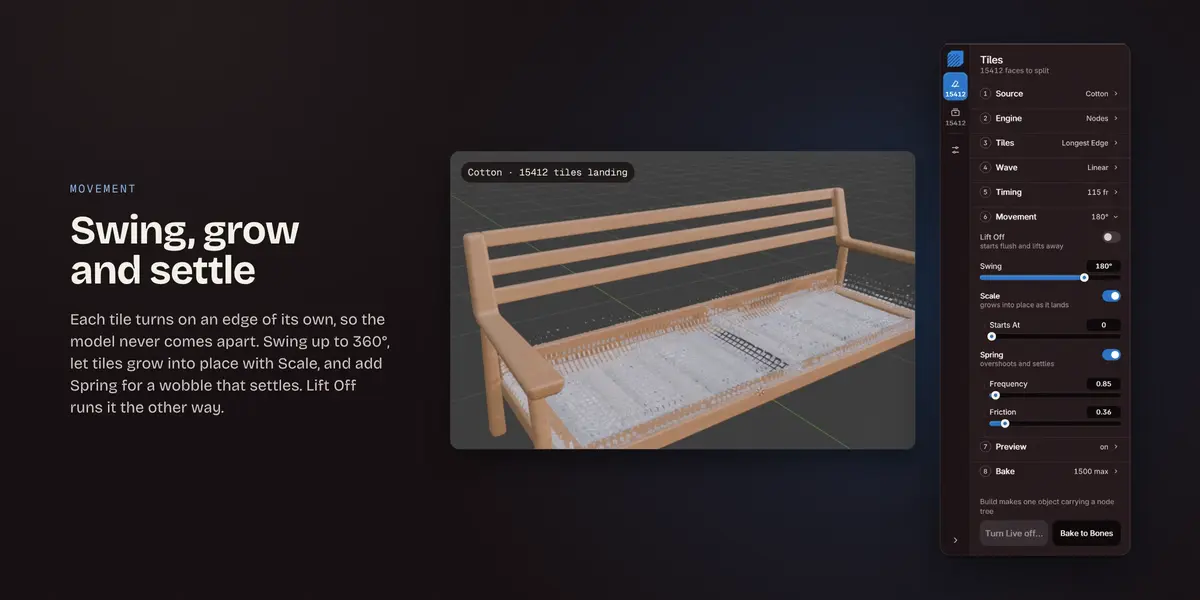
- Lift Off: off, each tile starts lifted and swings down onto the surface; on, it starts flush and lifts away. The wave keeps its direction either way.
- Swing: how far each tile is lifted before it swings down, up to 360° either way. A positive angle always lifts away from the mesh.
- Scale: each tile grows into place as it lands. Starts At is its size while it's lifted, and 0 means it appears out of nothing.
- Spring: each tile overshoots and settles. Frequency is how many swings it makes before settling, and Friction is how fast the wobble dies down.
- Interpolation, with Spring off: None, Linear, Bezier, Sine, Quad, Cubic, Quart, Expo, Back, Elastic or Bounce. Easing (Auto, In, Out, In Out) and, for Back, Overshoot shape the curve.
7 Preview
- Live: builds the result straight away and keeps it in step with every setting. Switching it off keeps what's on screen as the result, so turning it on and off never adds a second one.
- Progress: scrubs through the animation without playing it.
8 Bake
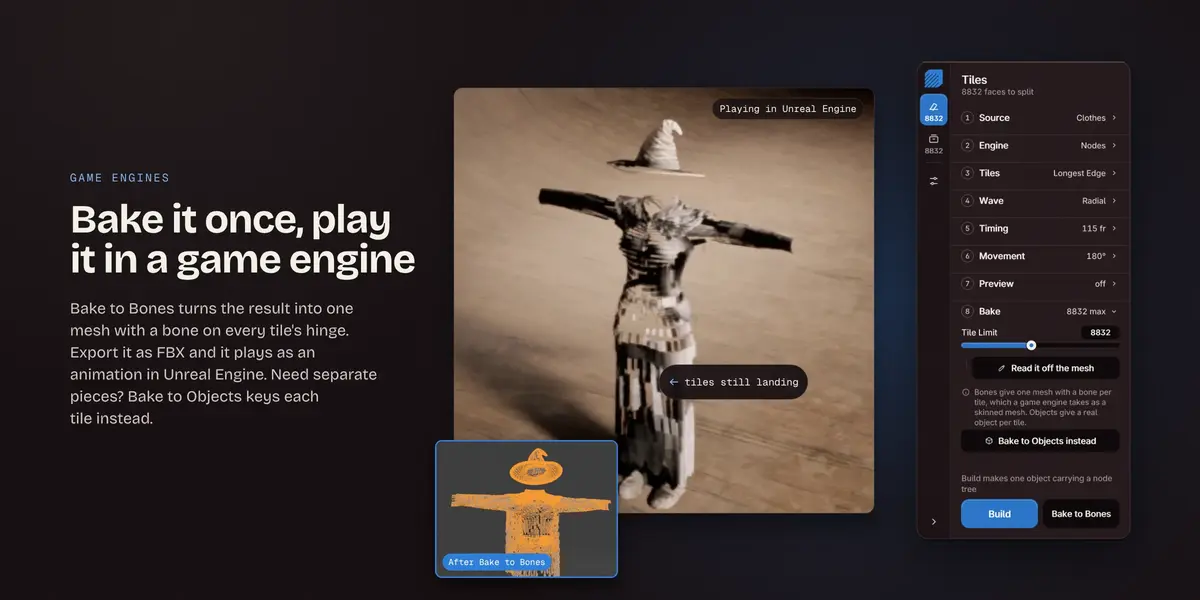
- Tile Limit: the most tiles the Objects engine and the bakes will make. A mesh with more builds an evenly spread sample of them. Read it off the mesh sets the limit to the mesh's full count, so nothing is left out.
- Bake to Objects instead: one real object per tile with its own keyframes, for when the tiles have to stay separate objects.
- Bake to Bones, the second button at the bottom: one mesh with a bone on every tile's hinge and the swing keyed on the bones. FBX and glTF carry it as an ordinary skinned mesh, far lighter than thousands of separate objects.
Build
The main button builds the result: one object carrying a node tree on the Nodes engine, or one keyed object per tile on the Objects engine. While Live is on, it reads Turn Live off to keep it. Undo takes a build back.
Result tab
1 Output
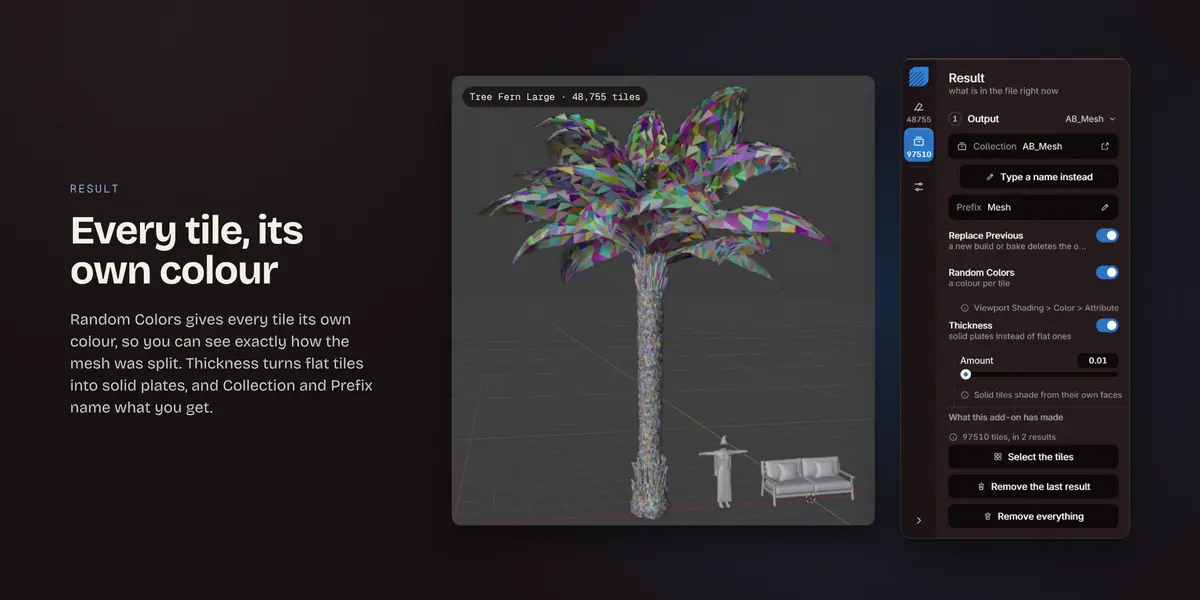
- Collection: the collection the result goes into. Click it for the collections in this file, or press Type a name instead for a new one, which is made when the result is built.
- Prefix: the start of every tile's name. Collection and Prefix are applied when the result is built.
- Replace Previous: a new build or bake of the same source replaces the older one. Off, each one adds a result beside it.
- Random Colors: a colour per tile. See it with Viewport Shading > Color > Attribute on the Nodes engine, or Object on the Objects engine.
- Thickness: gives every tile a Solidify modifier, so it reads as a plate. Amount sets how thick.
What this add-on has made
- How many tiles and results are in the file.
- Select the tiles: selects every tile of the last result with the empty they hang from, so the result moves and exports as one.
- Remove the last result: deletes only the most recent build. It asks first.
- Remove everything: deletes every result this add-on made in the file, Live ones included. It asks first, and Undo brings them back.
Settings tab
- Card or Classic panel: switches to a regular sidebar panel, which also has a fine Progress slider. A button at its top brings the card back.
- Accent: the colour the card is drawn in.
- Reset every setting: puts every setting back the way it came, the picked mesh included. Results already in the scene stay where they are. It asks first.
Taking it to a game engine
- Open step 8 Bake and press Read it off the mesh, so no tile is left out.
- Press Bake to Bones. You get one rig and one skinned mesh.
- On the Result tab, press Select the tiles.
- Choose File > Export > FBX. Tick Limit to Selected Objects and untick Add Leaf Bones. Under Animation, turn off NLA Strips and All Actions, then export.
- In Unreal Engine, import the FBX. It comes in as one skeletal mesh with its animation. Give it its material, set Animation Mode to Use Animation Asset and pick the animation in Anim to Play, or add it to a Level Sequence with an Animation track.
Have questions about this product?
Login to message
| Blender Extension Compatible | Yes |
| Published | about 11 hours ago |
| Blender Version | 4.2 - 5.2 |
| Extension Type | Add-on |
| Render Engine Used | Cycles |
| License | GPL |
Discover more products like this
precedural Blender_Geometry_Nodes wave Game Engine reveal animation animated-tiles fbx bake to bones Tiles