UV King – Smart UV Packing
 Arun C


Installation
-
Download the UV King (.zip) file
-
Open Blender
-
Go to Edit → Preferences → Add-ons
-
Click Install and select the zip file
-
Enable UV King
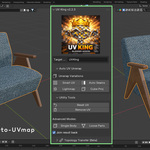
You will find UV King in the N-panel (Sidebar) inside:
-
3D View
-
UV Editor
Basic Usage (Quick Start)
-
Select your object
-
Enter Edit Mode
-
Open the UV Editor
-
Select all UV islands (A key)
-
Open UV King panel
-
Click Pack
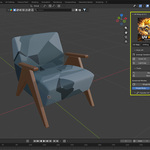
Your UVs will be automatically arranged for better space usage.
Auto Unwrap
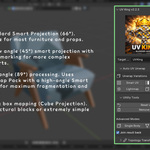
Use the built-in presets to quickly unwrap your mesh:
-
Smart UV (66°) → balanced for most models
-
Auto Seams (45°) → better for hard-surface objects
-
Lightmap (89°) → more cuts, less overlap
-
Cube Projection → simple box-style mapping
Packing Settings
-
Margin → space between UV islands and borders
-
Padding → space between islands
-
Scale Option
-
ON → allows resizing for better packing
-
OFF → keeps original scale (important for texel density)
-
Stacking
Use stacking to place identical UV islands on top of each other.
-
Saves texture space
-
Useful for repeated objects (chairs, bolts, panels)
Groups
-
Create groups to organize UV islands
-
Pack groups separately or together
-
Lock groups to keep their position
Quick Tools
-
Rotate UVs (±90°, ±45°)
-
Normalize → equal texel density
-
Orient 3D → match UV direction with 3D model
-
Copy / Paste UV → transfer UVs between similar meshes
Have questions about this product?
Login to message
| Blender Extension Compatible | Yes |
| Sales | 10+ |
| Dev Fund Contributor | |
| Published | 7 months ago |
| Blender Version | 4.0 - 5.1 |
| Extension Type | Add-on |
| Render Engine Used | Cycles, Eevee |
| License | GPL |

Discover more products like this
uv packing vfx pipeline udim Blender 4 UV Unwrap game asset workflow Texture packing blender addon uv stacking texel density uv-tools