Uvstudio — Batch Uv Automation + Texture Path Repair
 Anvil Interactive Solutions



UVStudio Documentation
Version 1.1.0 · Blender 4.2 – 5.0 · Windows / macOS / Linux
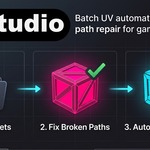
UVStudio has two modules in one N-panel: Batch UV (automated UV pipeline with texel density targeting) and Texture Repair (broken path scanning and intelligent relinking). No external dependencies, no license key, no activation — install and it works.
1. Installation
- Download uvstudio-1.1.0.zip from your purchases. Do not extract it.
- In Blender: Edit → Preferences → Get Extensions, click the dropdown arrow (top right) → Install from Disk, and select the zip.
- The addon enables automatically. Open the 3D Viewport, press N, and find the UVStudio tab.
Upgrading from an earlier version: uninstall the old version in Get Extensions first, then Install from Disk with the new zip.
2. Batch UV — quick start
- Select the mesh objects you want to process (or set Mode to Scene for everything).
- Set Target Texel Density (texels per meter, default 512) and Output Resolution (the texture size you will bake or paint at).
- Pick your Engine — this controls UV channel naming and the lightmap convention.
- Click Run UV Audit to pre-check the selection, then Run Batch UV.
For every object, UVStudio runs this pipeline in order: merge by distance (cleans micro-gaps) → mark seams by angle → unwrap → pack islands → scale UVs to your density target → generate lightmap UV → rename UV channels to the engine convention → write a result line to the session log.
3. Batch UV — every setting explained
- Mode: Selection processes selected mesh objects; Scene processes every mesh object in the scene.
- Unwrap Method: Smart UV Project is the robust default for props and hard-surface assets. Conformal and Angle-Based use your seams and preserve shape better for organic meshes.
- Target Texel Density: texels per meter. Common game targets: 256 for background props, 512 for standard props, 1024 for hero assets.
- Output Resolution: the texture resolution the density is calculated against (512 / 1024 / 2048 / 4096).
- Island Margin: spacing between UV islands. 0.02 is safe for 2048 textures; raise it for lower resolutions to avoid bleed.
- Seam Angle Limit: edges sharper than this angle become seams. Lower values = more seams and less stretching; higher = fewer islands.
- Merge Distance: vertices closer than this are merged before unwrapping, preventing degenerate islands from imported or AI-generated meshes.
- Generate Lightmap UV: creates a non-overlapping second UV channel — channel 2 for UE5 convention.
- Engine: UE5 names channels UV0/UV1, Unity uses uv0/uv1, Godot uses UV/UV2.
4. Understanding the results
Each object's log line shows island count, UV coverage, and the density achieved. Two statuses need explanation:
- Density clamped: the object has too much surface area to reach your target density at the chosen resolution. UVStudio scales to the maximum achievable and reports that value instead of silently failing. Fix by raising Output Resolution, splitting the mesh, or accepting the lower density for that asset.
- Overlap: the packed UVs exceed the 0–1 space. Usually caused by extremely dense or damaged geometry — inspect that object in the UV Editor.
5. UV Audit
Run before batching to catch problems early. The audit flags: objects with no UV maps, overlapping UVs, coverage below the threshold, missing lightmap channels, and UV names that don't match your engine convention. The audit only reads — it never modifies your meshes.
6. Viewport overlay and Density Heat View
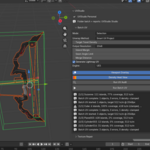
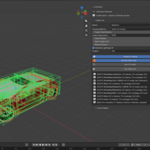
While a batch runs, UVStudio draws directly in the viewport: the object currently being processed is outlined in amber, completed objects turn green, failures red, and a HUD in the lower-left shows the progress bar and the exact pipeline stage. Toggle it with the Viewport Overlay button.
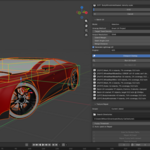
When a batch finishes with any flagged objects, the Density Heat View appears automatically: green = on target, yellow = density clamped, orange = UV overlap, red = failed. A legend draws in the viewport. Use it to spot the three problem props in a two-hundred-object scene at a glance, then clear it with the × button next to the toggle.
7. Texture Repair — quick start
- Open a .blend with broken (pink) textures. Save the file first if it's unsaved — the search starts from the .blend's own folder.
- Click Scan for Broken Paths. This is analysis only; nothing changes.
- Click Repair All Exact. Files with matching names in the .blend's folder or up to three subfolder levels deep are relinked instantly — this handles the common "textures/ subfolder" and "extracted from a zip" cases.
- For anything still broken, click Repair Fuzzy (with review). UVStudio compares missing filenames against every image in the search scope and lists candidates ranked by confidence. Nothing is relinked until you tick the candidates you accept and click Apply Accepted Matches.
- Optionally click Pack All Found to embed the textures into the .blend so the paths can never break again.
8. Texture Repair — settings
- Search Directories: add up to 5 extra root folders (for example a shared texture library on another drive). They are searched after the .blend's own folder.
- Fuzzy Match Threshold: minimum similarity (0.7–1.0, default 0.85) for a candidate to appear. Lower it if a heavily renamed file isn't being found; candidates at 95%+ are pre-ticked for convenience but still require your confirmation.
- Auto-pack on Repair: packs each texture into the .blend the moment it is relinked.
Supported image formats: PNG, JPG/JPEG, TGA, TIF/TIFF, EXR, HDR, BMP. Already-packed images are ignored by the scanner — they cannot break.
9. Recommended workflows
- Game prop pass (UE5): Audit → fix anything red-flagged manually → Batch UV at 512/2048 with lightmap on → review heat view → export via your usual FBX/glTF flow. UV0/UV1 arrive engine-ready.
- AI-generated meshes: retopologize first (Quadify handles this), then Batch UV. Raise Merge Distance slightly (0.0005) for meshes with micro-gaps from generation artifacts.
- Client handoff: before zipping a project, run Pack All Found — the recipient opens a fully working file with zero broken paths, no relative-path luck required.
- Received a broken project: open it → Repair All Exact → Repair Fuzzy for the stragglers → back to work in under a minute.
10. Troubleshooting
- Panel doesn't appear: confirm the extension is enabled in Get Extensions, and that you're in the 3D Viewport N-panel (press N), not the UV Editor's.
- "Save the .blend file or add a search directory first": Texture Repair needs a starting point for its search — save your file or add a Search Directory.
- Repair says fixed but textures are still pink: the found file may be a different image with the same name. Check the relinked path in the Image Editor and use fuzzy review to pick the right candidate.
- Everything reports density clamped: your target is too high for the resolution. 512 tx/m at 2048px supports roughly 16 m² of surface per object — large objects need 4096 or a lower target.
- Batch seems slow on very dense meshes: decimate or retopologize before UV processing; unwrap time scales with polygon count.
- Undo after a batch: single-scene batches support undo, but for large batches we recommend saving first — it's faster to reopen than to undo two hundred operations.
Support: [email protected] — include your Blender version, OS, and the session log text and we'll get you sorted quickly.
 Included
Includes 12 months of
- Support from Anvil Interactive Solutions
- Product updates
Extend this product’s Support Period +12 months: 50% of product price
Have questions before purchasing?
Login to message
| Blender Extension Compatible | Yes |
| Dev Fund Contributor | |
| Published | 2 months ago |
| Blender Version | 4.4 - 5.2 |
| Extension Type | Add-on |
| Render Engine Used | Cycles, Eevee |
| License | GPL |