Vertex Skin Weights
 Melowilo Animation LTD
Vertex Skin Weights – User Manual (v6.0)
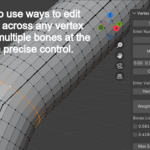
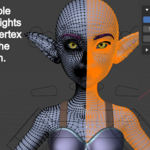
Vertex Skin Weights is a specialized Blender addon designed to streamline the rigging and skinning process. It provides granular, vertex-level control over weights, advanced normalization tools, and unique visualization options that go beyond Blender’s default weight painting tools.
1. Getting Started
Installation
Open Blender and go to Edit > Preferences > Add-ons.
Click Install and select the addon file VertexSkinWeightsUI_6_0_0.zip.
Enable the addon.
The tool is located in the 3D Viewport > Sidebar (N-panel) > Vertex Skin Weights.
Open Blender and go to Edit > Preferences > Add-ons.
Click Install and select the addon file VertexSkinWeightsUI_6_0_0.zip.
Enable the addon.
The tool is located in the 3D Viewport > Sidebar (N-panel) > Vertex Skin Weights.
Initial Setup
To use the tool, you must have a mesh object selected that has at least one Armature Modifier.
Target Armature Modifier: Select the specific modifier you wish to edit from the dropdown at the top. This is crucial for models using multiple armatures (e.g., separate face and body rigs).
Start Tool: Click the StartTool/Update Bones List button to initialize the interface.
Target Armature Modifier: Select the specific modifier you wish to edit from the dropdown at the top. This is crucial for models using multiple armatures (e.g., separate face and body rigs).
Start Tool: Click the StartTool/Update Bones List button to initialize the interface.
2. The Core Workflow: The Bones List
The addon's heart is a dynamic list of bones influencing your current selection.
Auto Update: When enabled, the list refreshes every time you change your vertex selection in Edit Mode.
Note: For very dense meshes, uncheck this and use the Weighted Bones (Man. Update) button to avoid lag.
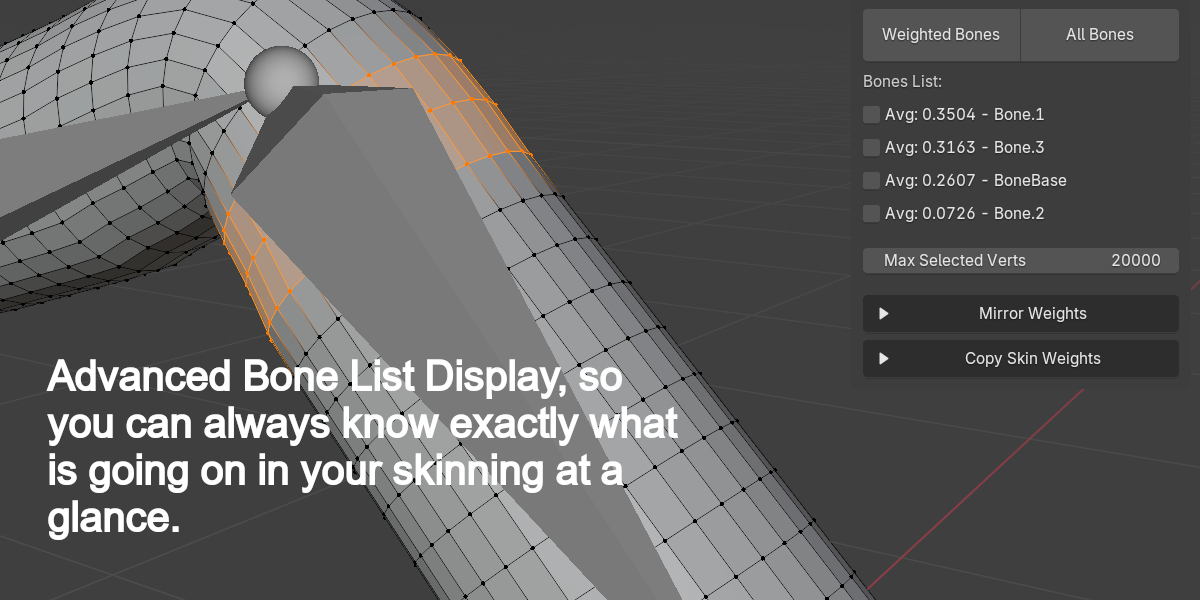
Bone Display: The list shows the average weight of deforming bones for the selected vertices.
Filtering: Use the Filter box to find specific Bones.
Auto Update: When enabled, the list refreshes every time you change your vertex selection in Edit Mode.
Note: For very dense meshes, uncheck this and use the Weighted Bones (Man. Update) button to avoid lag.
Bone Display: The list shows the average weight of deforming bones for the selected vertices.
Filtering: Use the Filter box to find specific Bones.
3. Weight Operations
These tools allow you to modify the numerical weight values of the vertices currently selected in Edit Mode.
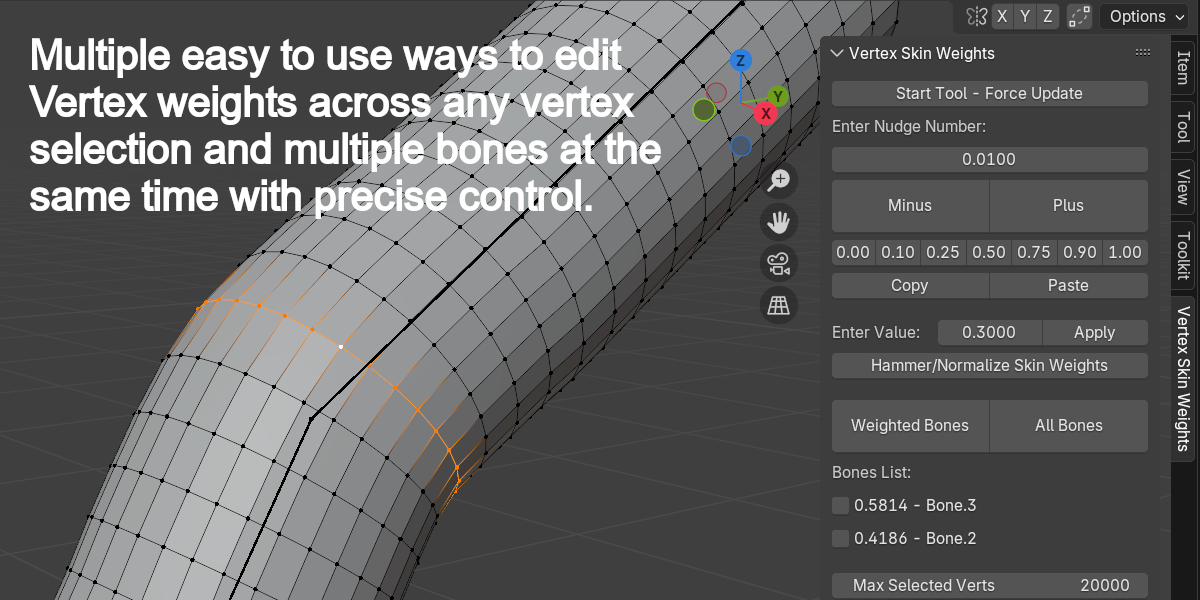
Nudge (Plus/Minus): Increments or decrements the weight of the ticked bones in the list by the value set in the "Nudge Value" box.
Fixed Value Buttons: Quick-set buttons (0.00 to 1.00) to assign absolute weights to the selected bones.
Copy/Paste:
Copy: Stores the raw weight values of the active (white) vertex.
Paste: Applies those stored weights to all currently selected vertices. If a vertex group doesn't exist on the mesh, the addon will automatically create it.
Smart Normalization: When you adjust weights using these tools, the addon automatically re-normalizes the remaining weight among other bones within the same armature modifier, ensuring the total weight stays at 1.0 without affecting secondary armatures.
Nudge (Plus/Minus): Increments or decrements the weight of the ticked bones in the list by the value set in the "Nudge Value" box.
Fixed Value Buttons: Quick-set buttons (0.00 to 1.00) to assign absolute weights to the selected bones.
Copy/Paste:
Copy: Stores the raw weight values of the active (white) vertex.
Paste: Applies those stored weights to all currently selected vertices. If a vertex group doesn't exist on the mesh, the addon will automatically create it.
Smart Normalization: When you adjust weights using these tools, the addon automatically re-normalizes the remaining weight among other bones within the same armature modifier, ensuring the total weight stays at 1.0 without affecting secondary armatures.
4. Selection & Utility Tools
These features help you manage which vertices and bones you are currently editing.
Viewport Pick Bone: Click this button, then click a bone directly in the 3D viewport to select/tick it in the list. This handles complex rigs by temporarily switching to Pose Mode and back.
Select Bone Verts: Selects every vertex on the mesh that has any weight assigned to the bones currently ticked in the list.
Selection Threshold (Verts Below/Above):
Selects vertices based on whether their average weight for the ticked bones is higher or lower than the threshold.
Excl. 0: If checked, "Verts Below" will ignore vertices with 0.0 weight, allowing you to find vertices with tiny "stray" weights.
Lock Bone Selection: "Locks" the selection (ticks) in your list so that changing your vertex selection doesn't untick your active bones.
Viewport Pick Bone: Click this button, then click a bone directly in the 3D viewport to select/tick it in the list. This handles complex rigs by temporarily switching to Pose Mode and back.
Select Bone Verts: Selects every vertex on the mesh that has any weight assigned to the bones currently ticked in the list.
Selection Threshold (Verts Below/Above):
Selects vertices based on whether their average weight for the ticked bones is higher or lower than the threshold.
Excl. 0: If checked, "Verts Below" will ignore vertices with 0.0 weight, allowing you to find vertices with tiny "stray" weights.
Lock Bone Selection: "Locks" the selection (ticks) in your list so that changing your vertex selection doesn't untick your active bones.
5. Hammer & Normalization (Smoothing)
Smoothing is essential for clean deformations in joints like elbows or knees.
Hammer / Norm: The Blender equivalent of Maya's Hammer tool. It looks at the surrounding unselected vertices and averages the weights of the selected ones to create a smooth transition.
Hammer to Ticked: A specialized version that forces the selected vertices to only use the bones you have ticked in the list. It purges all other bone influences from those vertices and smooths the result.
Hammer Settings:
Cycles: How many times the smoothing algorithm runs (higher = smoother).
Trim: Automatically removes weights below this value after hammering to keep the mesh clean.
Hammer / Norm: The Blender equivalent of Maya's Hammer tool. It looks at the surrounding unselected vertices and averages the weights of the selected ones to create a smooth transition.
Hammer to Ticked: A specialized version that forces the selected vertices to only use the bones you have ticked in the list. It purges all other bone influences from those vertices and smooths the result.
Hammer Settings:
Cycles: How many times the smoothing algorithm runs (higher = smoother).
Trim: Automatically removes weights below this value after hammering to keep the mesh clean.
6. Visualization & Overlays
The addon provides GPU-accelerated visual feedback that standard Blender lacks.
Default Weights Overlay: A shortcut to toggle Blender's native weight heat-map in Edit Mode. (Shows the last selected bone).
Cumulative Overlay (Ticked): A unique feature that displays a combined heat-map of all bones currently ticked in the list.
Size/Alpha: Adjust the thickness and brightness of the cumulative overlay lines.
Highlight Sel Bones: Draws a bright blue line directly over the bones selected in the list, making it easy to identify which bone corresponds to a specific vertex group in a crowded rig.
Default Weights Overlay: A shortcut to toggle Blender's native weight heat-map in Edit Mode. (Shows the last selected bone).
Cumulative Overlay (Ticked): A unique feature that displays a combined heat-map of all bones currently ticked in the list.
Size/Alpha: Adjust the thickness and brightness of the cumulative overlay lines.
Highlight Sel Bones: Draws a bright blue line directly over the bones selected in the list, making it easy to identify which bone corresponds to a specific vertex group in a crowded rig.
7. Advanced Modules (Sub-Panels)
Cleanup Tools
Ideal for game engine optimization (e.g., Unity/Unreal).
Clean Up Below: Removes all weights below a threshold mesh-wide and re-normalizes.
Max Bones per Vertex: Limits vertex influences (e.g., max 4 bones). It removes the weakest influences and redistributes the weight to the remaining ones.
Clean Up Below: Removes all weights below a threshold mesh-wide and re-normalizes.
Max Bones per Vertex: Limits vertex influences (e.g., max 4 bones). It removes the weakest influences and redistributes the weight to the remaining ones.
Mirror Weights
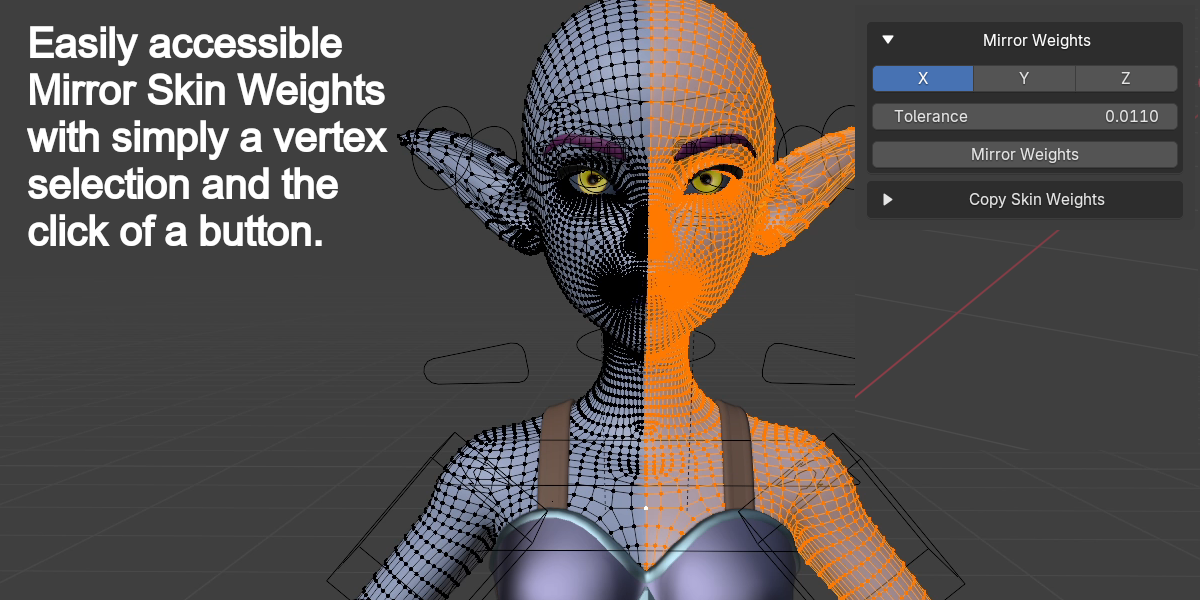
Select vertices on one side, choose the axis (X/Y/Z), and click Mirror Weights. It uses a naming algorithm to automatically swap weights (e.g., Arm.L weights are assigned to Arm.R on the opposite side).
Select vertices on one side, choose the axis (X/Y/Z), and click Mirror Weights. It uses a naming algorithm to automatically swap weights (e.g., Arm.L weights are assigned to Arm.R on the opposite side).
Copy Skin Weights (Mesh to Mesh)
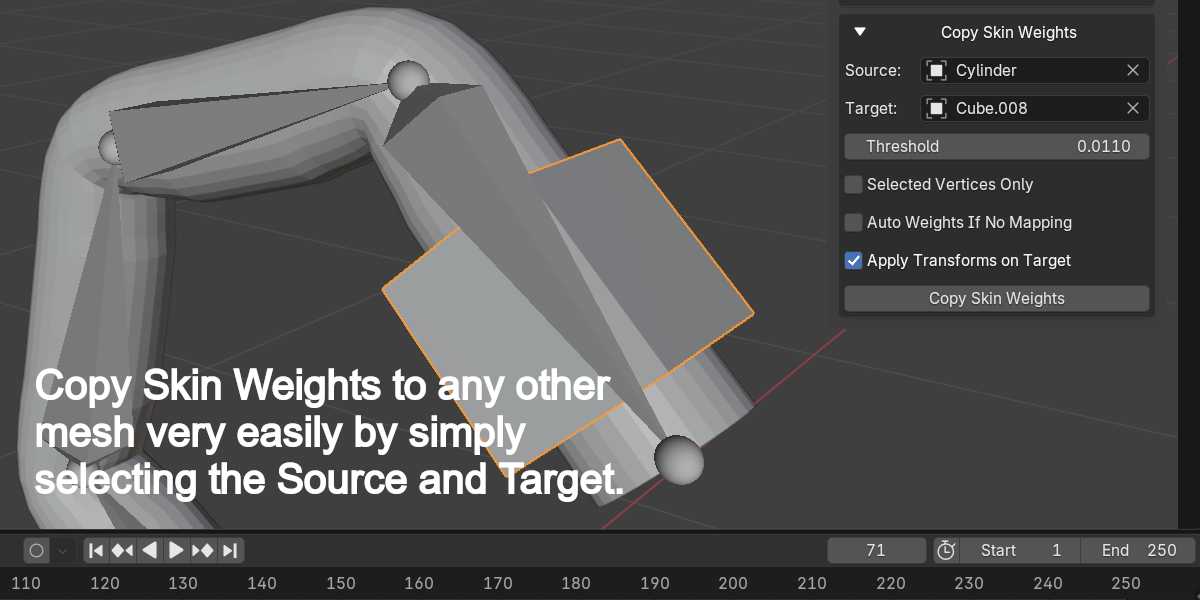
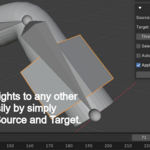
Used to transfer weights from a "Source" mesh to a "Target" mesh. It handles all the backend work: syncing armature modifiers, creating missing vertex groups, and performing a proximity-based data transfer.
Used to transfer weights from a "Source" mesh to a "Target" mesh. It handles all the backend work: syncing armature modifiers, creating missing vertex groups, and performing a proximity-based data transfer.
Gradient Tools
Gradient Between 2 Bones: Creates a perfect linear or eased transition between two bones (like a forearm twist). It projects the weight along the "bone line" between the two selected items.
Gradient to Selected Bone: Blends weights based on proximity to a single selected bone’s head. Vertices closer to the bone get more weight; those further away get less.
Gradient Between 2 Bones: Creates a perfect linear or eased transition between two bones (like a forearm twist). It projects the weight along the "bone line" between the two selected items.
Gradient to Selected Bone: Blends weights based on proximity to a single selected bone’s head. Vertices closer to the bone get more weight; those further away get less.
Transfer Bone Weights
A "fix-it" tool. If you accidentally weighted vertices to the wrong bone (e.g., UpperArm_Extra instead of UpperArm), you can transfer 100% of the weight from one vertex group to another across the selected vertices in one click.
Vertex Skin Weights Tool Manual
Installation Guide:
A "fix-it" tool. If you accidentally weighted vertices to the wrong bone (e.g., UpperArm_Extra instead of UpperArm), you can transfer 100% of the weight from one vertex group to another across the selected vertices in one click.
Download the VertexSkinWeightsTool_*****.zip file.
Open Blender and go to Edit > Preferences.
Select Add-ons and in the top right corner click on the drop-down and select Install from Disk.
Browse to the VertexSkinWeightsTool_*****.zip file, select it, and Install from Disk.
Make Sure the Vertex Skin Weights UI is clicked and enabled.
Open Blender and go to Edit > Preferences.
Select Add-ons and in the top right corner click on the drop-down and select Install from Disk.


Overview
The Vertex Skin Weights Tool provides a user-friendly interface for precisely editing vertex weights in Blender. This tool is designed for character riggers and animators who need fine control over skinning weights.
Location
The tool can be found in the 3D View sidebar under the "Vertex Skin Weights" tab when skinned meshes are selected. Enter “Edit Mode” to edit the skin vertex weights.
Basic Controls
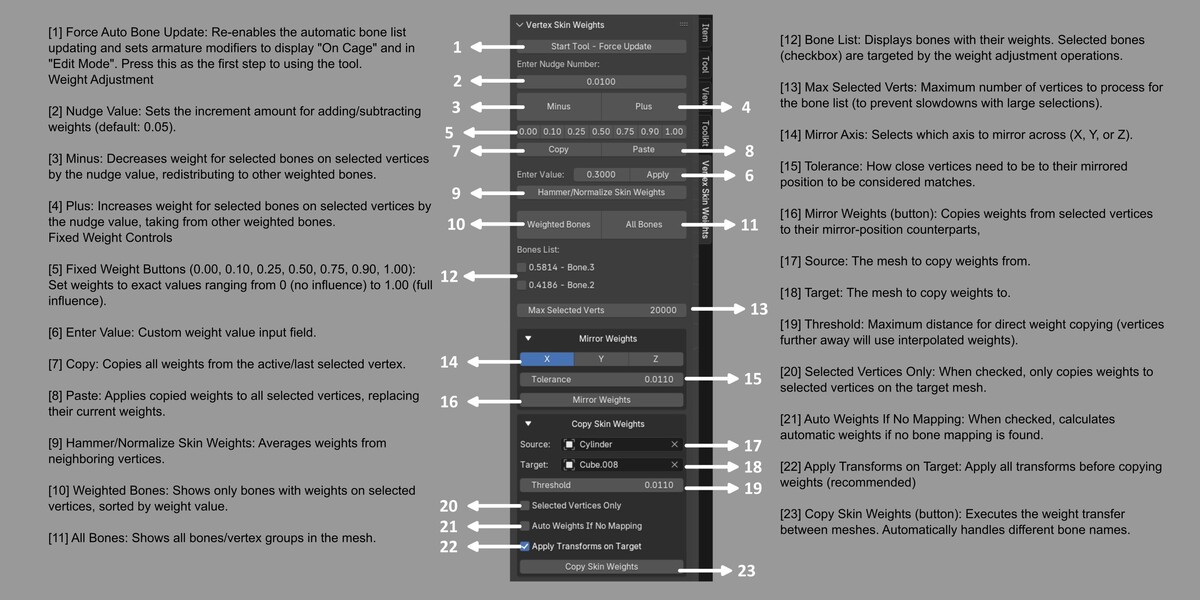
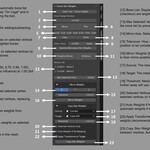
[1] Force Auto Bone Update: Re-enables the automatic bone list updating and sets armature modifiers to display "On Cage" and in "Edit Mode". Press this as the first step to using the tool.
Weight Adjustment
[2] Nudge Value: Sets the increment amount for adding/subtracting weights (default: 0.05).
[3] Minus: Decreases weight for selected bones on selected vertices by the nudge value, redistributing to other weighted bones.
[4] Plus: Increases weight for selected bones on selected vertices by the nudge value, taking from other weighted bones.
Fixed Weight Controls
[5] Fixed Weight Buttons (0.00, 0.10, 0.25, 0.50, 0.75, 0.90, 1.00): Set weights to exact values ranging from 0 (no influence) to 1.00 (full influence).
[6] Enter Value: Custom weight value input field.
Weight Copying
[7] Copy: Copies all weights from the active/last selected vertex.
[8] Paste: Applies copied weights to all selected vertices, replacing their current weights.
Weight Processing
[9] Hammer/Normalize Skin Weights: Averages weights from neighboring vertices.
Bone List Section
[10] Weighted Bones: Shows only bones with weights on selected vertices, sorted by weight value.
[11] All Bones: Shows all bones/vertex groups in the mesh.
[12] Bone List: Displays bones with their weights. Selected bones (checkbox) are targeted by the weight adjustment operations.
[13] Max Selected Verts: Maximum number of vertices to process for the bone list (to prevent slowdowns with large selections).
Mirror Weights Section
[14] Mirror Axis (X/Y/Z): Selects which axis to mirror across (X, Y, or Z).
[15] Tolerance: How close vertices need to be to their mirrored position to be considered matches.
[16] Mirror Weights (button): Copies weights from selected vertices to their mirror-position counterparts, automatically handling bone name side-switching (e.g., from "arm.L" to "arm.R").
Copy Skin Weights Section
[17] Source: The mesh to copy weights from.
[18] Target: The mesh to copy weights to.
[19] Threshold: Maximum distance for direct weight copying (vertices further away will use interpolated weights).
[20] Selected Vertices Only: When checked, only copies weights to selected vertices on the target mesh.
[21] Auto Weights If No Mapping: When checked, calculates automatic weights if no bone mapping is found between source and target.
[22] Apply Transforms on Target: Apply all transforms before copying weights (recommended)
[23] Copy Skin Weights (button): Executes the weight transfer between meshes. Automatically handles different bone names.
Tips and Best Practices
Select vertices before using any weight editing function.
Use "Weighted Bones" to focus on the relevant bones for selected vertices.
Copy and paste weights for consistent weighting across similar areas.
When using the Mirror function, ensure bone naming follows conventions (.L/.R, .l/.r, _L/_R, etc.).
For multi-mesh rigging, use Copy Skin Weights to transfer weights between different meshes.
Performance: The "Max Selected Verts" setting limits how many vertices can be selected before the bones list stops updating - increase for large selections
Multiple Bone Edits: When selecting multiple bones and setting a fixed weight, the addon will automatically distribute weights properly
Advanced Weight Transfer: For best results with the "Copy Skin Weights" function using Advanced mode, enable "Apply Transforms on Target"
Edit During Animation: The addon works in Edit Mode while the armature is posed, allowing you to see weight effects in real-time
Common Issues and Solutions
Bones List Not Updating: Click "Start Tool - Force Update" to restart the auto-update timer
No Bones Appearing: Make sure your mesh has vertex groups and is properly linked to an armature
Weight Copy Not Working: Ensure source and target meshes have compatible armatures with similar bone names
Mirror Not Finding Matching Vertices: Try increasing the tolerance value
Compatibility
Blender 4.2.0 and higher
Works with all common mesh types and armature setups
License
This addon is released under [license type] - see LICENSE file for details.
Support
For issues, suggestions, or contributions, please visit: www.melowilo.com